Step 1: Setting Up your Account
In this article
Part 1: Company Details
Let's start by adding your company information to YoPrint. You can access the settings page by going to Configuration > Settings
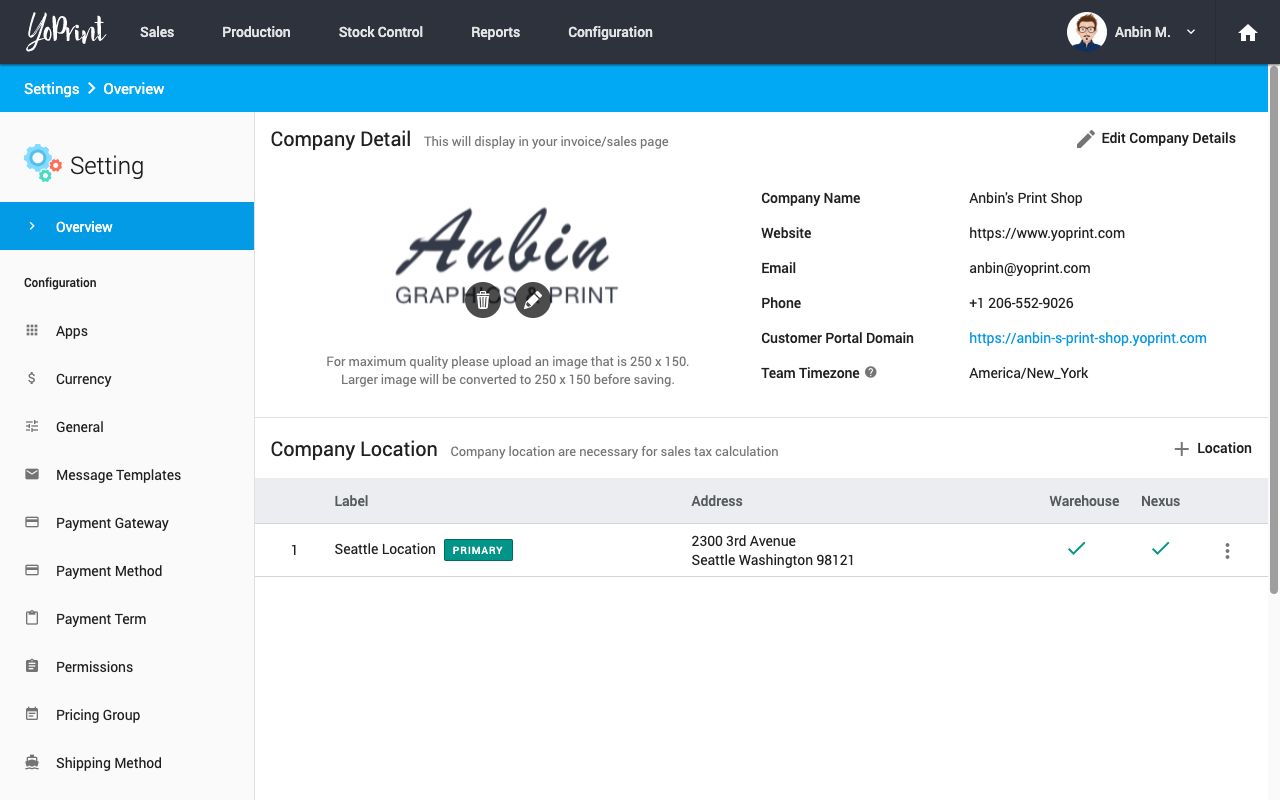
Click Edit Company Details button and provide your information.
Note
- It's important that this information is accurate and up-to-date since it appears on your customer portal, invoices, shipping labels, etc.
- Additionally, using a custom domain for your Customer Portal requires you to add a CNAME record pointing to domain.yoprint.com in your DNS provider.
Part 2: Company Locations
To take advantage of our Stock Management and Smart Sales Tax systems, you should add all your locations here. Click + Location to add a new location.
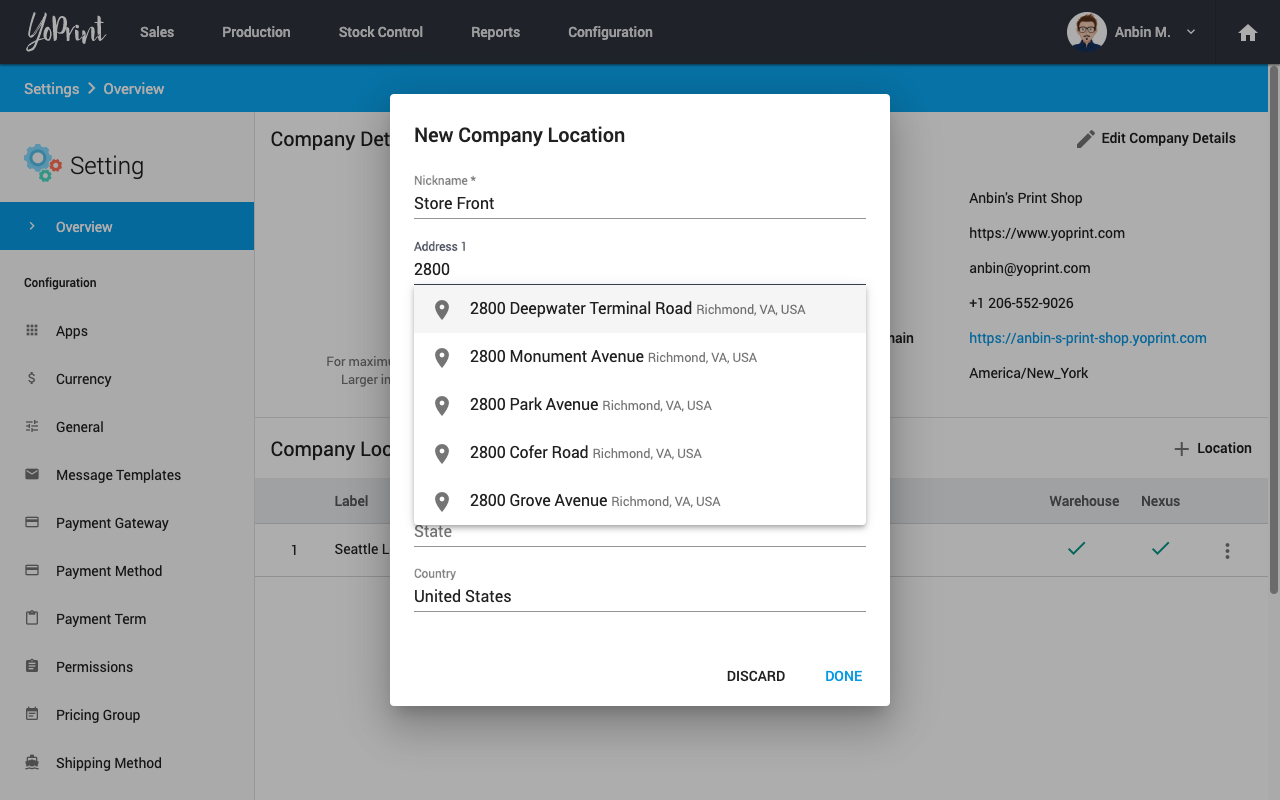
To enable inventory tracking, you should mark any location that keeps inventory as a warehouse.
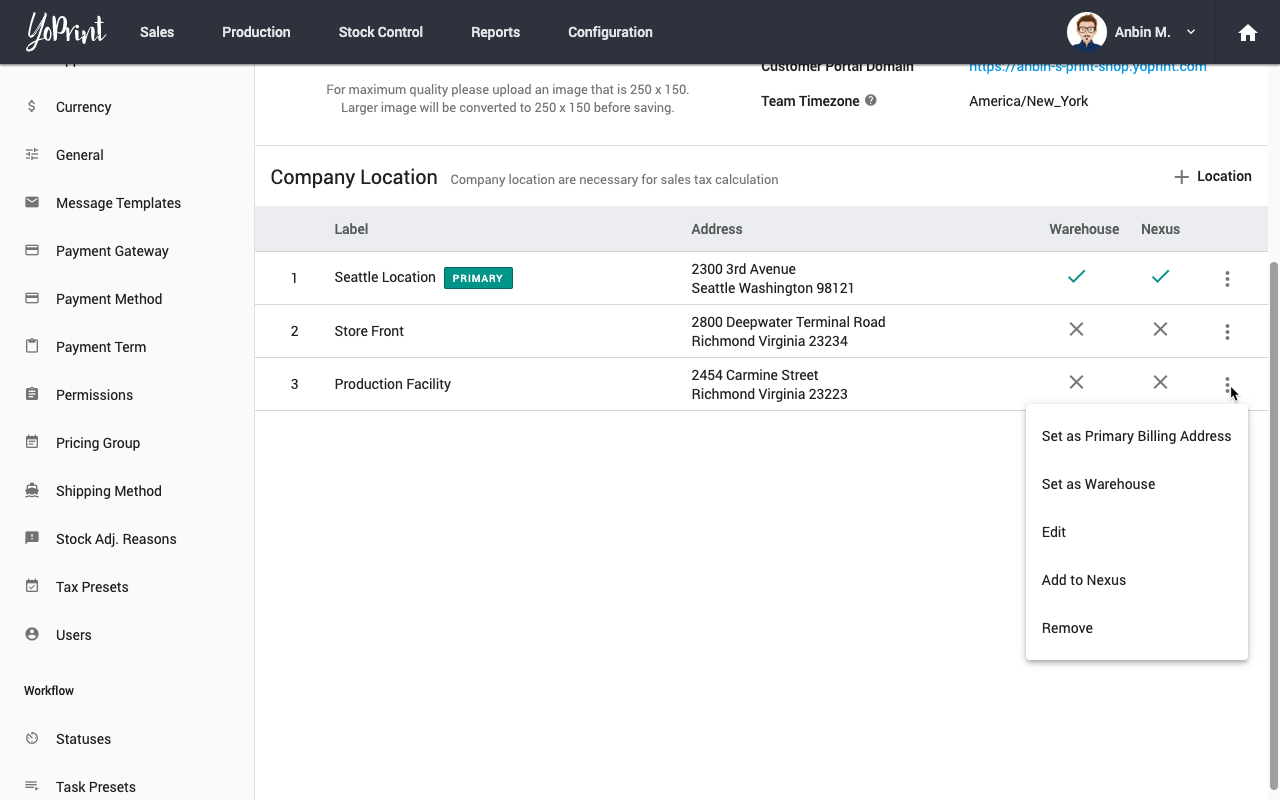
To ensure accurate tax collection, you should add all locations you are required to collect to sales tax. If you are unsure, which address qualifies for nexus, just add them all and YoPrint will take care of figuring that out for you.
Part 3: Invite Members
Next, invite your team to YoPrint. YoPrint allows everyone to have their own account with makes assigning and tracking work easier. You can access this section by clicking Users on the sidebar.
Click on Invite button.
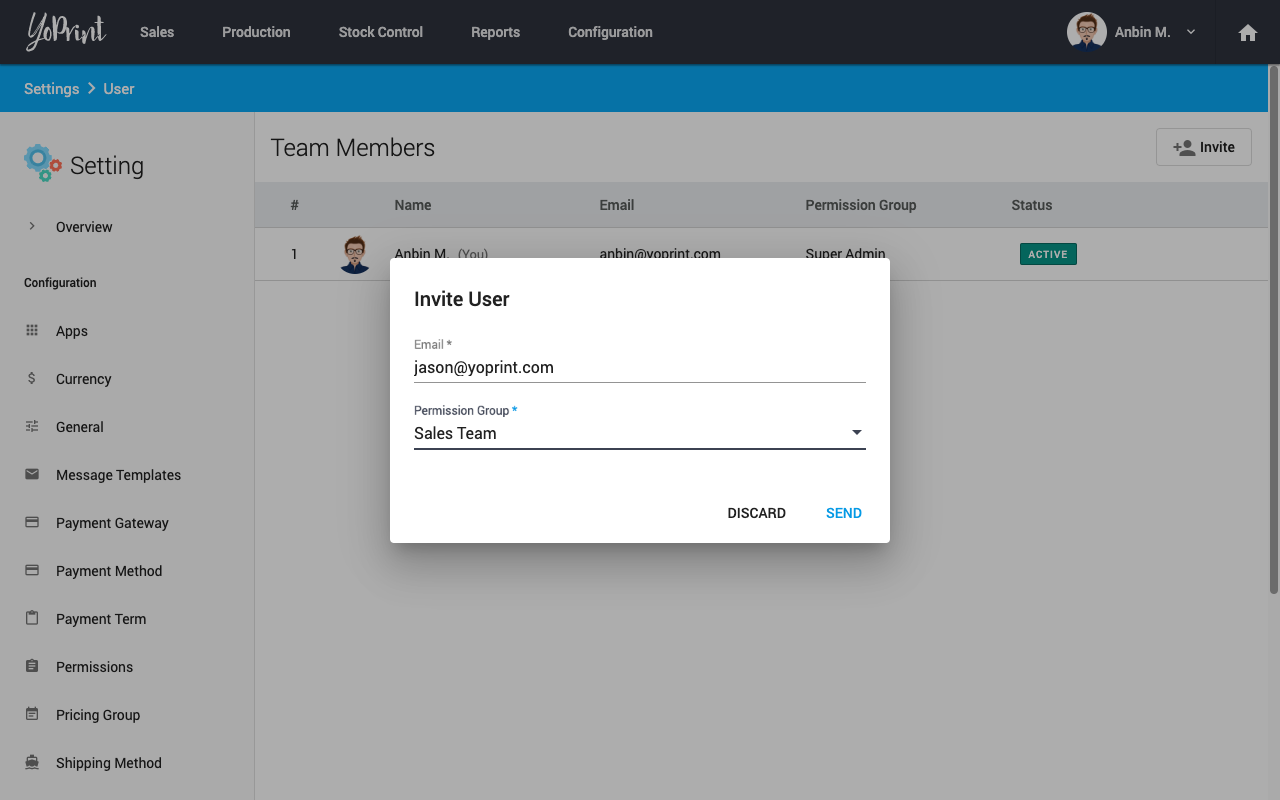
Fill in the email address, and the permissions group and click Send. Your team members will receive an email with the instructions to complete their account creation.
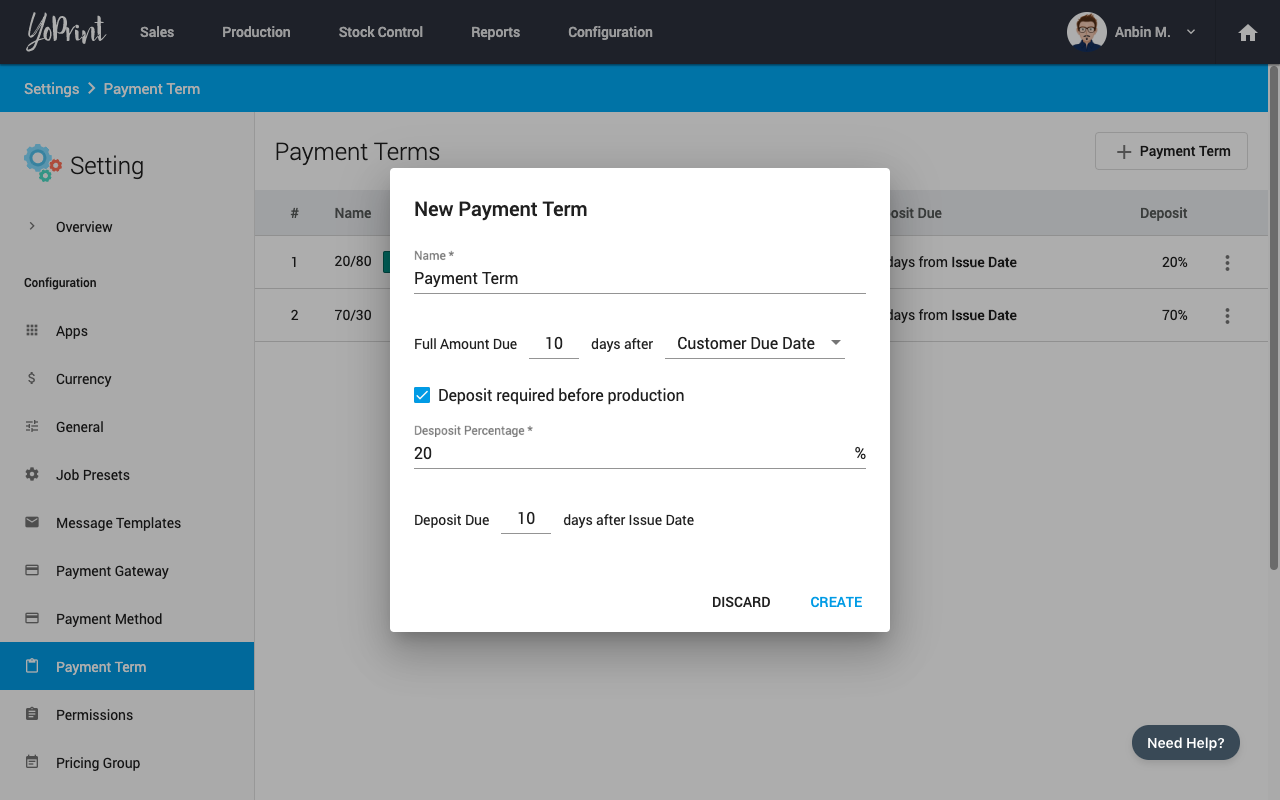
Part 4: Payment Terms
The next step in the process is configuring your Payment Terms. Payment Terms allow you to configure when deposit and full payments are due. To access this page, click on Payment Terms on the sidebar
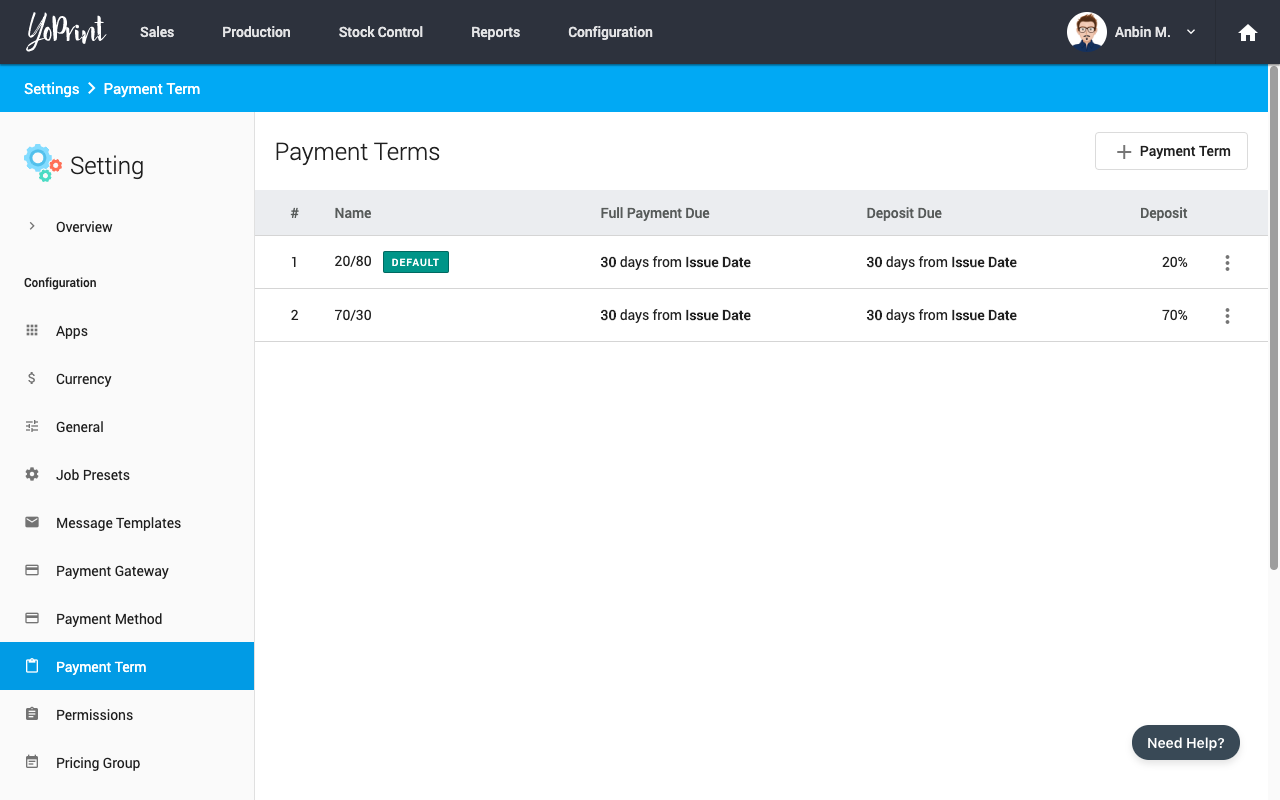
To add a new Payment Terms click + Payment Term button.
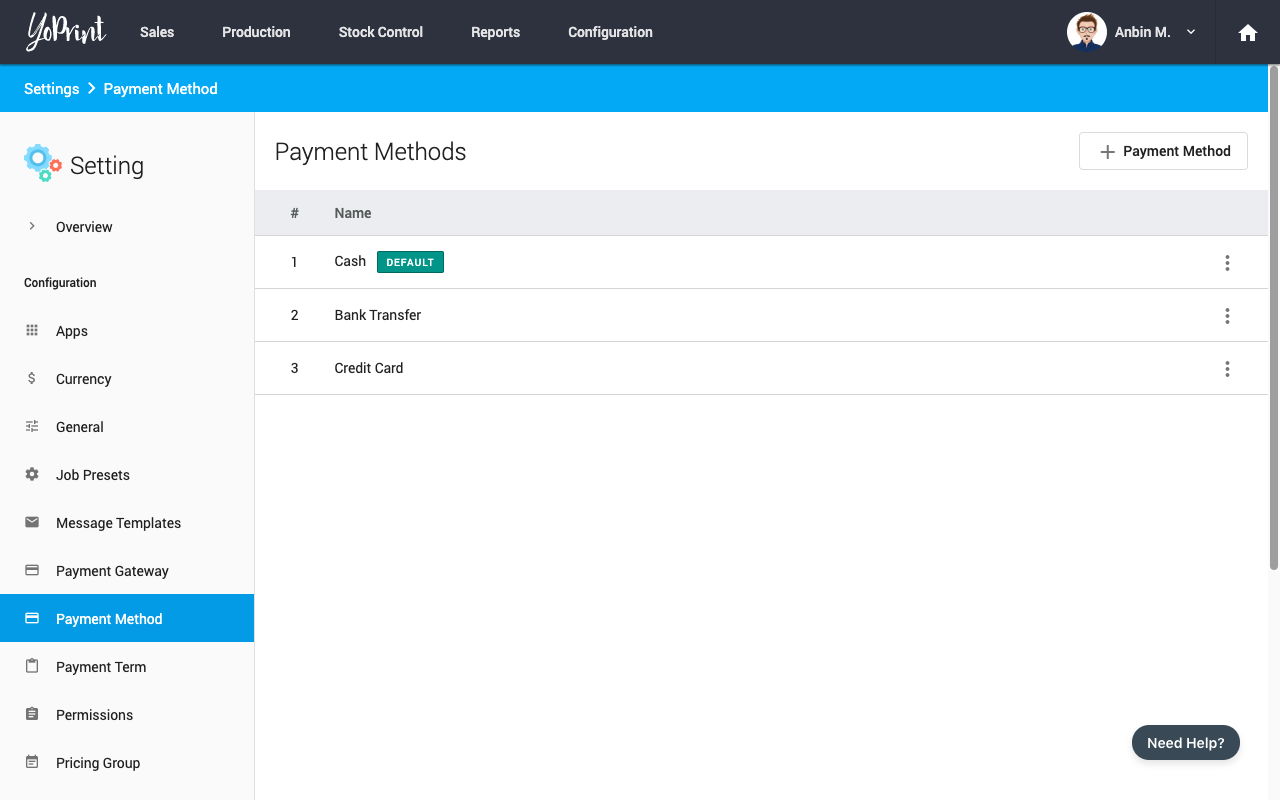
Part 5: Payments
YoPrint allows you to collect payments online and offline using your payment processor. The following list will help you setup your payment processor.
To record payments outside of the payment processors above, you need to create Payment Methods. To access this page, click on Payment Methods on the sidebar
Part 6: QuickBooks
Finally, if you use QuickBooks Online to manage your store, you will want to link it to YoPrint to seamlessly sync information from YoPrint to QuickBooks Online. This guide will help you configure your QuickBooks Online account.