Production Control
In this article
Track and manage your shop's schedule on the interactive Production Control timeline. See when orders, jobs, and tasks start, monitor progress against customer deadlines, and reschedule work by dragging bars across the calendar. A sales order bar reflects the order's scheduled dates, each job bar spans its scheduled work, and task bars show individual production operations.

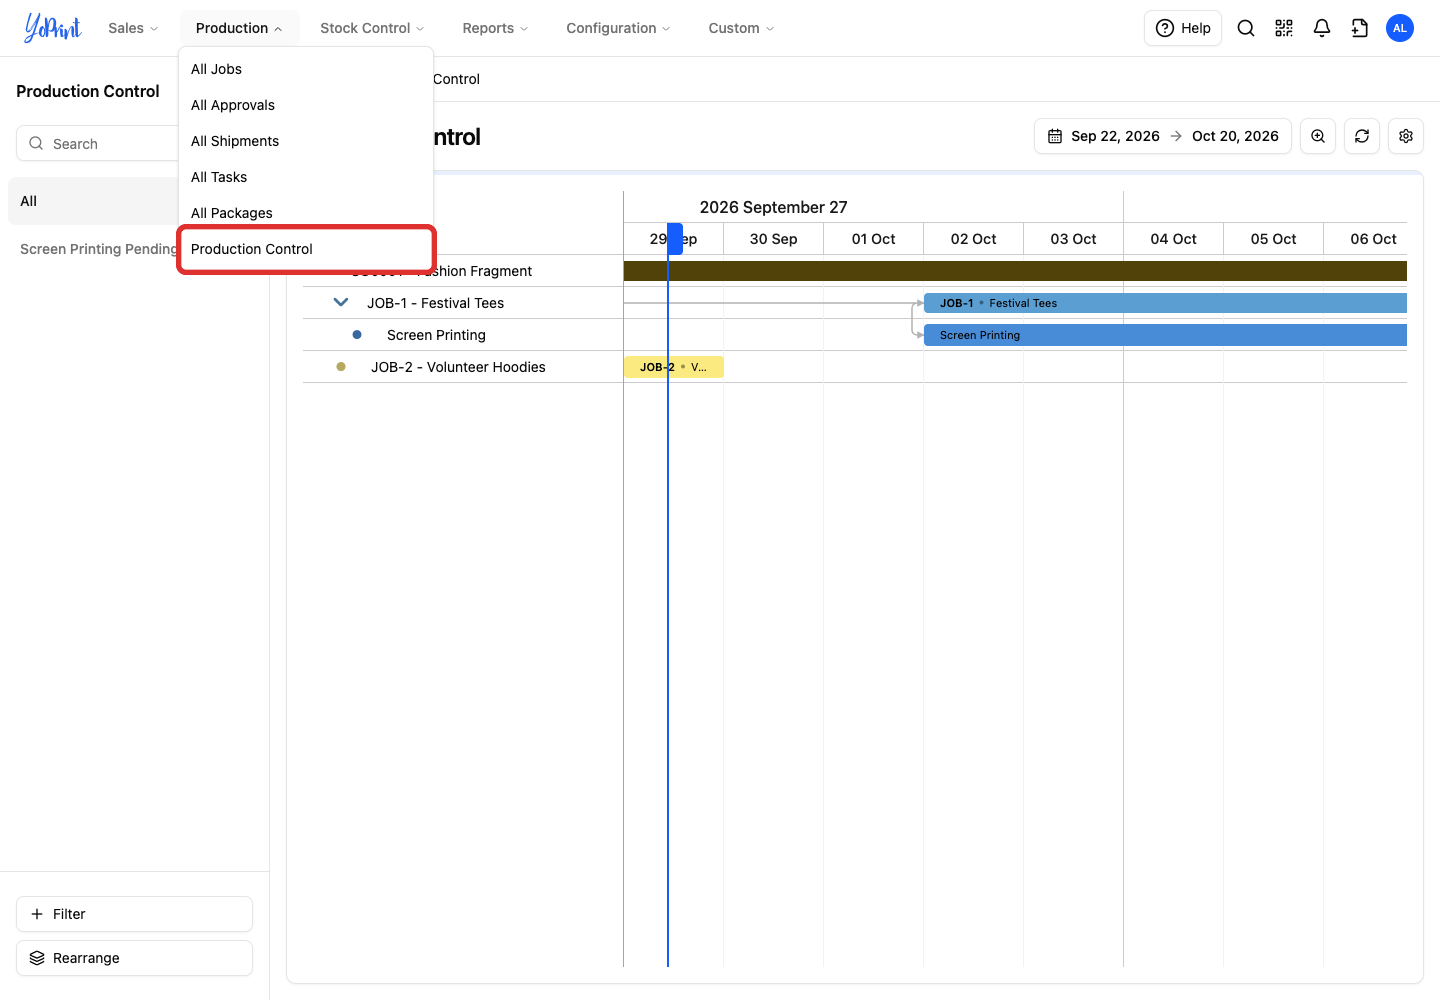
Open Production Control
-
In the primary navigation, click Production and select Production Control.
Read the production timeline
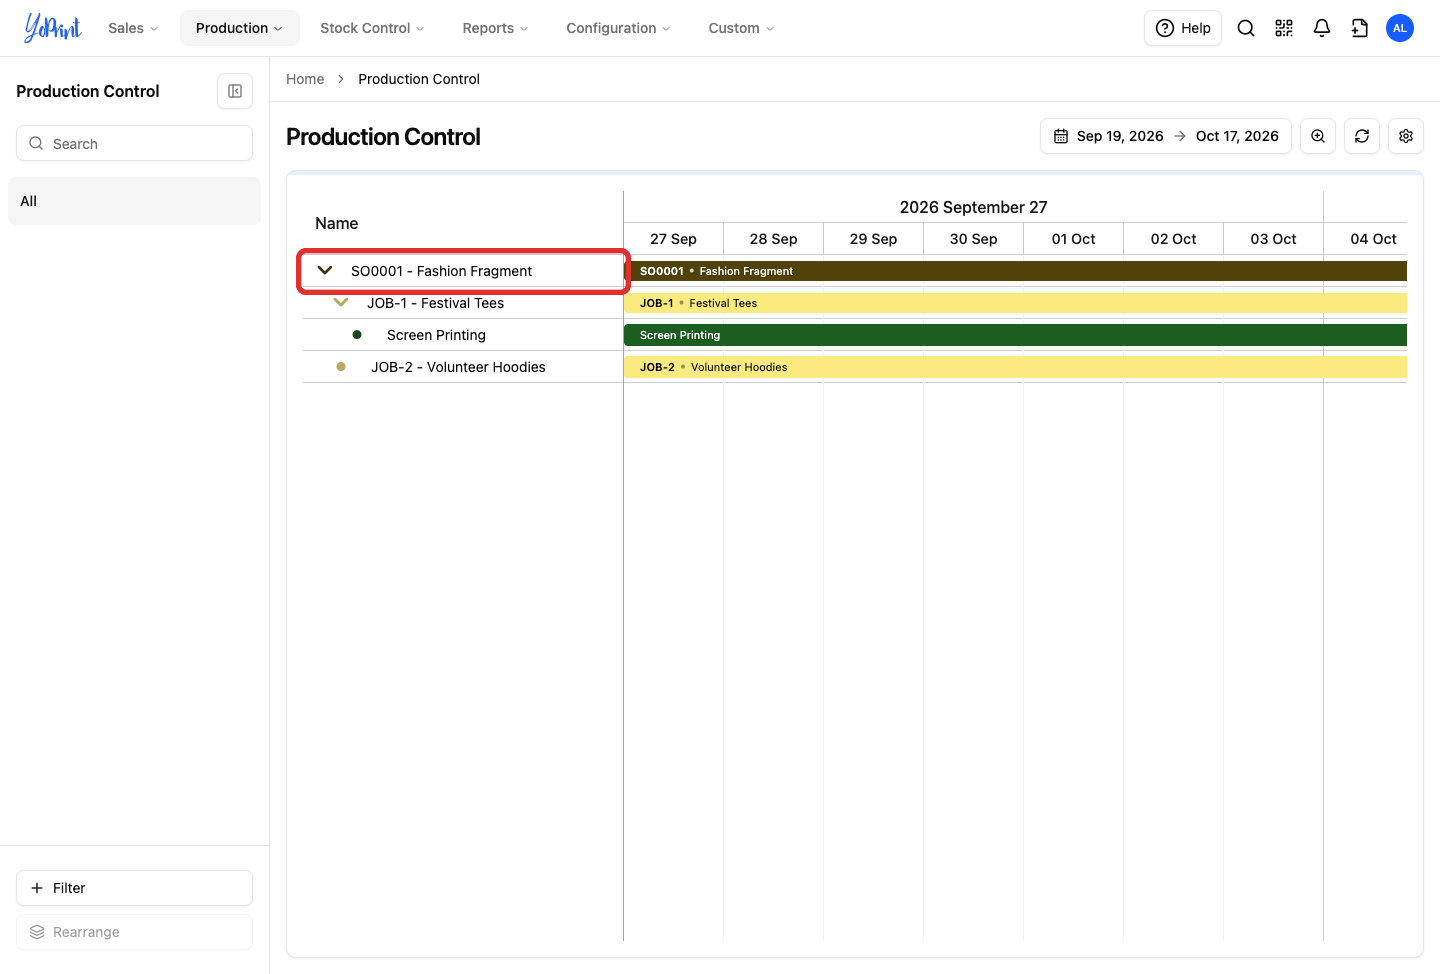
Production Control organizes your work into a three-level hierarchy:
- Sales Order: The top-level customer order bar.
- Job: A group of related services or items inside that order.
- Task: An individual production operation (such as Screen Printing, Embroidery, or DTG) with scheduled start and due dates.
-
Click the chevron arrow next to any order or job in the left list to expand or collapse its underlying work.
Draft sales orders do not appear on Production Control. When you create an order under Sales › Orders, publish the draft to make it active and place its jobs and tasks onto the production schedule. For step-by-step instructions, see Publish a draft order.
Adjust timeline zoom and scale
-
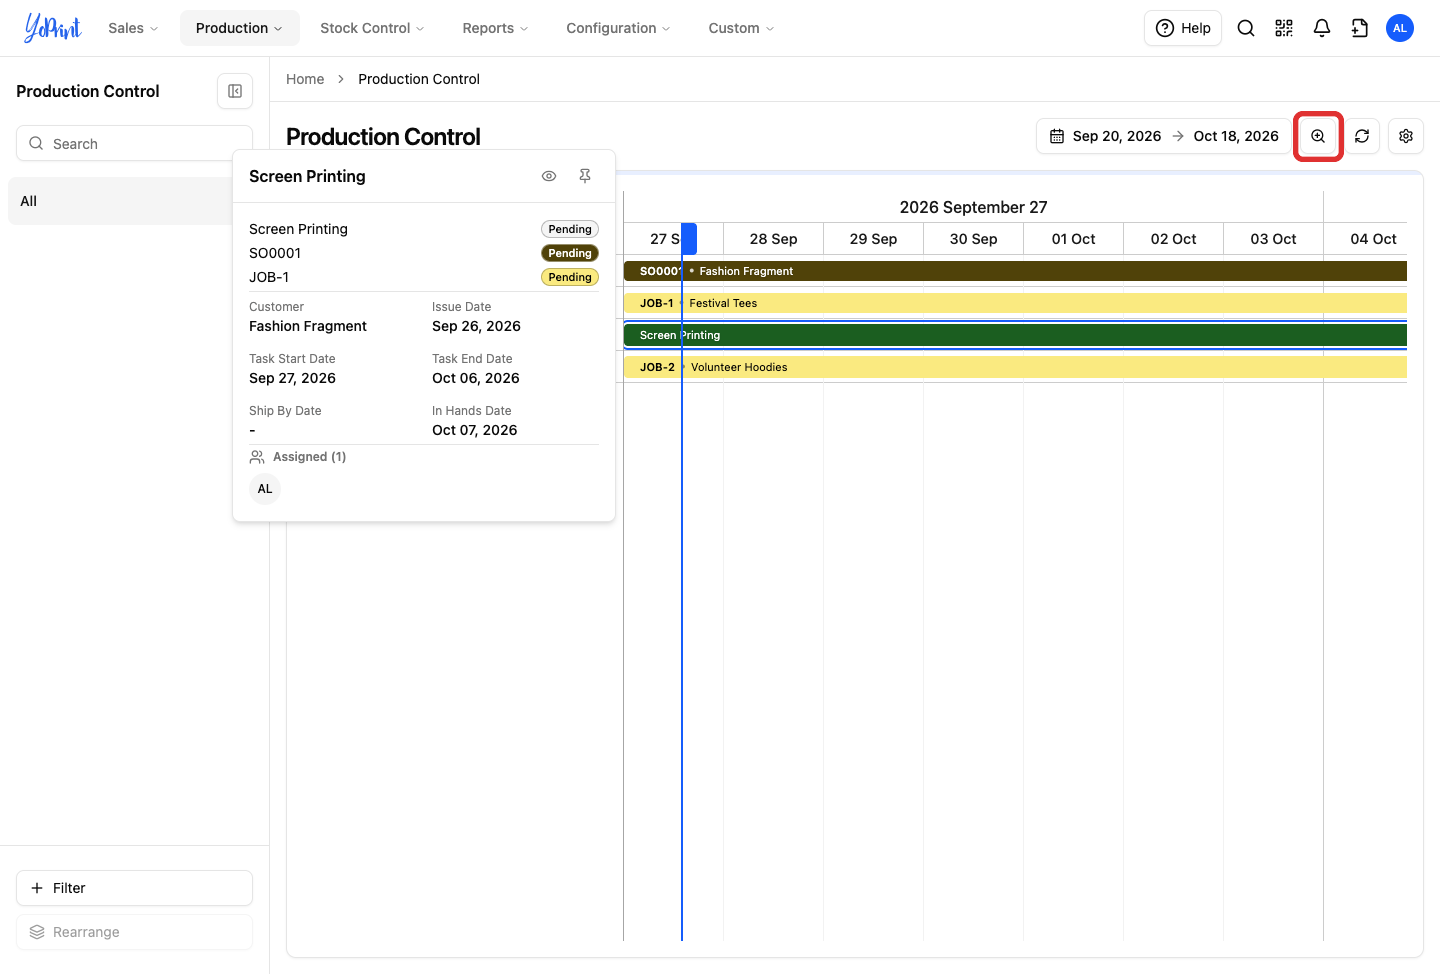
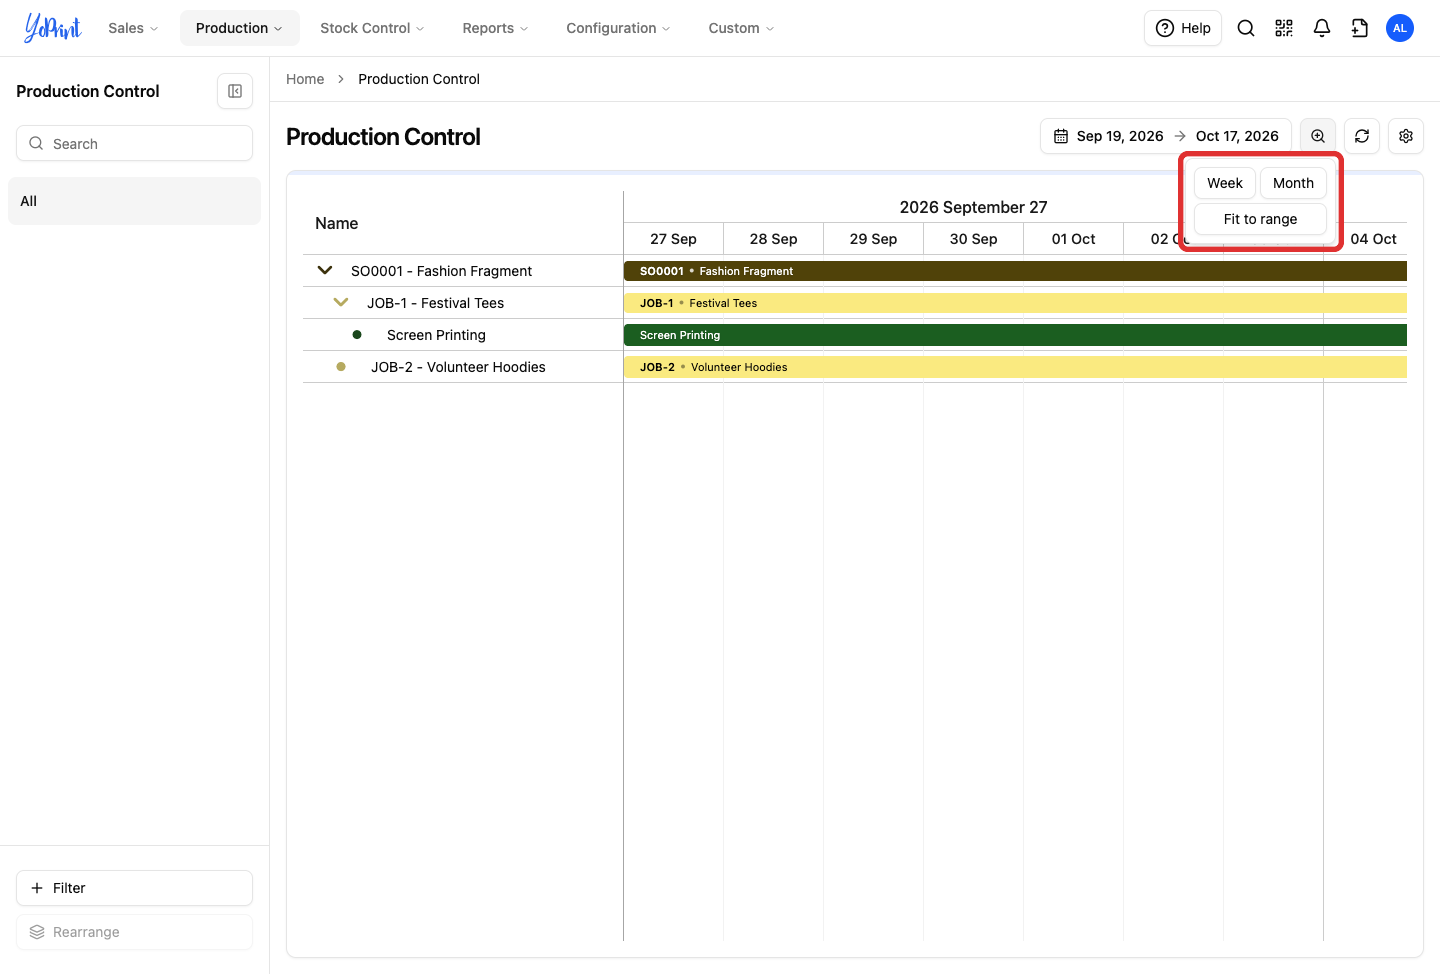
Click the Timeline scale button (magnifying glass) in the top toolbar.
-
Select a scale view to adjust your timeline resolution:
- Week: Displays daily columns grouped under weekly headers for managing day-to-day shop-floor operations.
- Month: Displays full monthly columns across the timeline for long-term capacity planning.
- Fit to range: Scales the selected date range to fit your current screen width.
Set the calendar date range
-
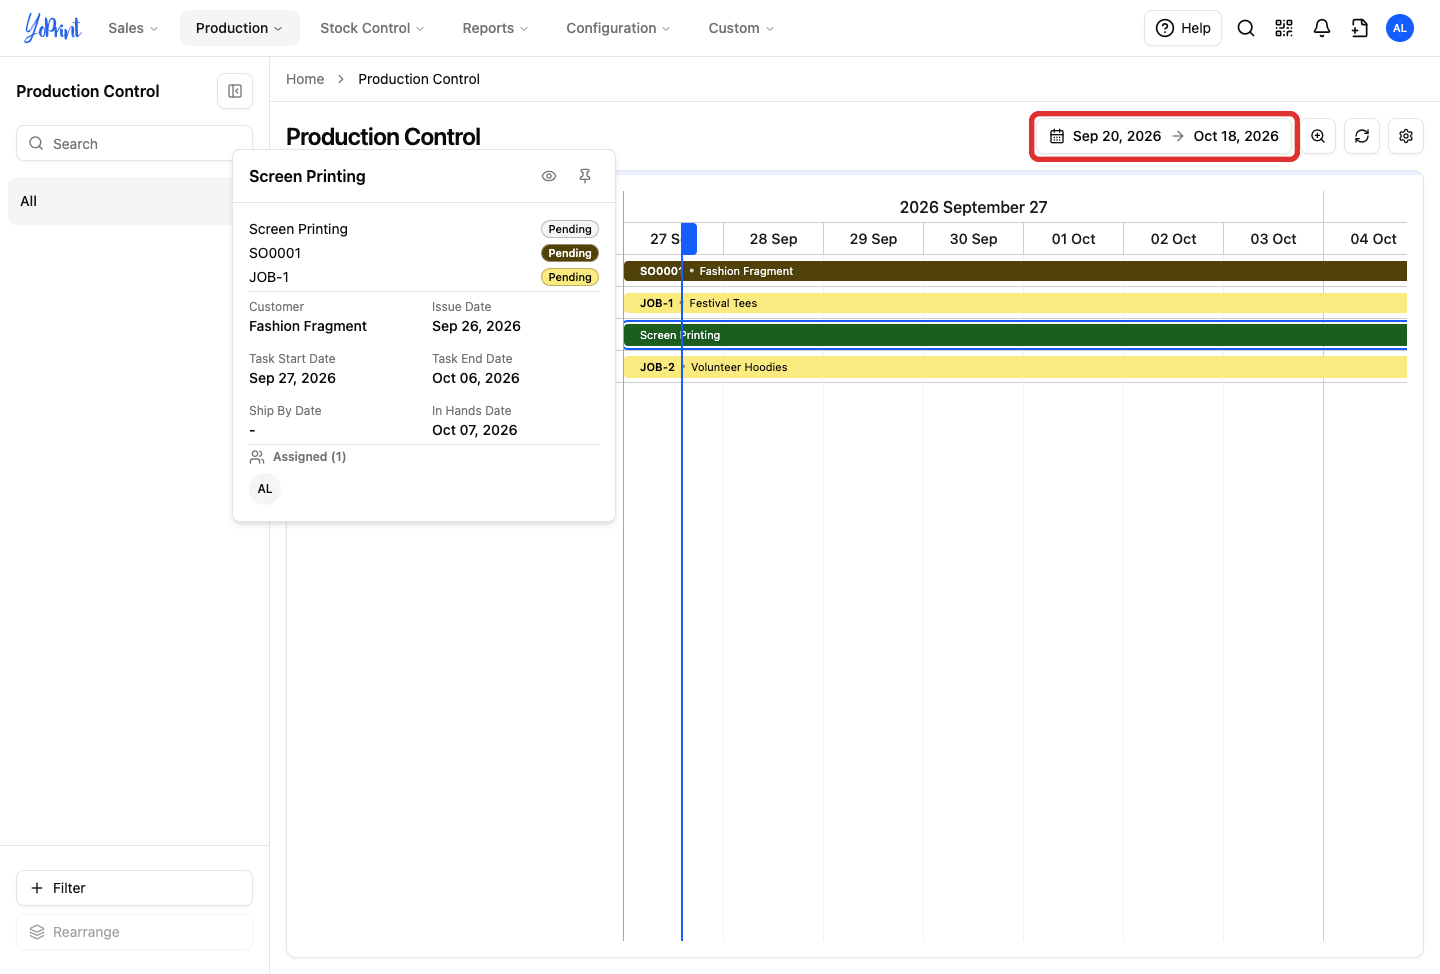
Click the date range button in the top toolbar to open the calendar picker.
-
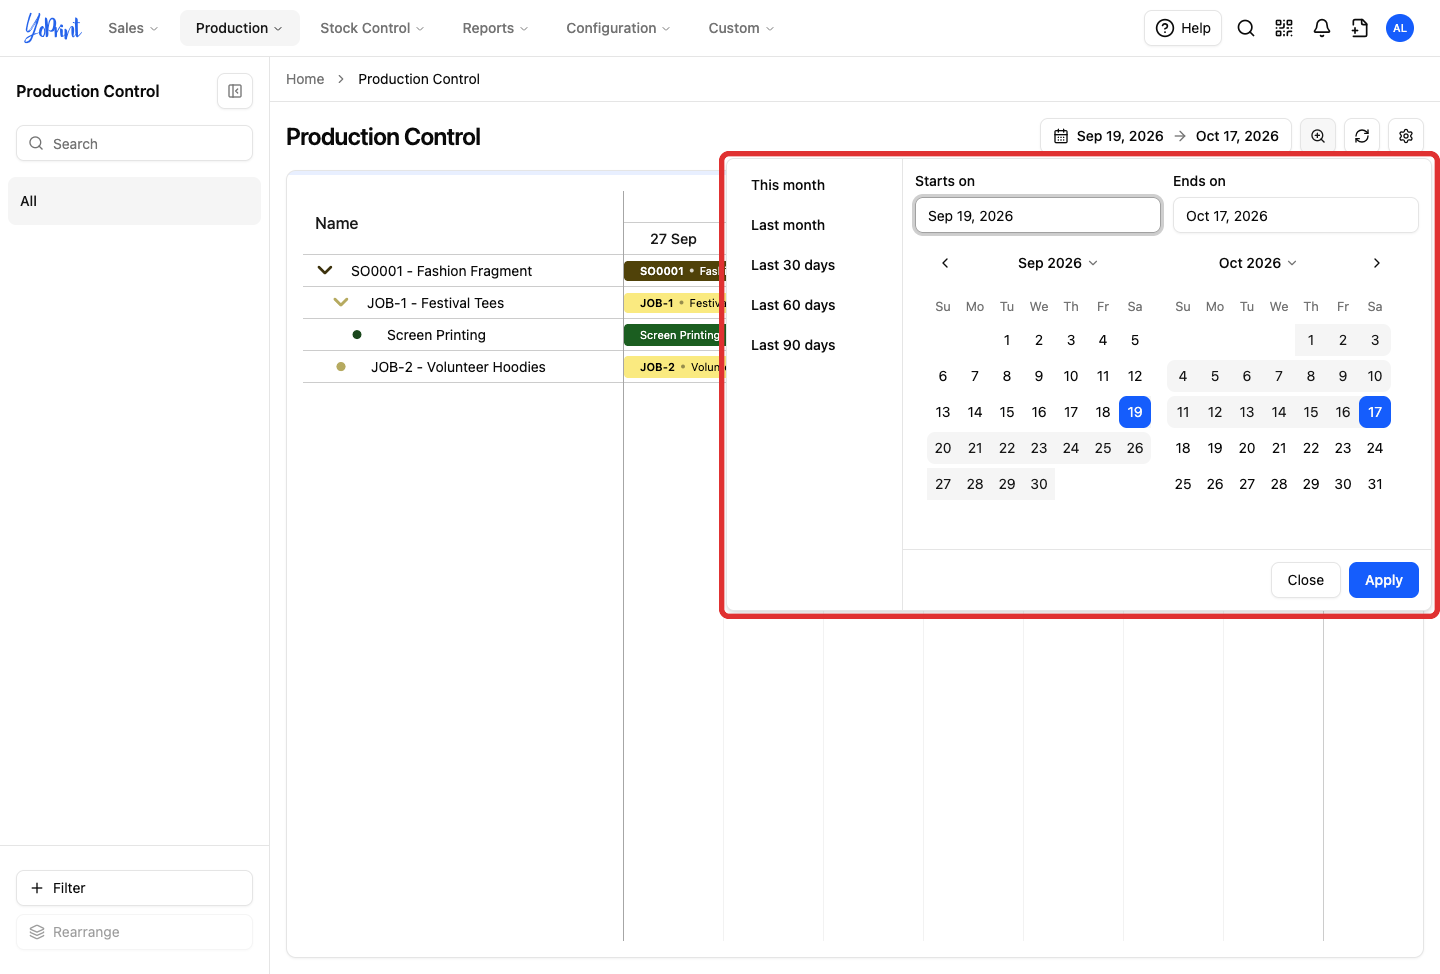
Choose the dates you want to display on the board:
- Select a quick preset from the left panel, such as This month, Last 30 days, or Last 60 days. Quick presets focus on current and past periods.
- Or select custom dates on the dual-month calendar. Click your start date first, then click your end date to complete the range. To plan upcoming work, navigate to future months and select your date range.
-
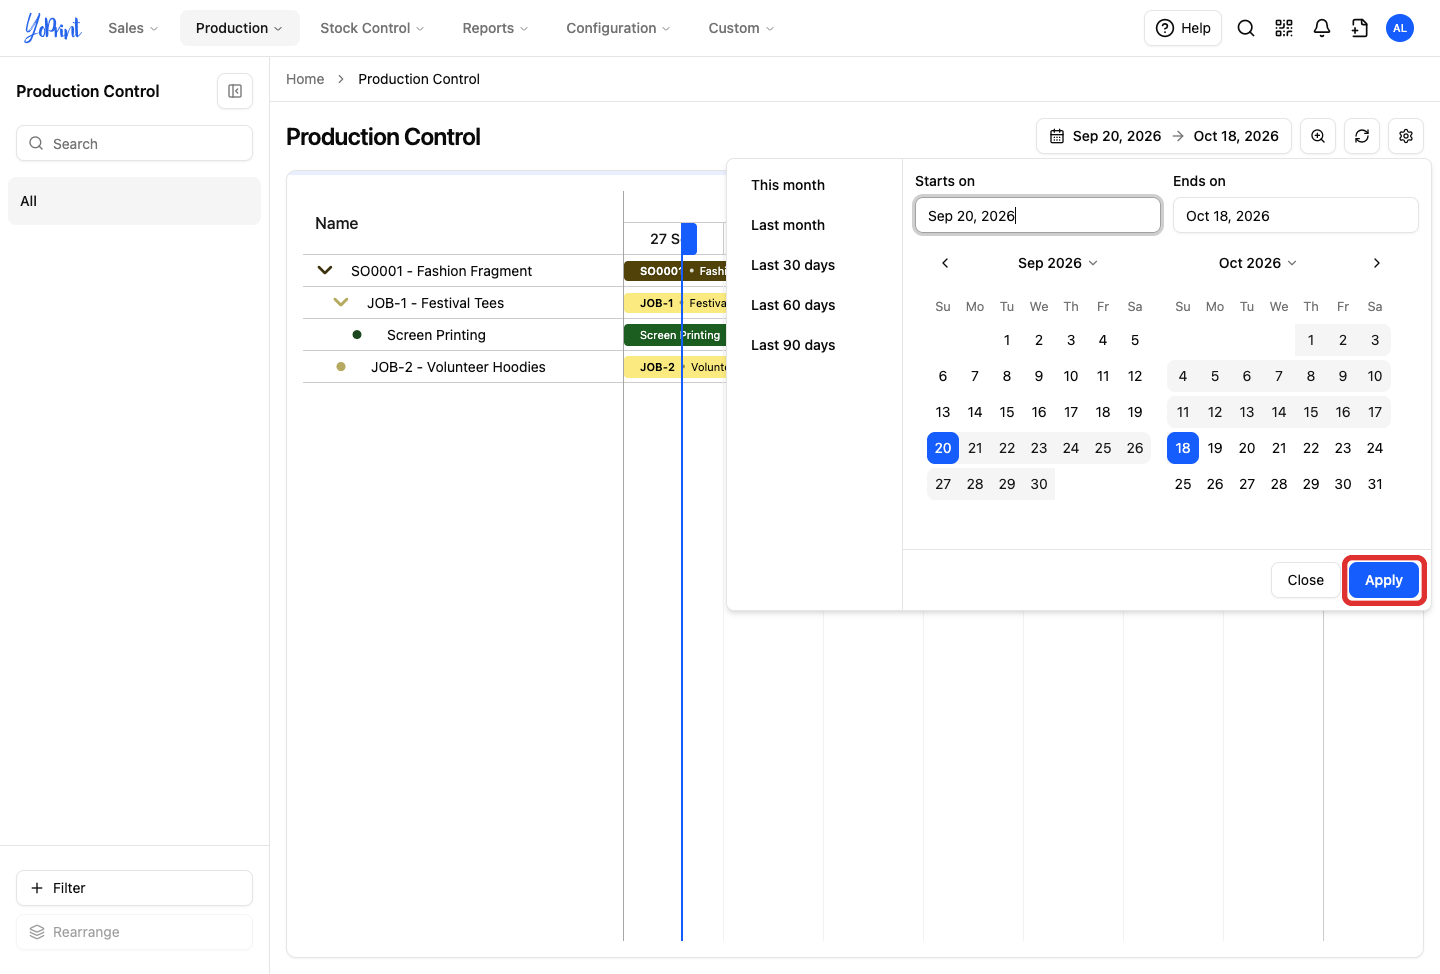
Click Apply to update the board with your selected date range.
Schedule and move tasks
-
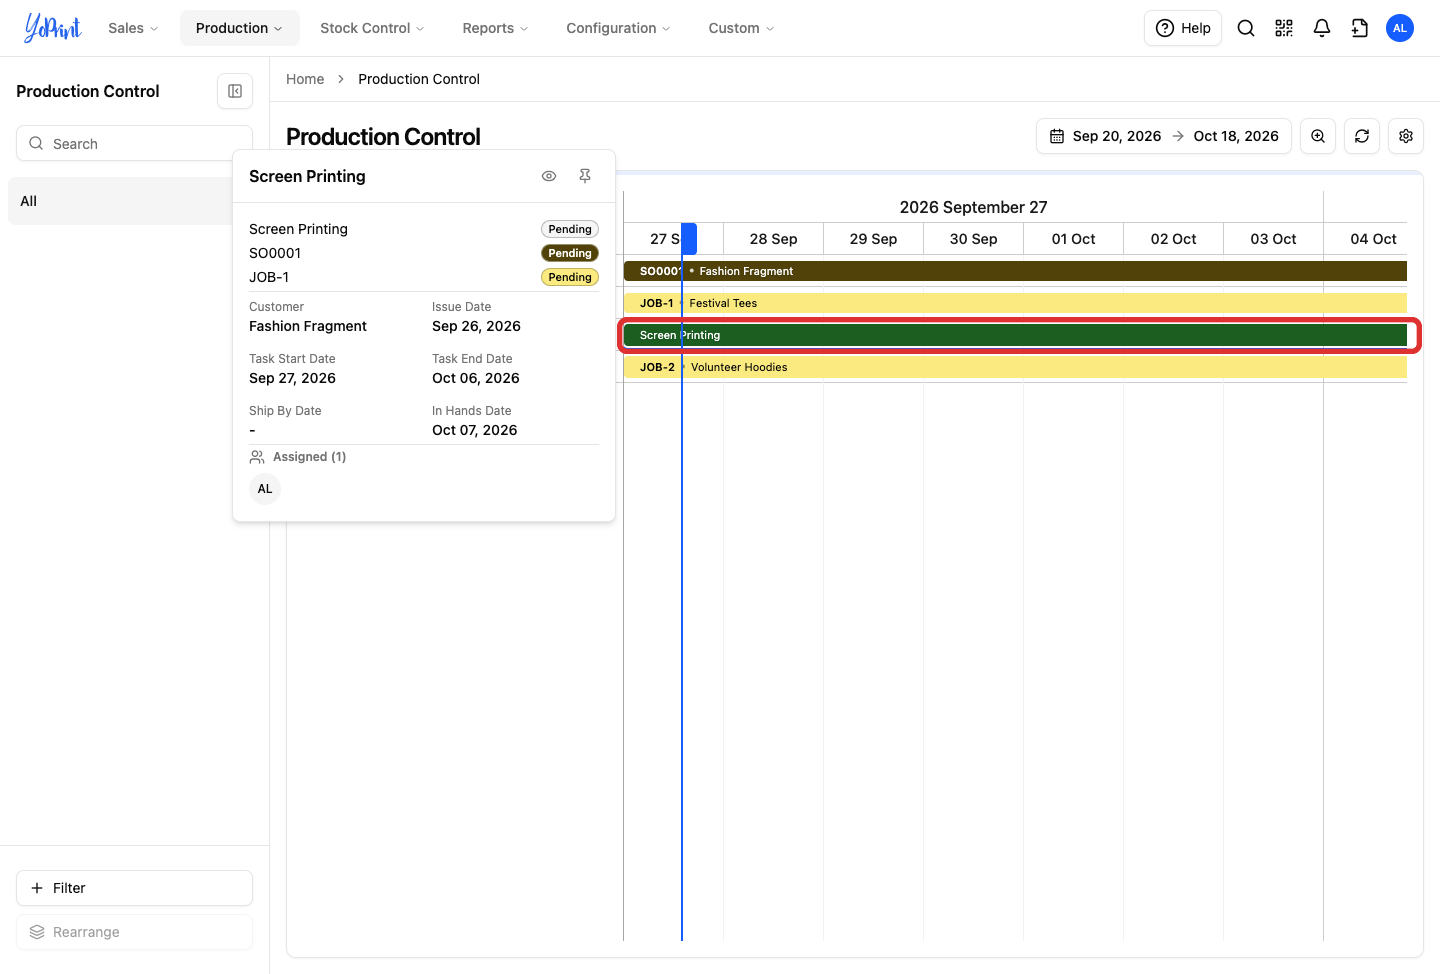
Click and drag a task bar horizontally along its row toward your target dates.
-
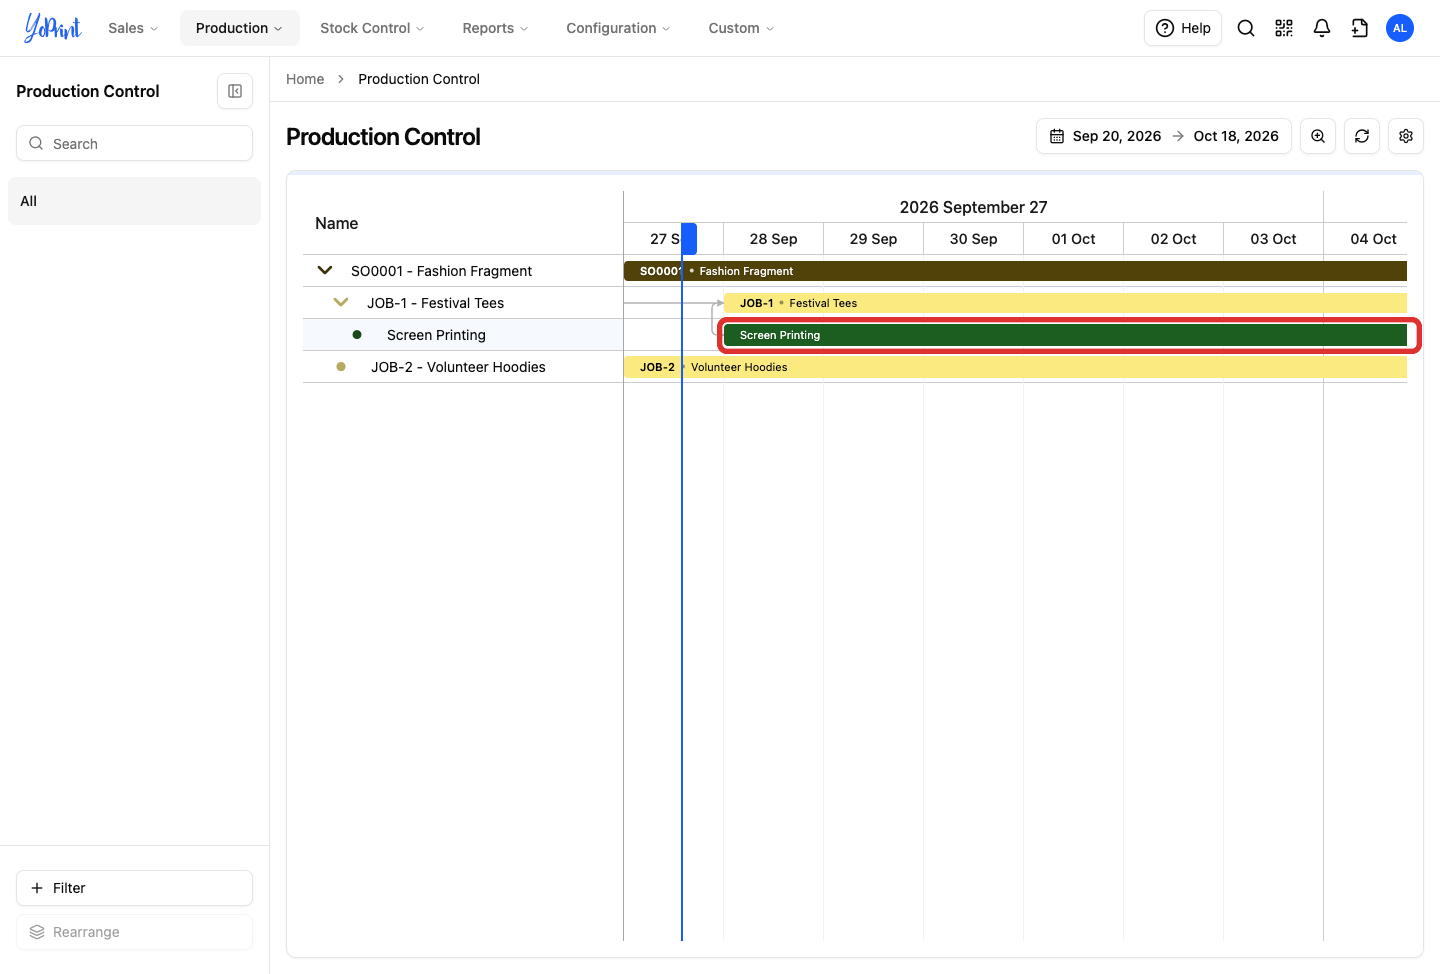
Release the task bar at the updated start and due dates on the calendar grid.
-
Click the task bar to inspect the schedule popover and confirm the updated dates.
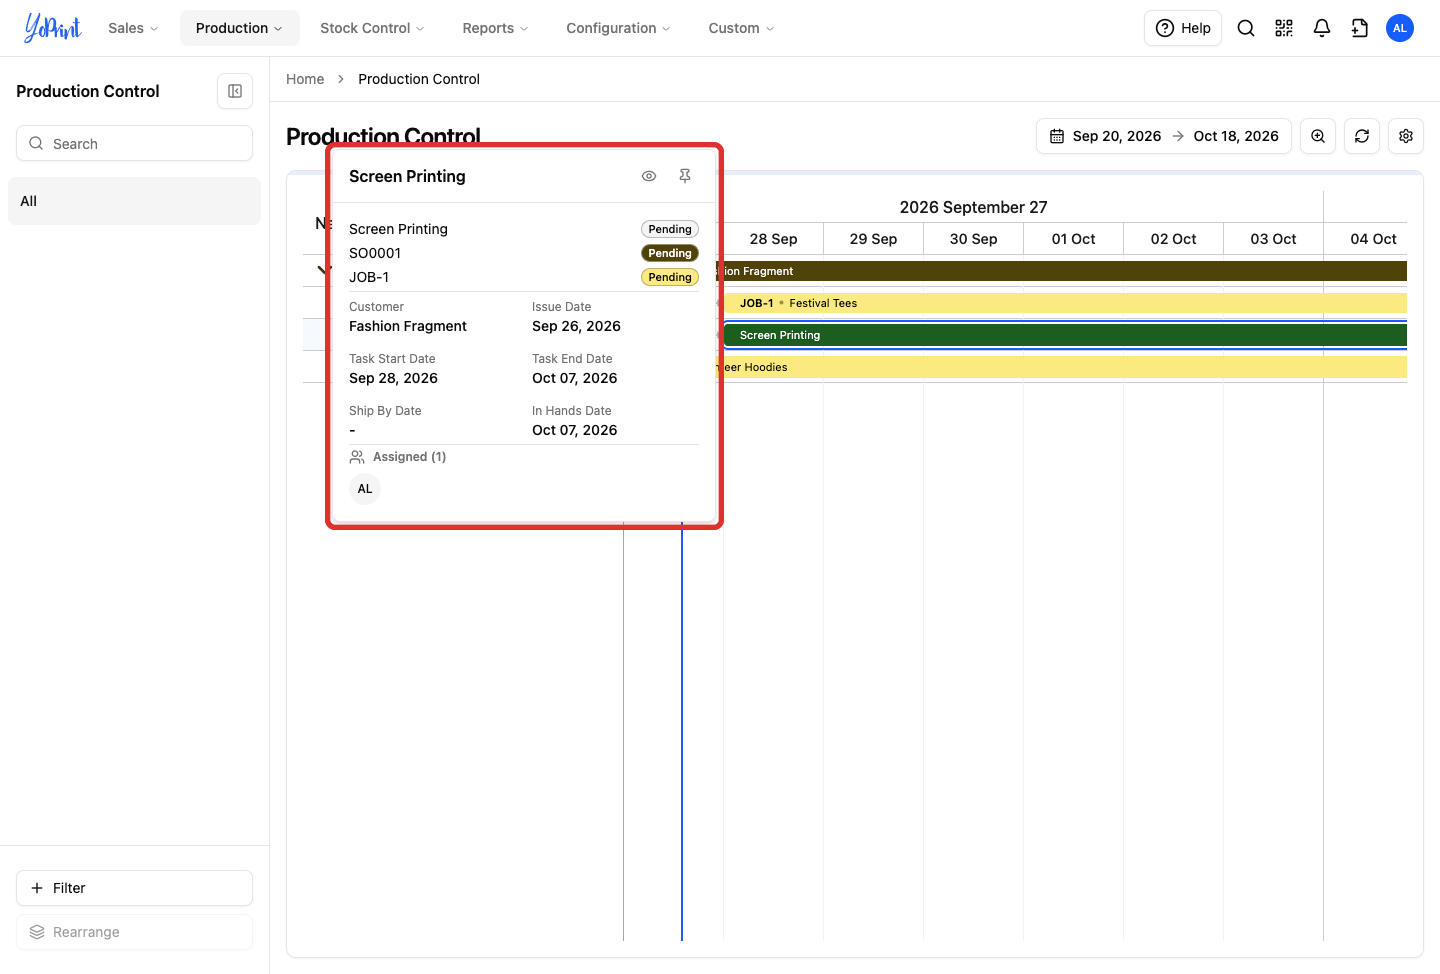
Moving a task updates its start date and due date across your shop, including in All Jobs and individual job records. The job bar adjusts to span its scheduled tasks, while the parent sales order bar remains anchored to the sales order's own start and due dates.
Update task details and status
-
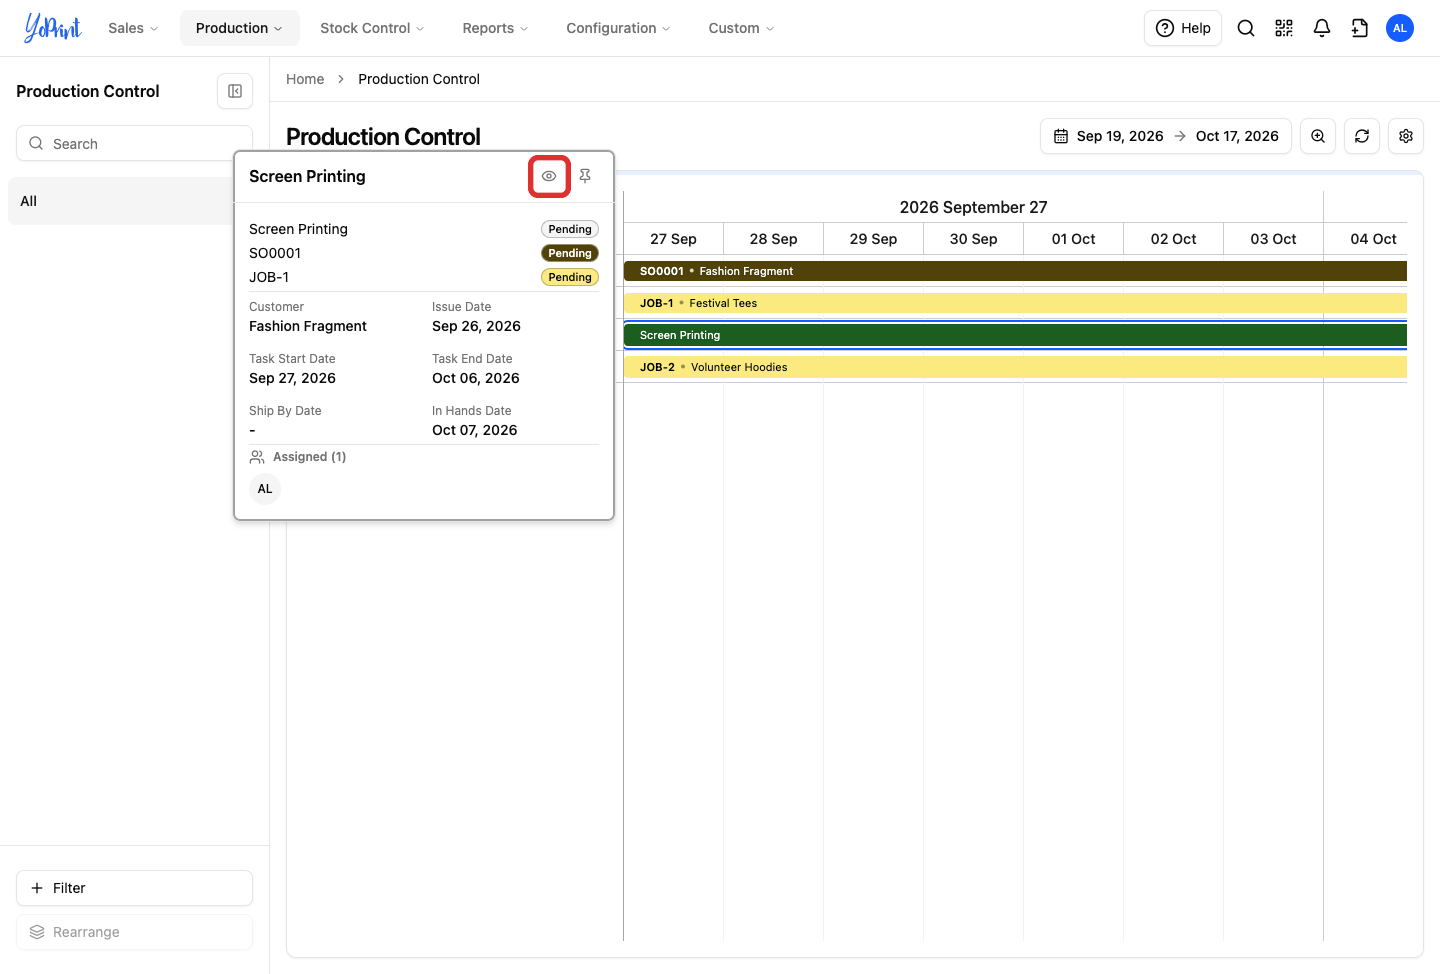
Click a task bar on the timeline to open its preview popover.
-
In the task preview popover, click View full details (eye icon in the top-right header).
-
In the Update Task dialog, select a new Status (such as Printing or Completed) to reflect current shop-floor progress.
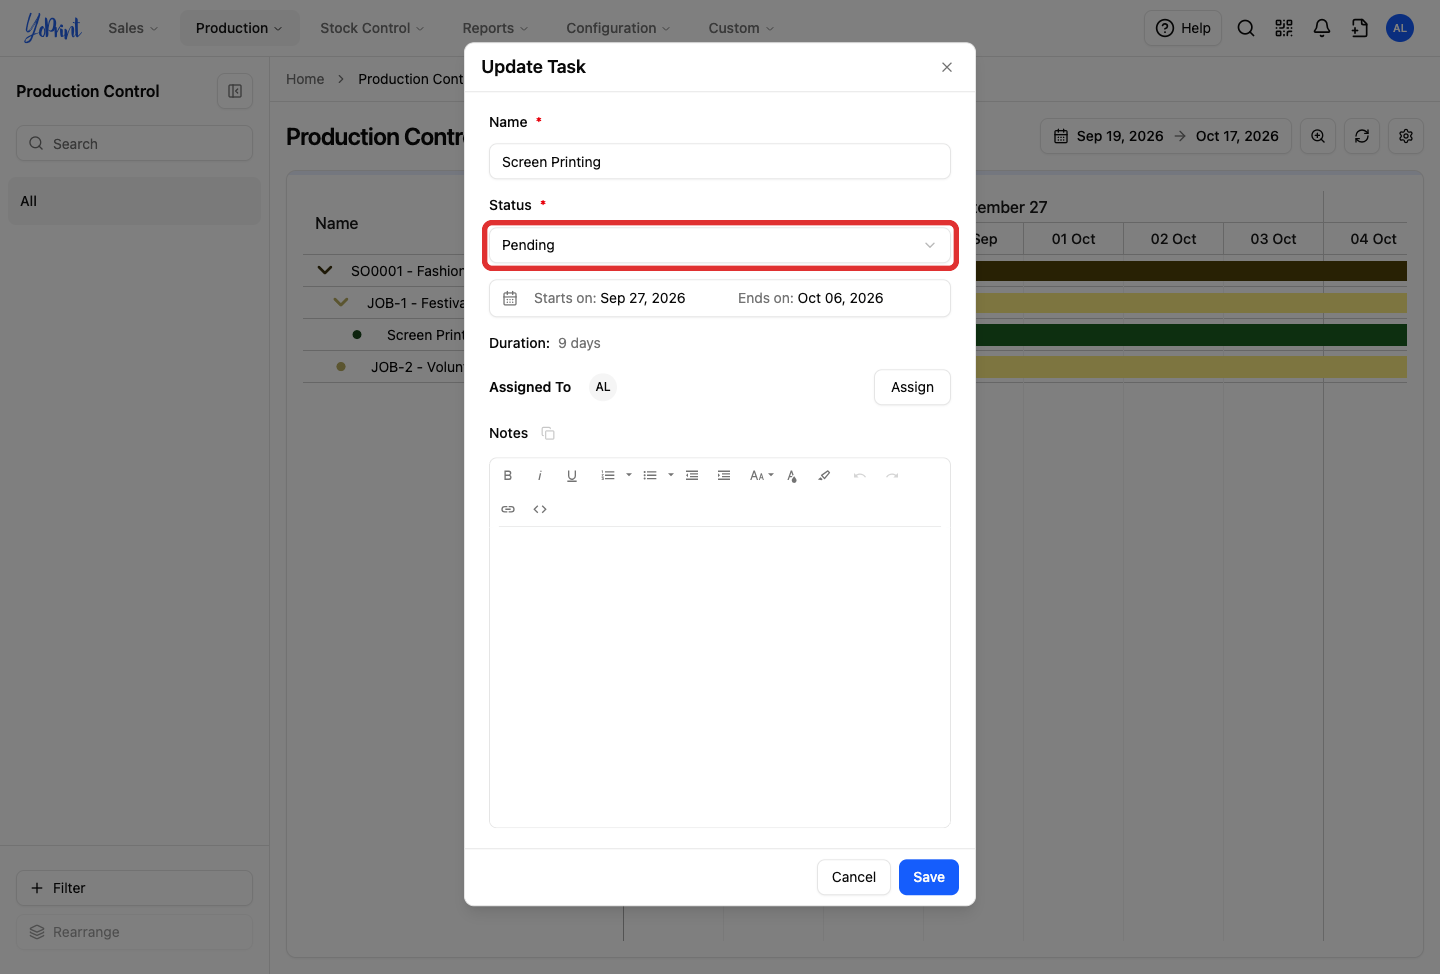
You can also assign team members, edit production notes, or adjust scheduled dates directly within this dialog before saving.
-
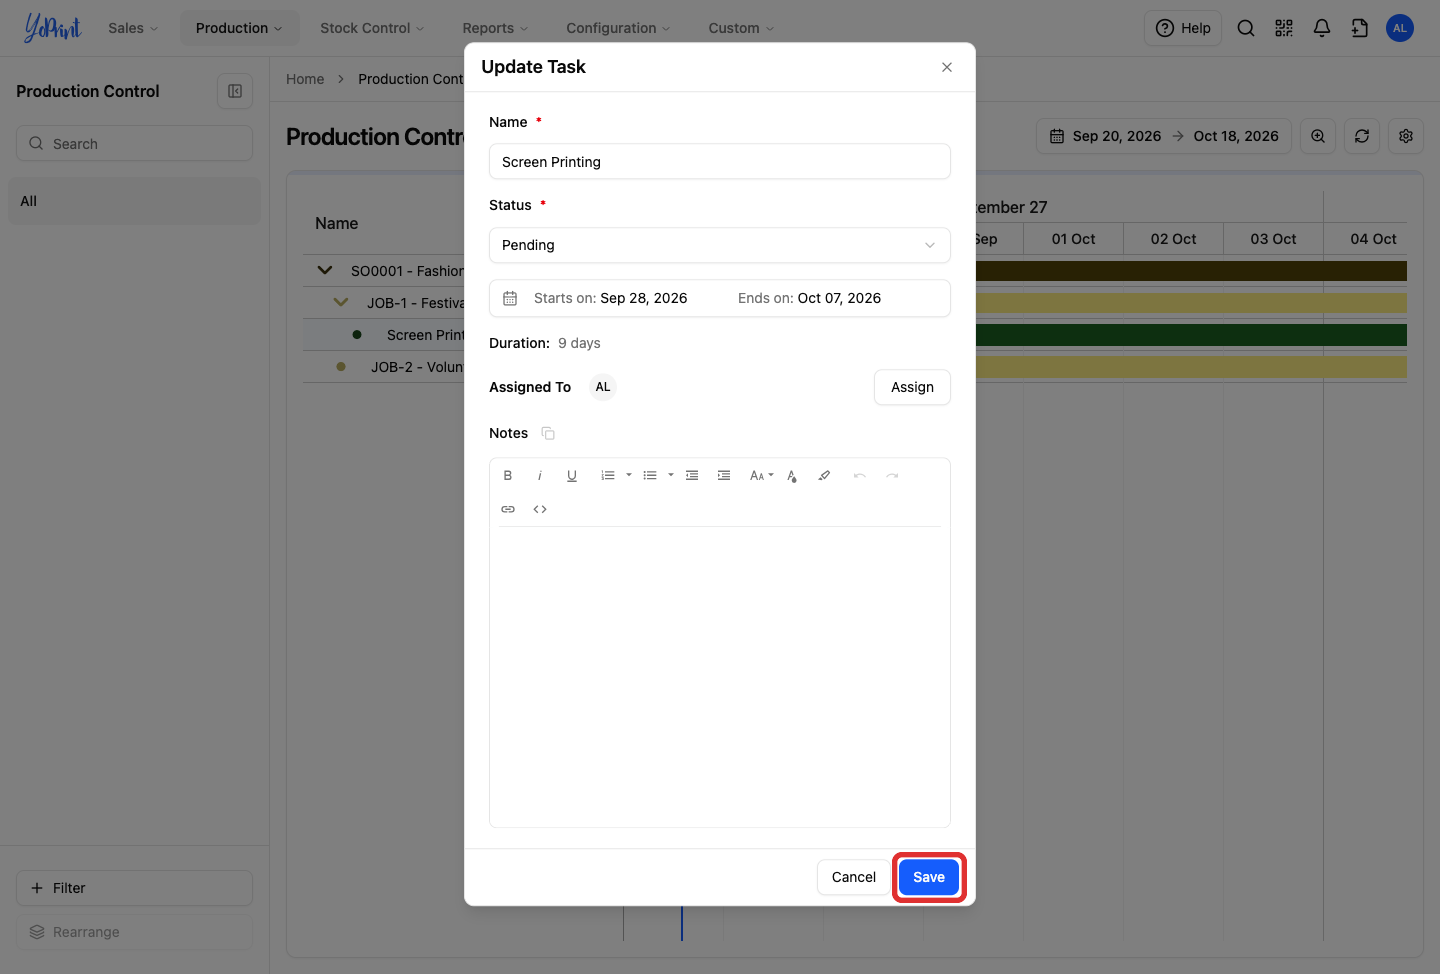
Click Save to apply your changes to the task.
Filter the production board
-
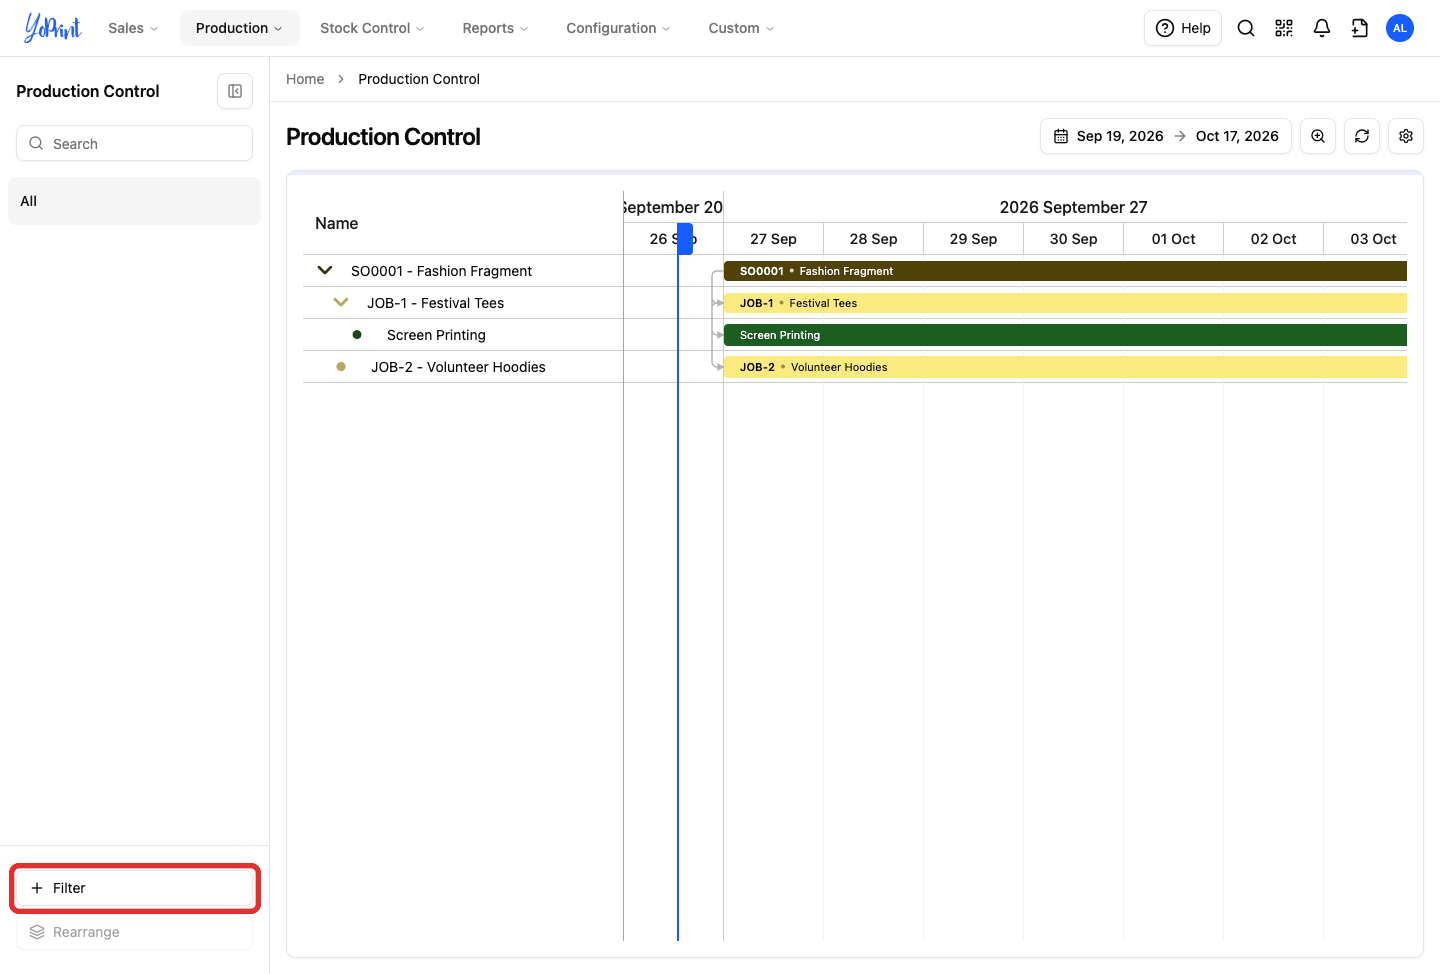
In the left sidebar, click Filter to create a custom view of your production schedule.
-
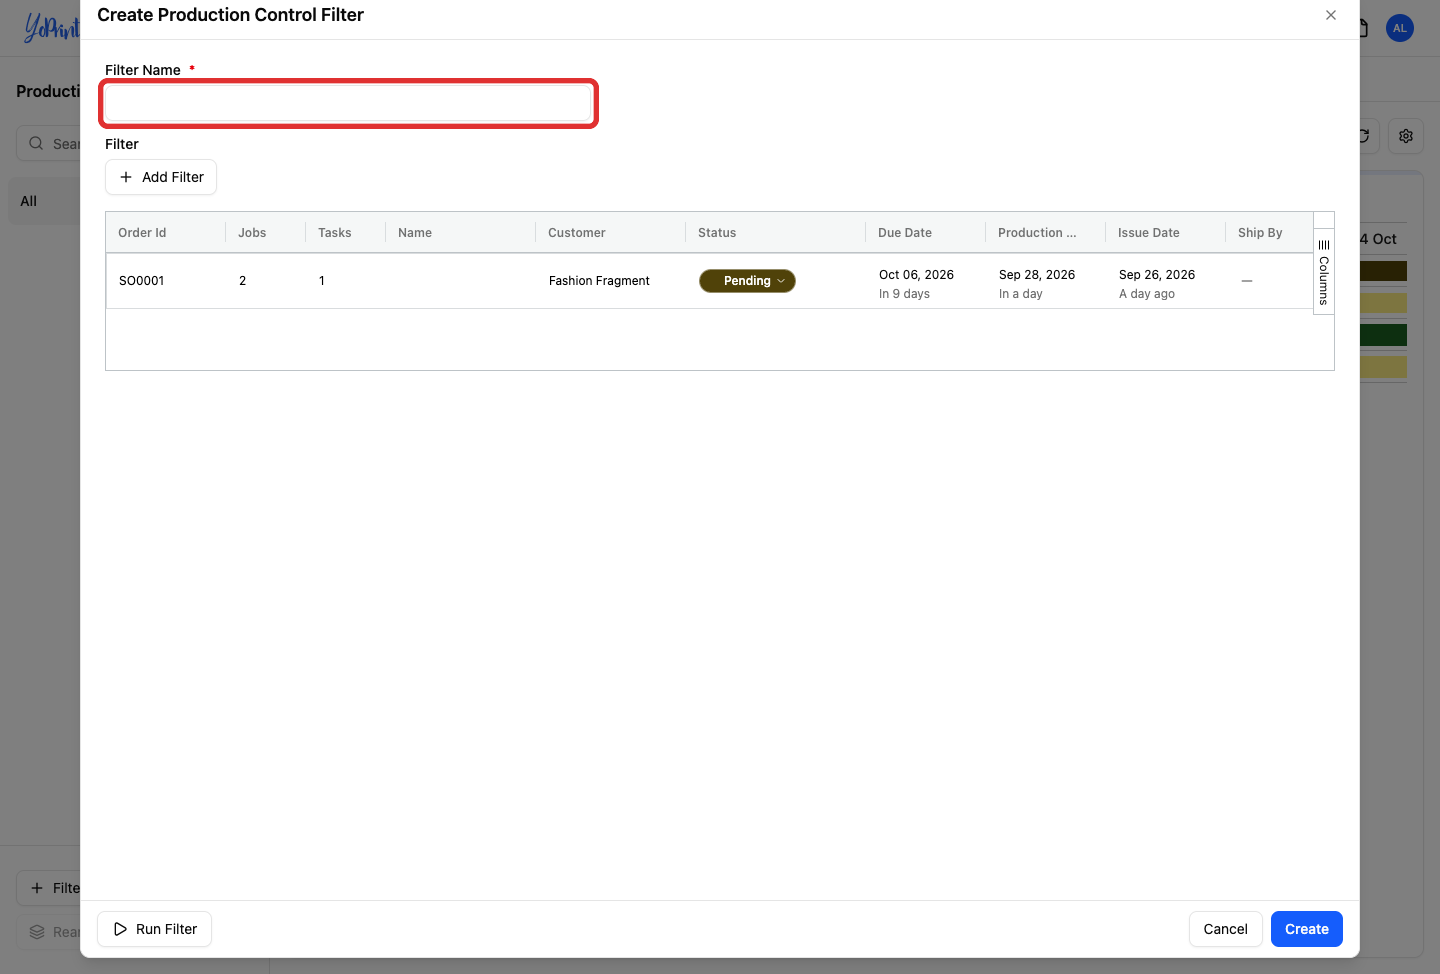
Enter a name in the Filter Name field (for example, Screen Printing Pending).
-
Click Add Filter and choose your criteria:
- Order criteria: Filter by Order Status, Customer, or Order Assigned Users.
- Job criteria: Filter by Job Status, Job Assigned Users, or Job Due Date.
- Task criteria: Filter by Task Status, Task Presets, or Task Assigned Users.
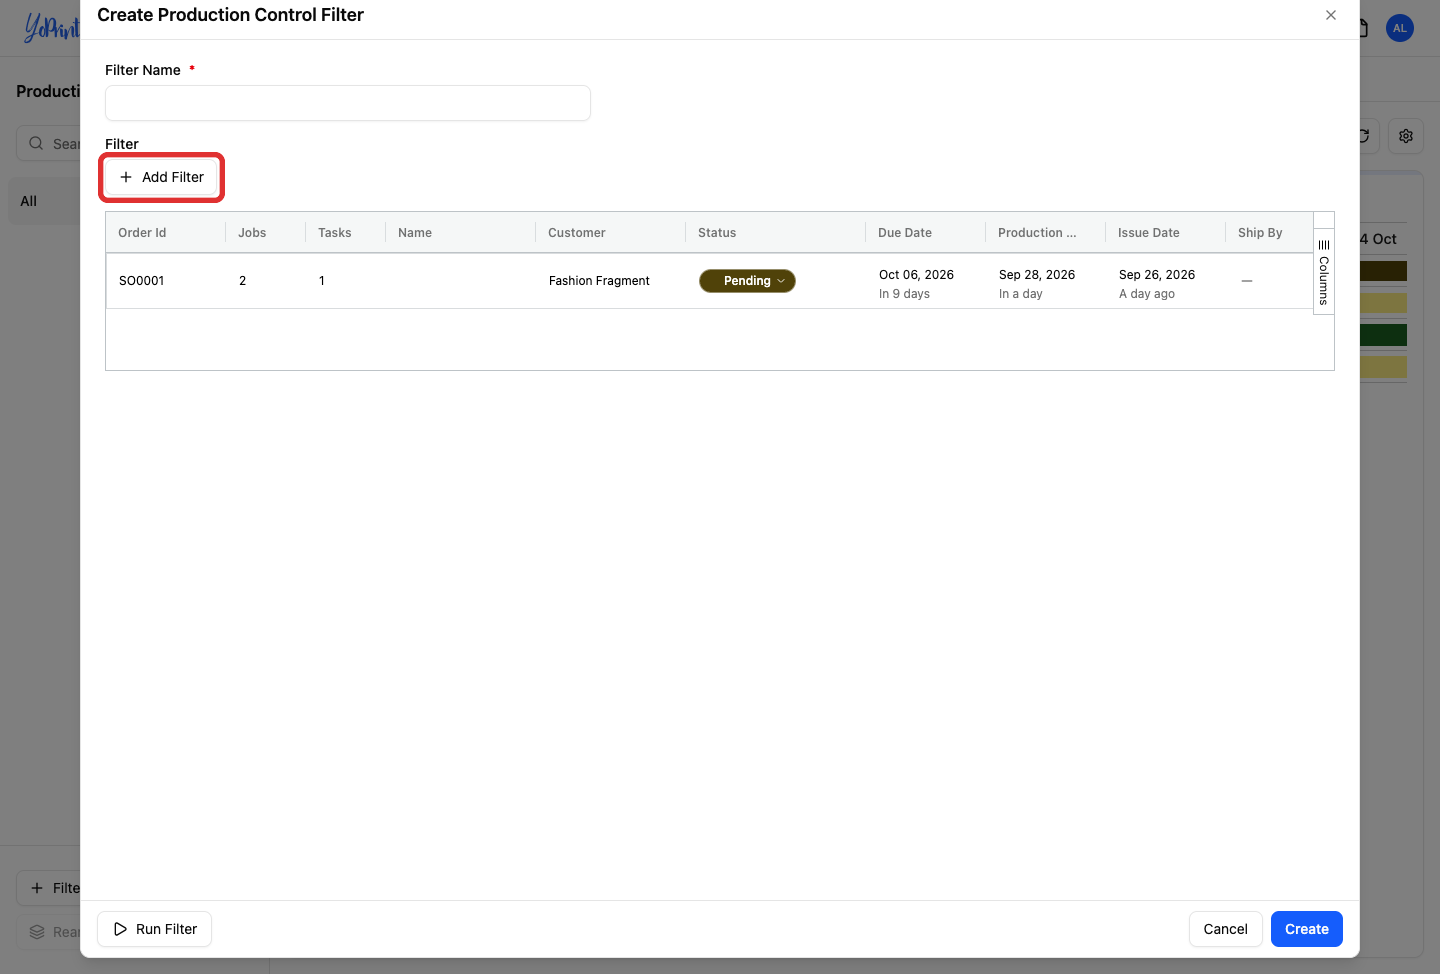
Select your comparison operator (such as in or not in). When filtering by task status, select a Task preset (such as Screen Printing) to unlock the Value menu, then choose your target statuses. Click Run Filter to preview matching orders in the table before saving.
Filters match sales orders meeting your criteria. When an order matches, all jobs in that order remain visible on the board, but each job only displays tasks matching your task filter.
-
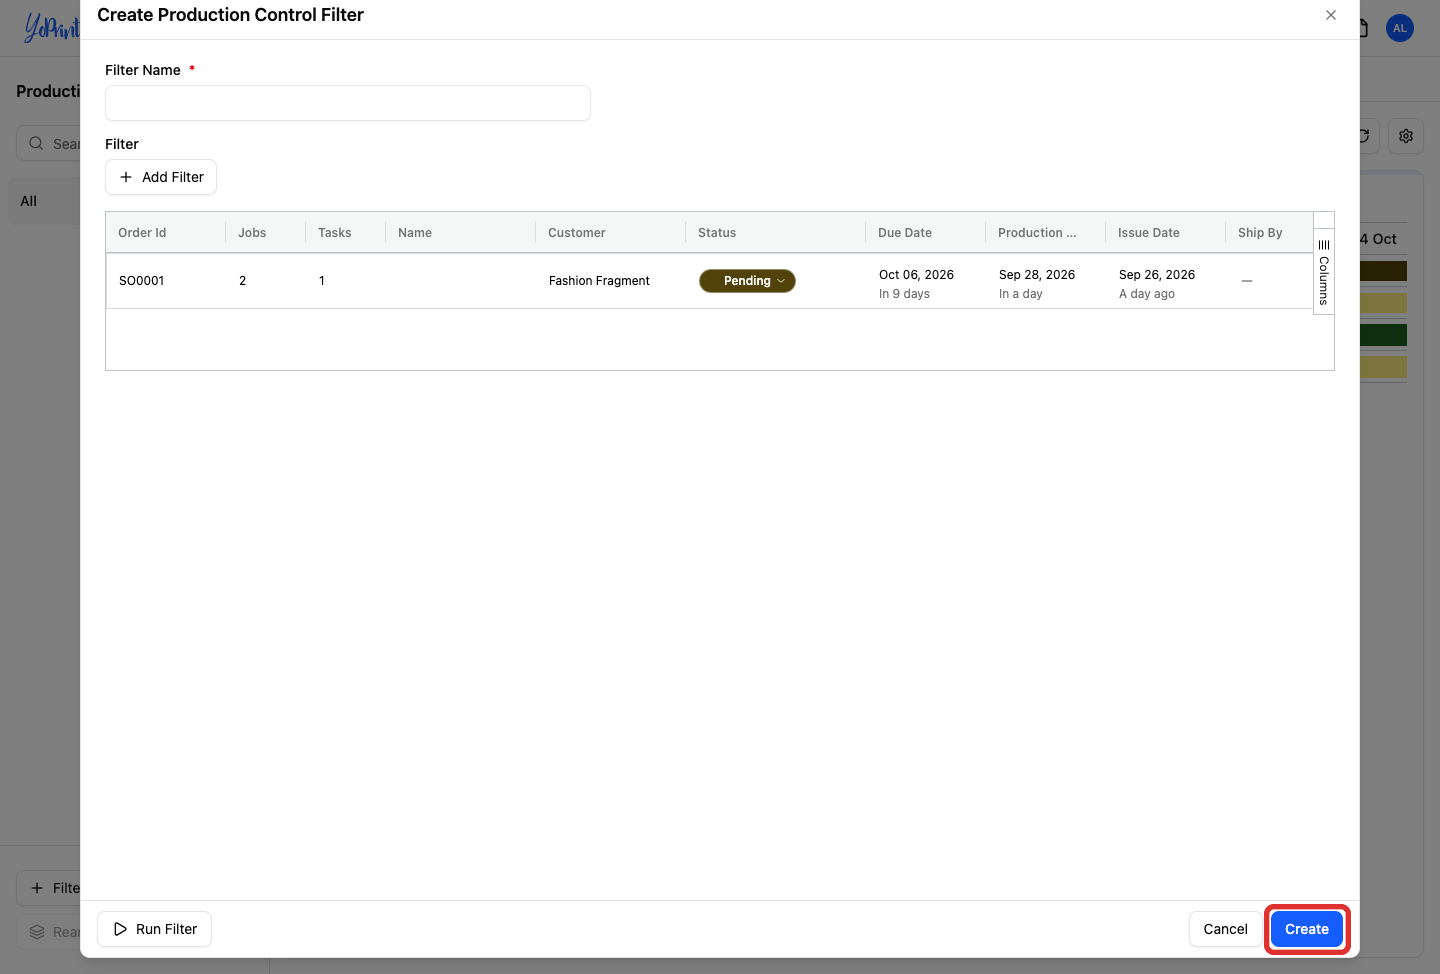
Click Create to save the filter to your sidebar.
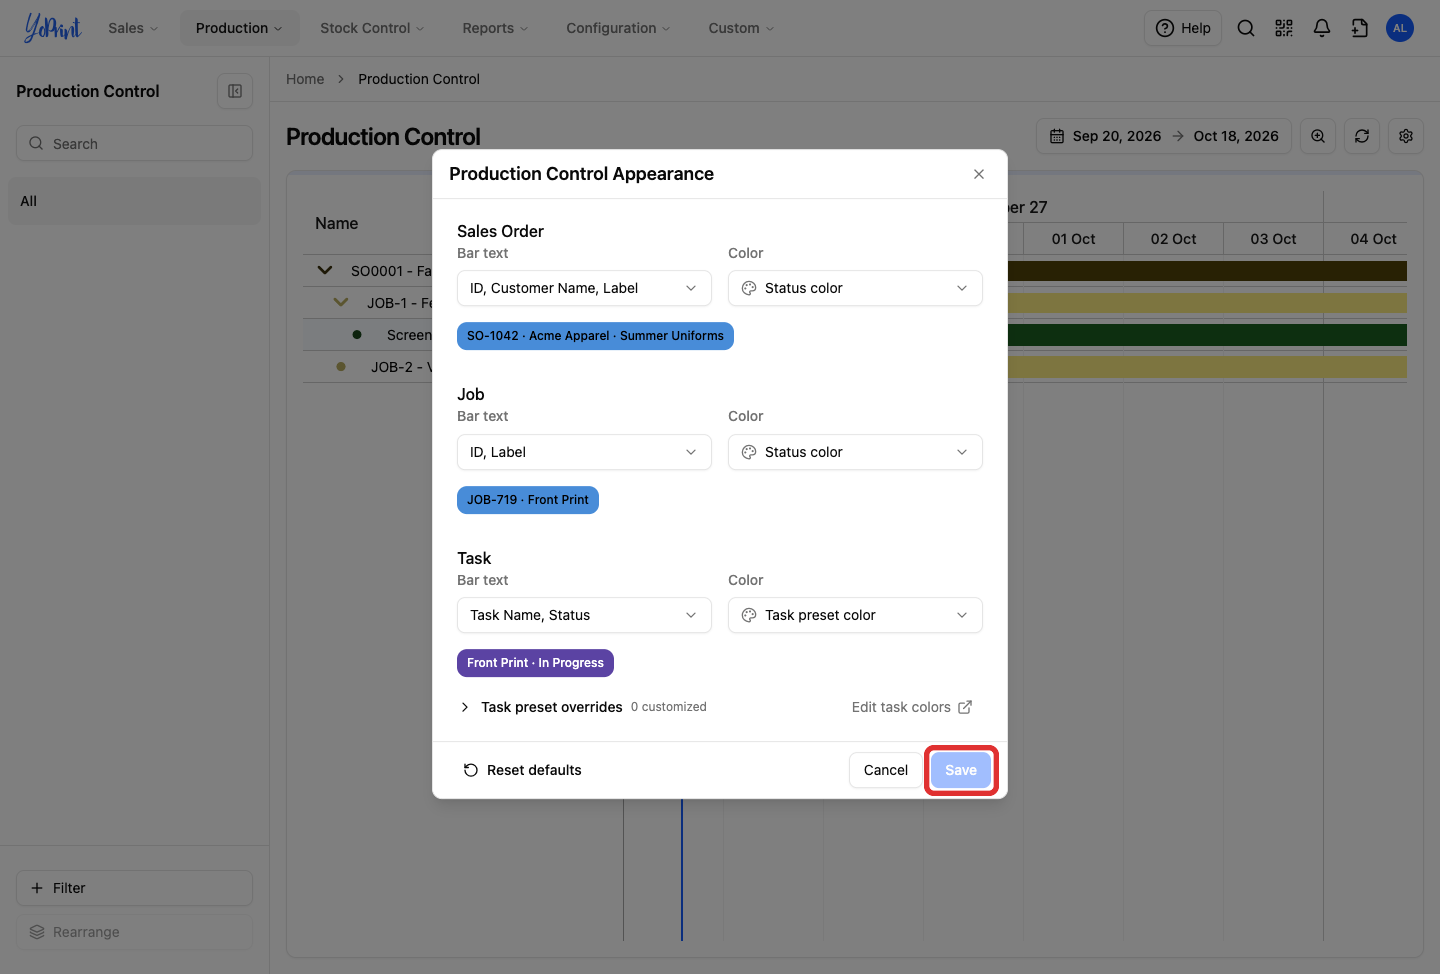
Customize timeline appearance
-
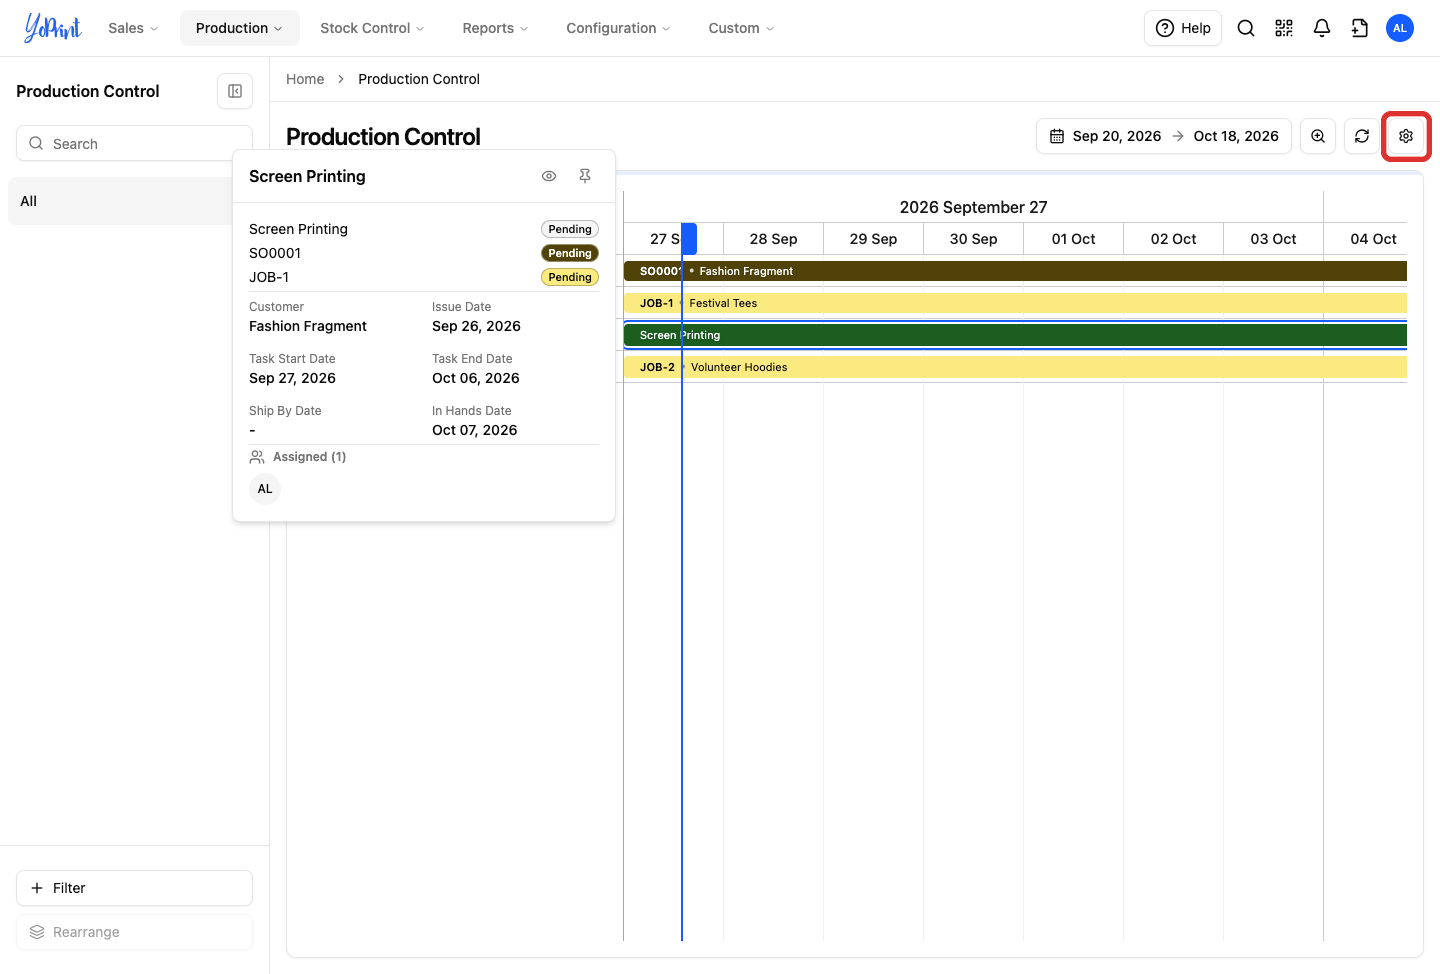
Click the Production Control Settings (gear icon) in the top toolbar.
-
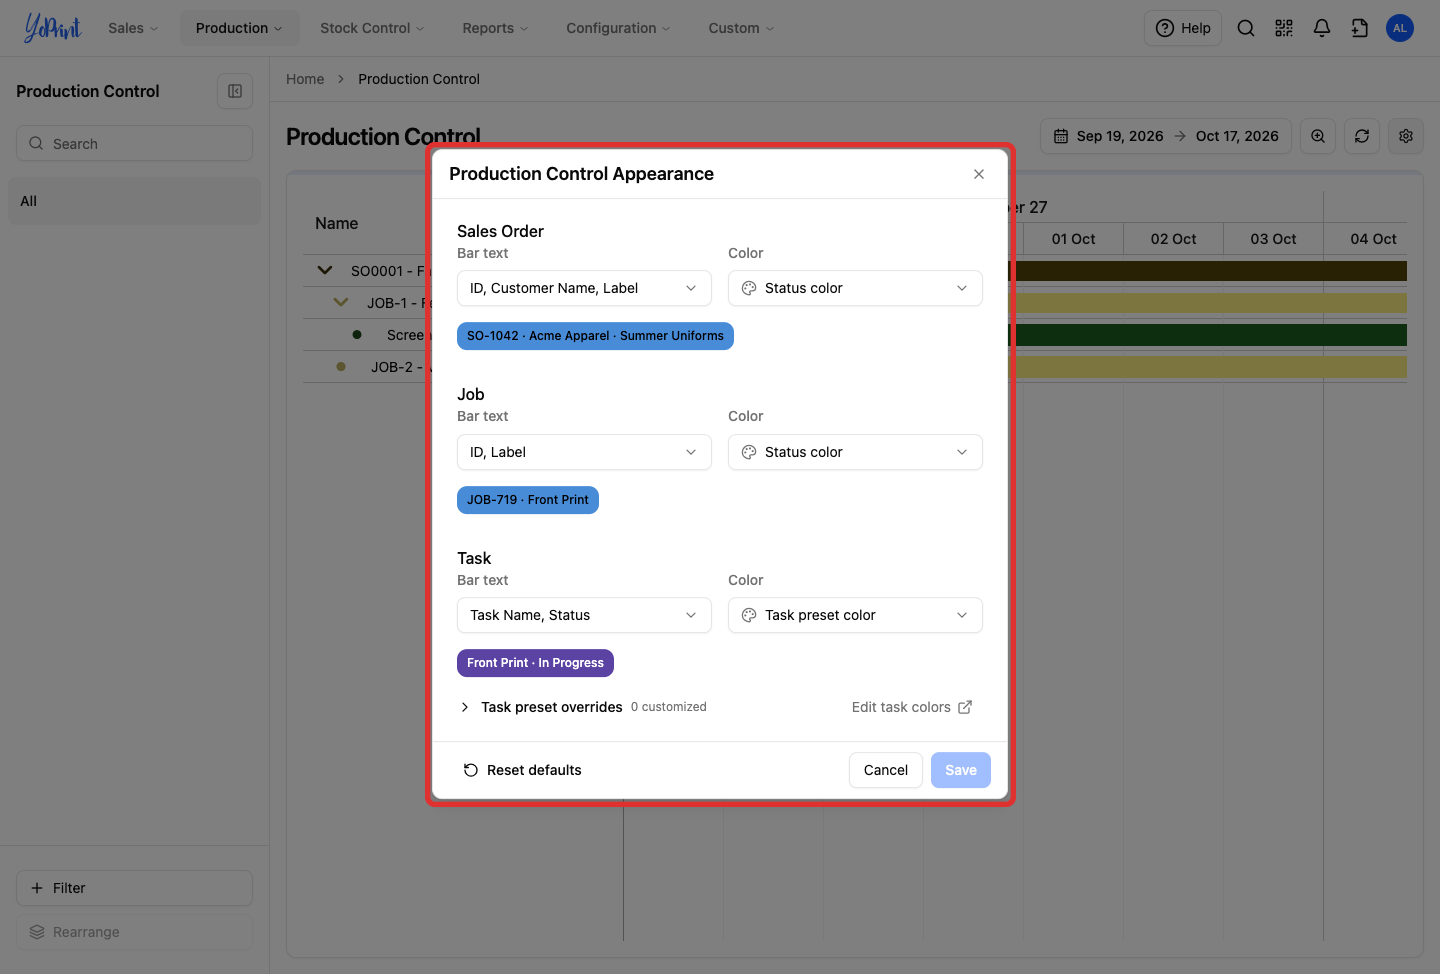
Set your display preferences for each hierarchy level:
- Sales Order: Choose bar text (ID, Customer Name, Label, Status, Customer PO) and bar color (Status color or a custom palette color).
- Job: Choose bar text (ID, Label) and bar color (Status color or custom color). Job colors are independent of task colors: choosing Status color uses the job's own status color (such as blue for In Production), rather than inheriting colors from underlying tasks.
- Task: Choose bar text (Task Name, Status) and default bar color (Task preset color, Status color, or custom color).
- Task preset overrides: Click the Task preset overrides row to expand it, then choose custom colors for individual presets (such as Screen Printing or Embroidery).
-
Click Save to apply your appearance preferences to the timeline.