Subcontracting Orders to Vendors
In this article
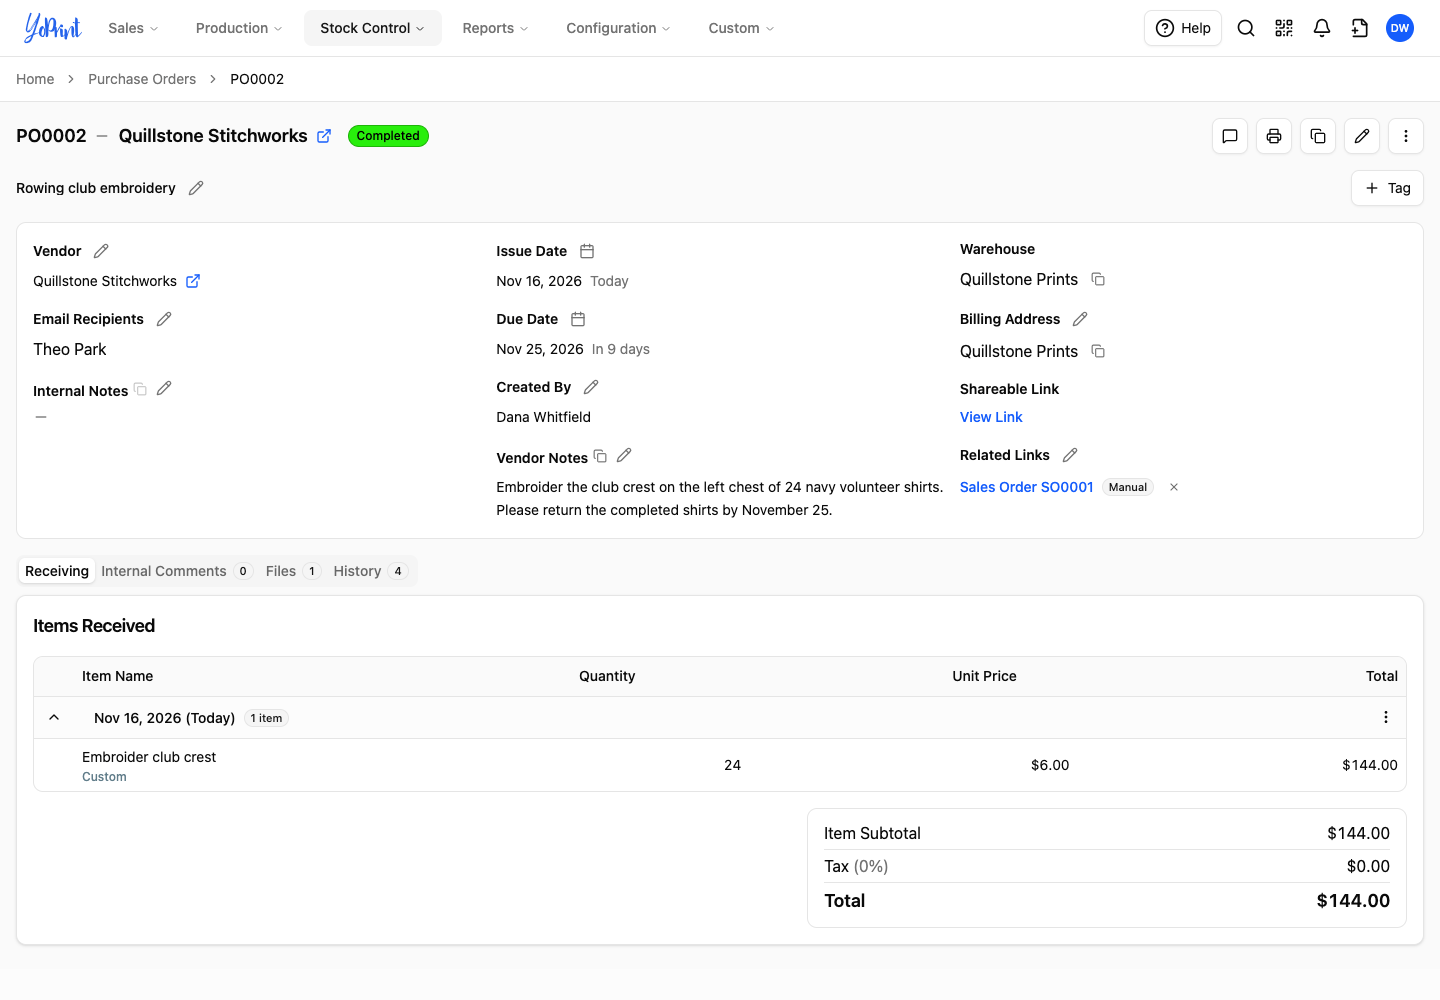
Use a purchase order to describe work you outsource to a vendor. On the purchase order, put the service, such as embroidery, on a custom line with the vendor's cost rather than your selling price. Start from the customer's quote or sales order to keep the two orders linked. You can then track the subcontract alongside the customer order.
Create the subcontract purchase order
Creating a purchase order does not send it to the vendor; confirm customer approval before sending work.
-
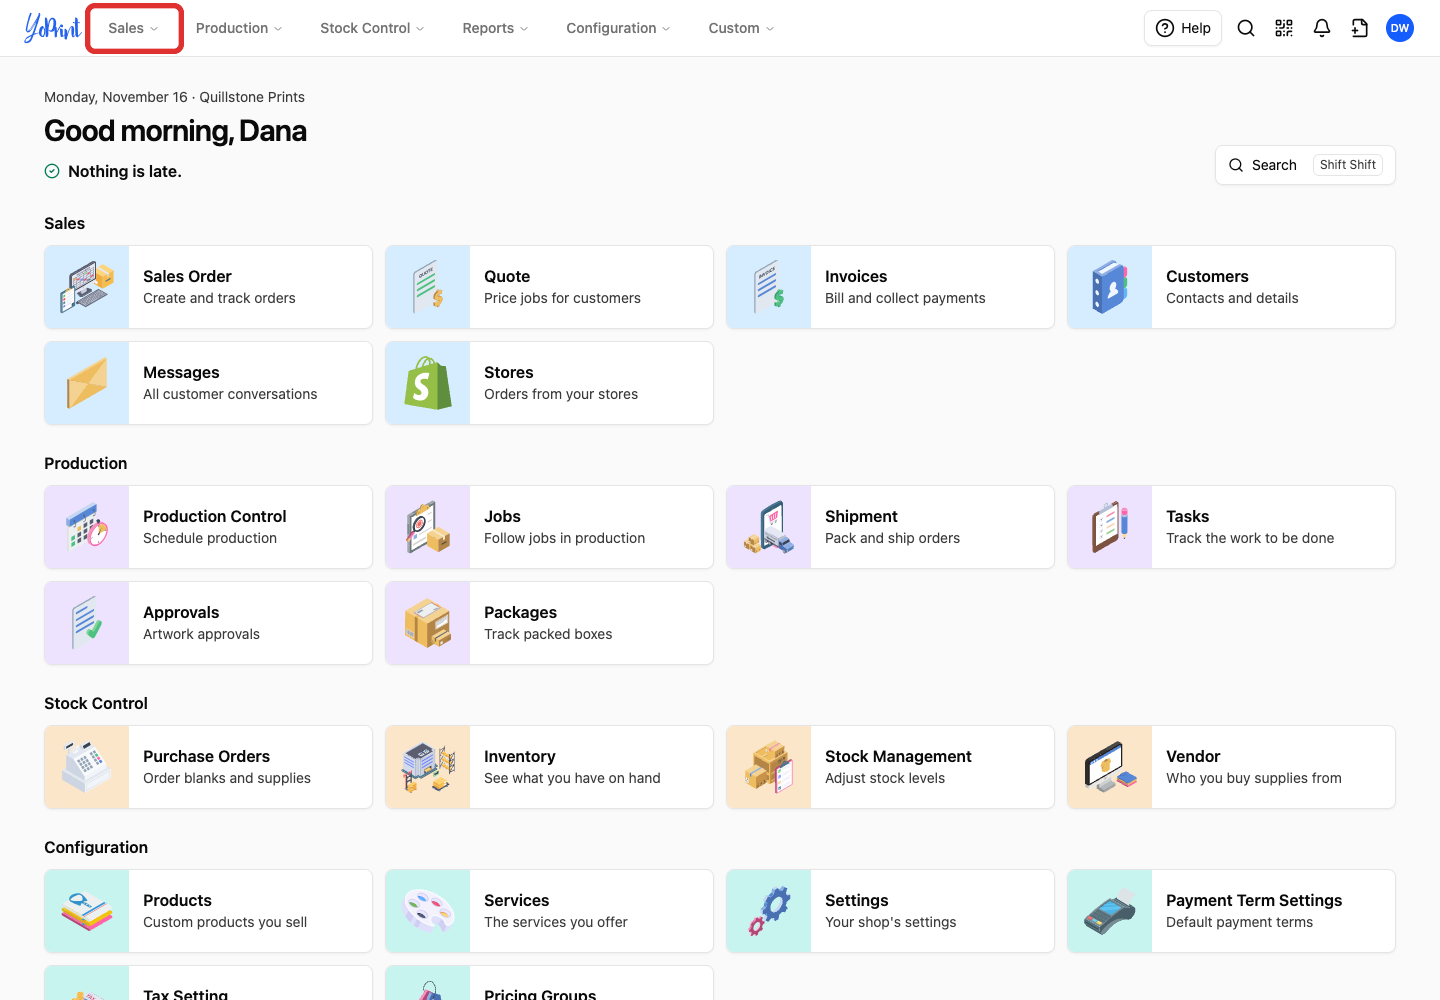
Open Sales in the top navigation.
-
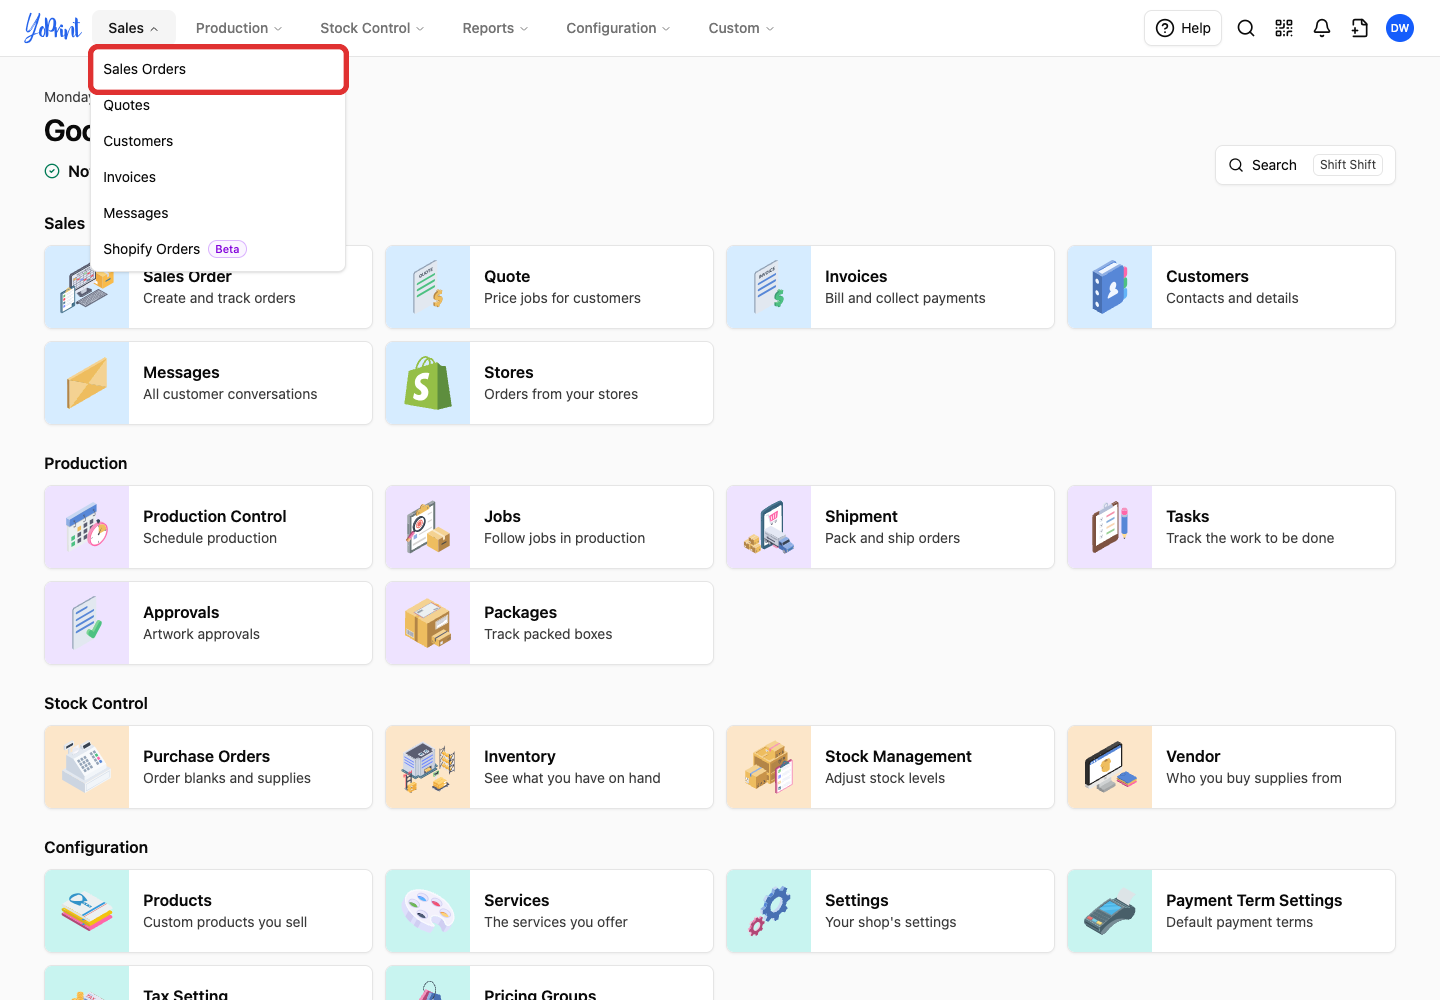
Choose Sales Orders.
Working from a quote
For a quote, choose Quotes instead.
-
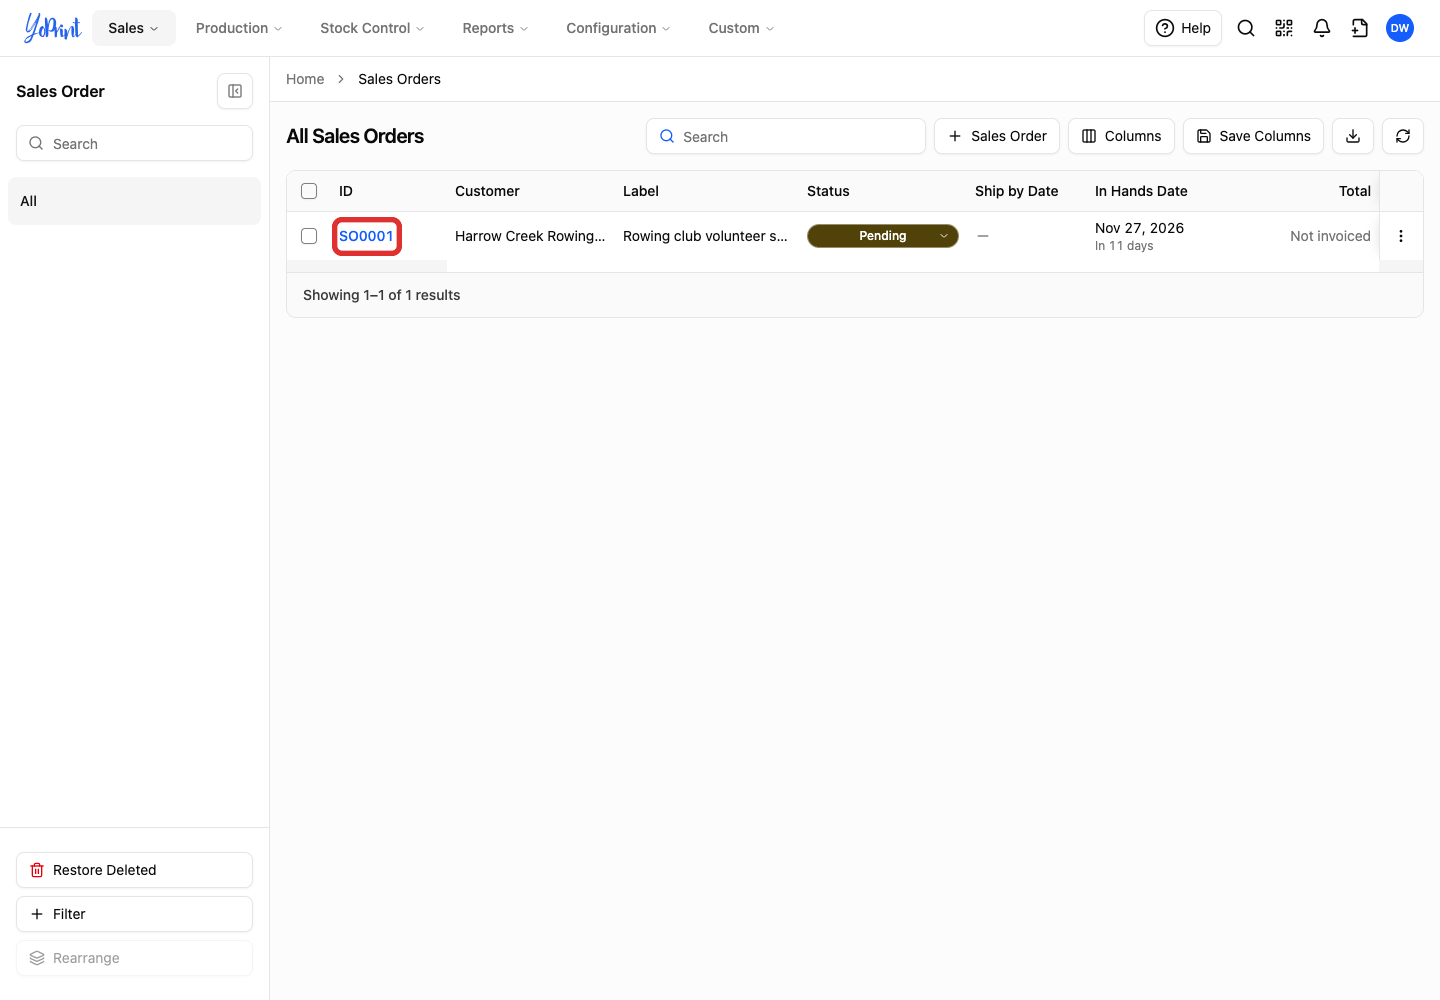
Click the order number to open the order details.
-
Click Quick Actions, the three-dot button at the top right of the order window.
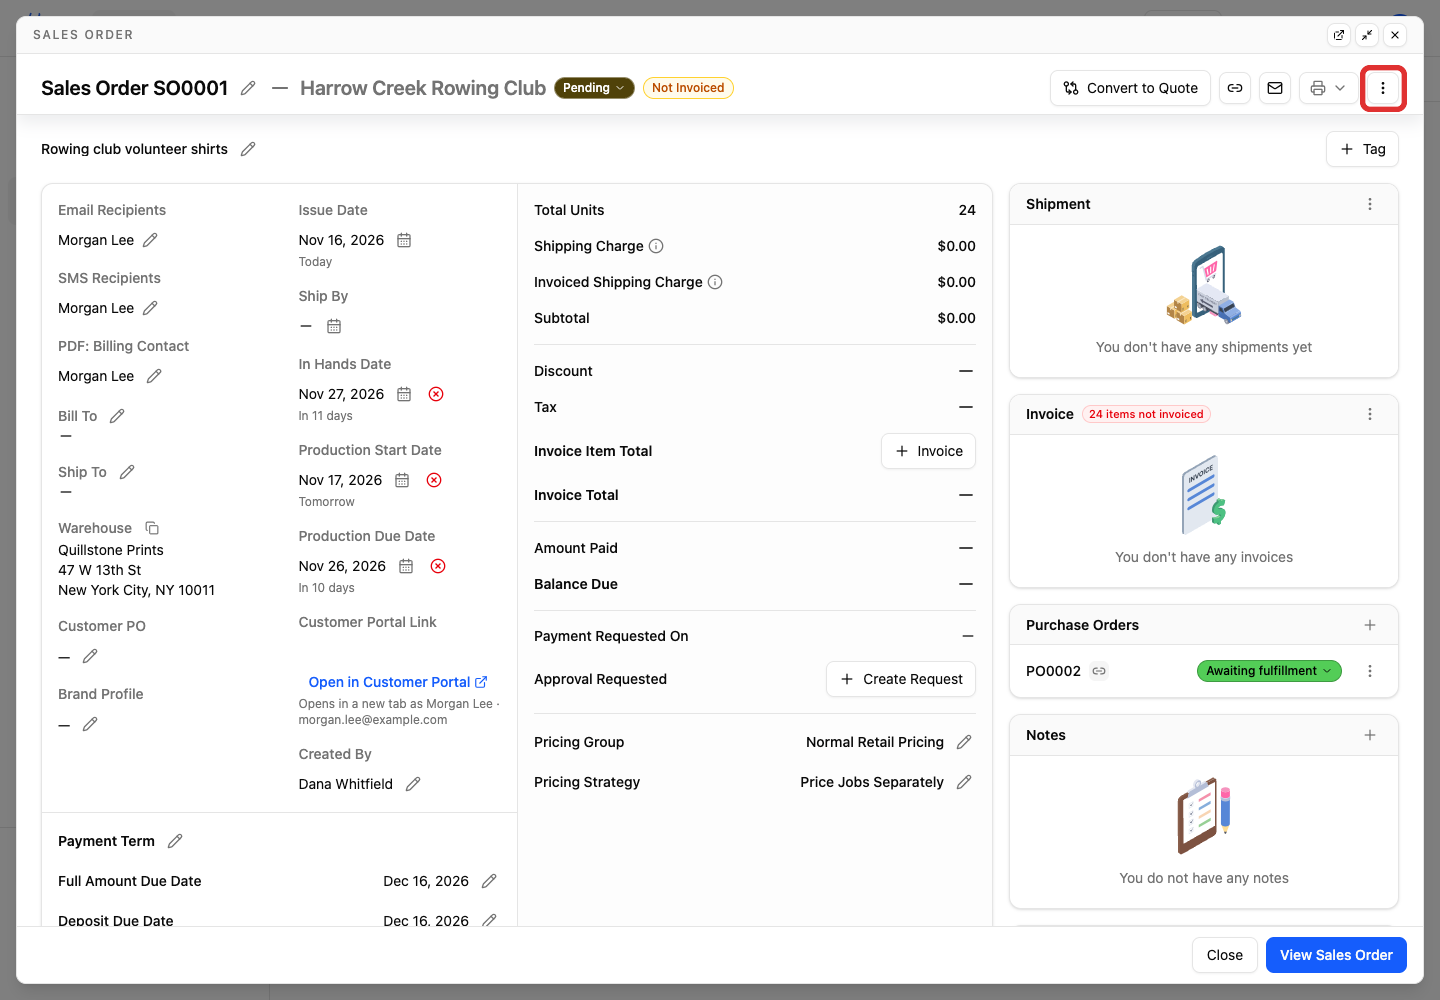
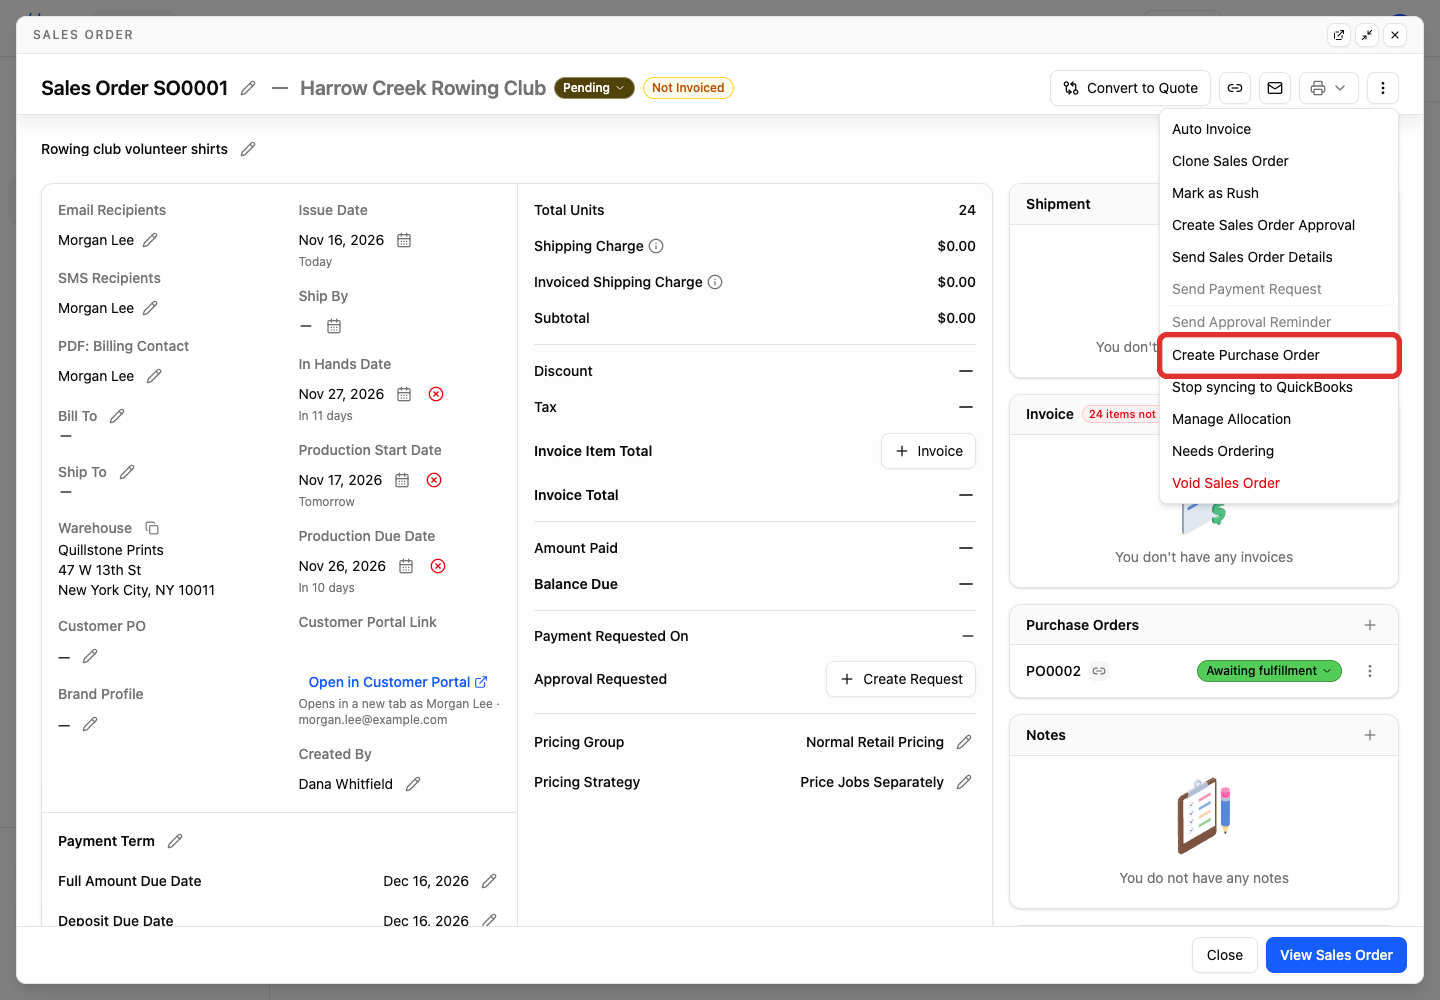
The + on the sales order's Purchase Orders card links an existing purchase order instead; it does not create one.
-
Choose Create Purchase Order.
Catalog products
If the sales order line is a catalog product rather than a custom line, YoPrint first asks how much to add (Needs ordering qty (recommended) or Full SO qty). Click Add to Purchase Order. Needs ordering qty adds only what still needs ordering, which can be 0, so check Qty on the new line. The purchase order carries the product with its colour, size and quantity. Label, the vendor and Unit Price start blank.
-
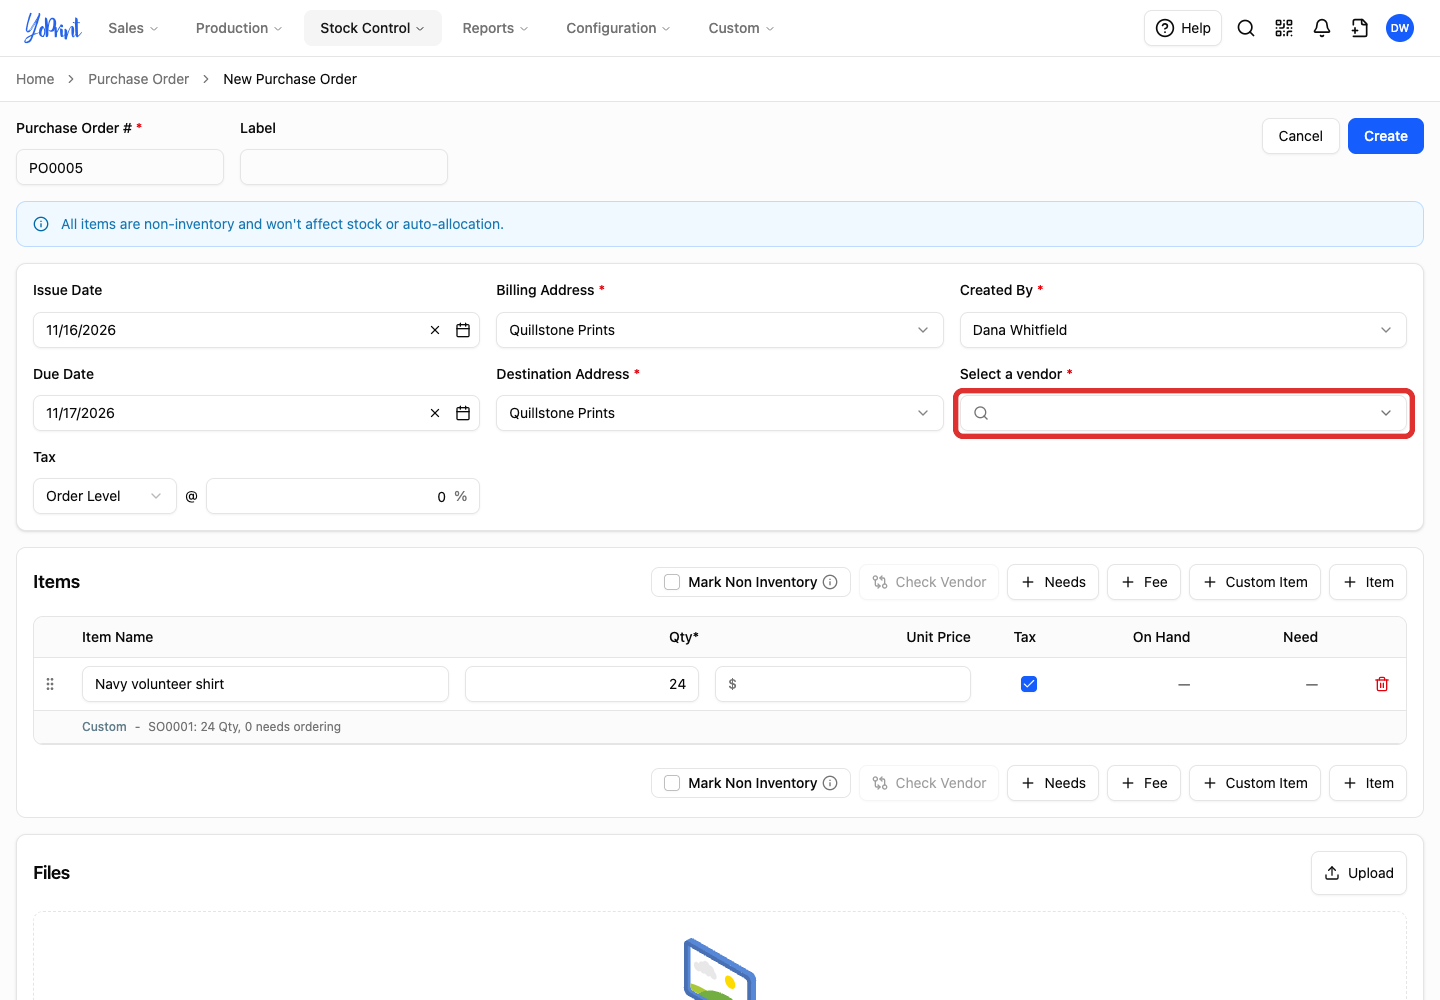
Open Select a vendor.
-
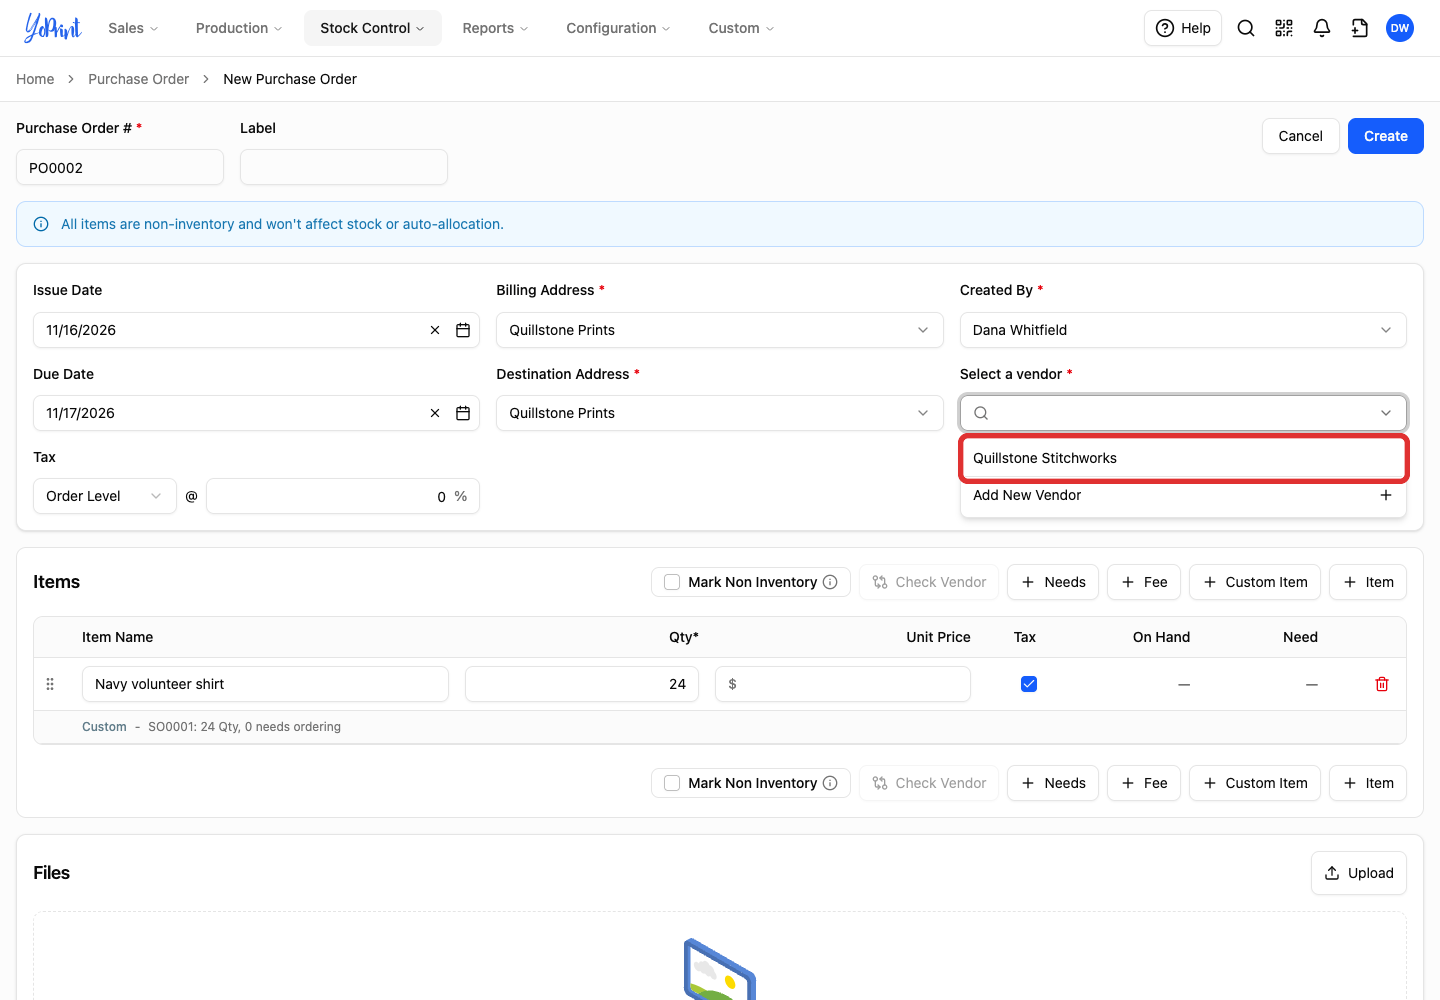
Choose the company doing the work.
Vendor not listed
If the vendor is not listed, choose Add New Vendor at the bottom of the list. New Vendor has fields for the company and its primary contact, including Email, which you need to email the vendor later. See add the vendor and its contact.
-
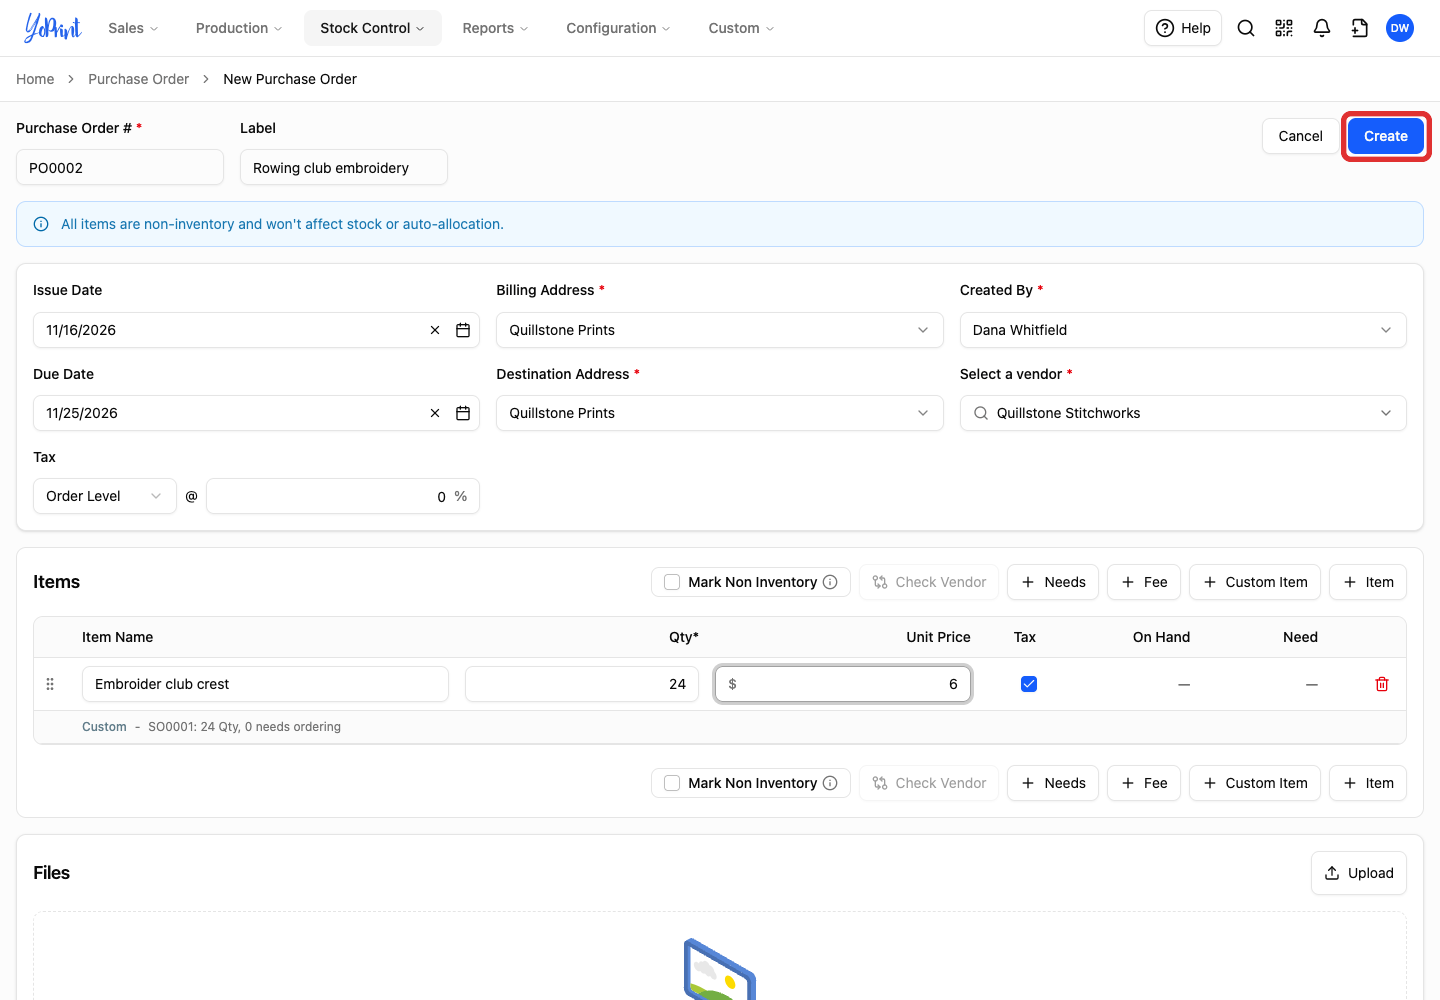
Add a Label for your team to recognize the subcontract.
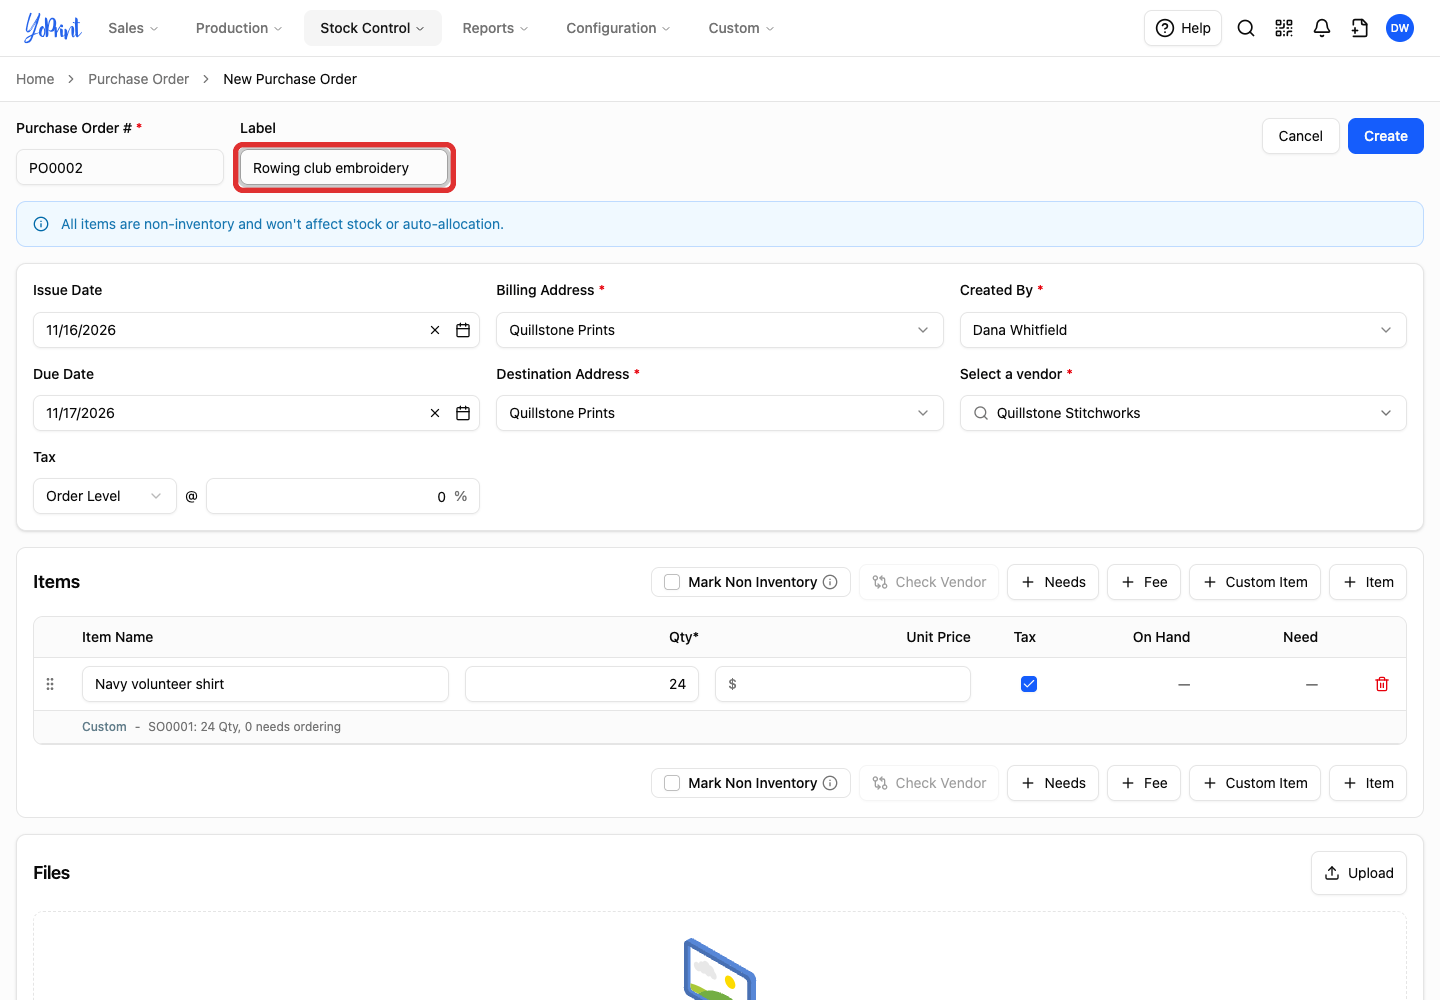
The shared page identifies the order by purchase-order number and does not show the Label.
-
Set the Due Date for when you need the work back, allowing time before the customer's deadline.
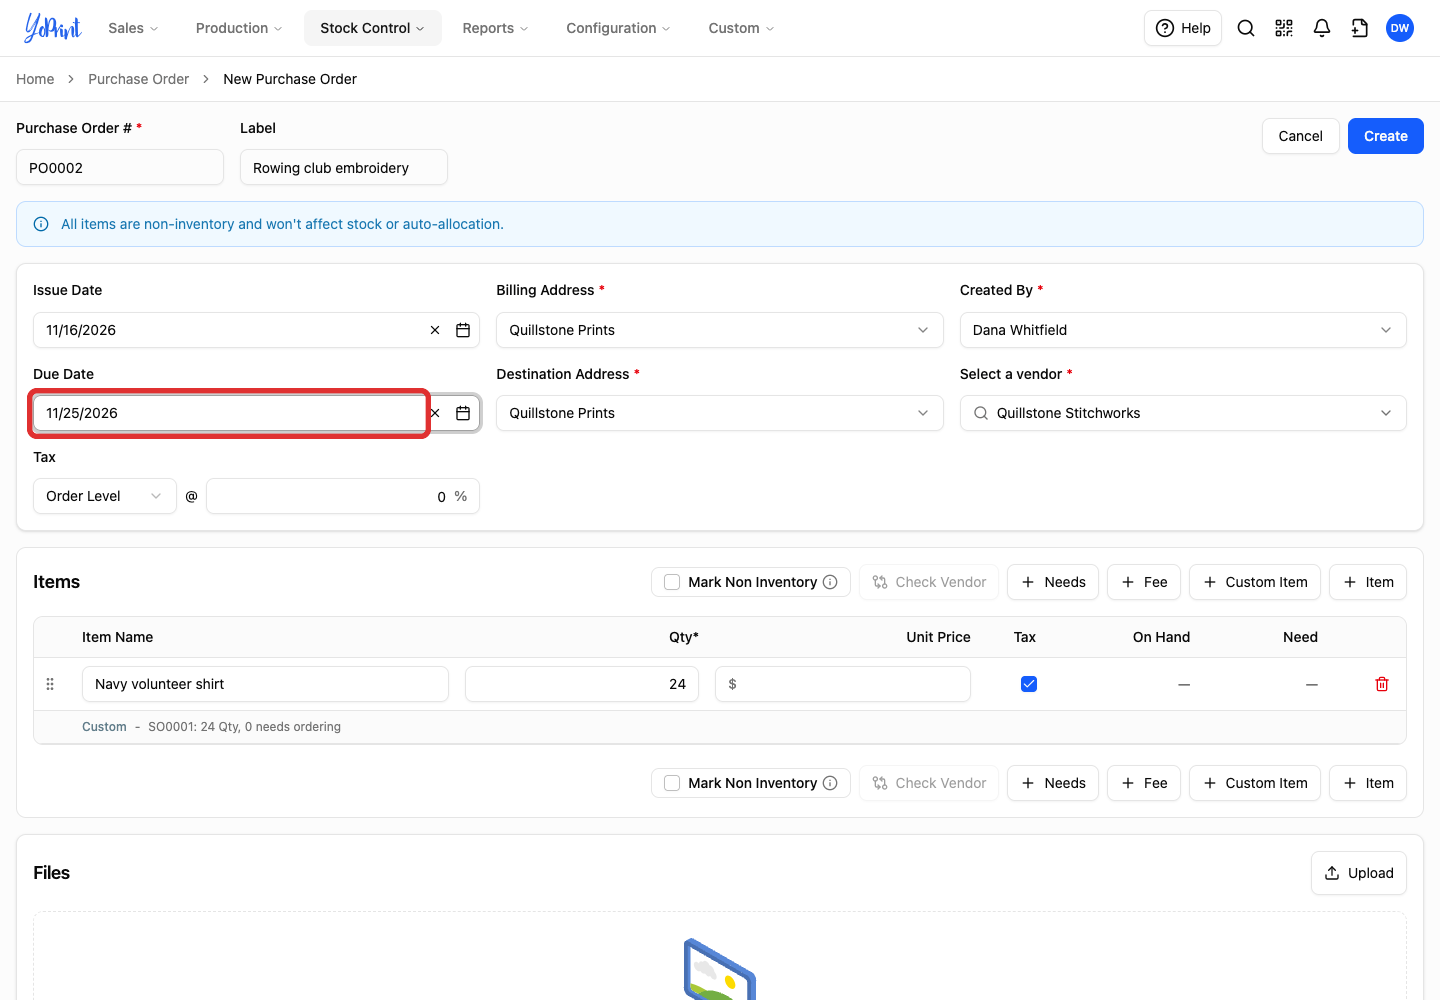
-
For the copied custom line shown here, replace the product name with the work, such as Embroider club crest. Enter the quantity and the vendor's Unit Price, which starts blank. For a setup or freight charge, use + Fee above the items.
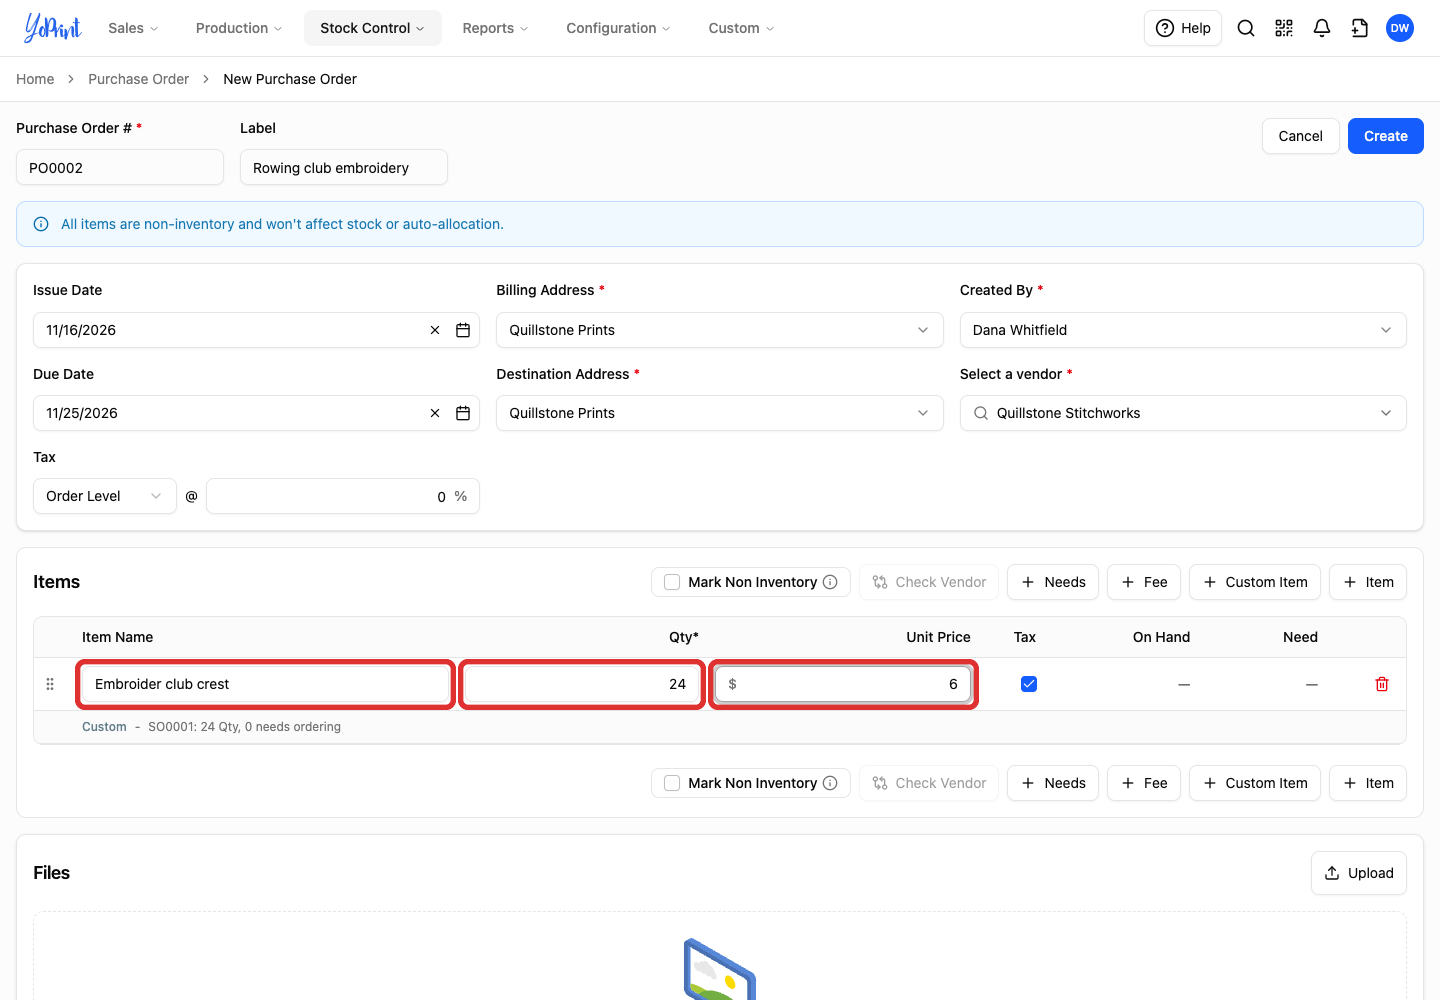
The sales-order reference stays with the renamed line.
-
Write the instructions the vendor needs in Vendor Notes.
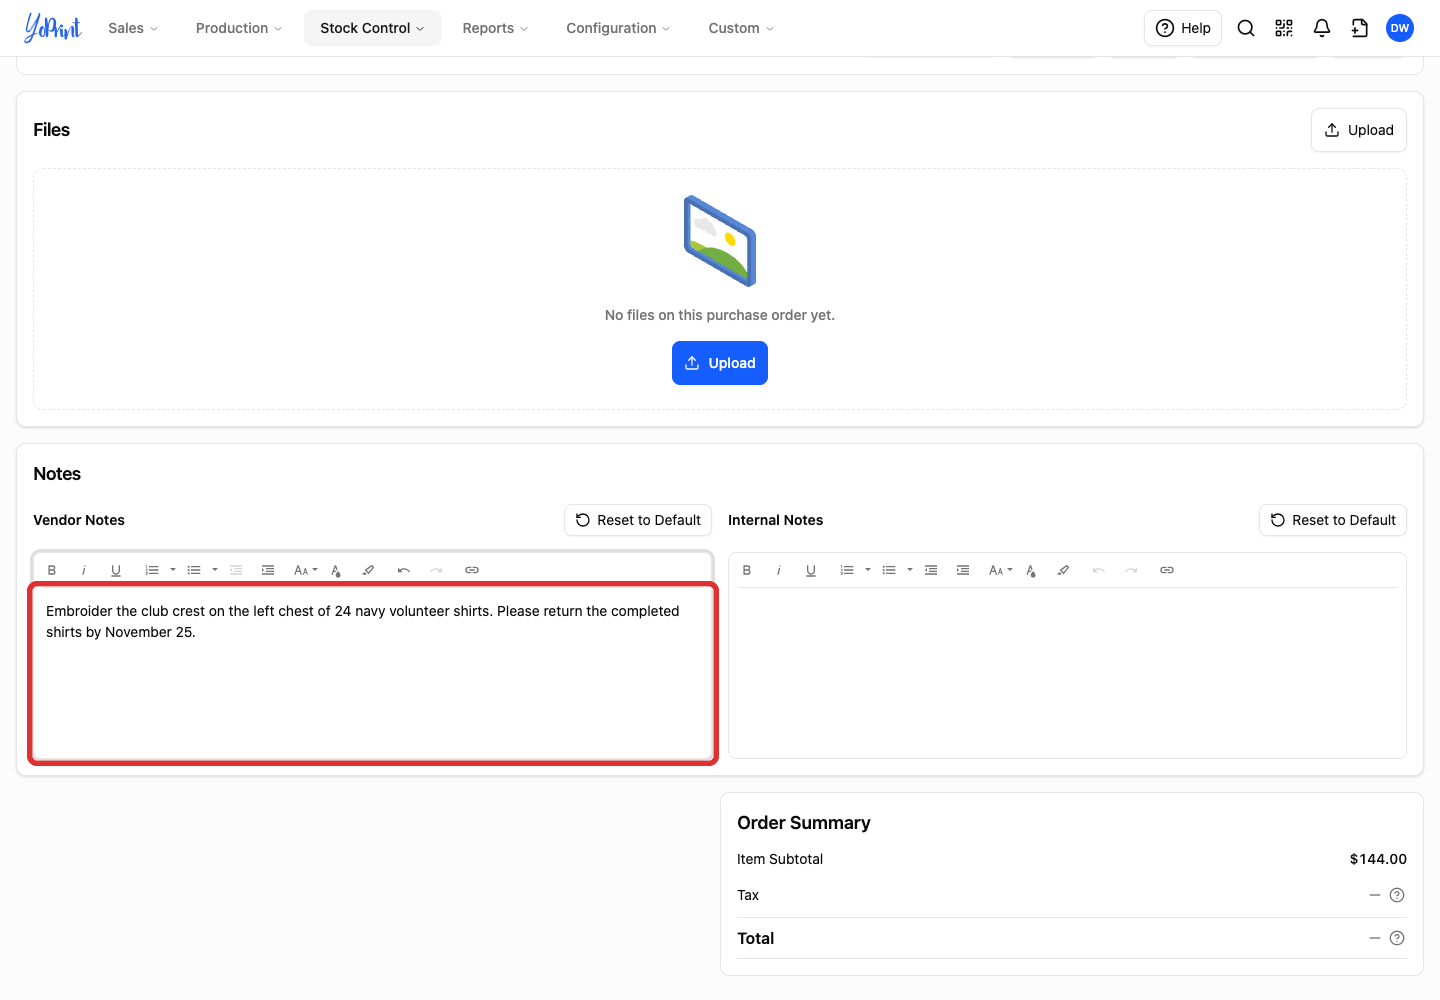
The vendor's default Vendor Notes fill this purchase order; editing them here leaves the vendor record unchanged.
-
Review the purchase order, including Destination Address, then click Create.
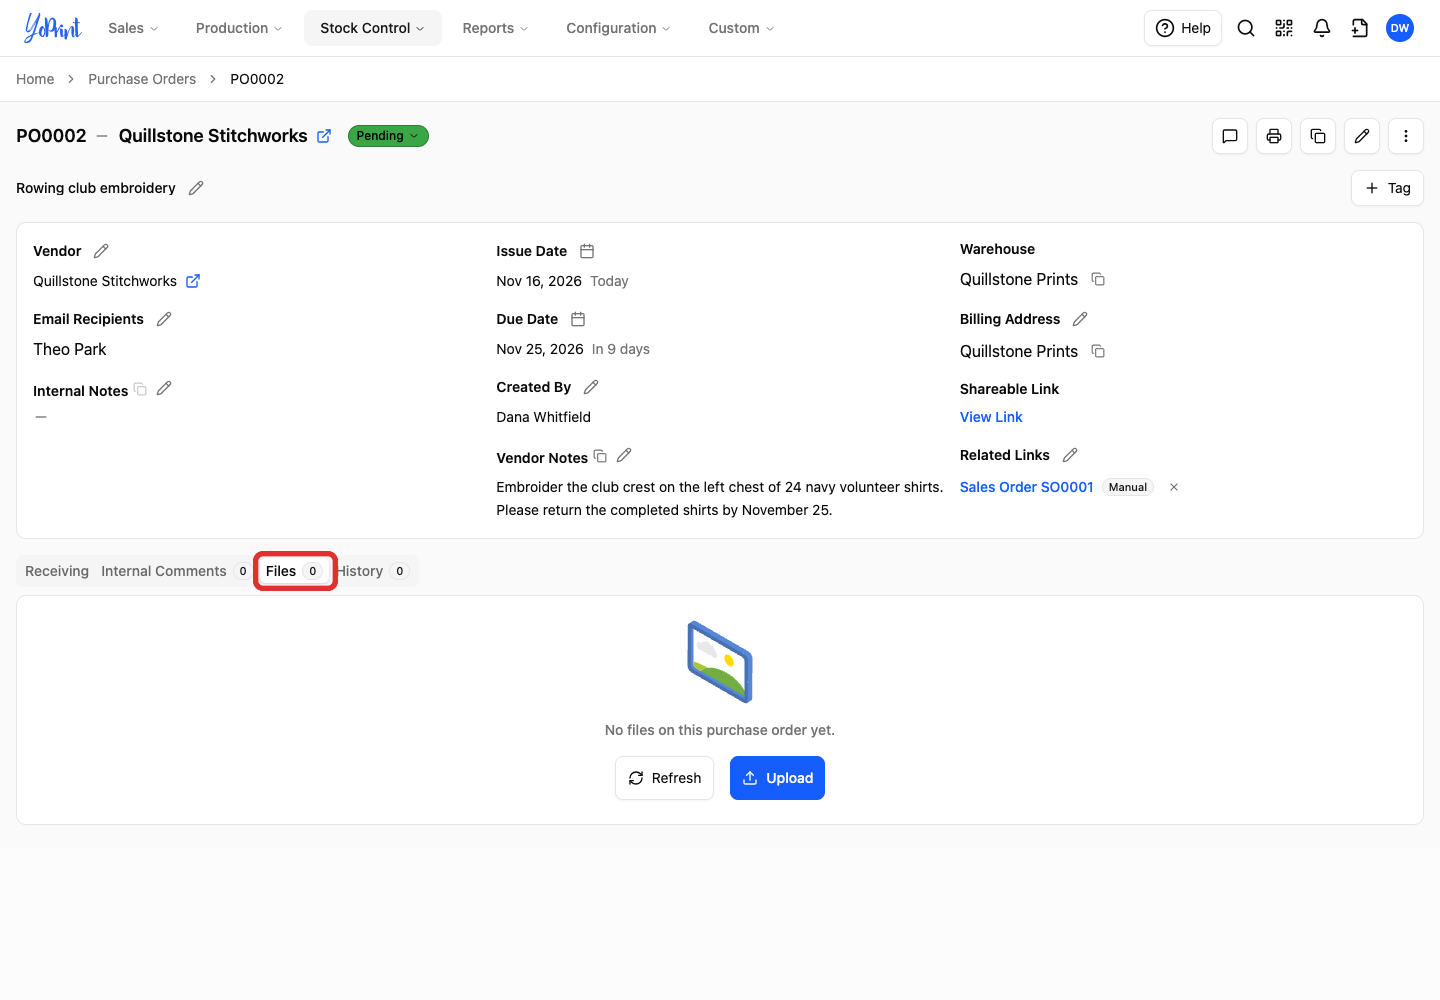
The saved purchase order opens with a link back to the customer order. To print a copy for a box you send the vendor, click the printer icon at the top of the purchase order and choose Purchase Order Detail.
Add artwork or instructions
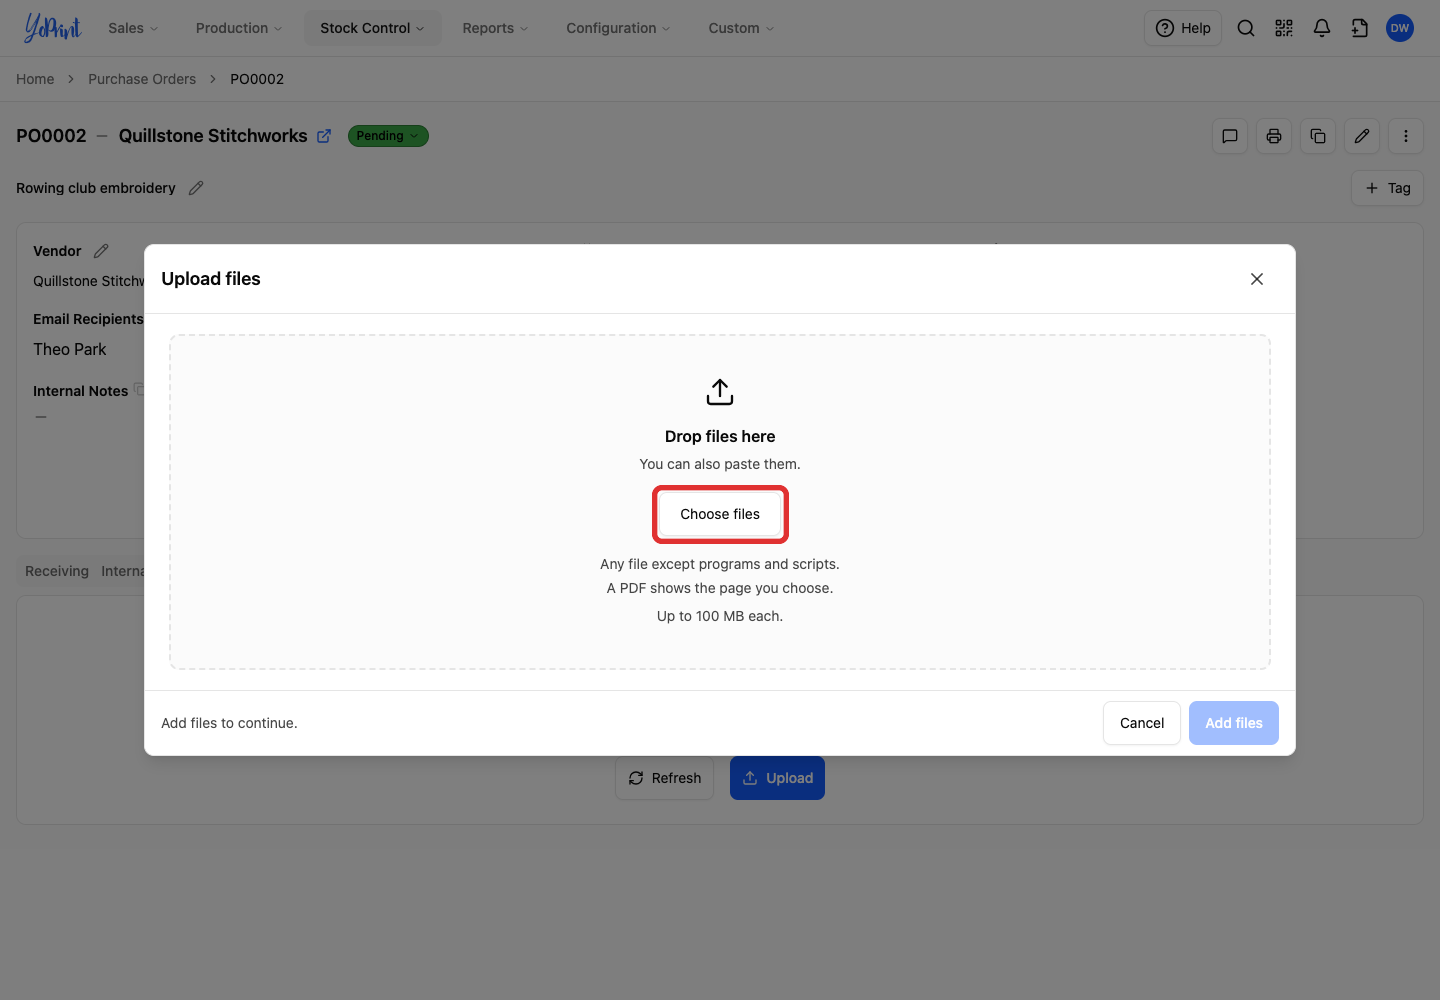
Each file can be up to 100 MB. Programs and scripts are not accepted. You can also upload files under Files on the New Purchase Order screen before you click Create; they stay with the purchase order.
-
Open the saved purchase order's Files tab.
-
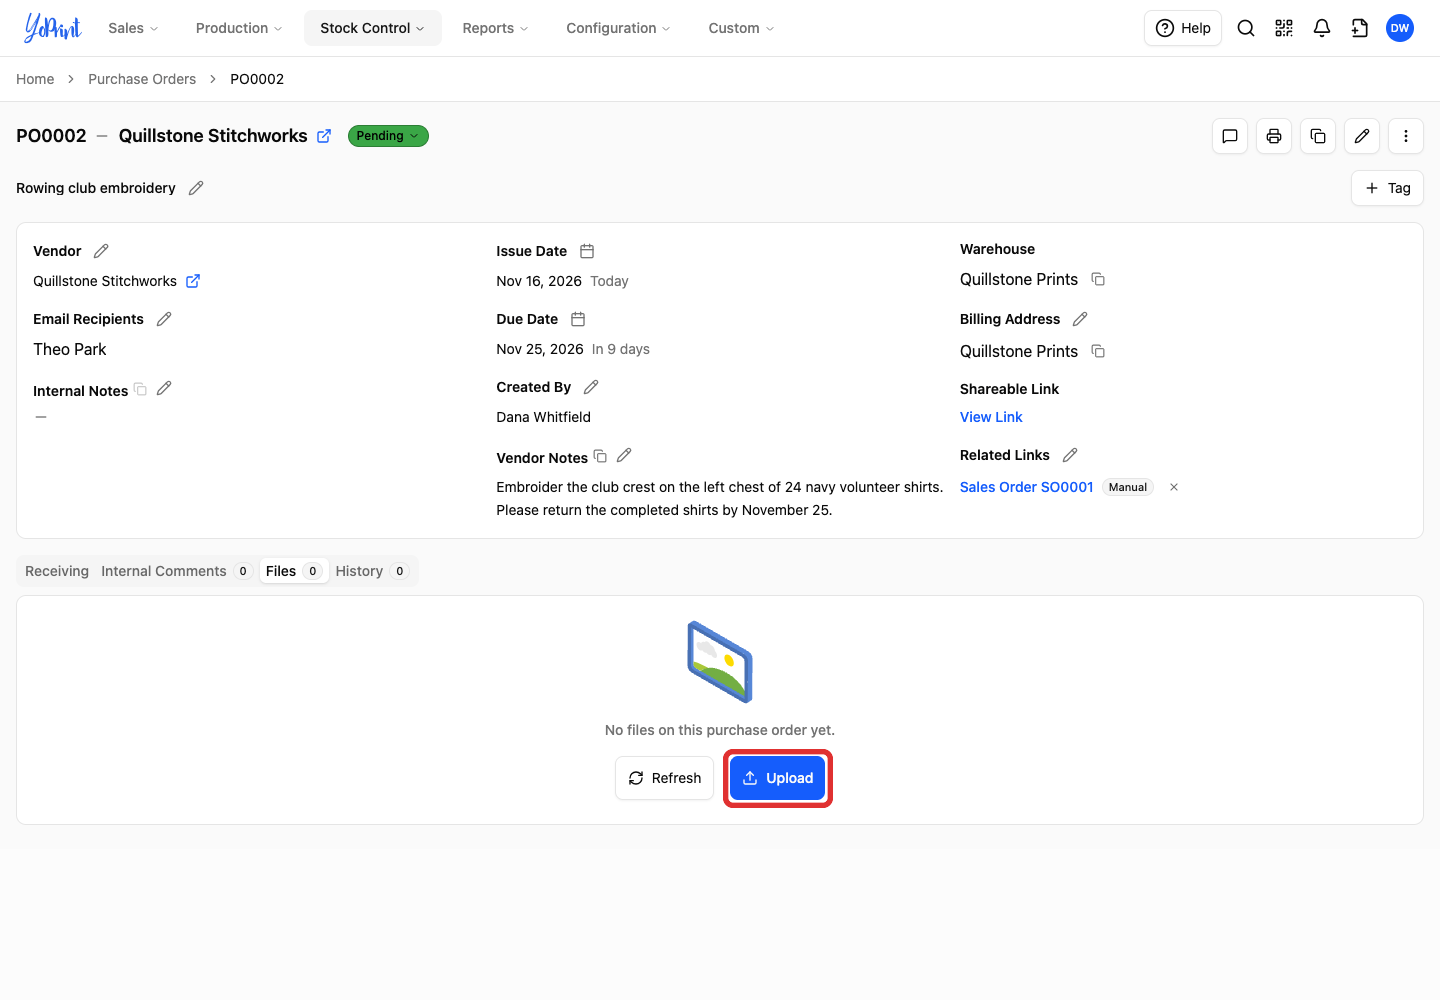
Click Upload to add artwork or instructions.
-
Click Choose files to select the files from your computer, or drag them into the upload area.
-
When the files show Uploaded, click Add 1 file.
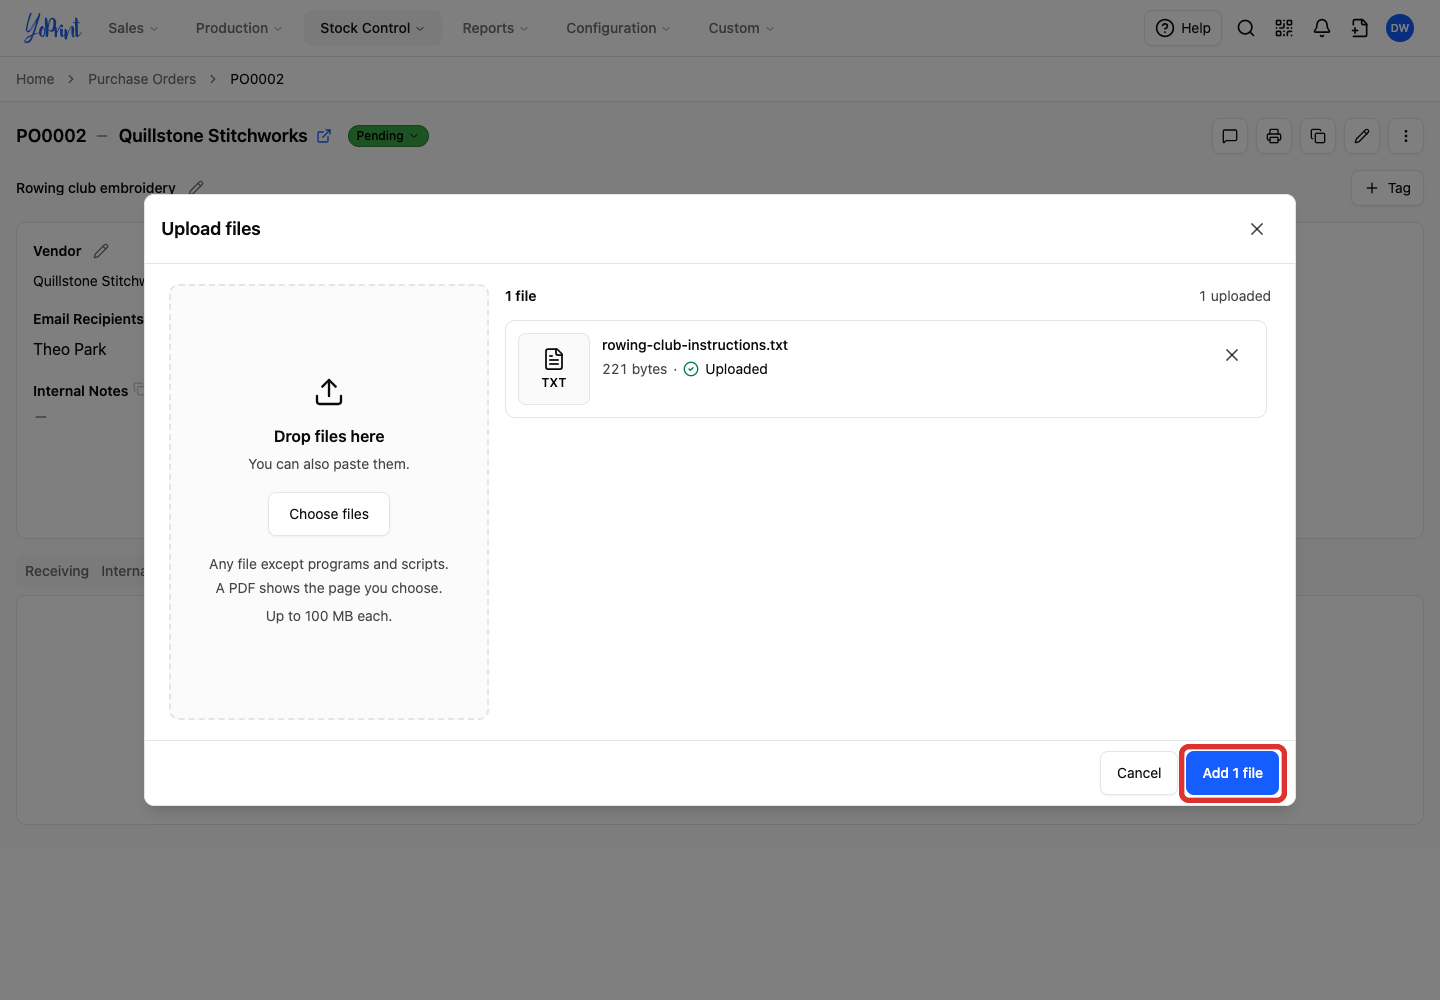
The button shows how many files you are adding, such as Add 2 files for two uploads.
Correct the purchase order
If you need to cancel the purchase order instead, see Voiding/Removing a Purchase Order.
Editing notes or attachments
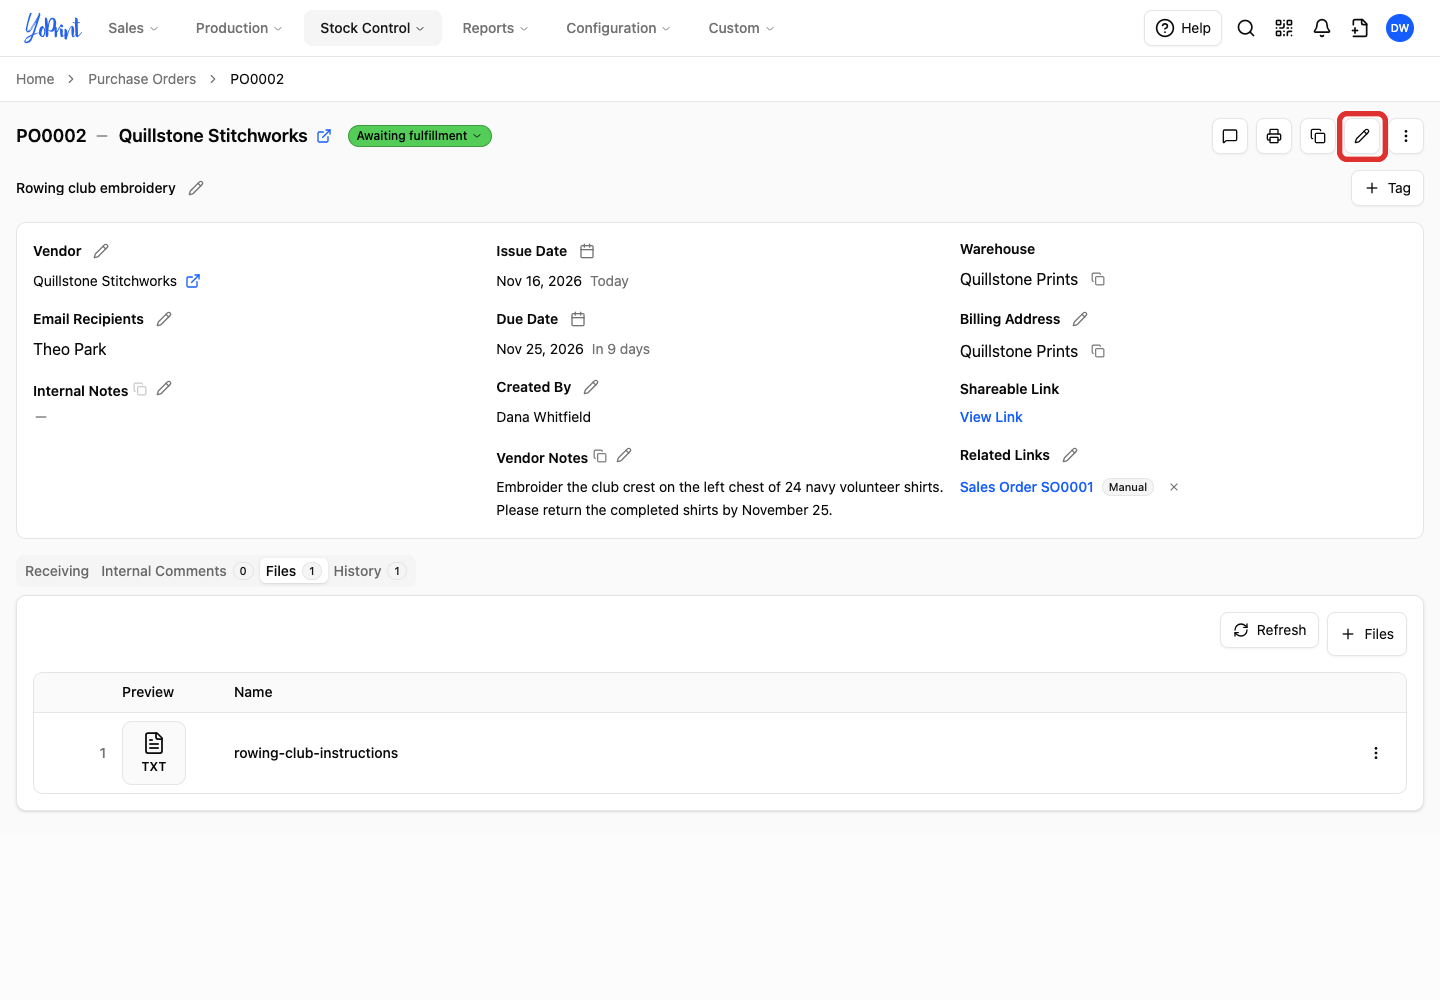
Use the Vendor Notes pencil on the saved purchase order to edit notes, or its Files tab to manage attachments.
-
Click Edit, the pencil button in the top-right action bar, to open the full purchase-order editor.
-
Change the dates, vendor, quantity, or unit price.
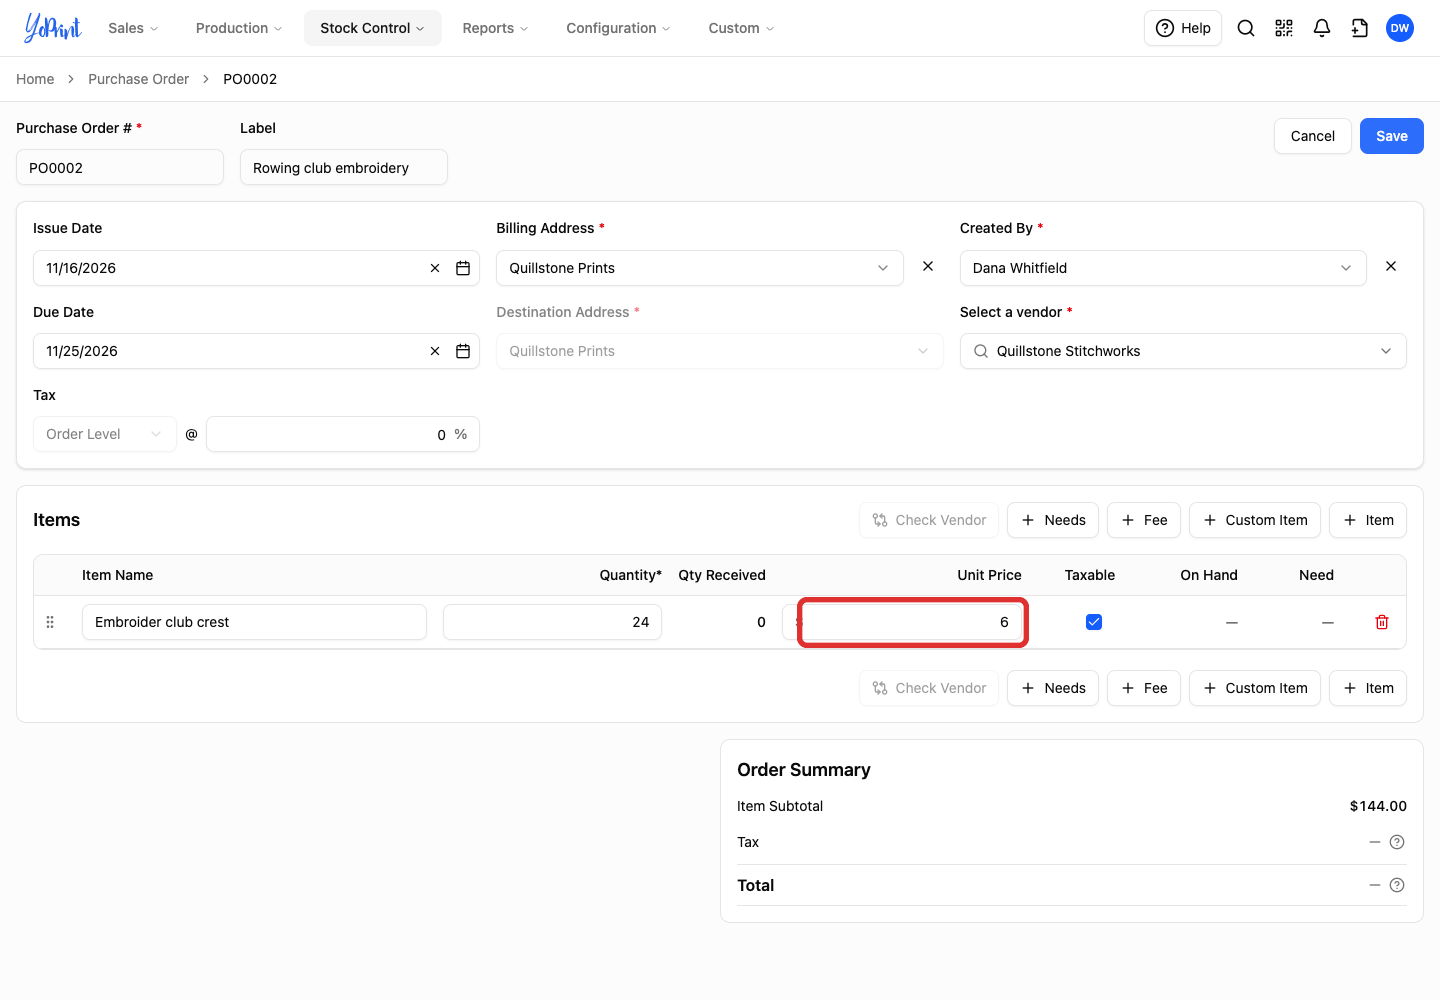
Destination Address is disabled in this editor and can't be changed after you click Create, so check it on the New Purchase Order screen.
-
Click Save.
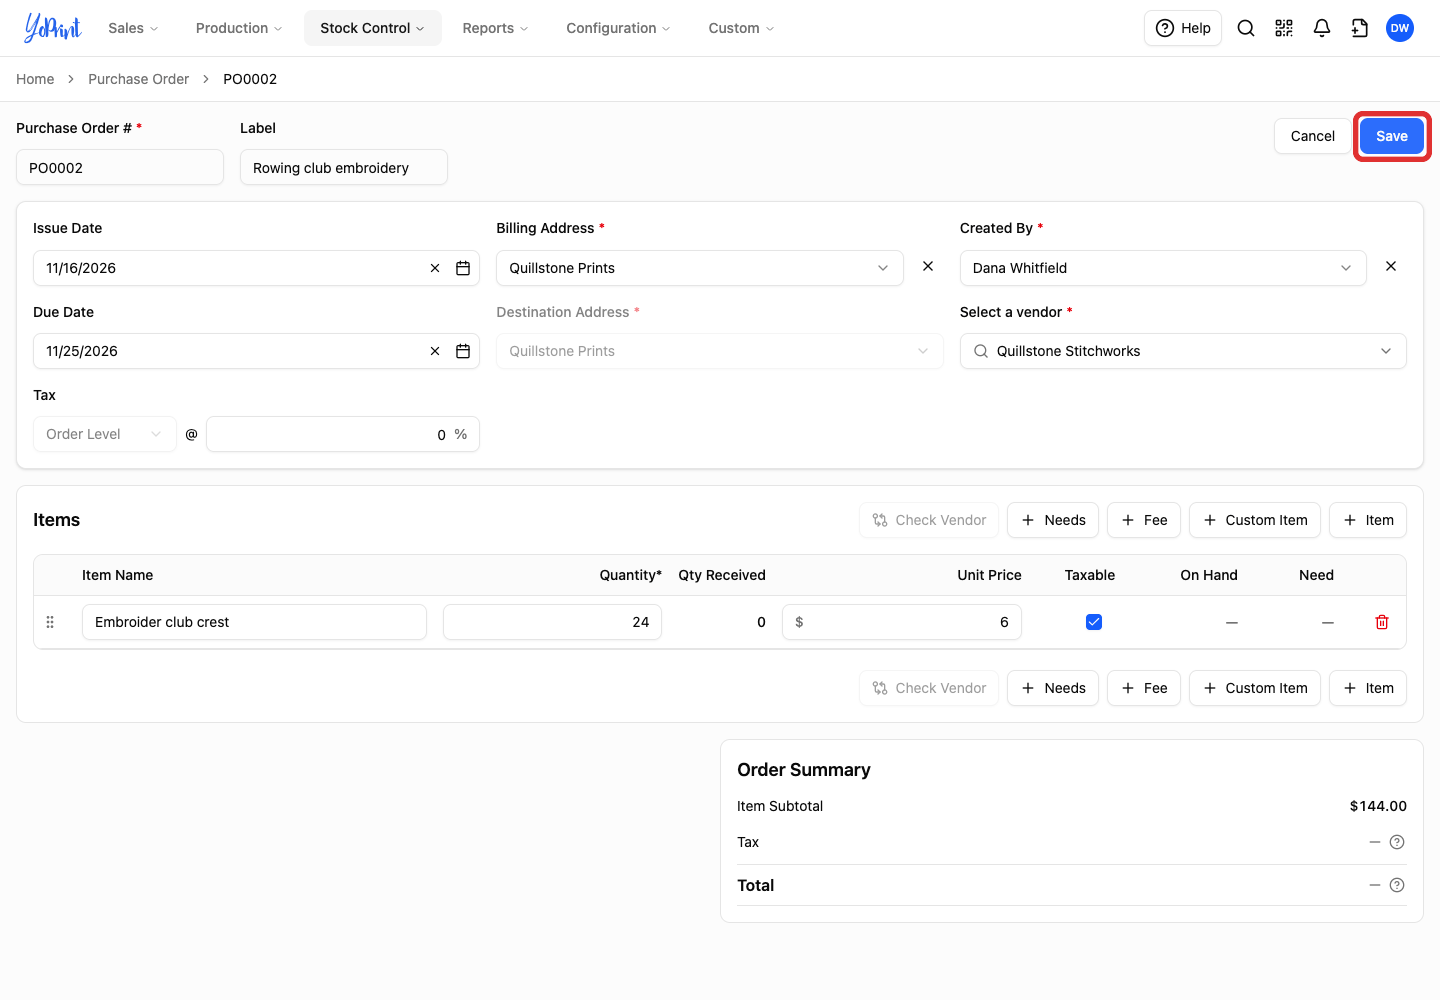
If you want to leave without saving your changes, click Cancel to return to the purchase order.
Saved changes also show on the vendor's shared page. If the vendor needs to know about the change, send them a message.
Email the vendor
-
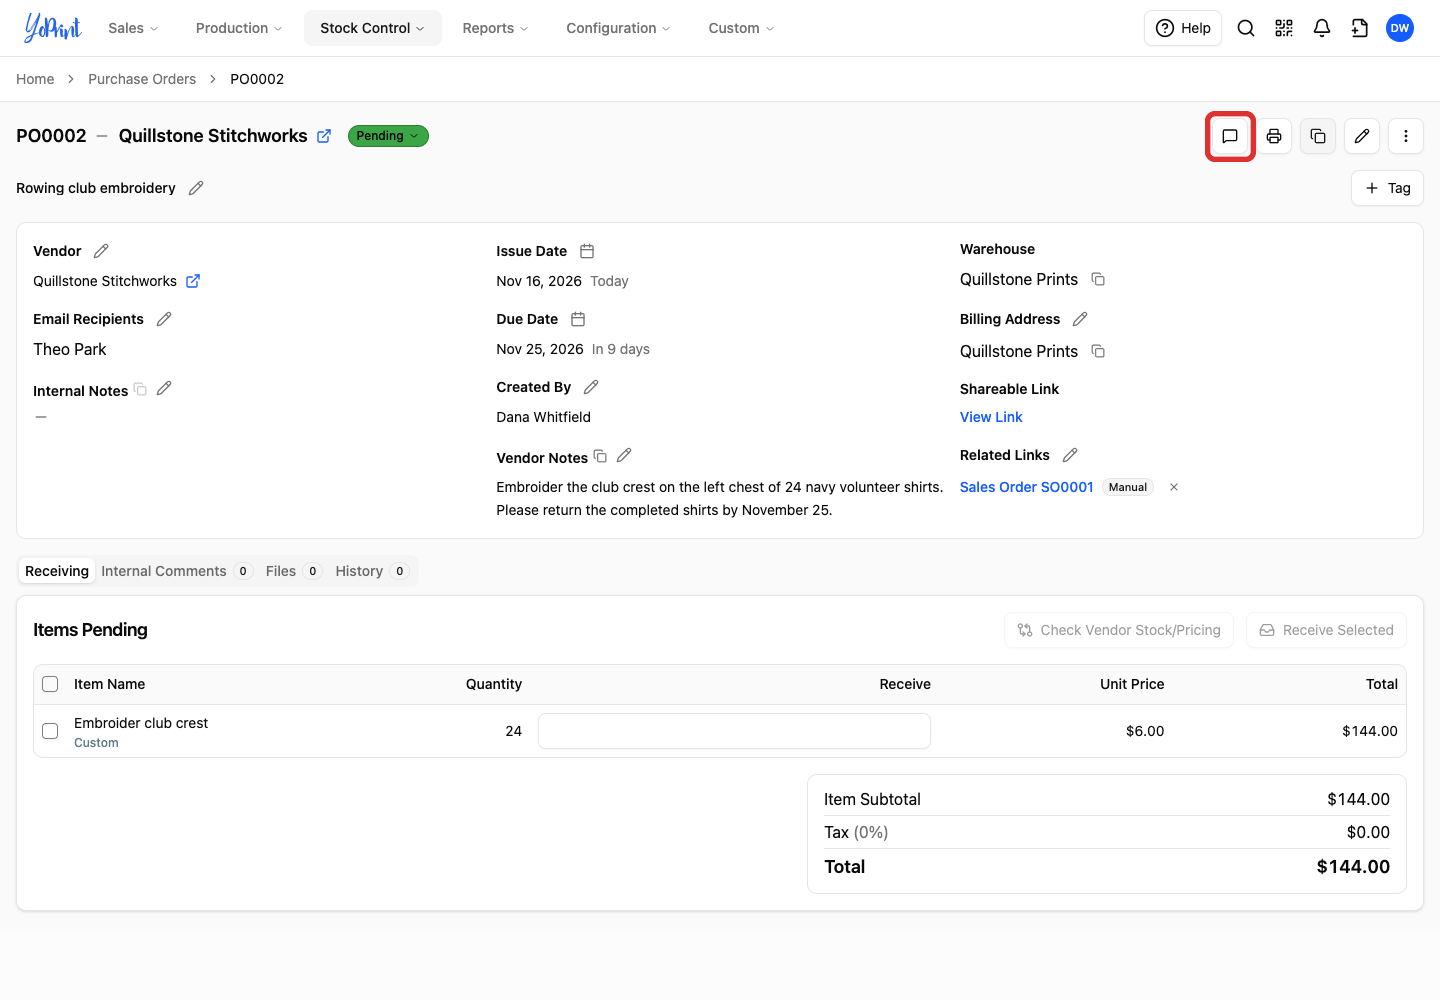
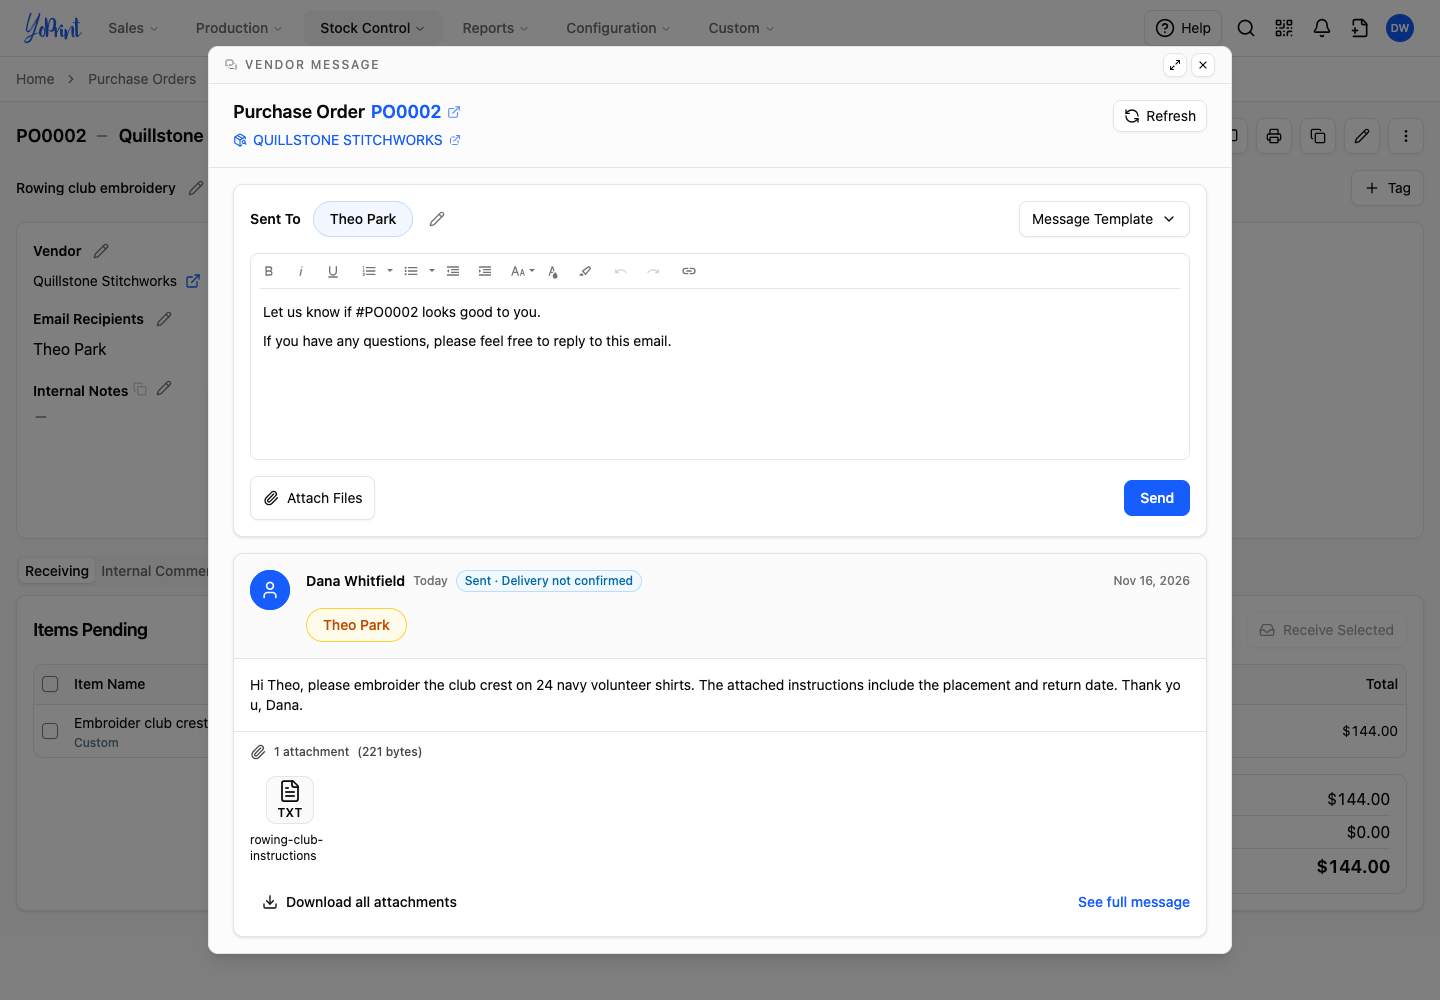
Click Message, the speech-bubble button at the top of the purchase order.
-
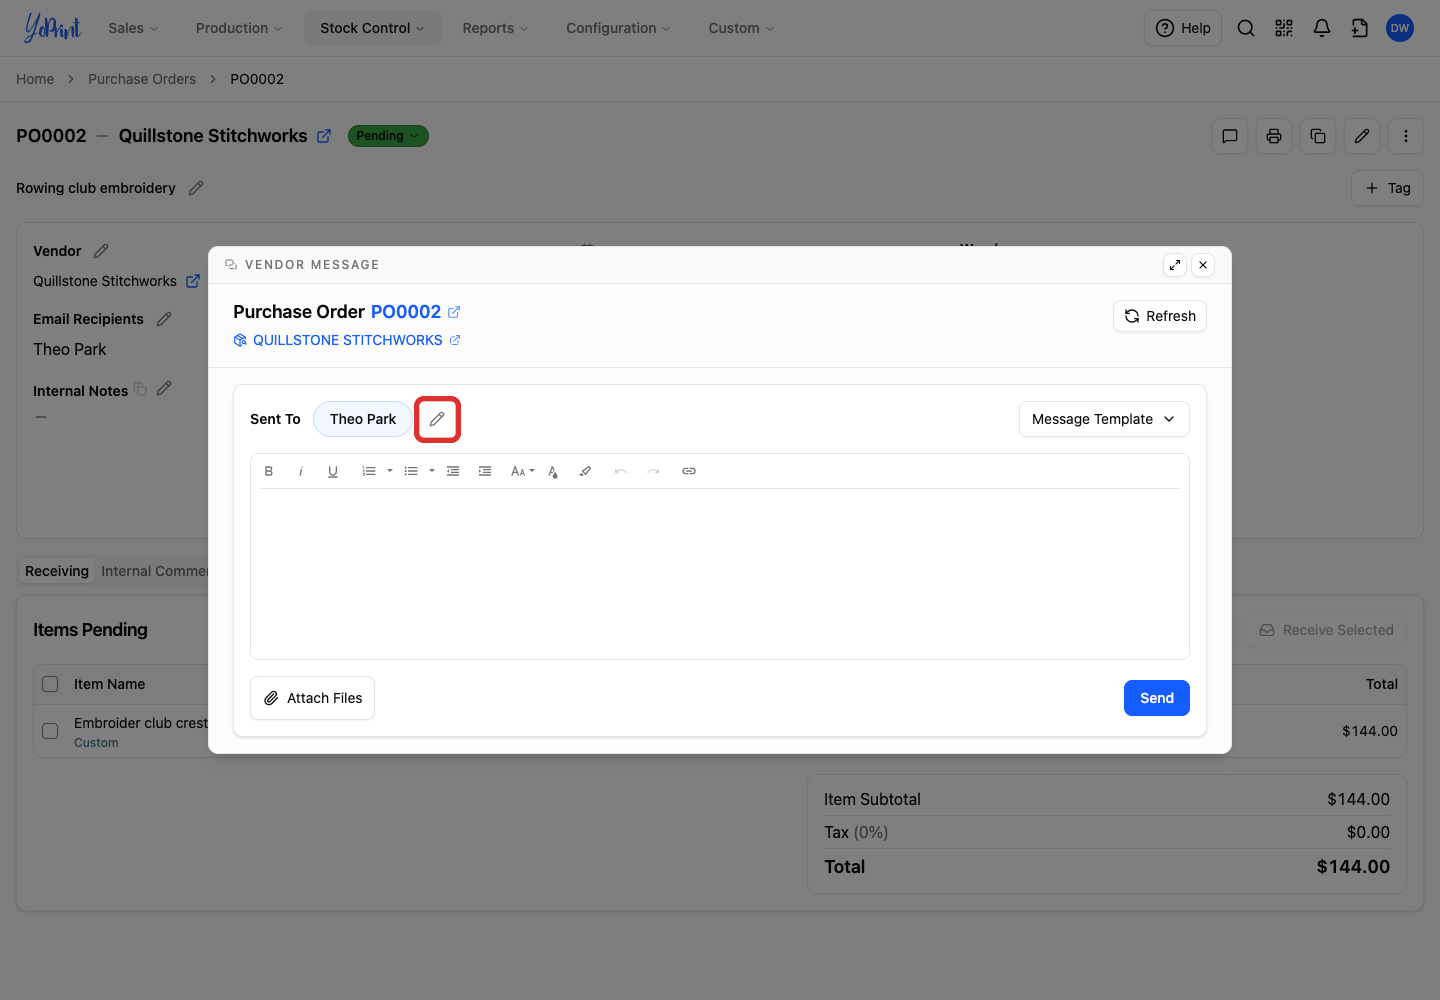
The vendor's contact is already in Sent To. To change who receives the email, click Edit recipients, the pencil beside the recipient name. Otherwise, go to step 5.
-
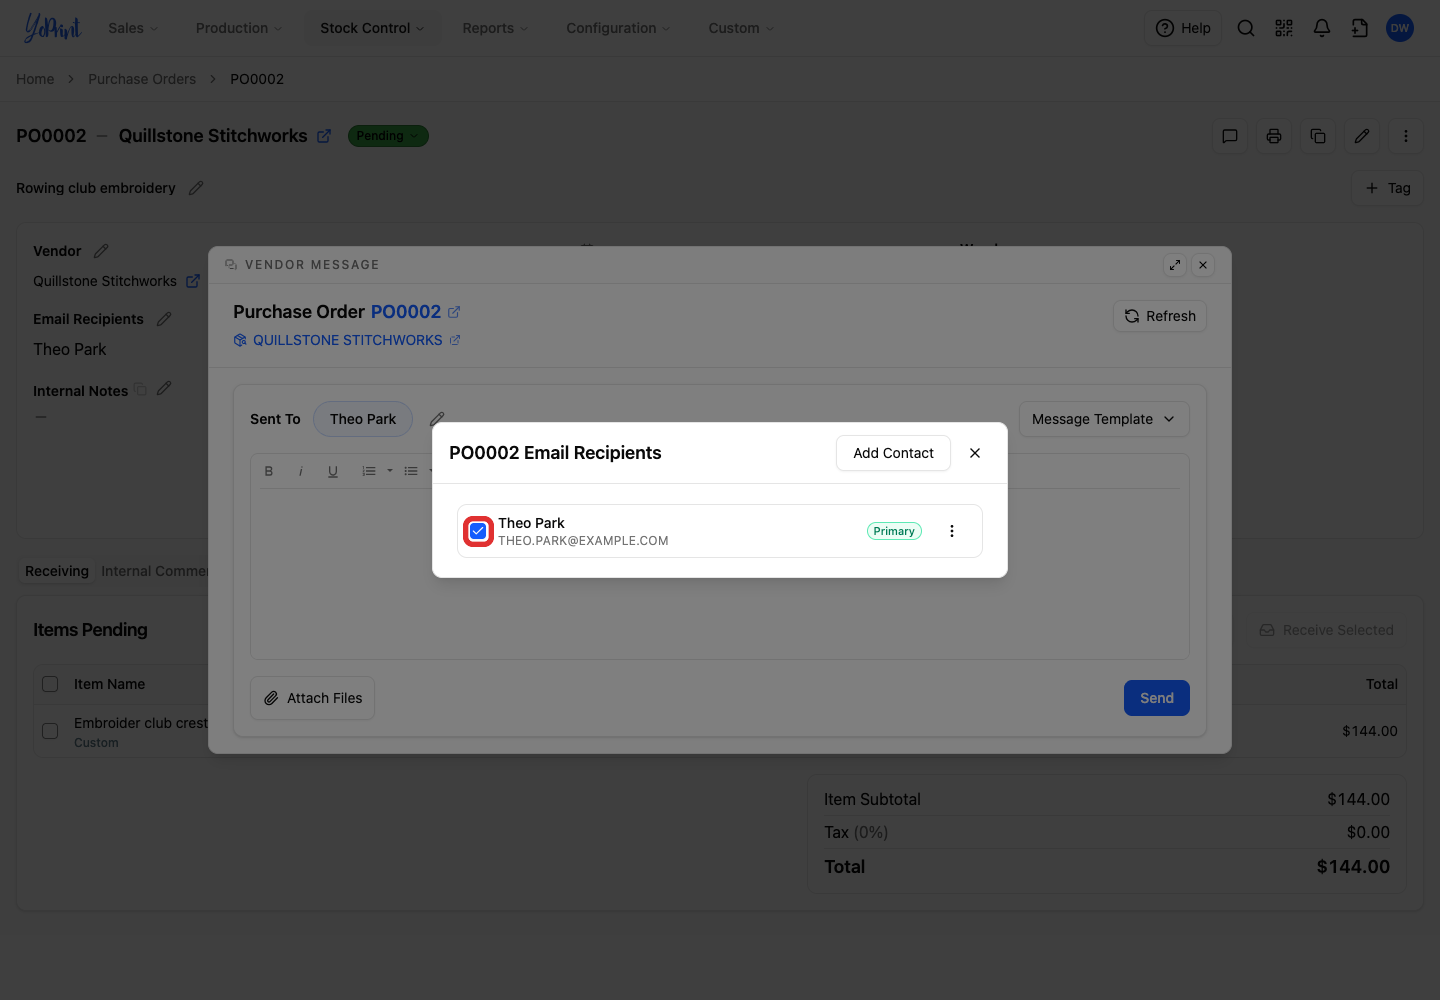
Select the contacts who should receive the email.
-
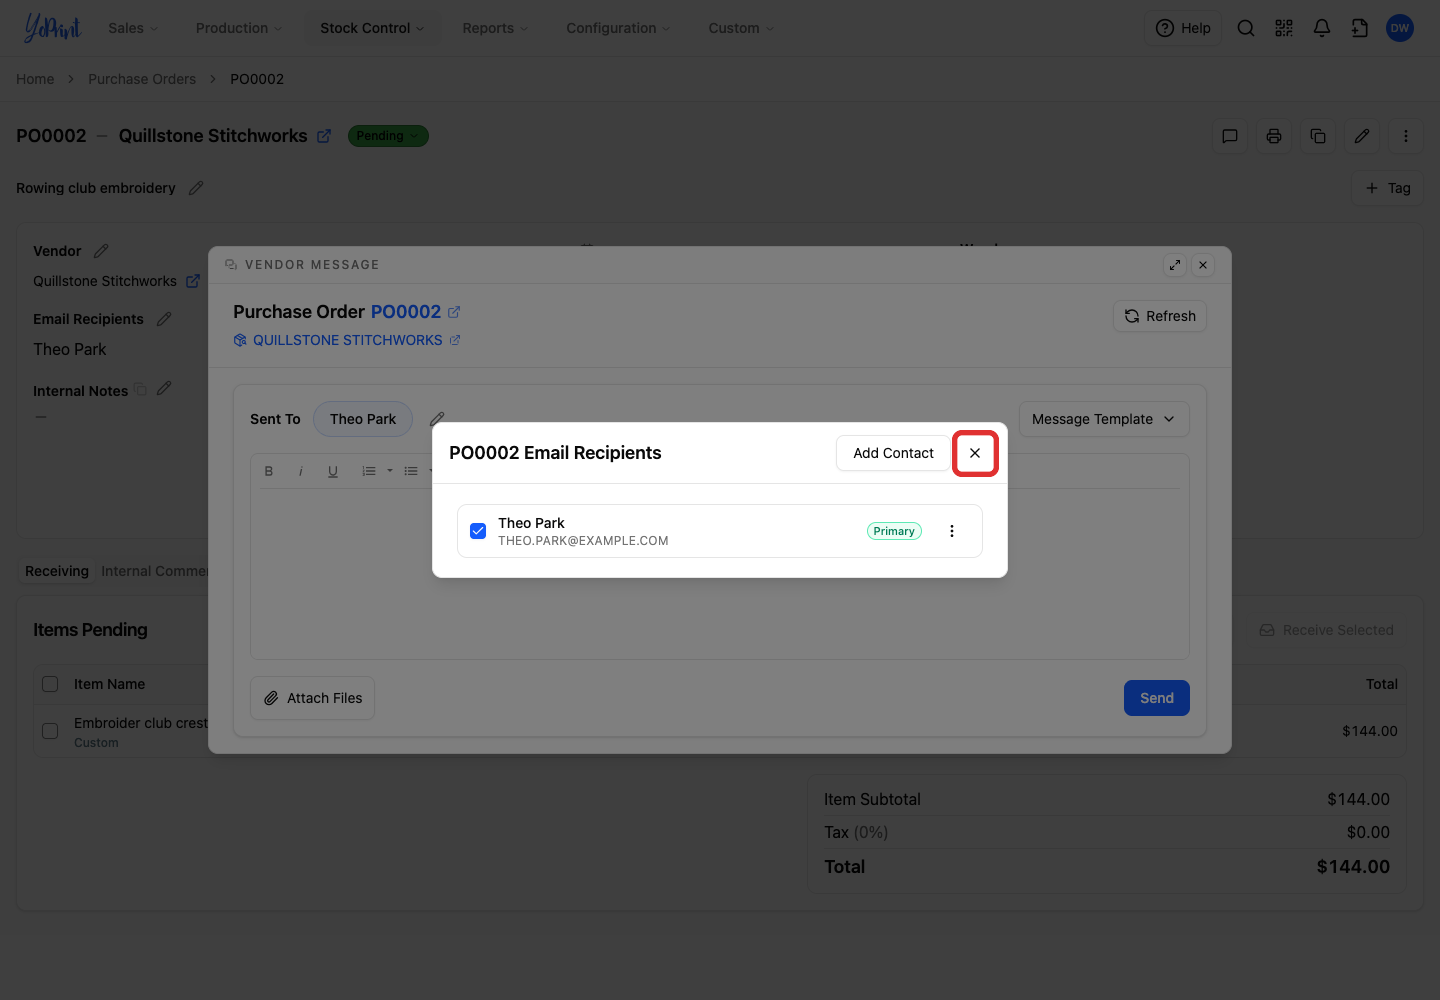
Close the recipient window to return to your message.
-
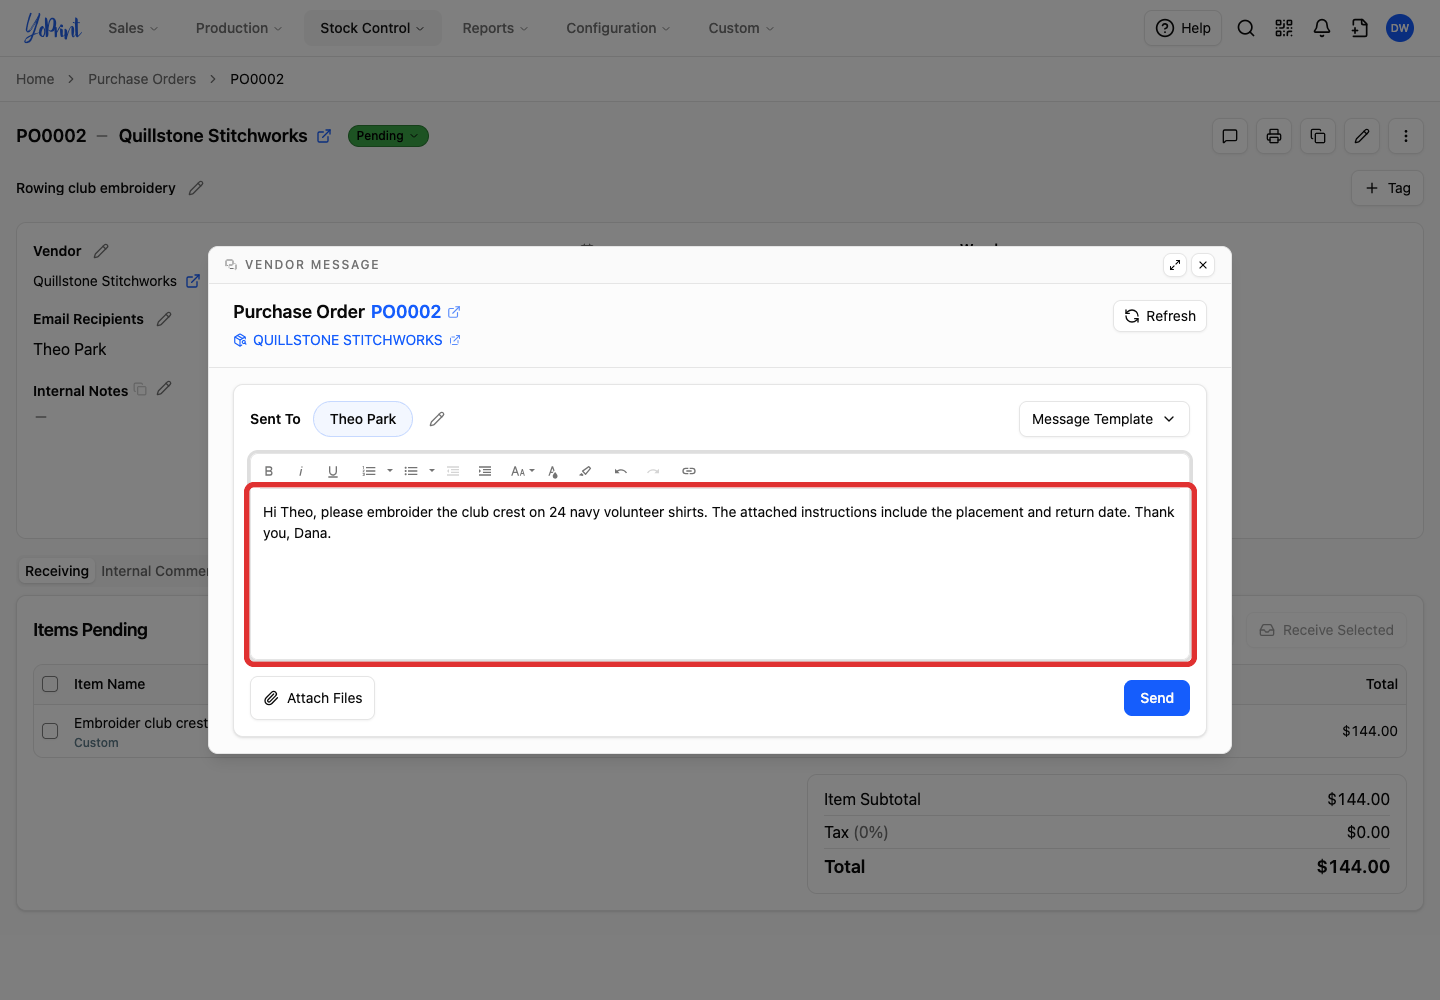
Write your message in the text box.
Optional: use a template or attach files
- If you want to start from a saved message, follow Use a template instead.
- To include a file with this email, follow Attach files to the email.
-
Check the recipients, message, and attachments, then click Send.
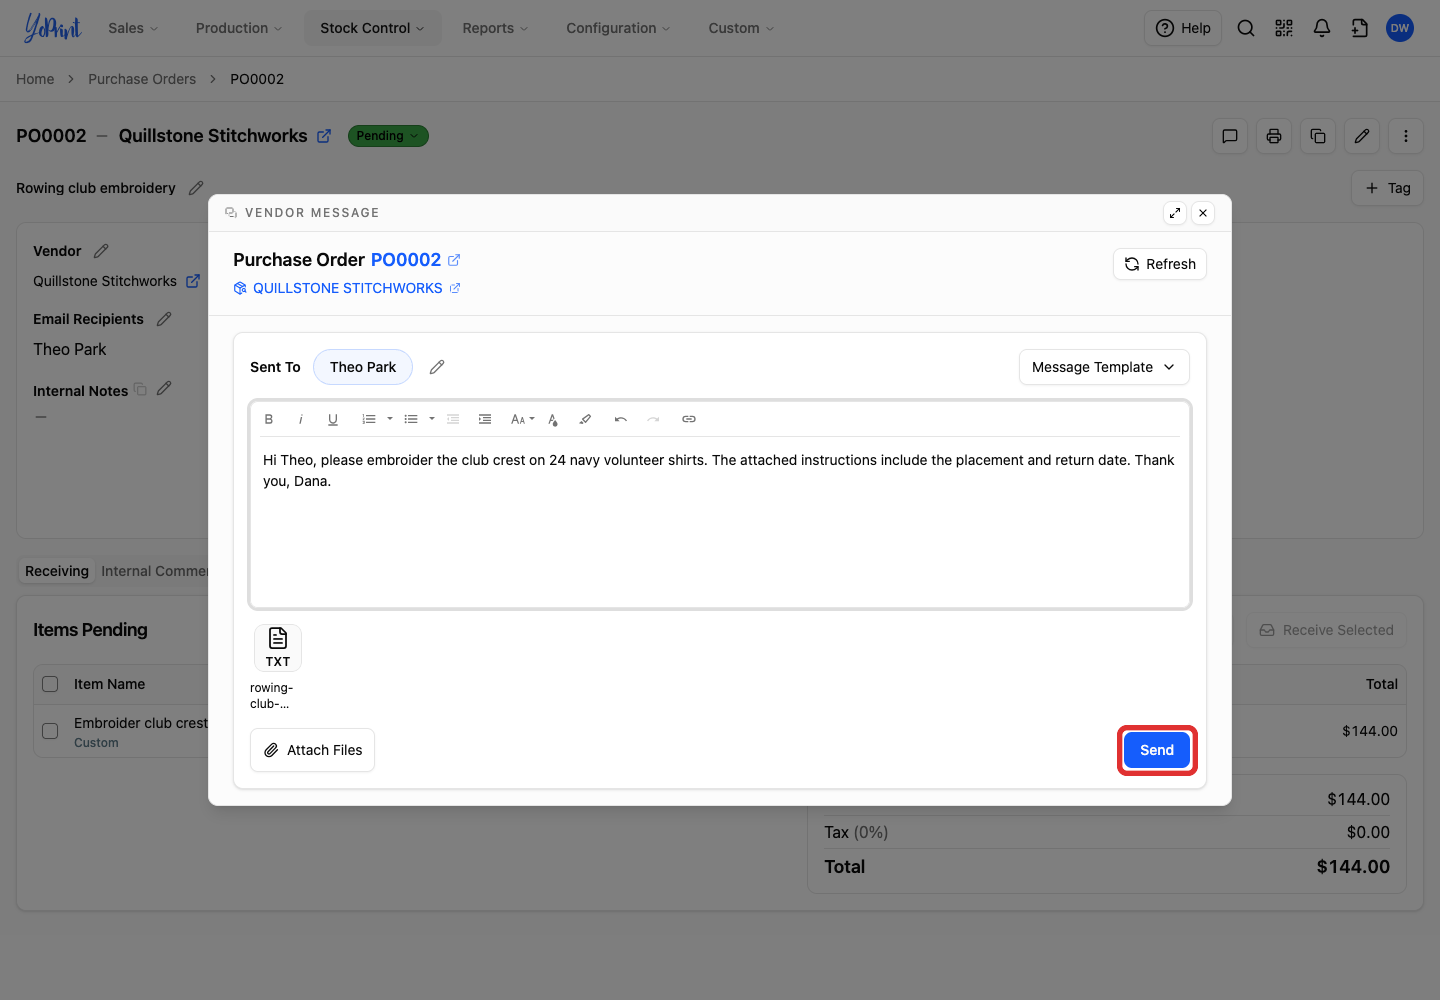
The vendor's email includes a View Purchase Order button that opens the purchase order's shared page. Reopen Message on this purchase order to review the conversation with the vendor, or see every thread in Sales > Messages (Message Feature Overview).
- To check whether the email arrived, see Message Delivery Status.
- If your shop sends text messages, see Sending Text Messages.
Use a template instead
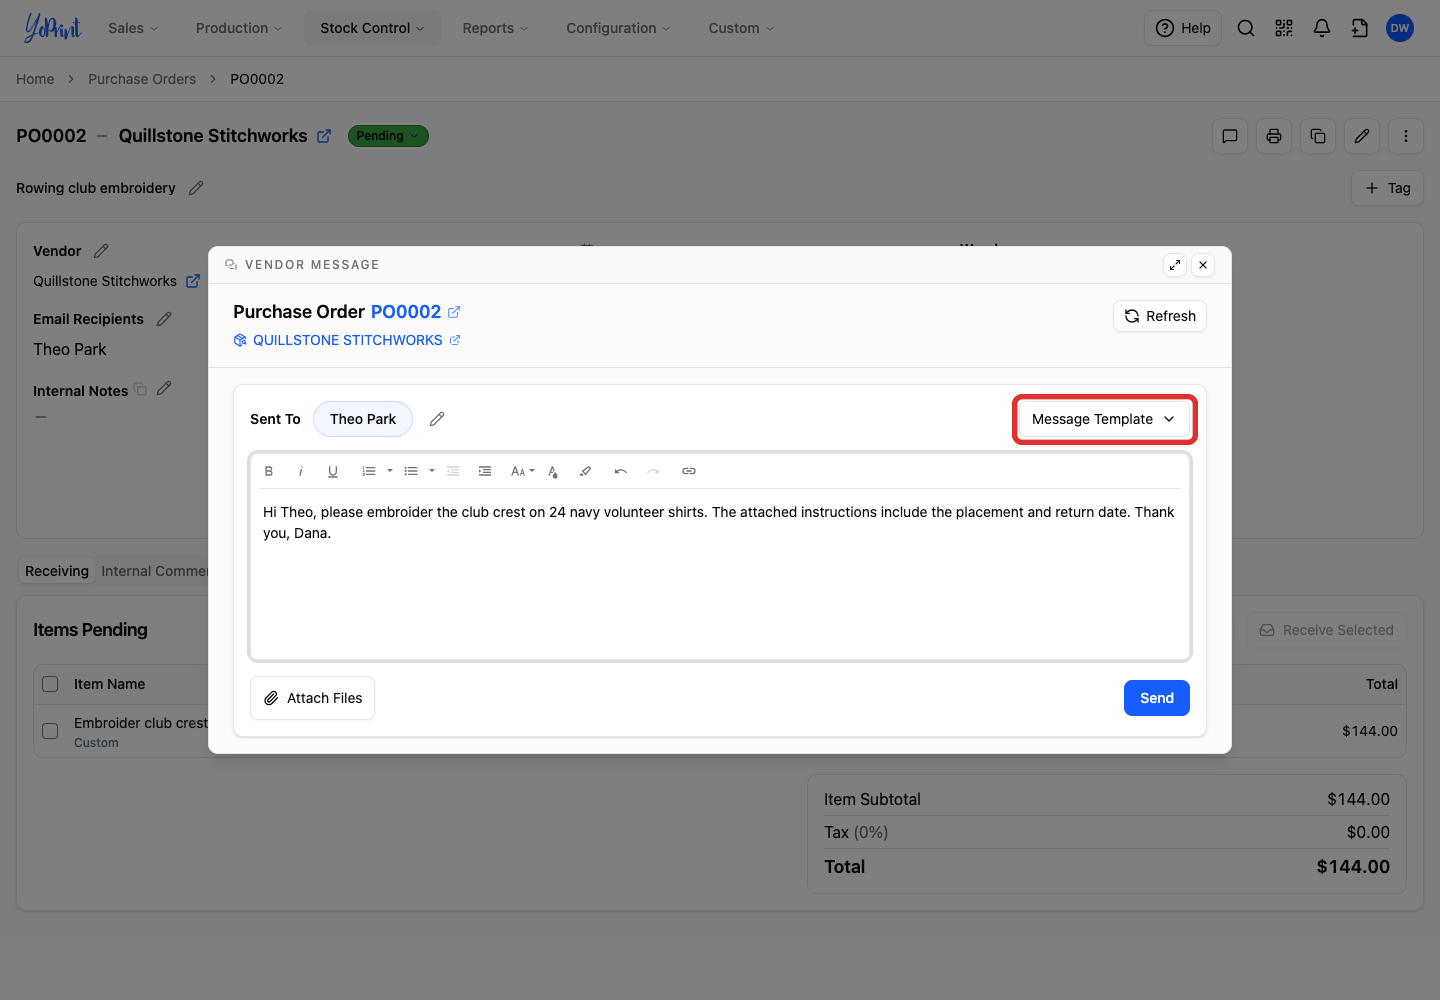
The Message Template menu lists purchase-order templates from Configuration > Settings > Message Templates. To create one, see How to Create and Use a Message Template.
-
Open Message Template.
-
Choose a template.
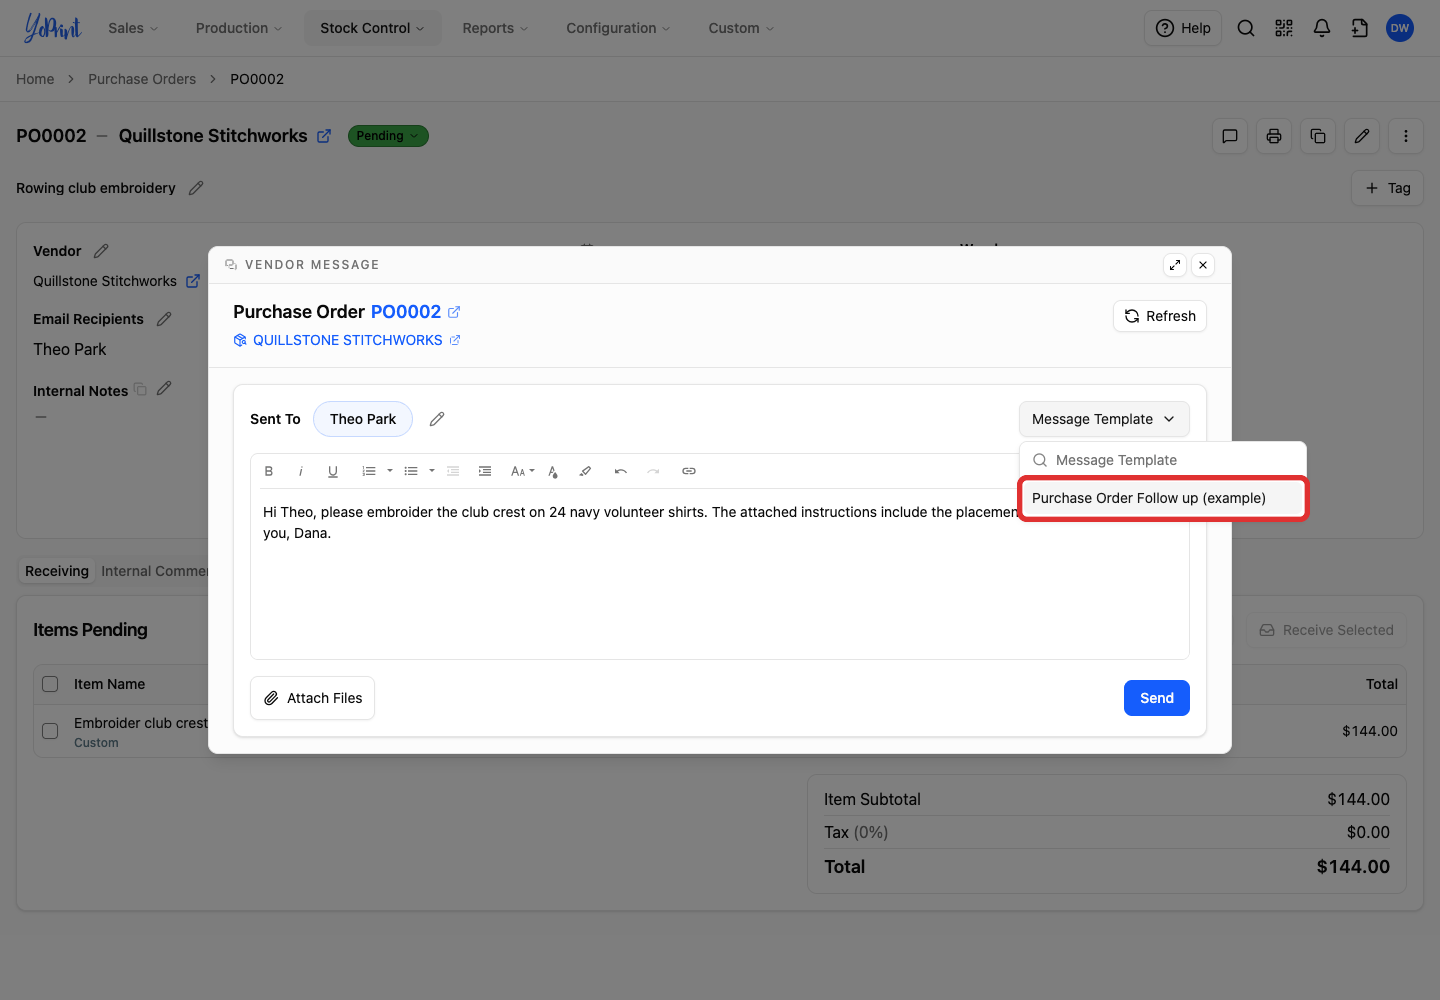
Replaces existing message text
Choosing a template replaces any text already in the message box. Review the message before sending.
Continue with Attach files to the email if needed, or return to step 6 above to click Send.
Attach files to the email
Files on the purchase order's Files tab already reach your vendor through View Purchase Order in the email. Attach a file here only if you want it in the email itself.
-
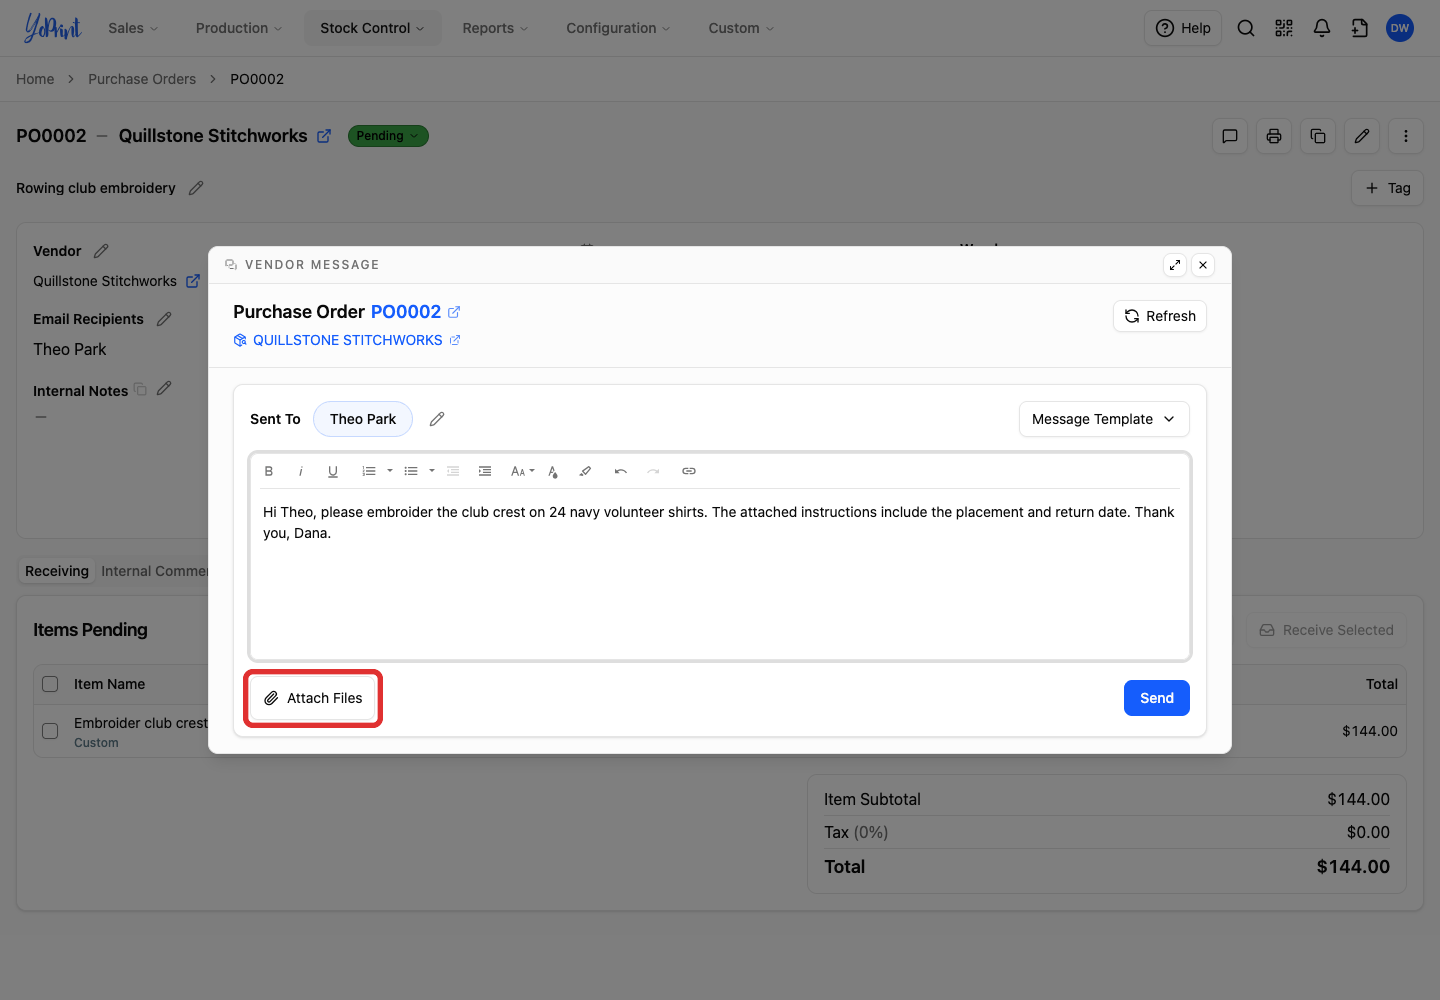
Click Attach Files.
-
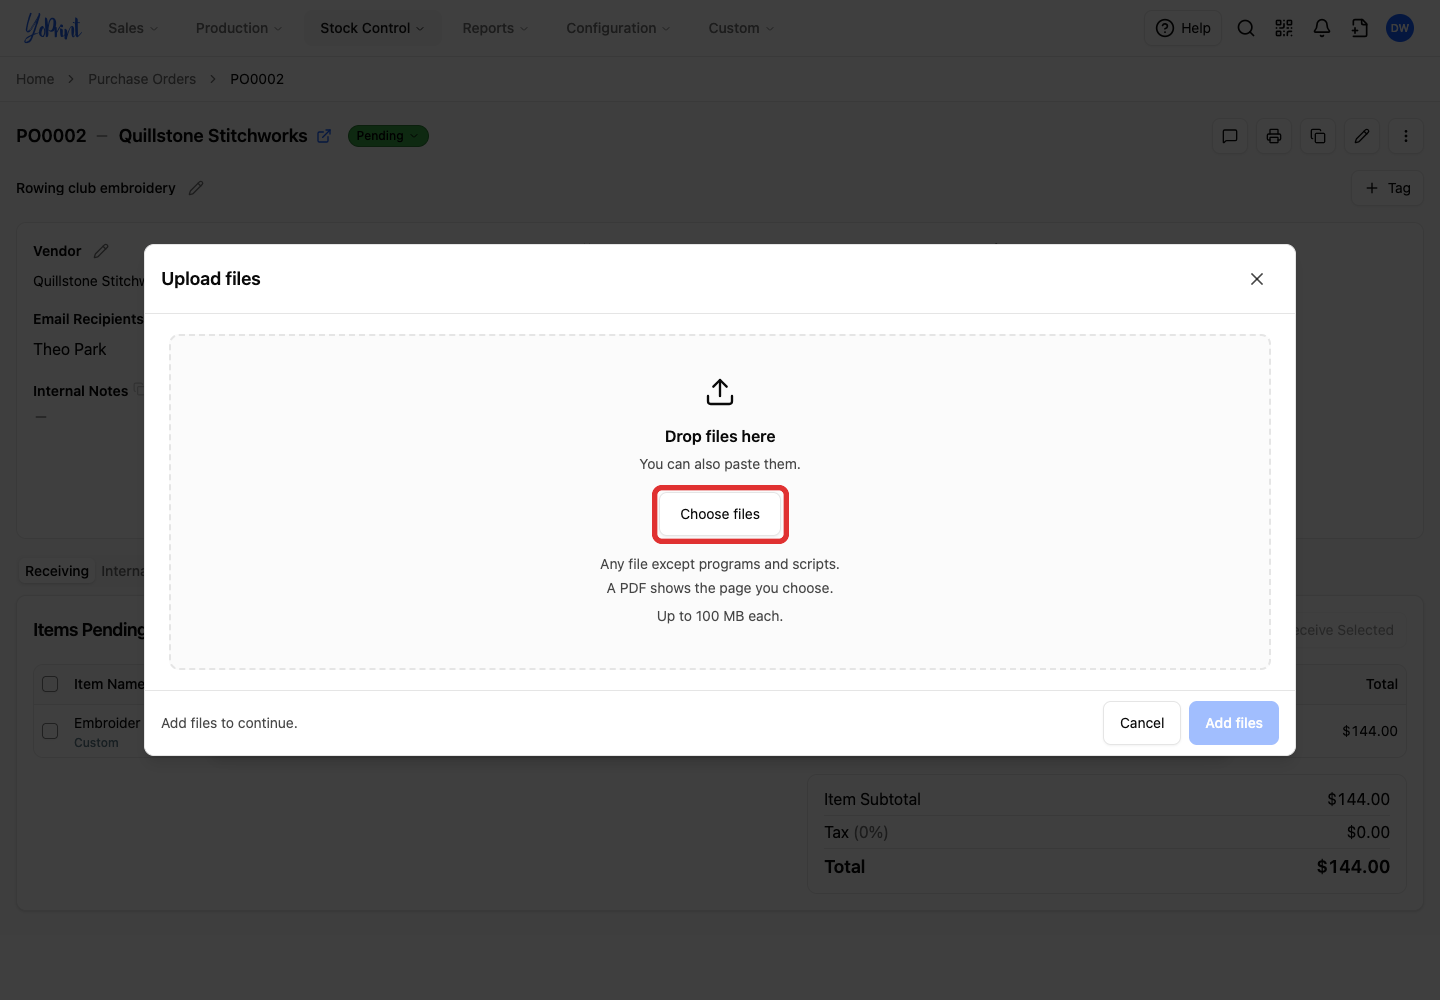
Click Choose files to select the files from your computer.
-
Once the upload succeeds, click Add 1 file.
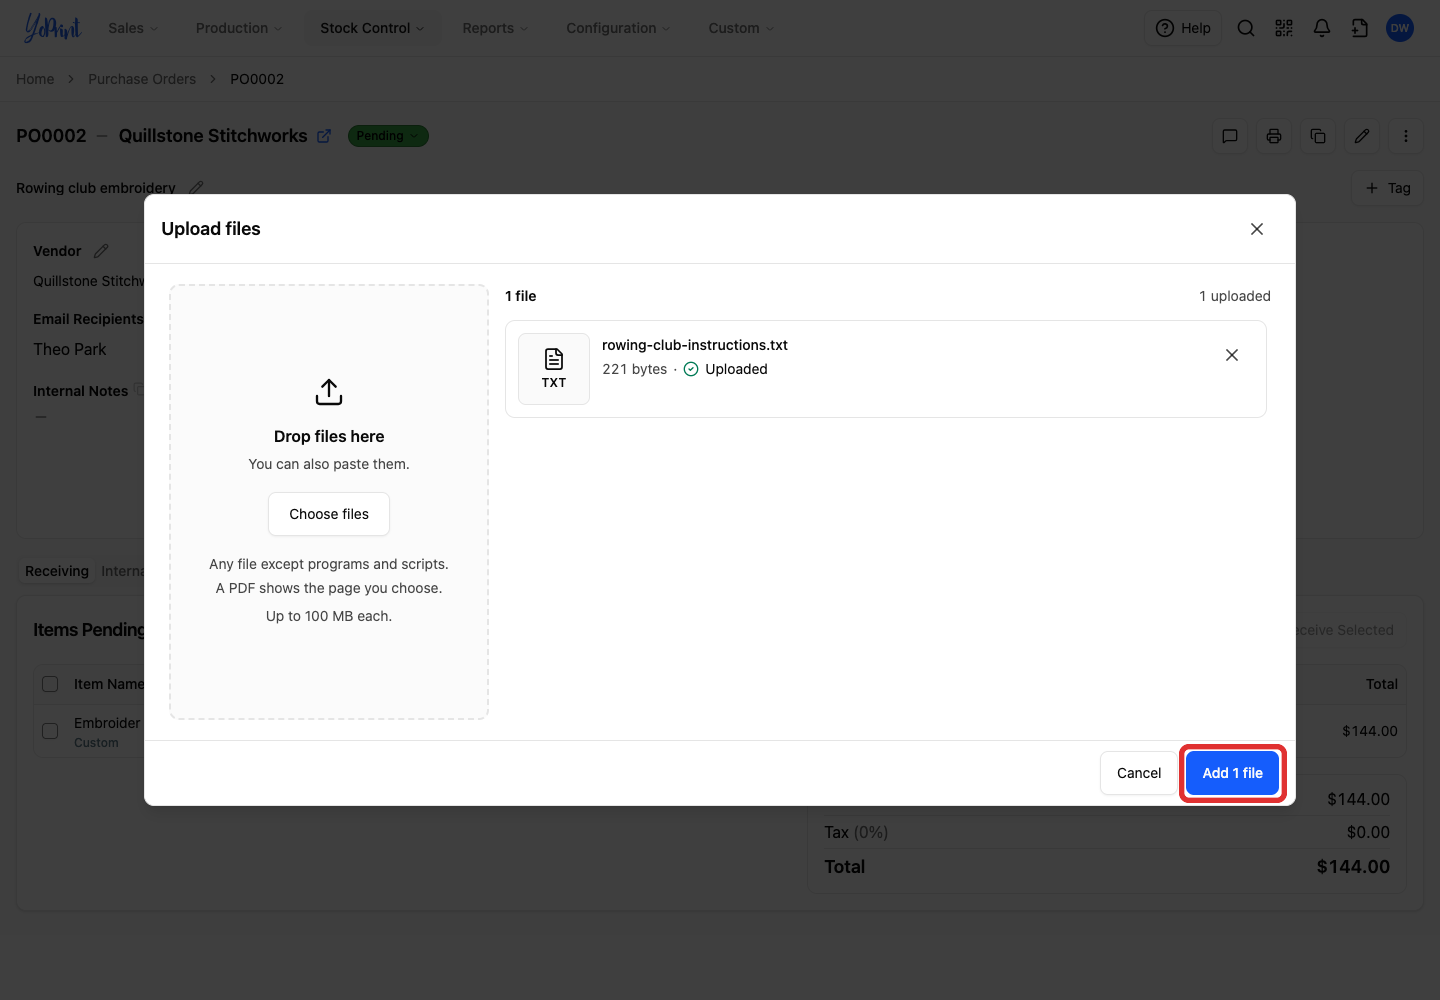
Return to step 6 above to check the recipients, message, and attachments, then click Send.
Share a link instead
Share only with the intended vendor
The shared page is read-only. It contains purchase-order details, notes, and downloadable files. Share the link only with the intended vendor.
-
Click View Link under Shareable Link.
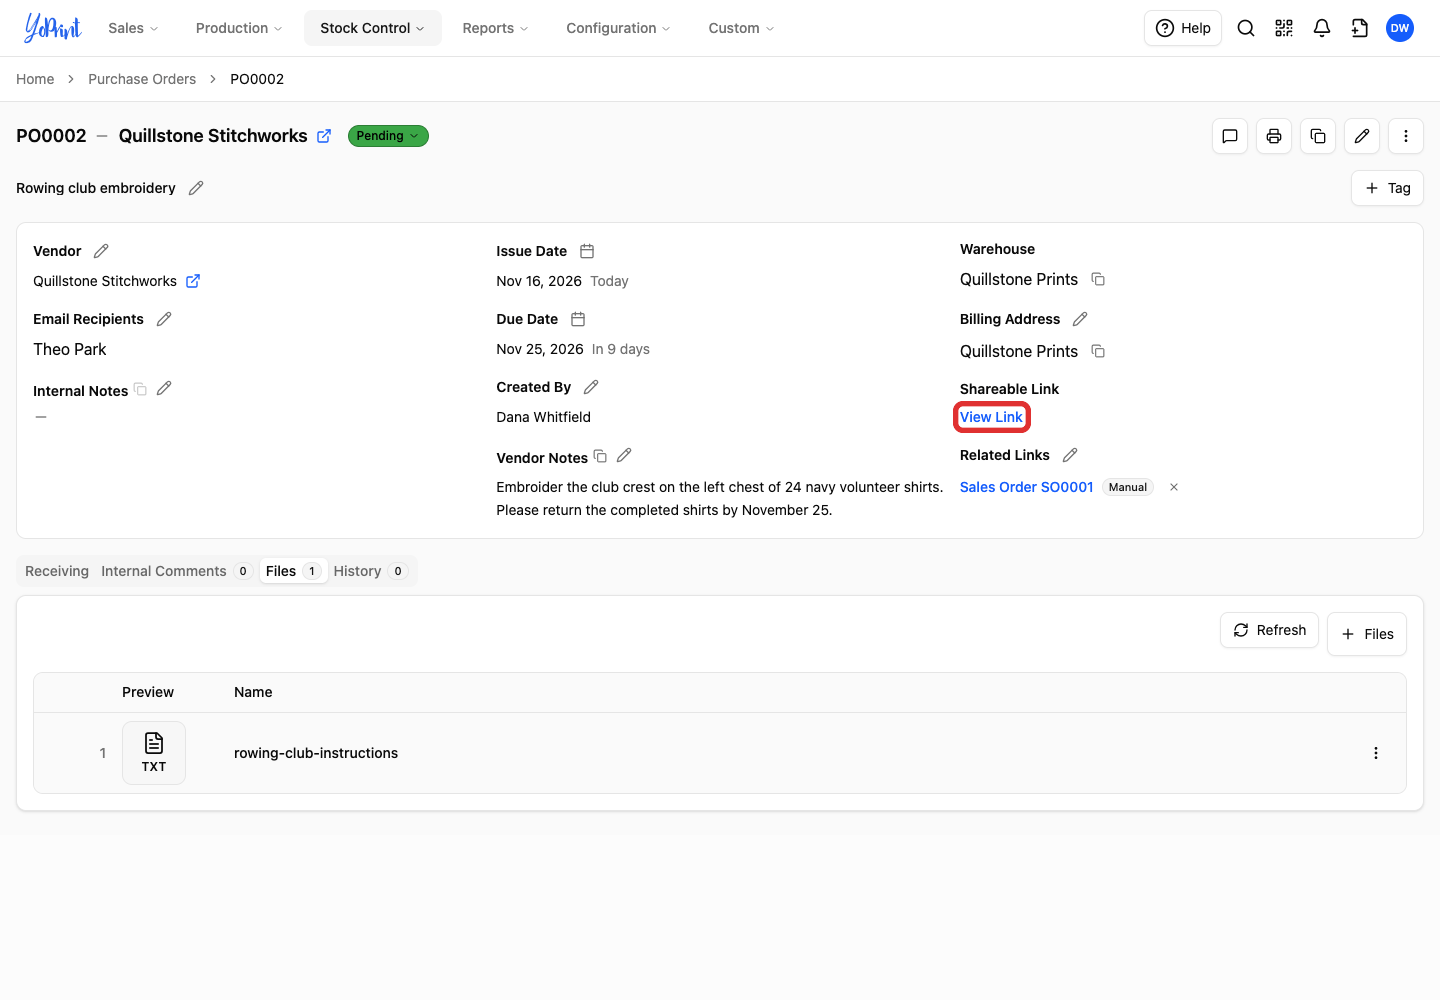
Copy the web address from your browser's address bar, then share it with the vendor through your usual channel.
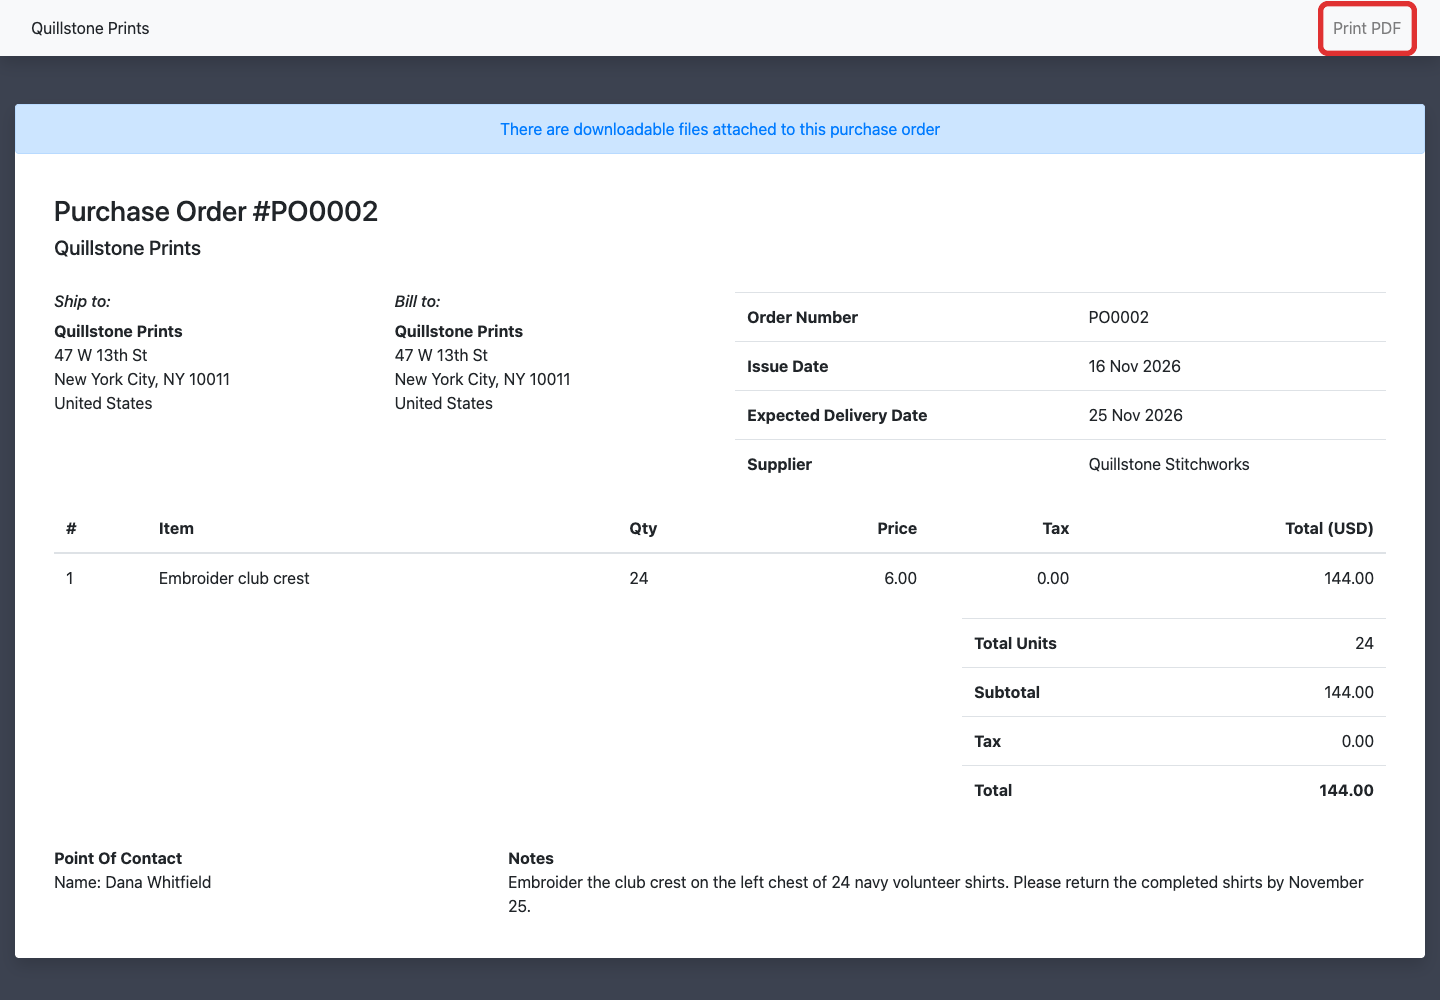
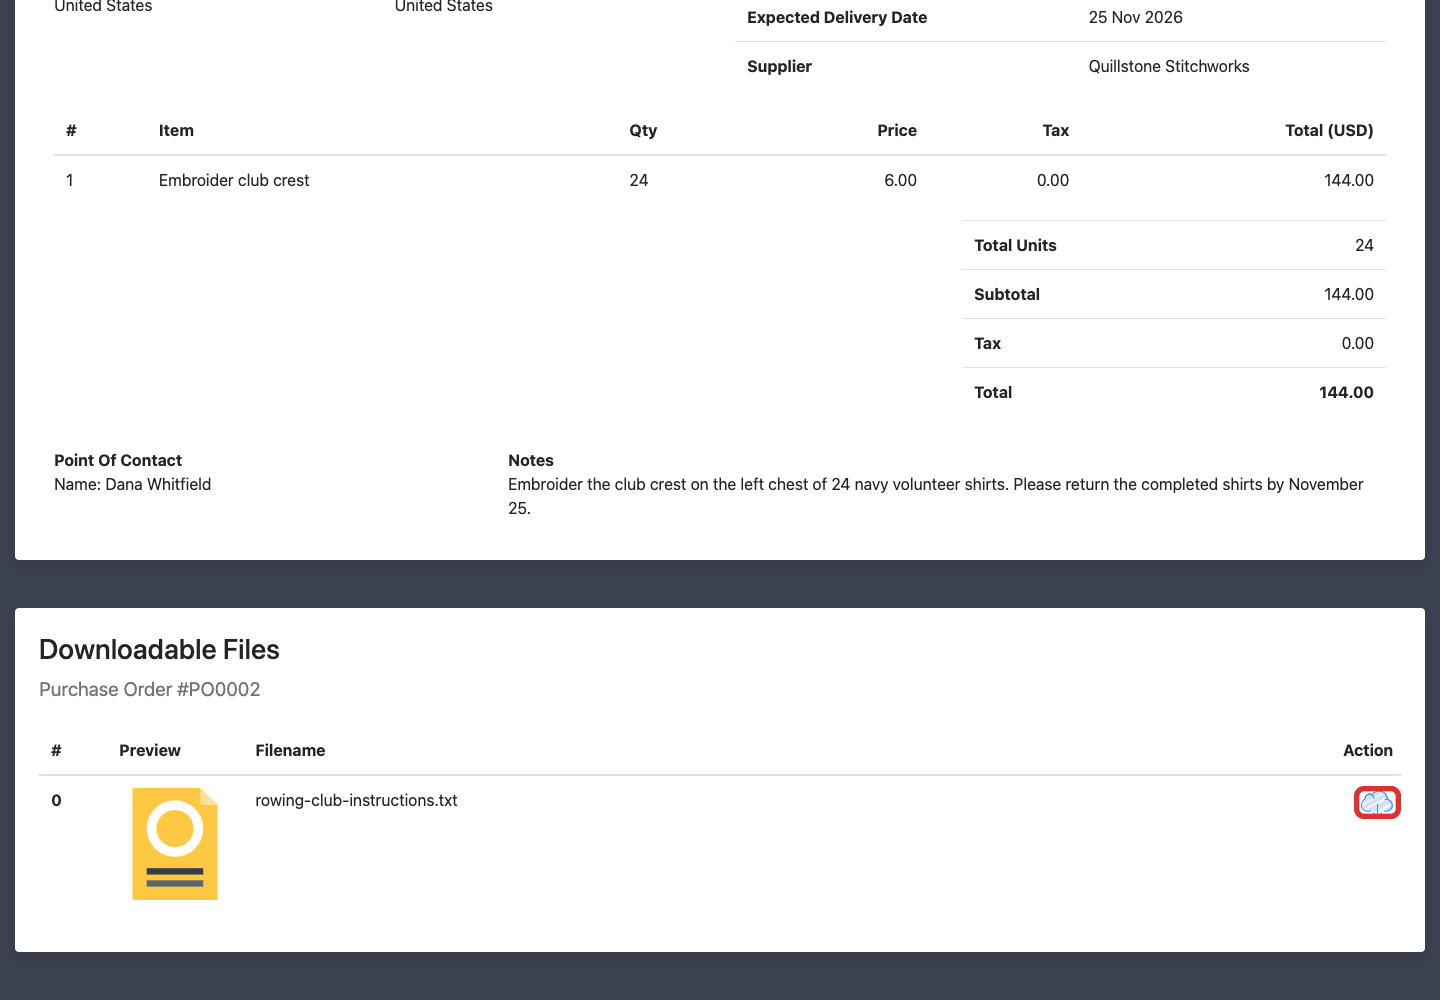
From the shared page, the vendor can print the purchase order or download attached files:
-
Click Print PDF to open a PDF copy of the purchase order.
-
Under Downloadable Files, click the download icon (a cloud with a down arrow) in the file's Action column.
Track the subcontract from the sales order
-
In Related Links, click the sales-order number, such as Sales Order SO0001.
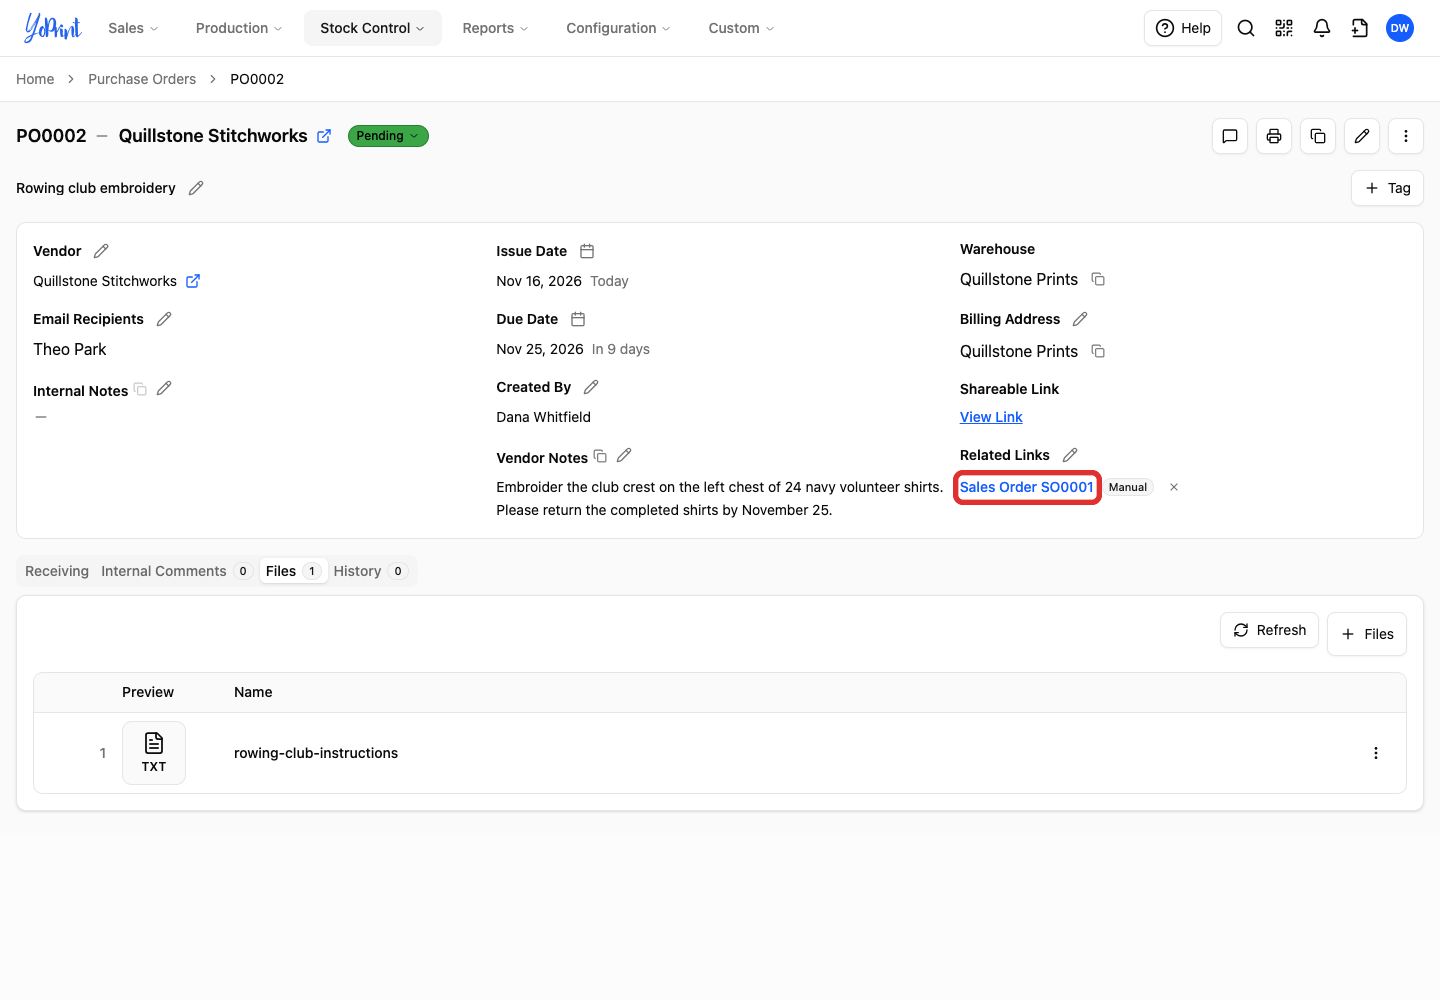
The sales order opens in a window over the purchase order.
-
In the sales order's Purchase Orders panel, click the subcontract's status.
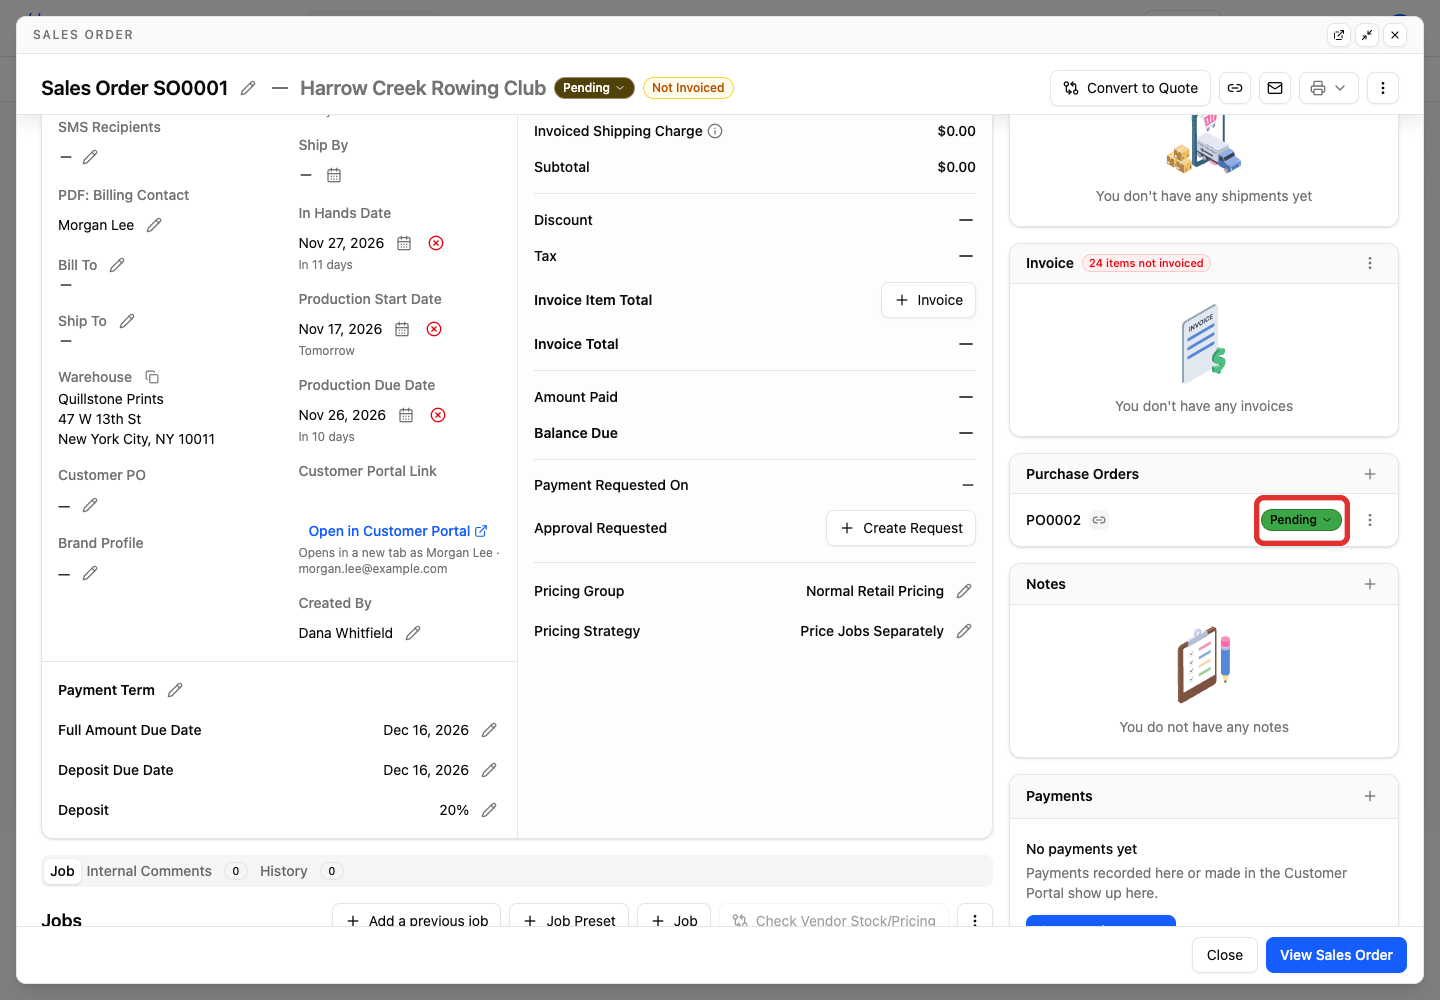
-
Choose the status that matches the vendor's latest update, such as Awaiting fulfillment.
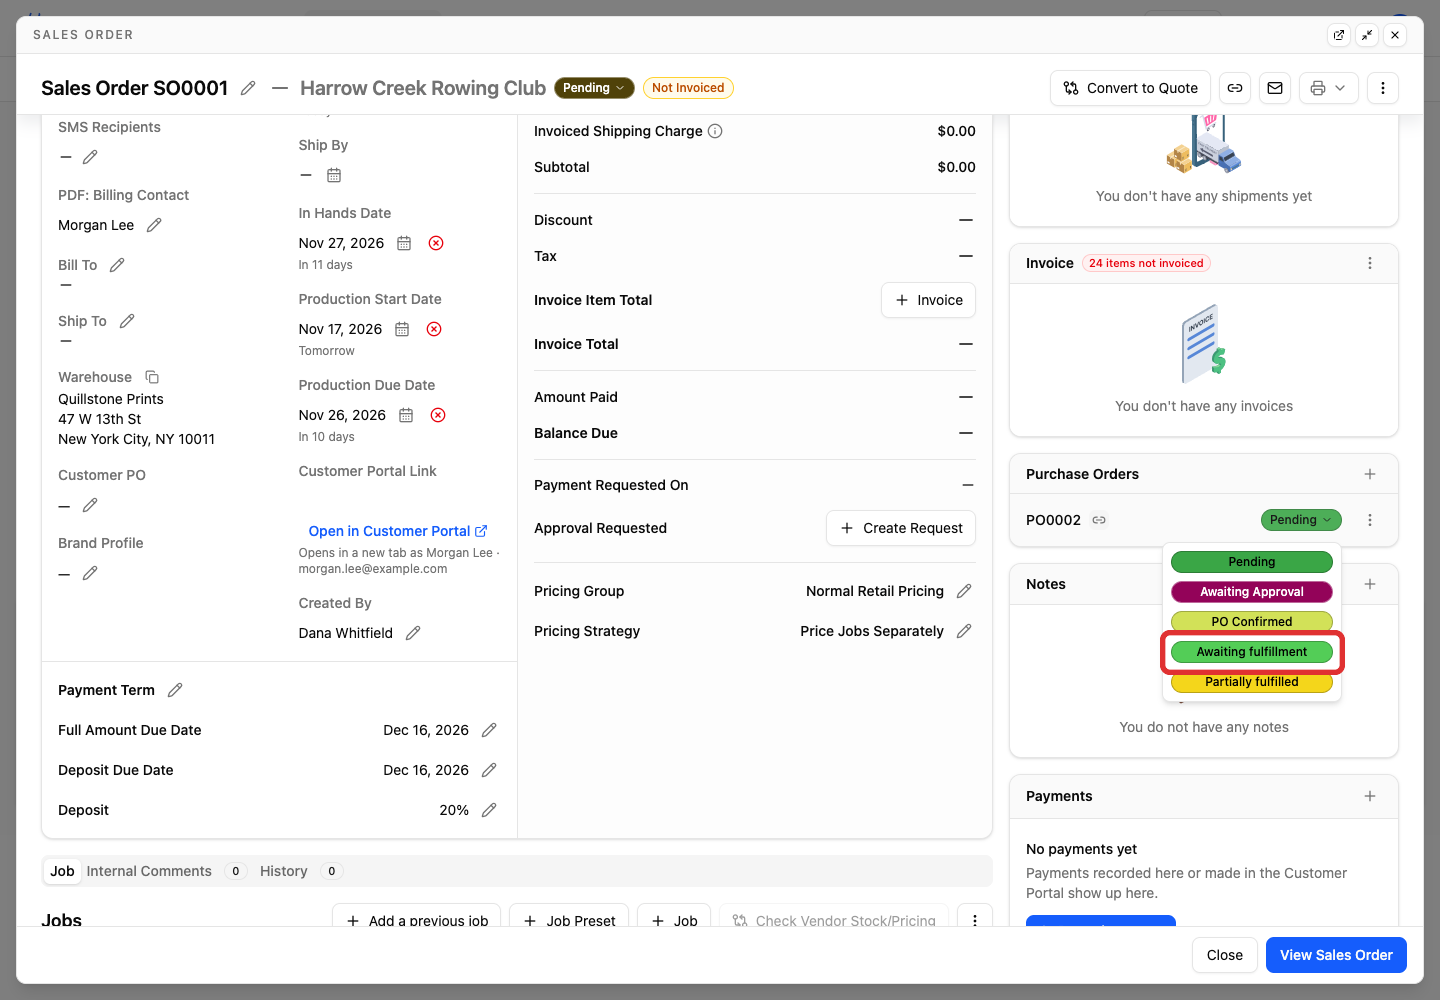
The status at the top of the purchase order is the same status, so you can change it there too. To add your own stages, see Customizing and Using Purchase Order Statuses.
Status changes do not update inventory
The status updates the purchase order itself; it does not receive items into inventory.
When the work comes back
On the purchase order's Receiving tab, select the line and click Receive Selected. In New Procurement, check Receipt Date and click Receive.
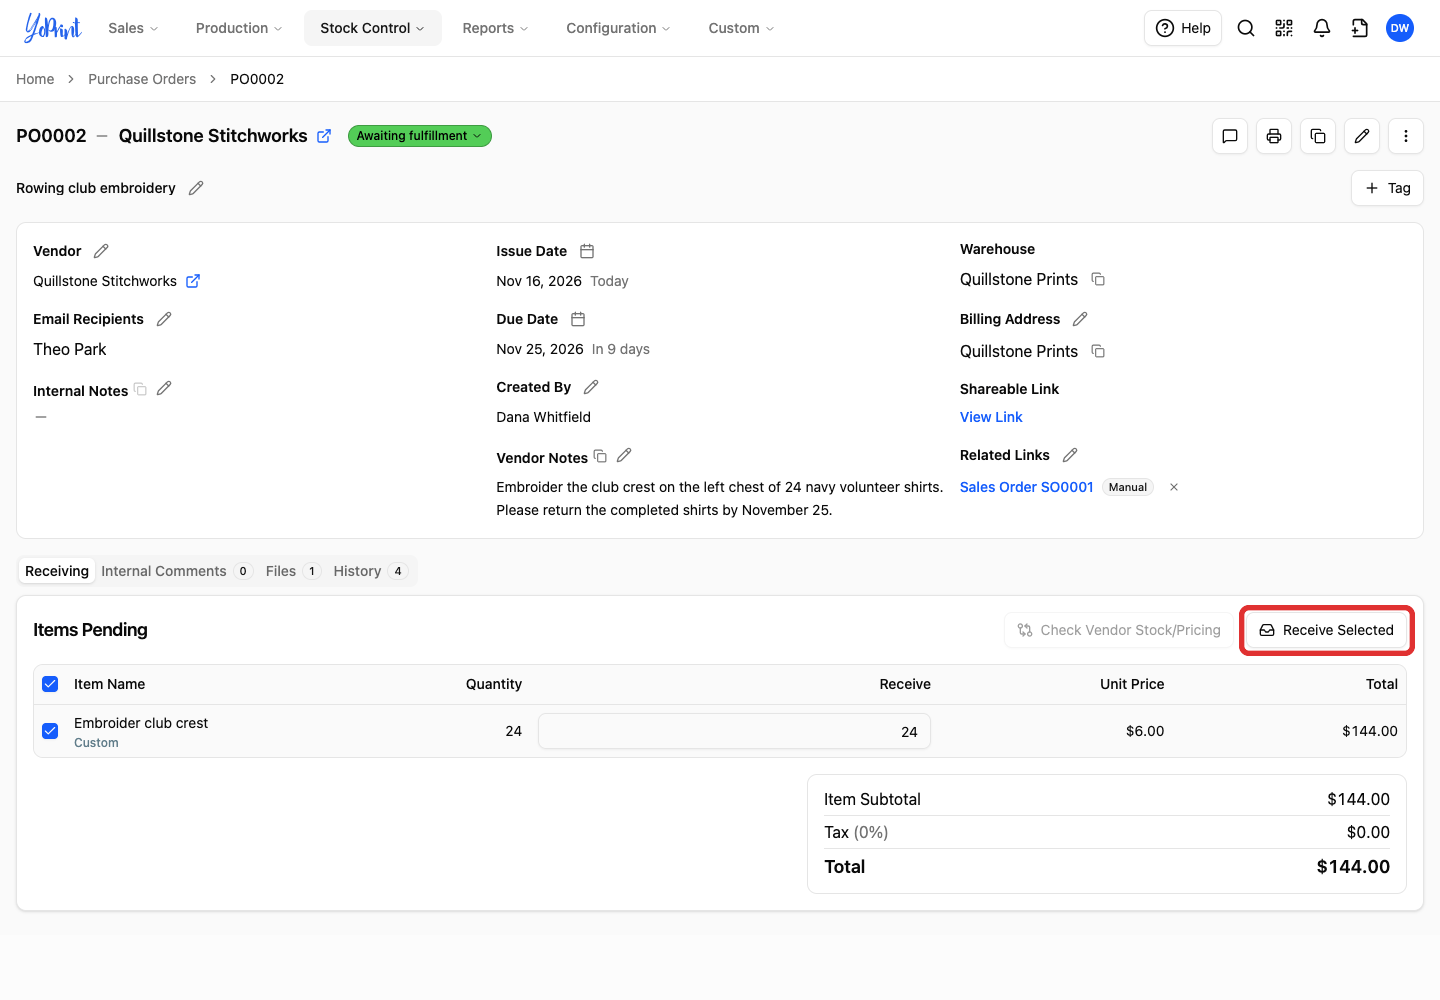
The purchase order shows Completed, and so does its row in the sales order's Purchase Orders panel. For a partial delivery or to undo a receipt, see Purchase Order Receiving. Then carry on with the sales order: ship it and invoice it.