Connecting Zapier with YoPrint and Creating a Zap
Zapier lets you automate your workflow across YoPrint and other apps. You could get an order to instantly show up in Trello once the sales order is approved. Or perhaps, automatically send an email once a quote is approved.
Let’s look at how to connect Zapier with YoPrint, and create your first Zap.
- First, if you don’t have a Zapier account, you’ll need to create one and log in.
- Next, click on this invitation link: https://zapier.com/developer/public-invite/167809/793bfb2ef78ce222457f70a46292ec87/
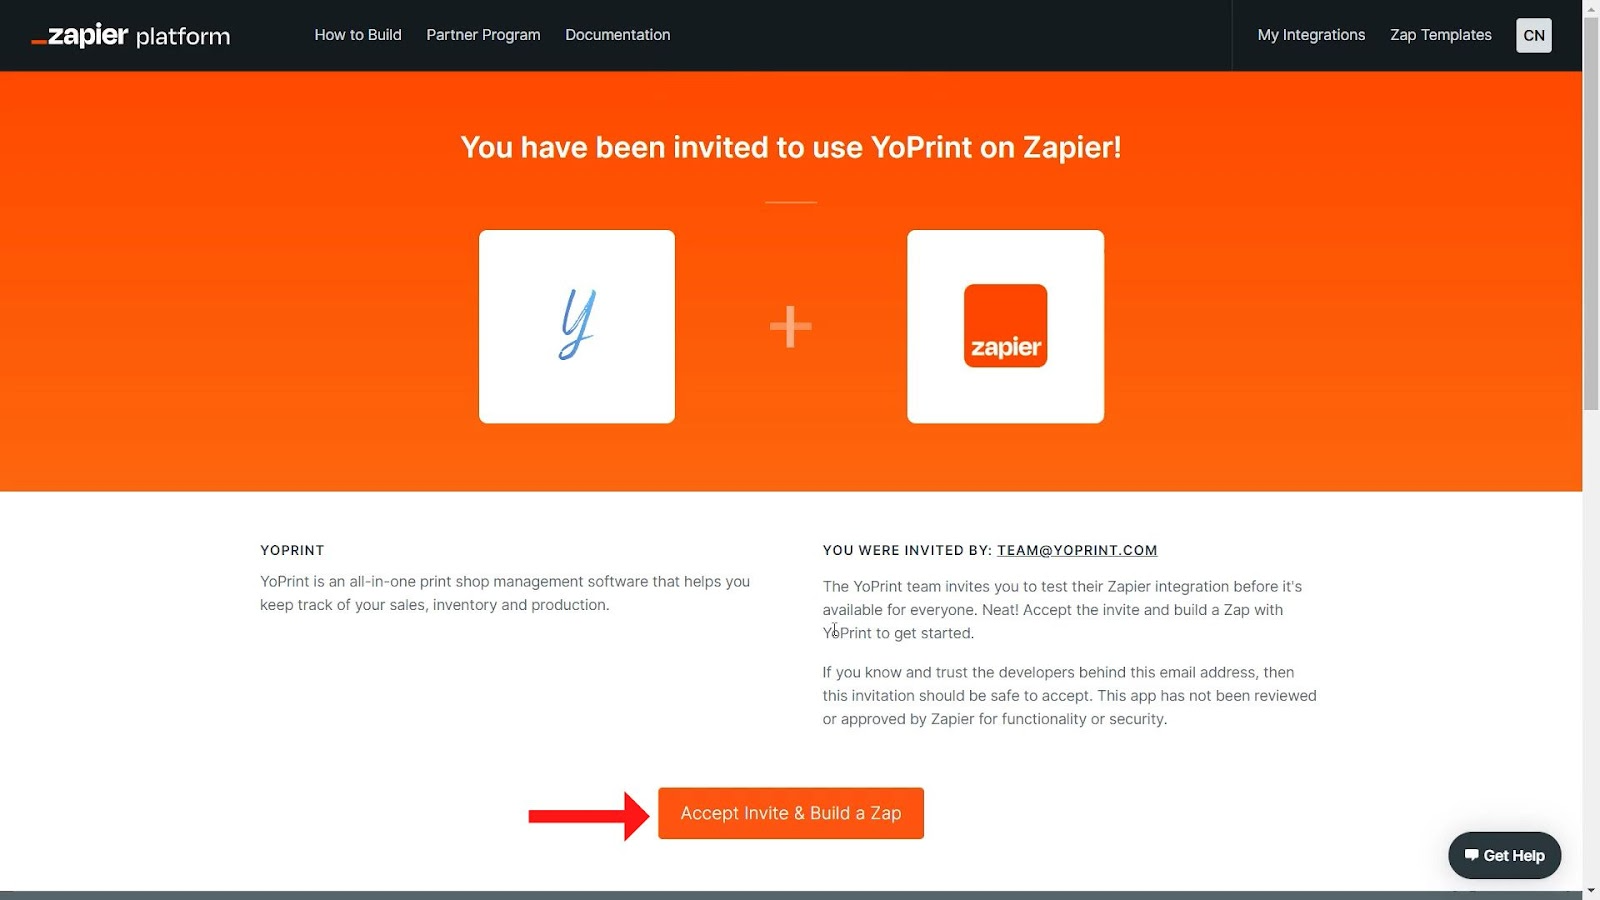
You’ll be taken to the page below. Click on Accept Invite & Build a Zap.
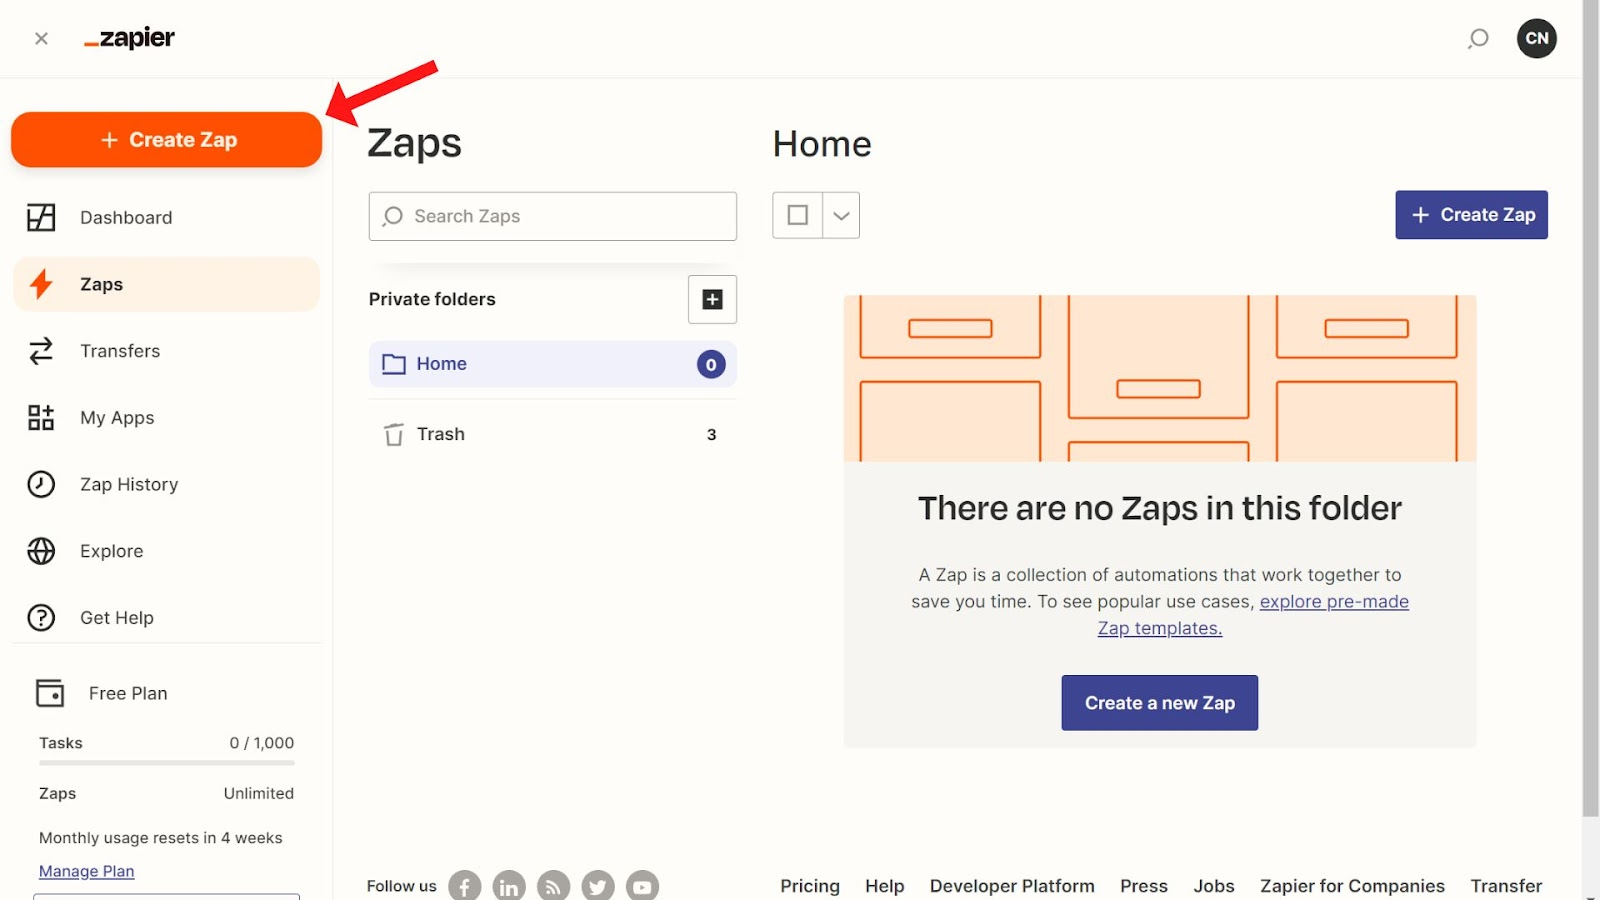
- You’ll be taken to your Zapier dashboard, where you can create a new Zap.
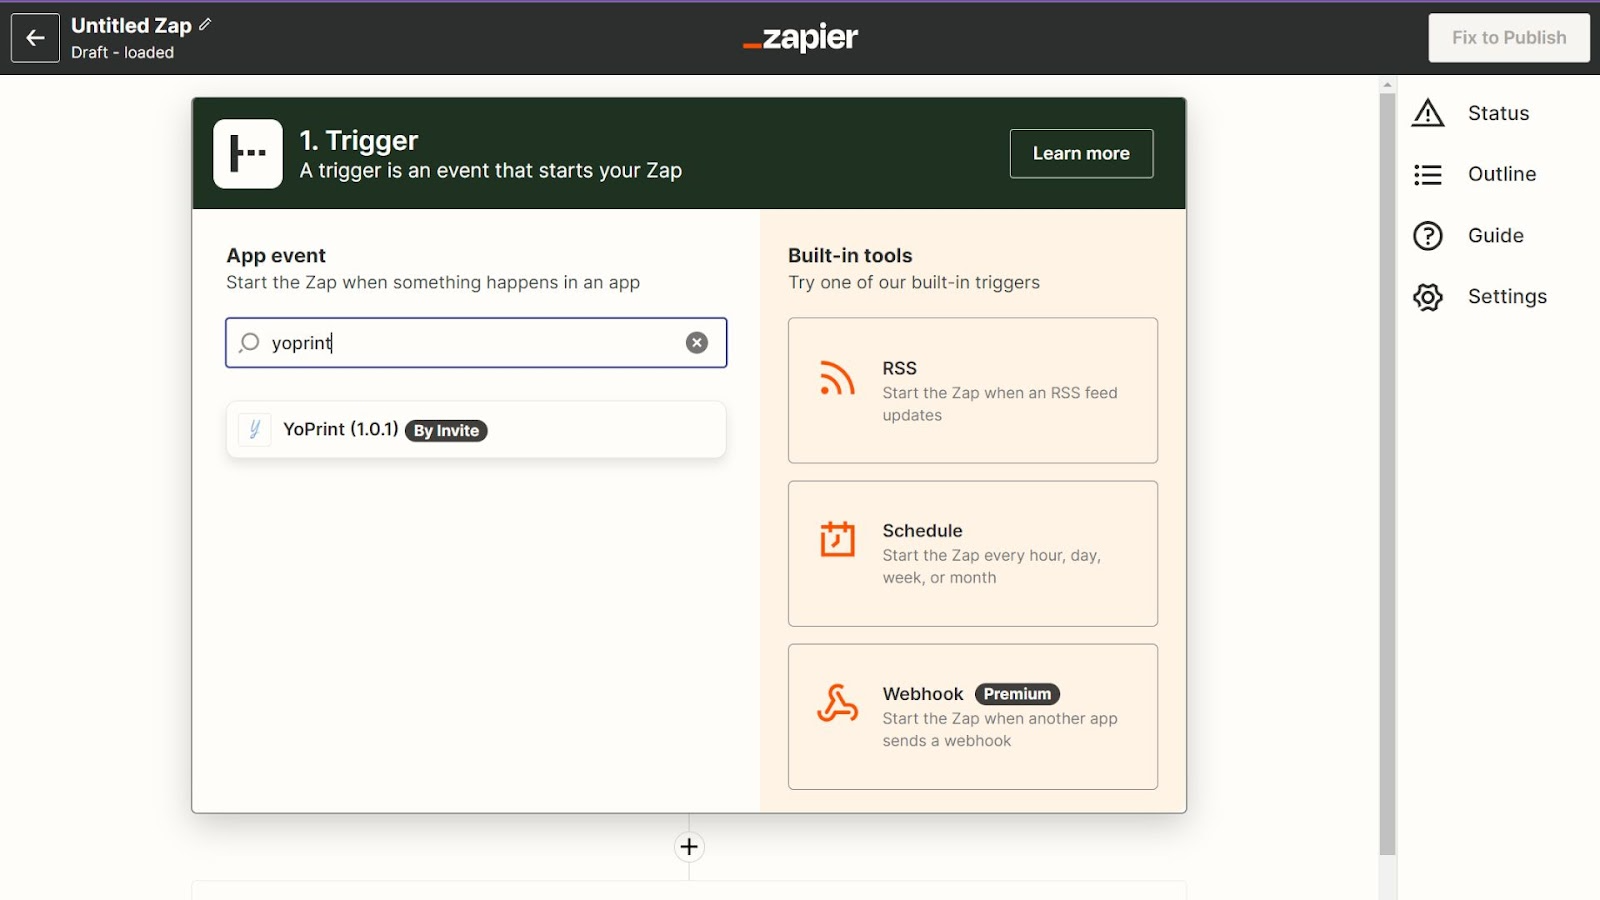
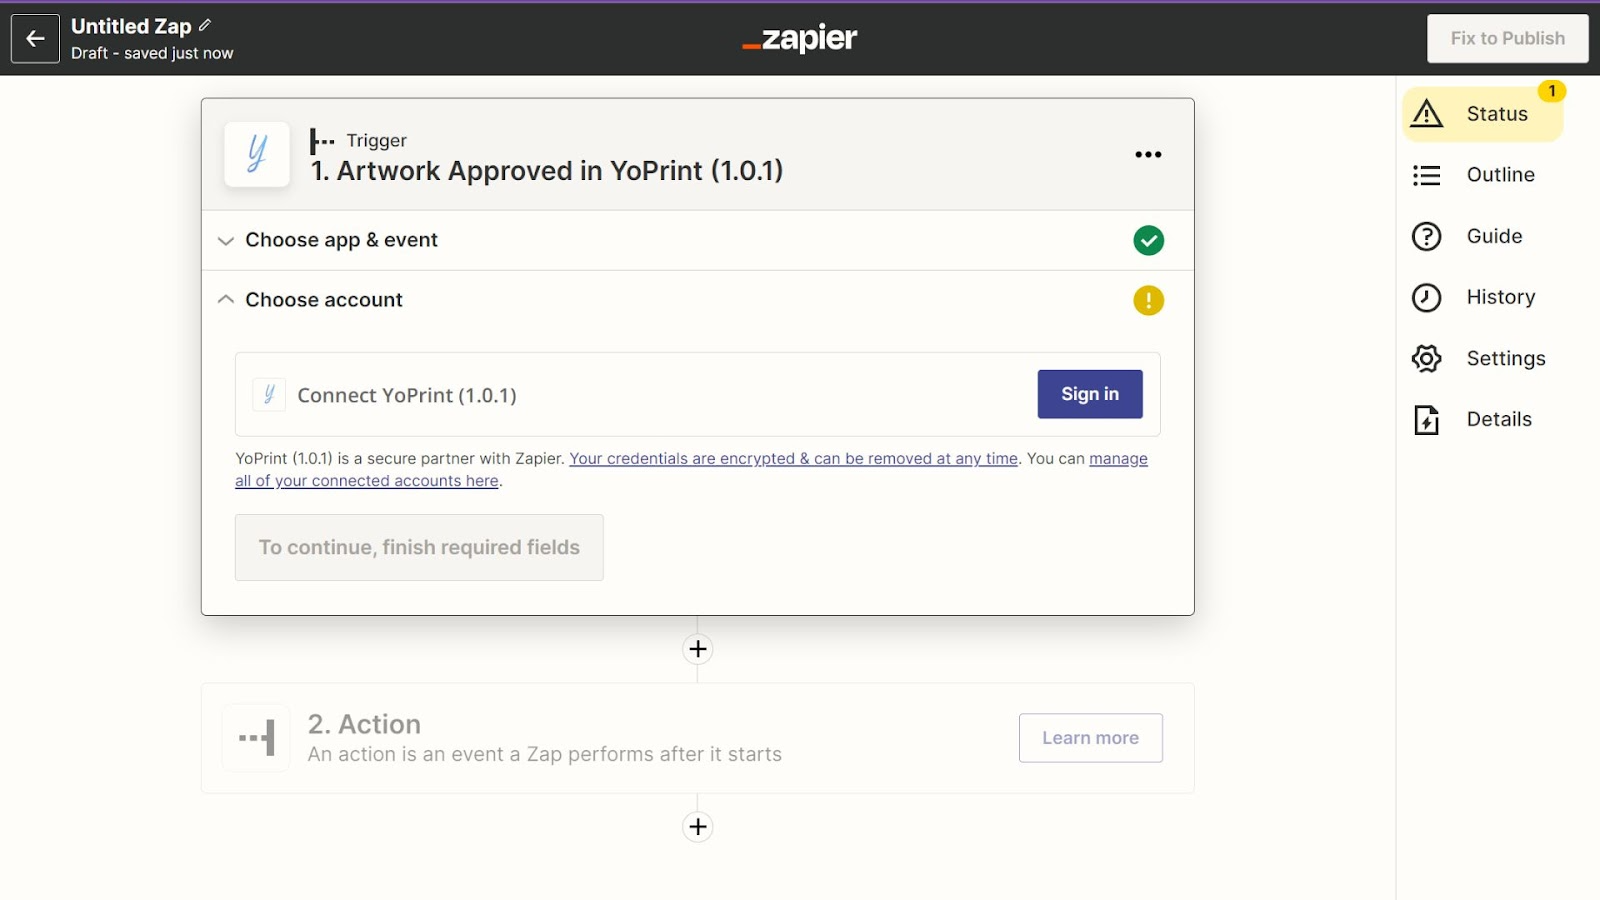
- Search for, and select YoPrint.
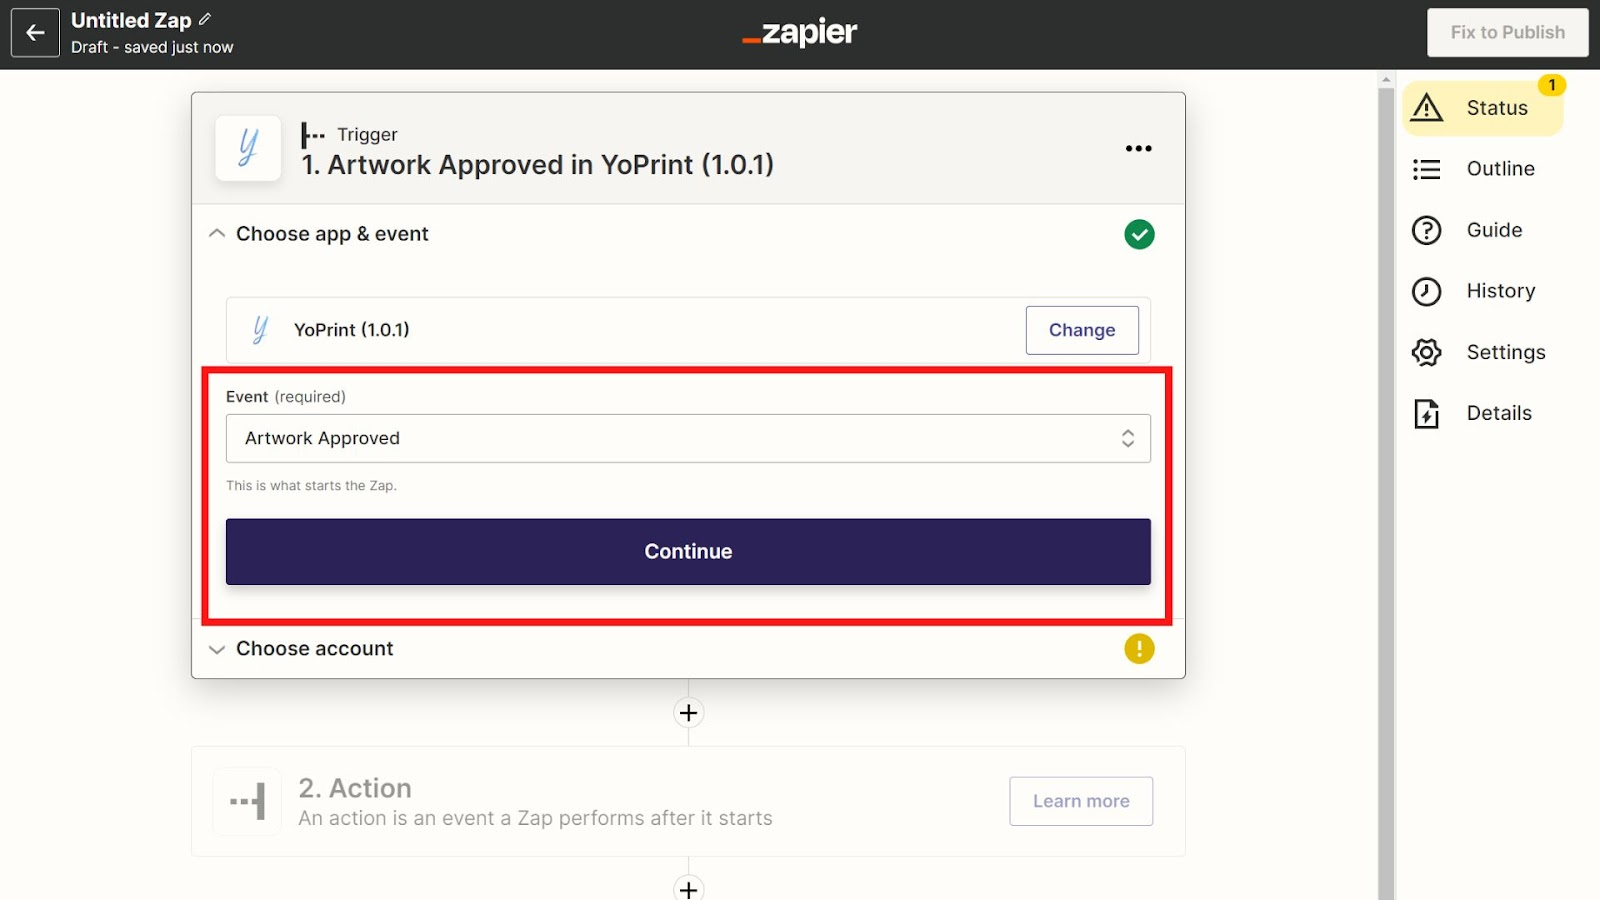
- Next, choose the Event. When an event is triggered, that’s when the automation, or Action, kicks in. Once you’ve selected a trigger, click on Continue.
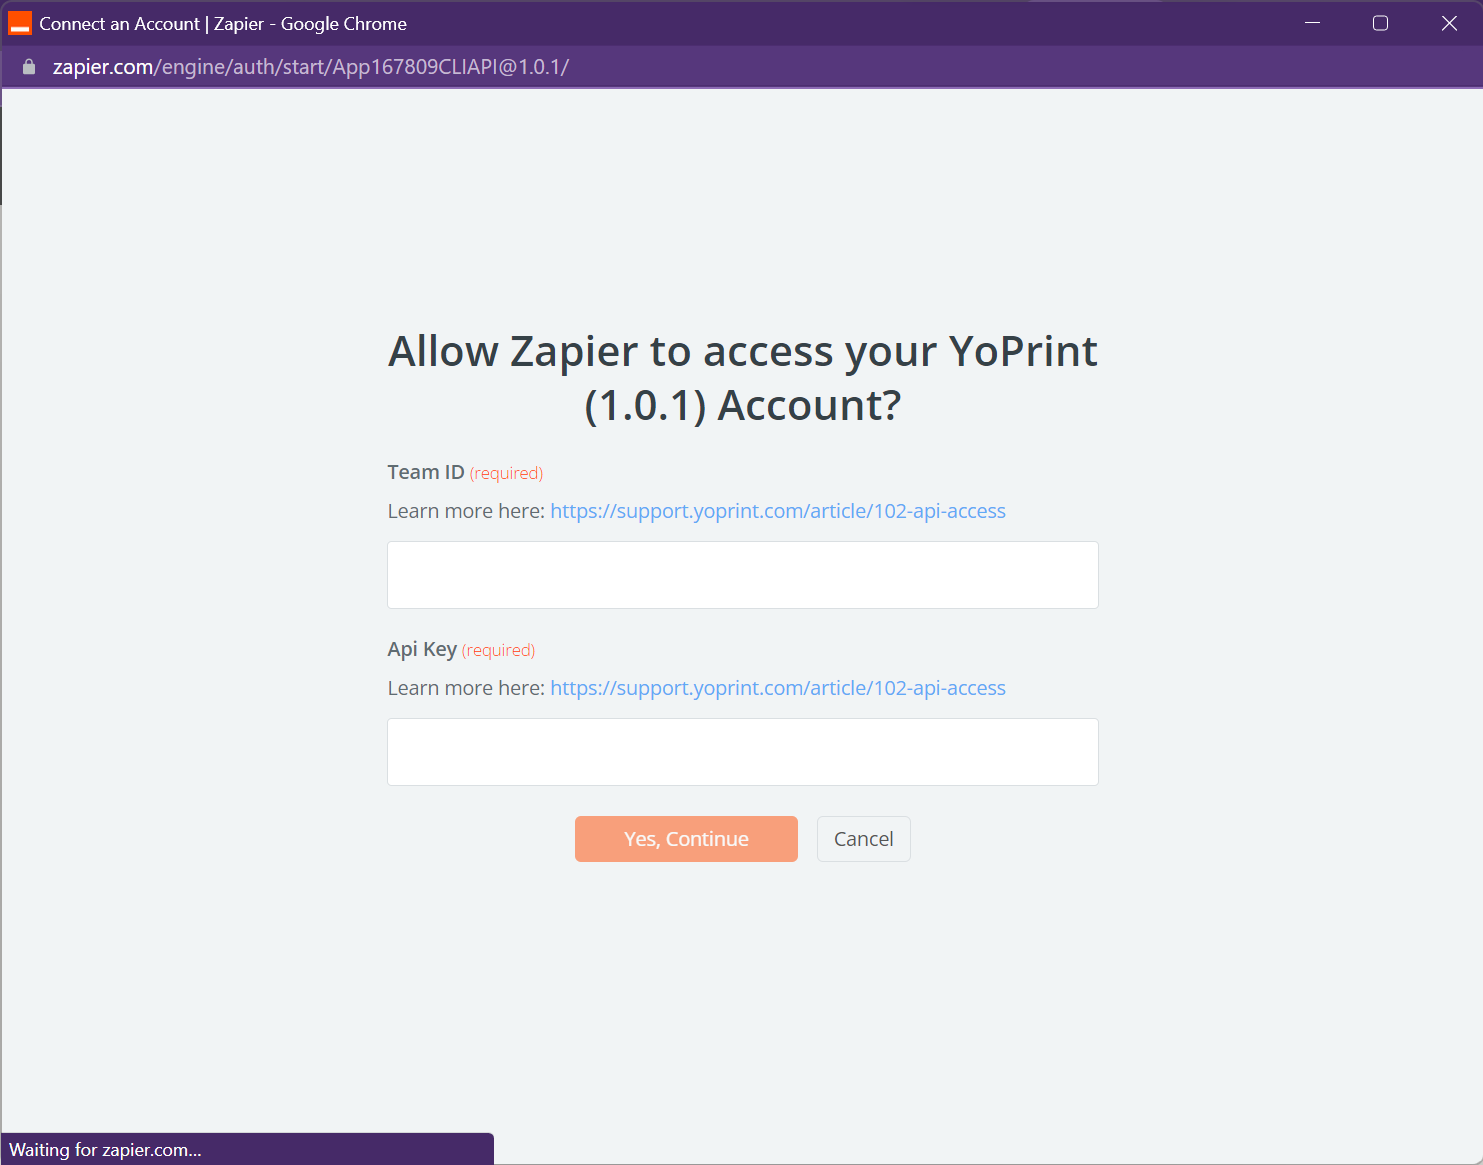
- Now, you’ll need to connect YoPrint. Click on Sign In, and a new window will pop up for you to input your credentials - the Team ID and API Key.
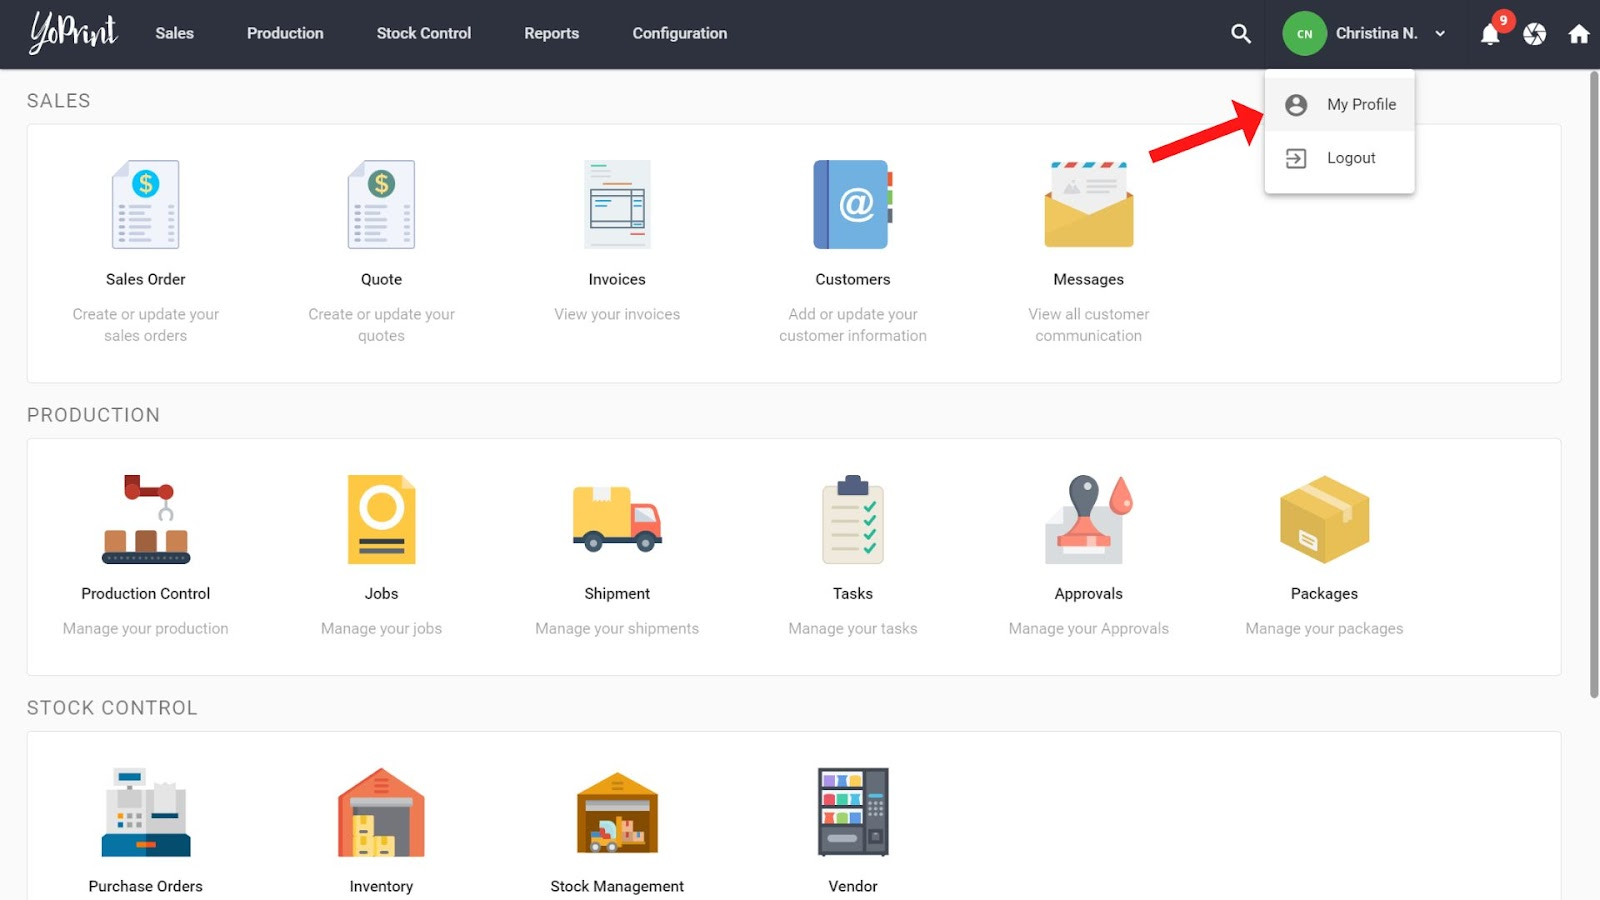
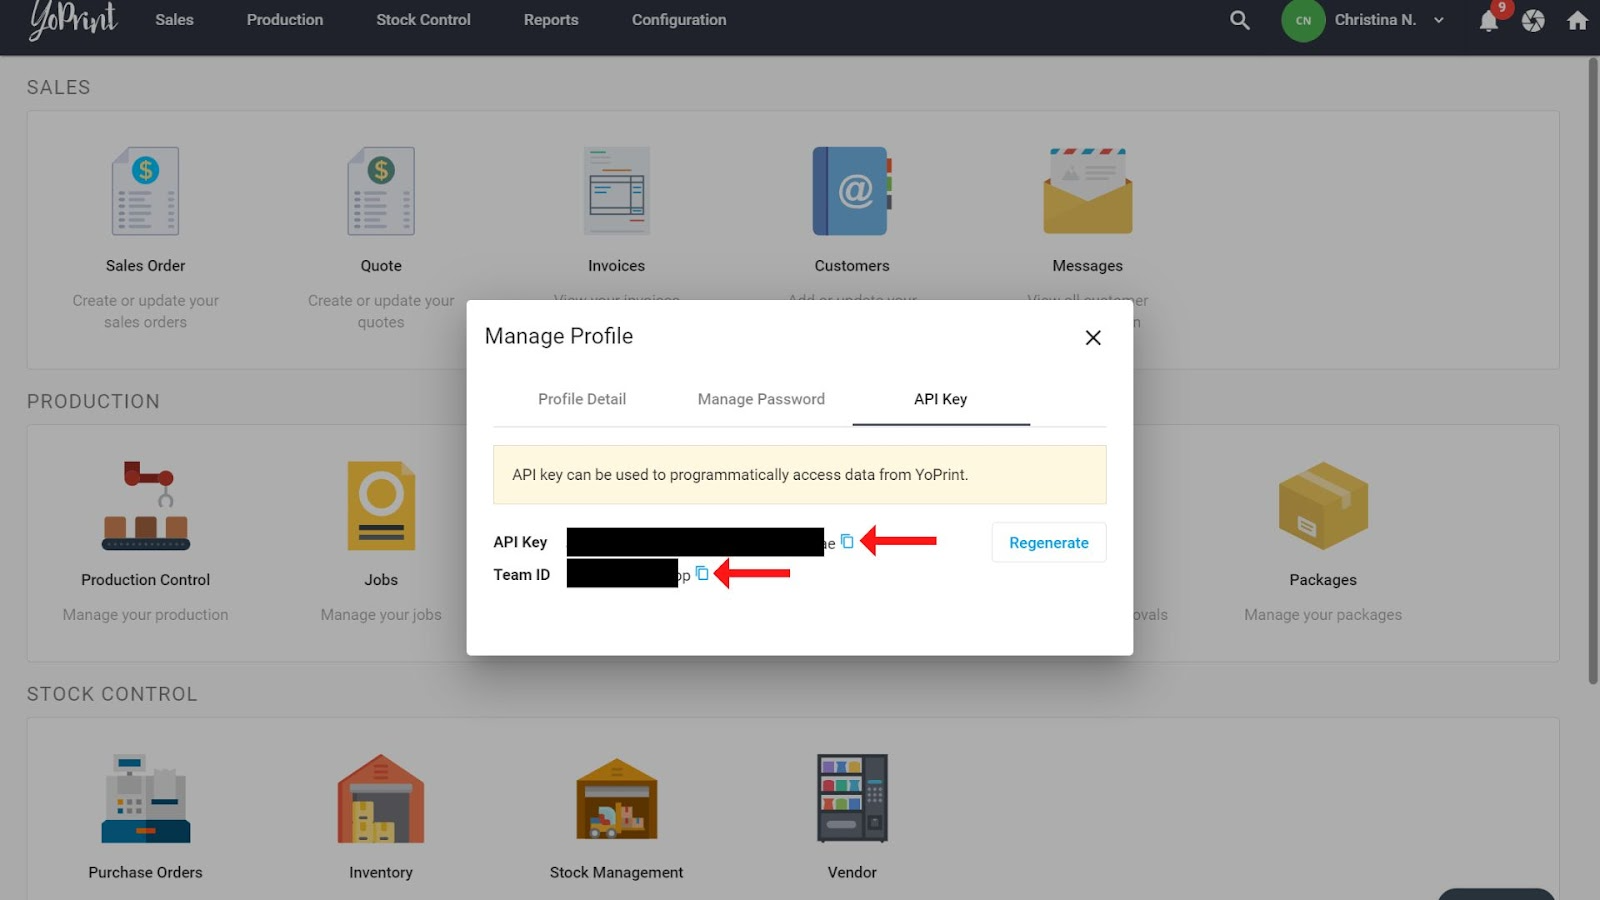
- Head to your Profile in app.yoprint.com to copy your Team ID and API Key.
- Put your credentials into the pop-up window, and click on Yes, Continue. YoPrint is now connected to Zapier.
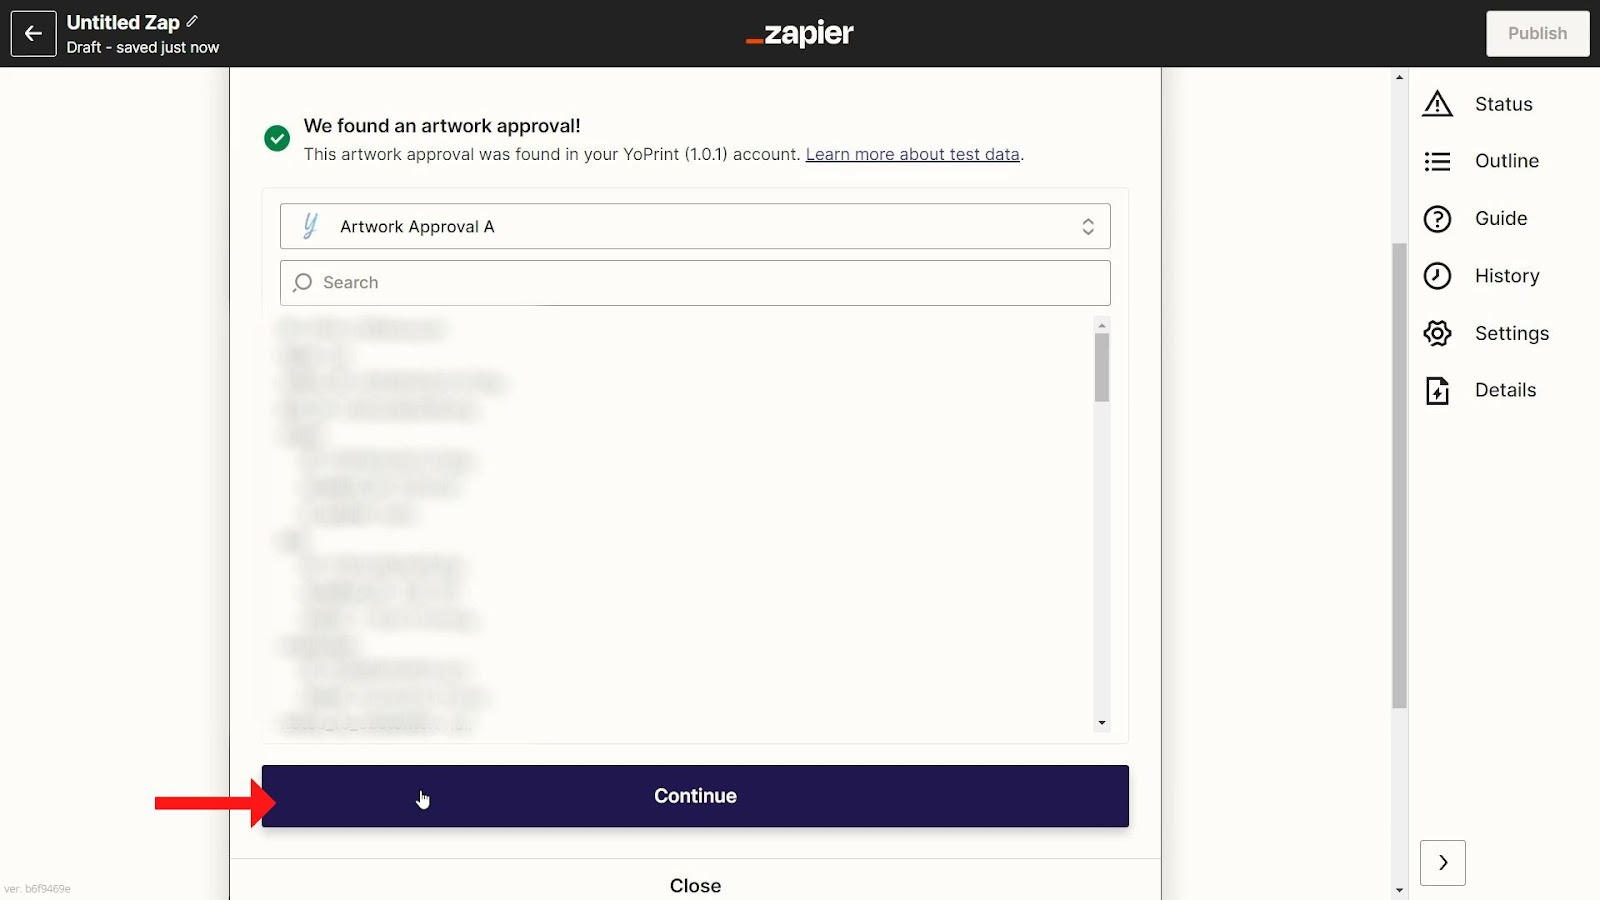
- Now, in the Test Trigger section, click on the Test Trigger button to ensure it’s working correctly.
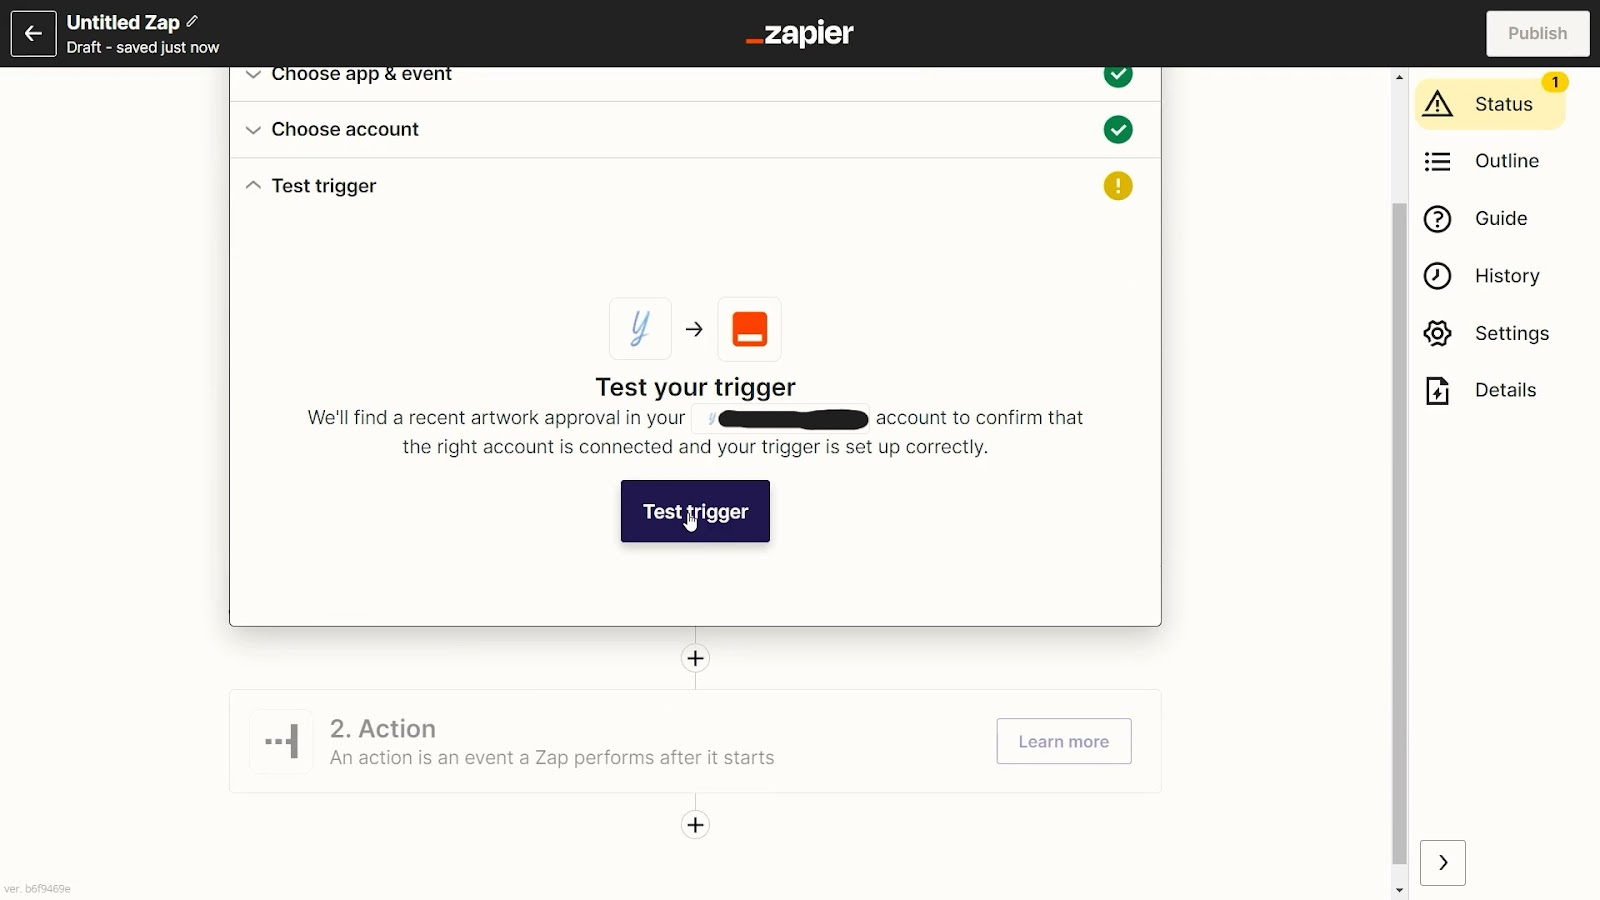
- Once it’s tested, click on Continue to move on to adding an action.
- Let’s create an action. First, add the app you want the action to appear in. For example, let’s say you want to get a message in Slack every time an artwork is approved. Go ahead and select Slack.
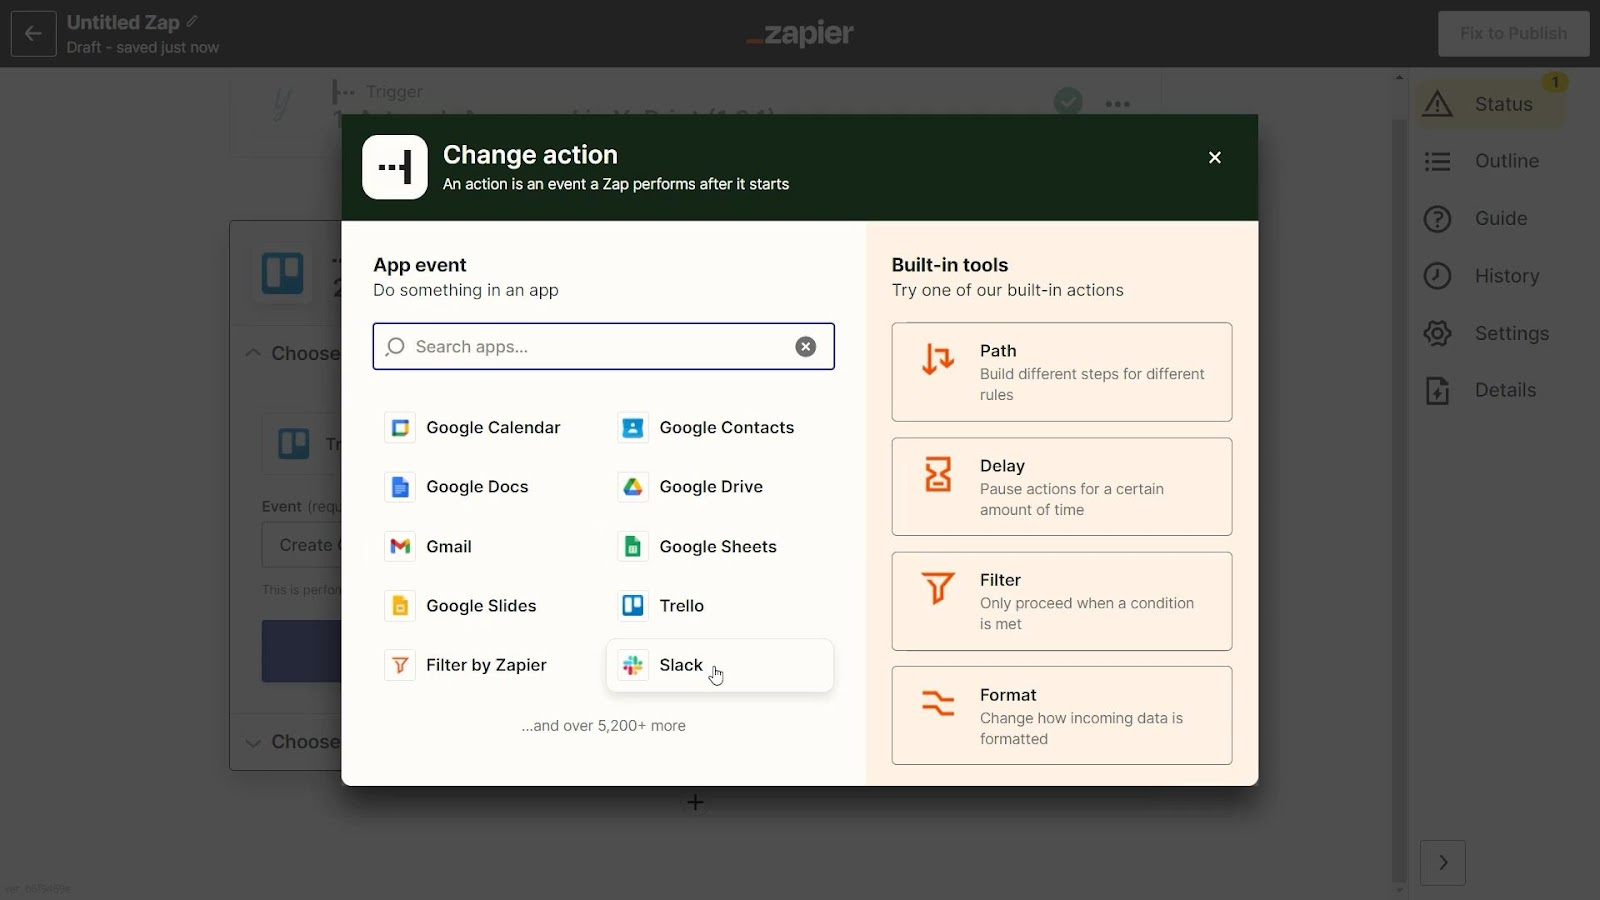
- Select the Event. In this case, it would be Send Direct Message. Then click on Continue.

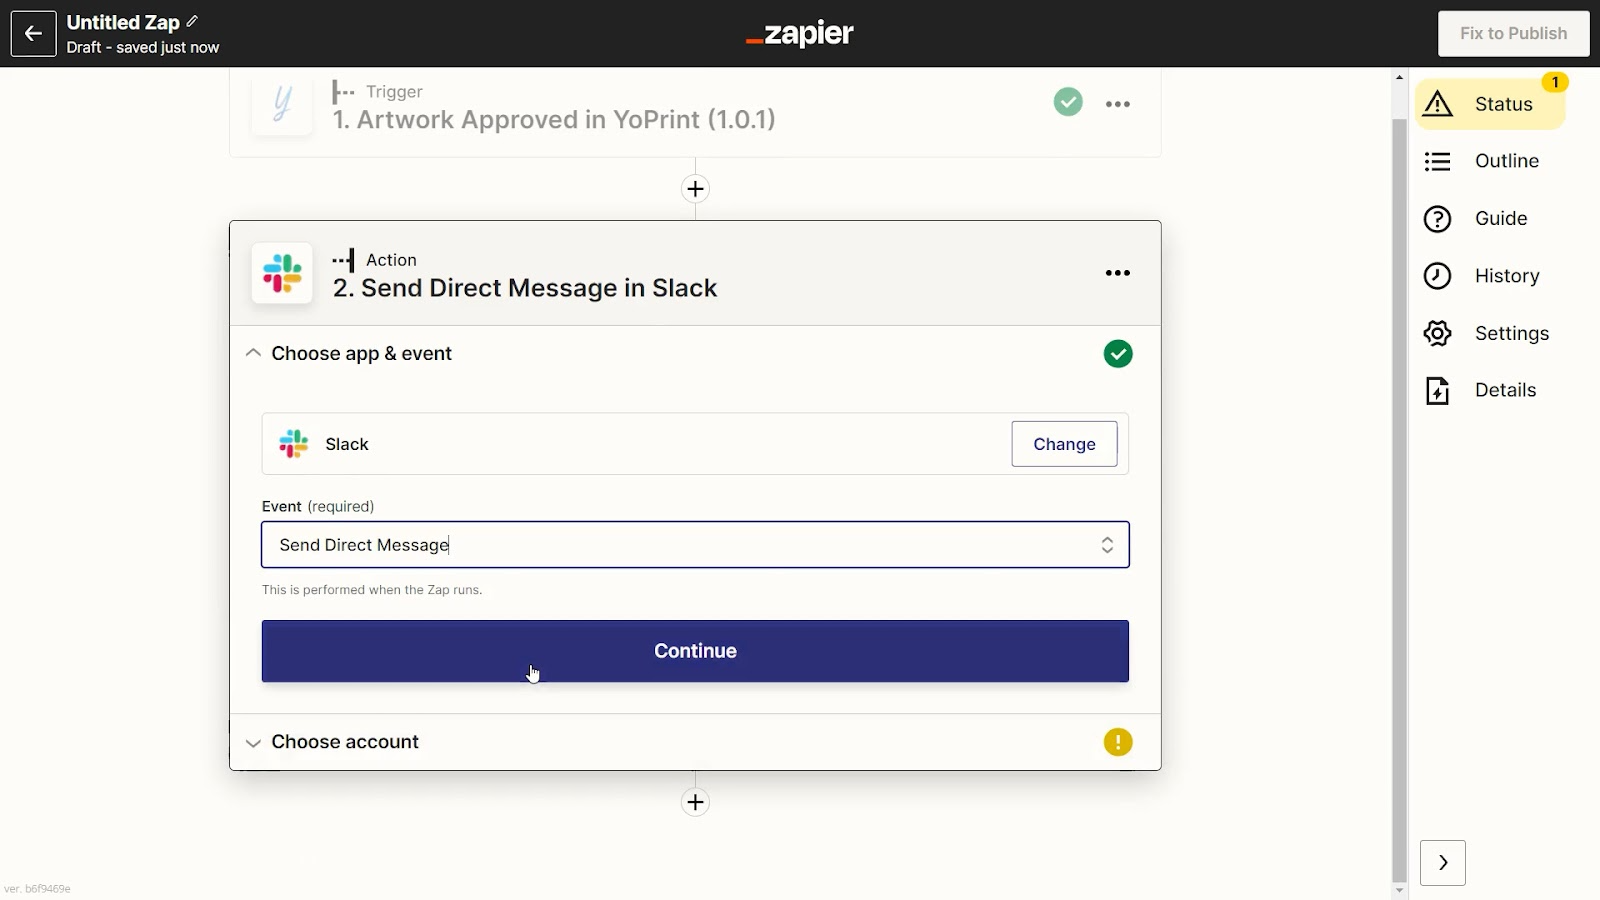
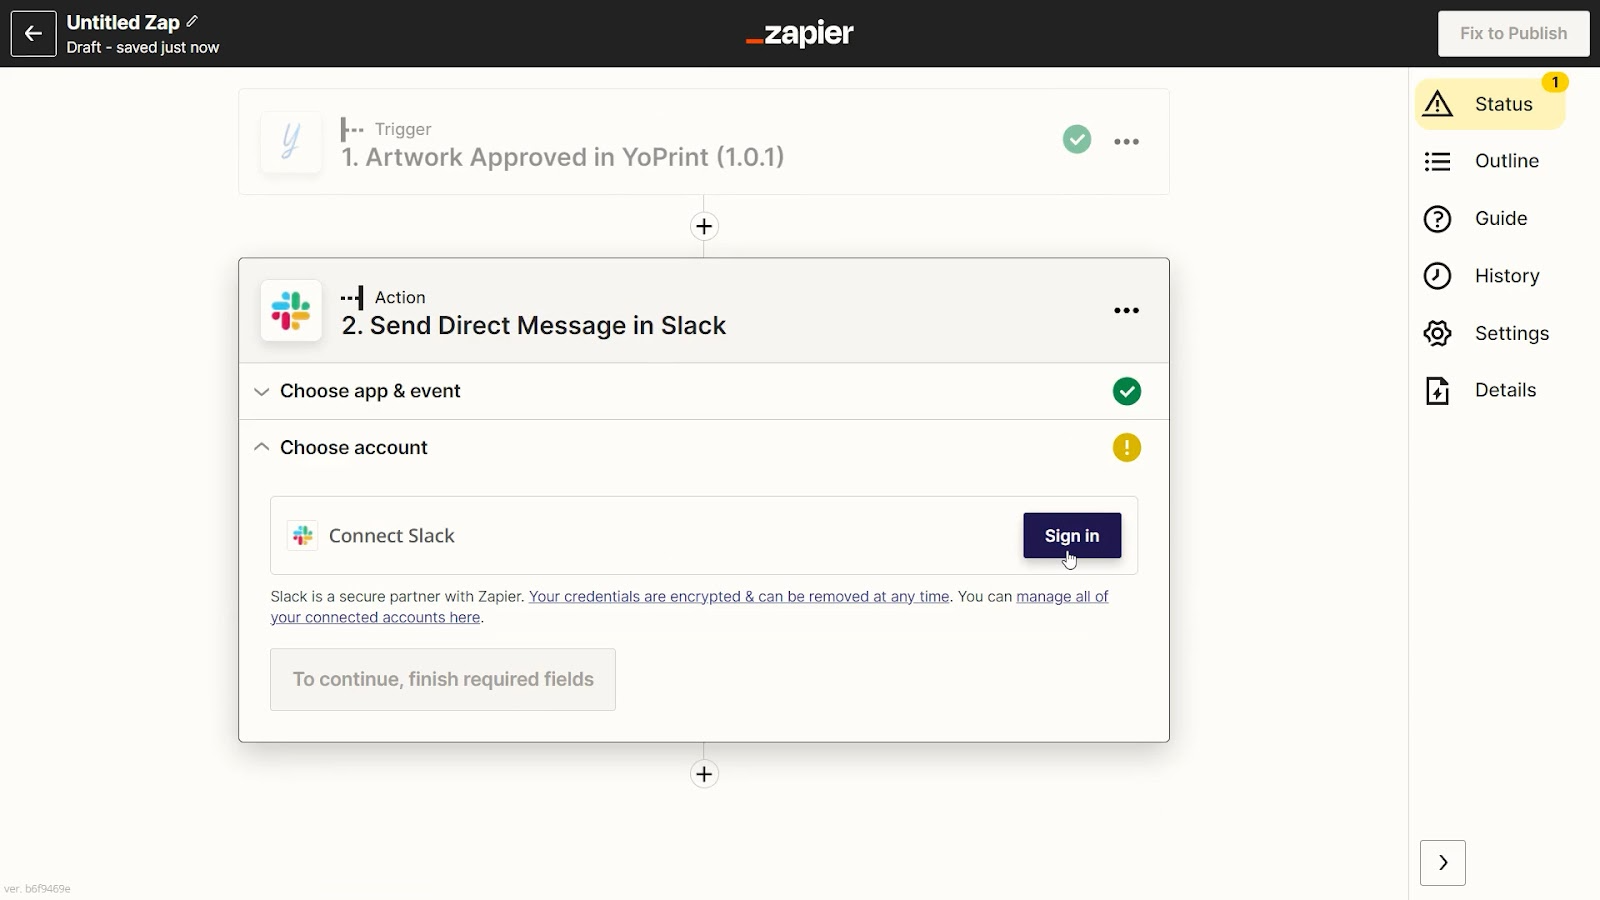
- If you haven’t previously connected Slack (or the app of your choice) to Zapier, you’ll be prompted to do so at this stage. Follow the instructions to connect the app.
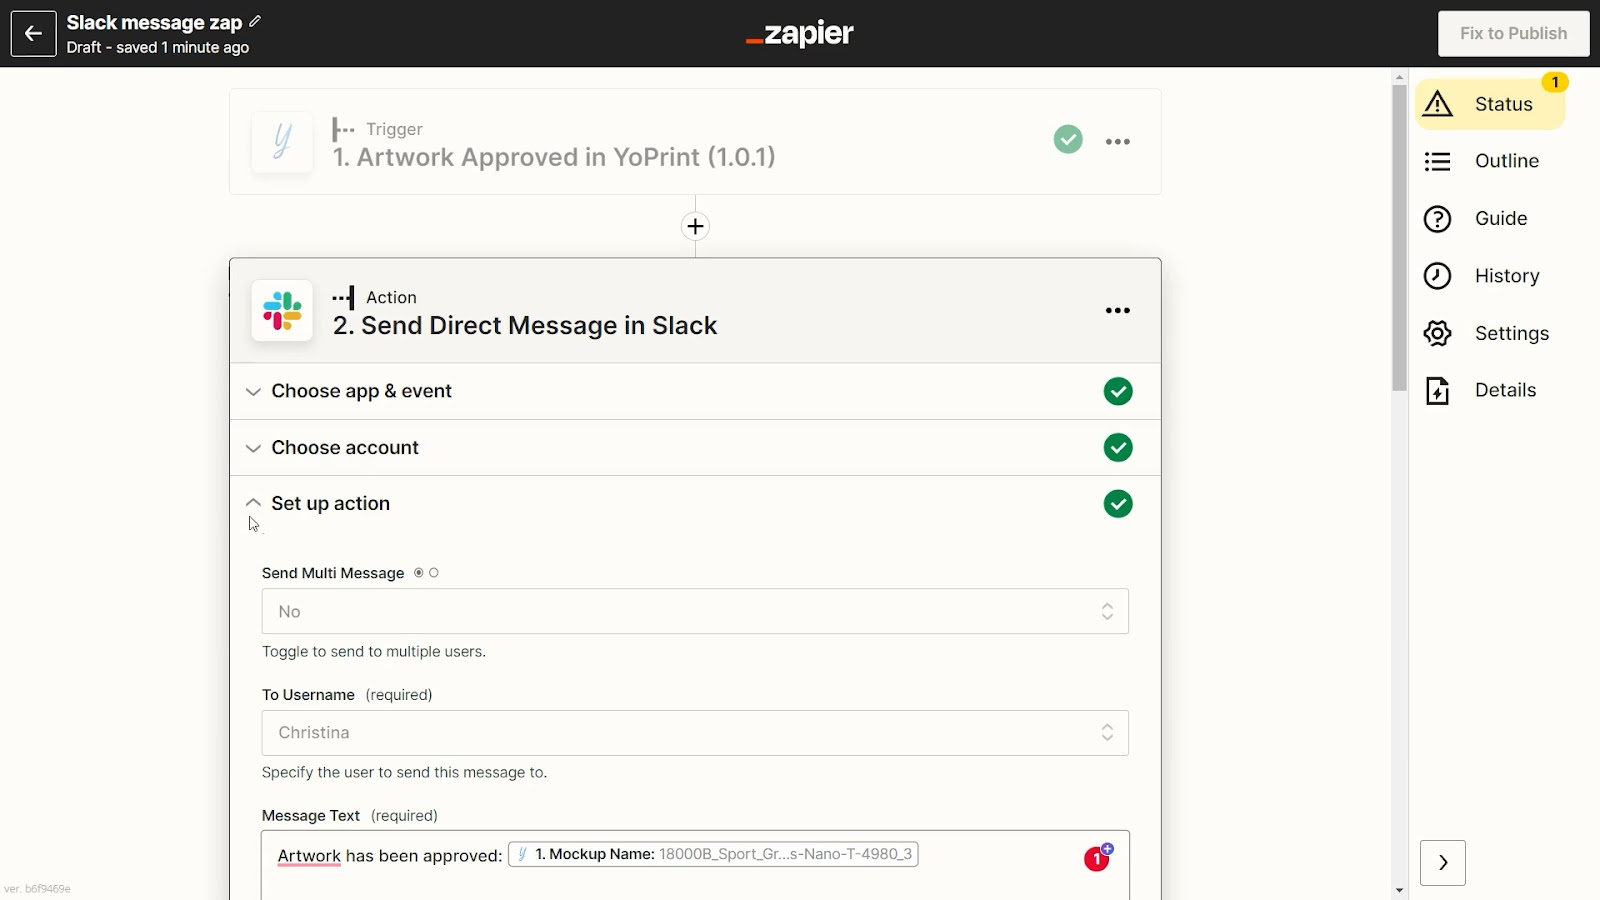
- Now it’s time to set up the action. Fill in all the details, and click on Continue once you’re done.
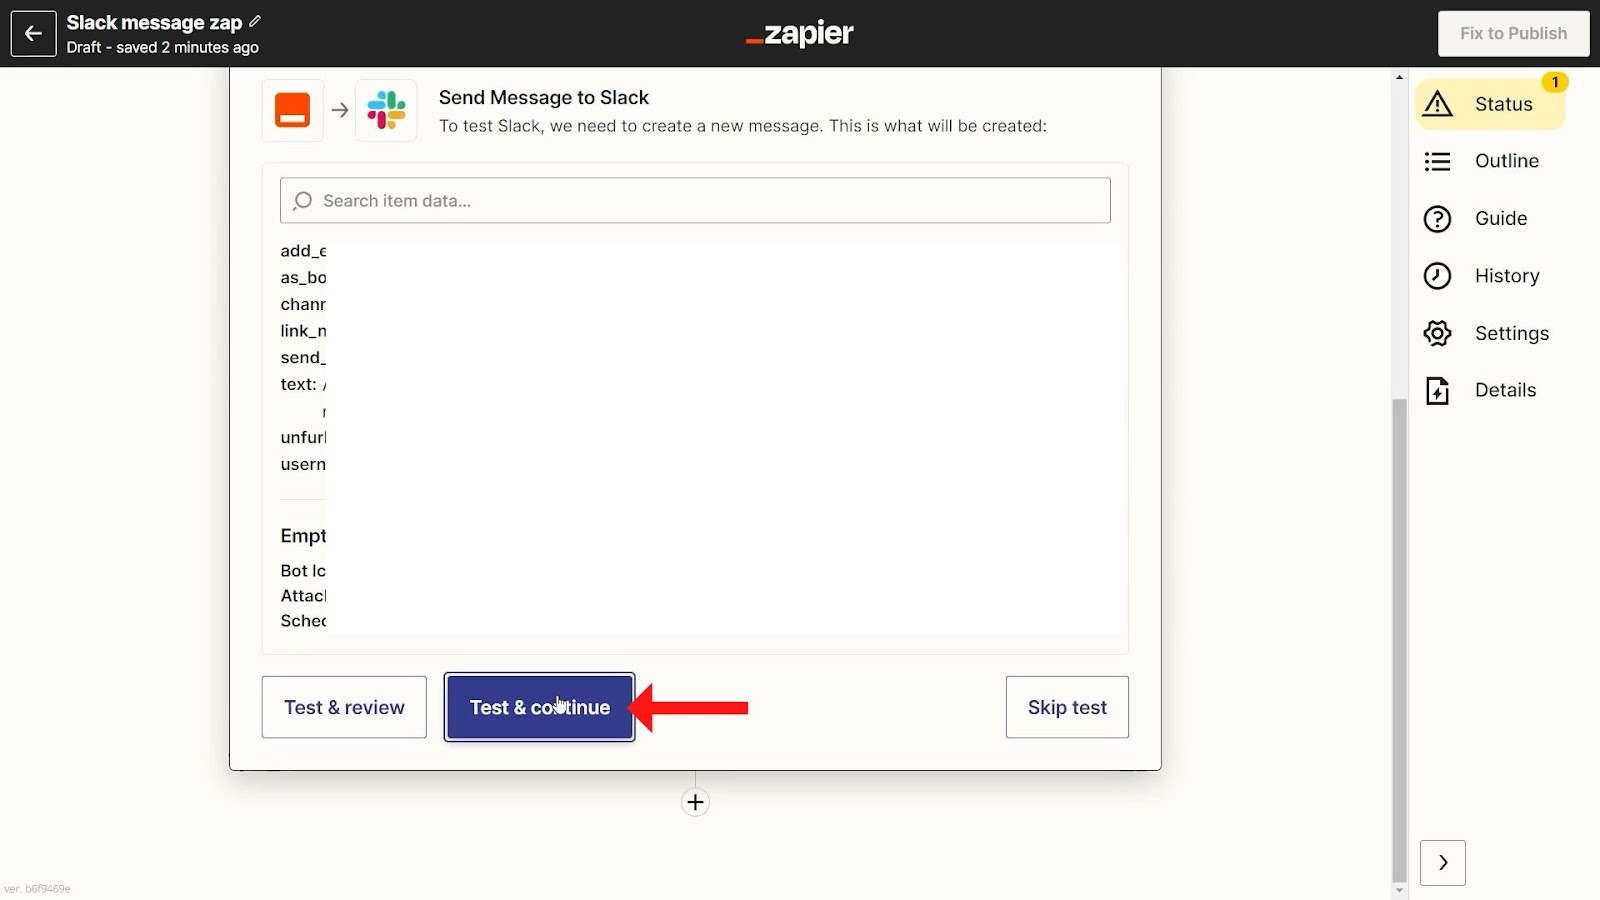
- Almost there! You’ll have the opportunity to test the Zap to make sure it’s working as intended. Let’s click on ‘Test and Continue.’
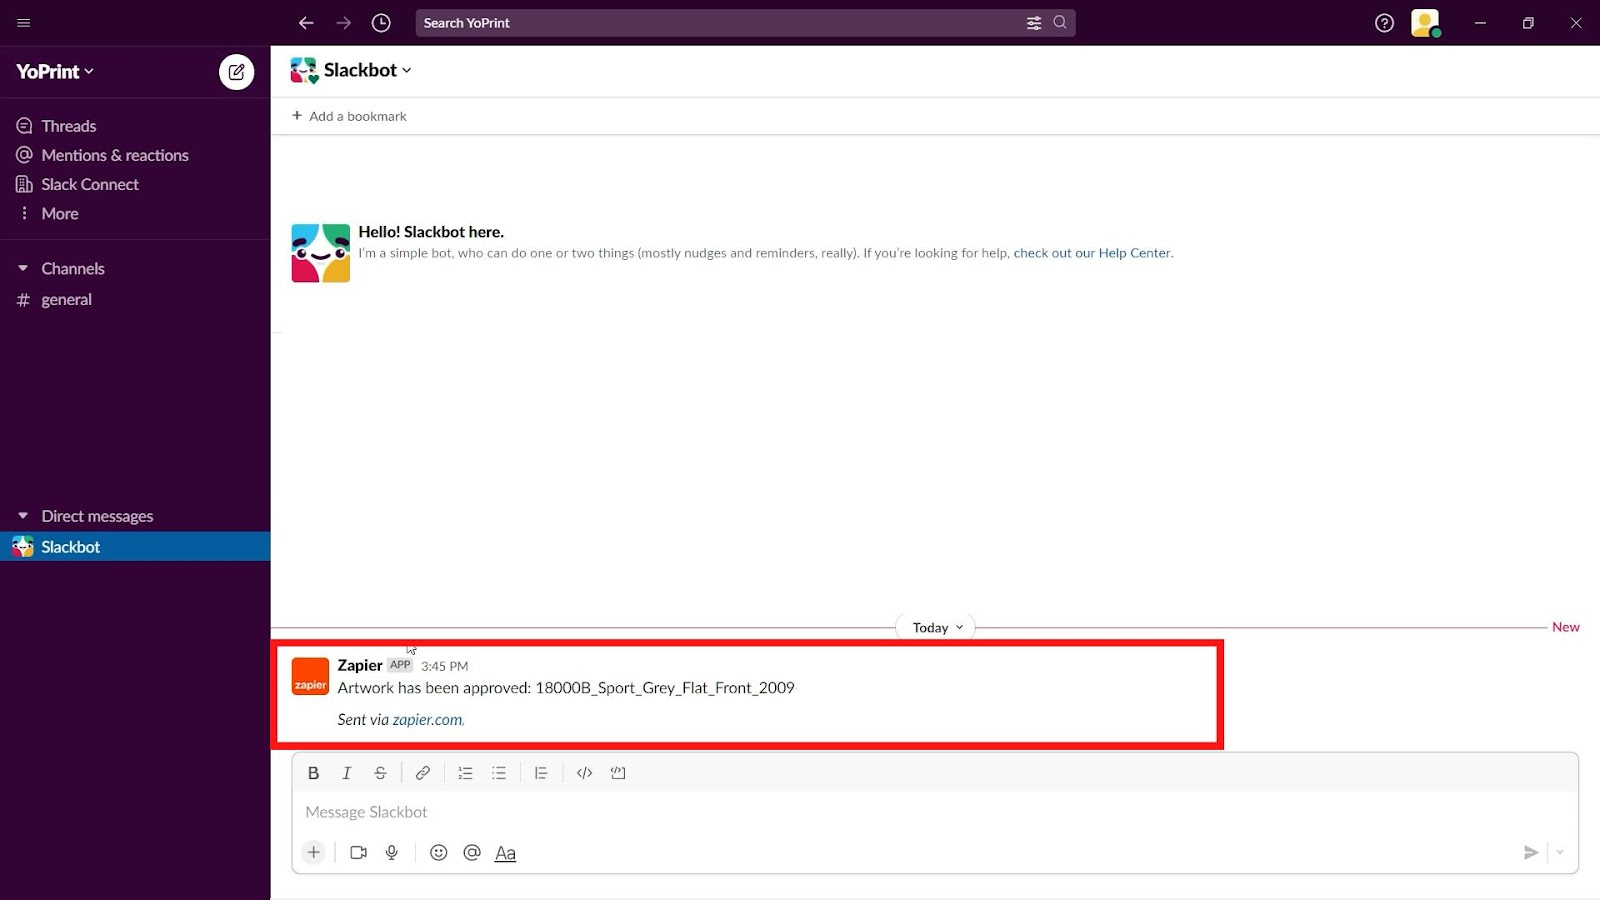
- Here’s the direct message received in Slack that was prompted by the test.
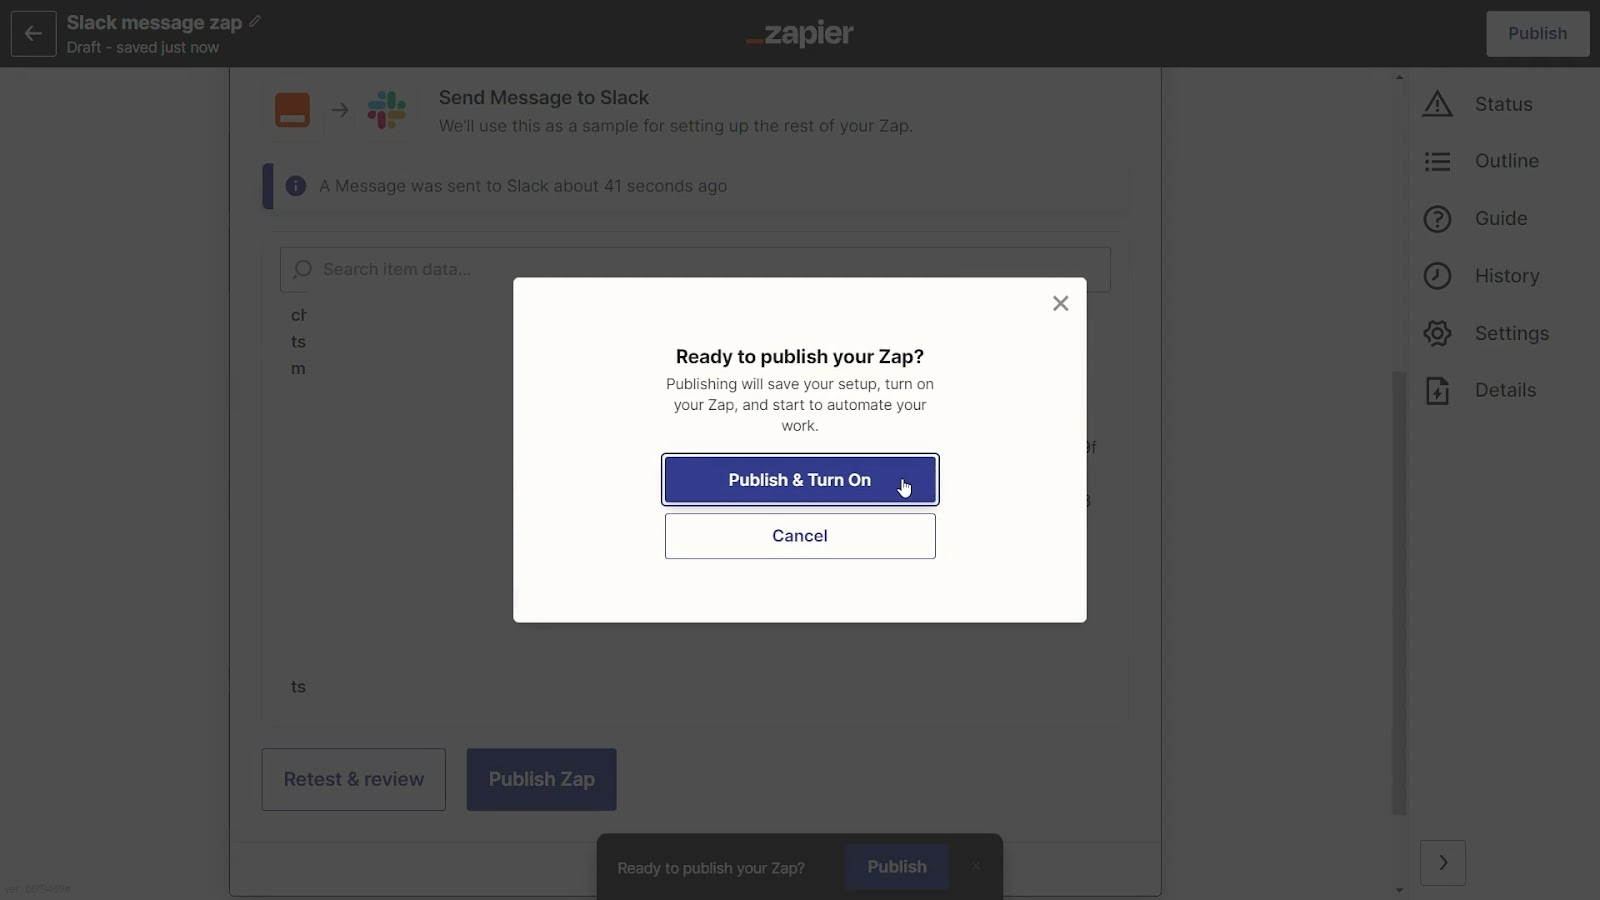
- Lastly, it’s time to publish the Zap. Hit the Publish & Turn On button, and your automation is live.

Connecting triggers in YoPrint to Slack is just one of many things you can do with Zapier. You’re able to connect YoPrint with thousands of apps, and build a smooth workflow across multiple platforms. You can check out all of Zapier’s integrations here.
Are there other Zapier triggers, actions, and searches you’d like to see? We’d love to hear from you. Email us your feedback at support@yoprint.com. With your help, we can make the best Zapier integration possible.