🎥 Managing Filters
In this article
Filters are a great way to streamline and organize your team production in the workflow. We have enabled our powerful filters in many places throughout the app, including Sales Orders and Purchase Orders, so that you can look at what matters when it matters. In this article, we will walk you through the process of managing filters on a Sales Order page.
Create and Test a Filter
- Click on + Filter on the sidebar of the Sales Order page.

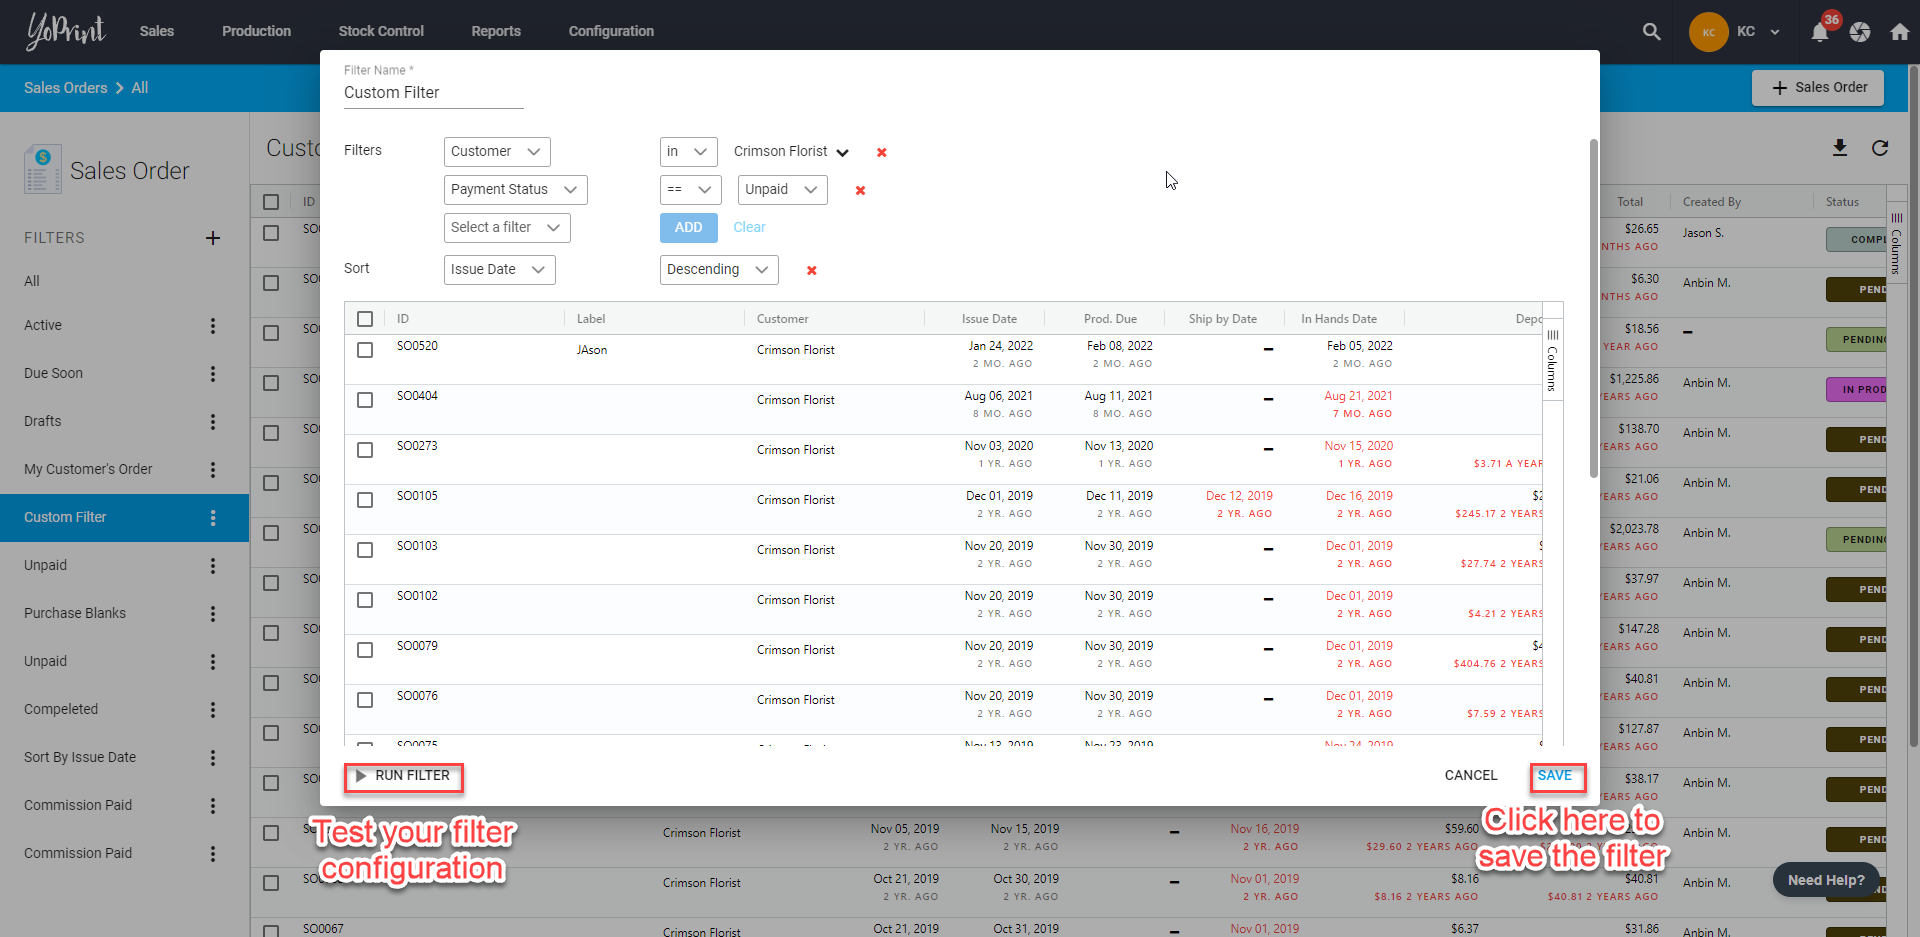
- Name your filter and select the criteria for this filter. In this case, let's create a filter to see all unpaid Sales Orders by a customer arranged in descending order by issue date to view. This is how you would set the criteria:

Tip: You can set your filter to be as specific as you like by including more filter criteria.
- Once you're done, you can click on Run Filter to see whether the filter is configured properly.
- Click on Save when you are satisfied with it.
Create a Rush Filter
To create a Rush filter in a Sales Order:
- Click on + Filter
- Name the filter, and set the Filter criteria to Is Rush == True.
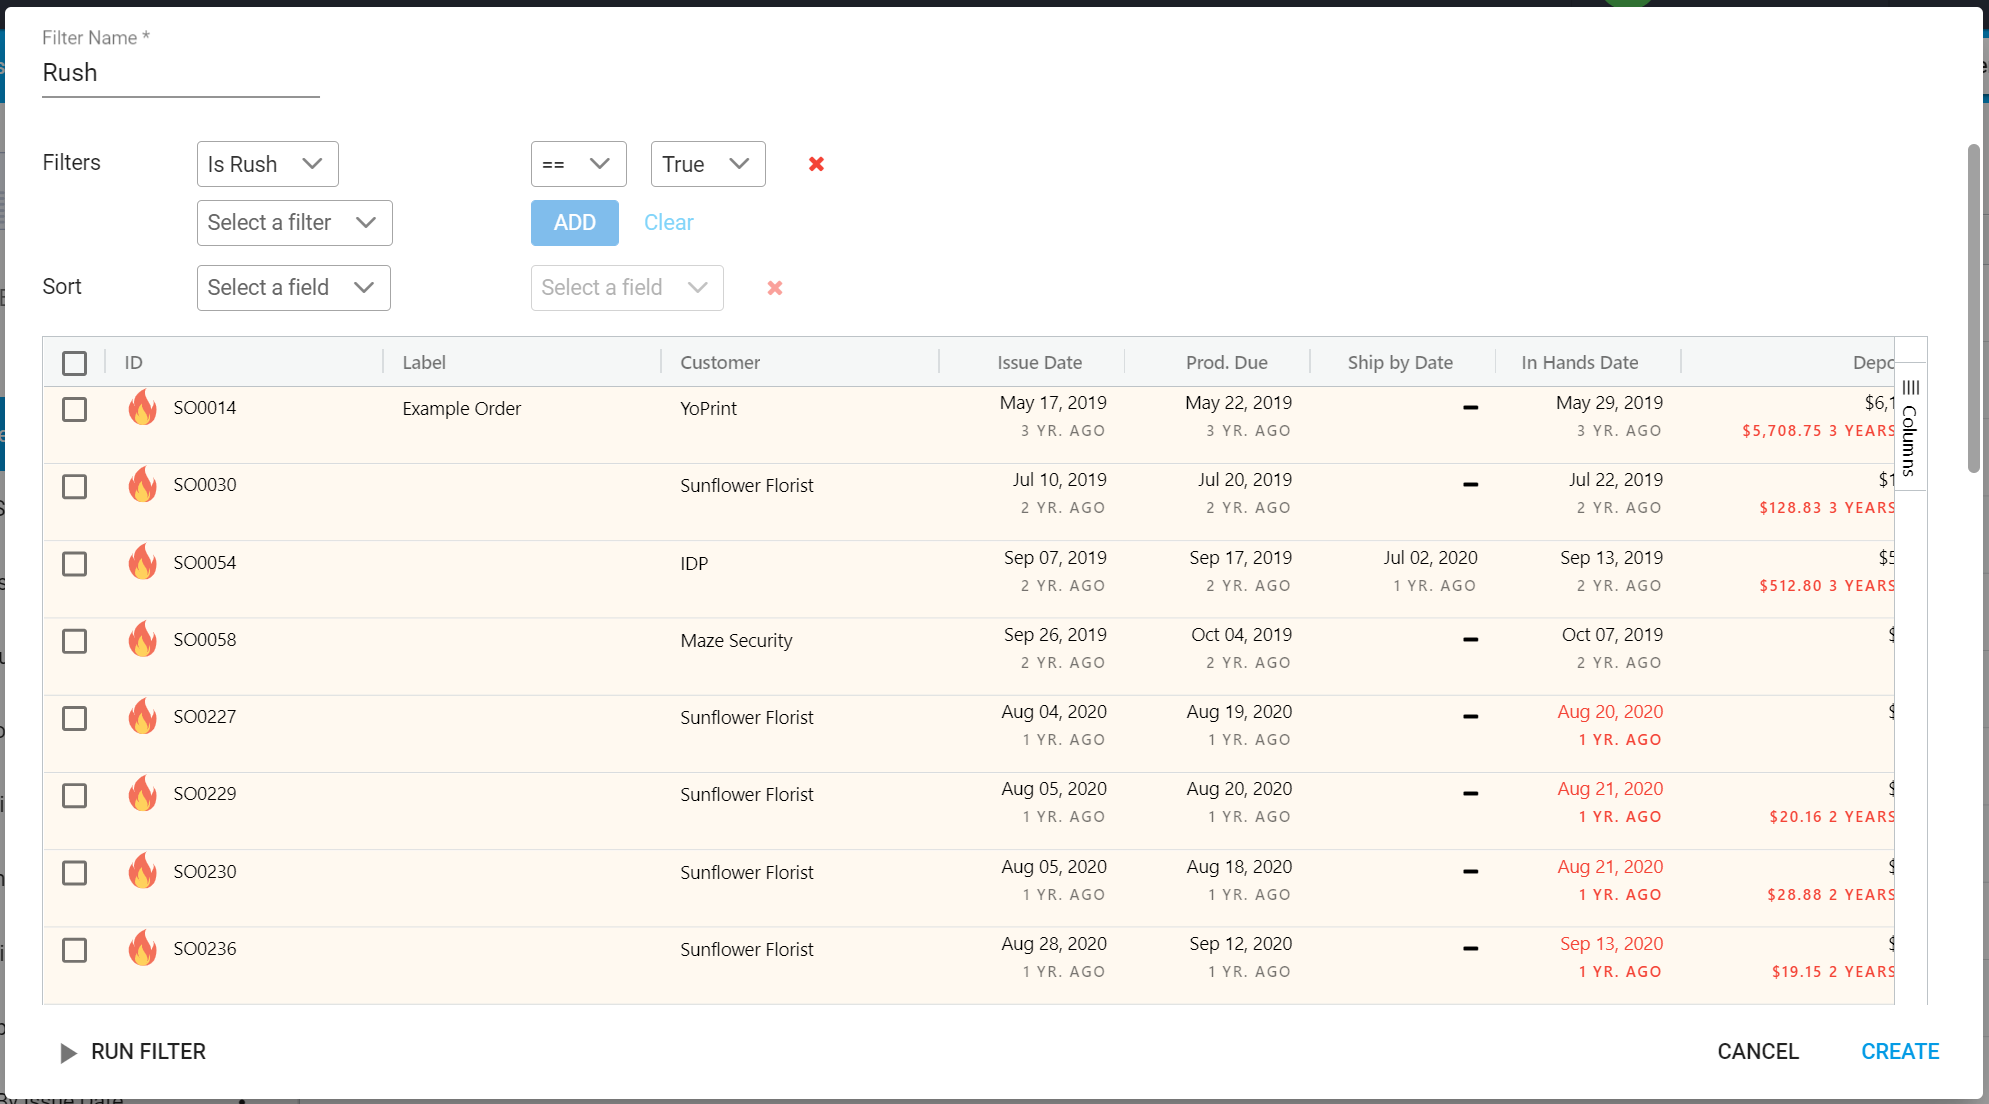
- Click on Create to create the filter.
Edit or Remove a Filter
You can just as easily edit or remove a filter. Just click ⋮ and choose Edit or the pencil icon. If you want to remove a filter, choose Remove. This will permanently remove the filter but you can always add the filter again if you removed it by mistake.
