Import and Update Products Using a CSV Template
In this article
Use a CSV file to add your shop’s products in bulk. A CSV is a spreadsheet saved as plain text, with one column for each product detail. If you sell items from suppliers like SanMar or AlphaBroder, search YoPrint’s supplier catalogs instead of importing a CSV.
Choose a product type
A simple product has no size or color options, such as a ceramic mug. A variant product has sizes, colors, or both, such as a T-shirt in Small and Medium.
Use a separate CSV file for each product type. Download the template for your product type so the column headers match YoPrint. Keep your working spreadsheet as a backup, and save the import file as a UTF-8 CSV so names such as Café keep their accents.
Add simple products
Open Products.
-
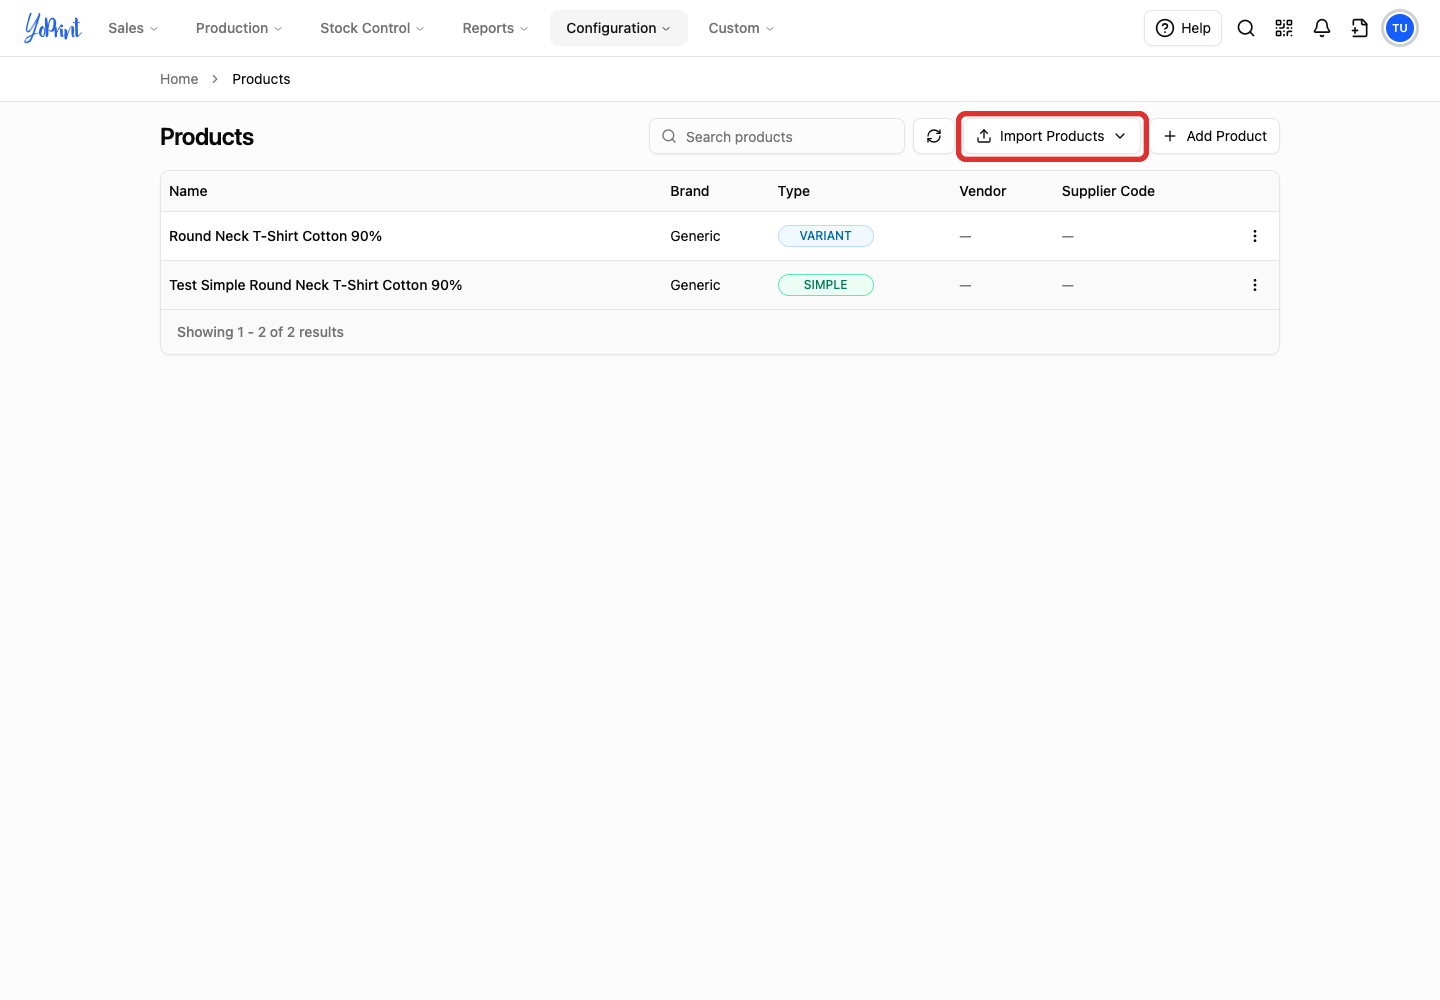
Click Import Products.
-
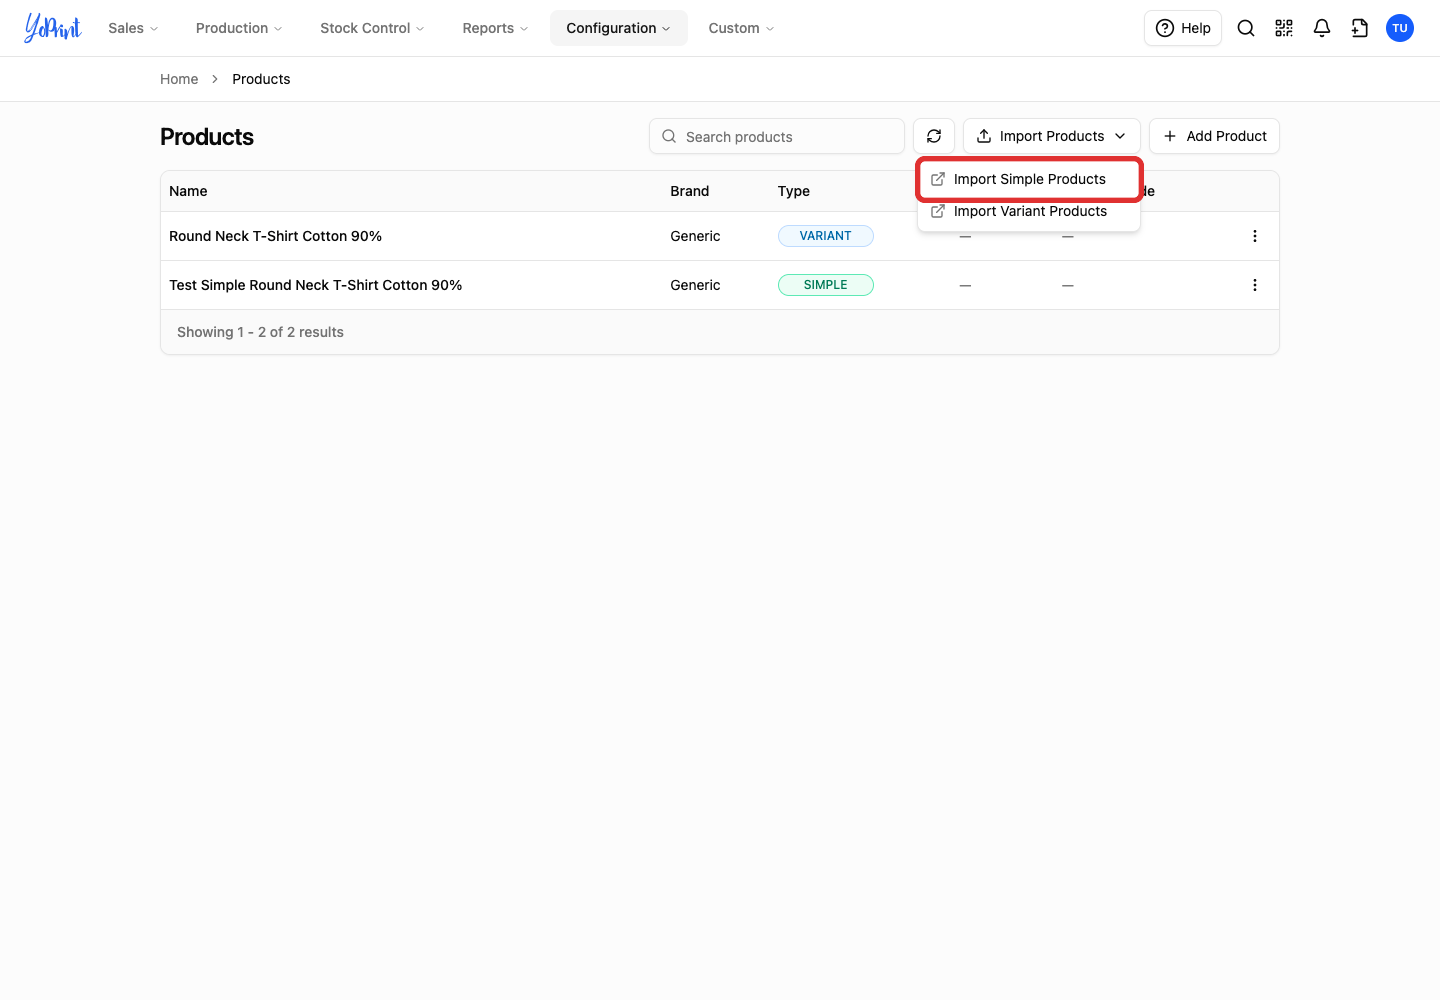
Choose Import Simple Products. The Import Portal opens in a new tab.
-
Click Download template.
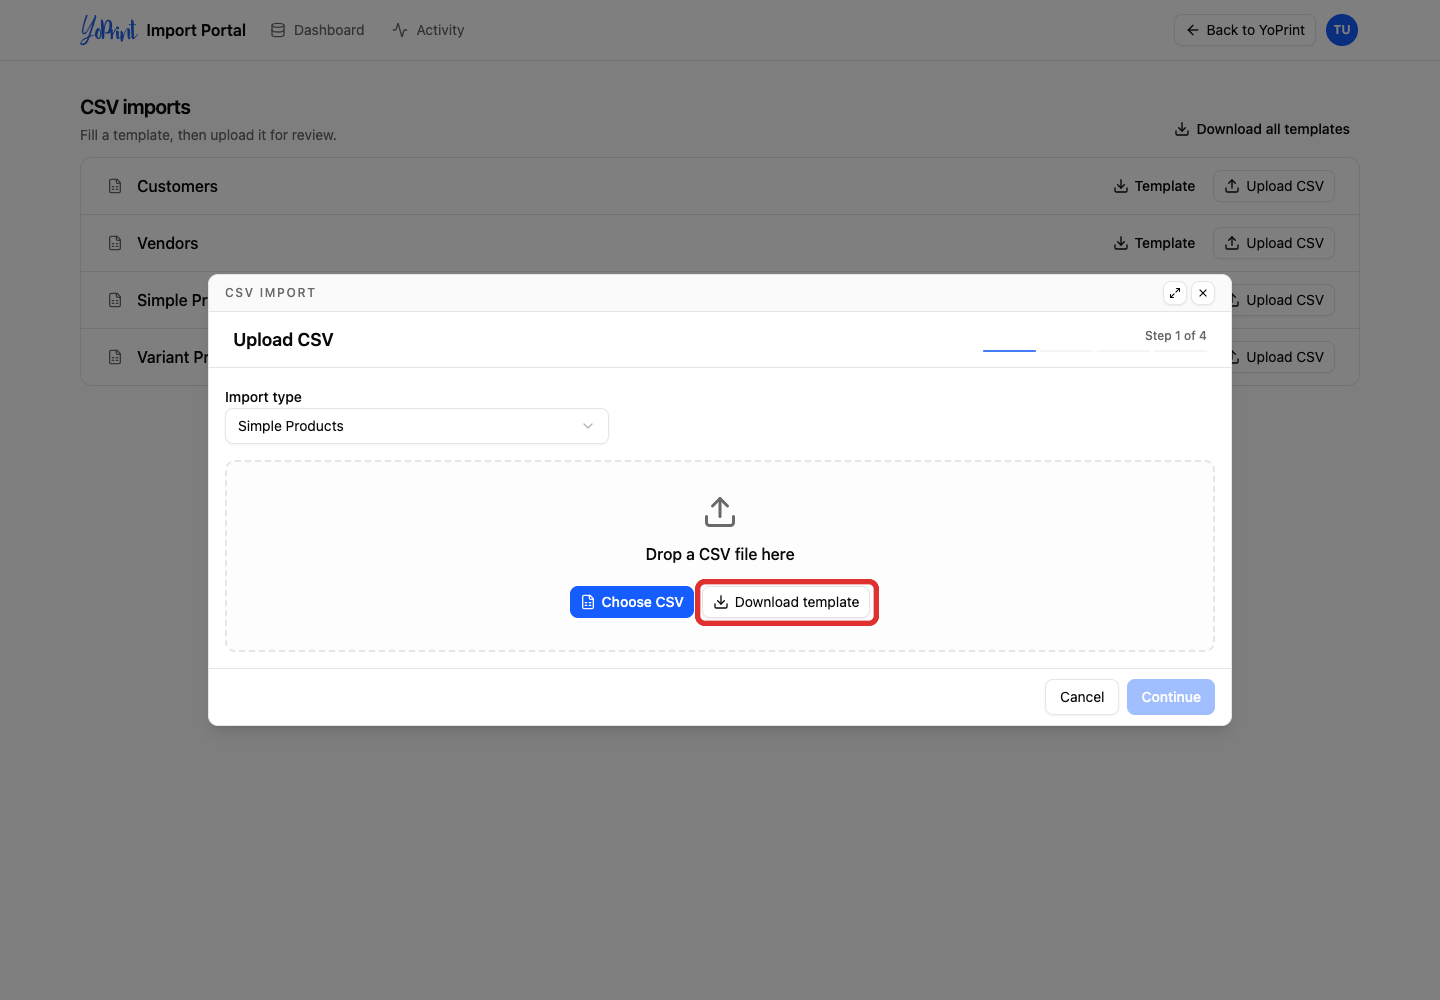
Replace the example rows with your products. Each row creates or updates one simple product.
| Column | What to enter |
|---|---|
brand |
The product’s brand or manufacturer, such as Maple Thread. |
title |
The product name, such as Café ceramic mug. A title is required. |
description |
A description of the product, such as White 11 oz ceramic mug. |
supplier_code |
The supplier’s reference for this product, such as MT-MUG-11. Keep it consistent when importing the same product again. |
weight |
The weight as a number in pounds (or your shop's weight unit), such as 0.8. Do not include a suffix such as lbs. |
price |
The product’s base price, such as 12.50. A price is required for a new product. Enter a number without a currency symbol. |
The template covers core product details. Set other fields, such as vendor, directly in YoPrint after the import.
Save the filled file as UTF-8 CSV. The example below has two products: a ceramic mug at 12.50 and a canvas tote at 8.00.
-
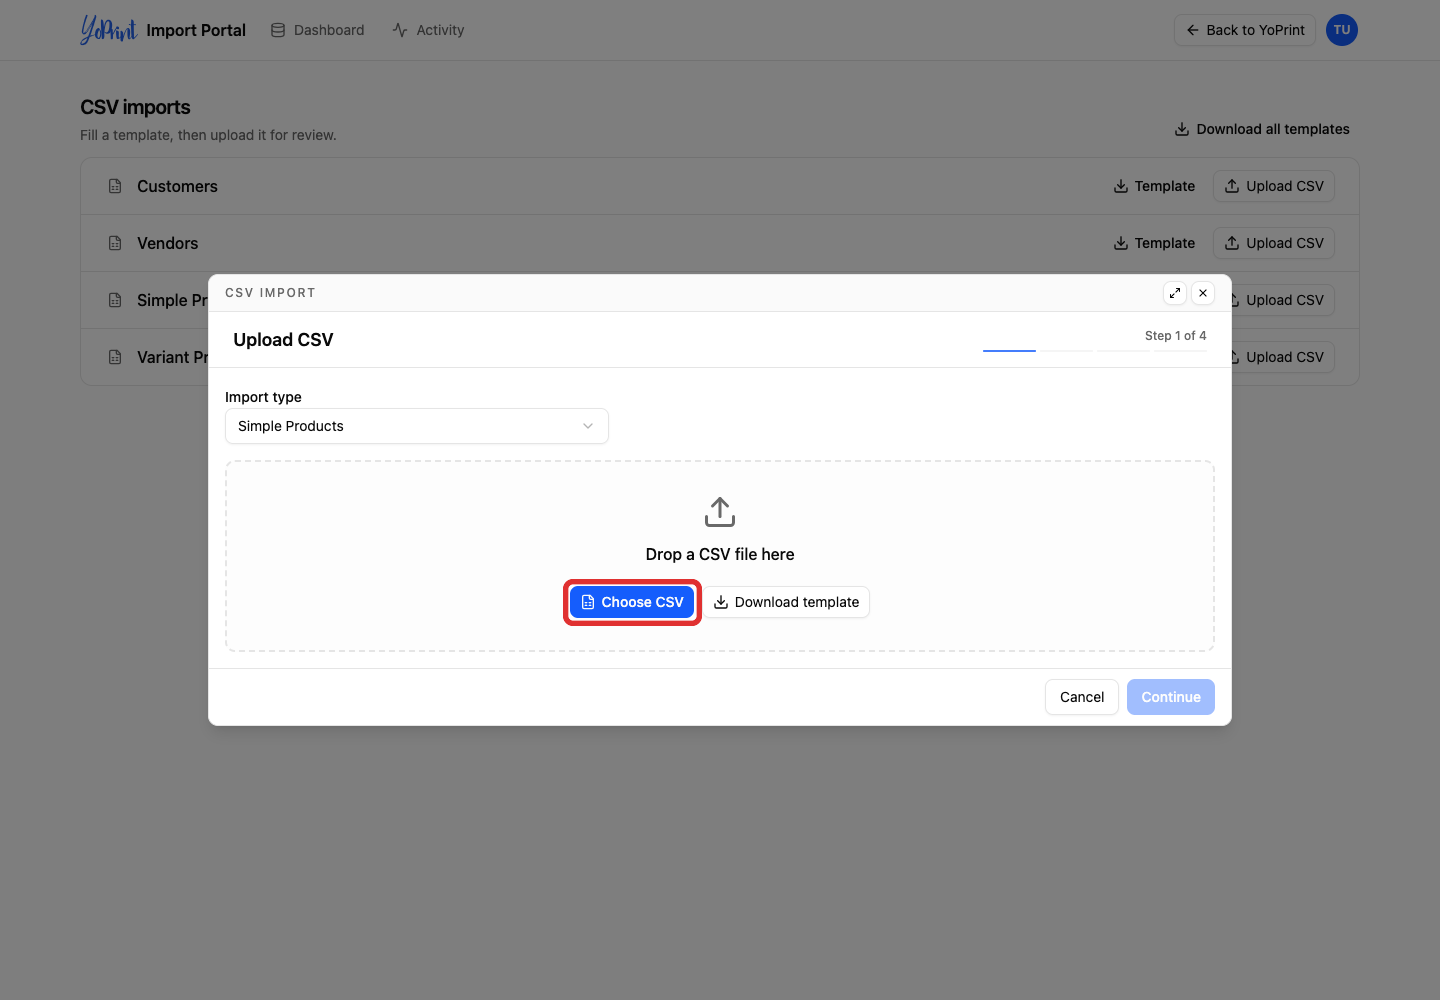
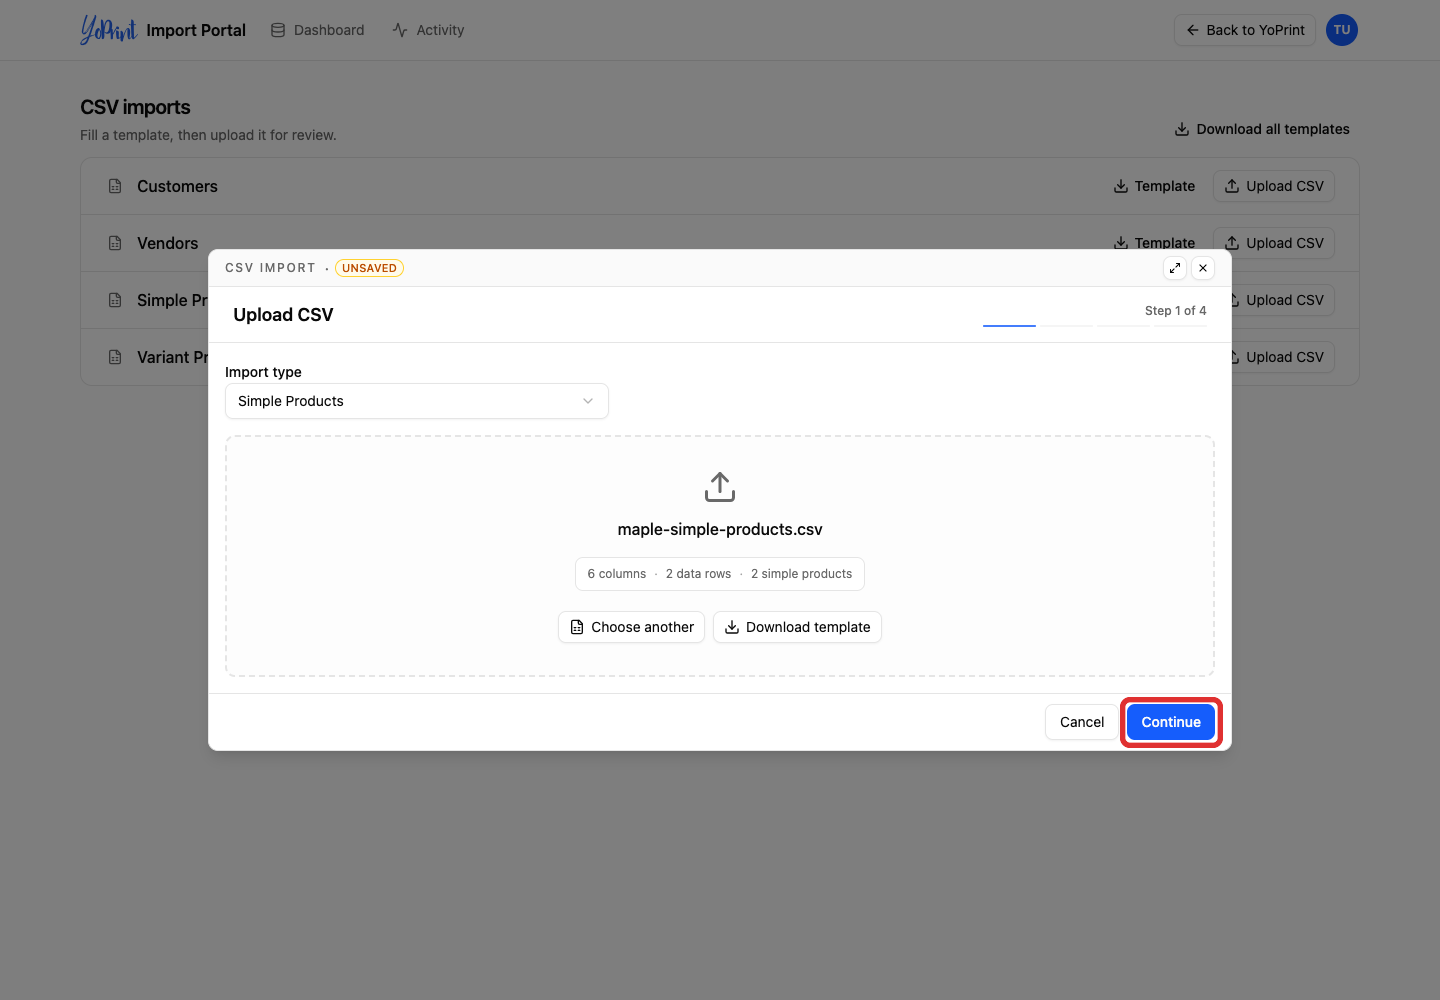
Click Choose CSV and select your saved file.
-
Click Continue.
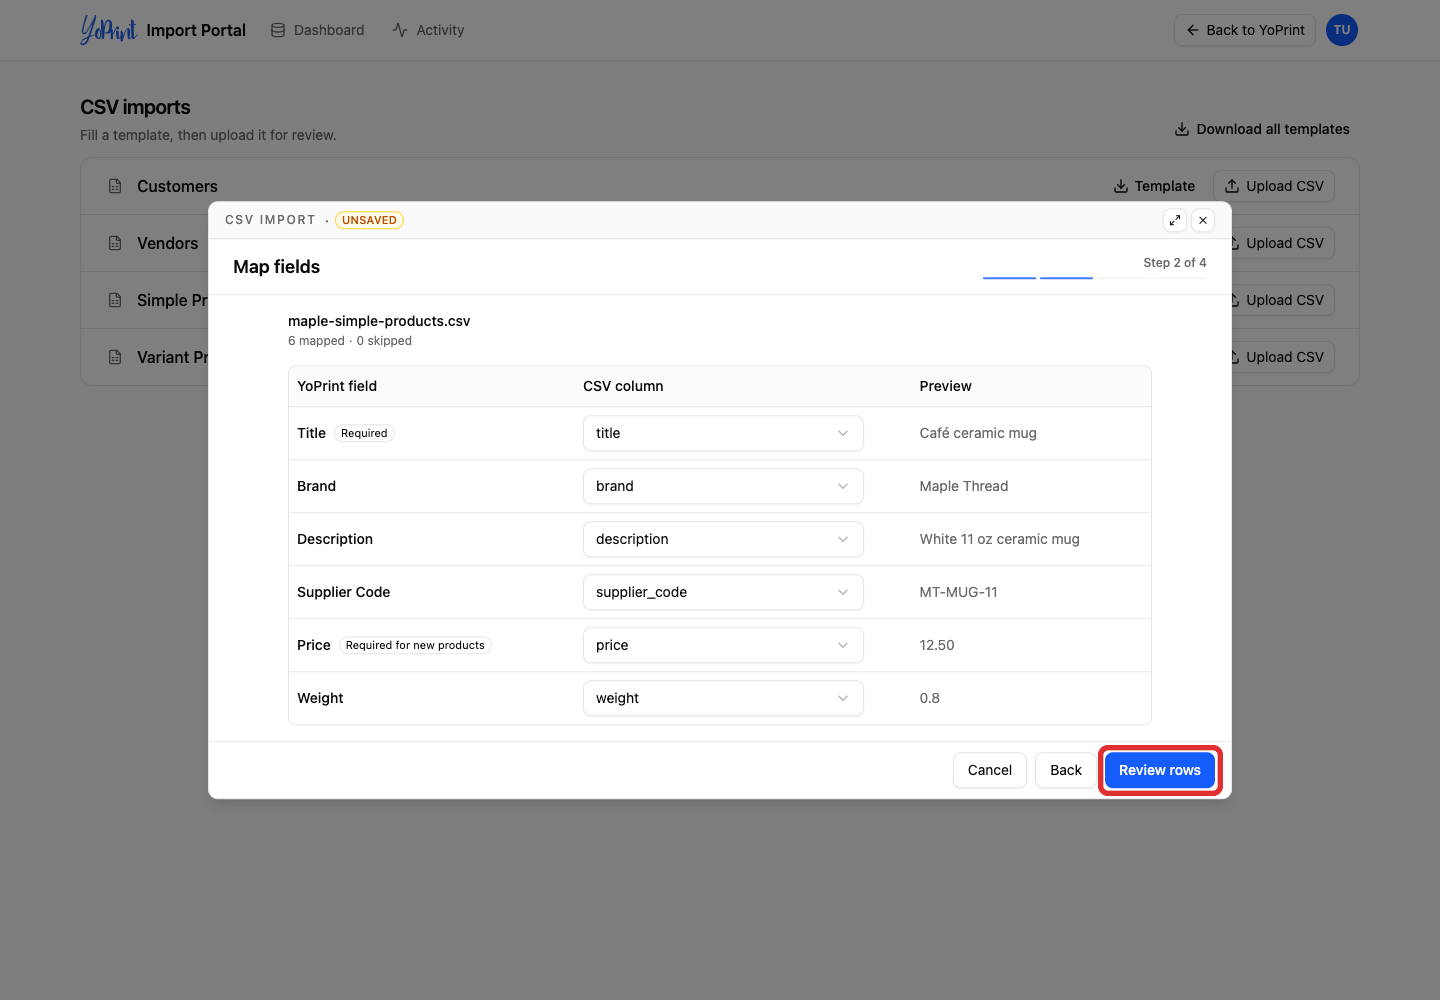
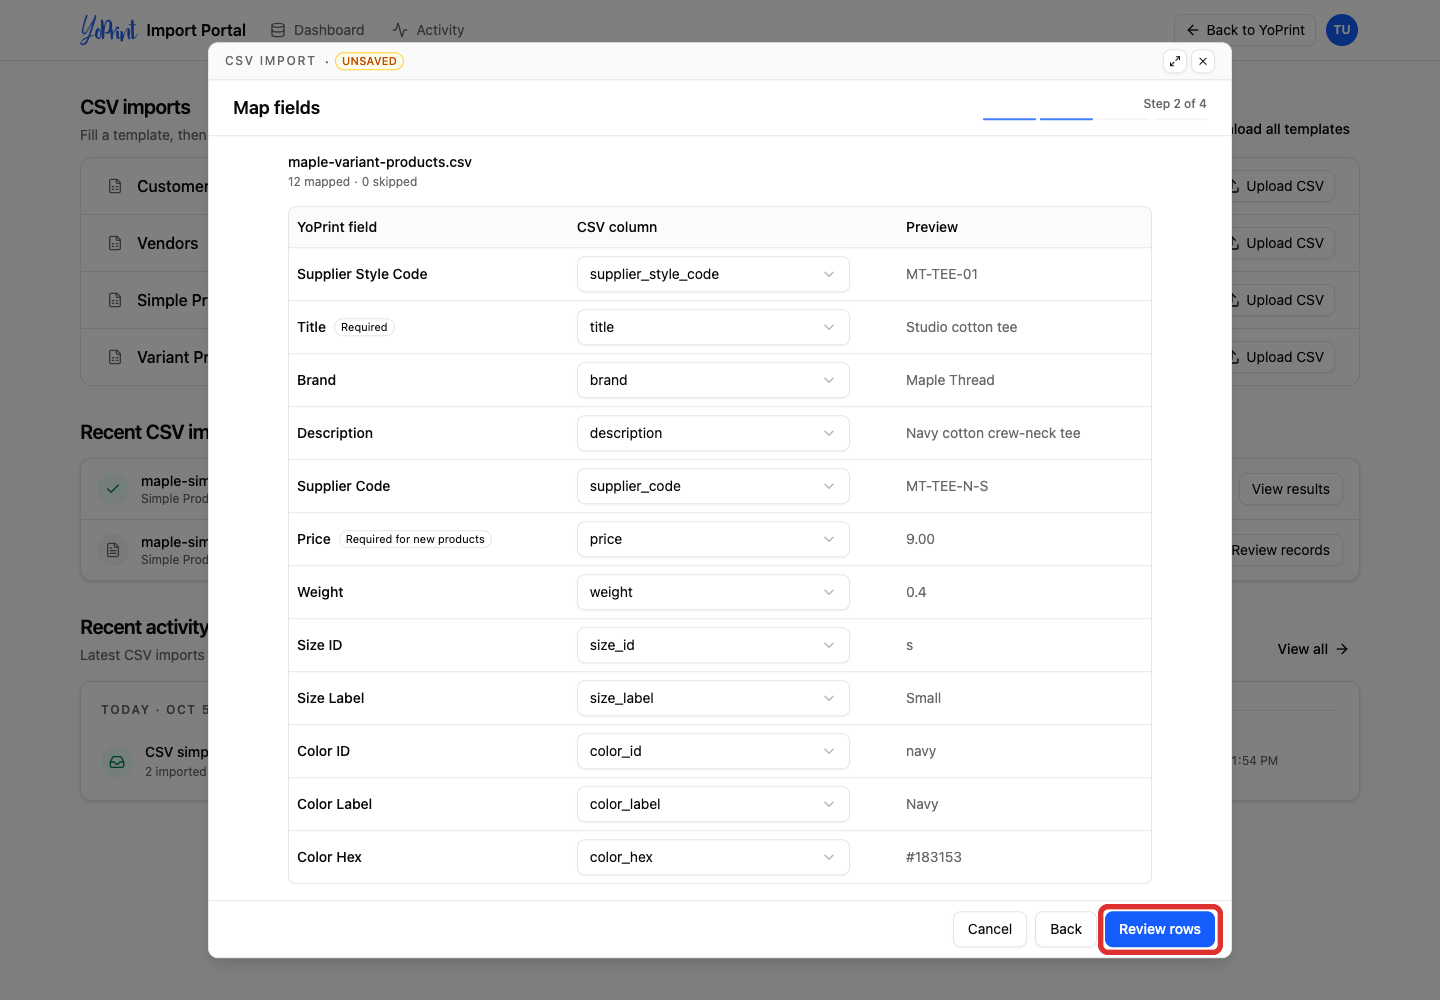
Map fields connects each CSV column to a YoPrint field. The Preview column shows a sample value from your file so you can check your mapping. YoPrint matches the template columns automatically. If a column does not match, click its dropdown to select the matching header from your file, or choose Skipped to leave that field unmapped. If a required column cannot be mapped, see Troubleshoot CSV Import Errors.
-
Click Review rows.
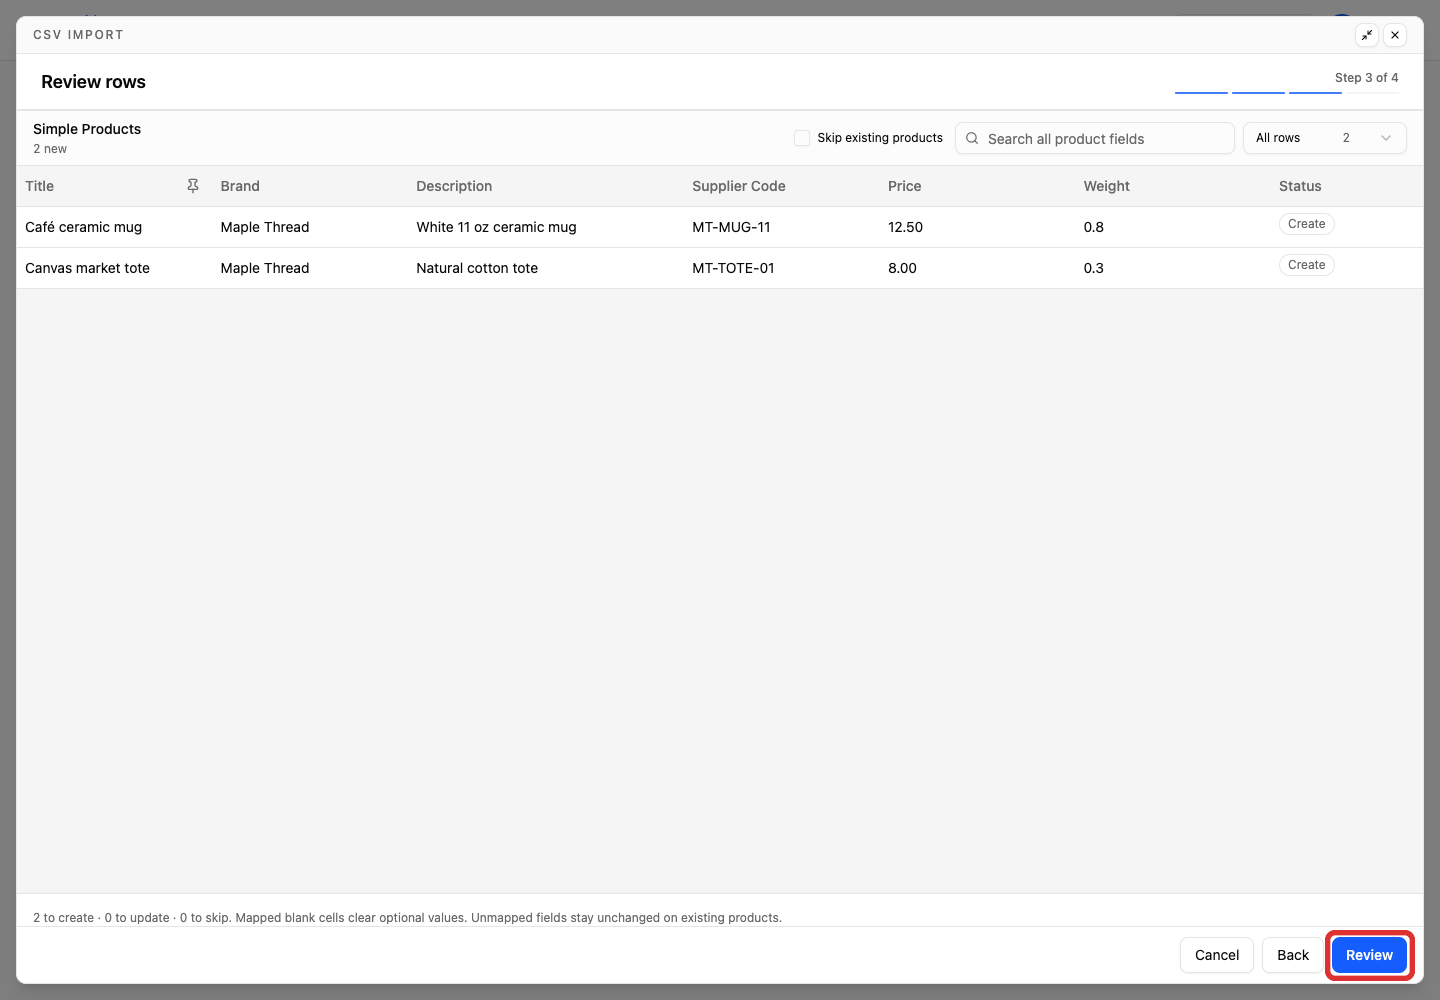
The review shows which products will be created, updated, or skipped. For a new product, the status is Create. Check the names, codes, and prices before continuing.
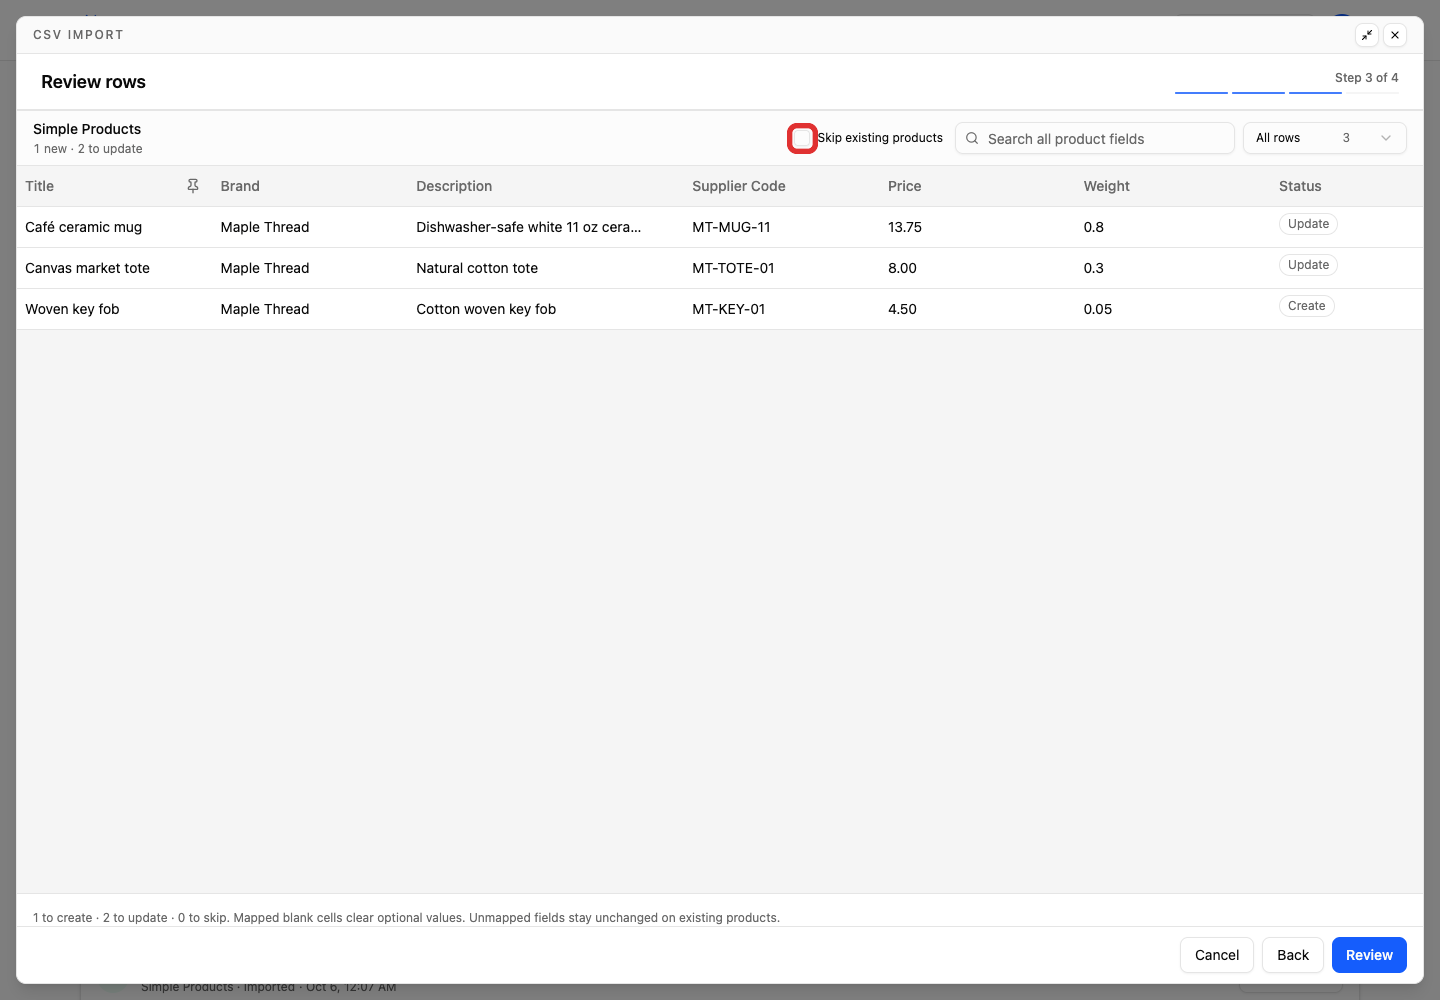
To add only new products and leave existing products unchanged, check Skip existing products at the top of the review table.
-
Click Review.
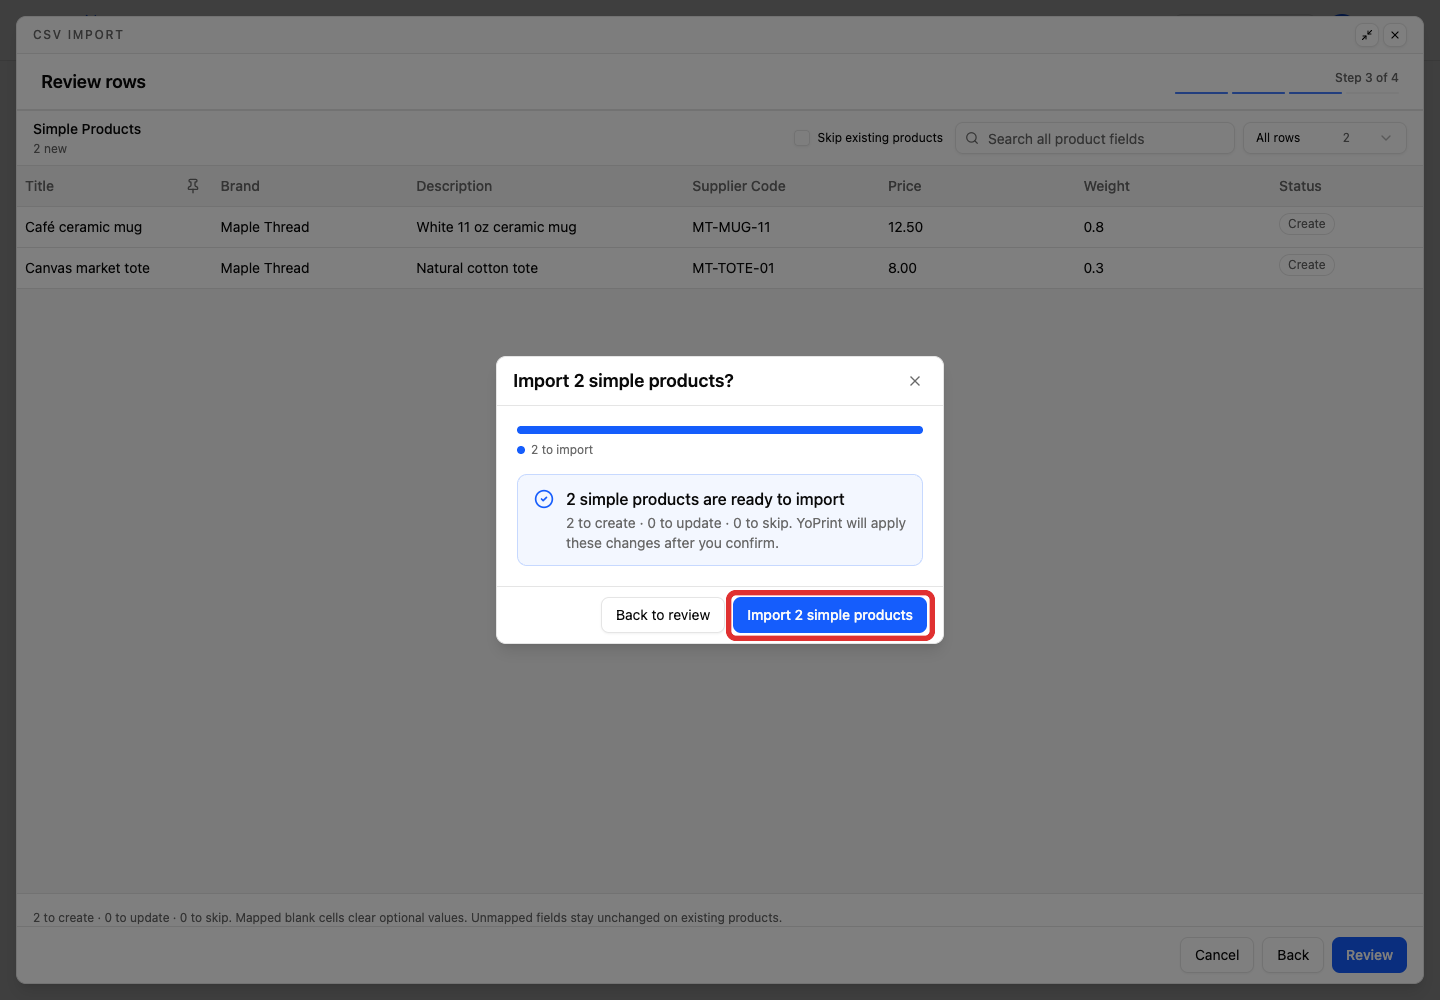
-
Click Import 2 simple products. The number on the button is the number of products ready after review.
Import complete shows the total imported count and how many products were created, updated, or skipped. This file created two products. Click Done to close the dialog. To return to YoPrint, switch back to your Products browser tab or click Back to YoPrint at the top right of the portal. In YoPrint, click Refresh above the products list to display your newly imported products.

Add variant products
Open Products.
-
Click Import Products.
-
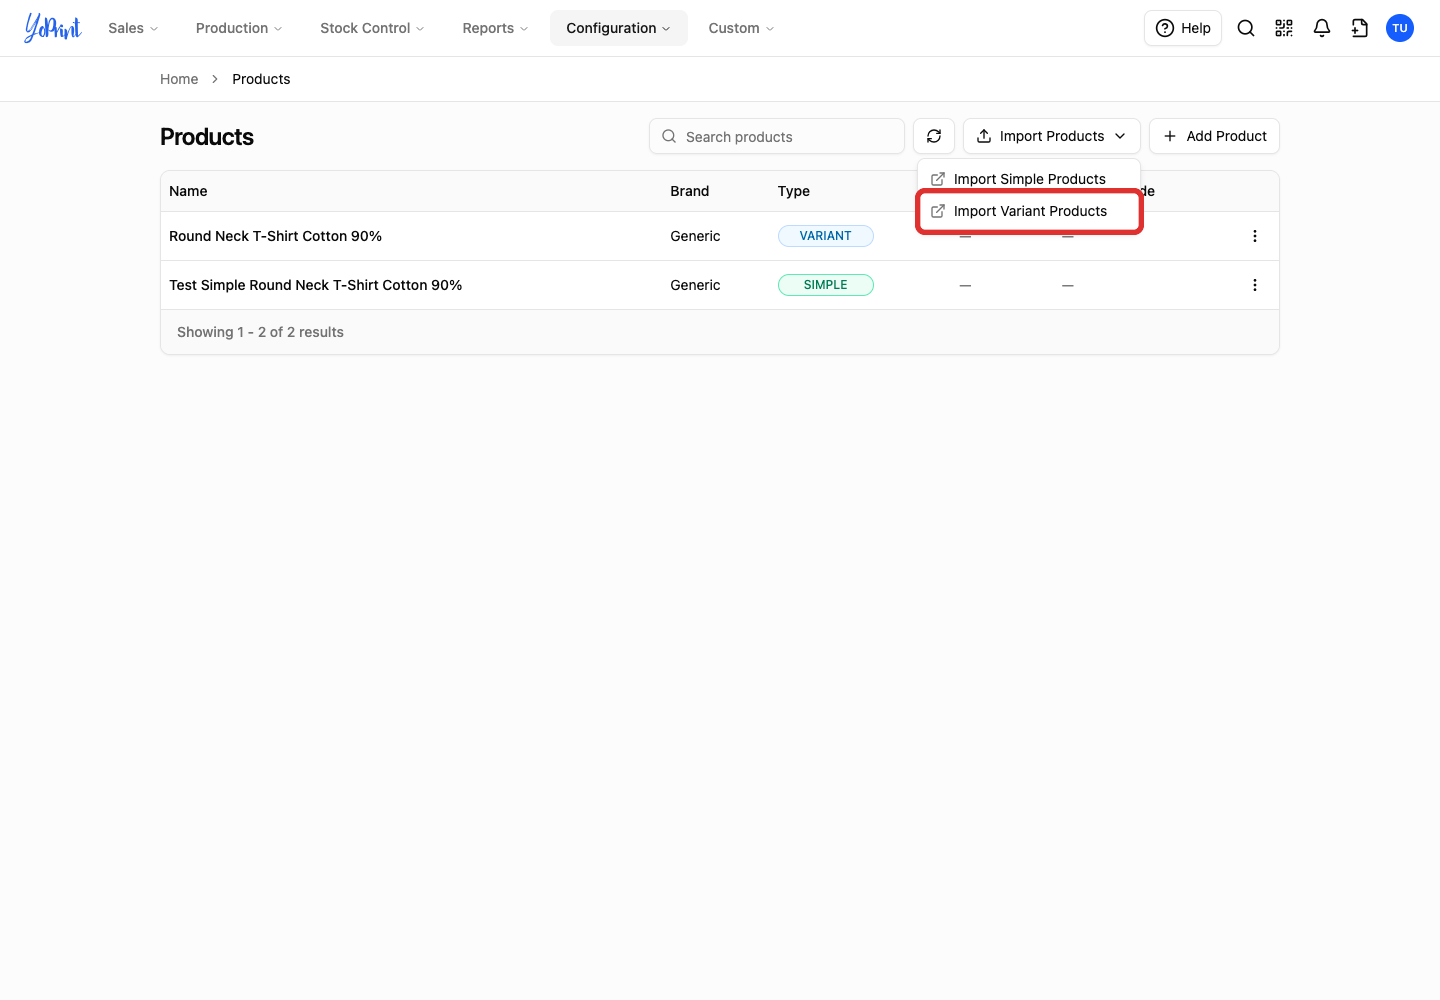
Choose Import Variant Products.
-
Click Download template.
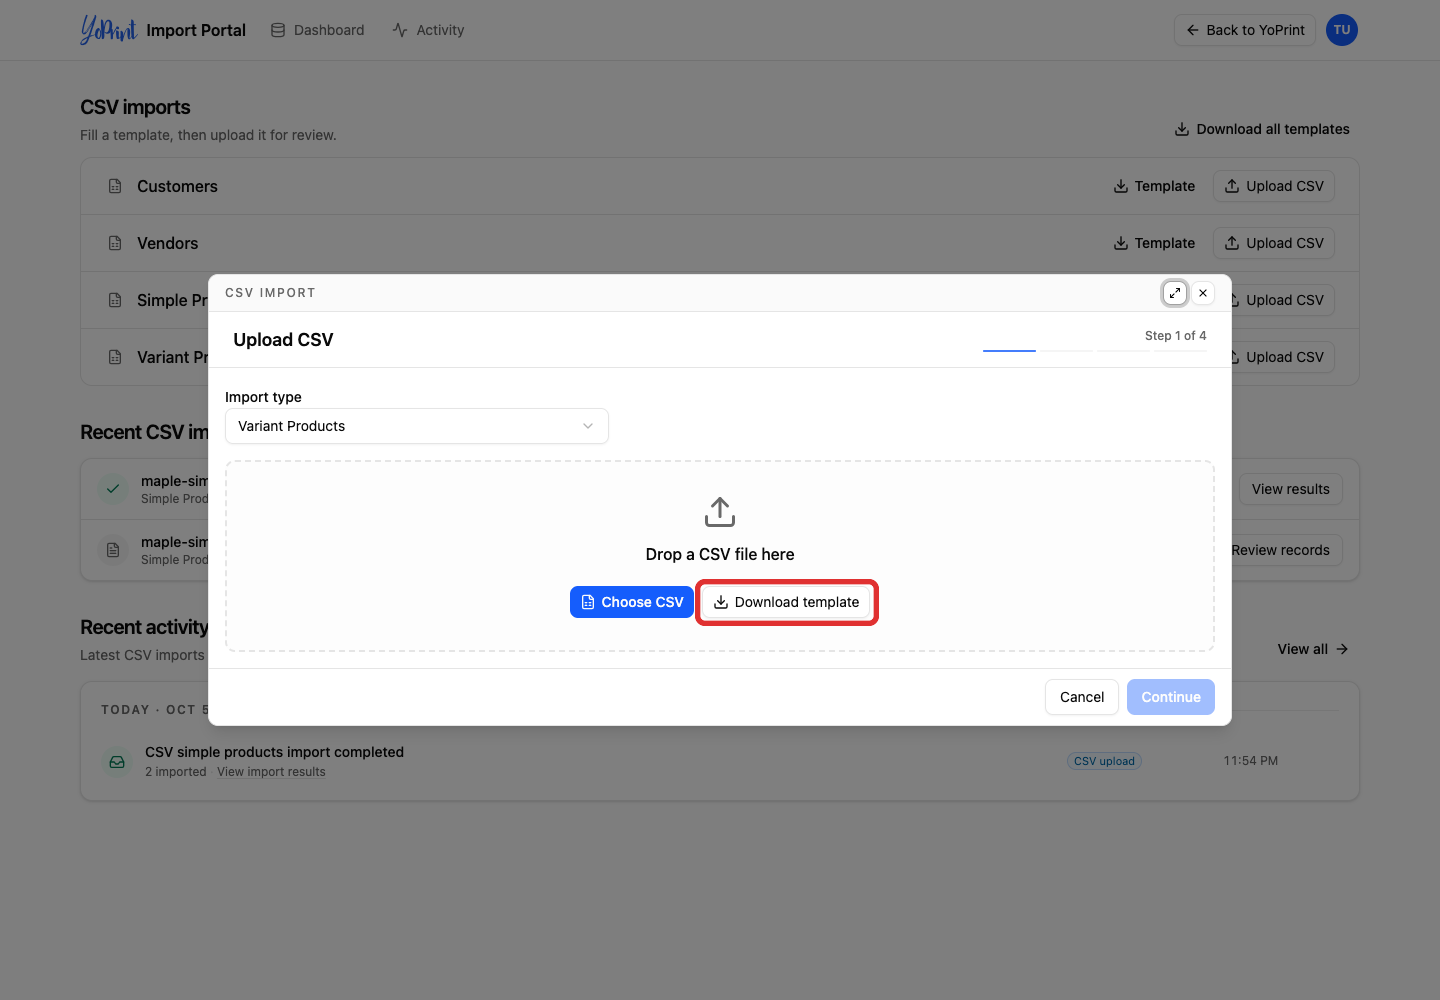
Use one row for each size and color combination. Keep the same brand , title and supplier_style_code on the rows that belong to one product. In this example, two rows create one Studio cotton tee with Small and Medium sizes in Navy.
The variant template includes the simple-product columns explained above, plus these details:
| Column | What to enter |
|---|---|
supplier_style_code |
The supplier’s reference for the whole product, such as MT-TEE-01. It groups the variants with the same brand and title. |
supplier_code |
The reference for an individual variant, such as MT-TEE-N-S for Navy, Small. |
size_id |
A consistent internal size code, such as s. |
size_label |
The size name customers see on quotes and orders, such as Small. |
color_id |
A consistent internal color code, such as navy. |
color_label |
The color name customers see on quotes and orders, such as Navy. |
color_hex |
Optional. A color value beginning with #, such as #183153. For yellow, use #ffff00. If you do not have hex codes, leave this column blank. |
Fill both the ID and label for each size or color you use. A variant product needs a size, a color, or both. If your product varies only by size, leave the color columns blank. If it varies only by color, leave the size columns blank. Enter each variant’s price and weight as numbers, without currency symbols or weight suffixes.
Save the filled template as UTF-8 CSV.
-
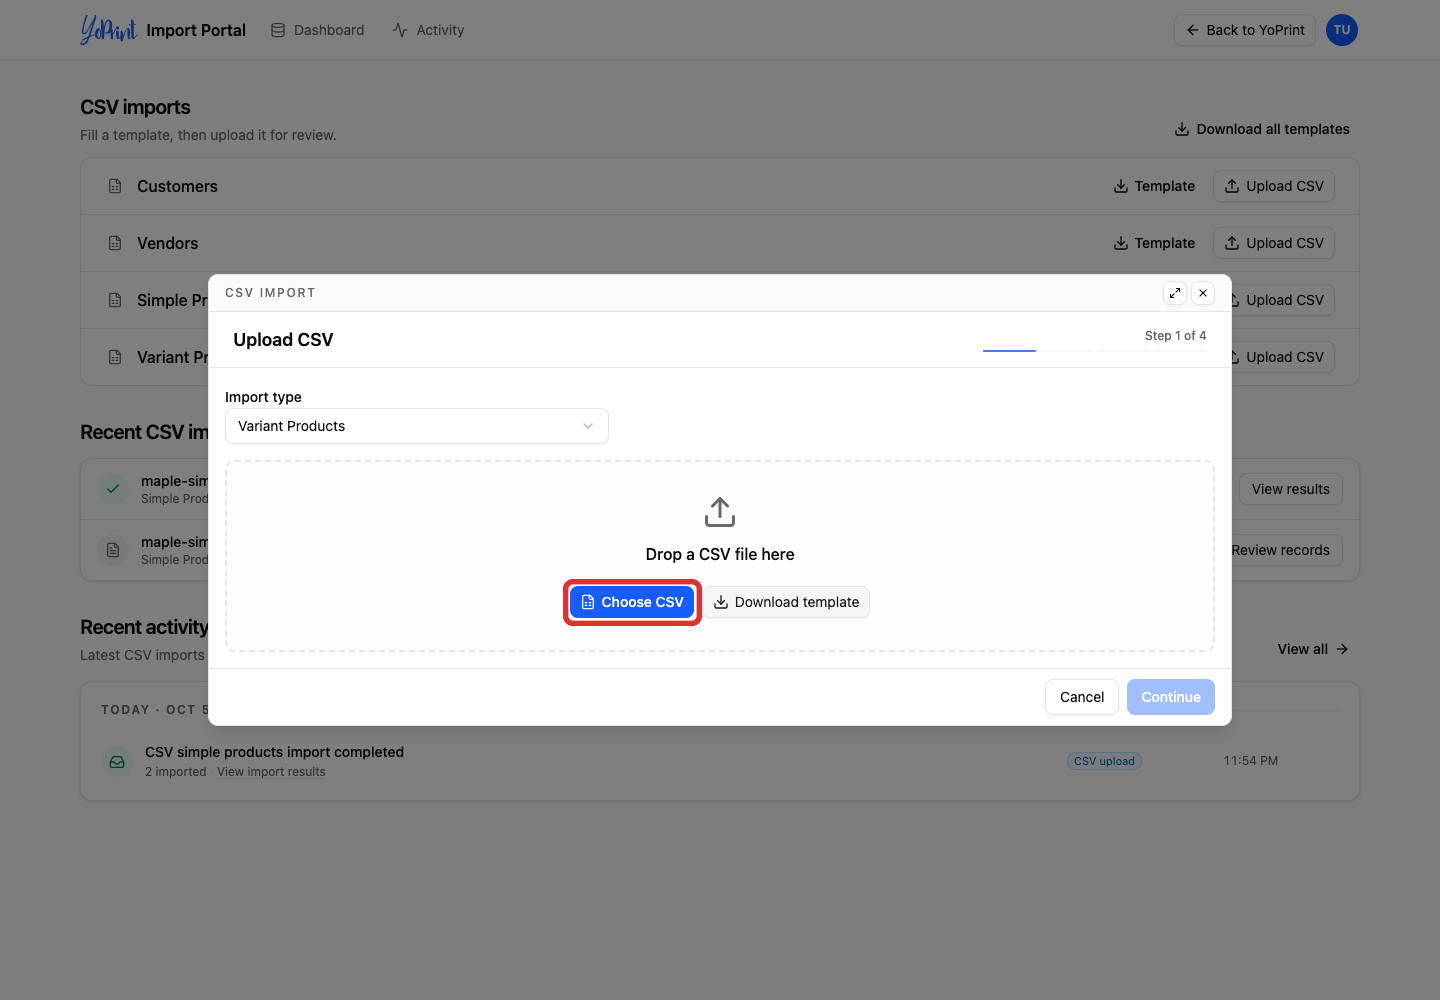
Click Choose CSV and select your variant file.
-
Click Continue.
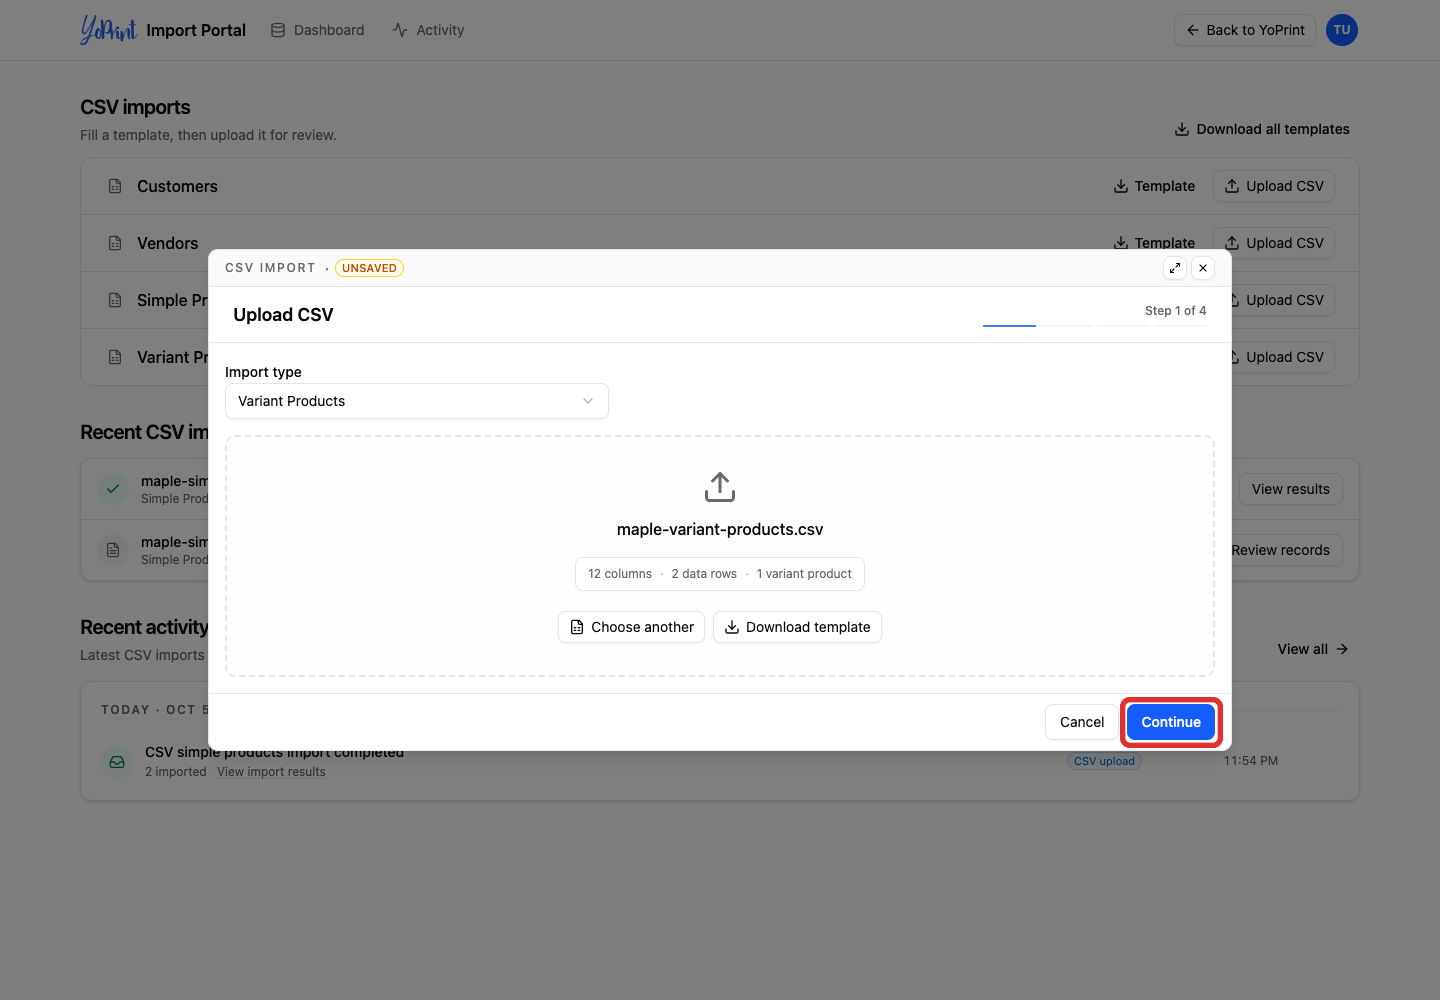
Check the mapped columns and their preview values. In particular, distinguish the whole product’s Supplier Style Code from each variant’s Supplier Code.
-
Click Review rows.
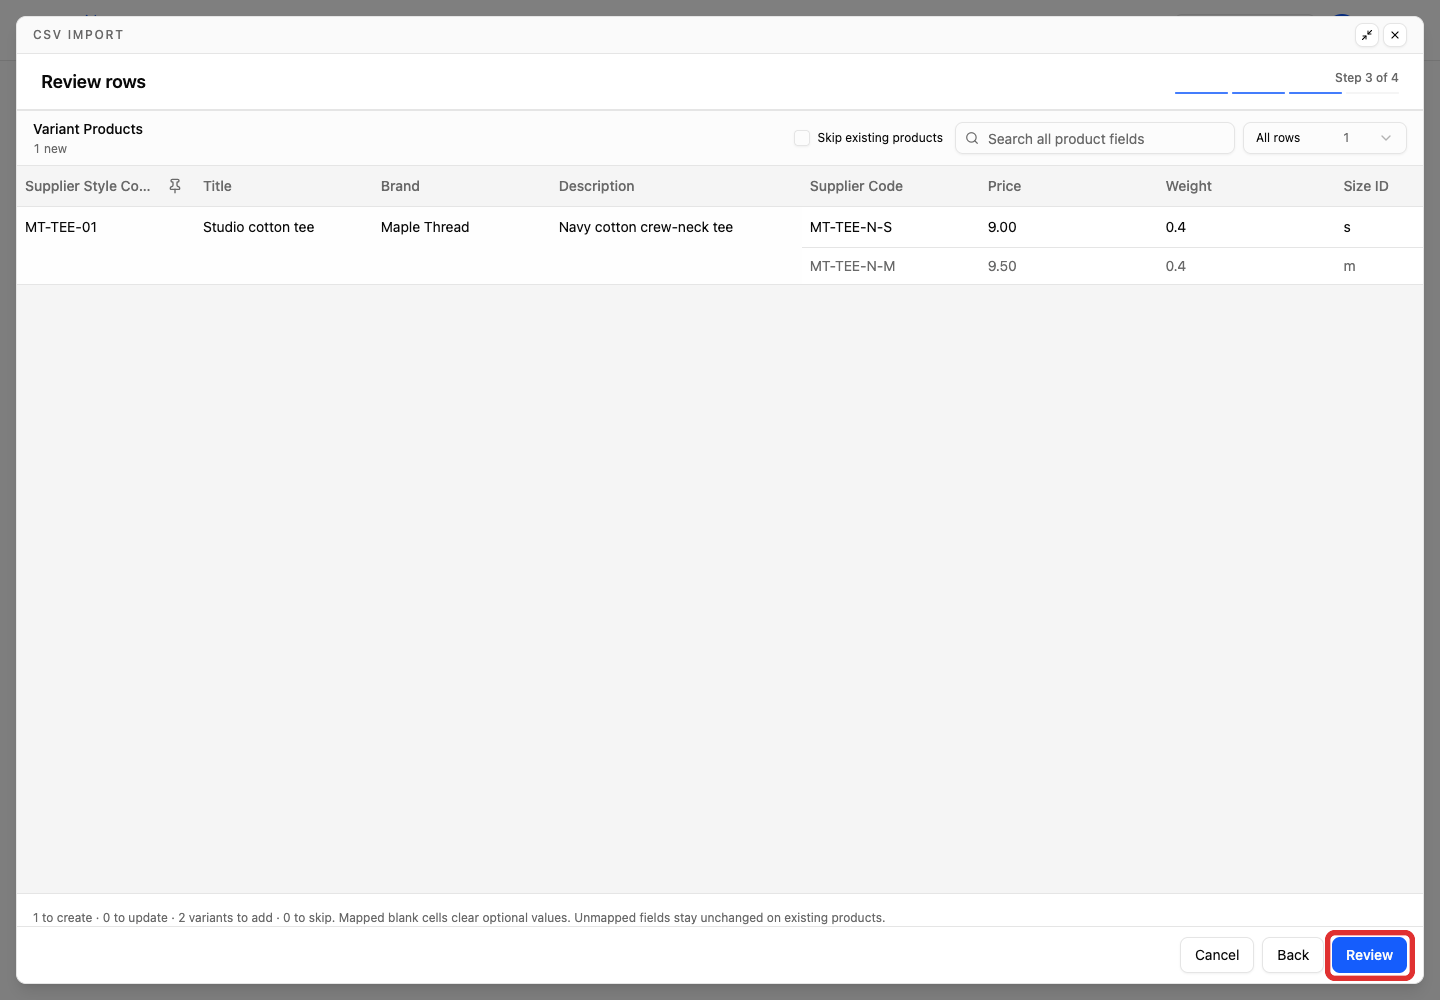
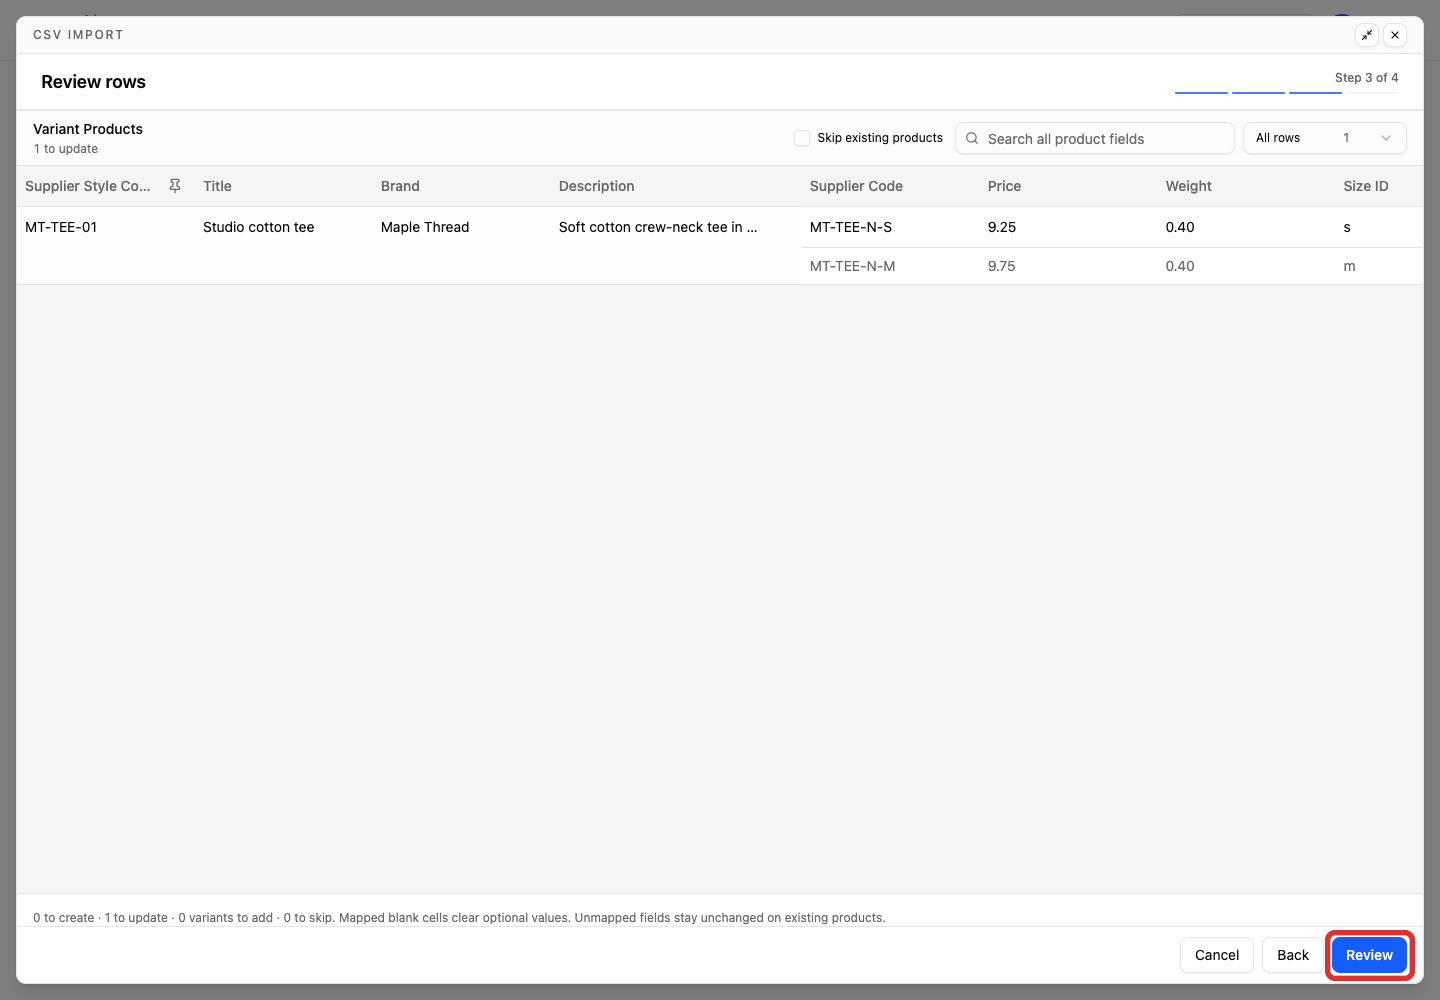
The review groups the size and color rows under their product. The example has one new product with two variants to add.
-
Click Review.
-
Click Import 1 variant product. The confirmation counts products, so several variant rows can belong to one product.
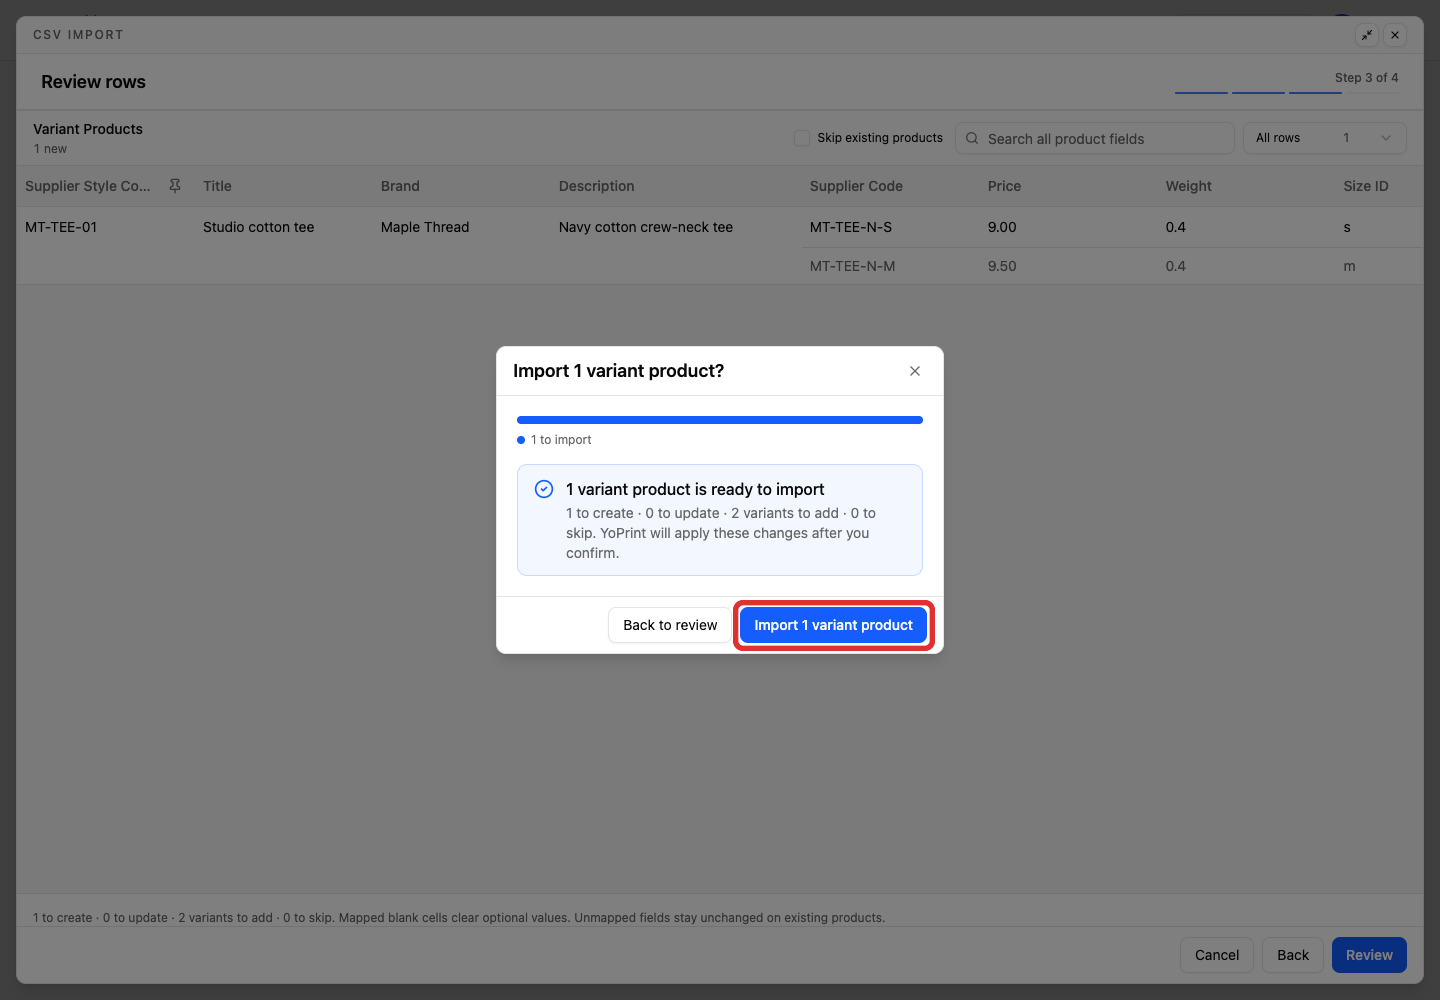
The result shows both the product count and the number of variants added or updated. Click Done to close the dialog. To return to YoPrint, switch back to your Products browser tab or click Back to YoPrint. In YoPrint, click Refresh above the products list to display your newly imported variant product.

Update products you already have
Update descriptions, prices and other product details in bulk with a CSV file. Export your products, change the values you need, and review the proposed updates before importing them.
CSV never deletes a product; Remove in the Products list removes one product at a time with a confirmation.
Export your products
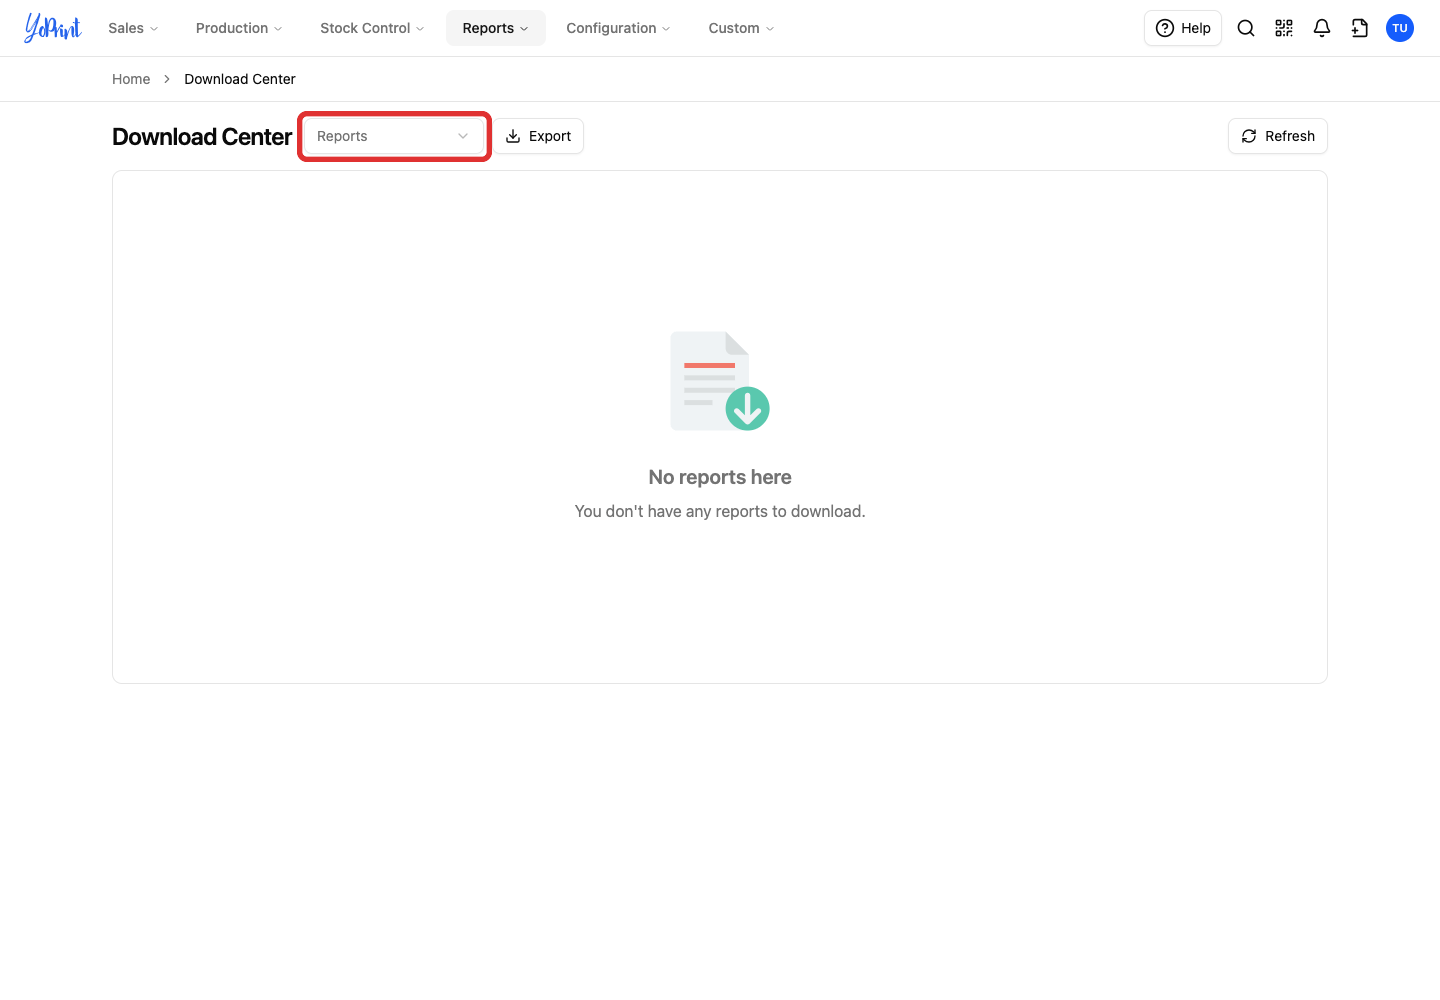
Open Reports > Download Center.
-
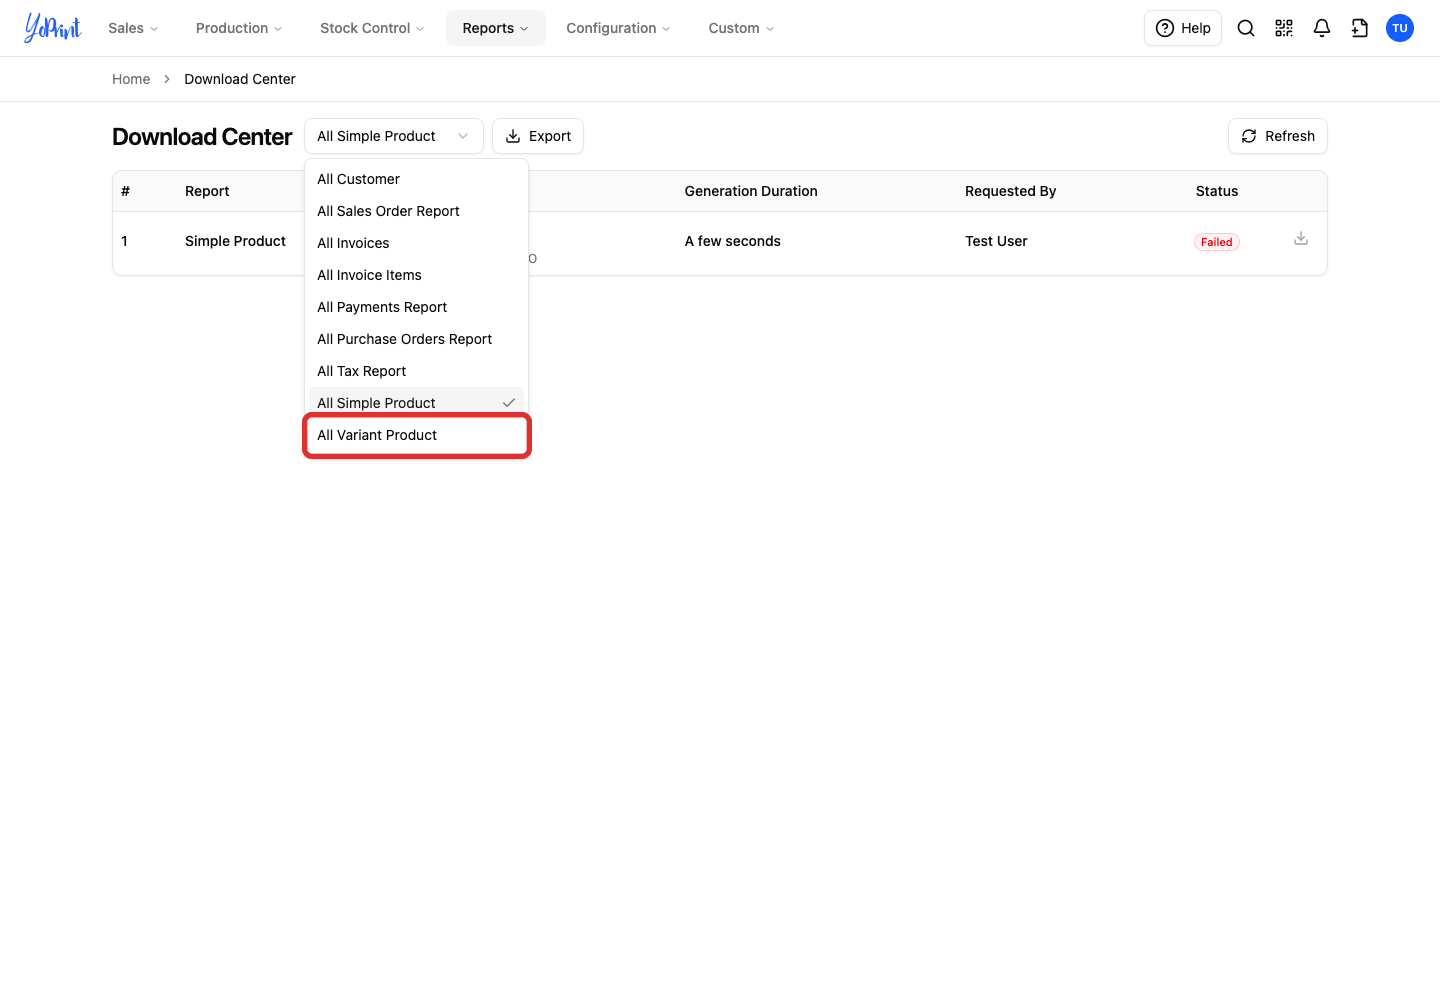
Open the Reports dropdown.
-
Select All Variant Product for products with sizes or colors. For products without variants, select All Simple Product.
-
Click Export.
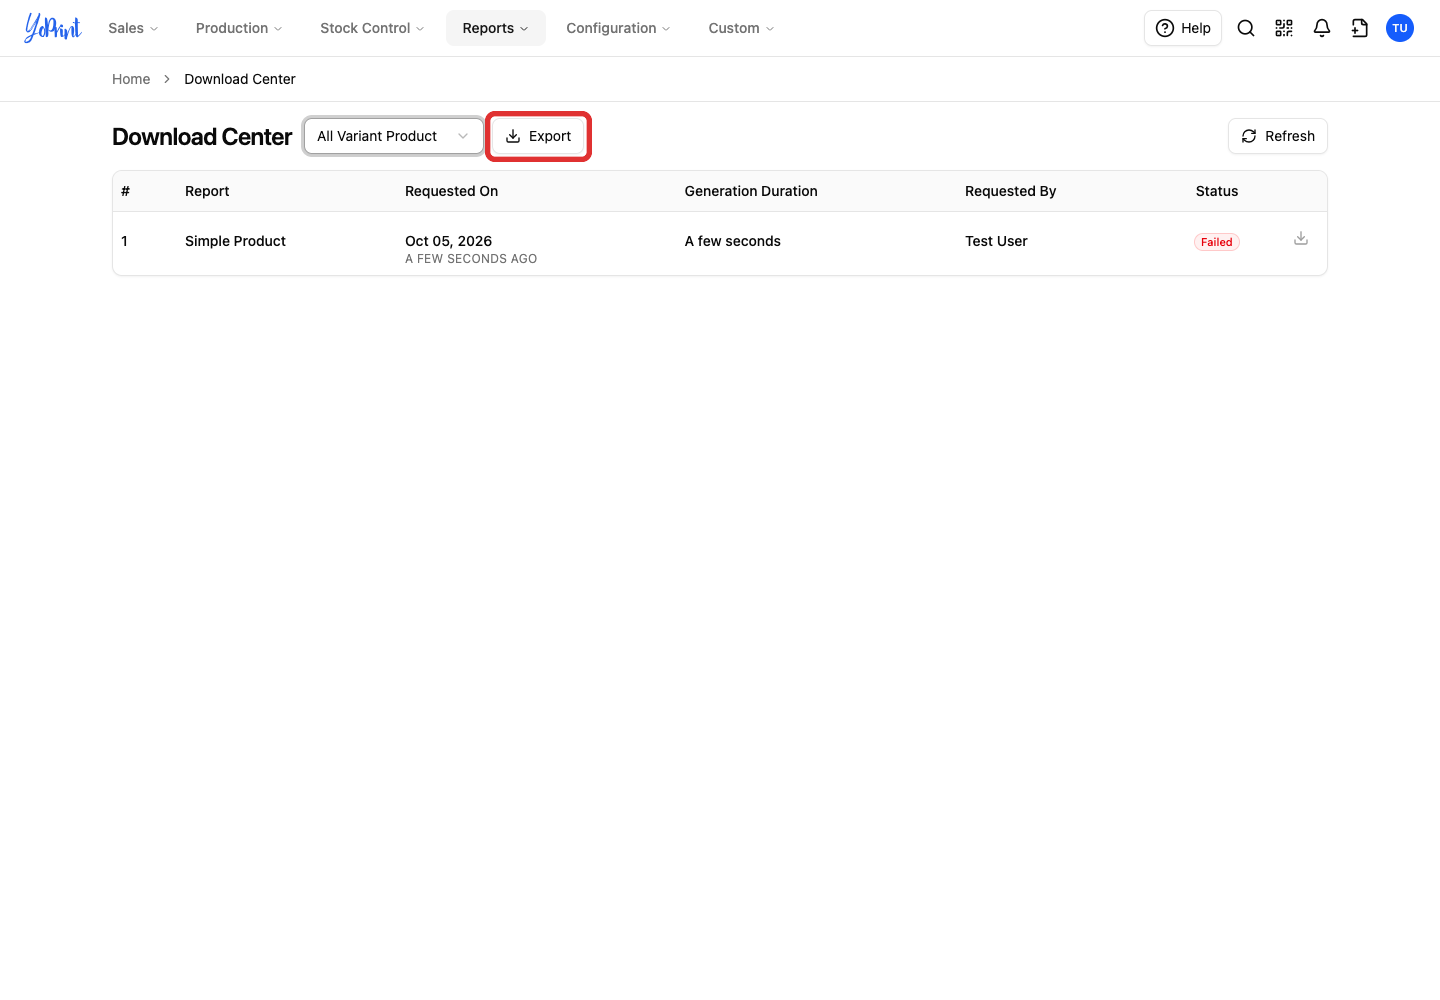
The export appears in the table with status Pending while YoPrint generates the file. Click Refresh above the table until the status changes to Ready.
-
Click Download beside that export.
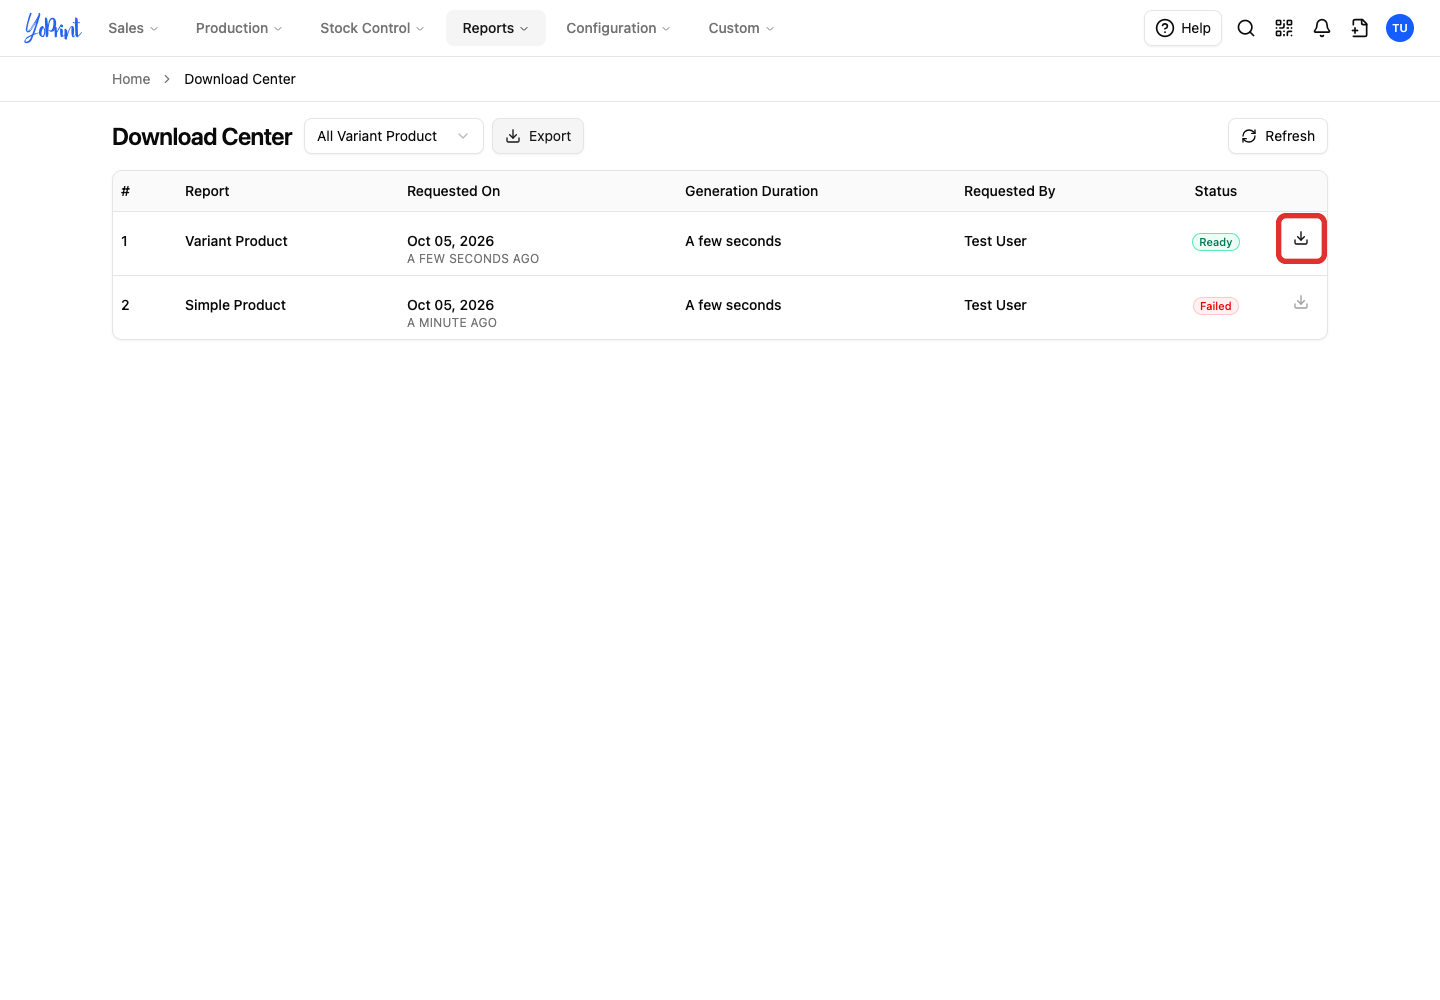
Keep this original export as a backup. Make your changes in a separate copy.
Change the values in your file
Keep only the products you plan to update in your file, and keep the header row. Use separate files for simple and variant products. The column tables in Add simple products and Add variant products above explain what each field contains.
Product identifiers and editable fields
YoPrint recognises a simple product by its brand, title and supplier code; a variant product's parent by brand, title and supplier style code; and each variant inside it by its size and colour IDs, while the displayed size and colour labels and a variant's own supplier code can be changed.
If an existing simple product has no supplier code, leave supplier_code blank. YoPrint matches it using brand and title.
Matching normalizes letter case and spacing. If you change an identity column, the row can match another existing product, or YoPrint creates a new product if no match exists. A valid new size or color ID combination adds a variant to the product instead of renaming an existing one, provided it uses the product's existing dimensions. To rename a product, edit it directly in Products.
Change the values in the relevant columns. You can update fields like description , price , and weight :
- Enter prices and weights as numbers, without currency symbols or unit suffixes.
- For variants,
size_labelandcolor_labelare the displayed names.color_hexis the color hex value, such as #183153.
In this example, the Studio cotton tee keeps its brand, title, style code, size IDs and color ID. Its description becomes Soft cotton crew-neck tee in Navy, and its Small and Medium prices become 9.25 and 9.75.
Protect existing data from blank cells
Keep the identity columns mapped when updating products. Leaving an identity field unmapped can make YoPrint treat the row as a new product instead. Mapped blank cells clear optional values on an existing matched product. To keep a non-identity field unchanged, select Skipped in its dropdown on the Map fields screen, or remove that column from your CSV file. Other optional fields left unmapped keep their values. Check your columns and blank cells before importing an update.
Save the edited copy as UTF-8 CSV.
Import the edited file
Open Products.
-
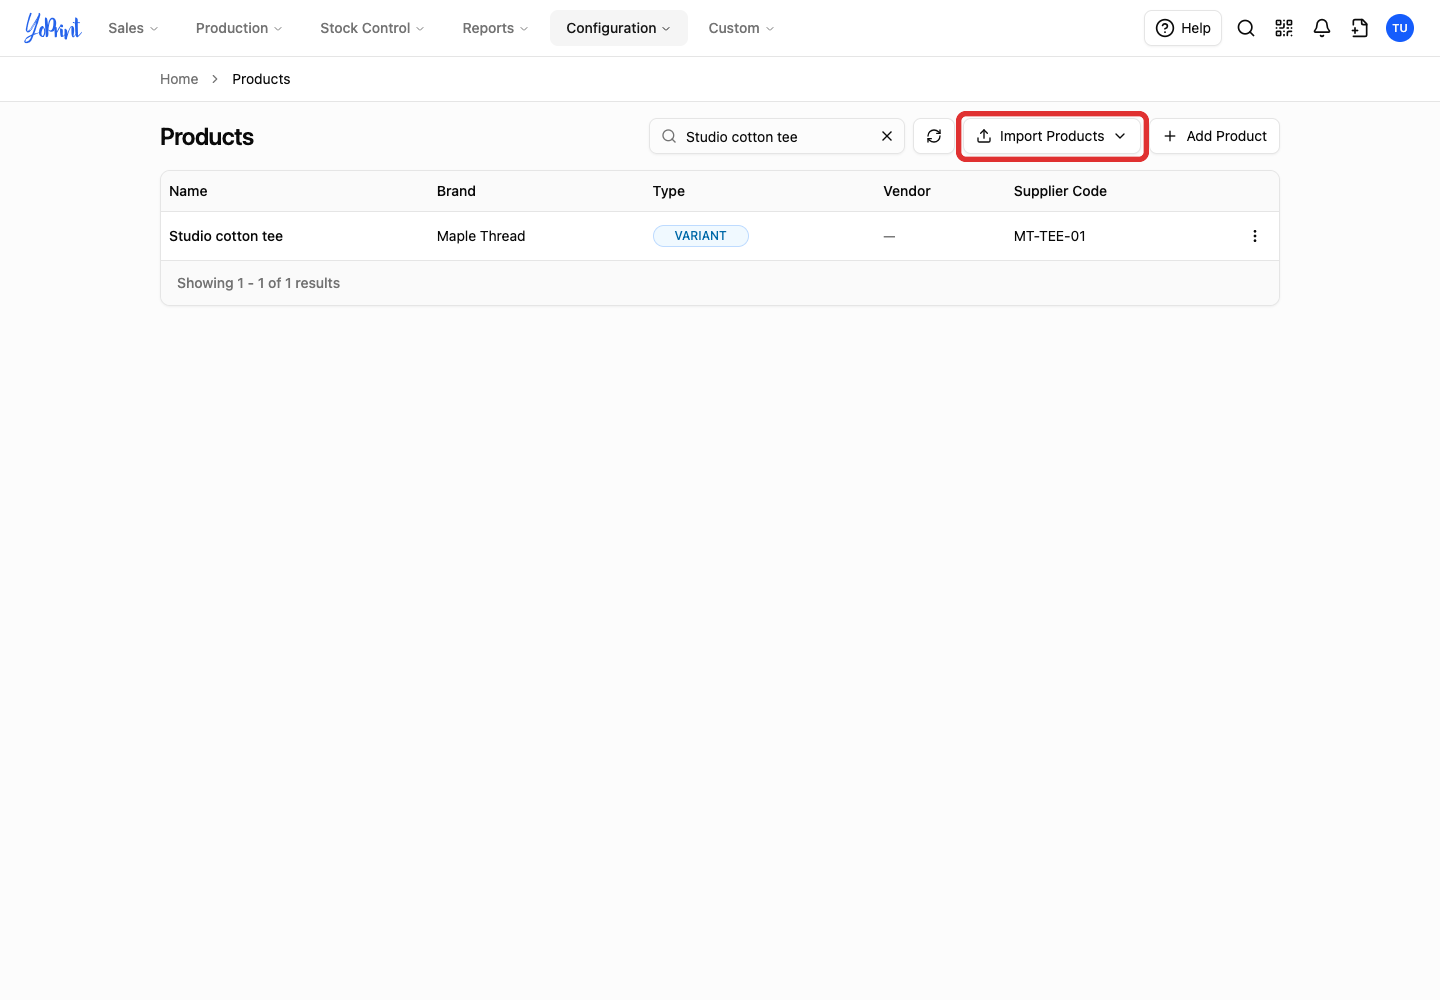
Click Import Products.
-
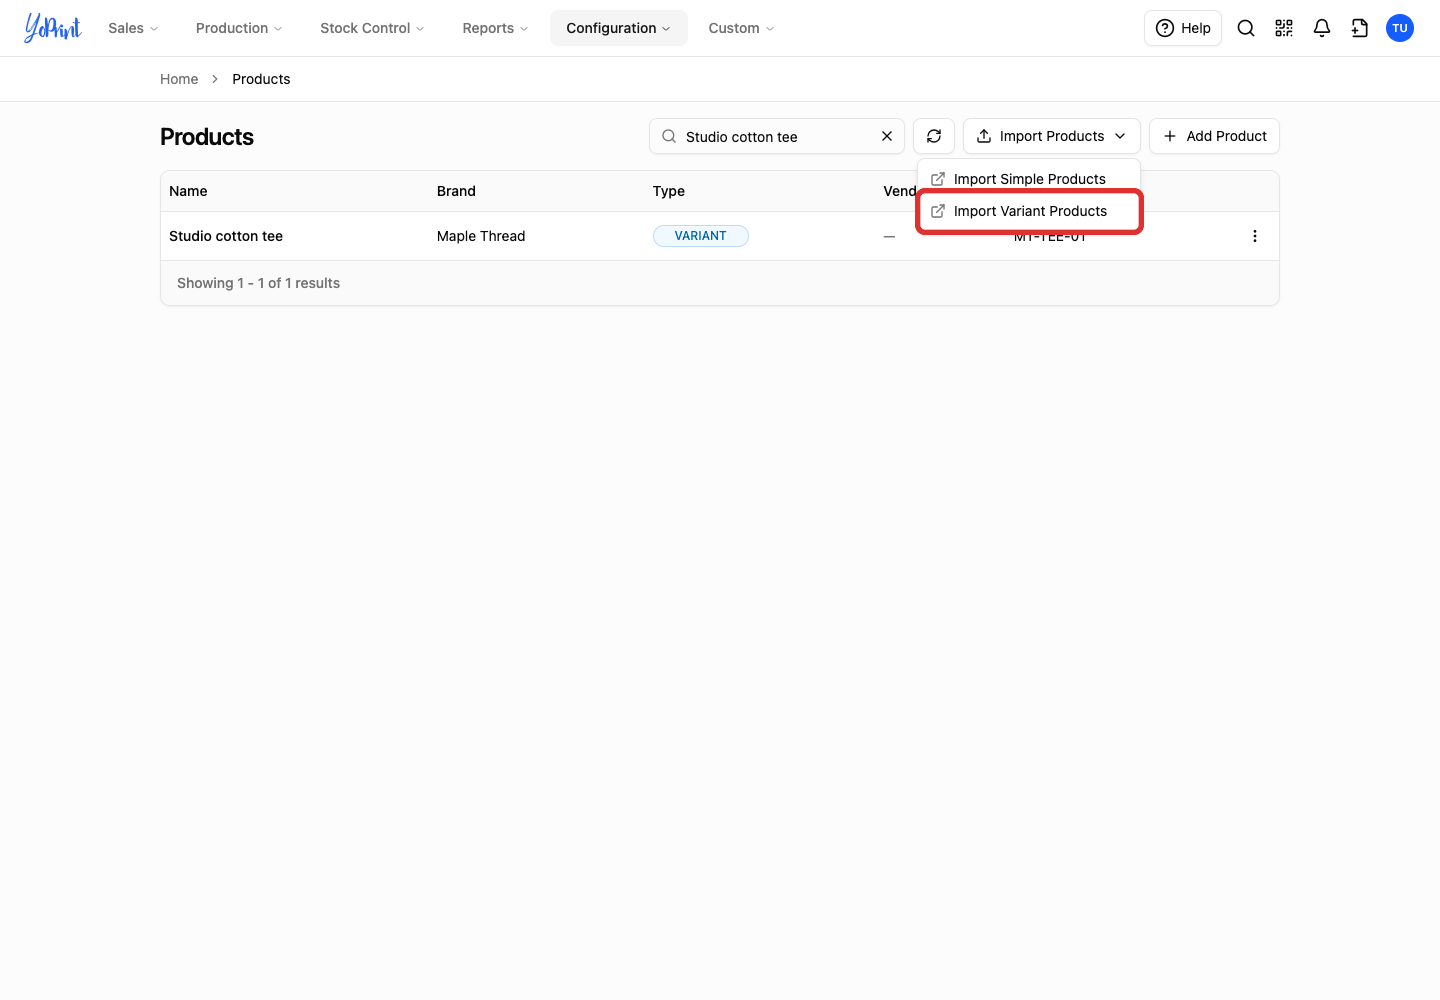
Choose Import Variant Products for a variant export, or Import Simple Products for a simple-product export.
-
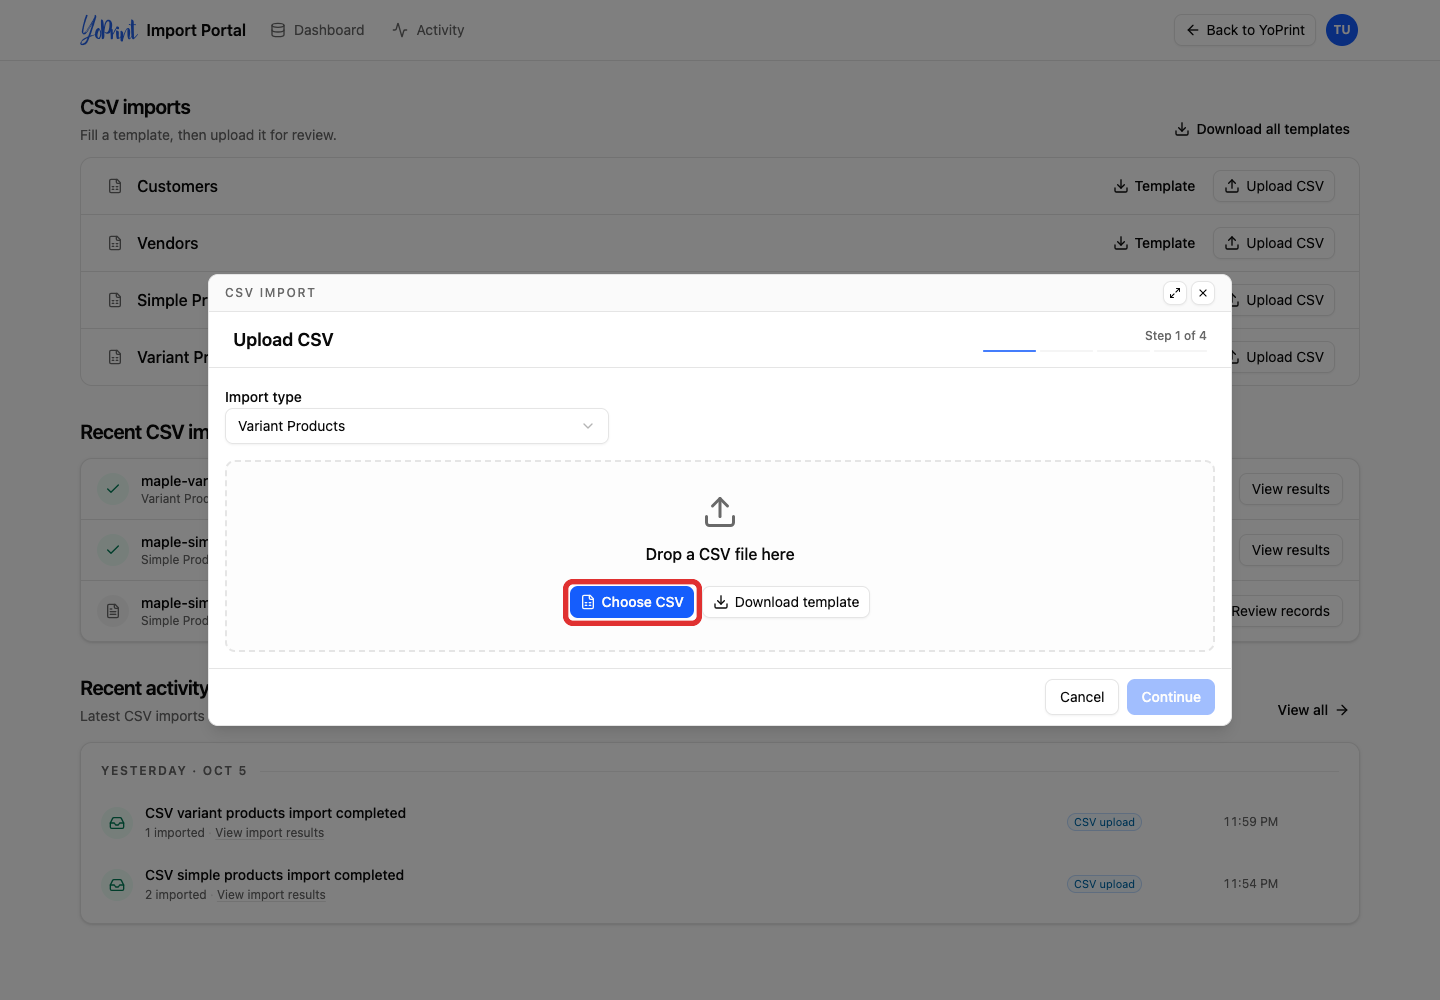
Click Choose CSV and select your edited file.
-
Click Continue.
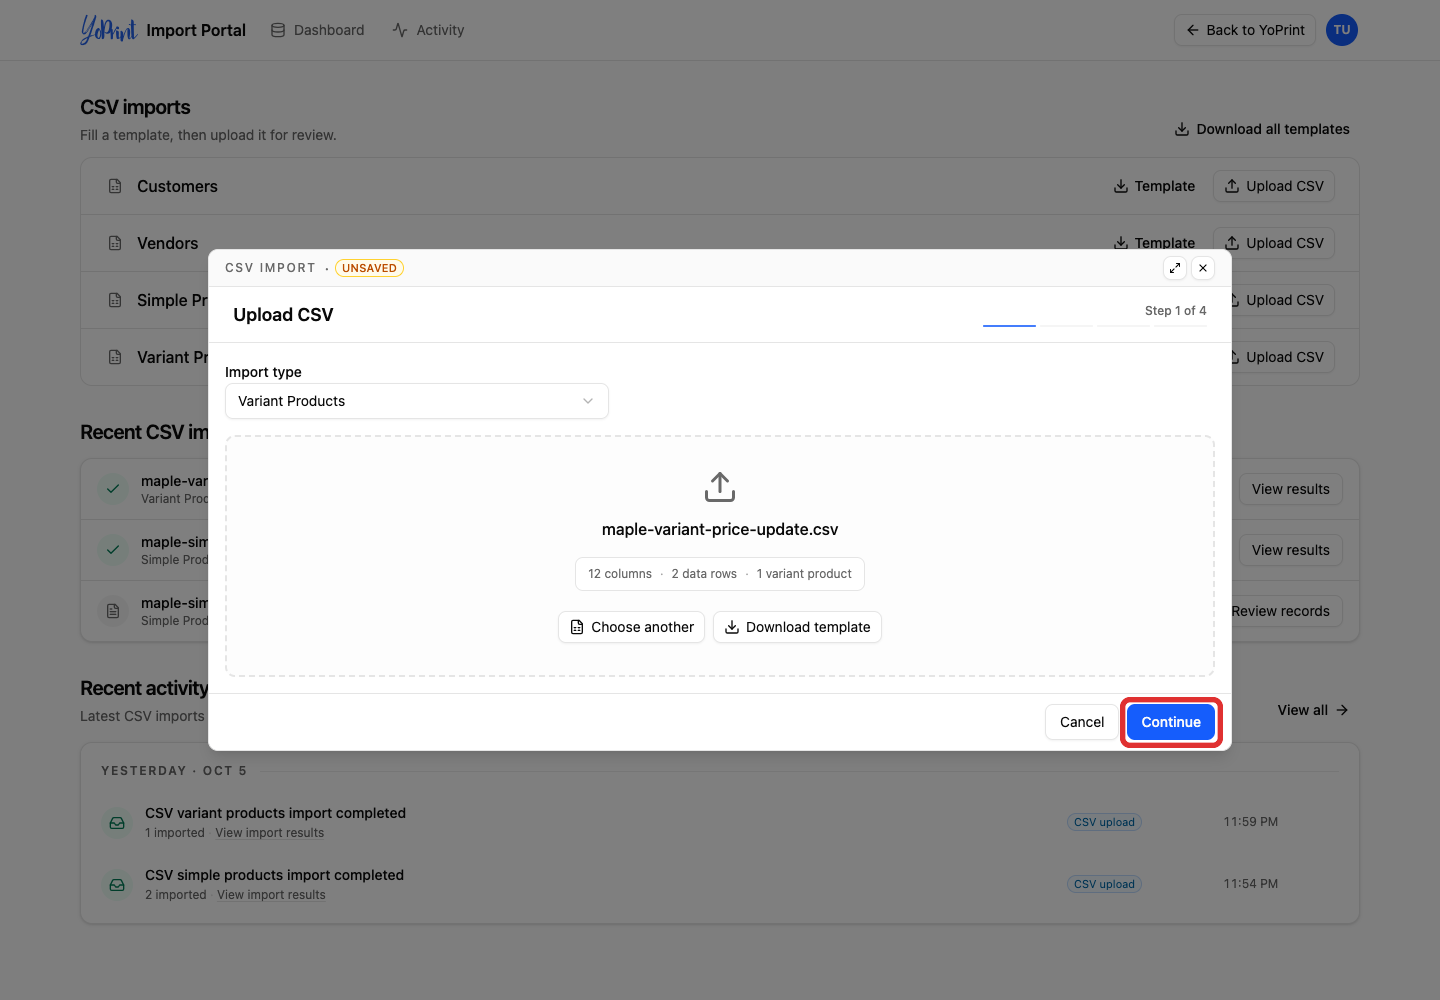
Check the mapped fields and Preview values. Keep your identity columns mapped so YoPrint can find each product.
-
Click Review rows.
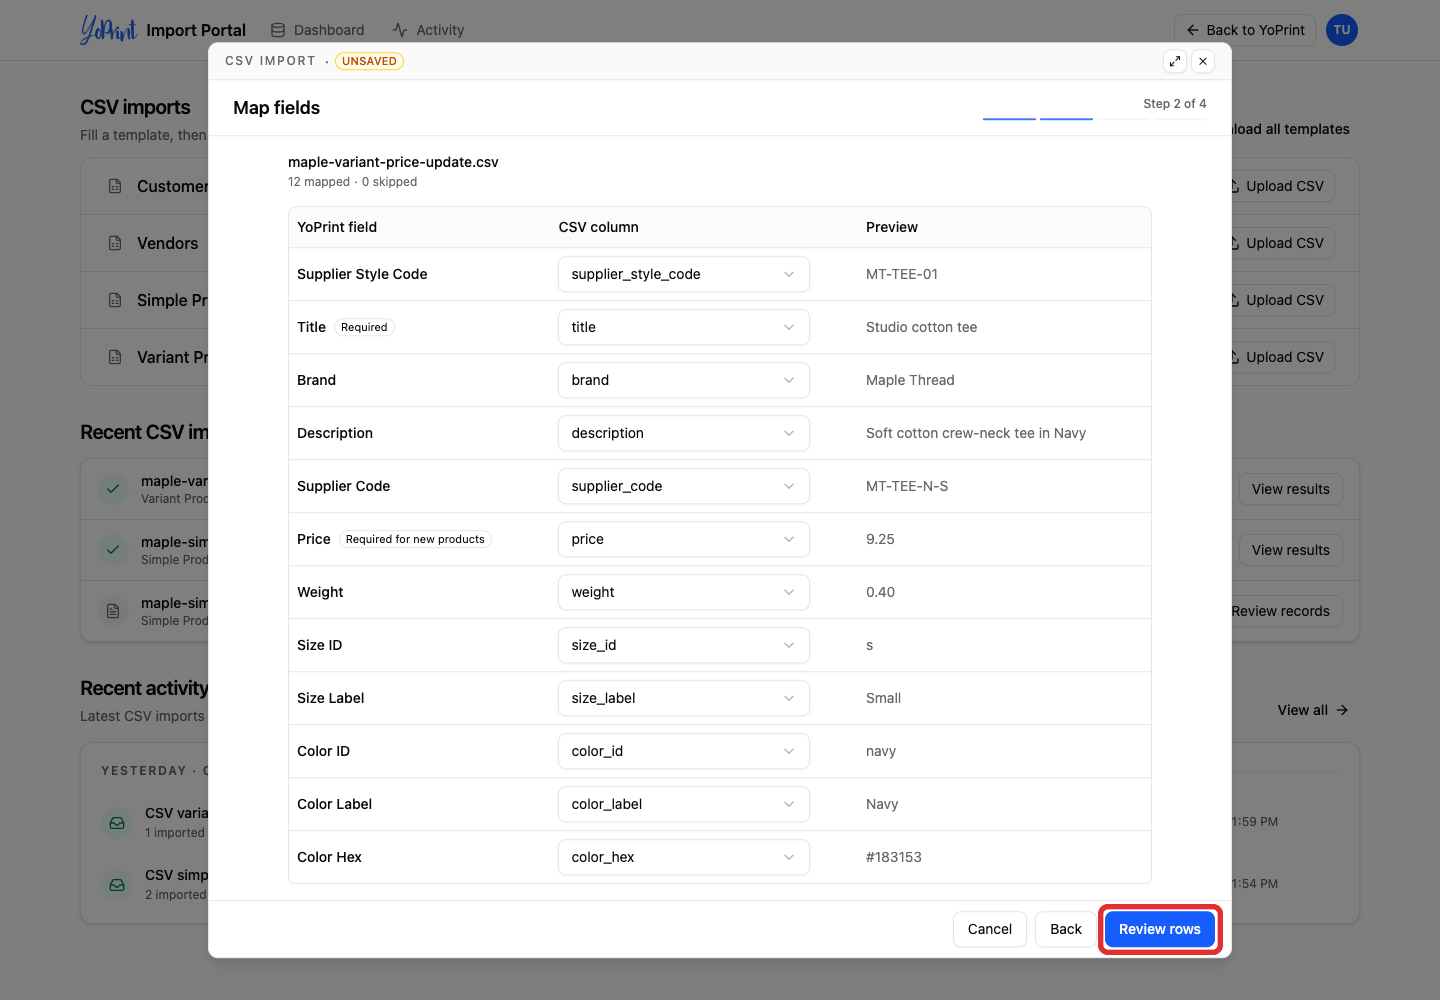
Leave Skip existing products unchecked at the top of the table. This tells YoPrint to apply your updates to your existing products.
The review screen displays the action YoPrint will take for each item before you import. Check that each product shows Update with the values you intended. If you see an unexpected Create, check the product's name and codes before continuing.
Check the create, update, and skip counts at the bottom of the table. In this example, one product and two variants are ready to update.
-
Click Review.
-
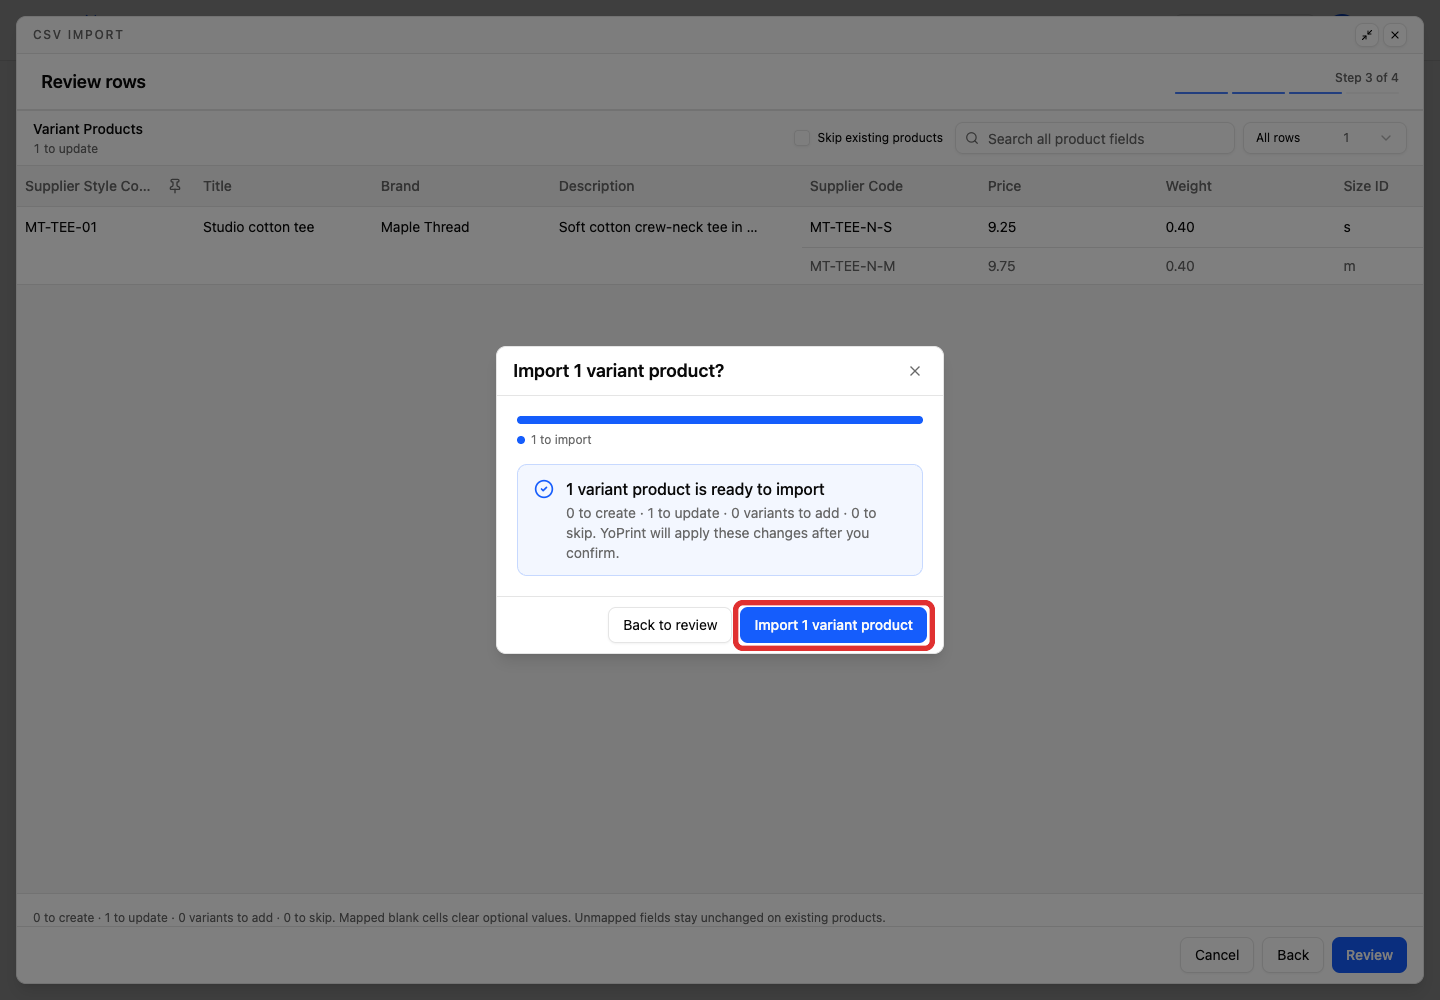
Click Import 1 variant product to confirm the update. The button counts the products ready to import after review.
Import complete shows the outcome. Here, one product and two variants were updated, with no new product or variant added. For a simple-product file, the result shows counts for the simple products created, updated, or skipped rather than listing each product by name.

Click Done to close the summary dialog. Switch back to your YoPrint browser tab (or click Back to YoPrint at the top right of the portal).
Above the Products table in YoPrint, click Refresh to update the products list. After an update, a simple product's new price shows in its Edit Product dialog, and a variant's in the Product Variants table or its Edit Variant dialog, not in the parent's price field.
Add new products while skipping existing ones
If your file contains both new and existing products, you can add only the new items and keep your current catalog untouched. Upload and map your file using the steps above.
-
On the Review rows screen, check Skip existing products at the top of the table.
-
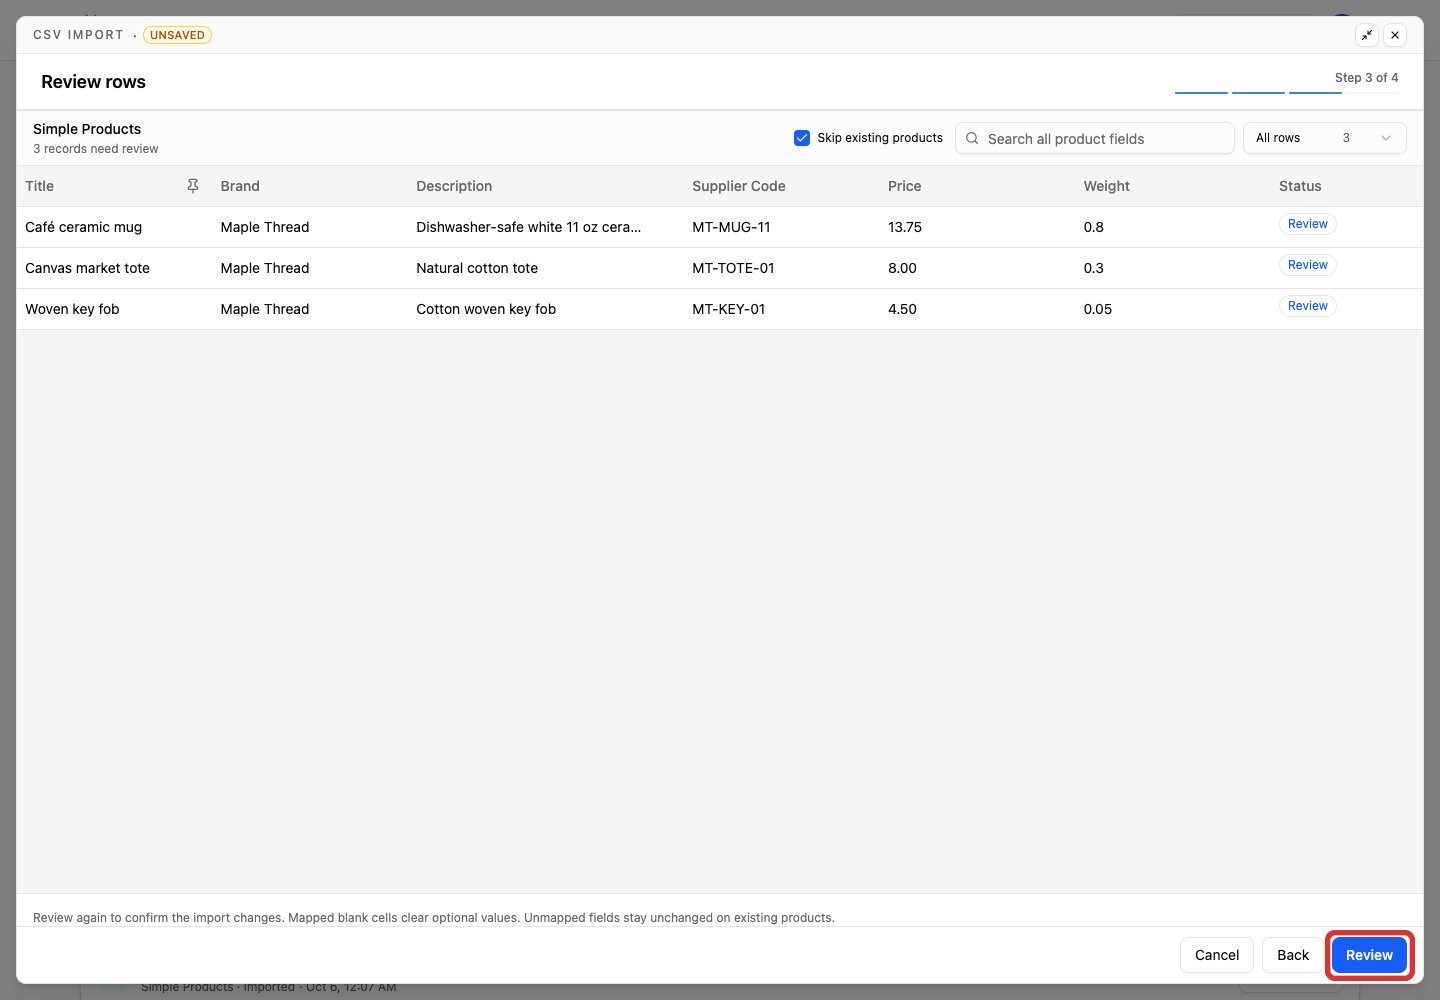
Click Review.
-
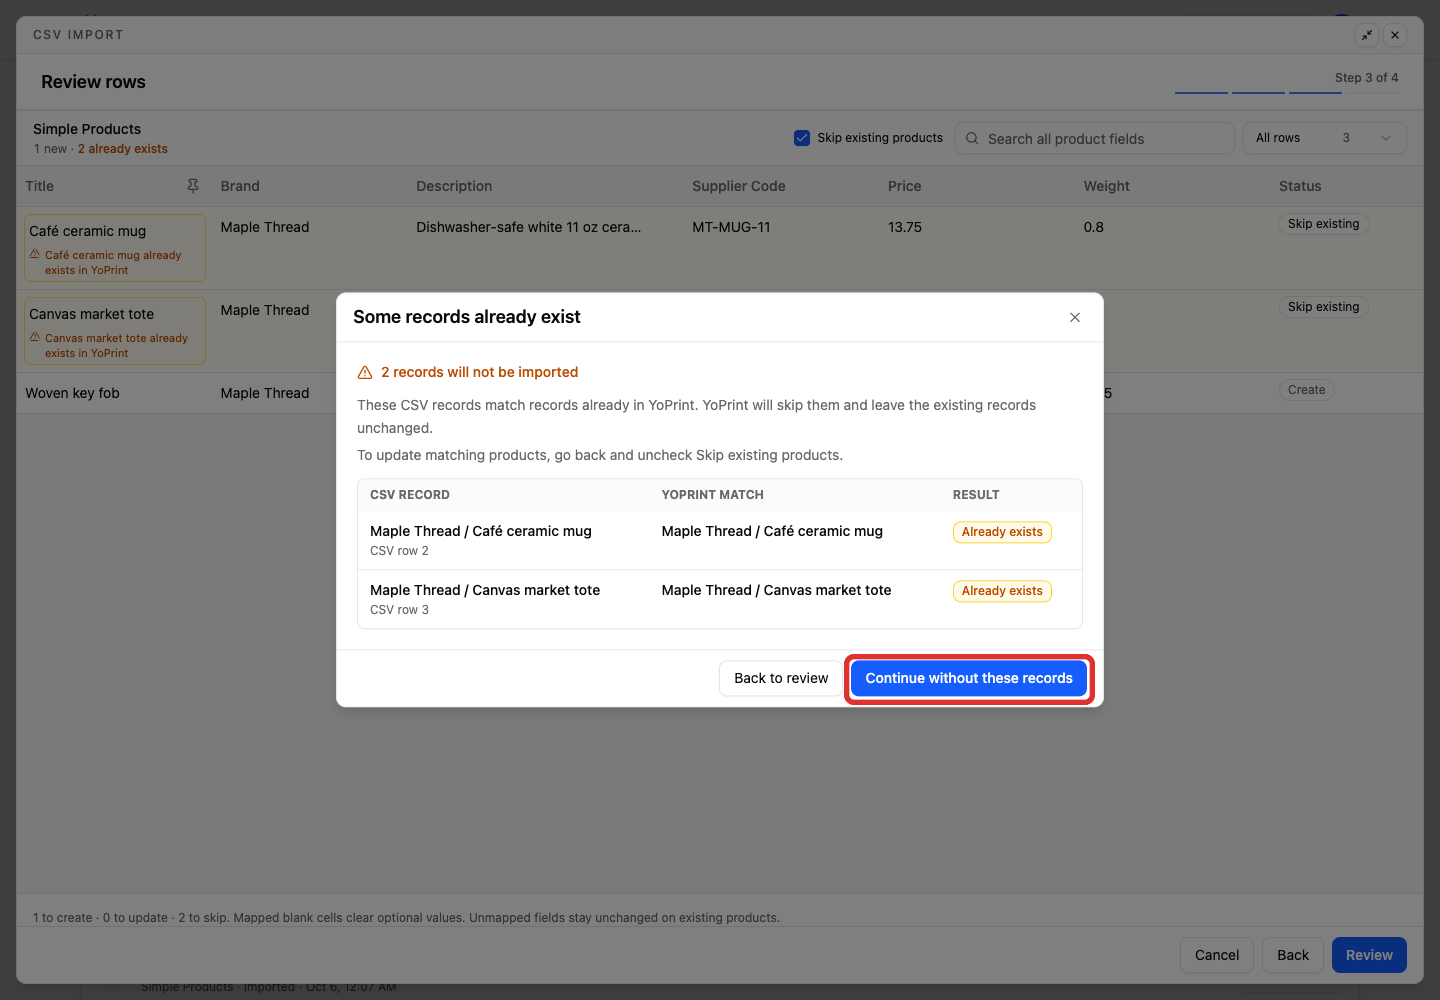
In Some records already exist, click Continue without these records. This leaves the matching products unchanged in YoPrint and continues importing only the new rows.
The confirmation shows counts for products to import and products to skip rather than listing product names. Click Download skipped rows CSV if you want to keep a file of the skipped products for your records.
-
Click Import 1 simple product.
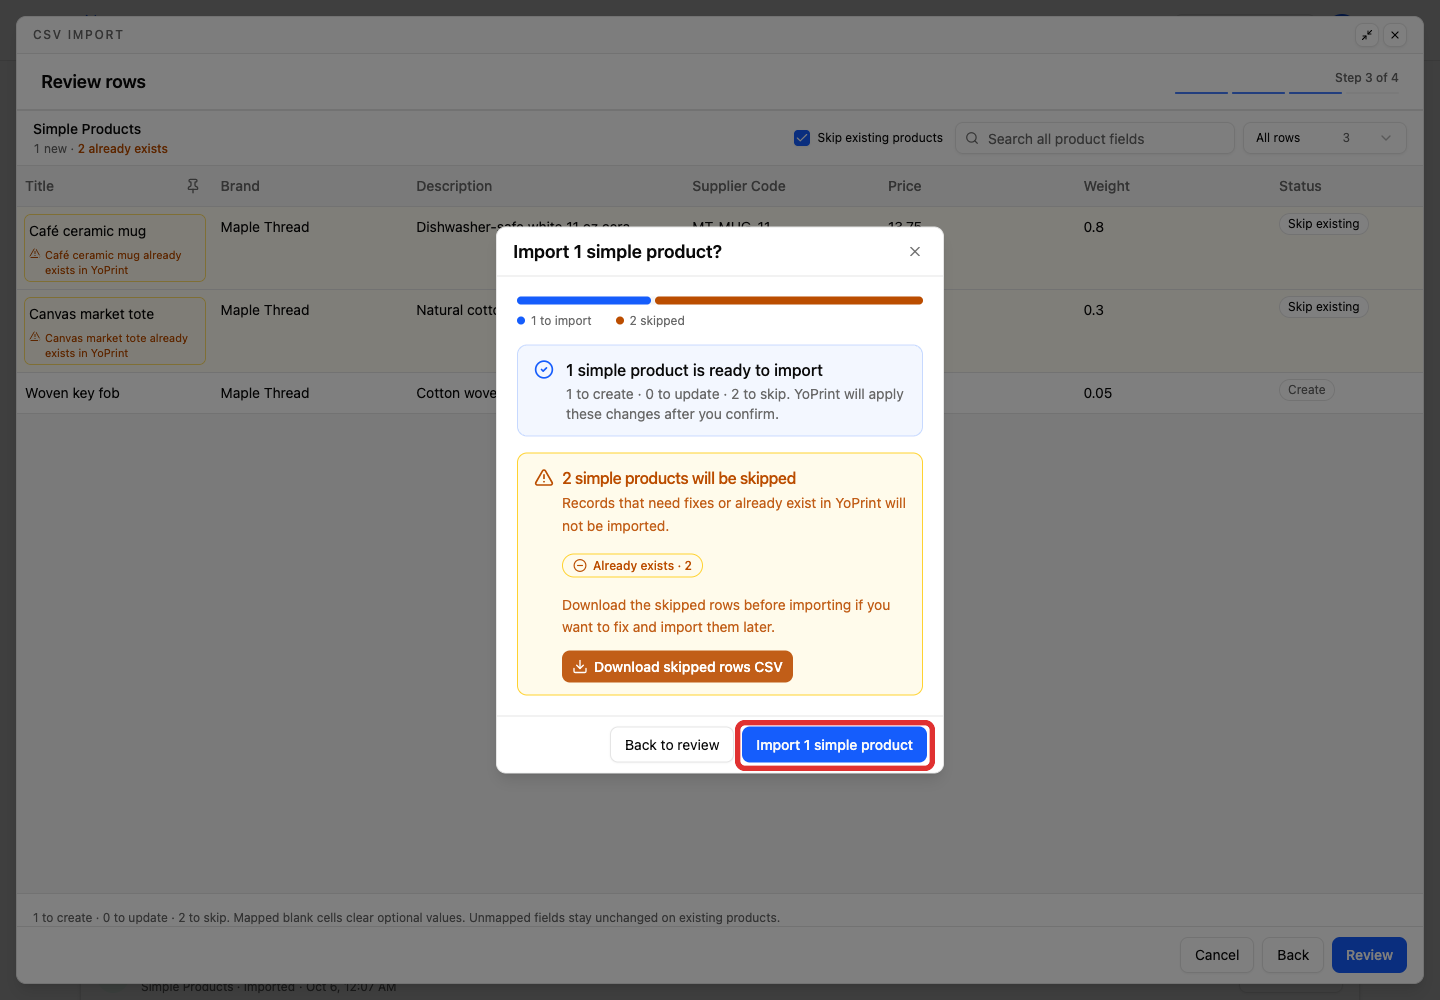
The result says Partial import completed because two existing products were skipped. Check the counts and Records not imported to distinguish intentionally skipped products from rows that need a correction.

Click Done to close the dialog, return to YoPrint, and click Refresh above the Products table to view the new products.
The portal shows progress and the result, including imported and not-imported records. If rows need a fix, follow Troubleshoot CSV Import Errors to correct and retry them.