Collect and Record Payments
In this article
YoPrint gives you two ways to collect payments: record money you have received offline, or let your customer pay online through the customer portal. Connect a payment gateway in Configuration > Settings > Apps to accept online payments. See Configure Stripe Payments or Configure Square Payments for setup. Online payments speed up collection, and YoPrint records confirmed payments automatically to save manual entry.
These two routes differ in who records the payment.
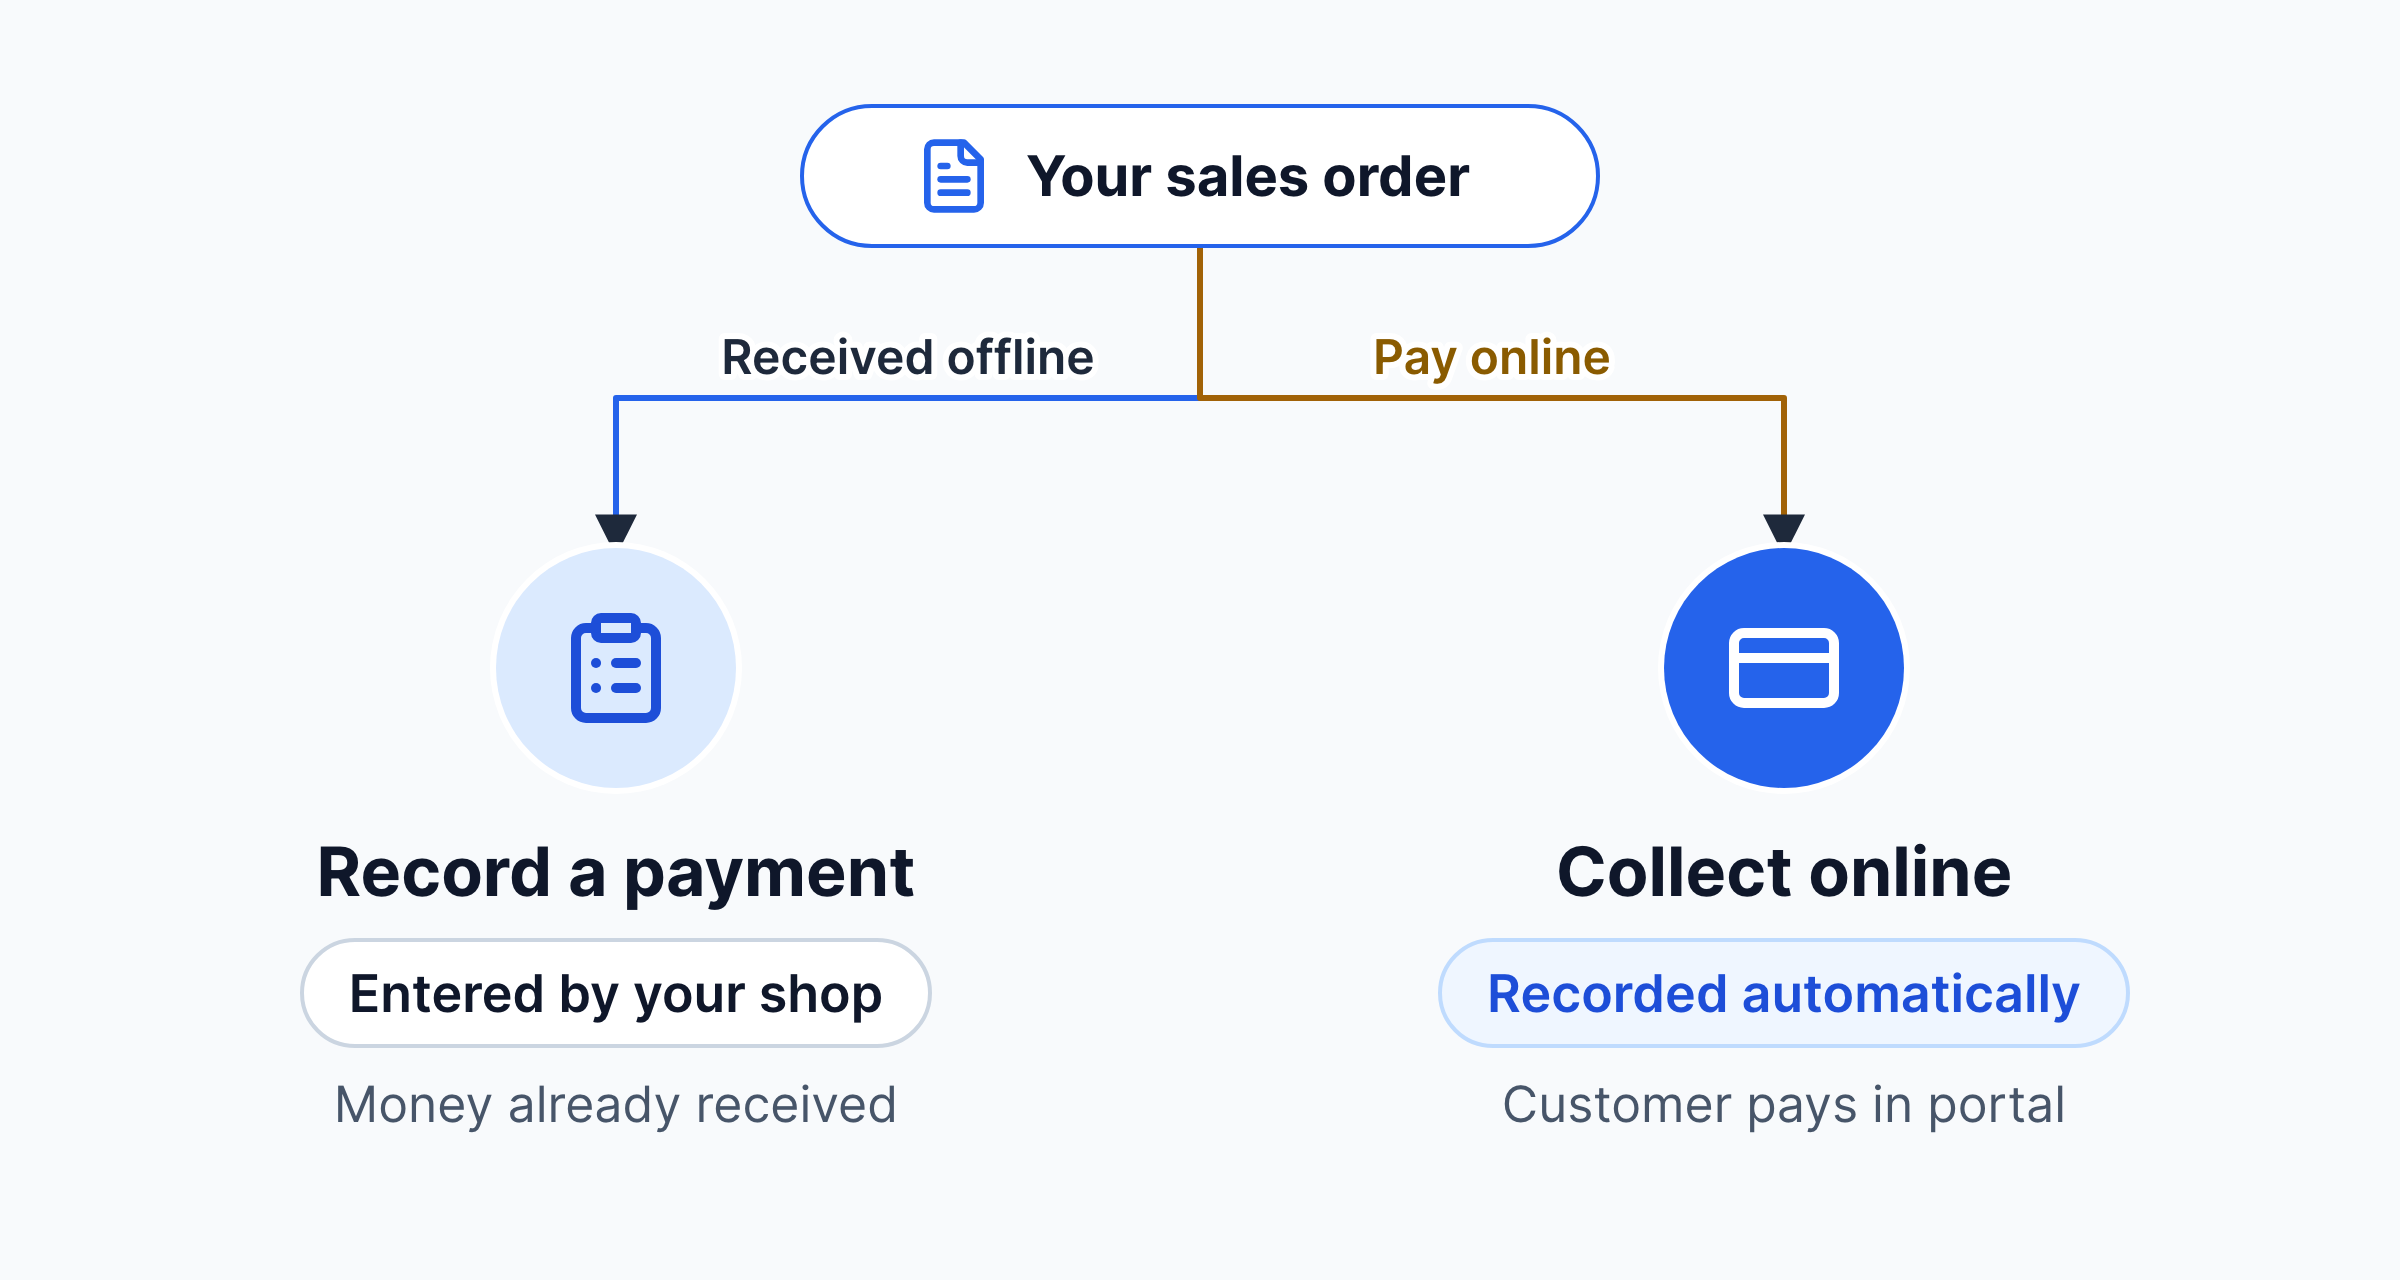
Record a payment you received
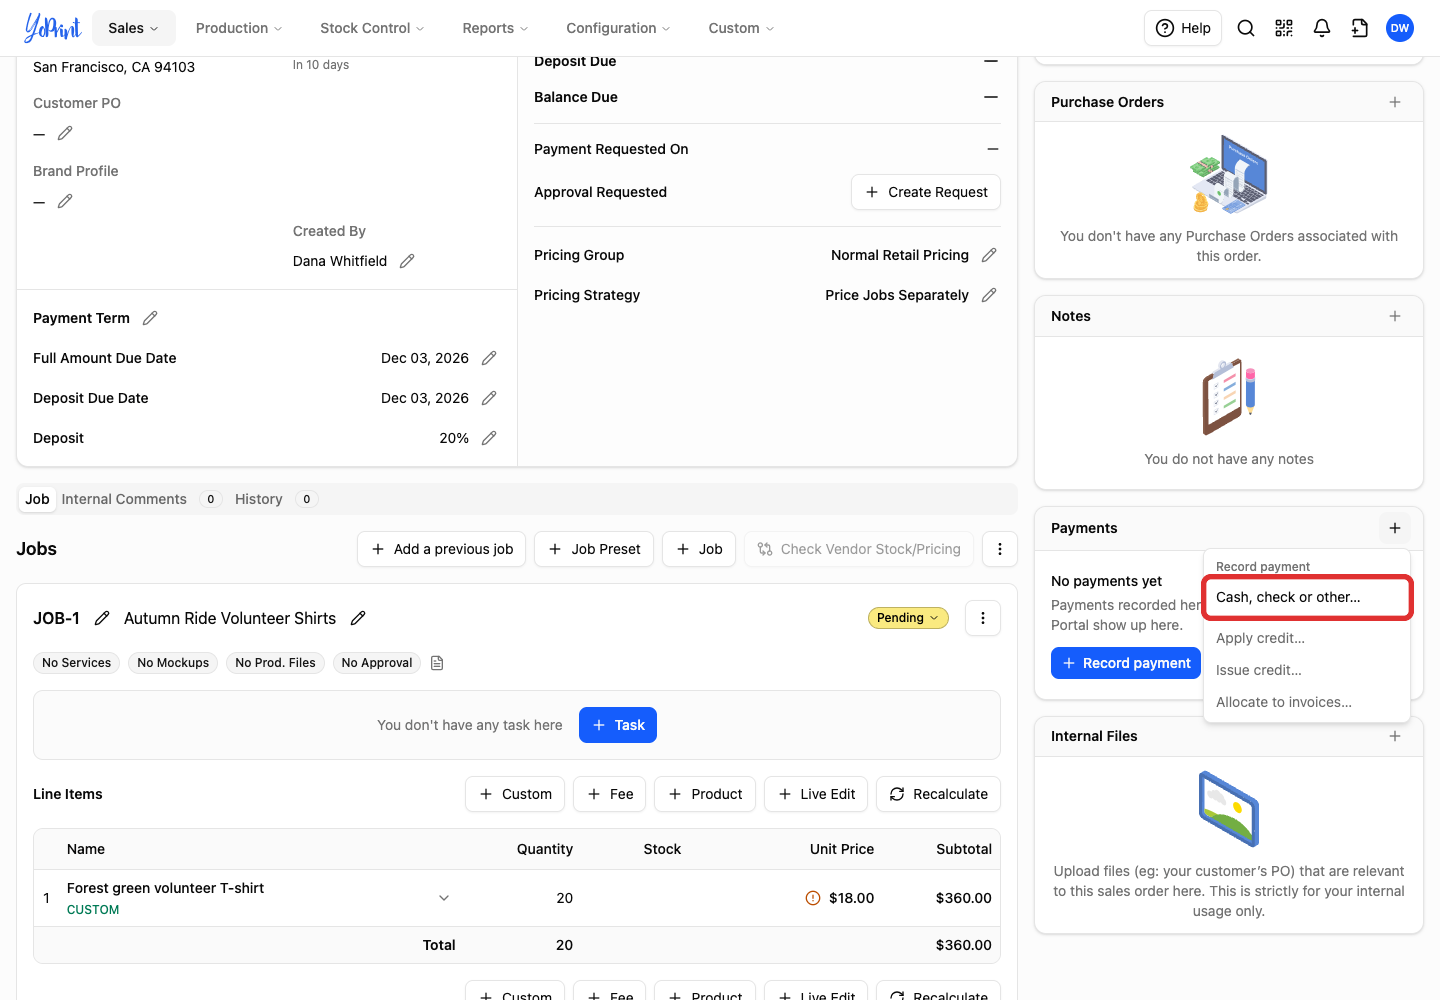
In Payments, Cash, check or other… opens Record Manual Payment to record money you have already received, such as cash, a check, or a payment taken in person or over the phone. It does not charge a card.
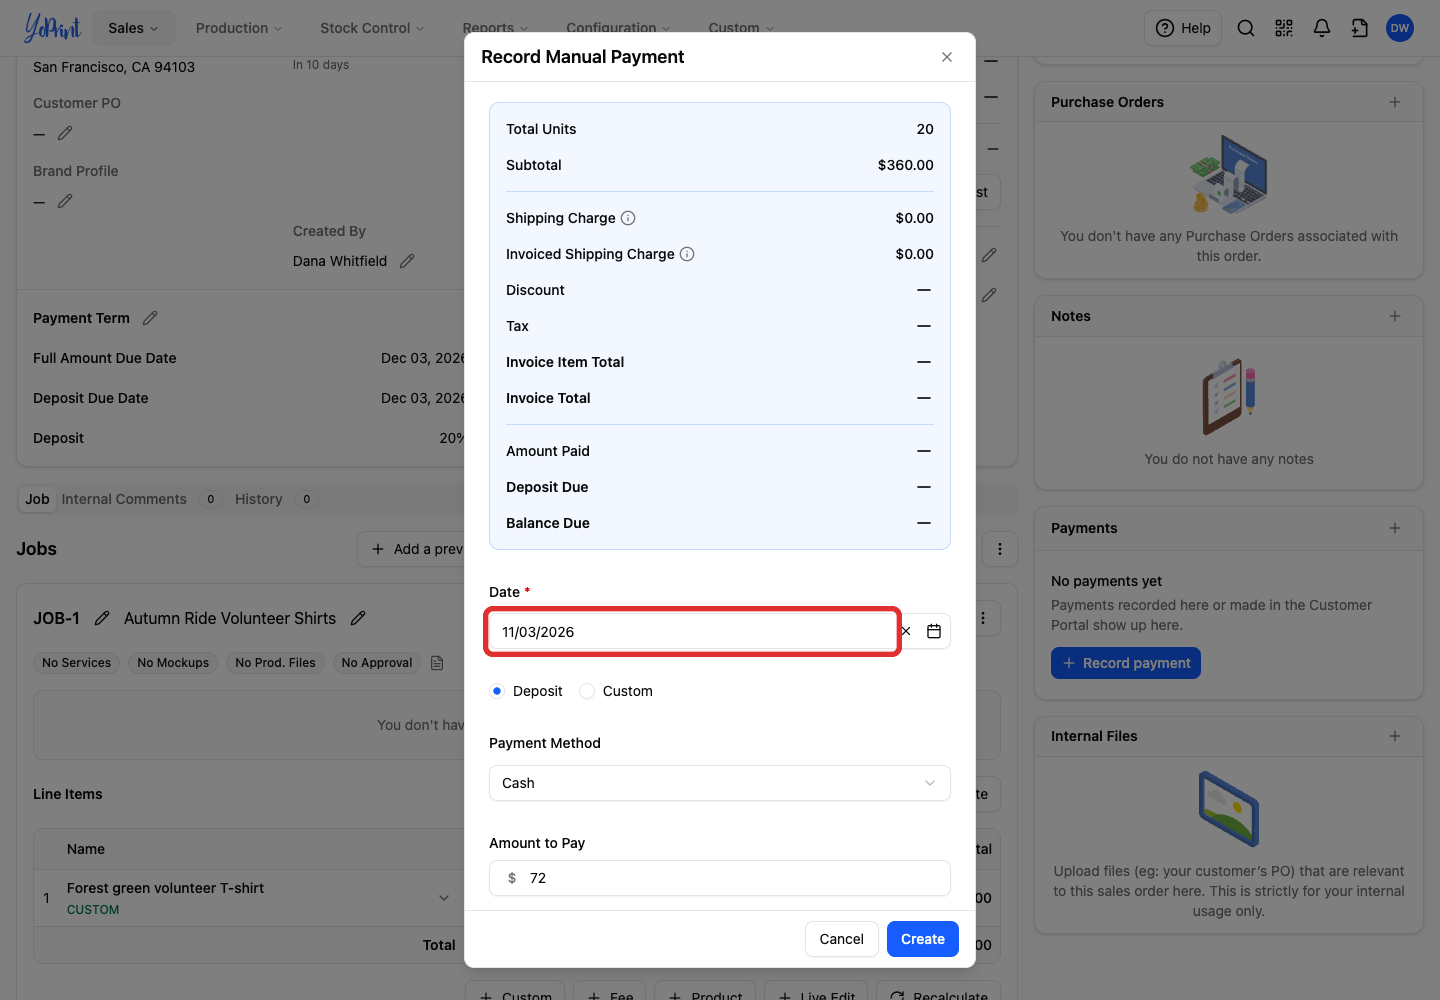
In this example, the shop received a $72 cash deposit before creating the invoice.
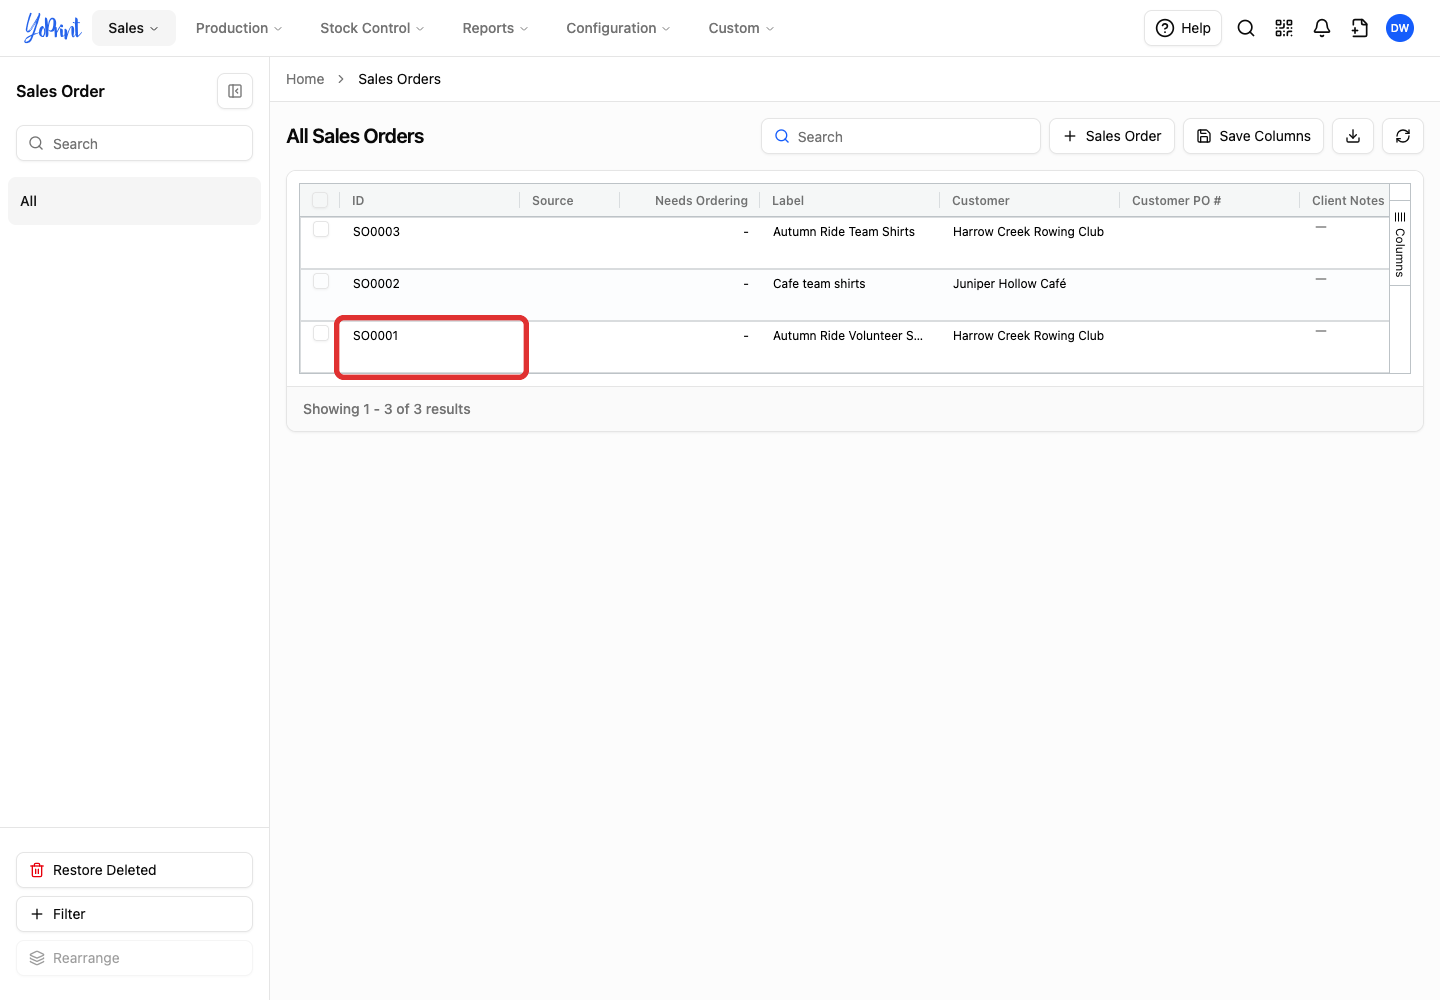
From Sales Orders, double-click the order’s row to open its preview.
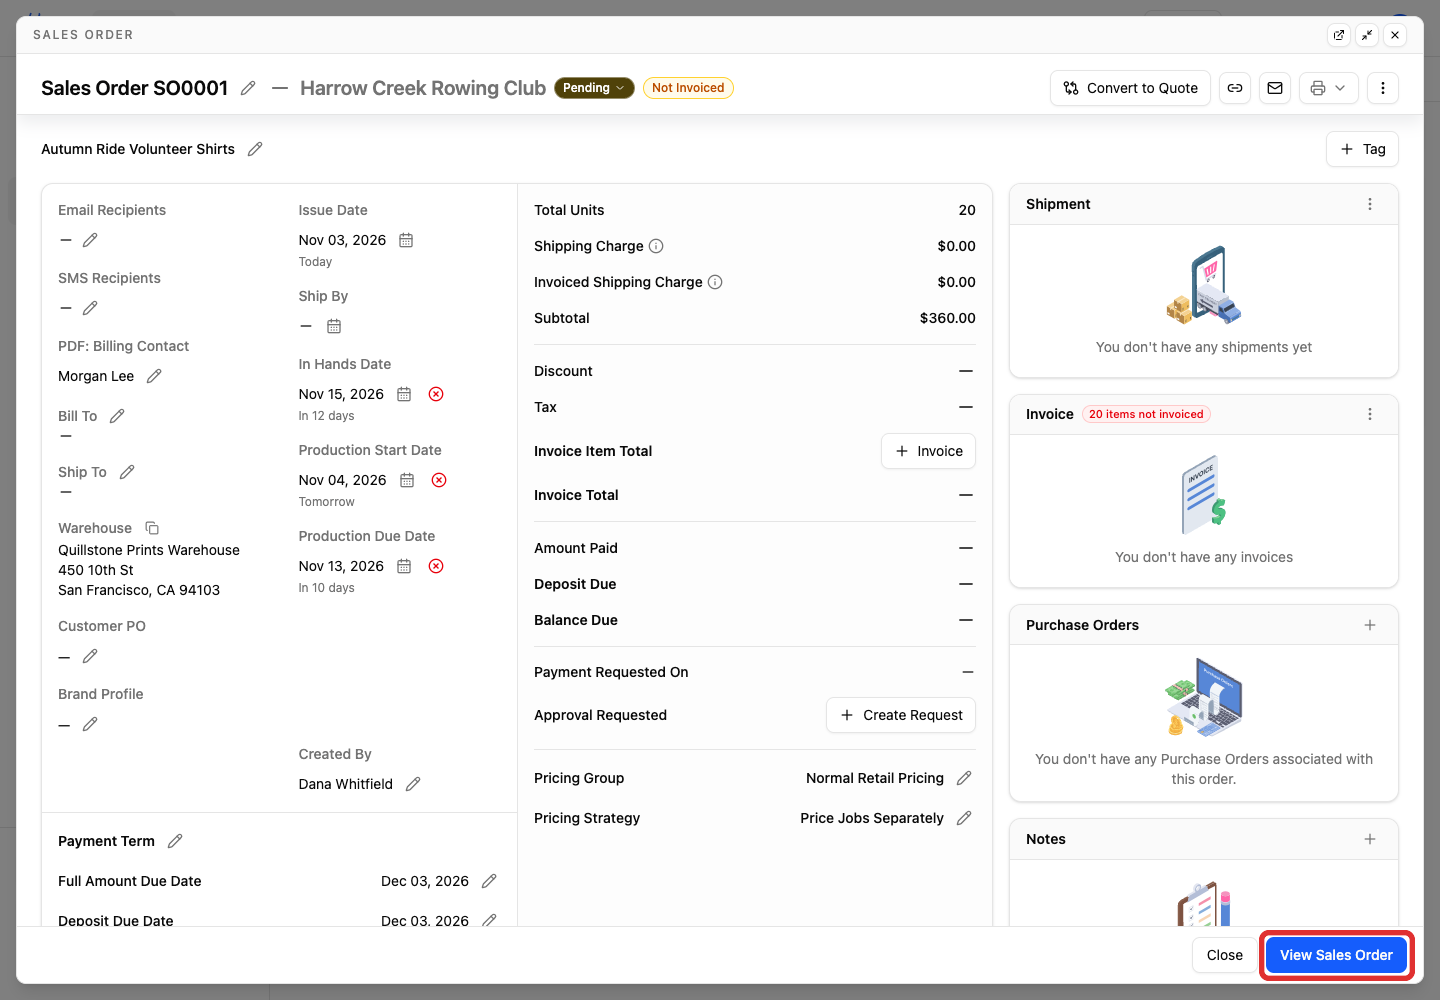
Click View Sales Order in the preview.
-
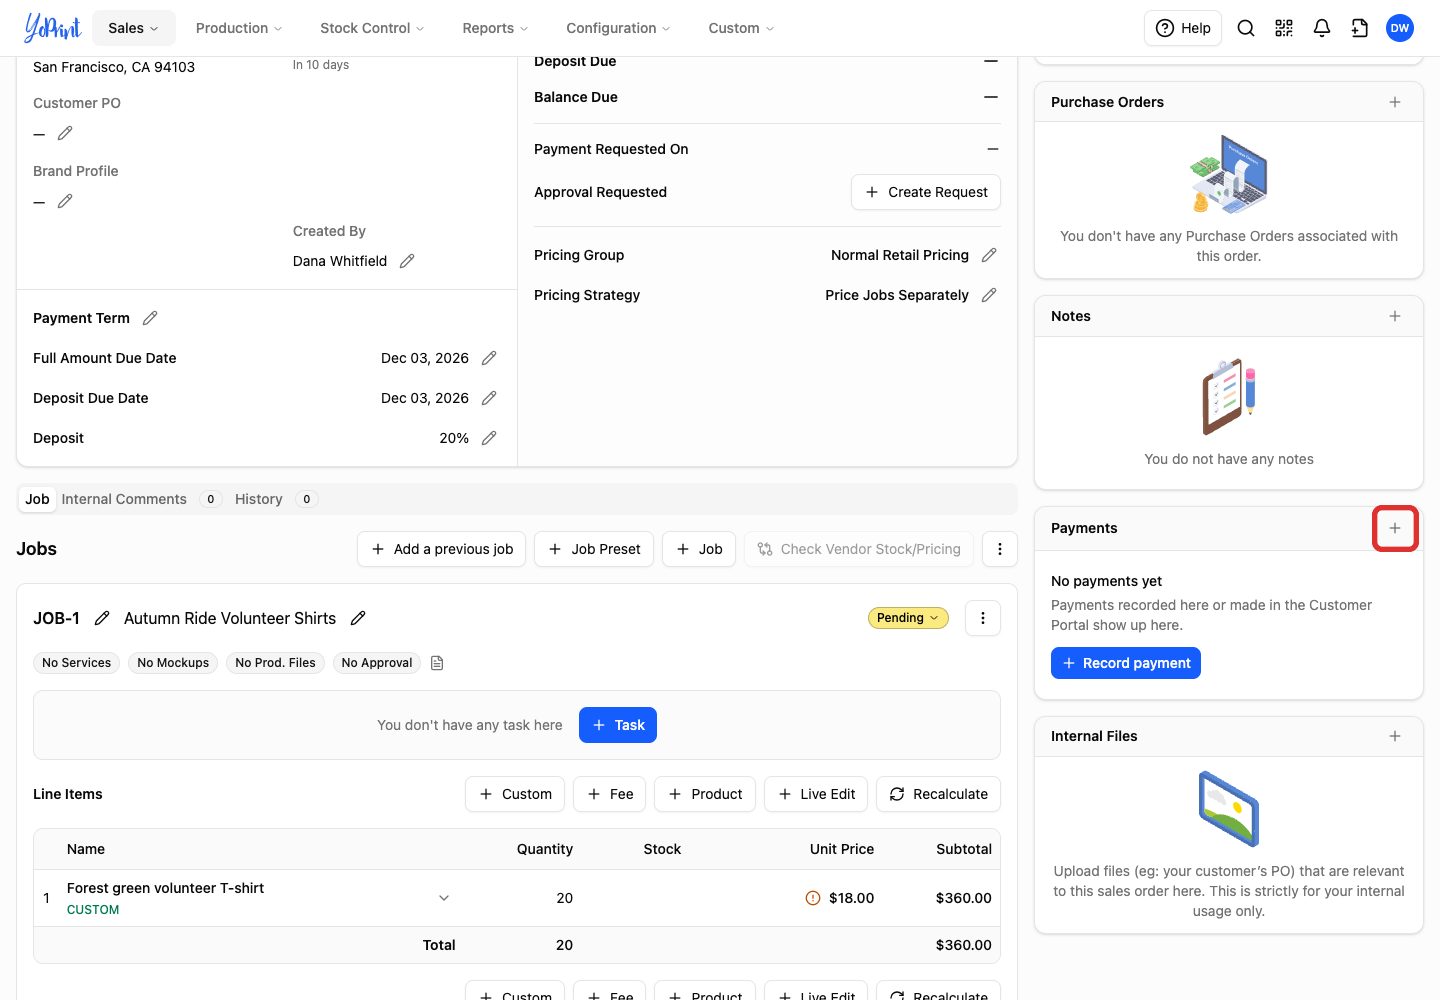
On the sales order, scroll down to Payments, then click +.
-
Choose Cash, check or other….
Using customer credit
Choose Apply credit… if the customer has available credit that you want to use toward this order. Choose Issue Credit to return unallocated order funds to the customer as store credit. See Customer Fund / Credit Management for those steps.
Date starts at today’s date. Use the calendar picker to choose a different payment date.
-
Choose an available amount option: Deposit, Full Amount, or Custom.
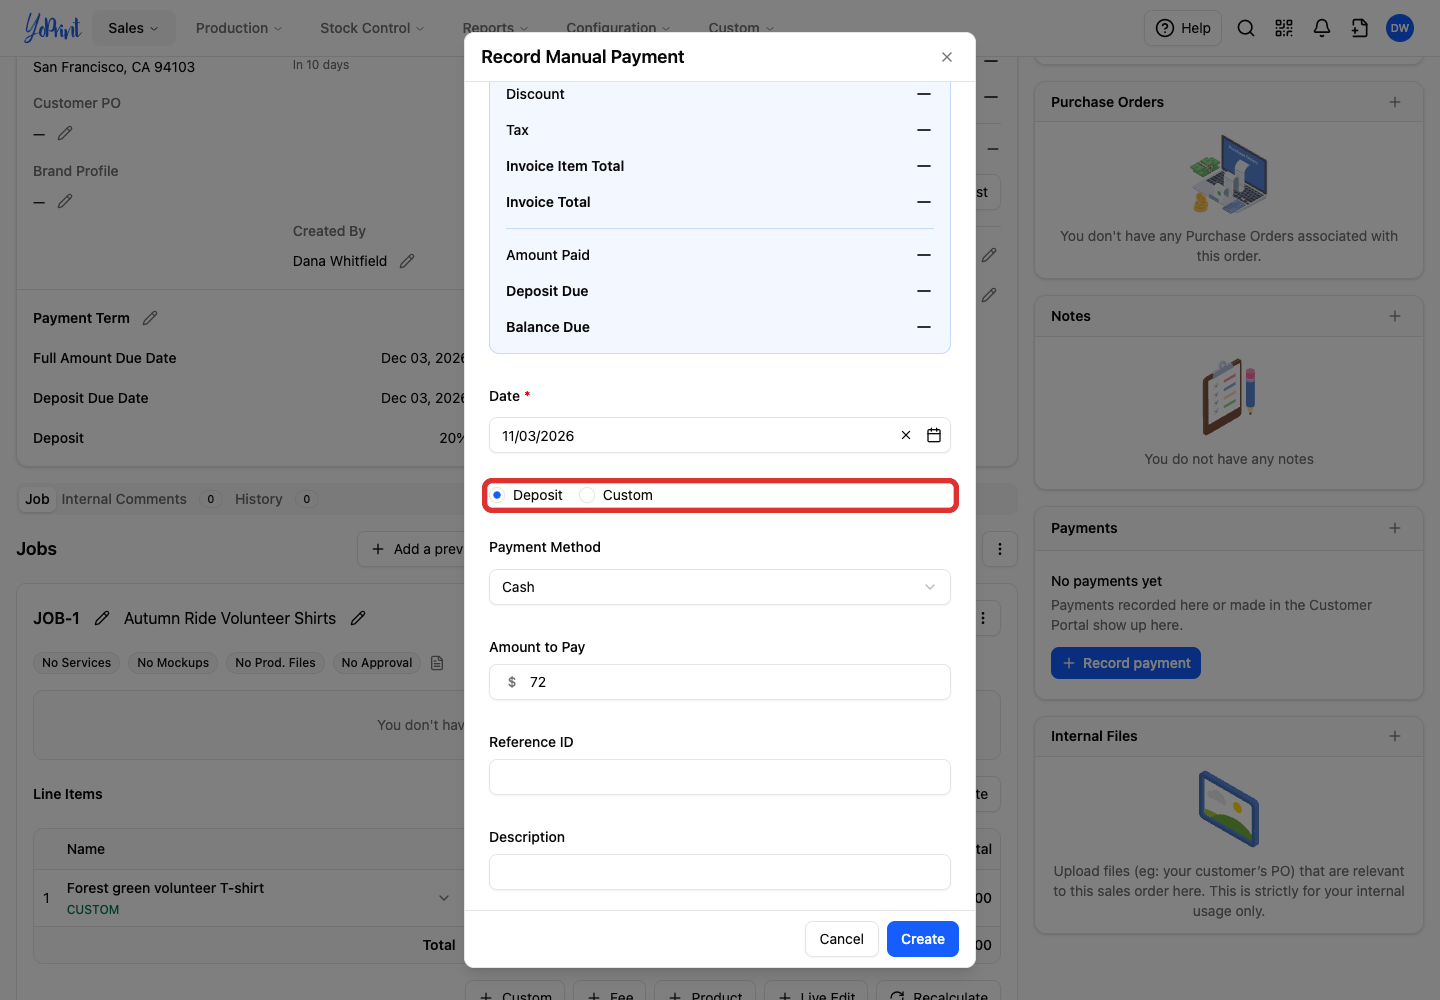
- Deposit fills Amount to Pay with the remaining deposit due from the order’s payment terms. For example, a 20% deposit on a $360 order is $72. Deposit appears while a deposit is still due. See Manage Payment Terms to set deposit amounts and due dates.
- Full Amount fills in the order’s remaining balance. This option appears after an invoice exists.
- Custom lets you enter the amount you received in Amount to Pay.
-
Select the Payment Method your customer used, such as Cash or Bank Transfer.
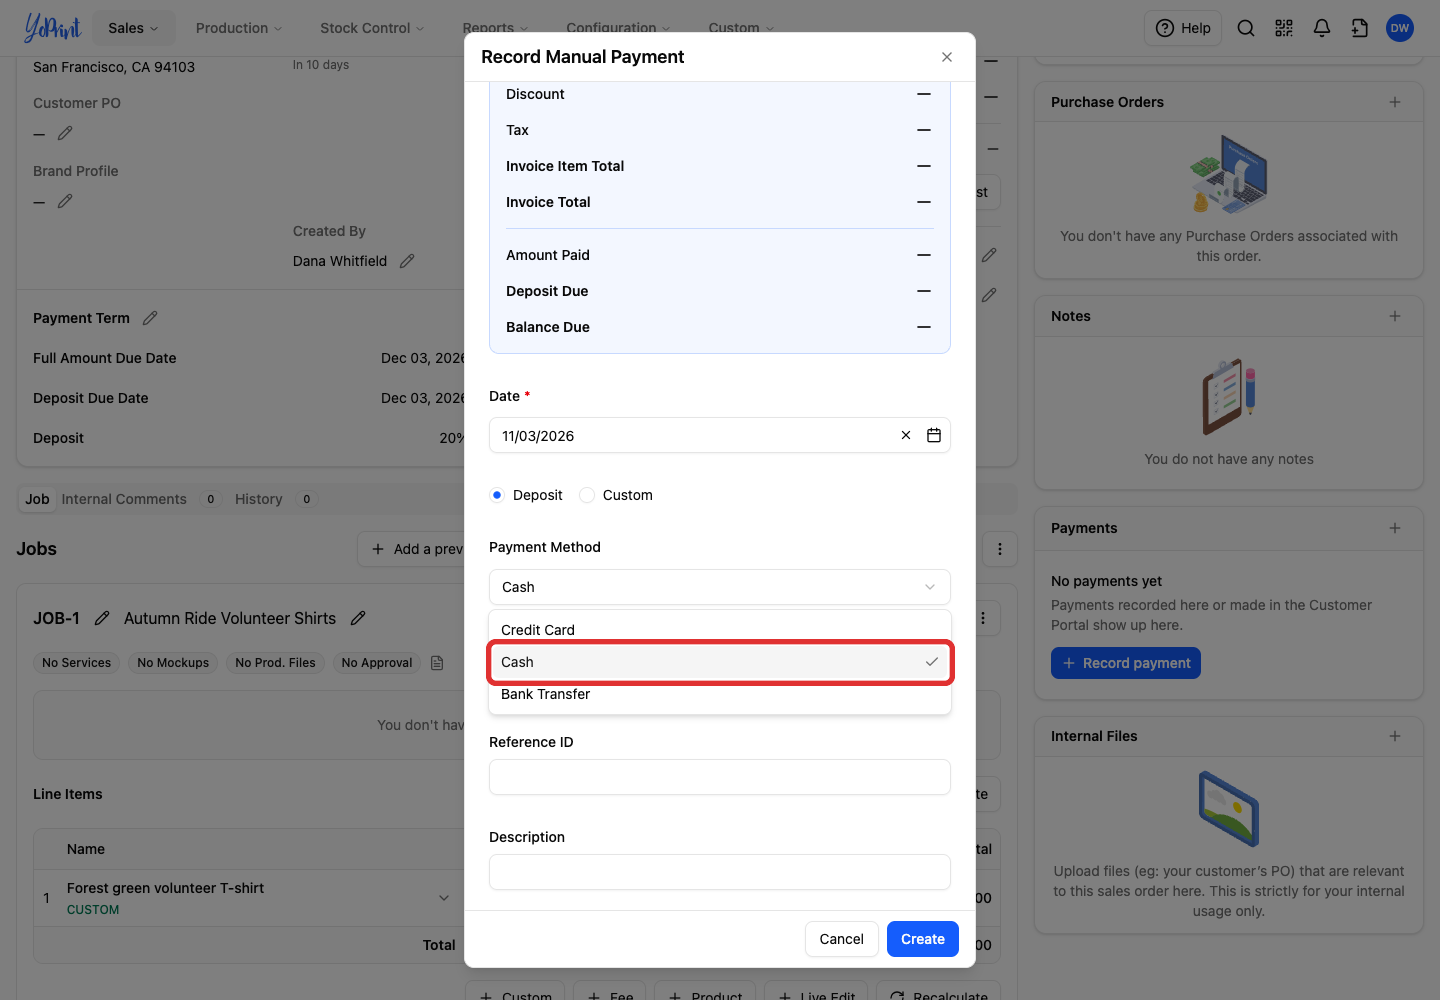
See Customizing Payment Method to change the available method names.
-
Enter the check number or payment identifier in Reference ID, if you have one.
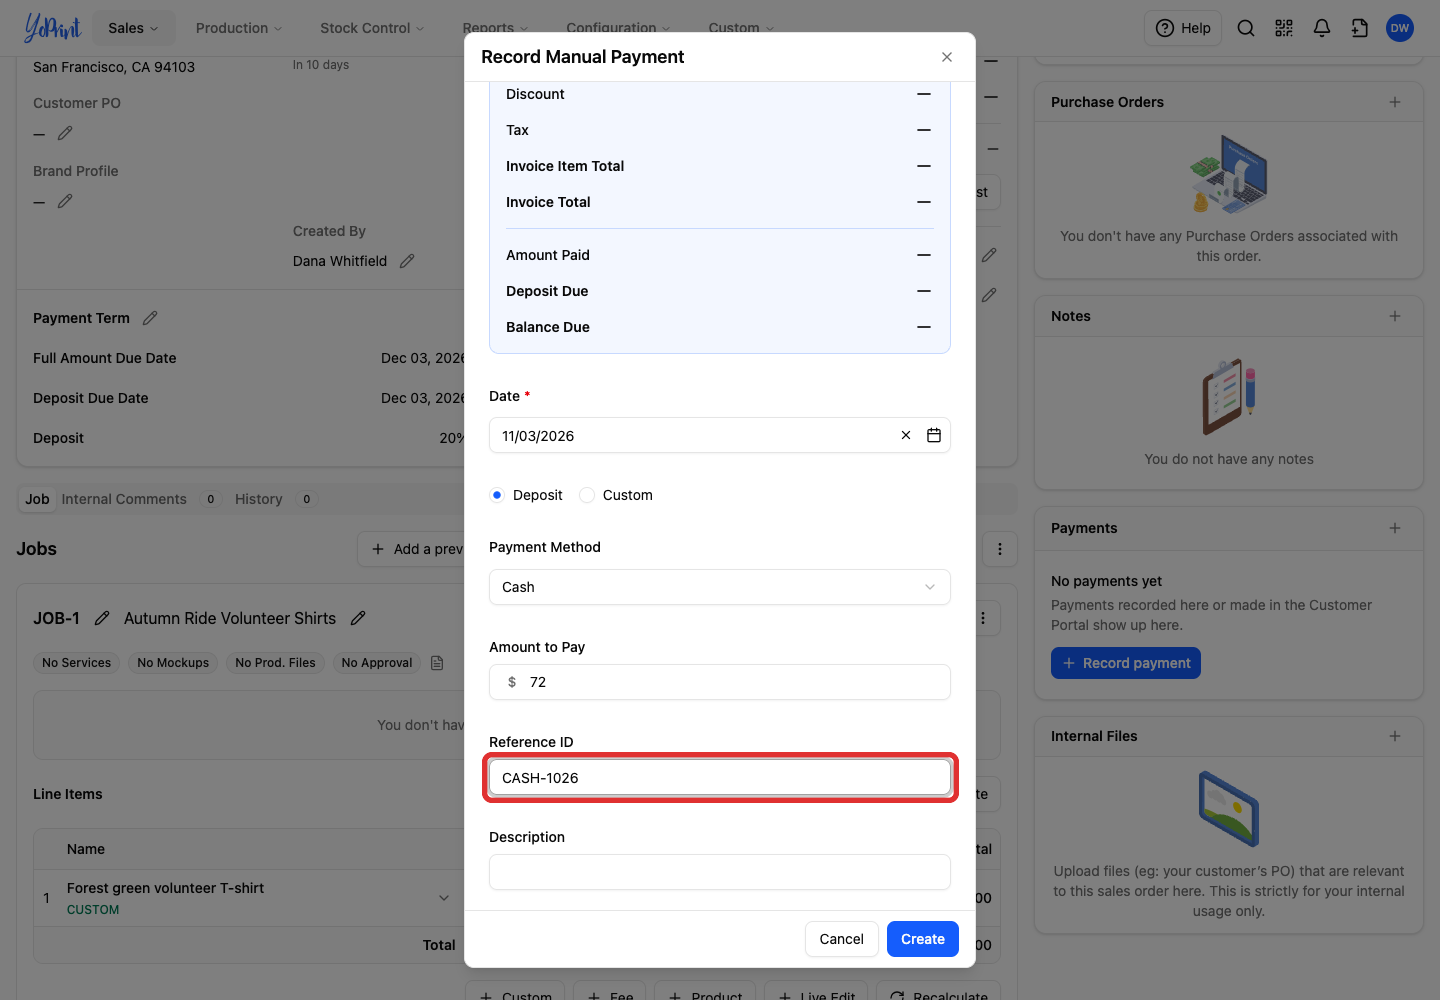
Add an optional note about the payment in Description.
-
Click Create.
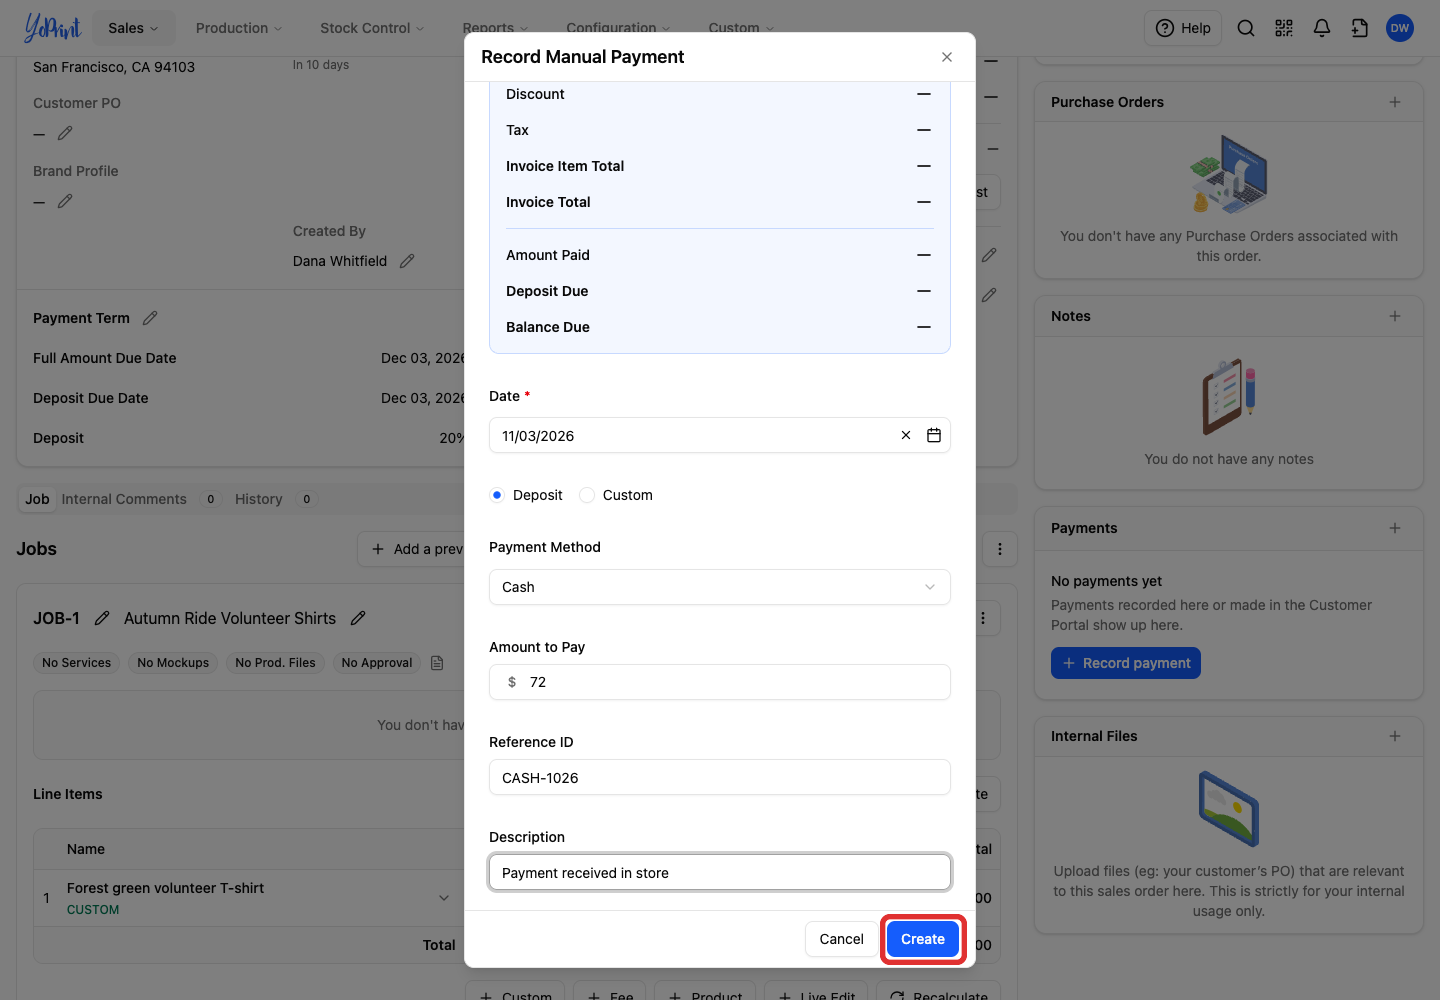
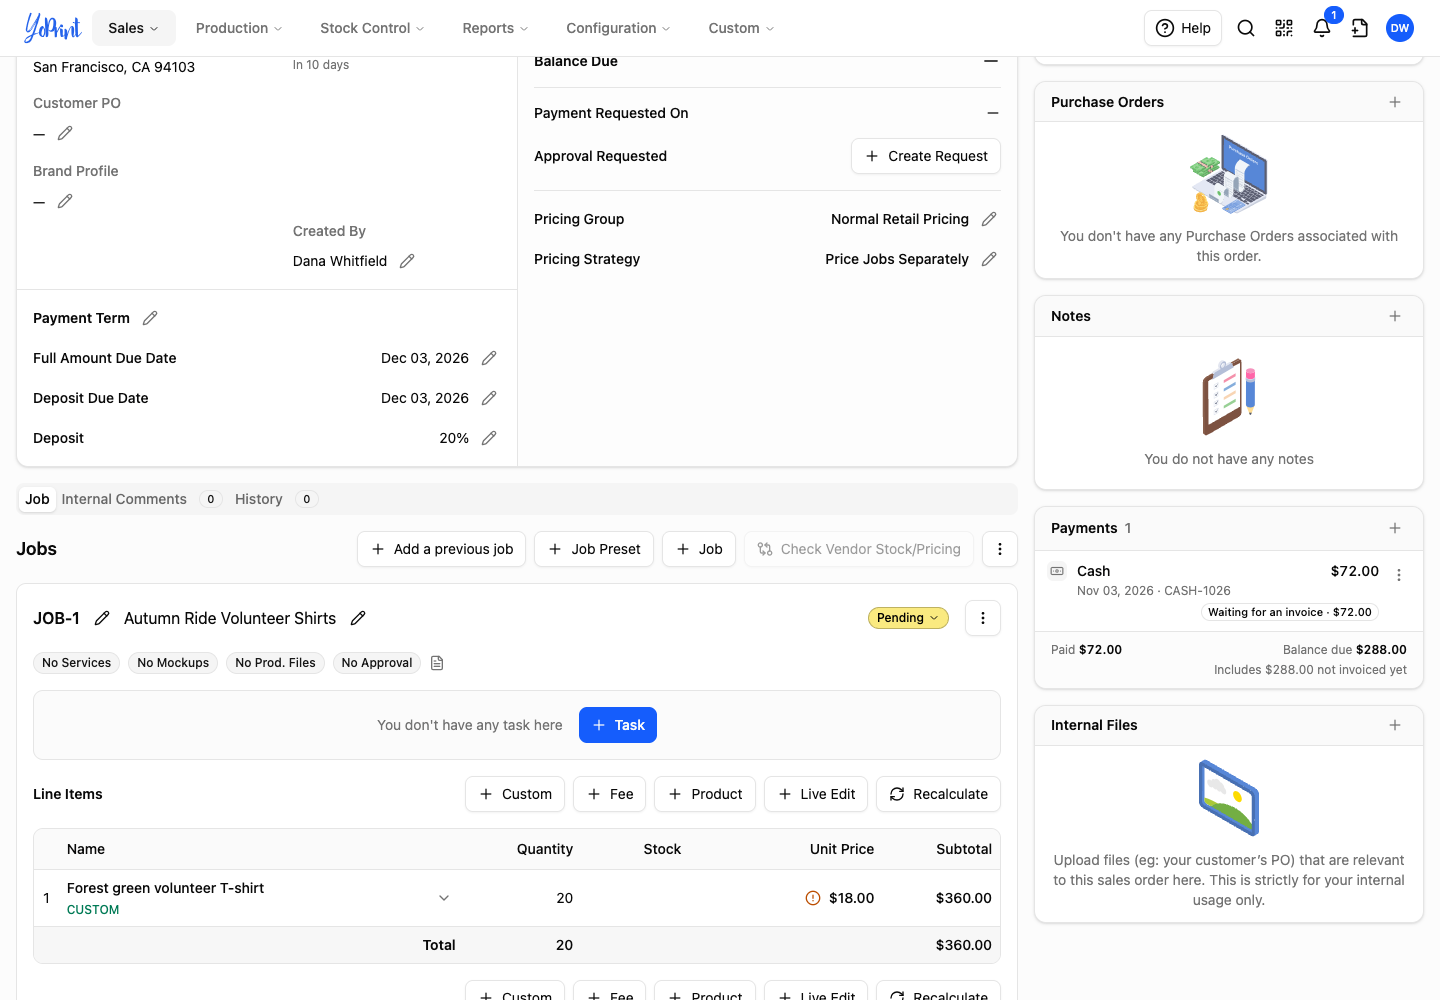
The payment appears under Payments with its method and amount. In this example, it says Waiting for an invoice because the invoice has not been created yet.
Payments received before an invoice
YoPrint applies payments to invoices. If you record a payment before creating an invoice, its row in Payments says Waiting for an invoice. Create the invoice in the Invoice panel to update Amount Paid and Balance Due.
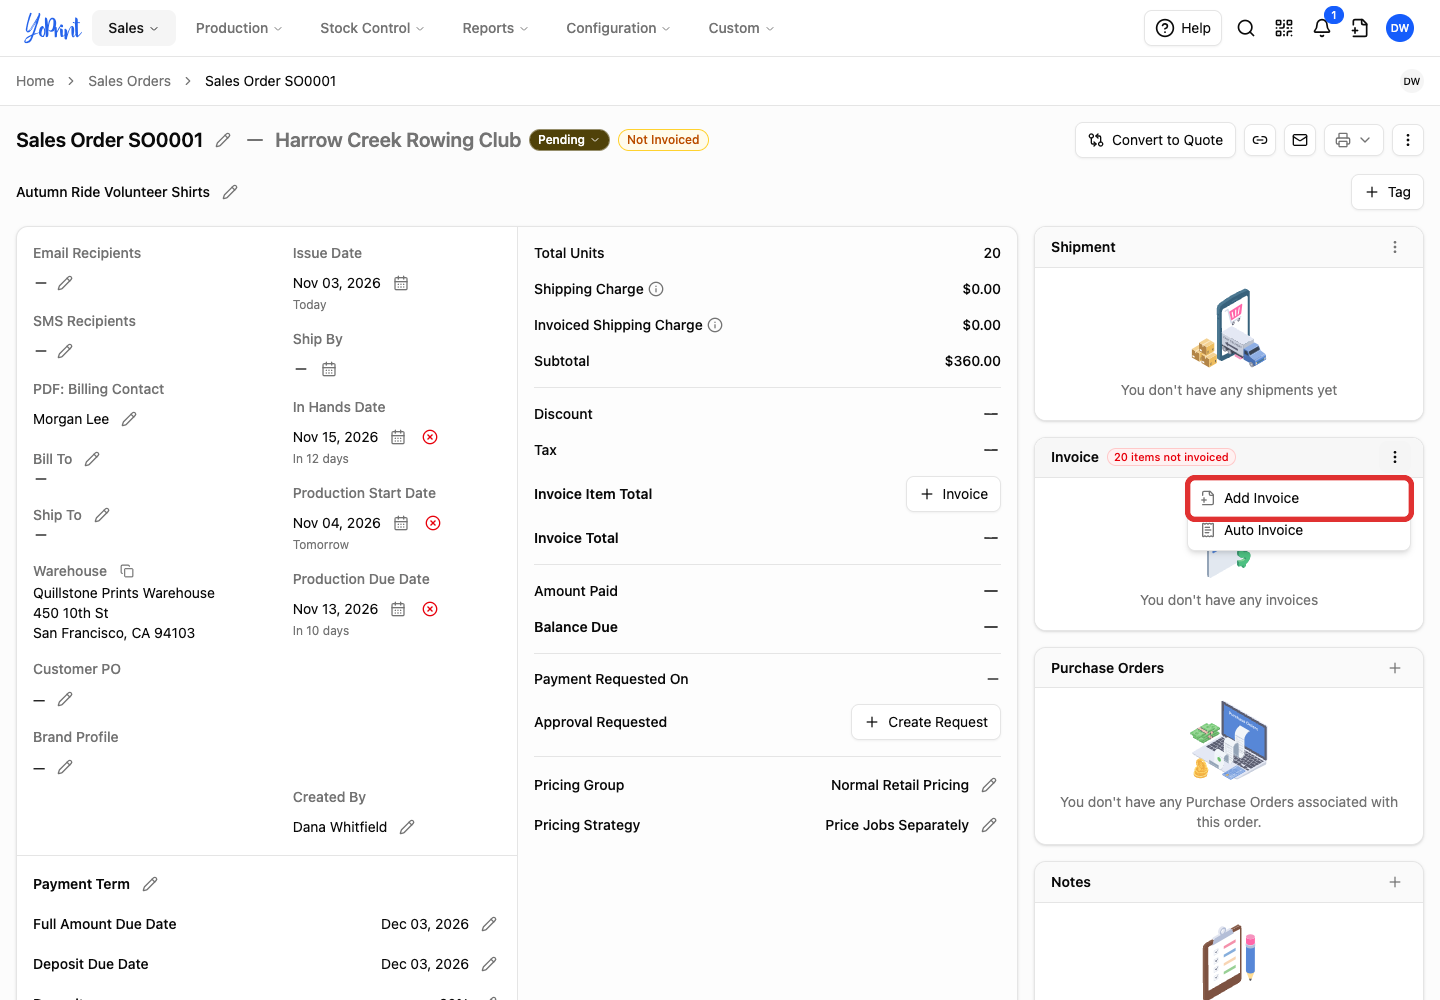
Open Invoice Actions (⋮) in the panel header.
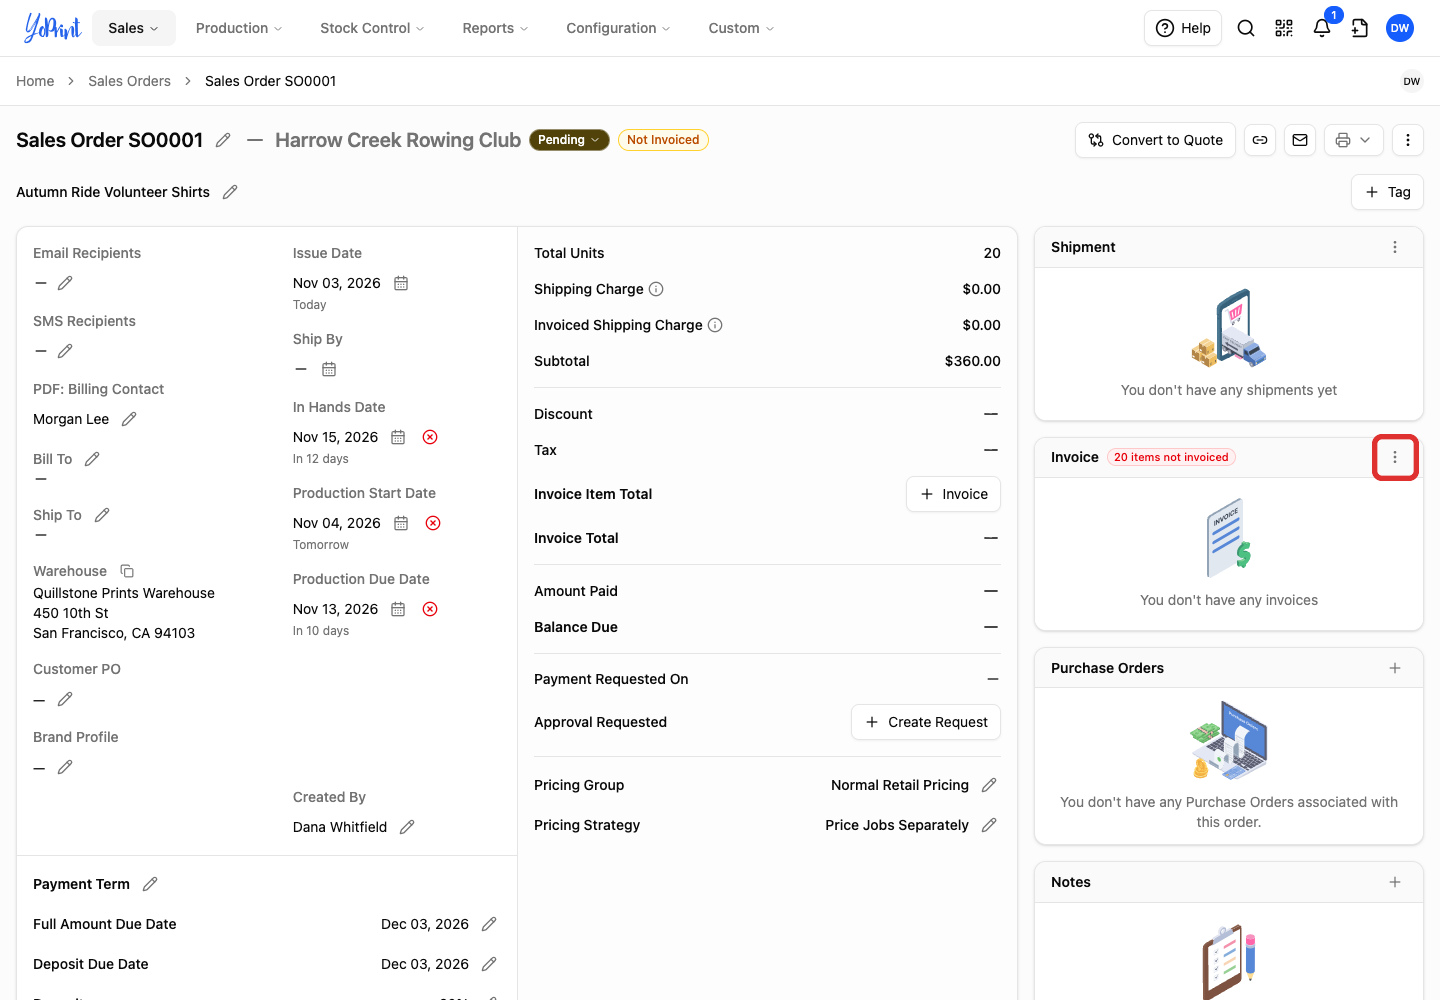
Choose Add Invoice.
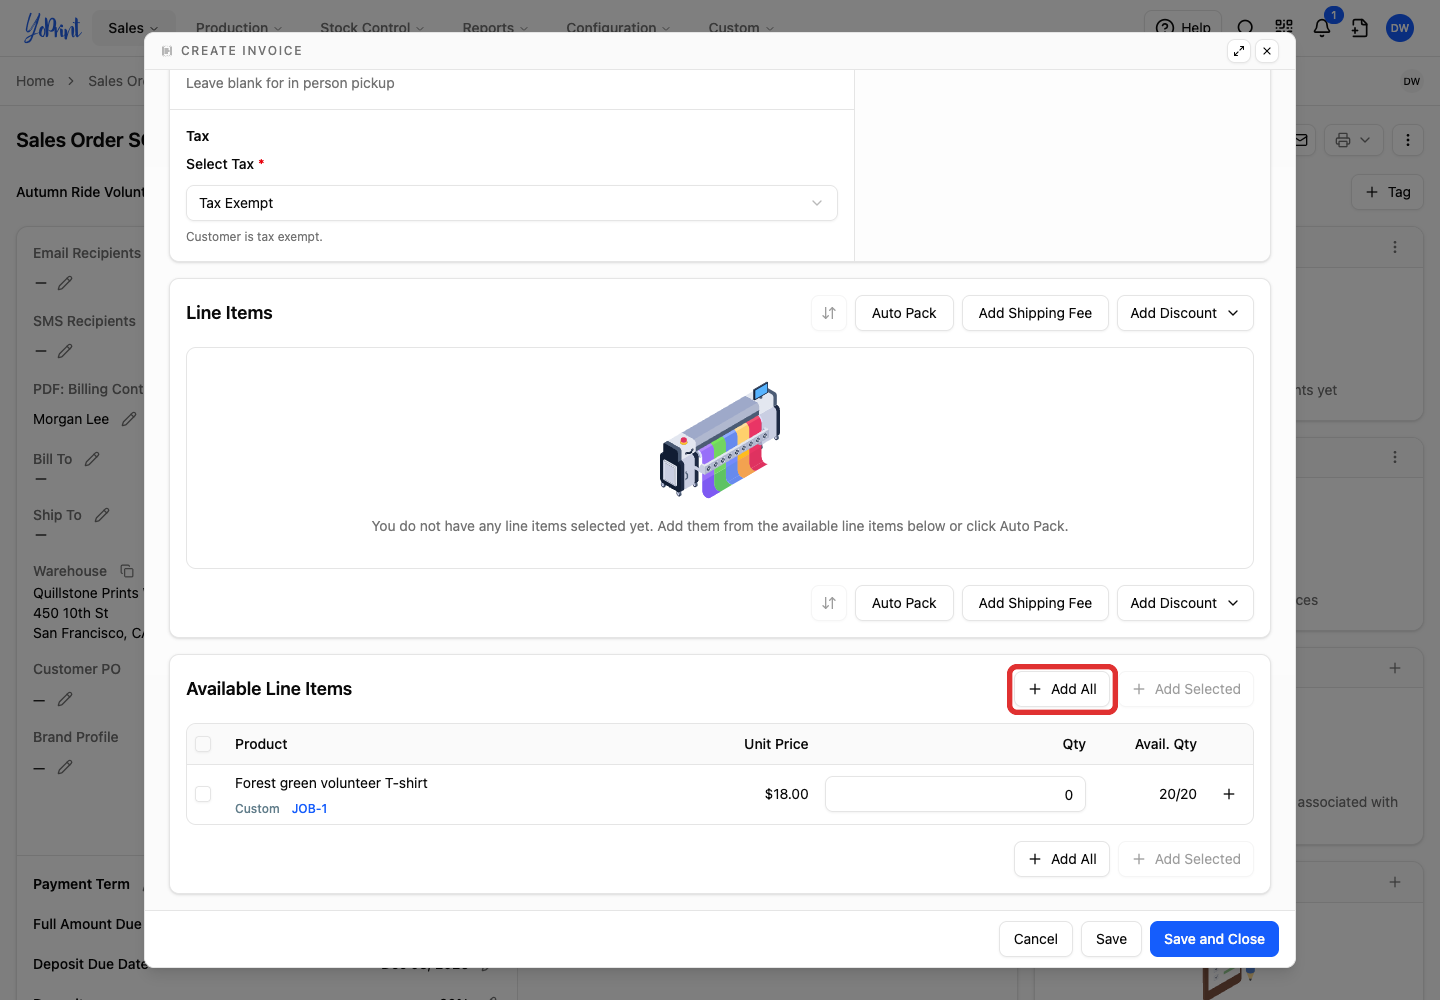
In the invoice window, click Add All to add the available items.
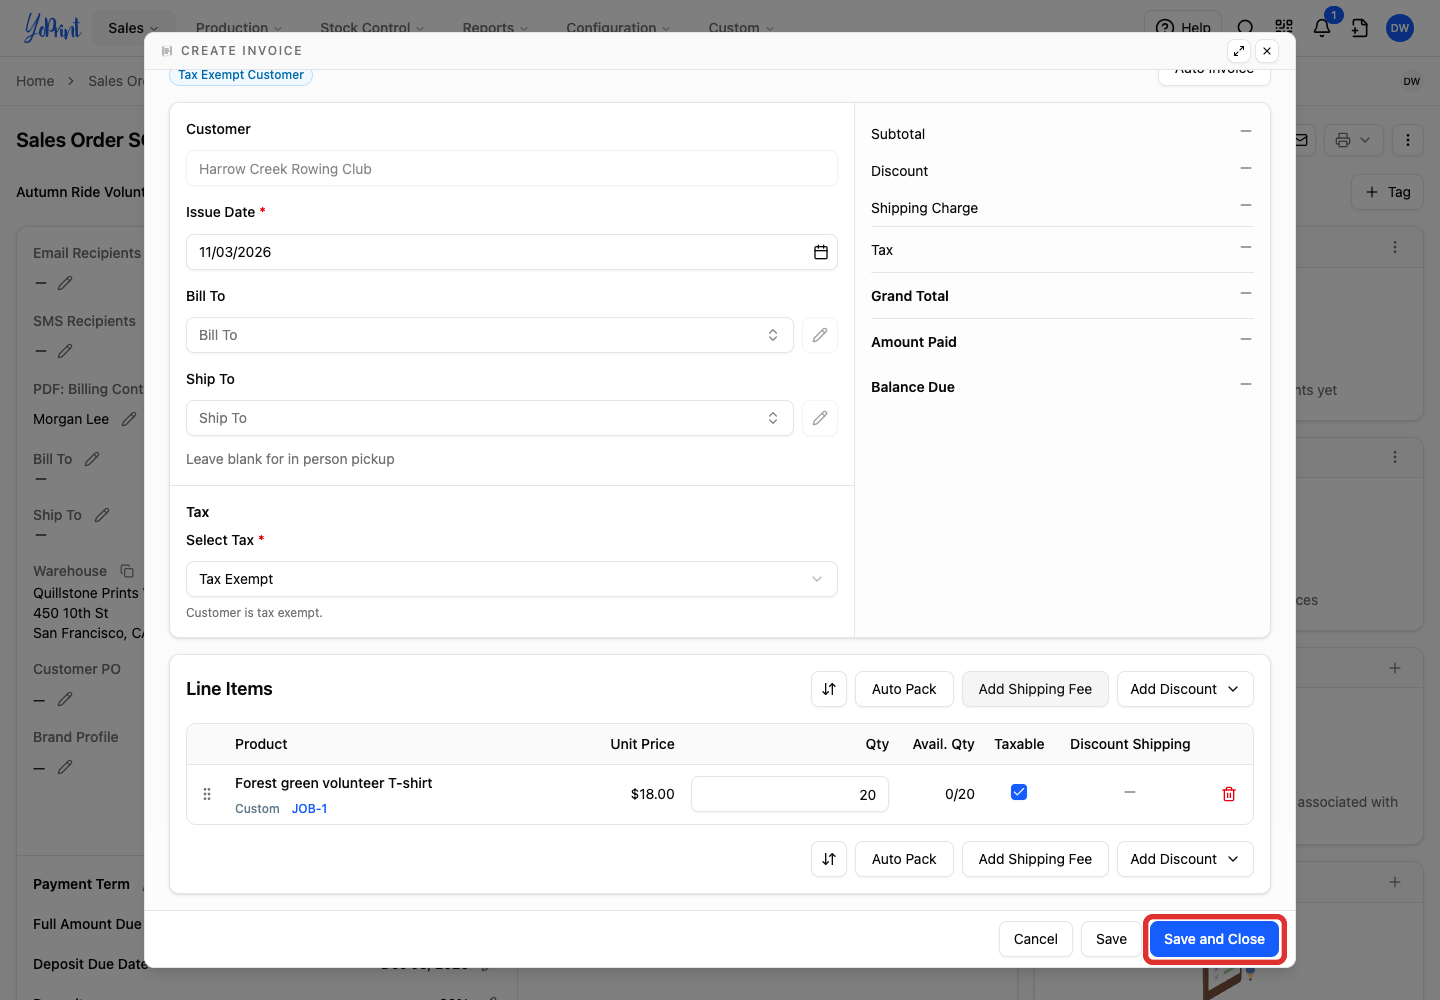
Check the items and tax, then click Save and Close.
After you create the invoice, YoPrint automatically applies the payment to it.
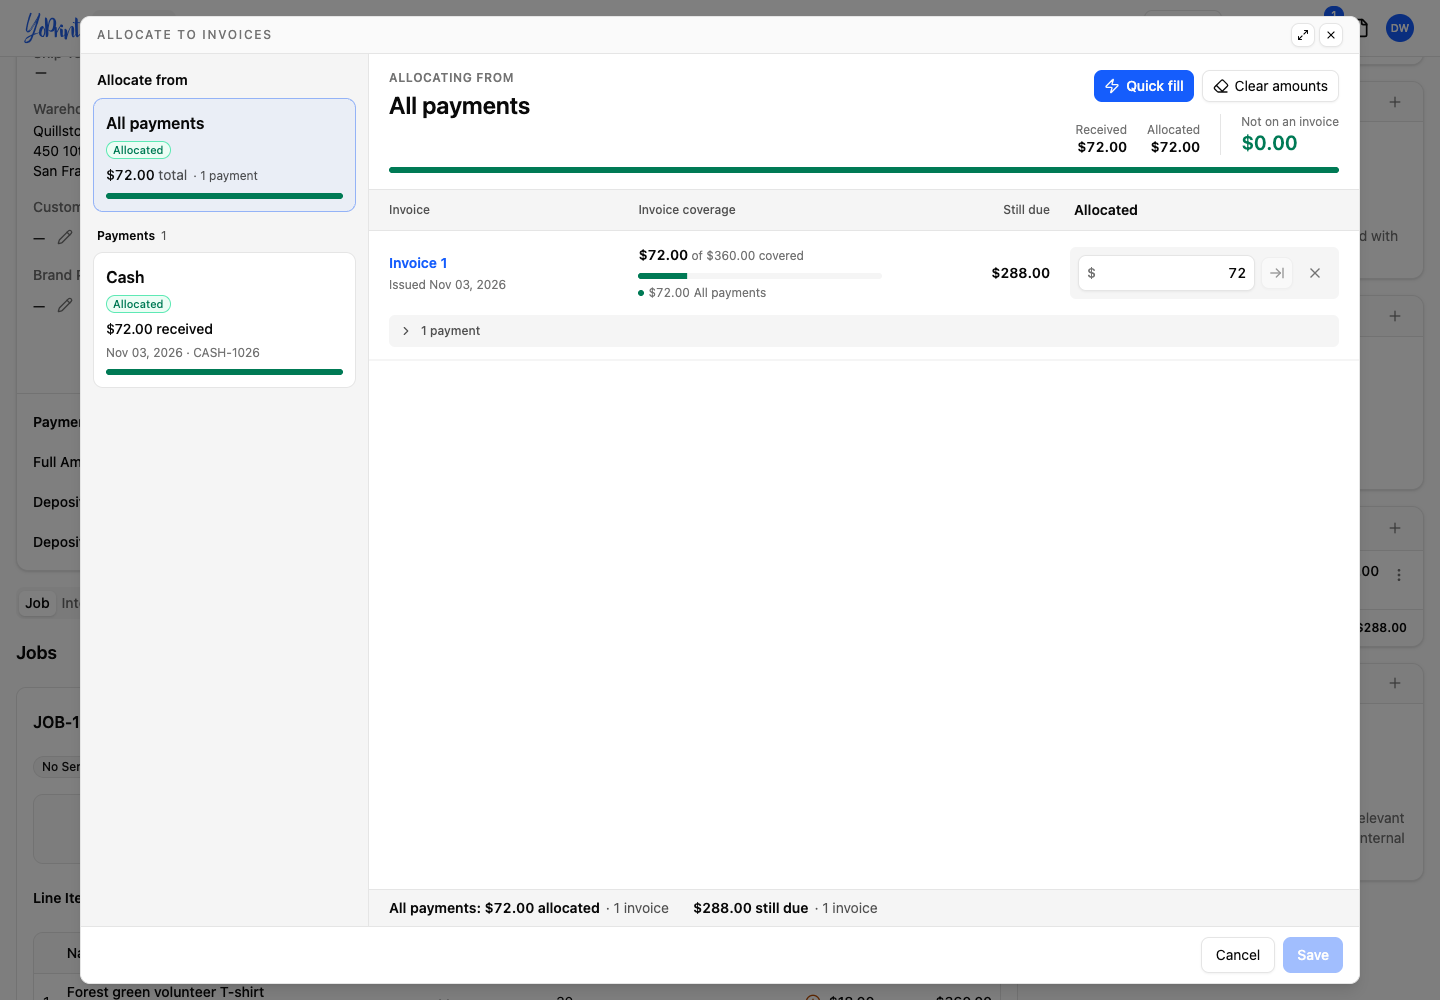
To check how the money is assigned, open + in Payments, then choose Allocate to invoices….
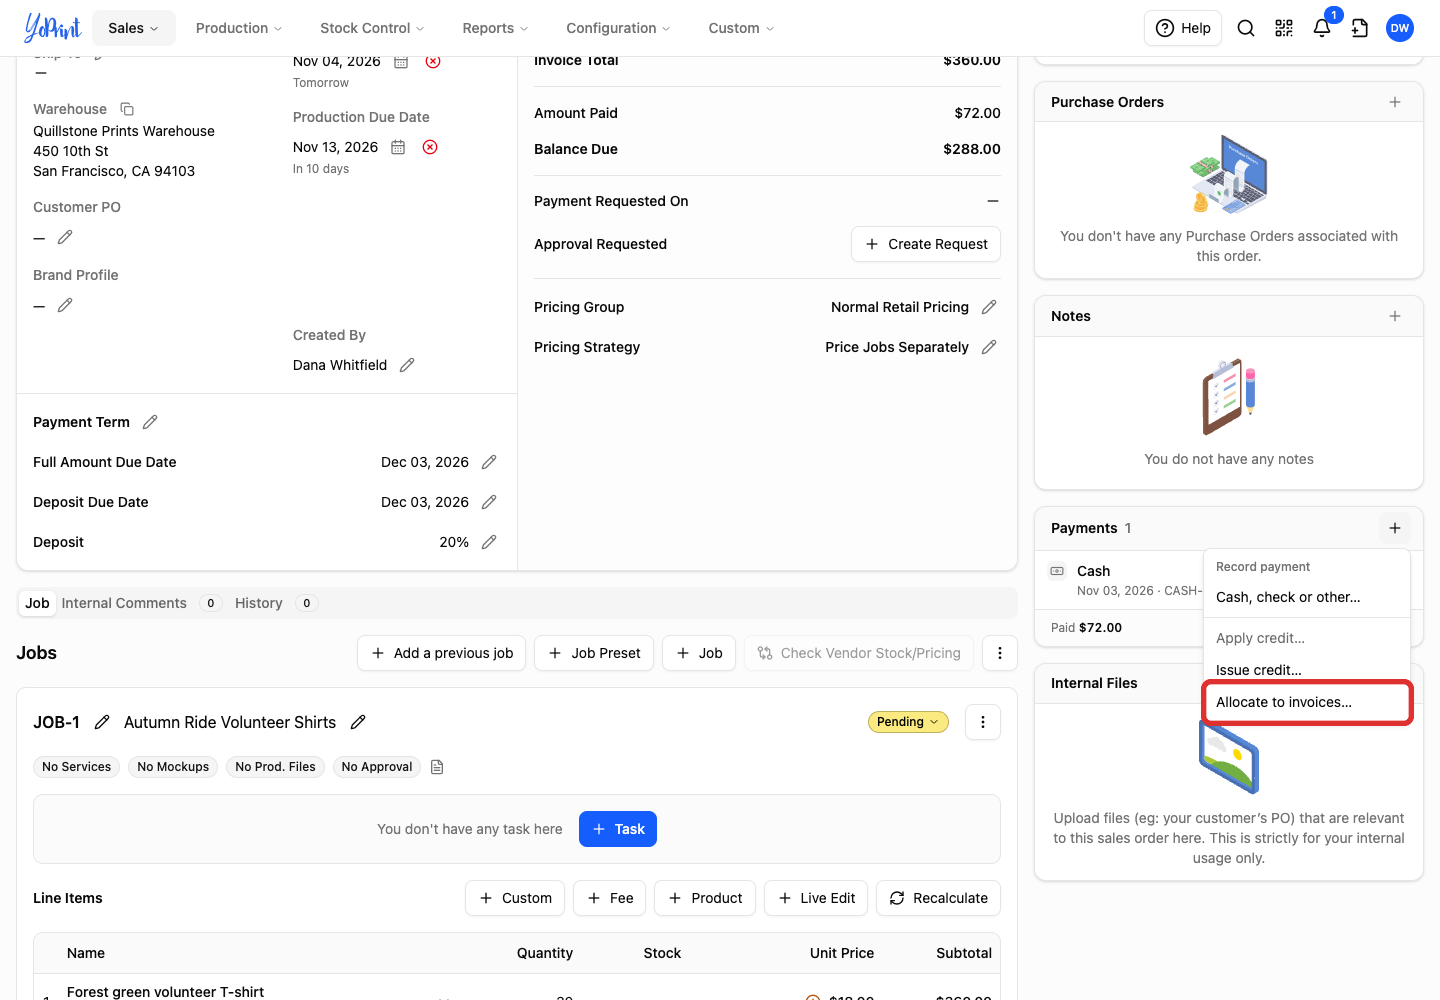
The allocation window shows the payments, how much of each invoice is covered, and what is still due. In this example, $72 of the $360 invoice is covered, leaving $288 due.
Correct a recorded manual payment
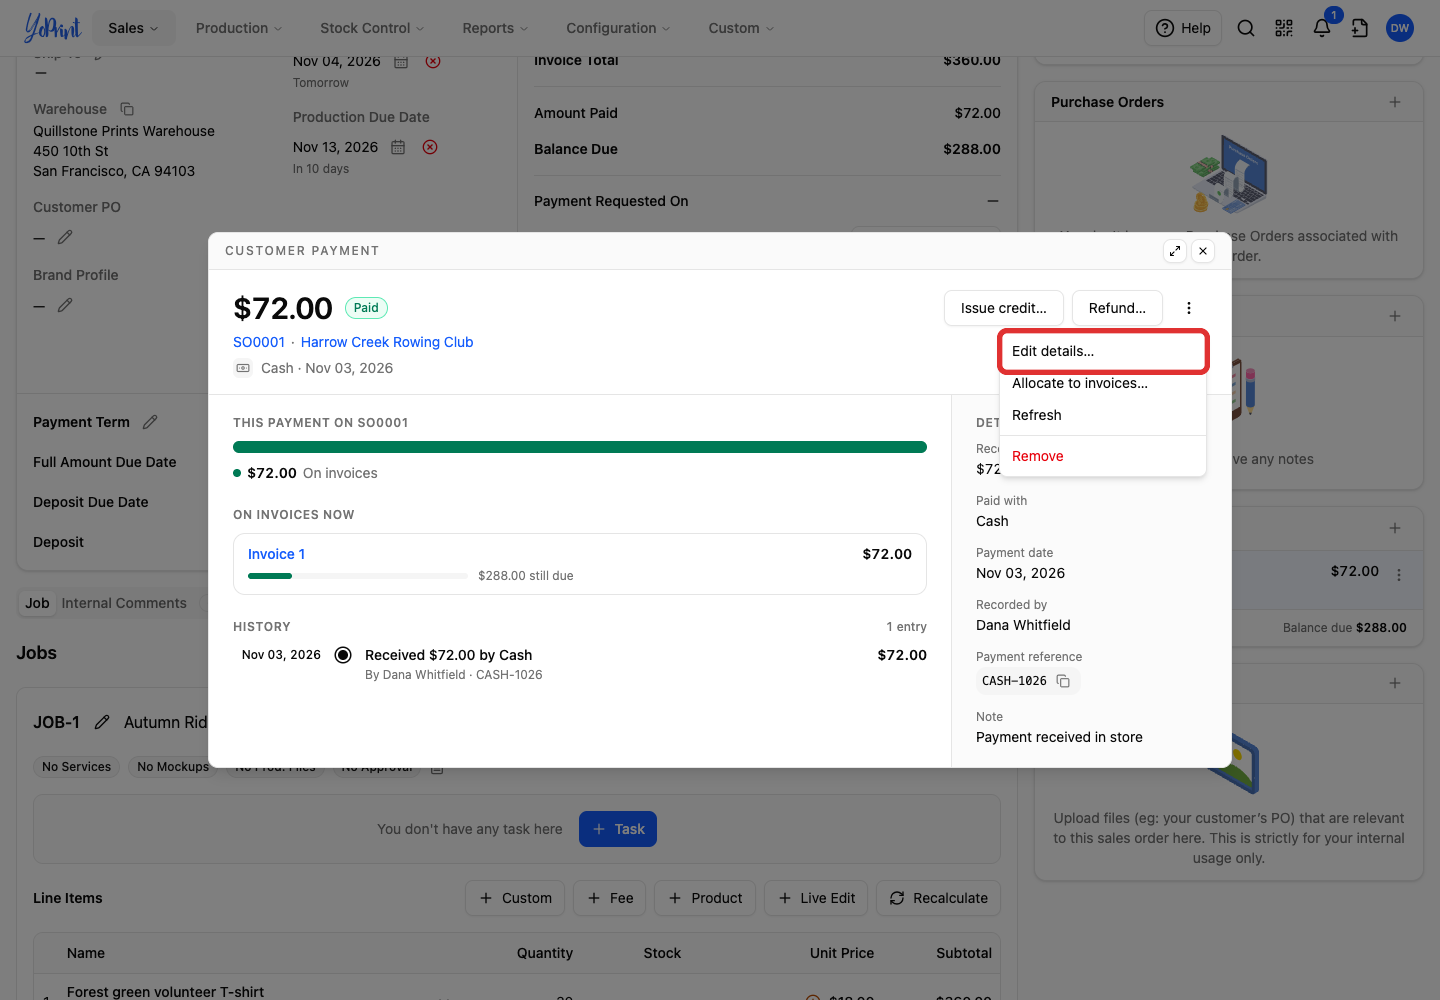
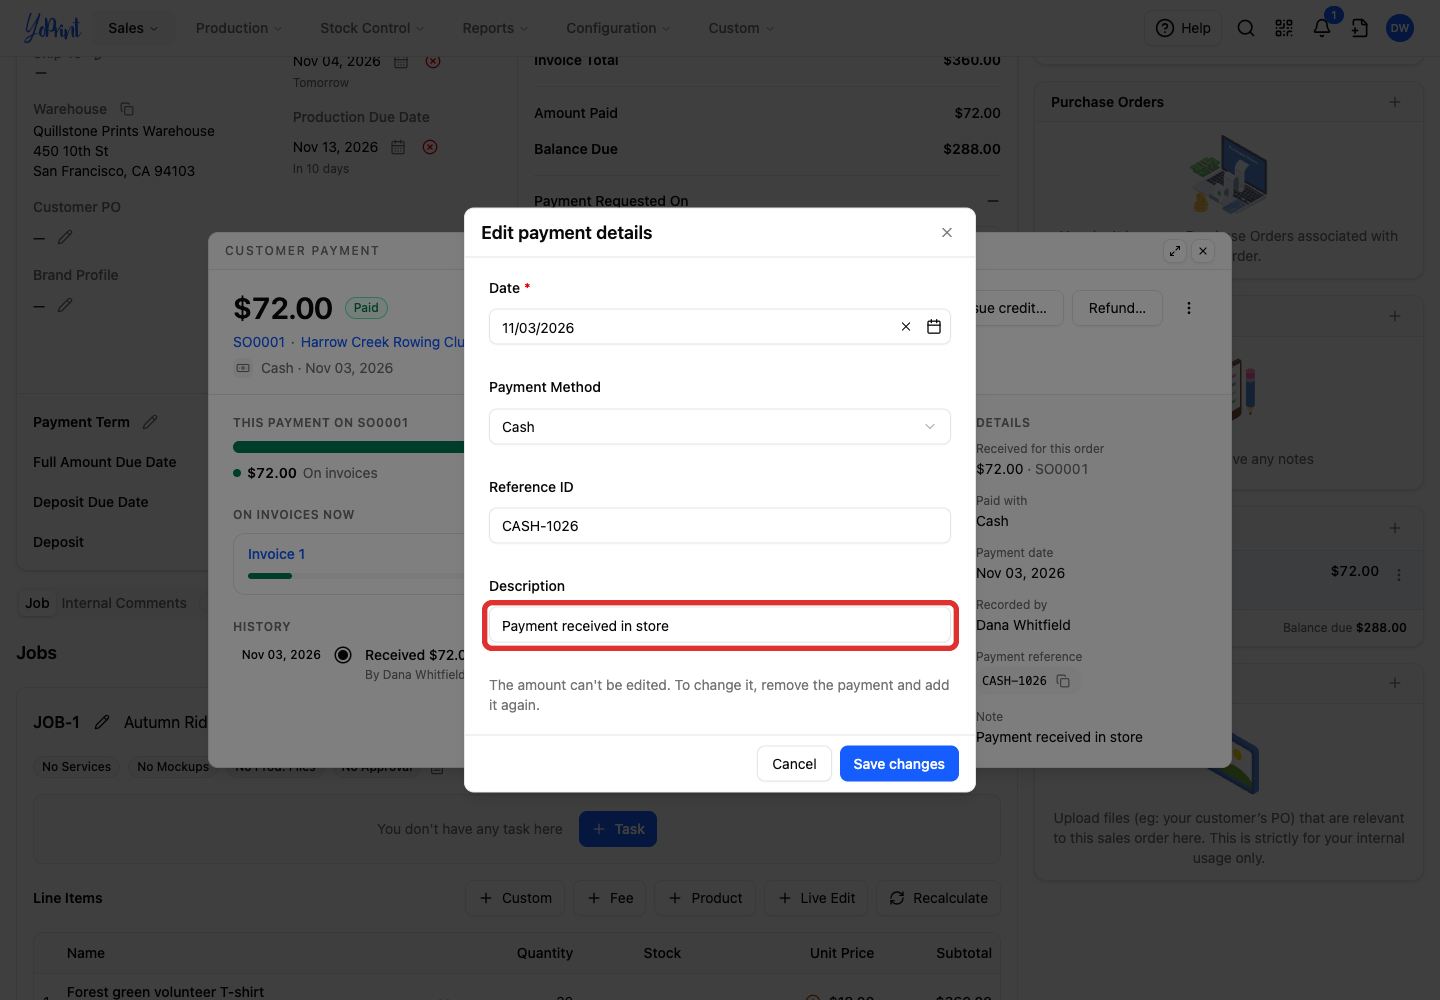
Use Edit details… to correct a manual payment’s date, payment method, reference, or note. It does not change the payment amount. To change the amount, choose Remove in More actions (⋮) and add the payment again.
-
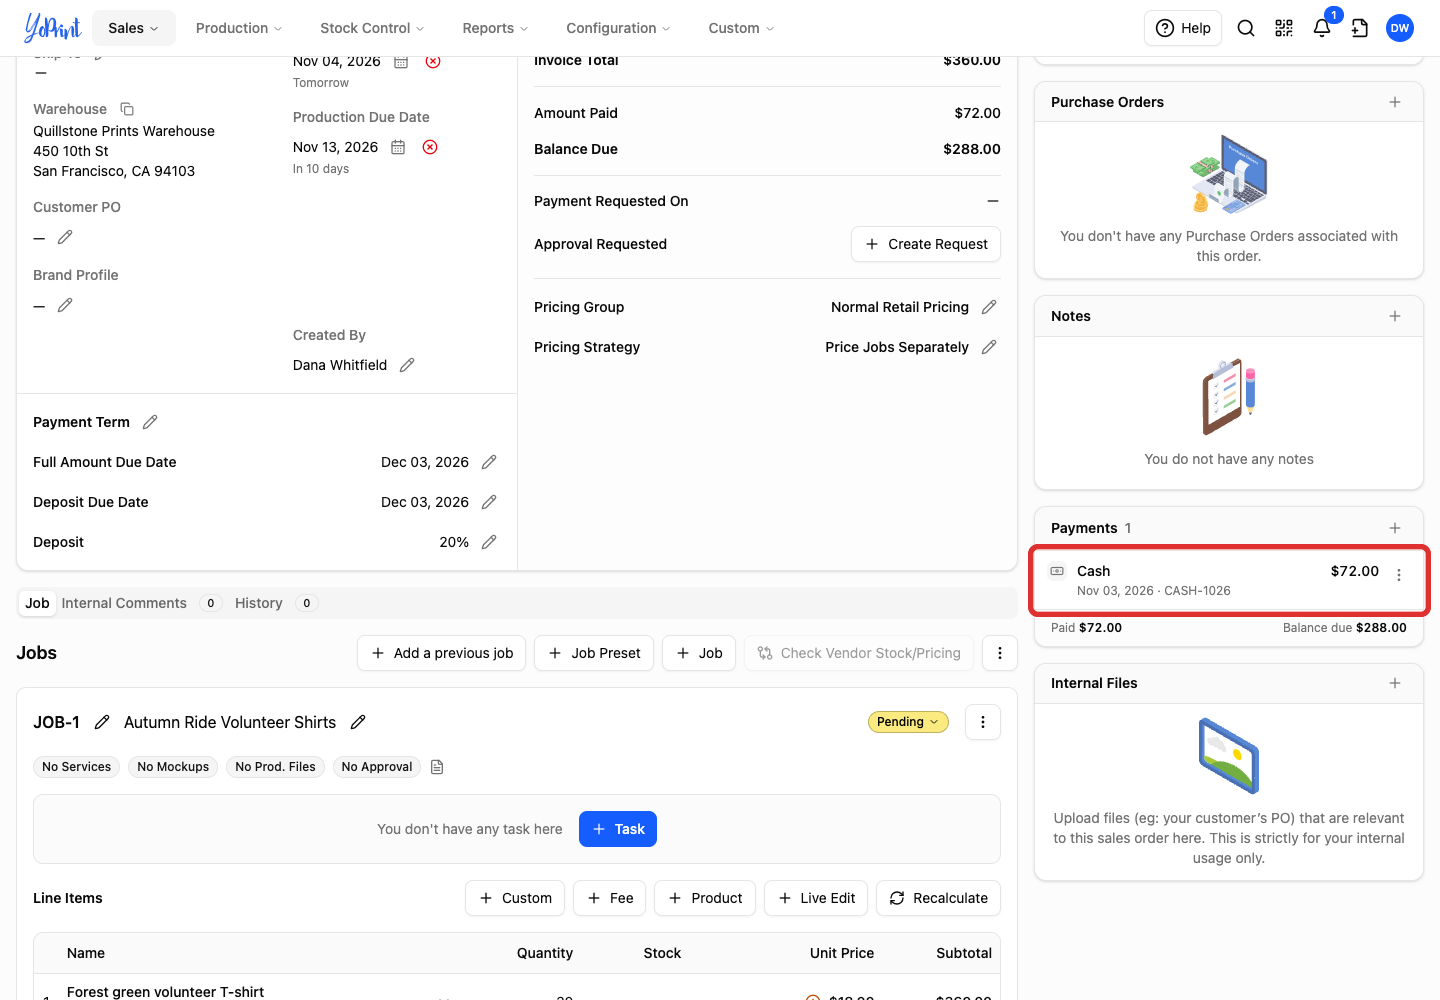
In Payments, double-click the manual payment’s row.
-
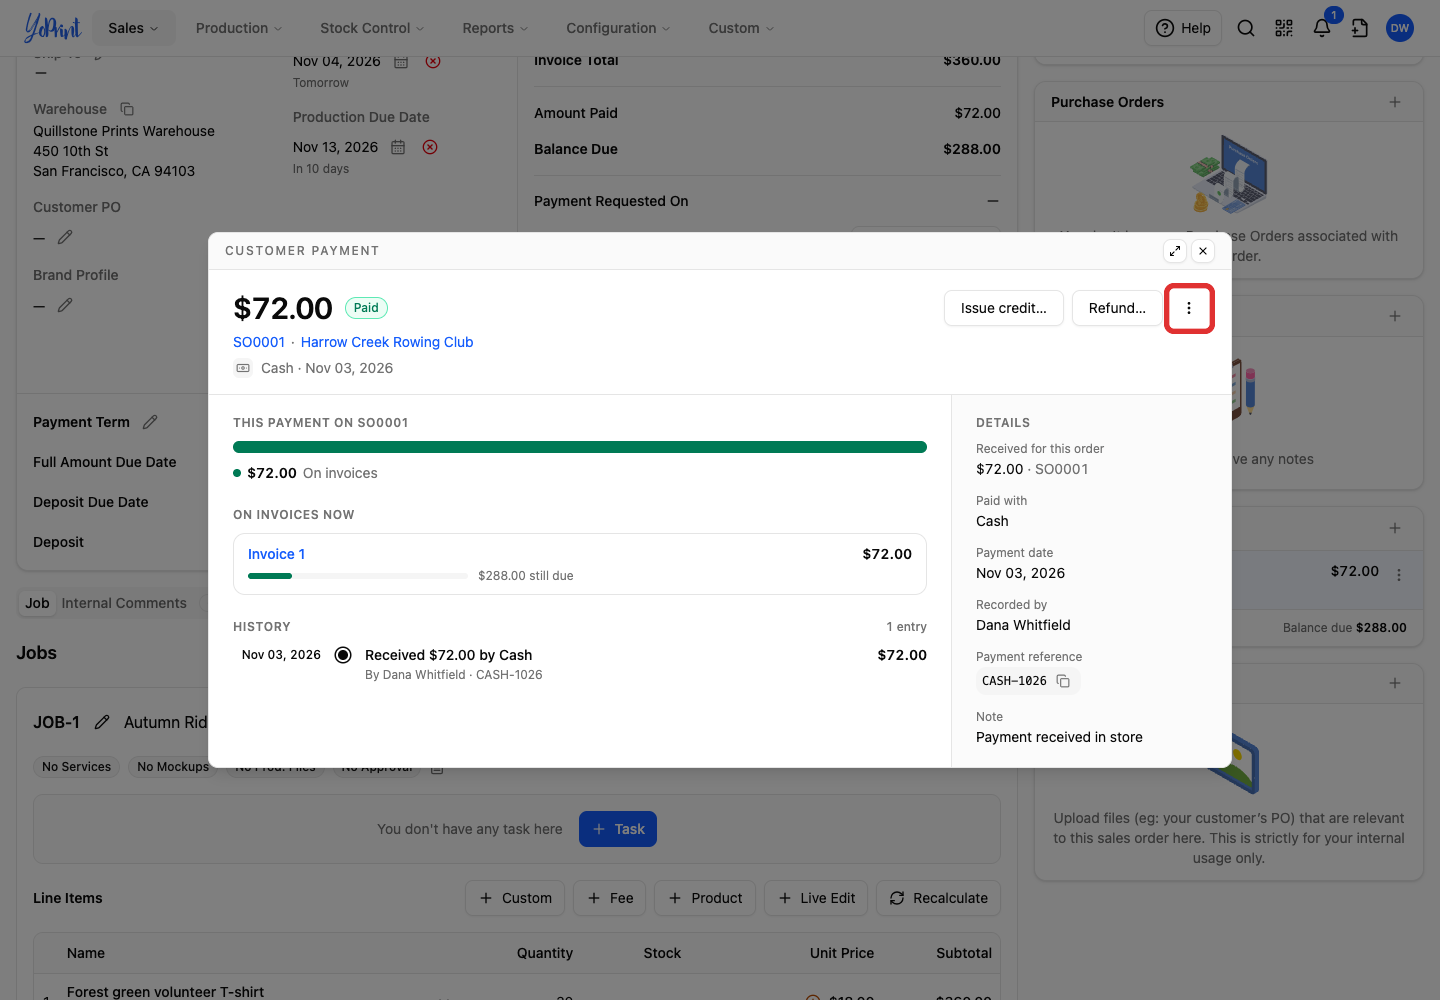
Open More actions (⋮) in the payment window.
-
Choose Edit details….
-
Correct Date, Payment Method, Reference ID, or Description as needed.
-
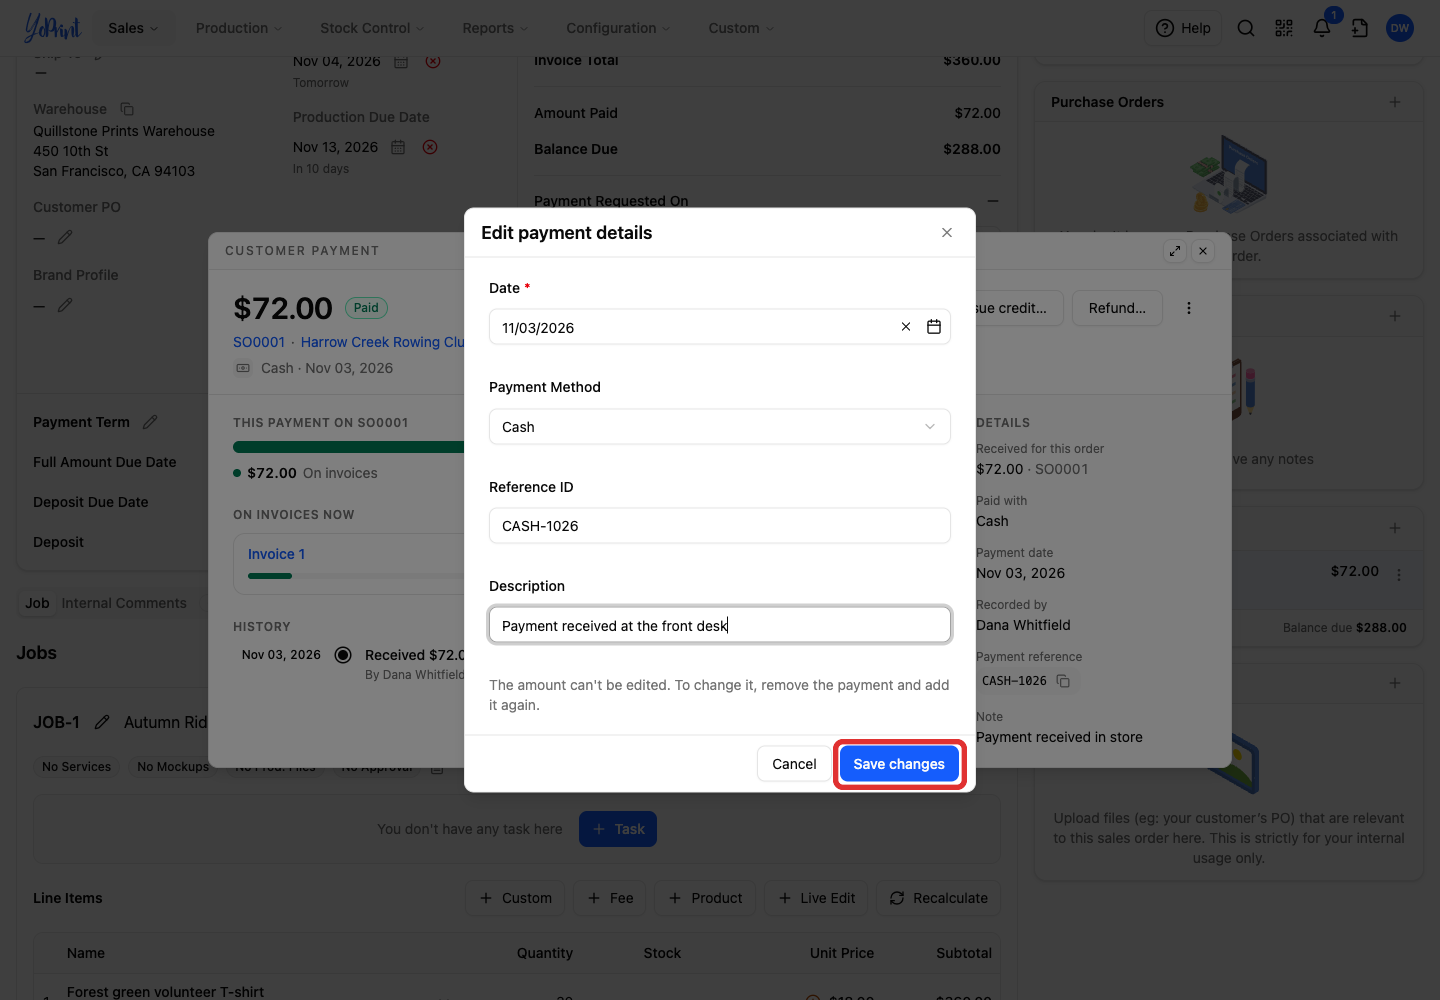
Click Save changes.
Check the order balance
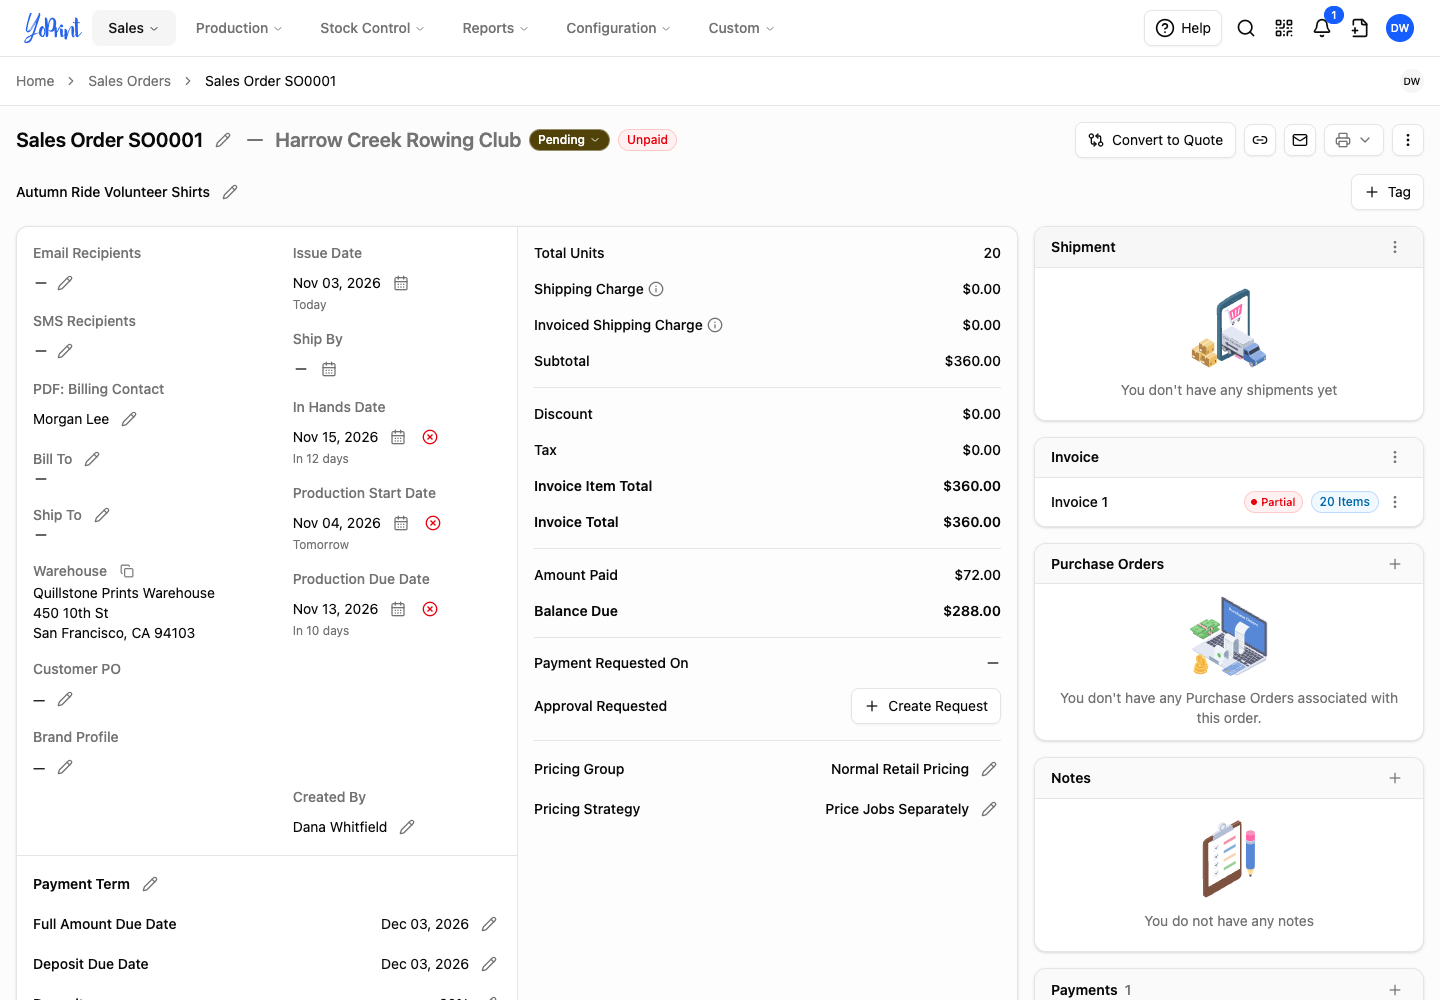
Check the header at the top of the sales order to review what the customer has paid and what remains due. Amount Paid shows the amount paid toward the order’s invoices. Balance Due shows what remains owed. Payment Requested On displays a dash until you send a payment request.
Send a payment request
Send a payment request whenever a sales order has a balance due. YoPrint uses the label Payment Reminder for both the first payment notice and follow-up reminders.
-
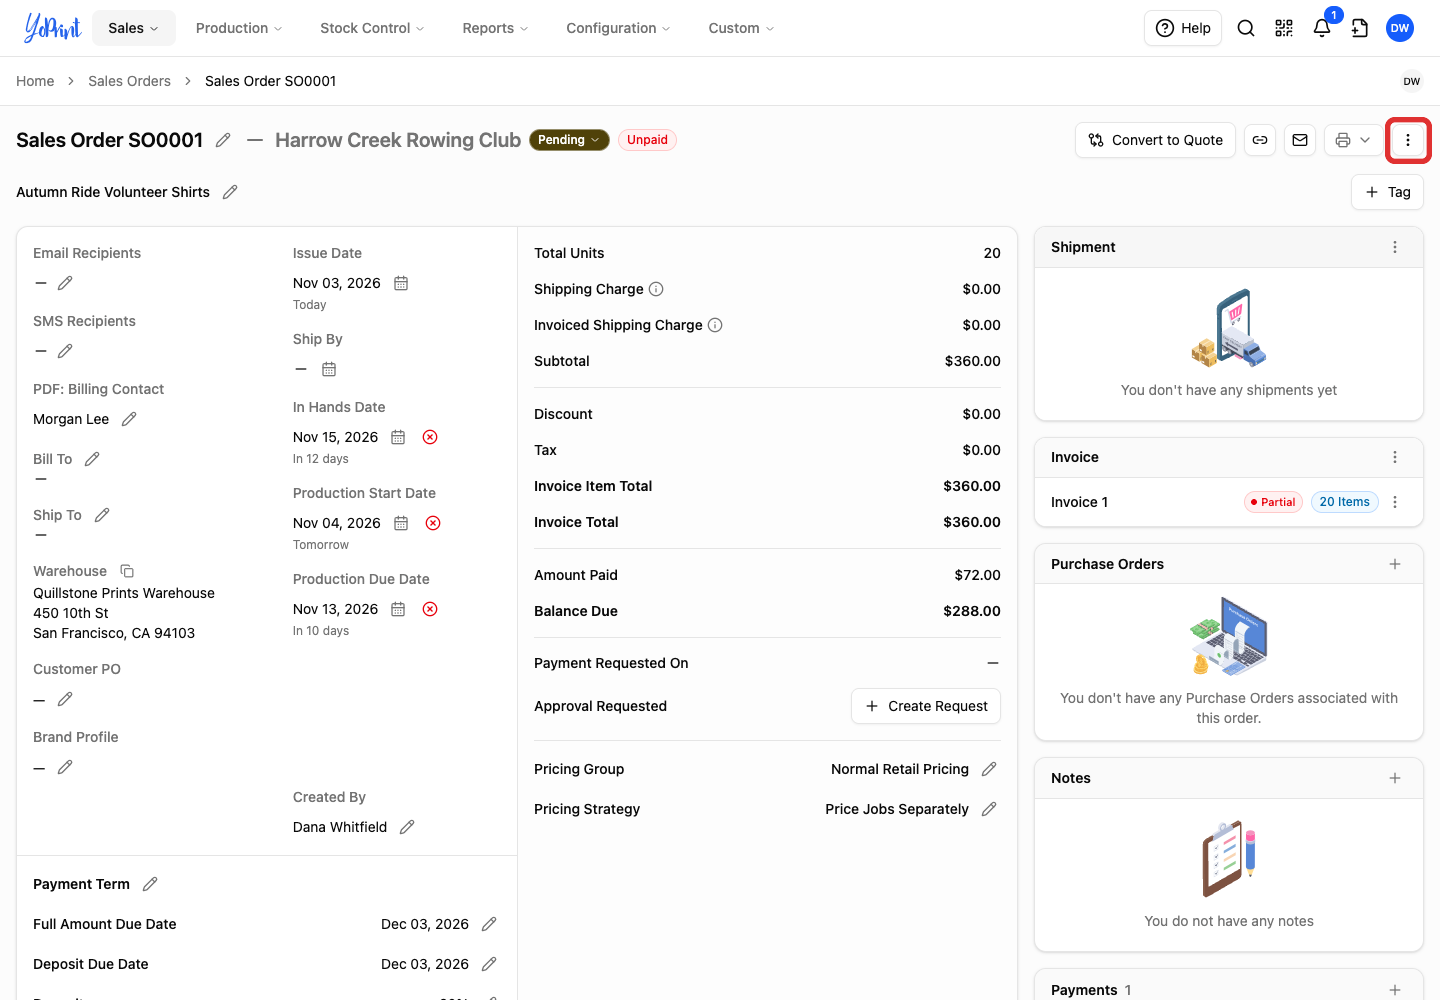
Open Quick Actions (⋮) at the top right of the sales order.
-
Choose Send Payment Request.
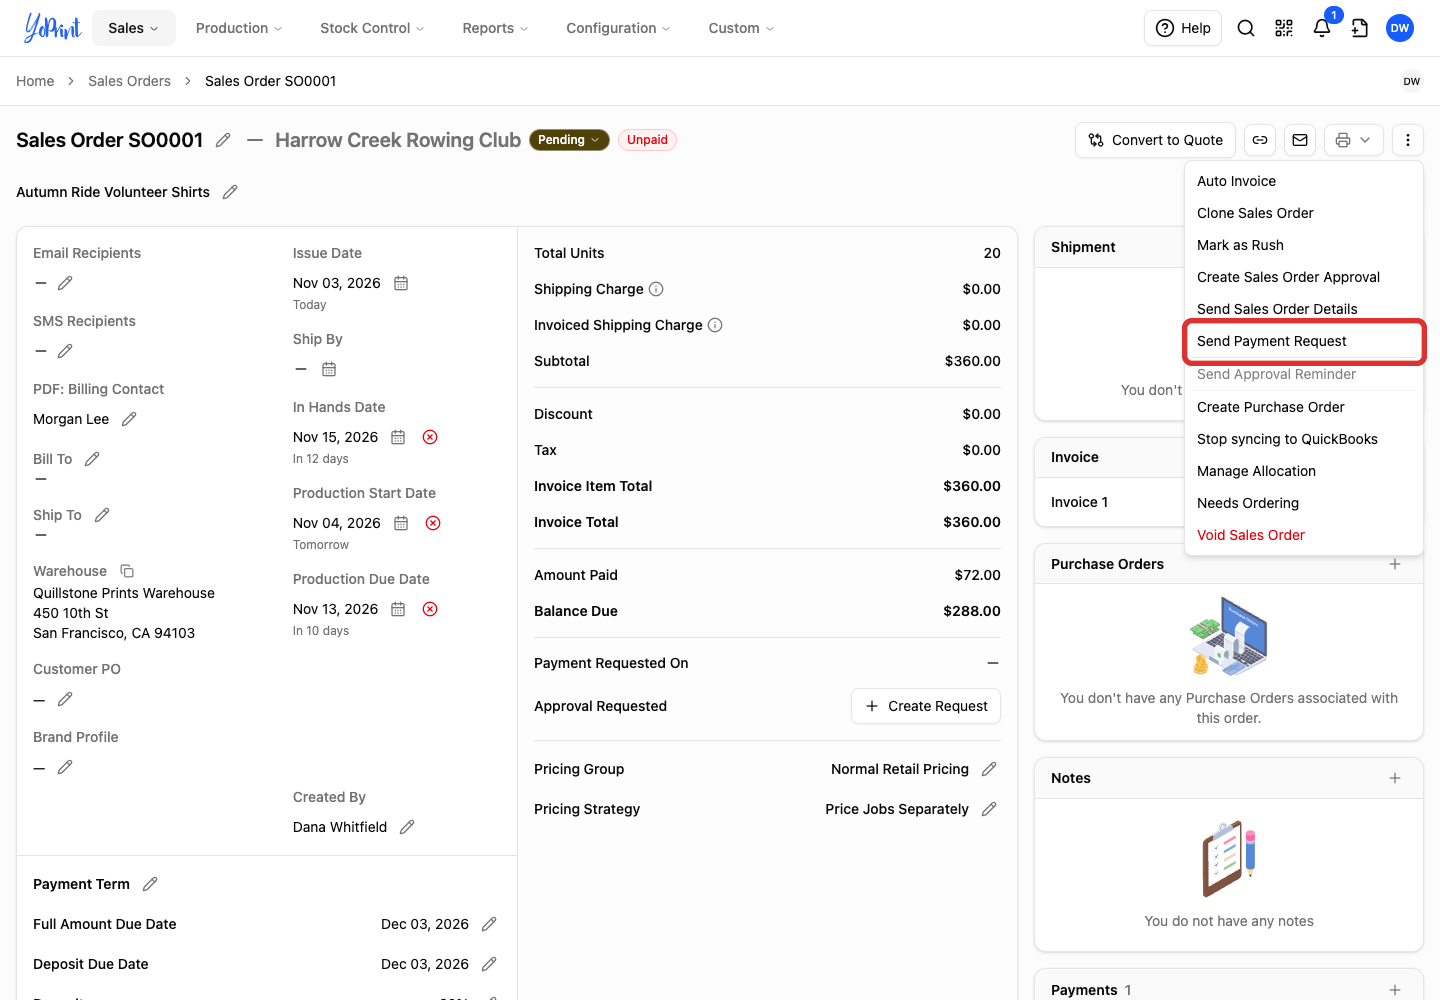
Recipients already selected
If the sales order already has an email recipient selected, YoPrint sends the reminder immediately. Otherwise, Email Participants opens so you can choose a recipient.
-
If Email Participants opens, select the checkbox next to the recipient.
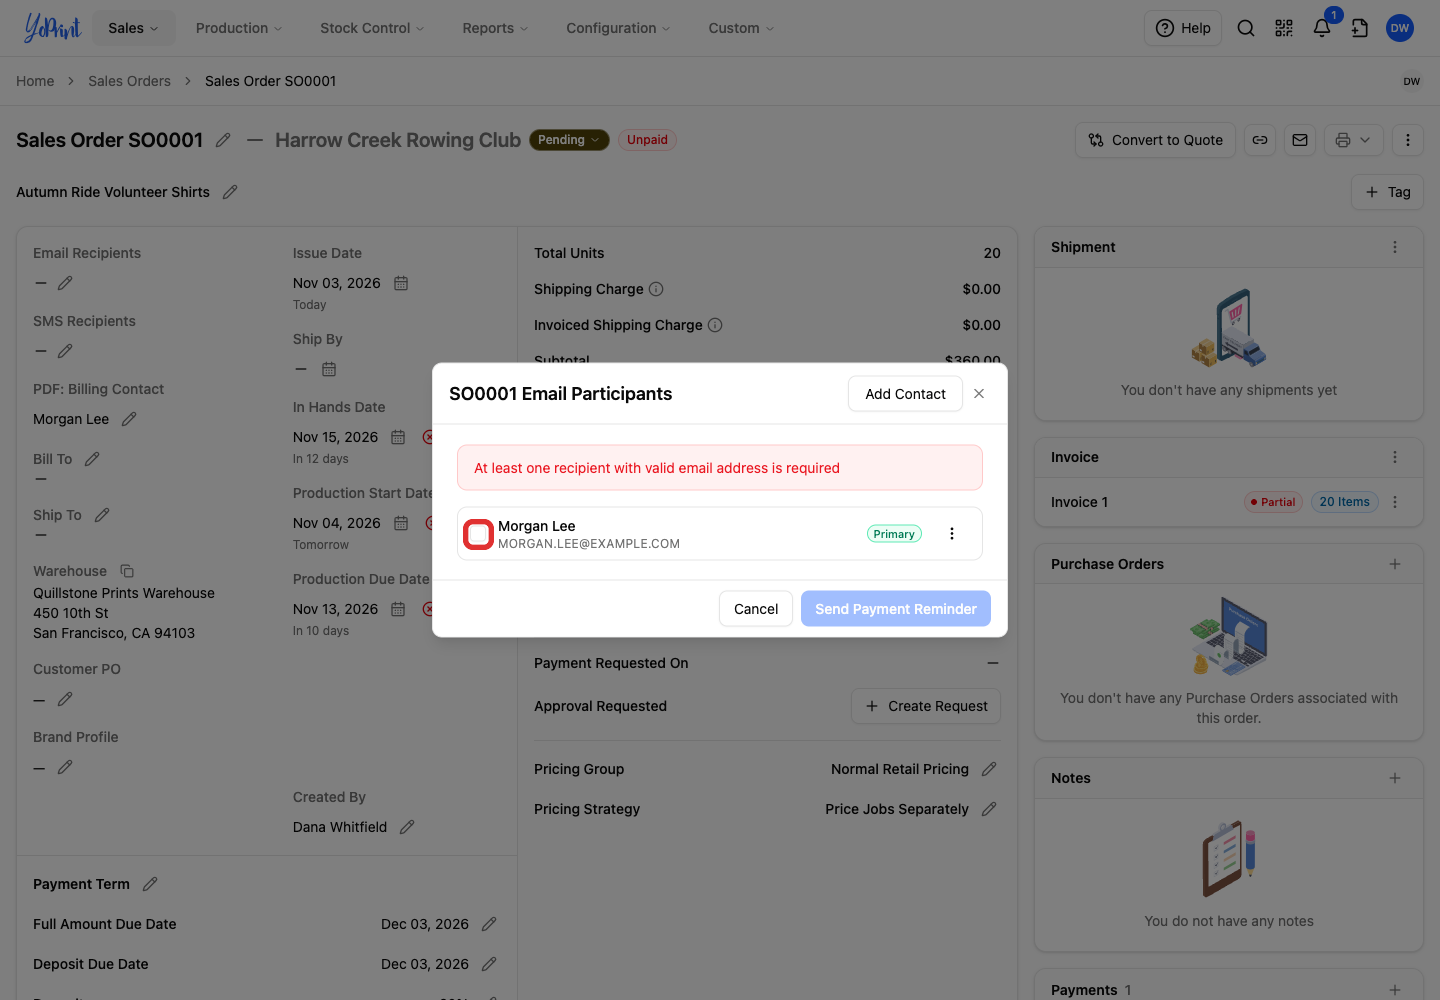
Each row shows the contact’s name and email address. Click Add Contact to add a recipient who is missing or needs an email address. Send Payment Reminder stays disabled until you select a recipient with a valid email address.
-
Click Send Payment Reminder.
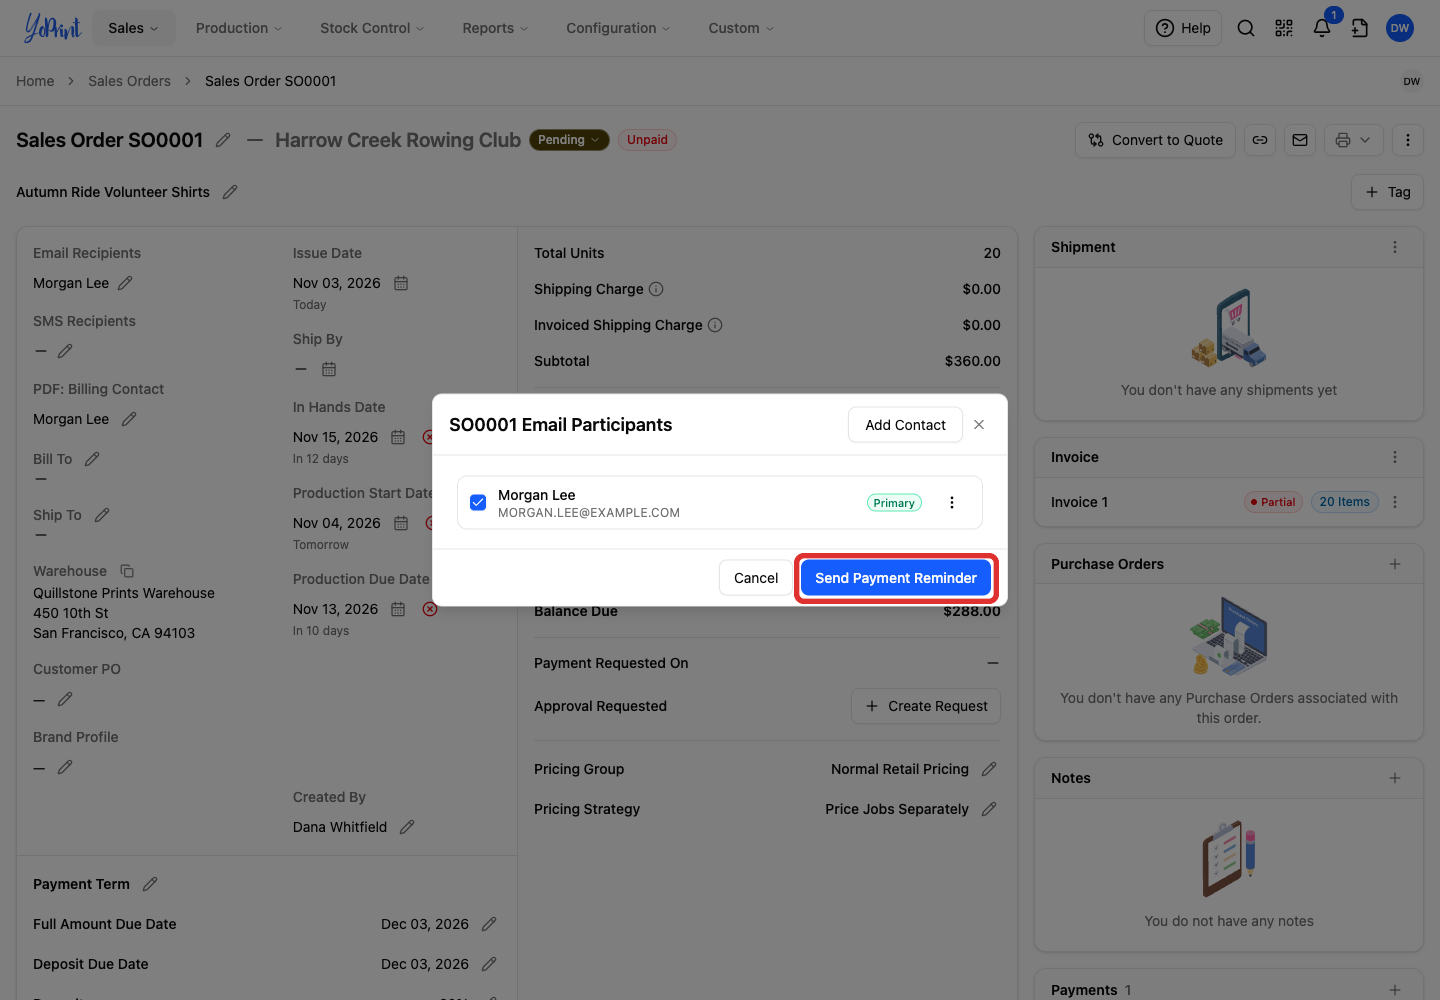
After you send the request, Payment Requested On shows when you sent it. The email’s subject identifies the order and says Payment Reminder, or Payment Overdue when the payment is late. The message shows the amount due and the due date. Its Pay Now link opens the sales order so the customer can pay online.
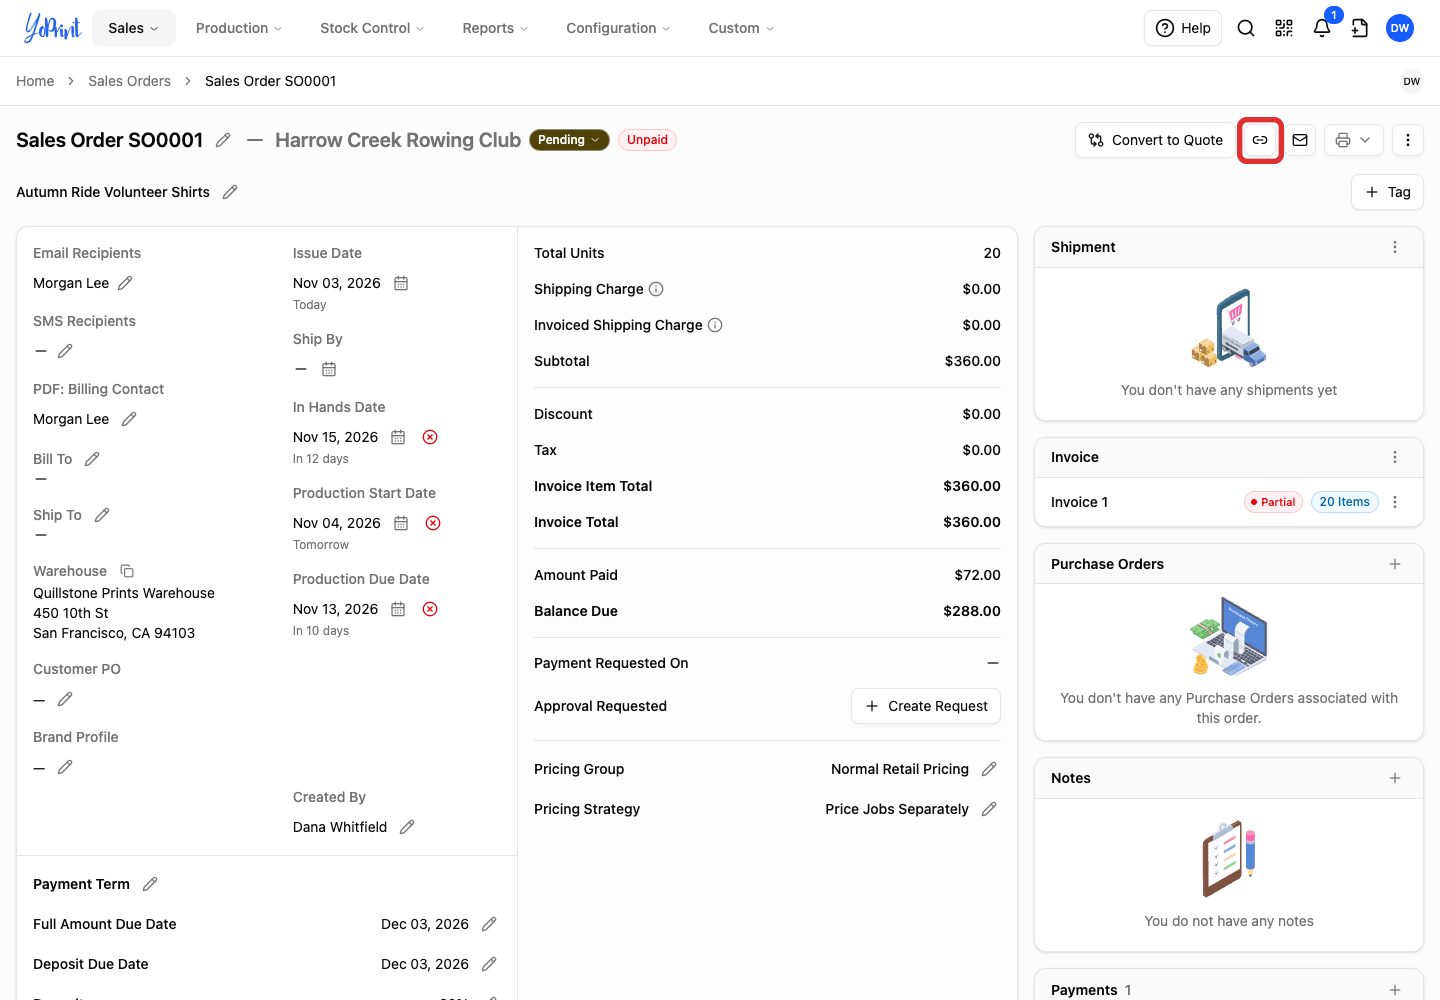
To share the order link yourself, click the link icon beside Convert to Quote at the top of the sales order.
How your customer pays an invoice or order online
Your customer opens your link and signs in with the email address you have on file. On the sign-in screen, they click Email me a code and Verify and continue. See Customer Portal Overview for the sign-in steps.
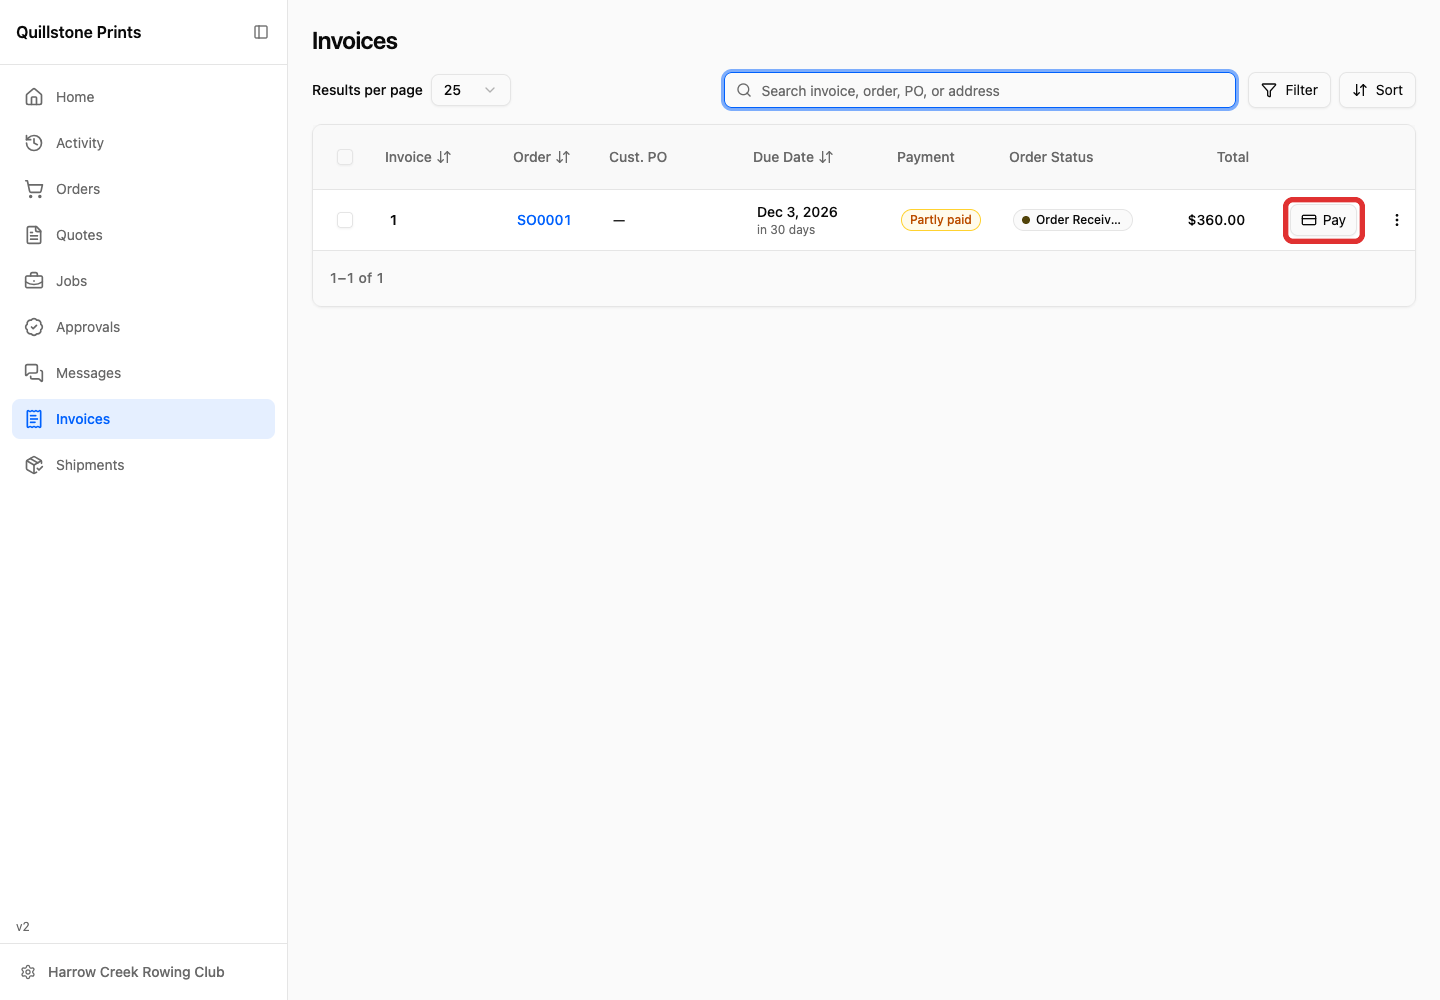
In this example, your customer pays the $288 balance on Invoice 1 for SO0001.
-
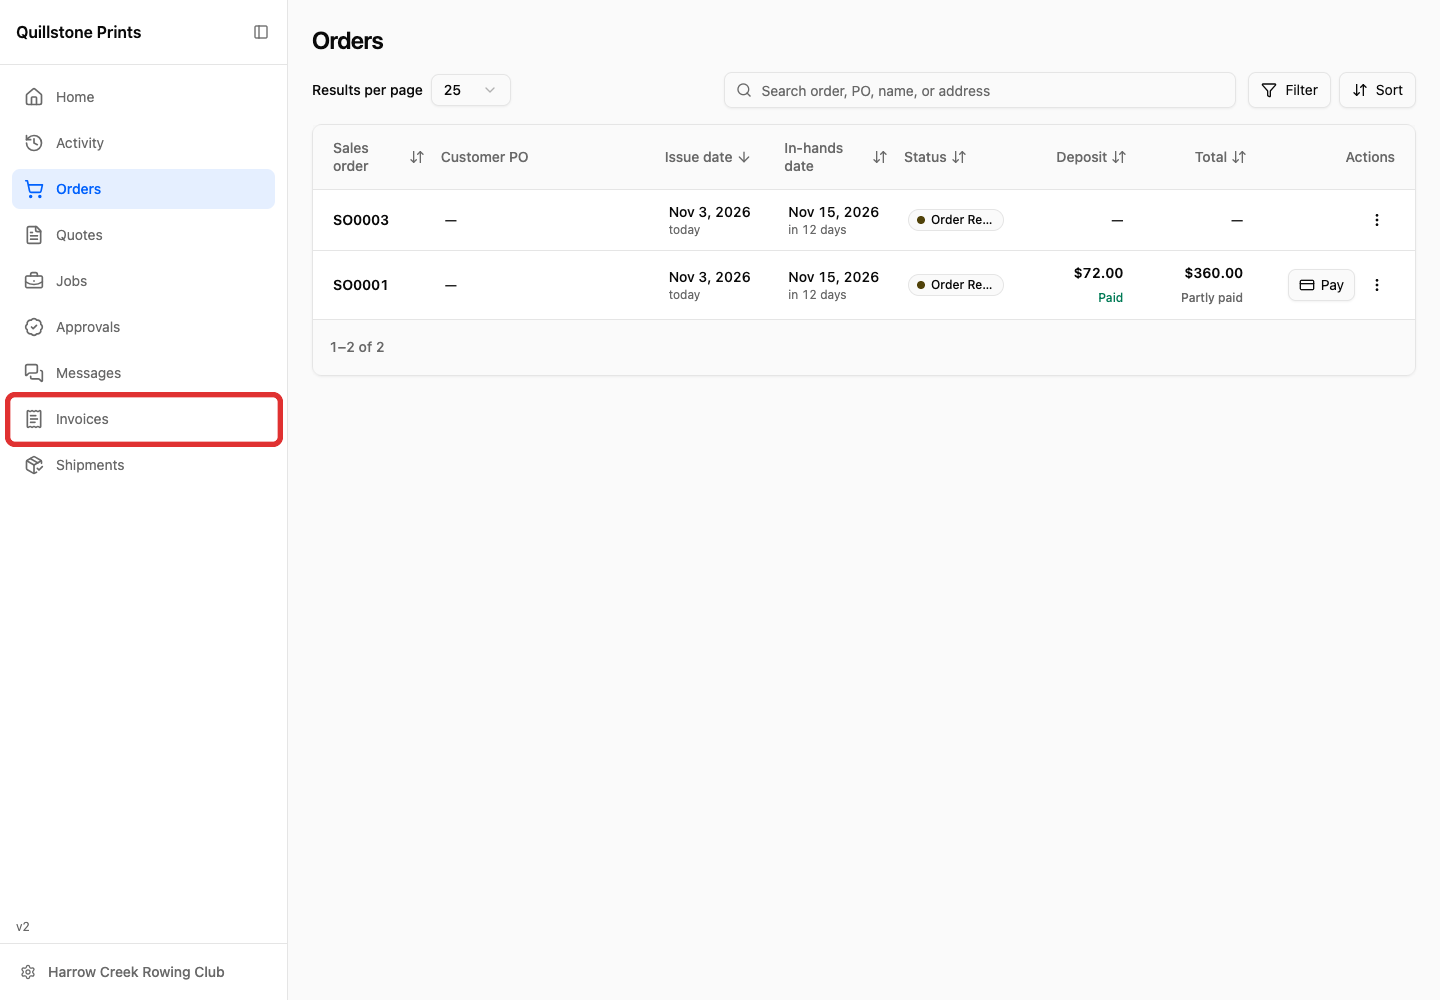
Select Invoices in the sidebar to view shared invoices and their payment status.
-
Click Pay beside an invoice to open the payment window.
-
Under Payment Option, choose the amount to pay.
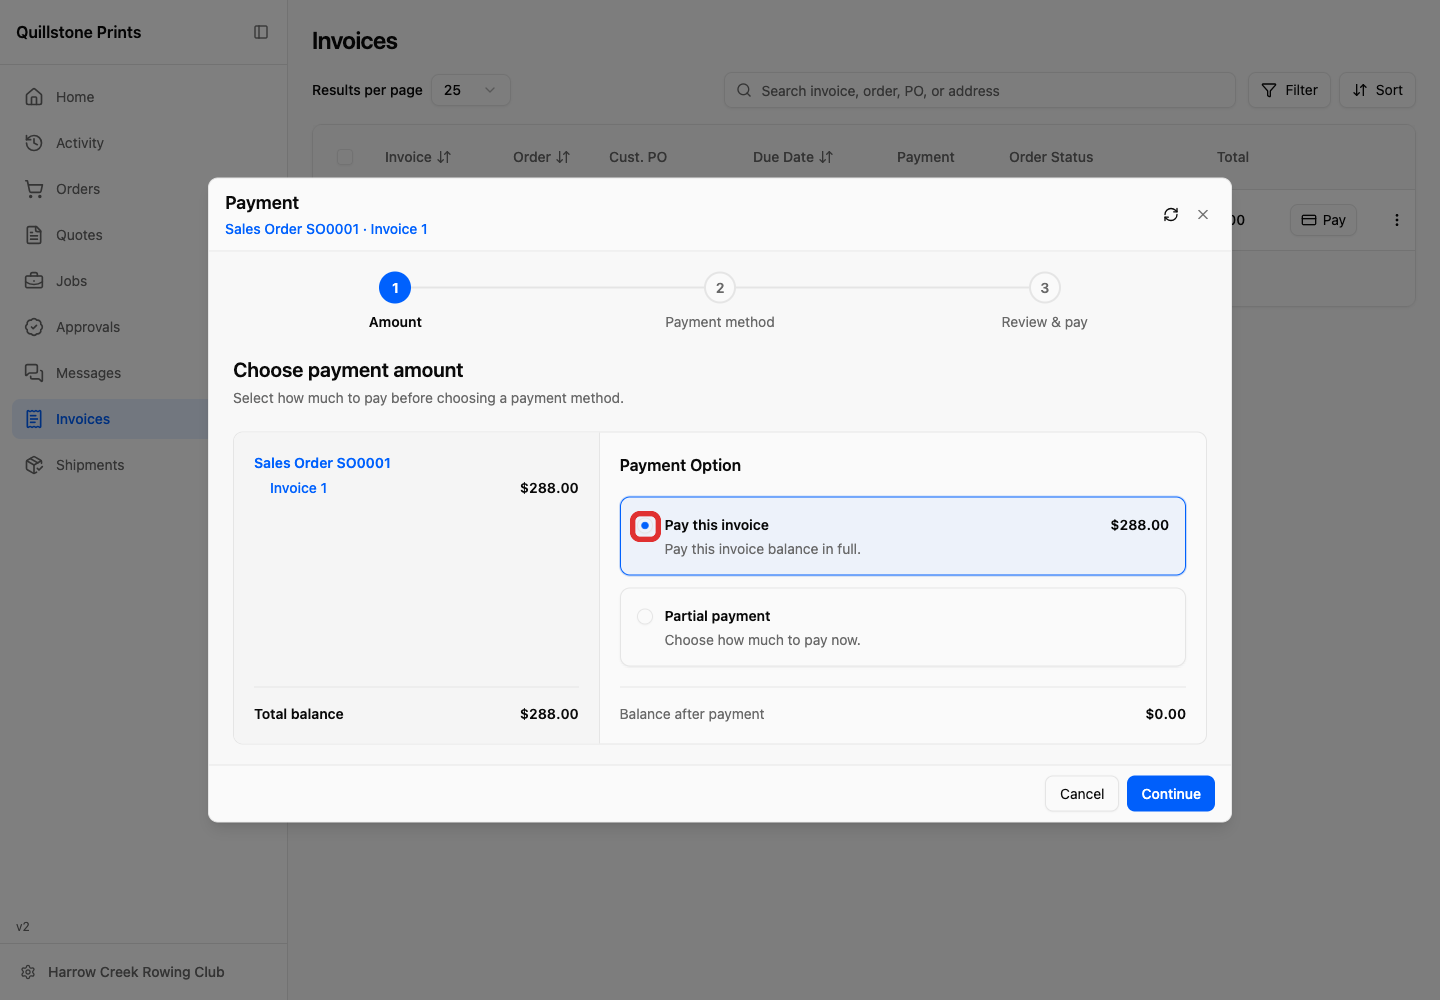
The payment window shows the outstanding balance after payments already applied. Pay this invoice pays that invoice balance in full.
-
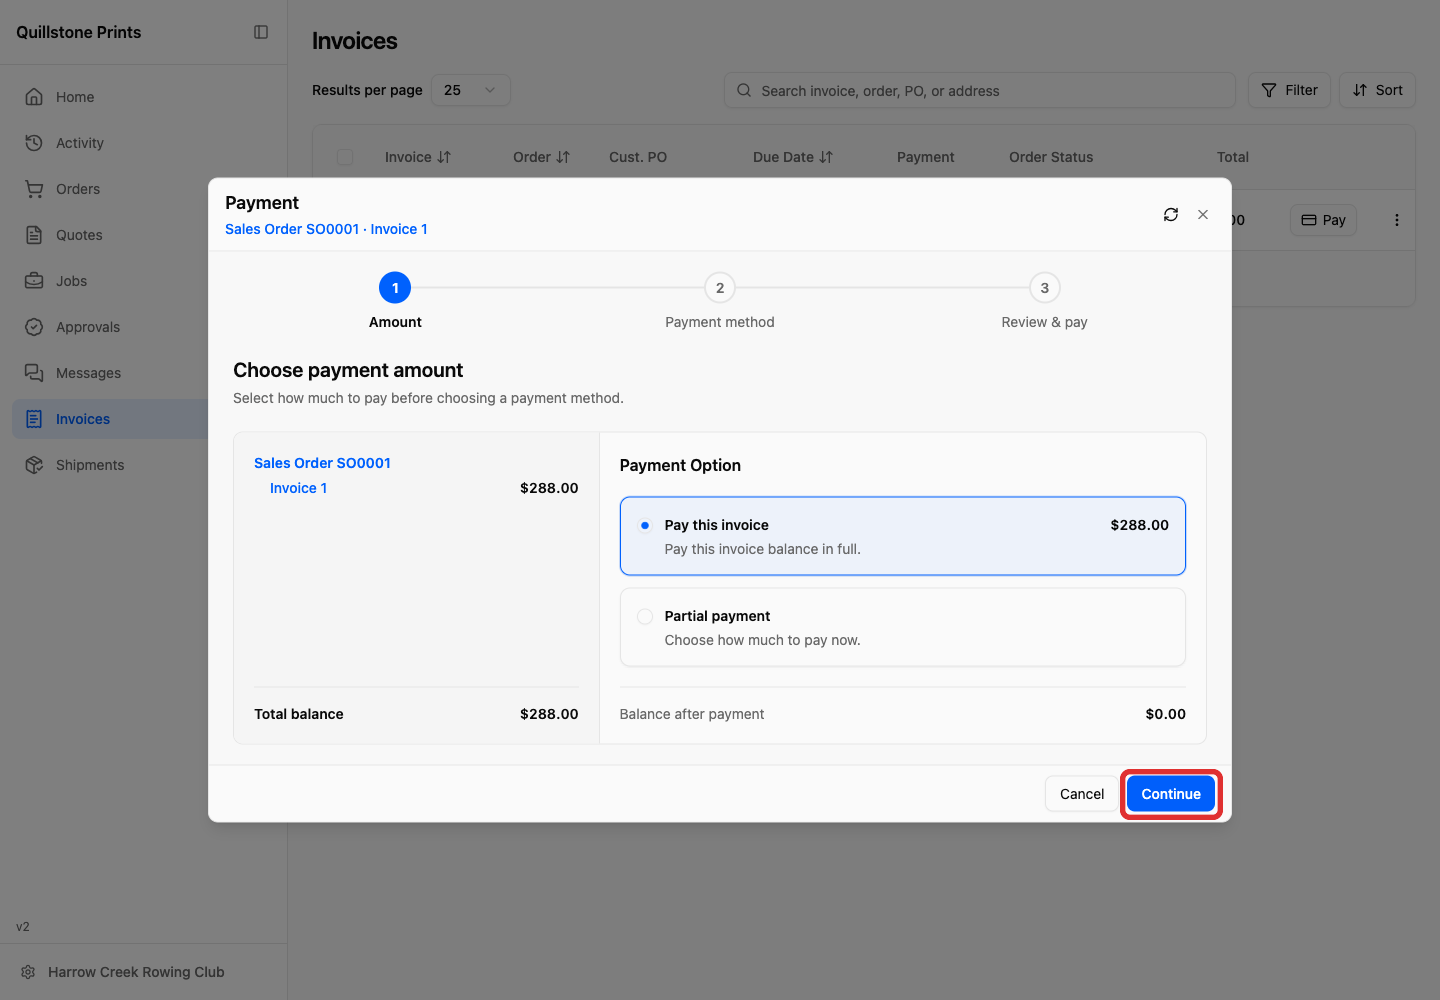
Click Continue.
-
Select an available payment method, such as Credit or debit card (Stripe).
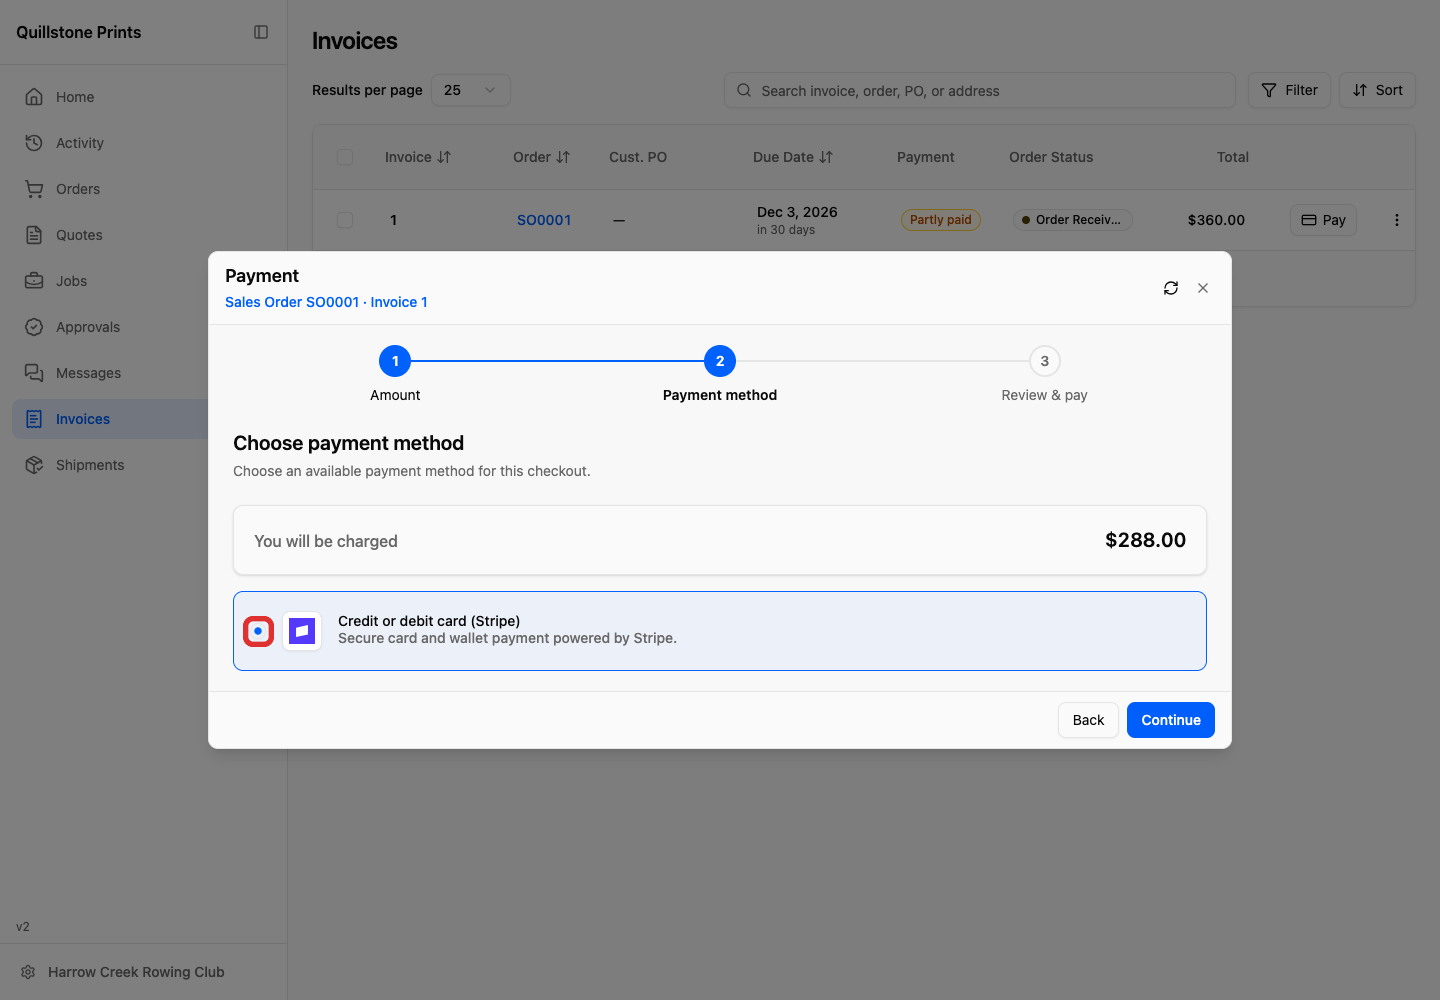
This screen shows the total charge before the customer continues.
-
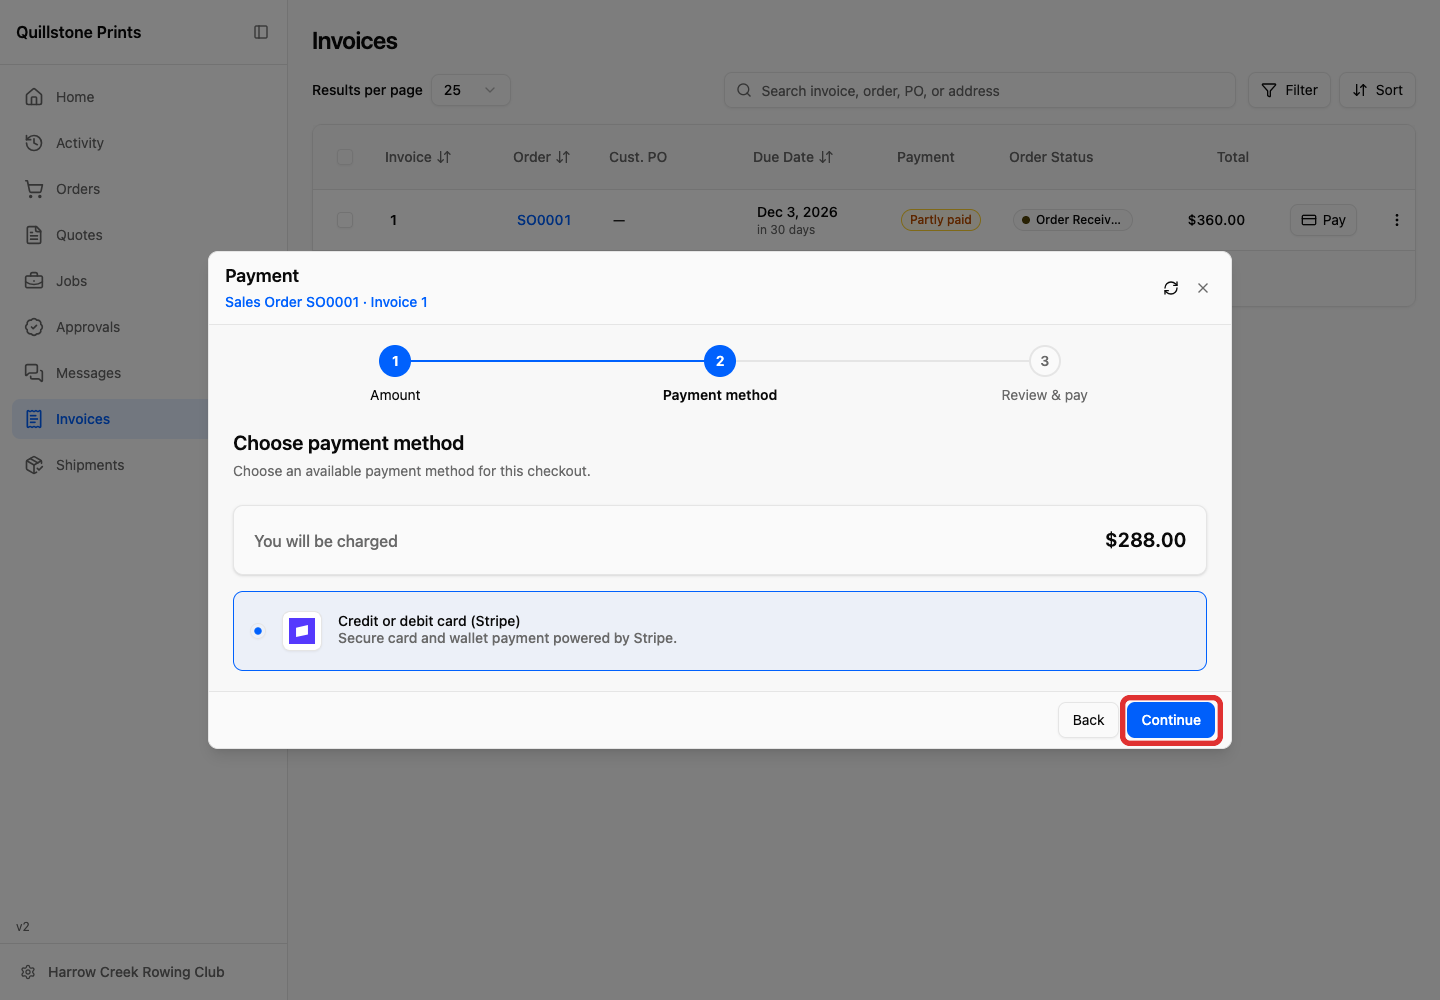
Click Continue to review the payment.
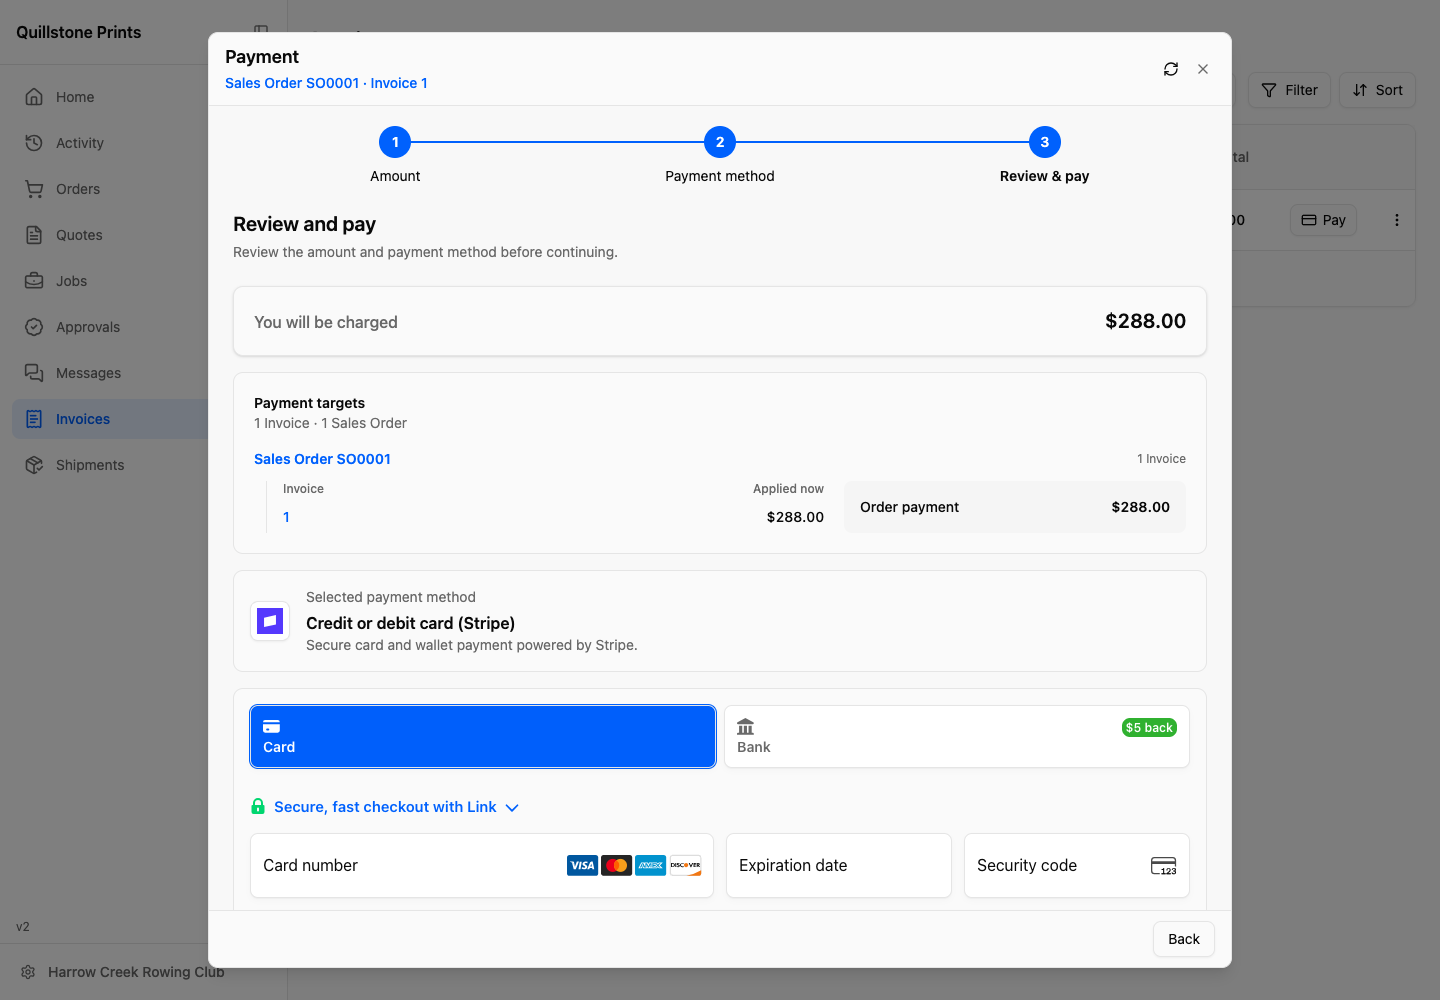
Review and pay confirms the total charge, the orders and invoices being paid, and the selected payment method.
-
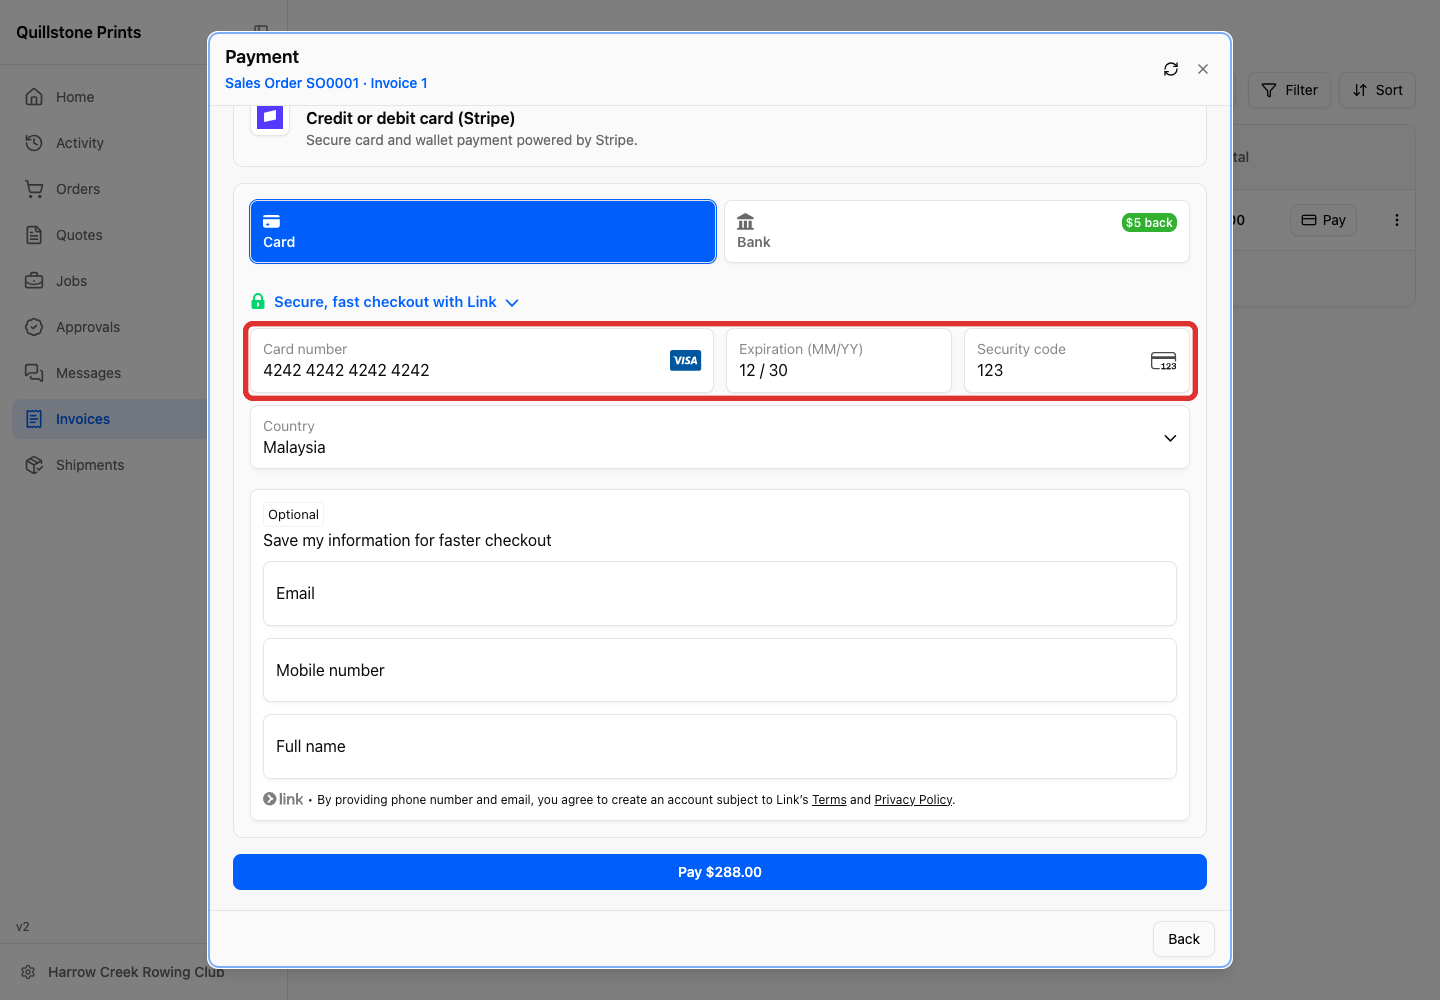
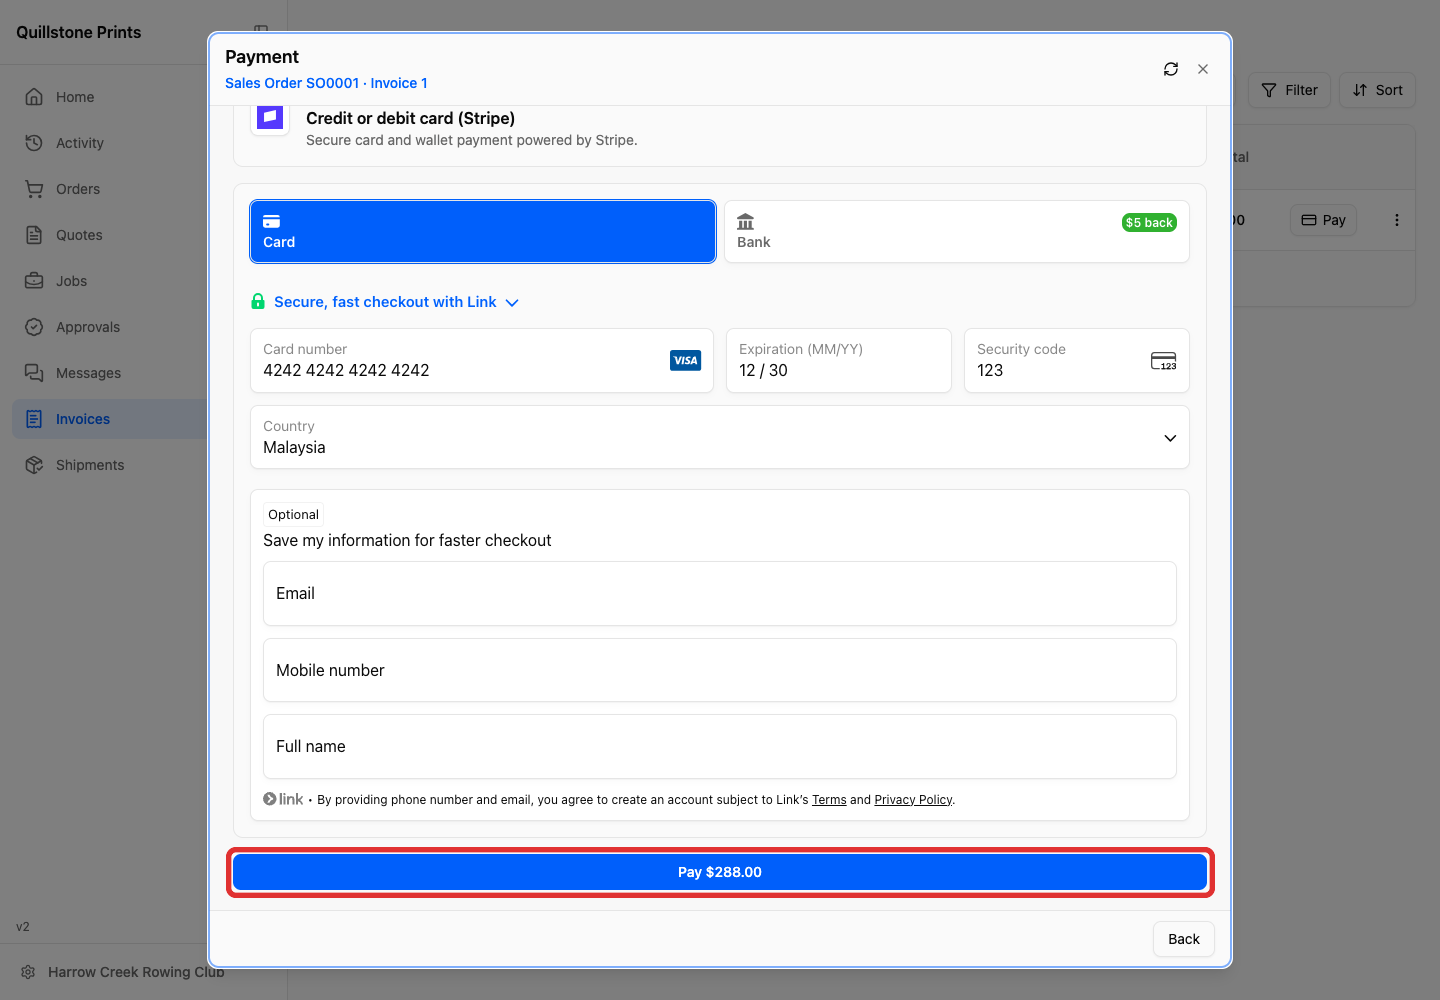
On the same Review and pay screen, scroll down and enter the Card number, Expiration date, and Security code.
-
Click Pay to pay the total charge shown on the button.
Payment Successful confirms the completed payment and shows the total paid. YoPrint records the payment on the sales order and updates its balance automatically.
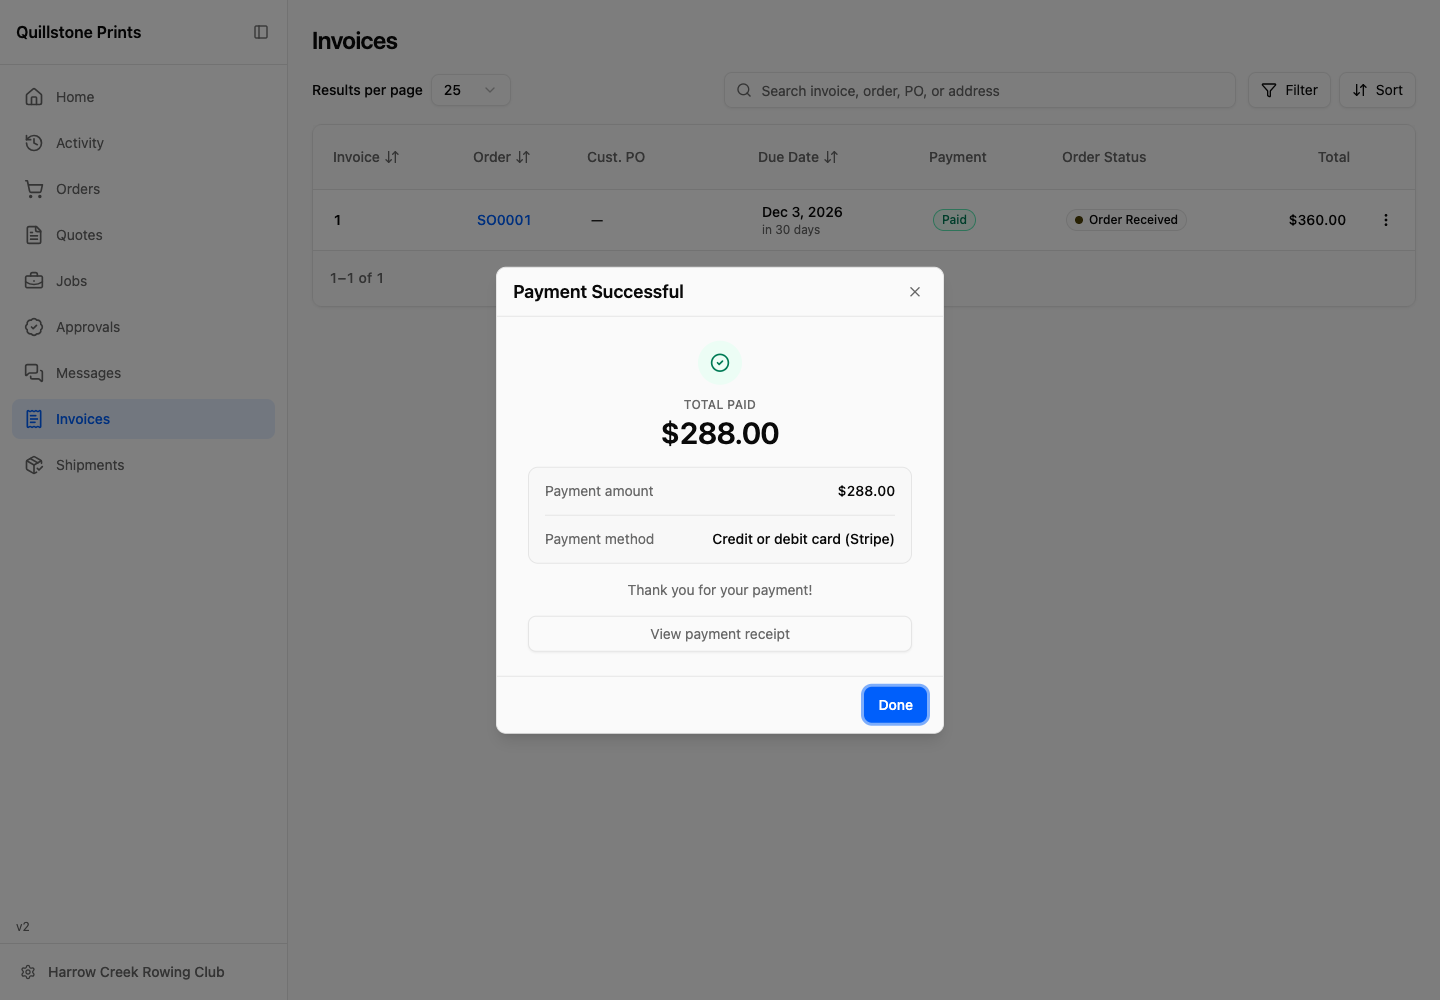
On Payment Successful, View payment receipt opens the receipt. See What Your Customers See on a Receipt for its fields. To reopen a receipt later, open the sales order in Orders, expand the payment in Payments, and click View payment receipt. See Find a receipt later.
Paying multiple invoices together
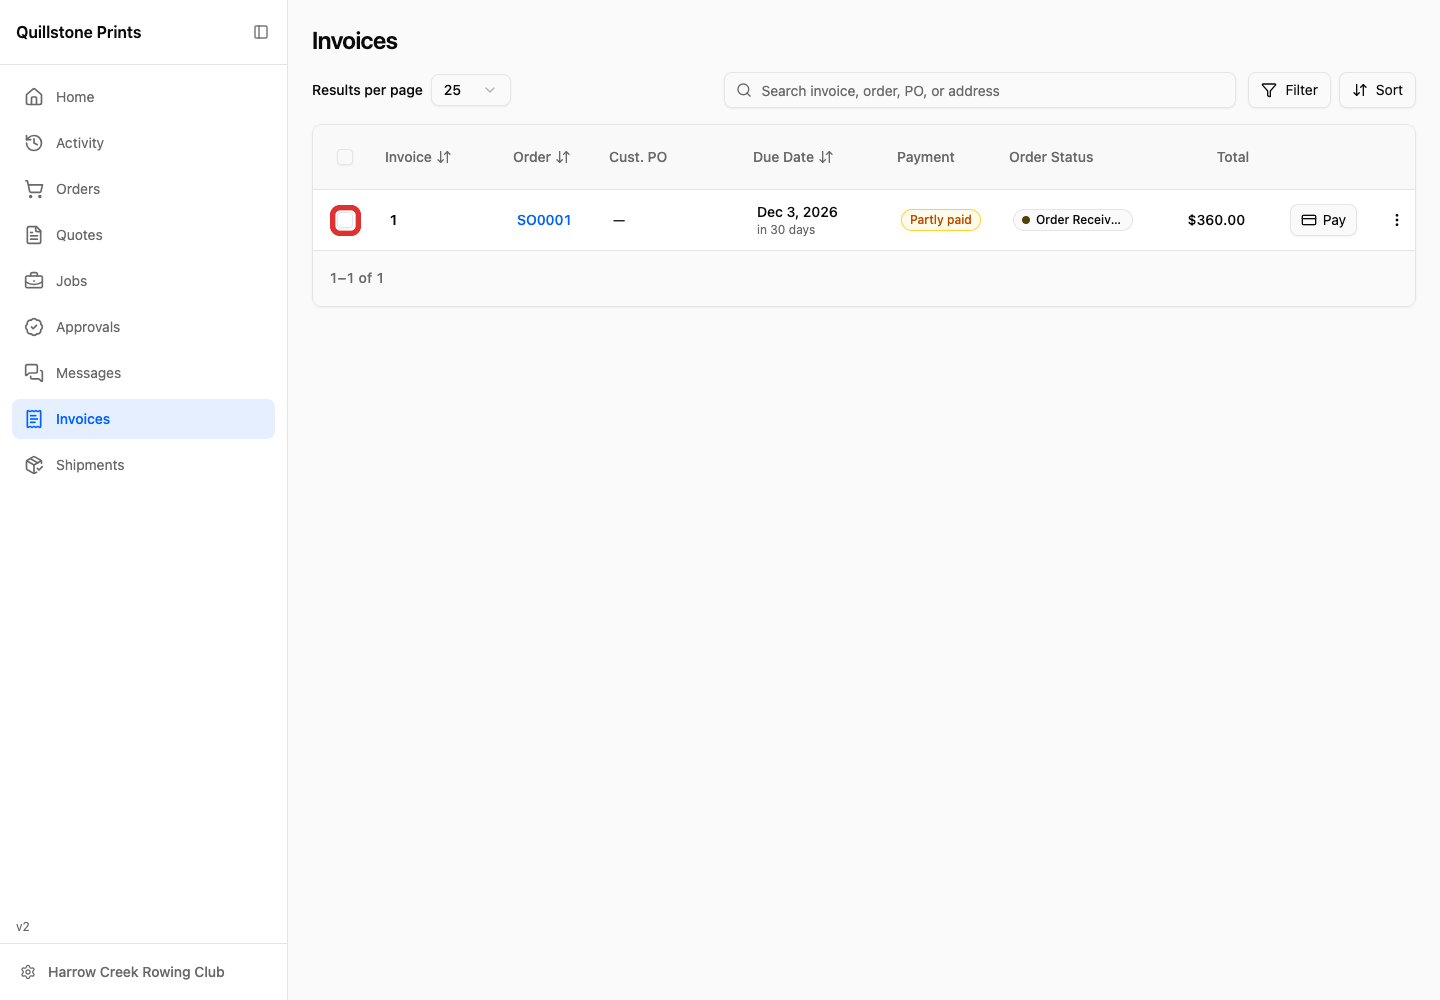
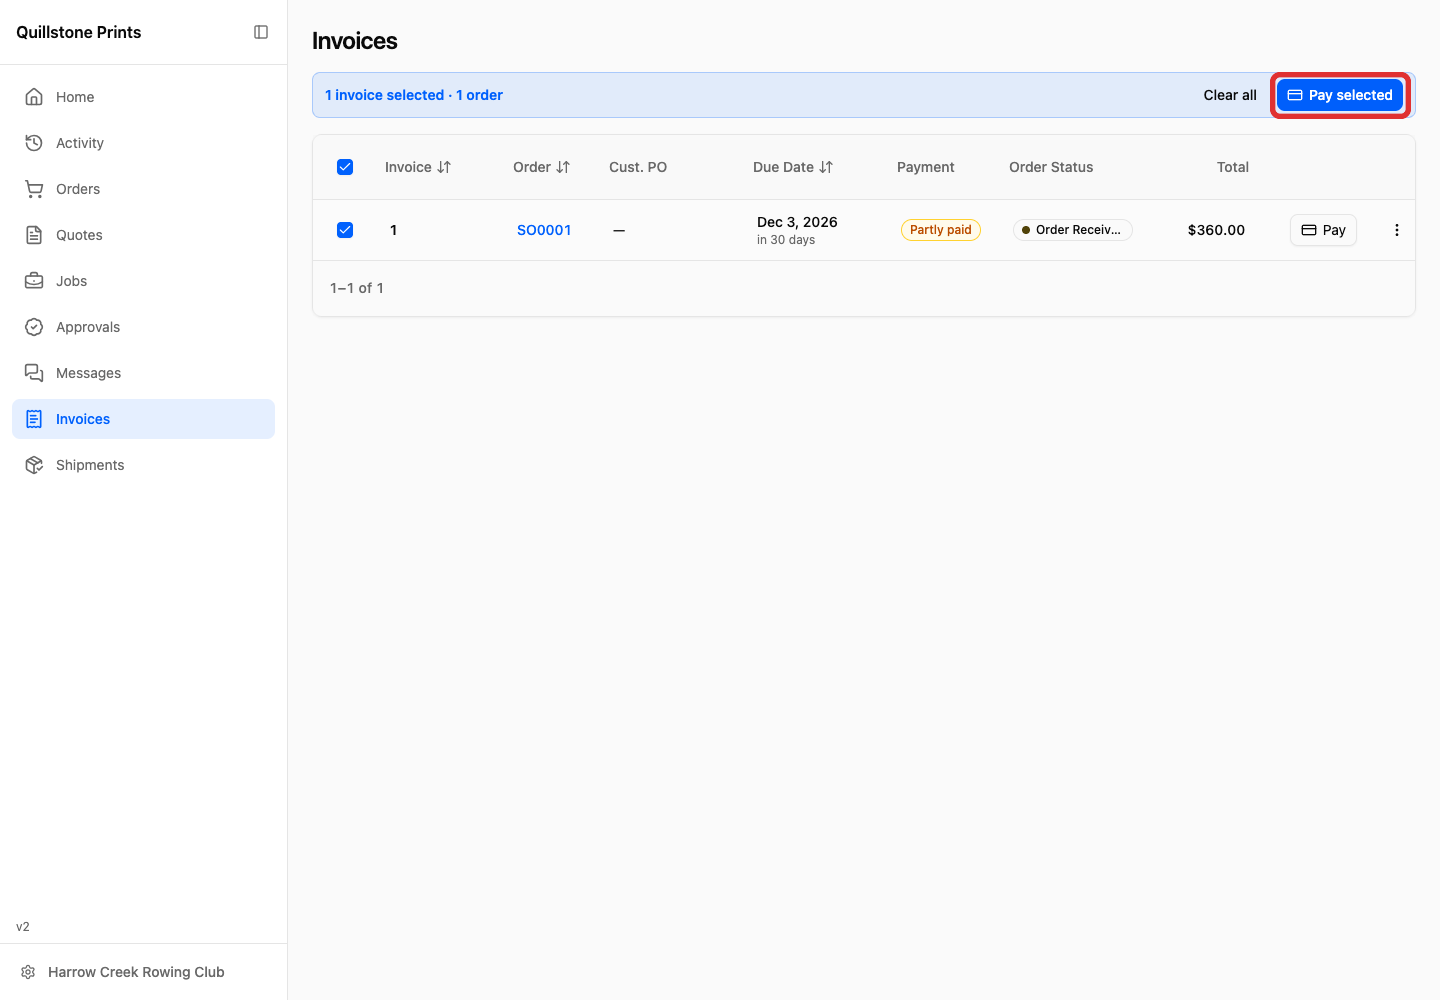
To combine invoices into one payment, select the checkbox for each invoice, then click Pay selected.
Making a partial payment
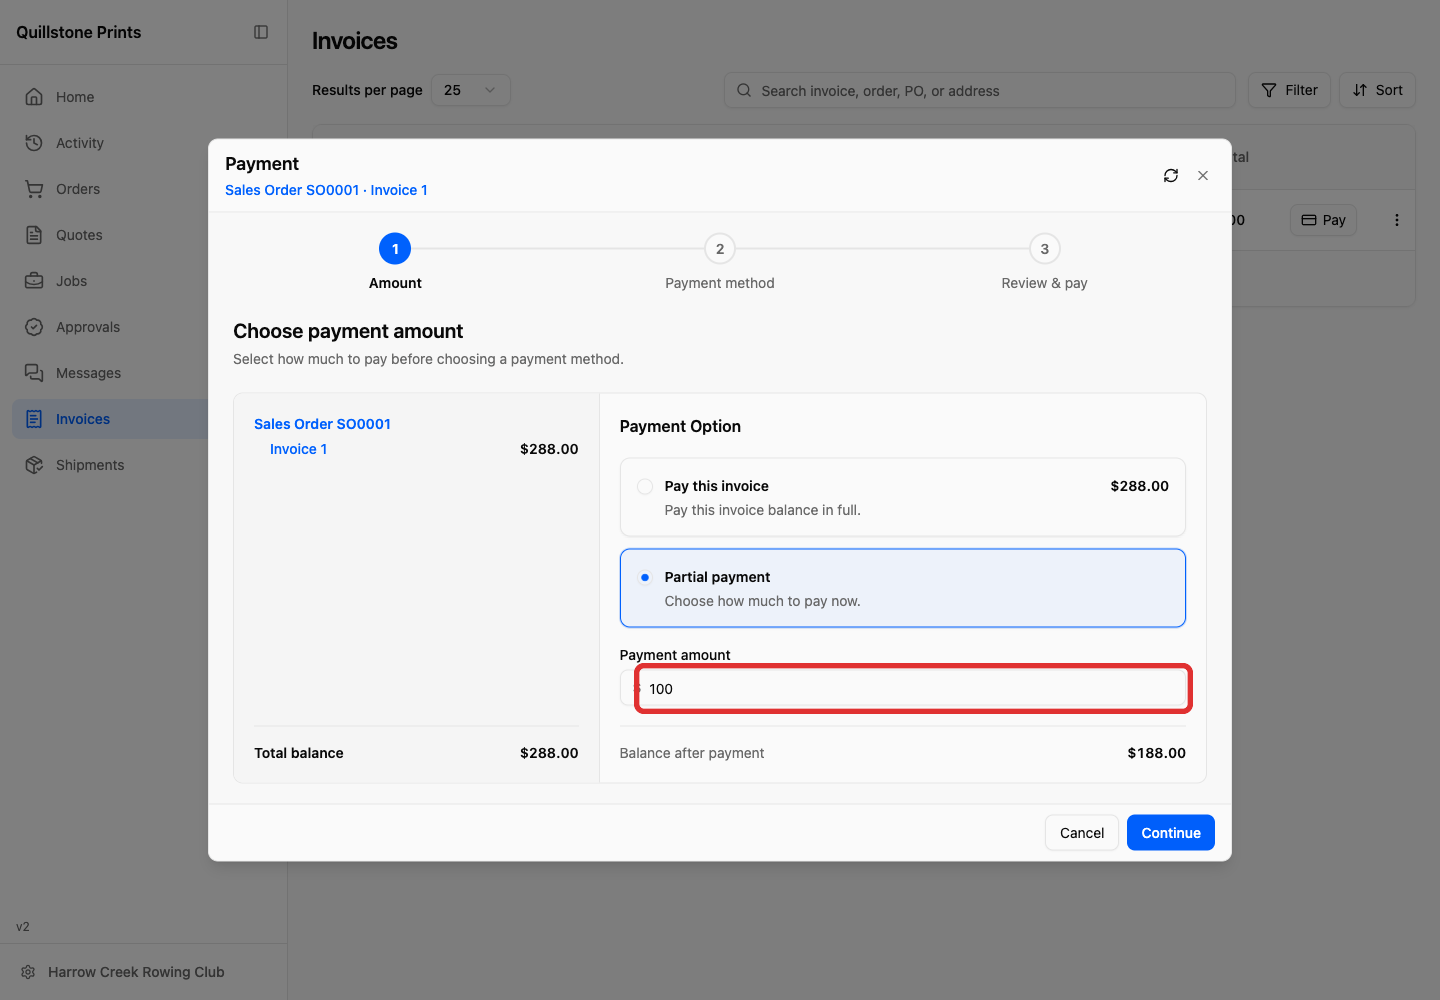
To pay a smaller amount now, select Partial payment and enter the Payment amount.
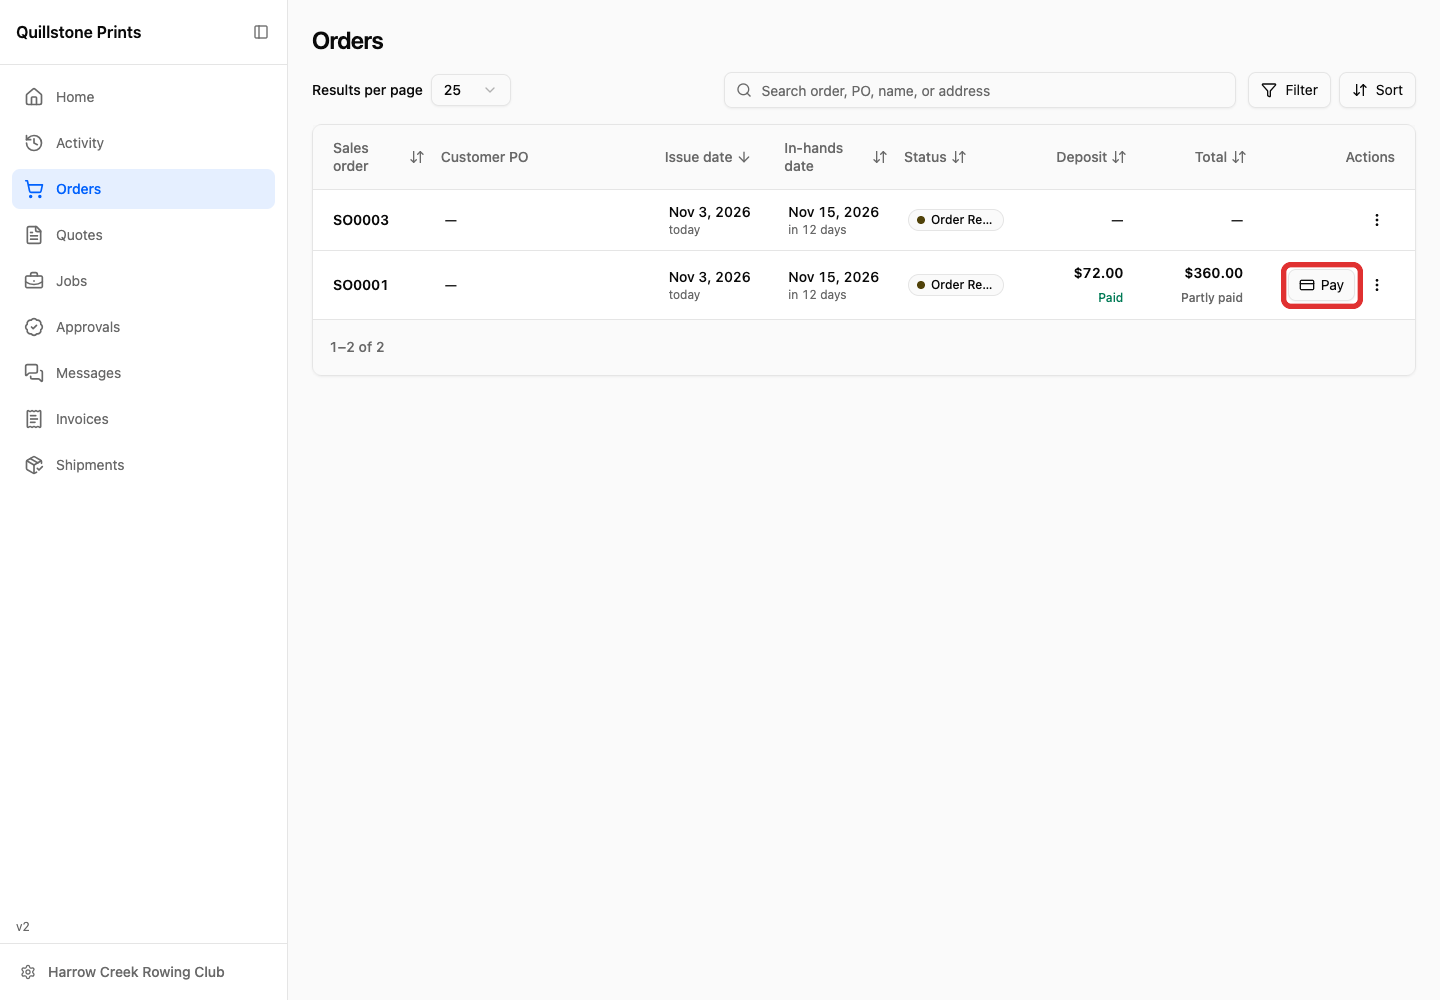
Clicking Pay Now in a payment reminder email opens the order’s payment window directly. In the portal, customers can also click Pay beside the order in Orders.
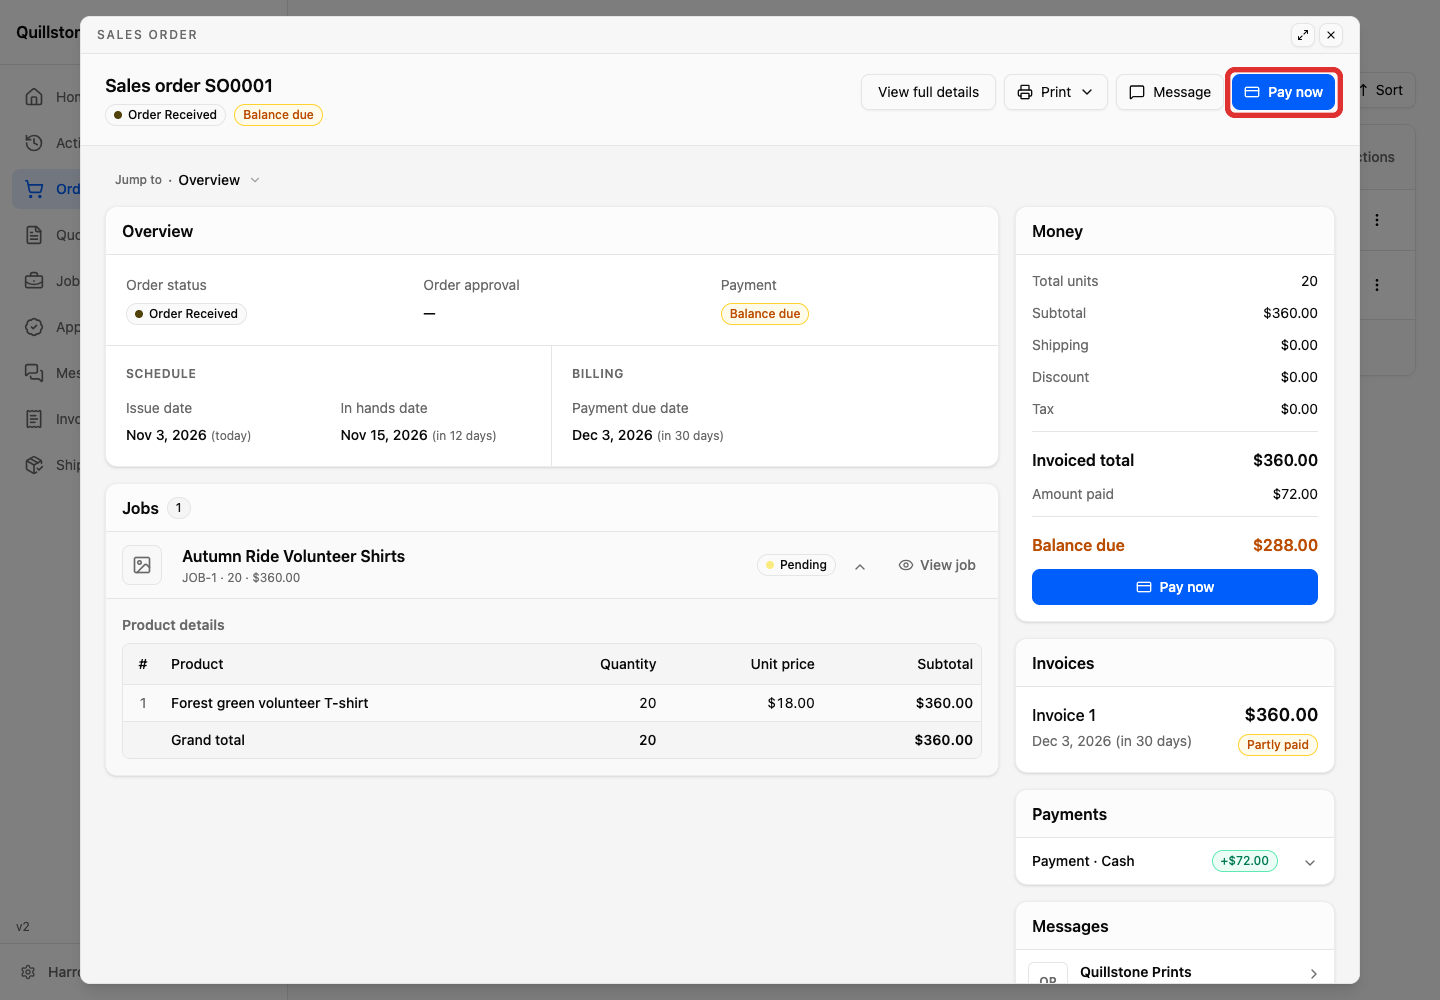
If the payment window is closed, or if the customer opens the sales order in the portal, they can click Pay now at the top right to open it. The Pay now button in Money opens the same window. All of these order entry points use the same payment steps.
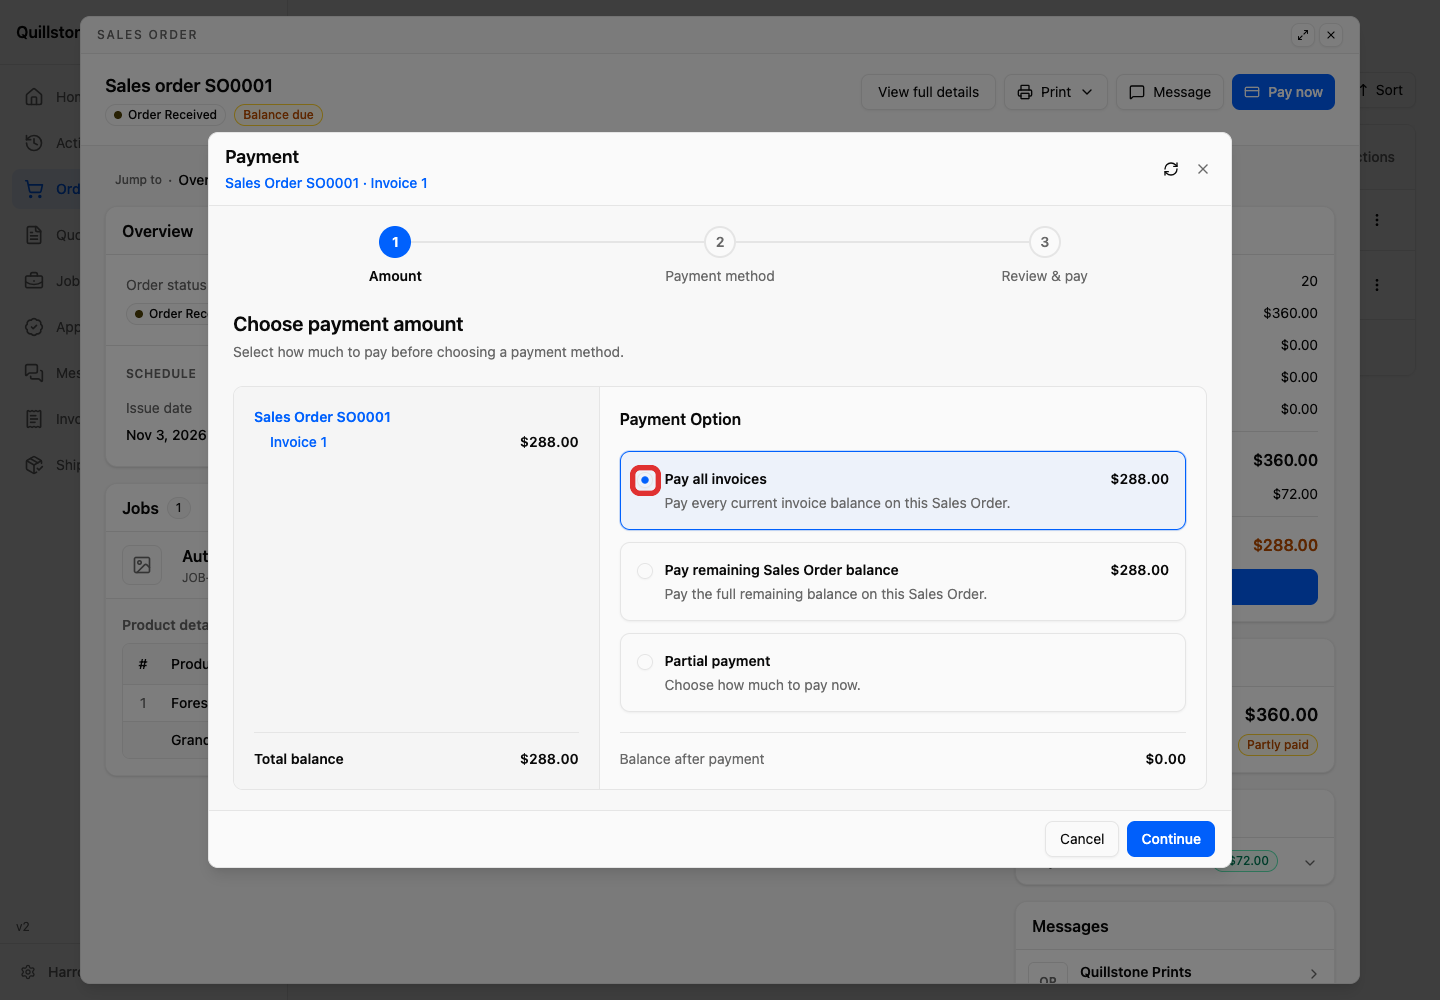
Paying from an order
Choose Pay all invoices to pay the order’s current invoice balances. Choose Pay remaining Sales Order balance to pay the remaining balance shown for the order.
Paying from Invoices selects the invoice instead. To pay from the Invoices list, your customer closes any open order preview with Close at the top right first.
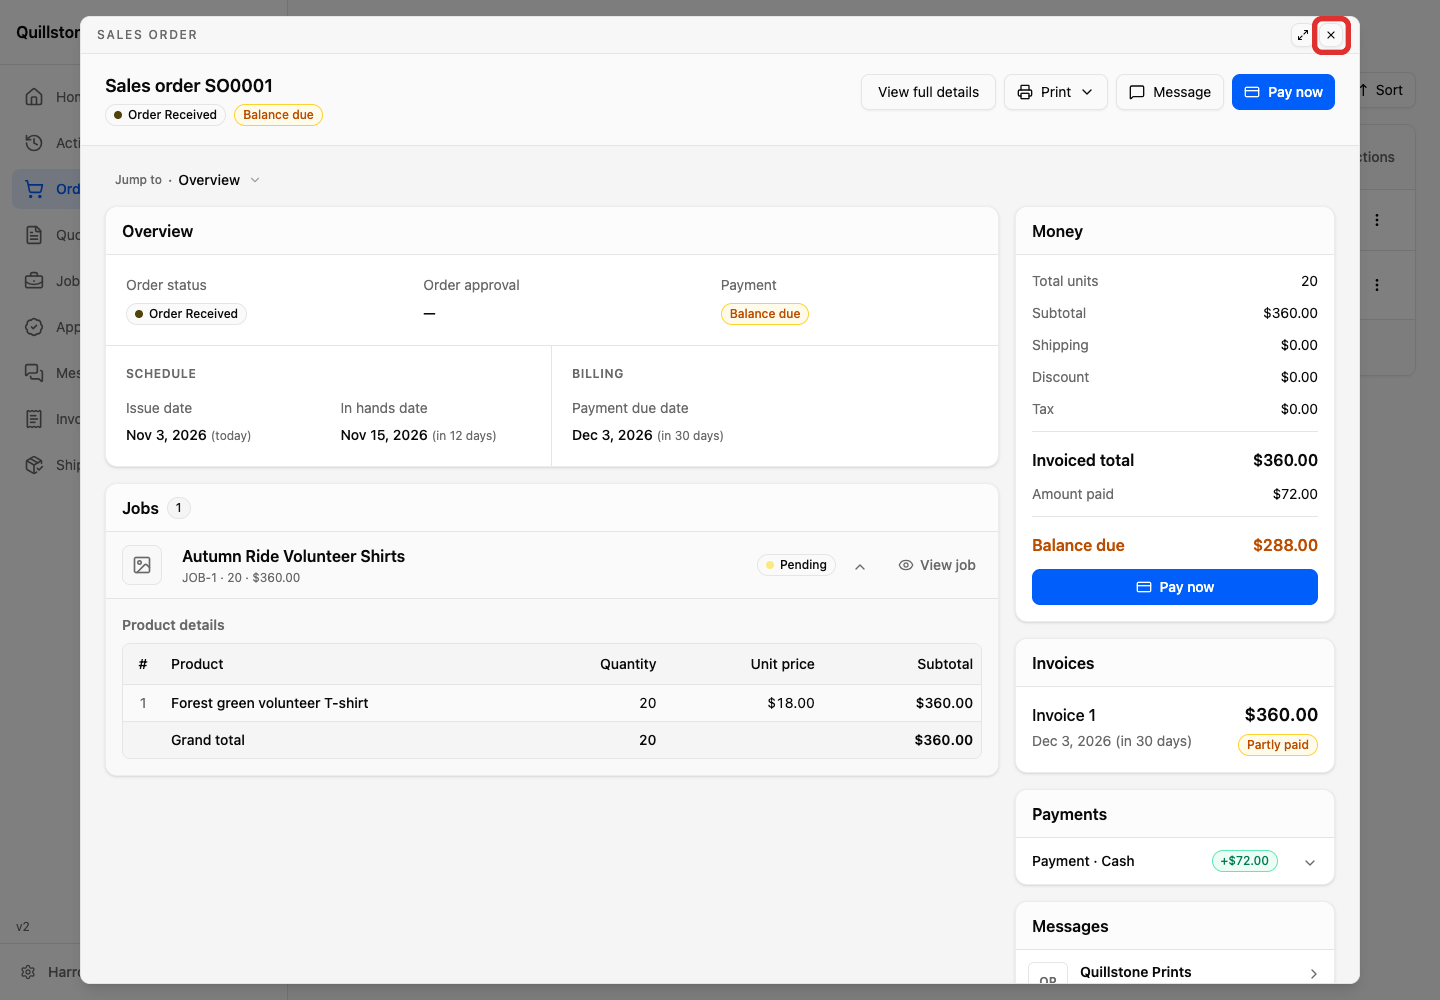
See Customer Portal Overview for Home, quotes, invoices, and shipments.
Review an online payment
On the sales order, double-click the online payment’s row in Payments, such as Stripe, then open More actions (⋮) in the payment window and choose View whole payment. See Read a Customer Payment for finding a payment, reading its details, or checking where the money was applied.
To refund a payment, see How Refunds Work in YoPrint. To manage customer credit, see Customer Fund / Credit Management.