HEIC file workaround
In this article
Understand why HEIC photos need conversion
By default, iPhones and iPads capture photos in Apple's High Efficiency Image Container (.heic) format to save storage space. However, web browsers cannot display HEIC images directly on web pages.
Because YoPrint does not convert HEIC images on the server, an uploaded HEIC file cannot generate an in-browser thumbnail preview or display on customer quotes and artwork approvals. While the Show in PDF column displays a green checkmark by default, web browsers and PDF generators cannot decode HEIC files, leaving the artwork unrendered on exported PDF quotes and customer artwork approvals (proofs).

-
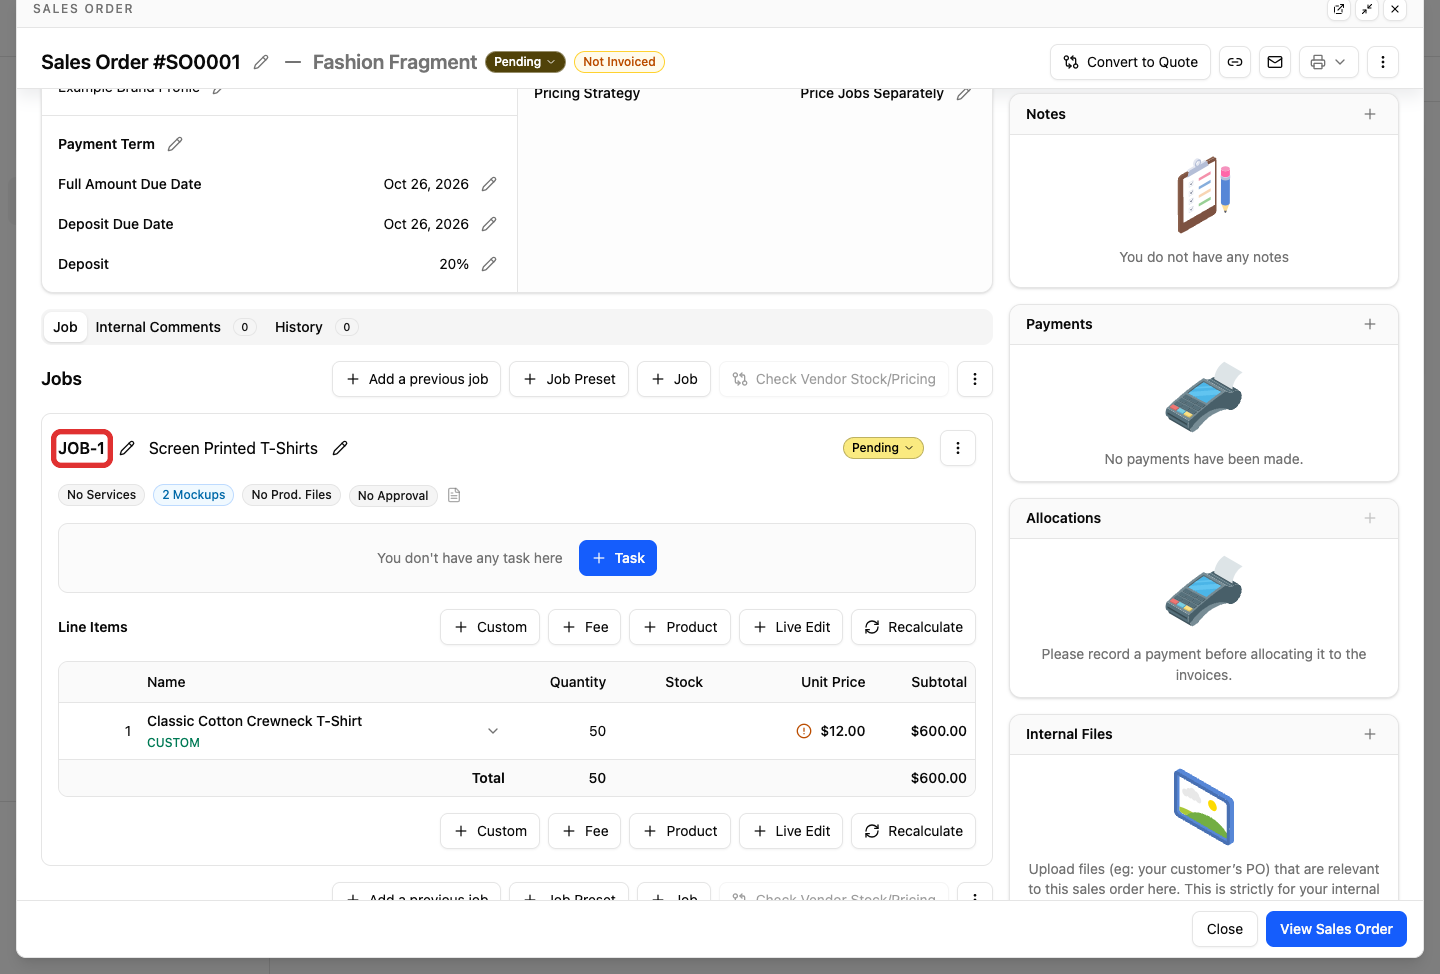
In Sales > Sales Orders, open your sales order, select the Job tab, and click JOB-1 (or your job name) to open the job details.
-
In the Mockup Files tab, review the file preview in the table.
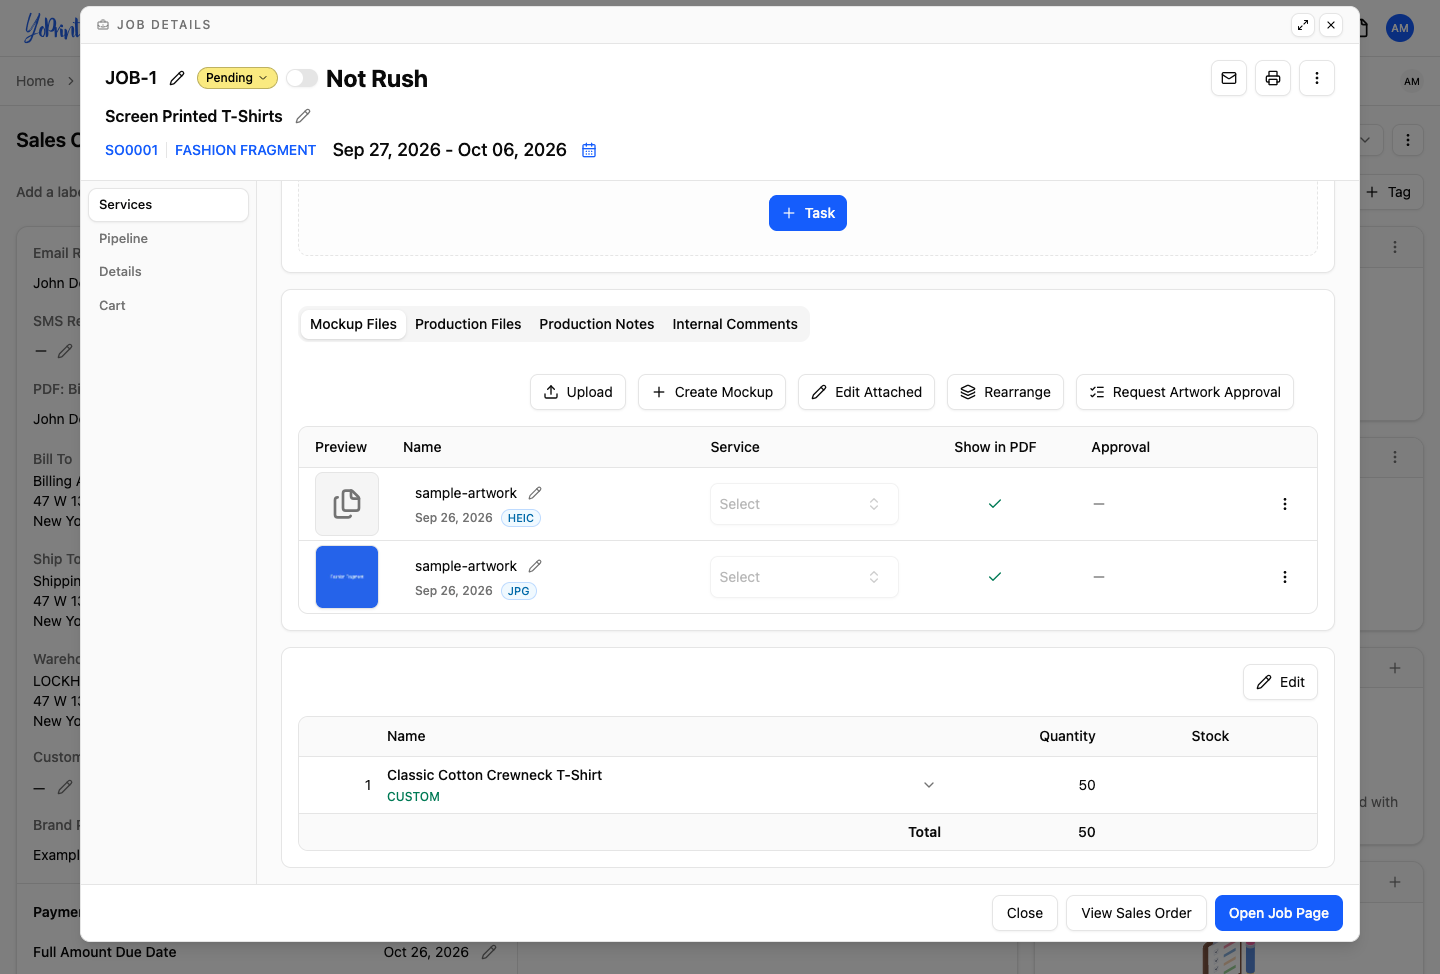
An unconverted HEIC file displays a generic document icon without an image preview. A converted JPG or PNG displays an image thumbnail immediately and enables the artwork for PDF quotes and customer artwork approvals.
Convert HEIC photos on your computer
If you have HEIC photos on your computer, convert them to JPG or PNG before uploading them to YoPrint.
If you are using Windows, jump to Convert on Windows.
Convert on Mac
- In Finder, right-click the HEIC file and select Quick Actions > Convert Image.
-
Select JPEG or PNG as the format and click Convert to JPEG (or Convert to PNG).
If you prefer using Preview, double-click the photo to open it, click File > Export, and select JPEG or PNG.
Convert on Windows
- In File Explorer, right-click the HEIC photo and select Open with > Photos (or Paint).
- Click Save as and select .jpg or .png as the file format.
After converting your photo, upload the new JPEG or PNG to your job's Mockup Files in YoPrint to generate an image preview. Uploading the converted file adds a new row to the Mockup Files table rather than replacing the original file. To avoid duplicate or unviewable files on your quotes and customer approvals, open the original HEIC file's row menu (...) and click Remove (or select Don't show in PDF).
Save iPhone photos as JPEG automatically
These steps happen in Apple's Settings app. Apple's screens may have changed since these pictures were taken. If something looks different, follow Apple's guide: Using HEIF or HEVC media on Apple devices.
You can configure your iPhone or iPad to capture or transfer photos as standard JPEGs so you do not need to convert them manually before uploading. These settings apply to your shop's devices. If a customer sends you an HEIC photo from their device, convert the file on your computer using Convert HEIC photos on your computer.
Set camera capture to JPEG
-
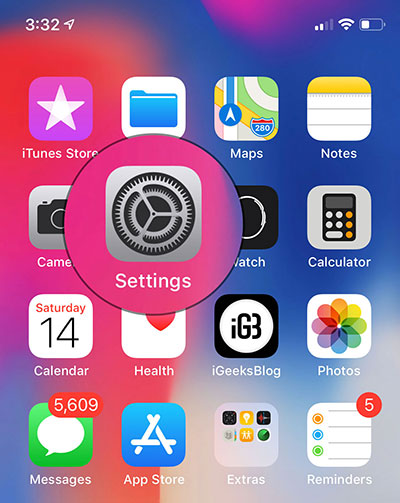
Open Settings on your iPhone or iPad.
-
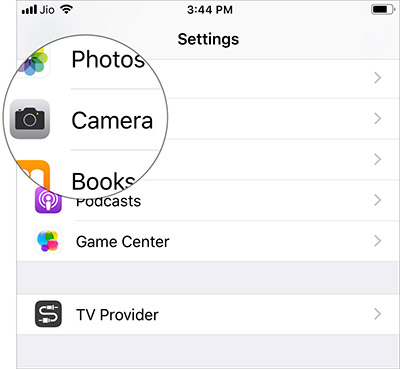
Tap Camera.
-
Tap Formats.
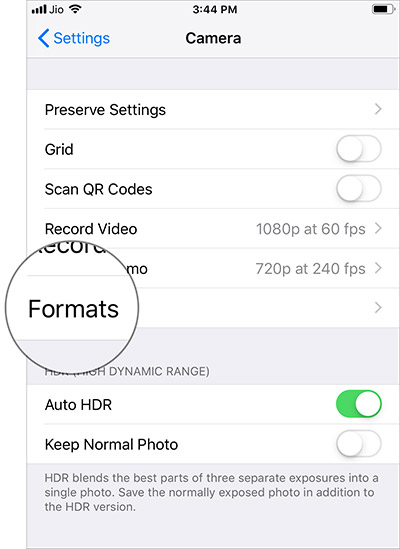
-
Select Most Compatible.
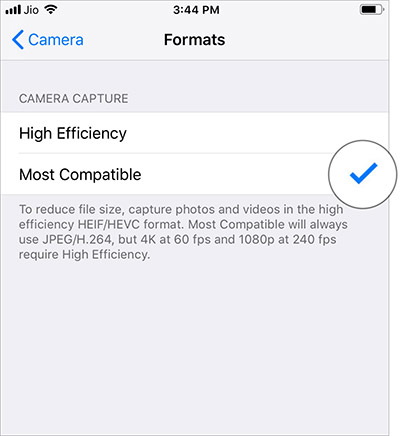
Most Compatible saves photos as standard JPEG files that work across all web browsers and design tools. High Efficiency saves photos as HEIC files.
If you want to keep saving storage on your device with HEIC photos, you can set your device to convert them automatically during transfer instead. See Convert photos during transfer.
Convert photos during transfer
- On your iPhone or iPad, open Settings and tap Photos.
- Scroll down to Transfer to Mac or PC and select Automatic.
When set to Automatic, your device keeps HEIC files on the phone to save space, but automatically converts them to JPEG whenever you transfer them to your computer using a USB cable. Transfers through AirDrop, iCloud, or third-party cloud apps retain the original HEIC format and still require conversion on your computer.