Configuring Authorize.net Integration
In this article
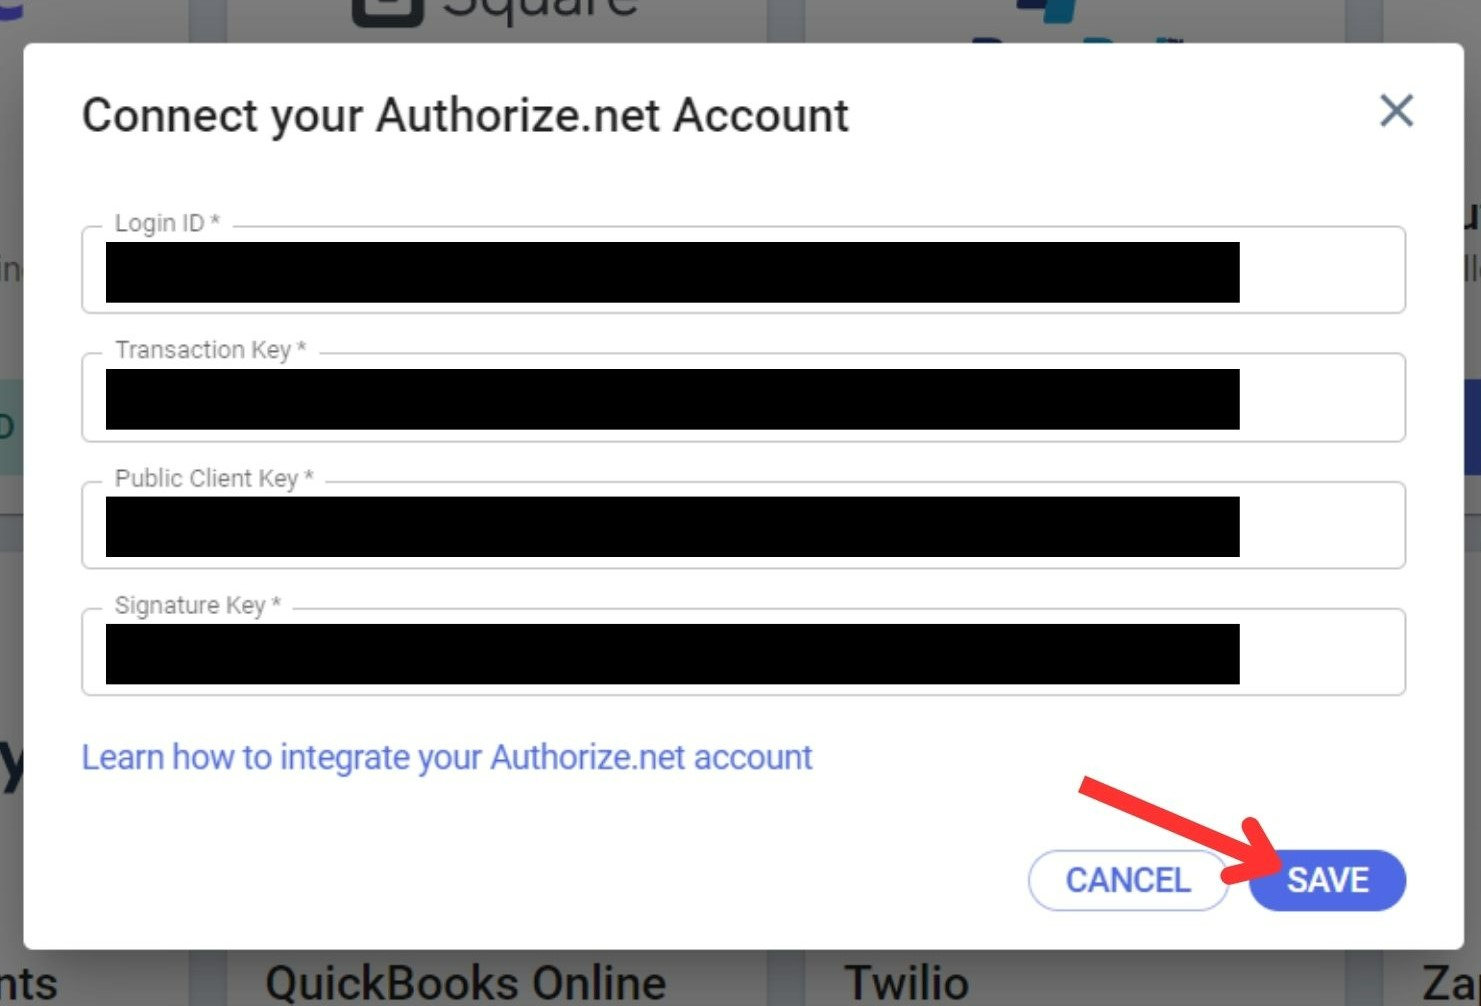
To connect your authorize.net account to YoPrint, you’ll need your Login ID, Transaction Key, Public Client Key, and Signature Key from authorize.net.
First thing you’ll need to do is login to your Authorize.net merchant interface.
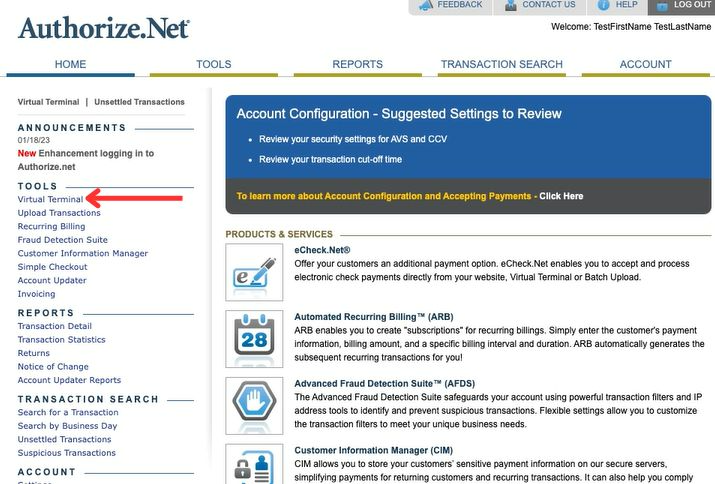
Getting Your Login ID, Transaction Key, and Signature Key
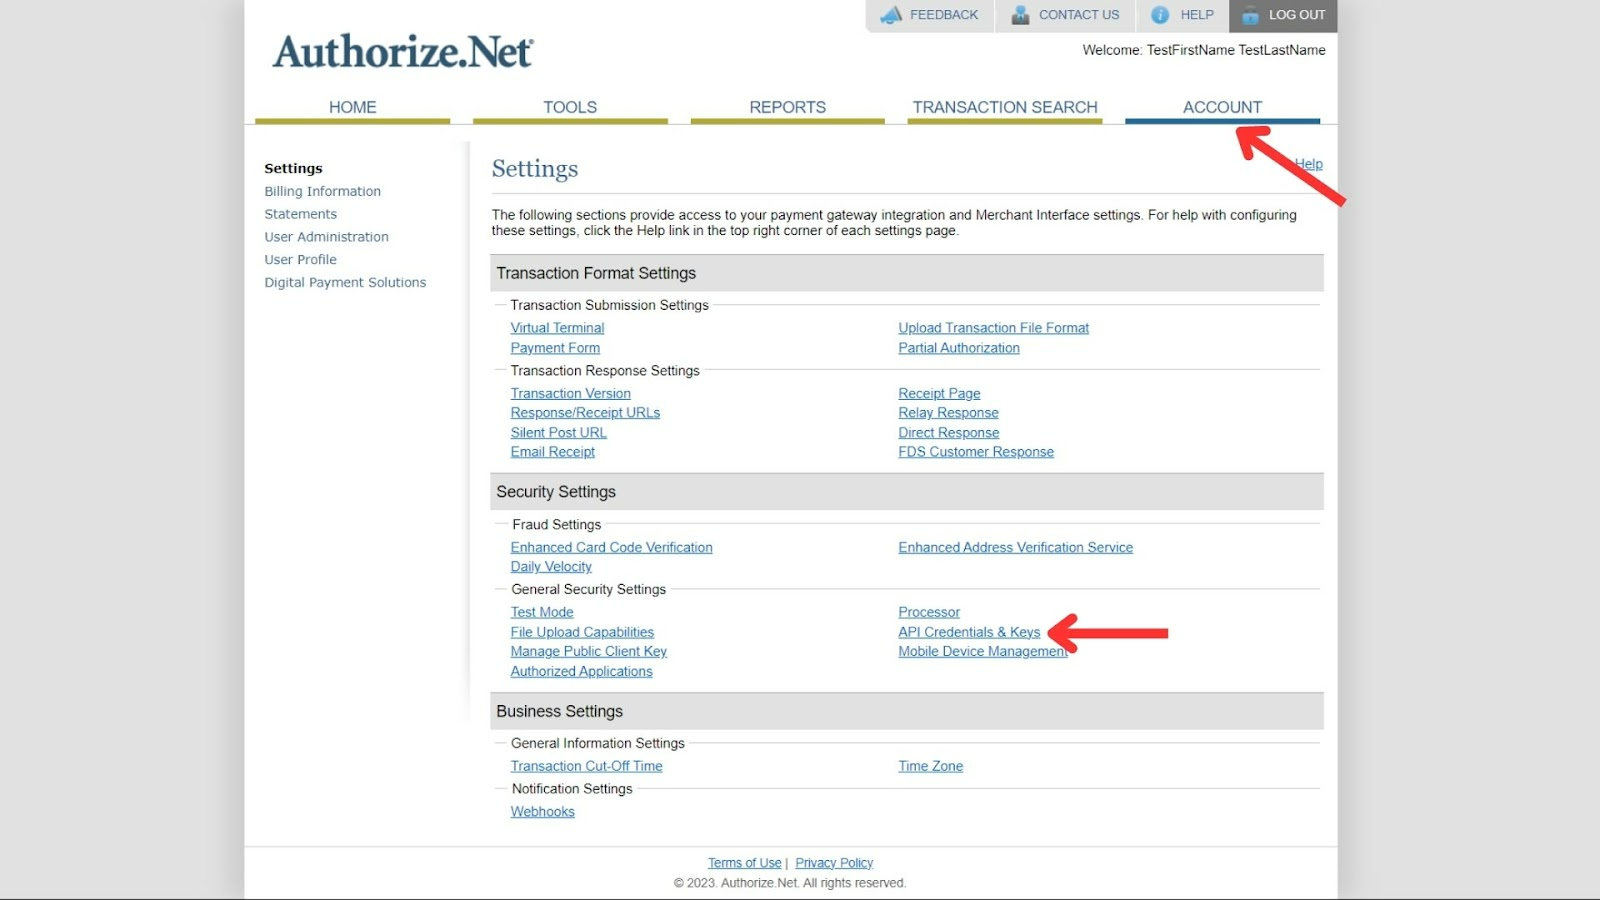
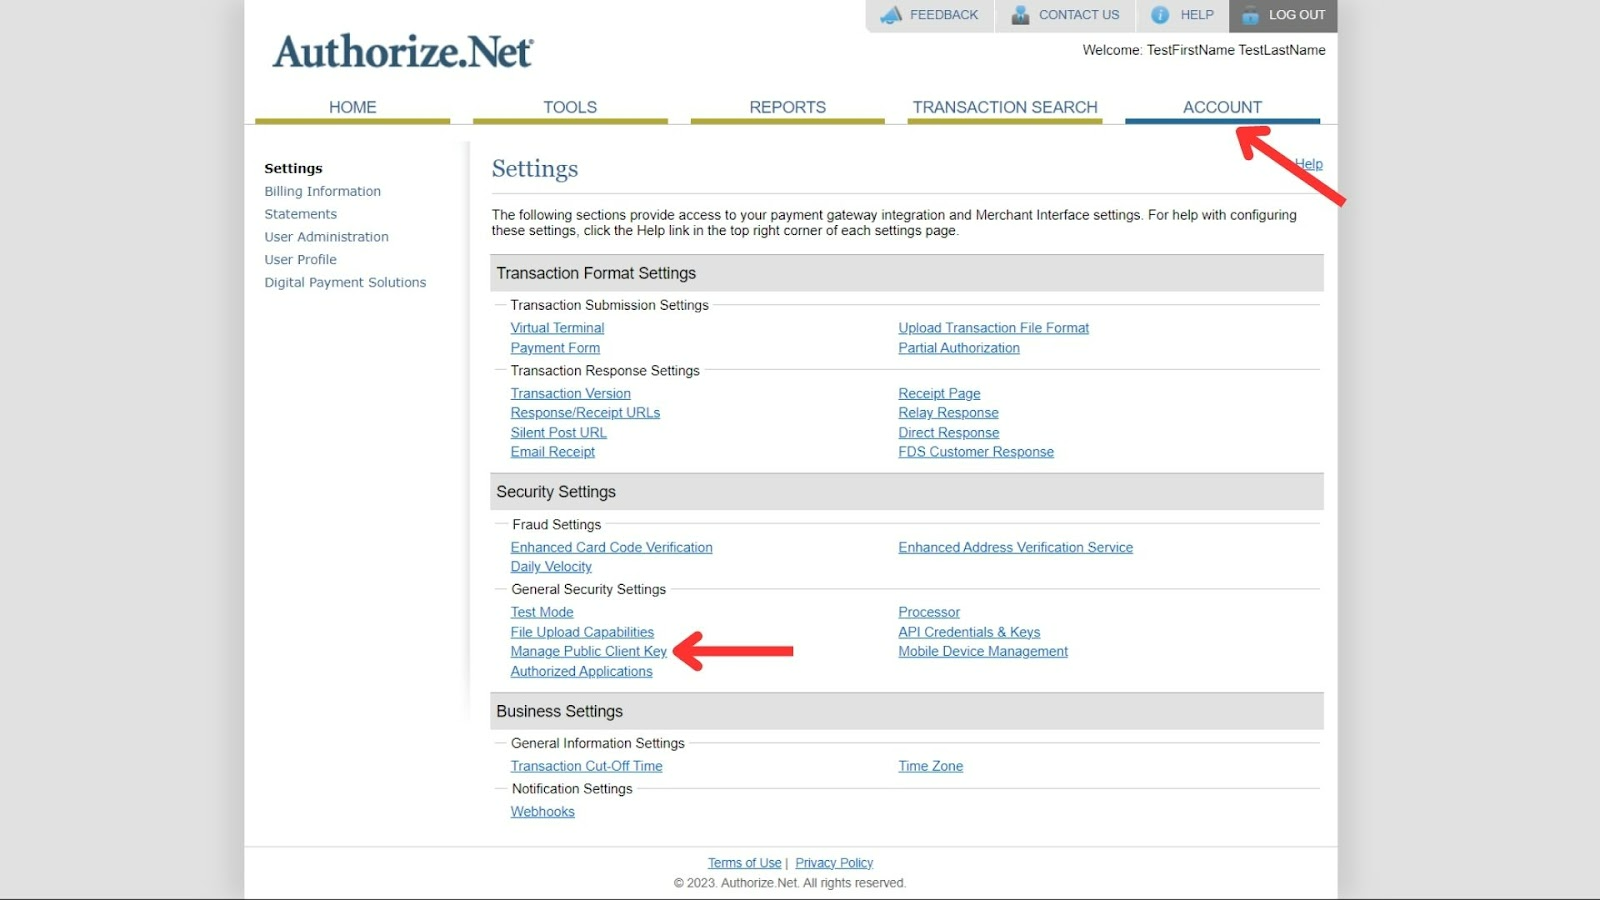
In the Authorize.net merchant interface, go to the Account page, and click on API Credentials and Key.
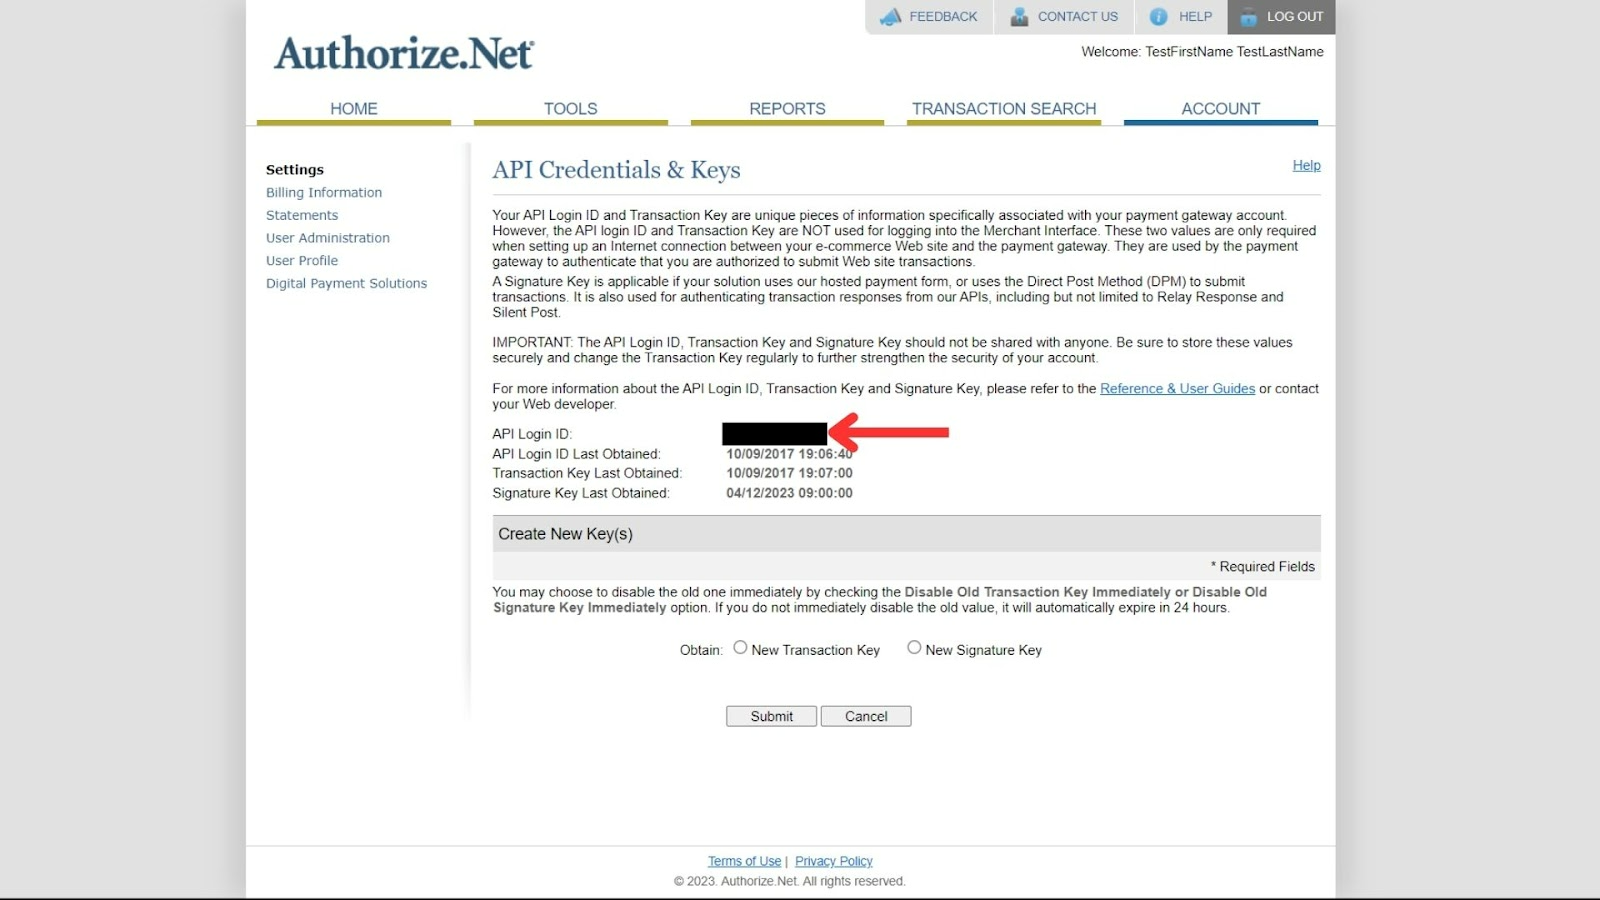
Copy and paste your Login ID to a secure location.
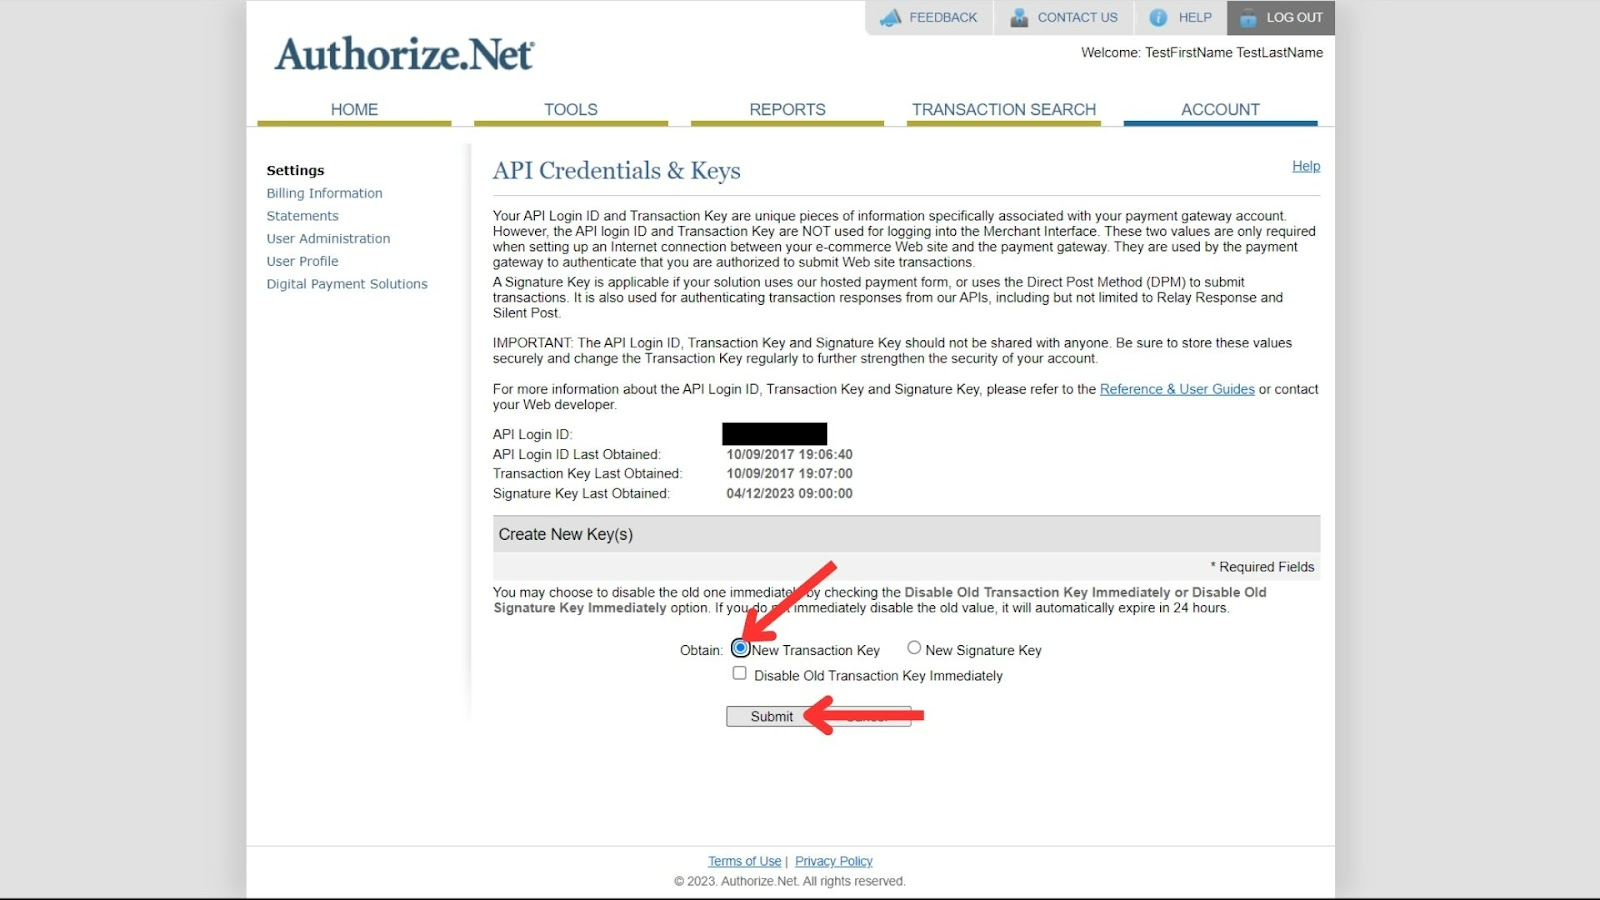
Select New Transaction Key, click on Submit, then copy your Transaction Key.
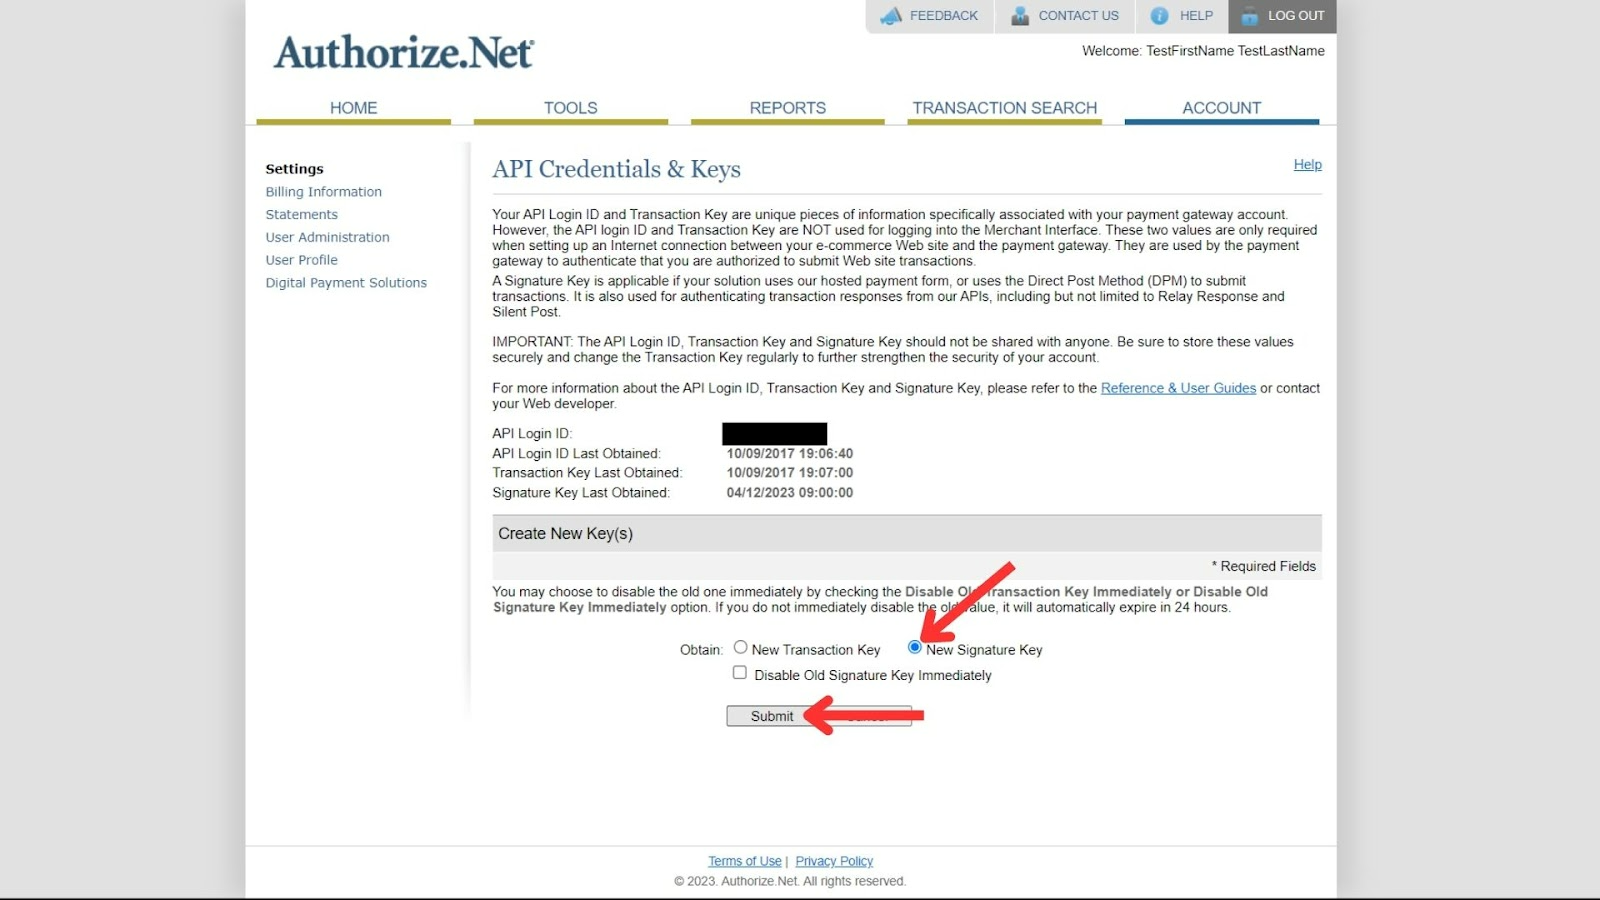
Then, select New Signature Key, click on Submit, and copy your Signature Key.
Getting Your Public Client Key
Head to the Account page, and select Manage Public Client Key.
If you already have a public client key, copy it. If one doesn’t exist, create a new one.
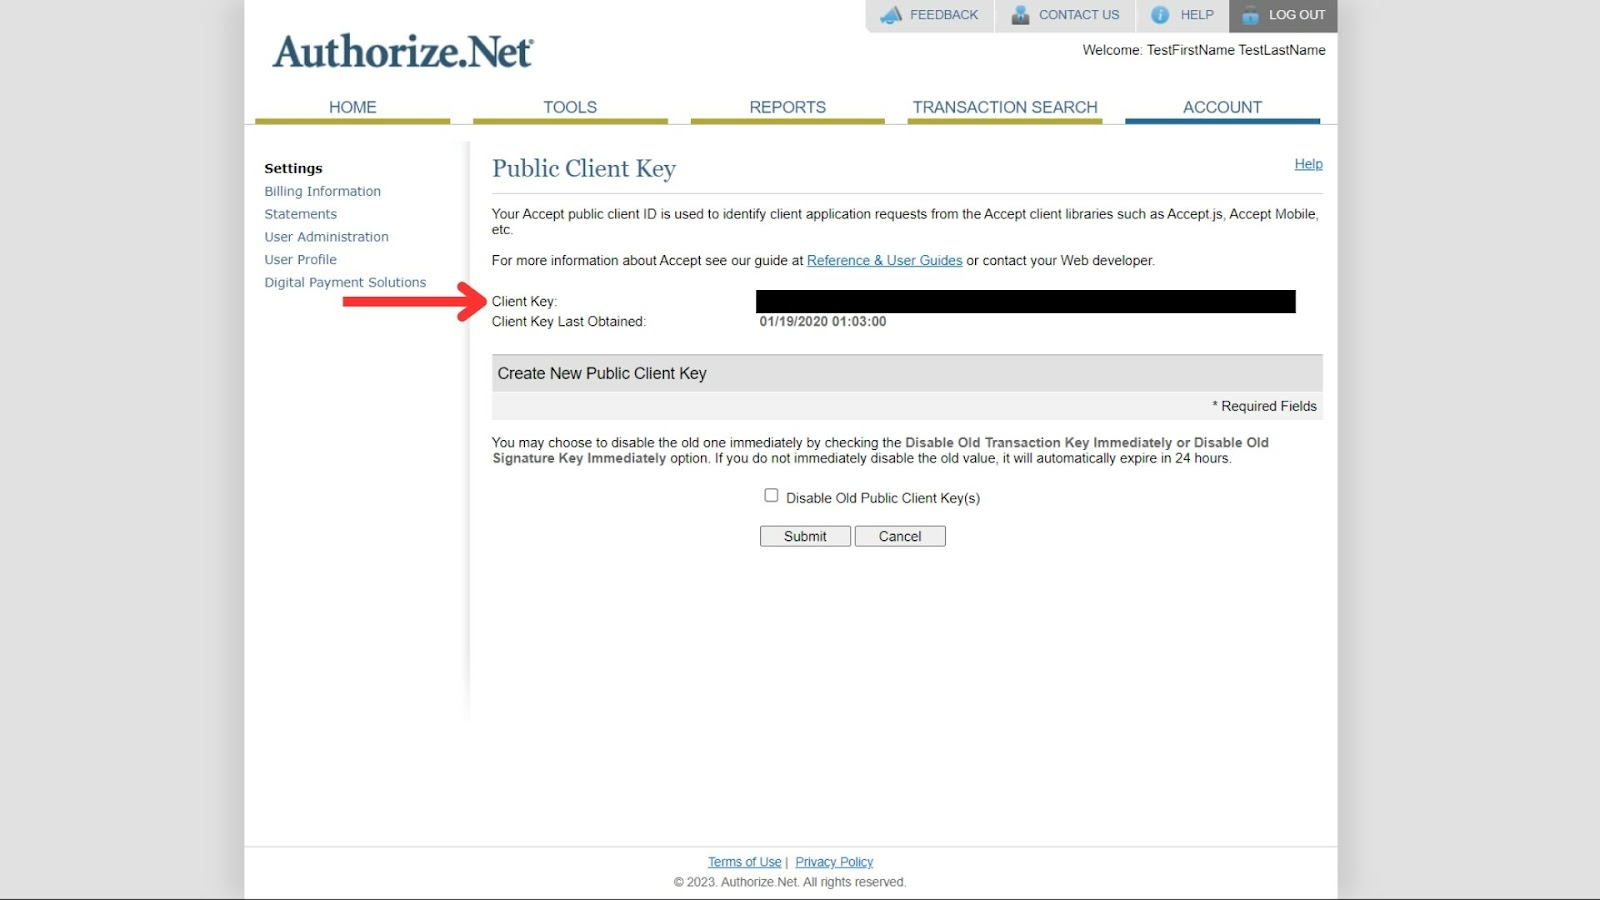
Make sure you store these keys securely and do not share them with anyone.
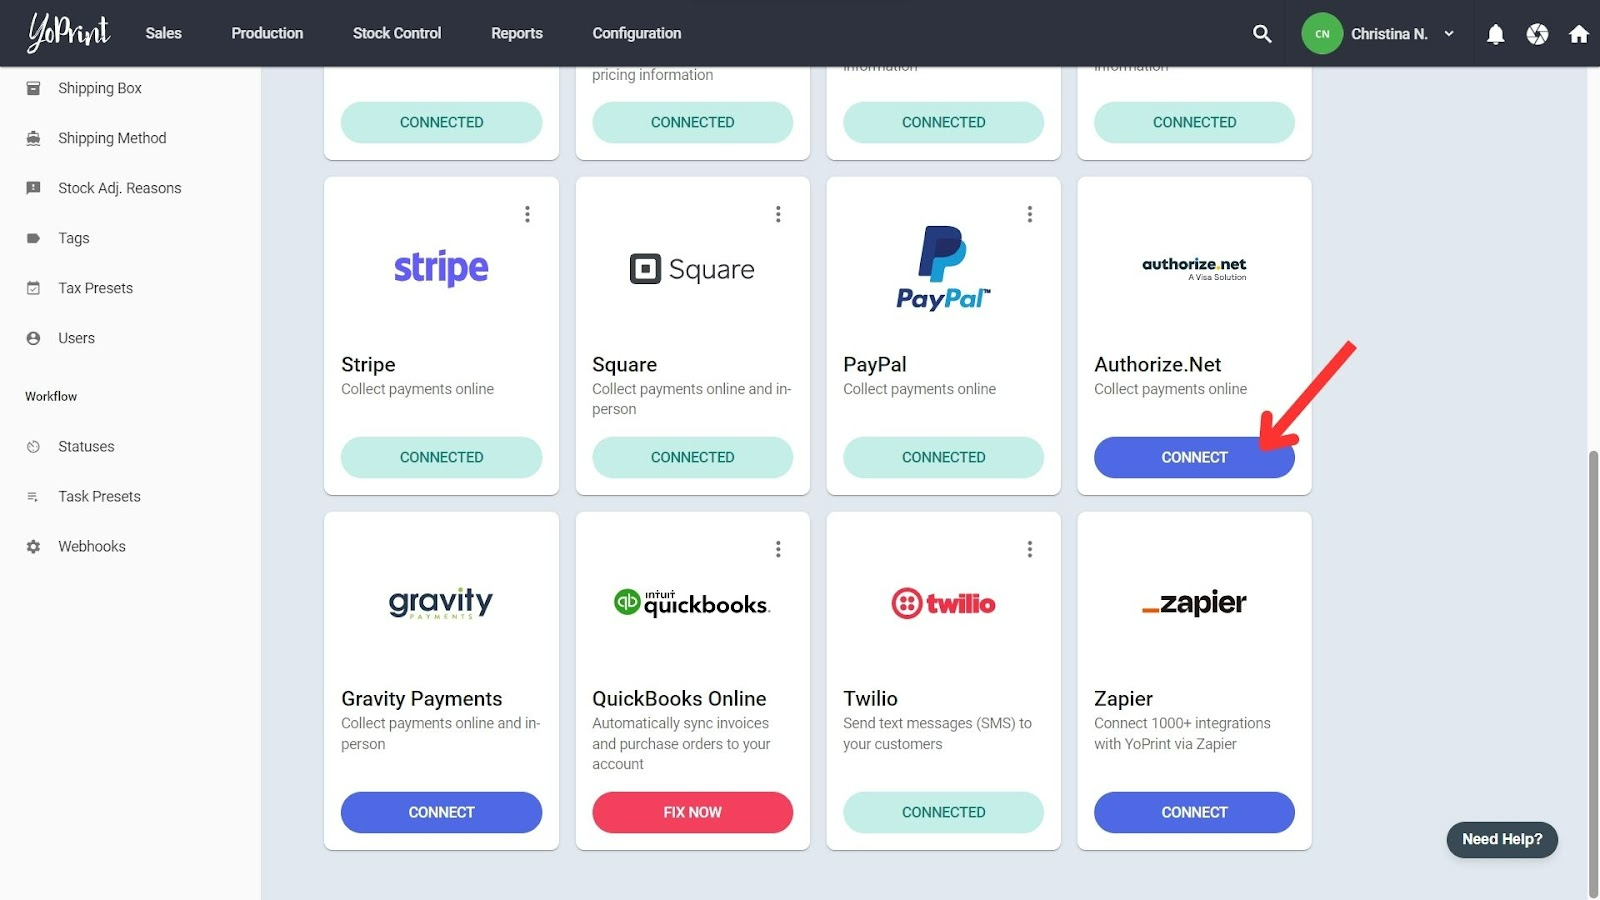
Connecting Authorize.net in YoPrint
Navigate to Settings > Apps > Connect.
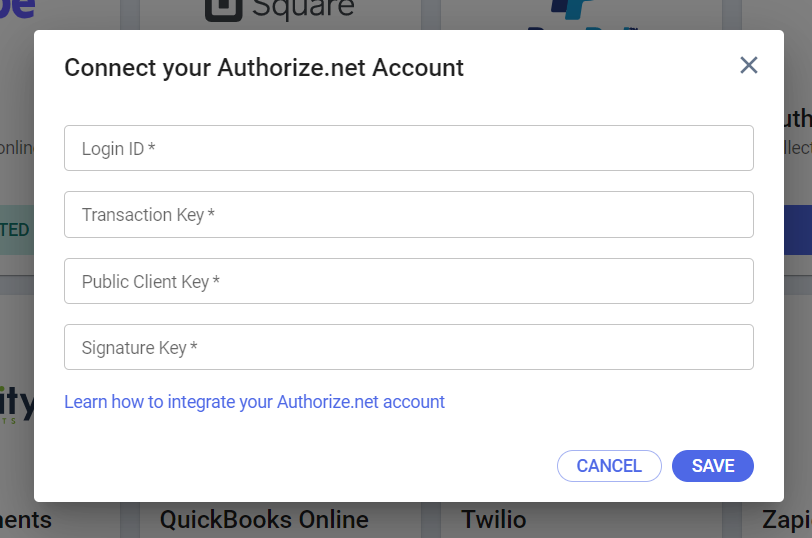
Paste in the Login ID, Transaction Key, Public Client Key, and Signature Key. Then click on Save, and voila, your Authorize.net account is connected and you’re ready to collect payments online.
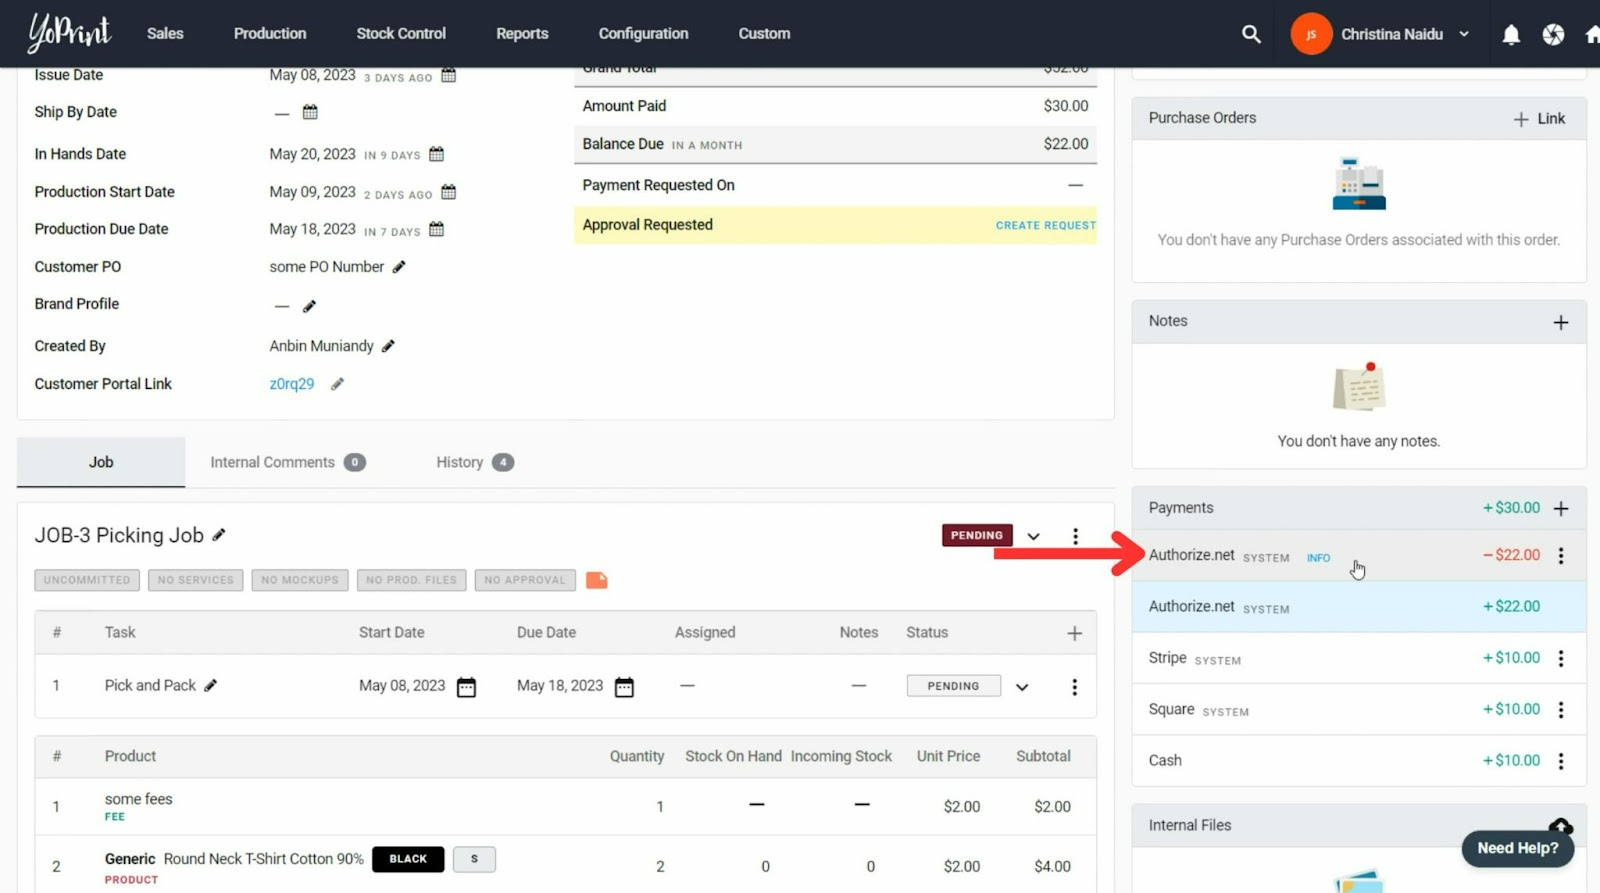
Now that Authorize.net is integrated, your customers can pay for their orders on their customer portal.
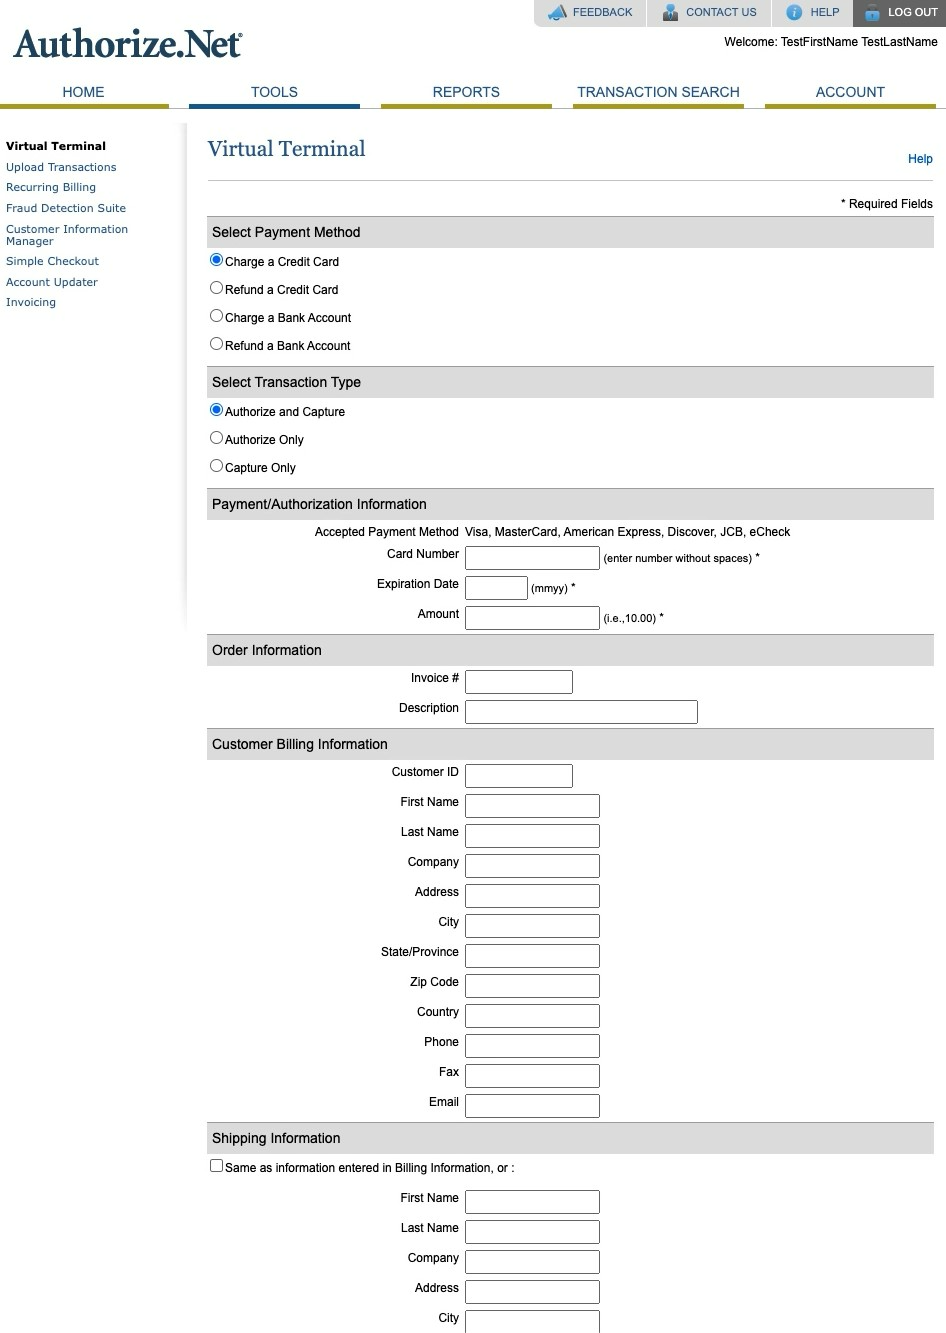
Authorize.net Virtual Terminal
Let’s say you’ve got a customer right in front of you, their credit card is out, and they’re ready to pay. To make sure this payment is recorded in YoPrint, you can use Authorize.net’s virtual terminal.
- In your Authorize.net account, go to Virtual Terminal.
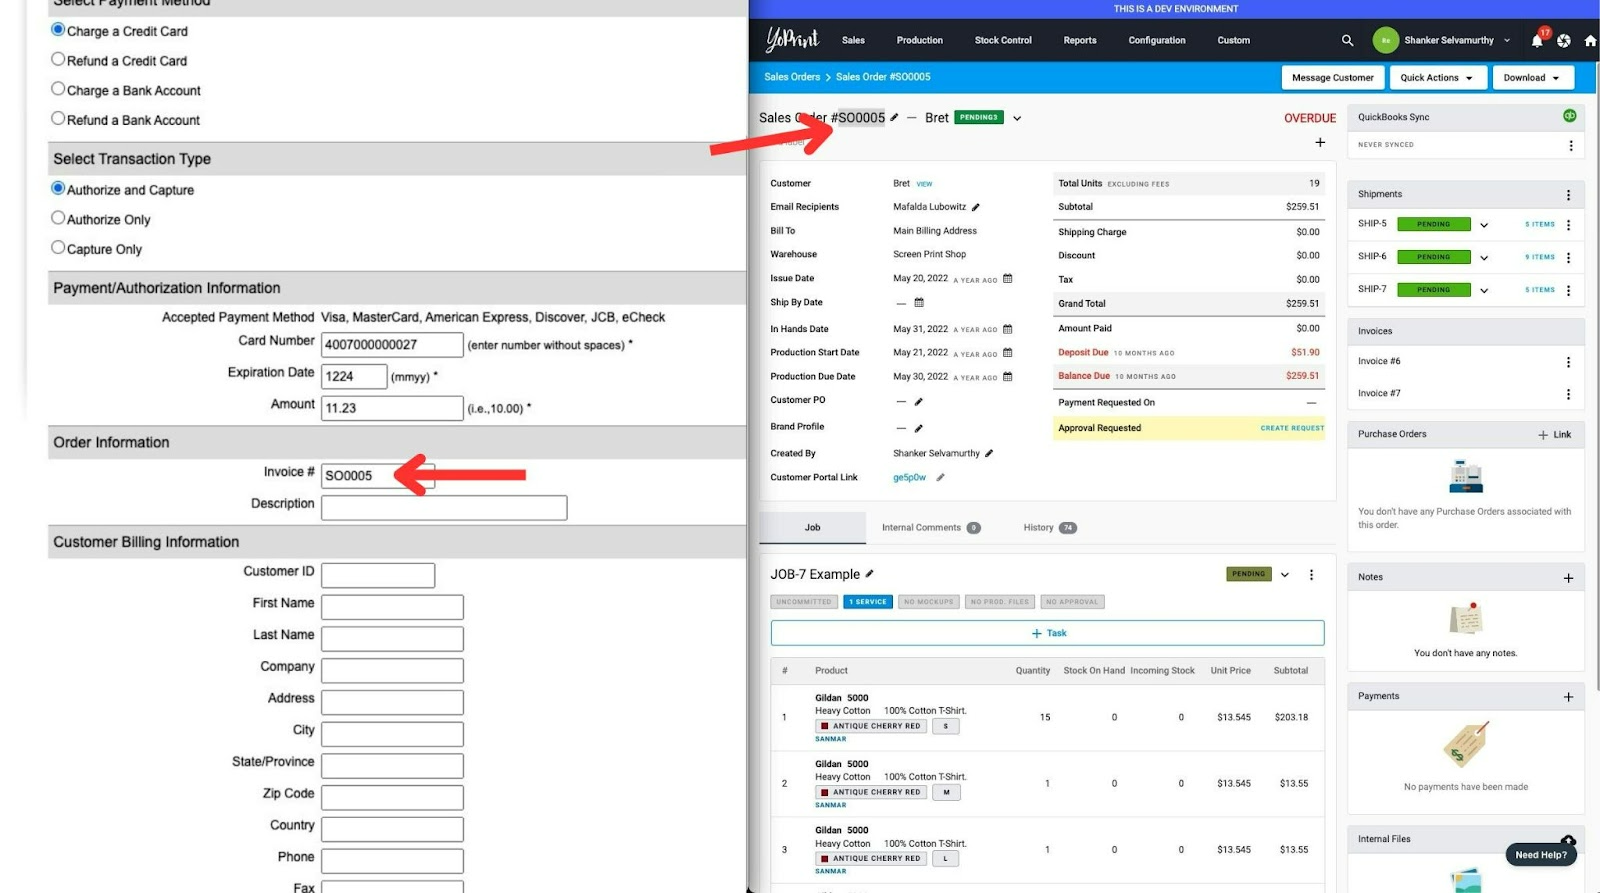
- Select the payment method and transaction type, and put in your customer’s card details, as well as the amount they’ll be paying.
- Copy and paste the sales order number into the invoice number section, so that Authorize.net can allocate the payment to the right order in YoPrint.
- Fill in the rest of the details.
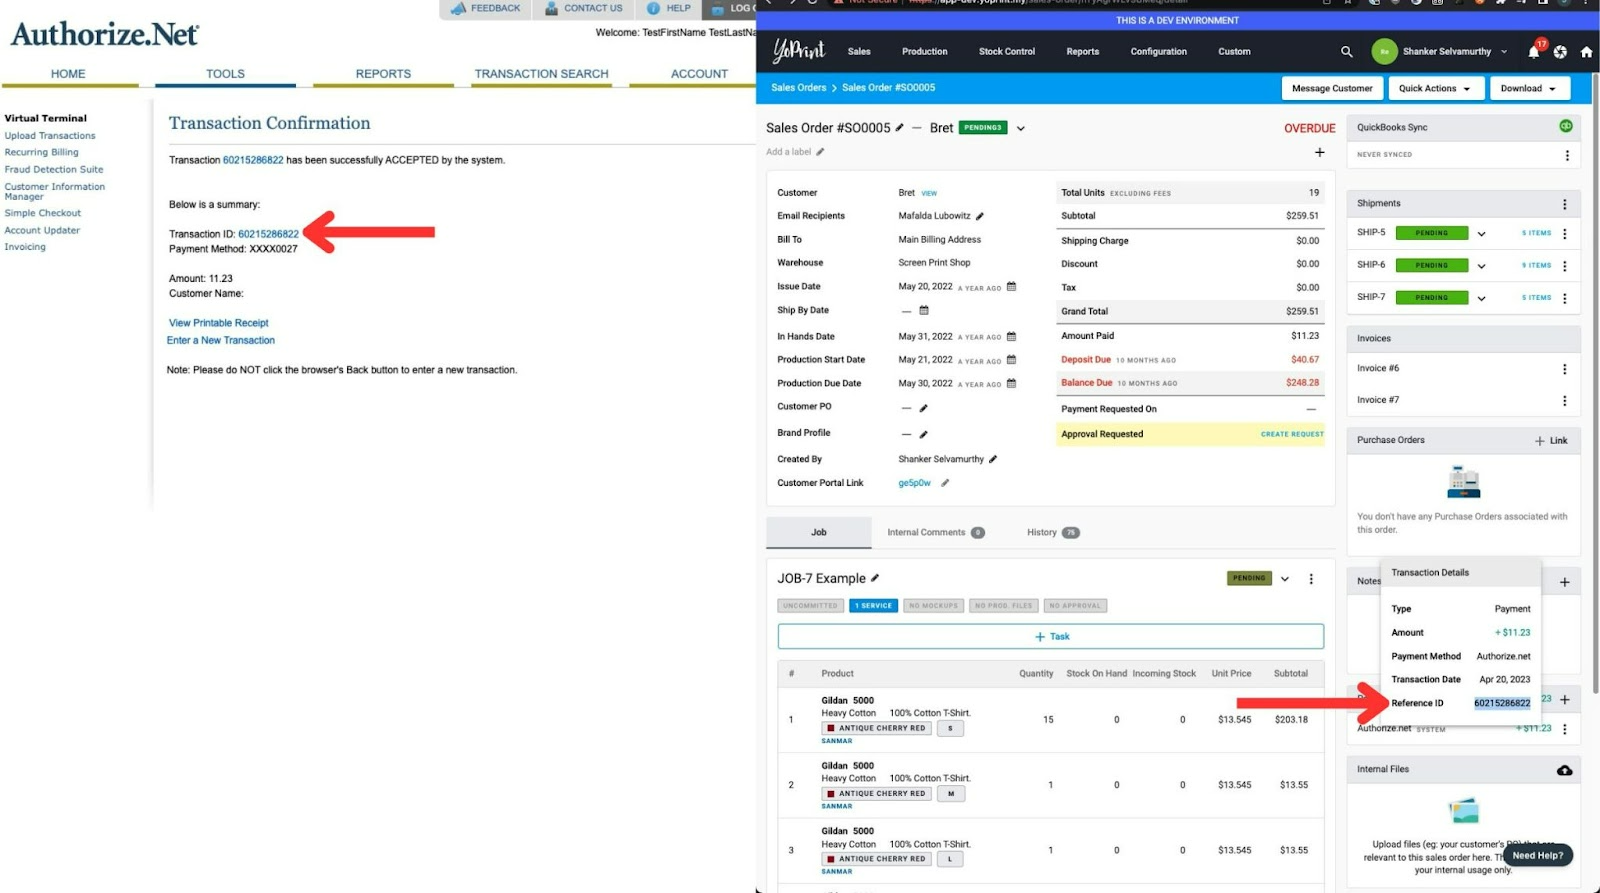
- Once you hit submit, your payment is recorded in YoPrint. You can cross check the reference ID in YoPrint and Authorize.net.
Issue Refunds
There are two ways to issue refunds. If you’d like to issue a refund directly in YoPrint, check out this article. If you want to issue a refund from Authorize.net, here’s how to do it:
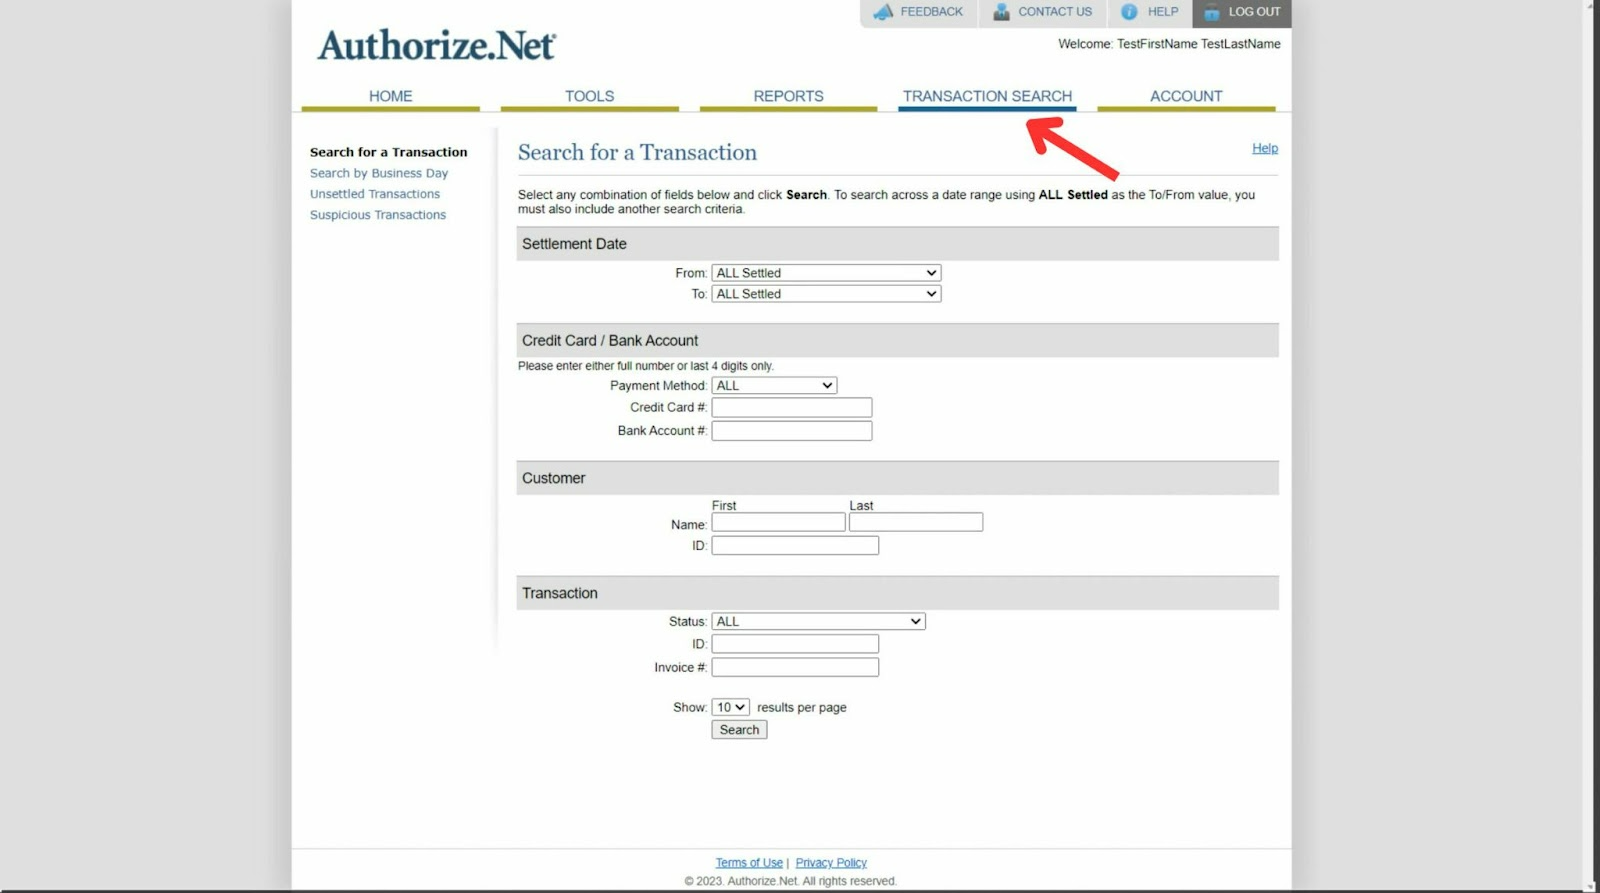
- Go to the Transactions page and search through settled transactions. You can put in the Reference ID from YoPrint to help with your search, or any of the other details on the search page.
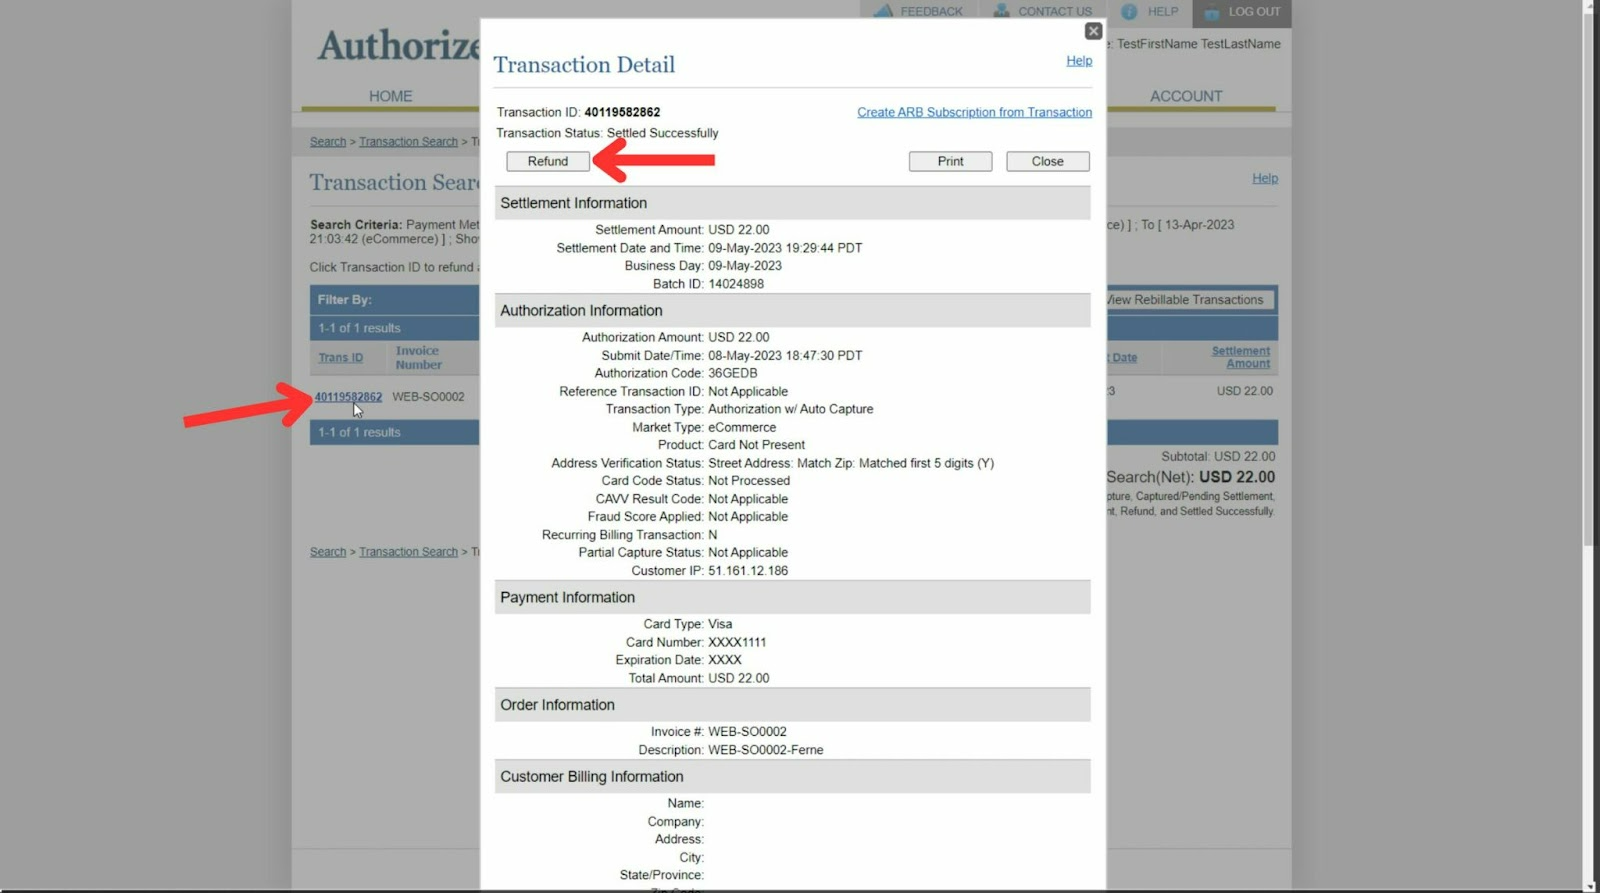
- Select the transaction and click on Refund. Confirm the refund details and then click on OK.
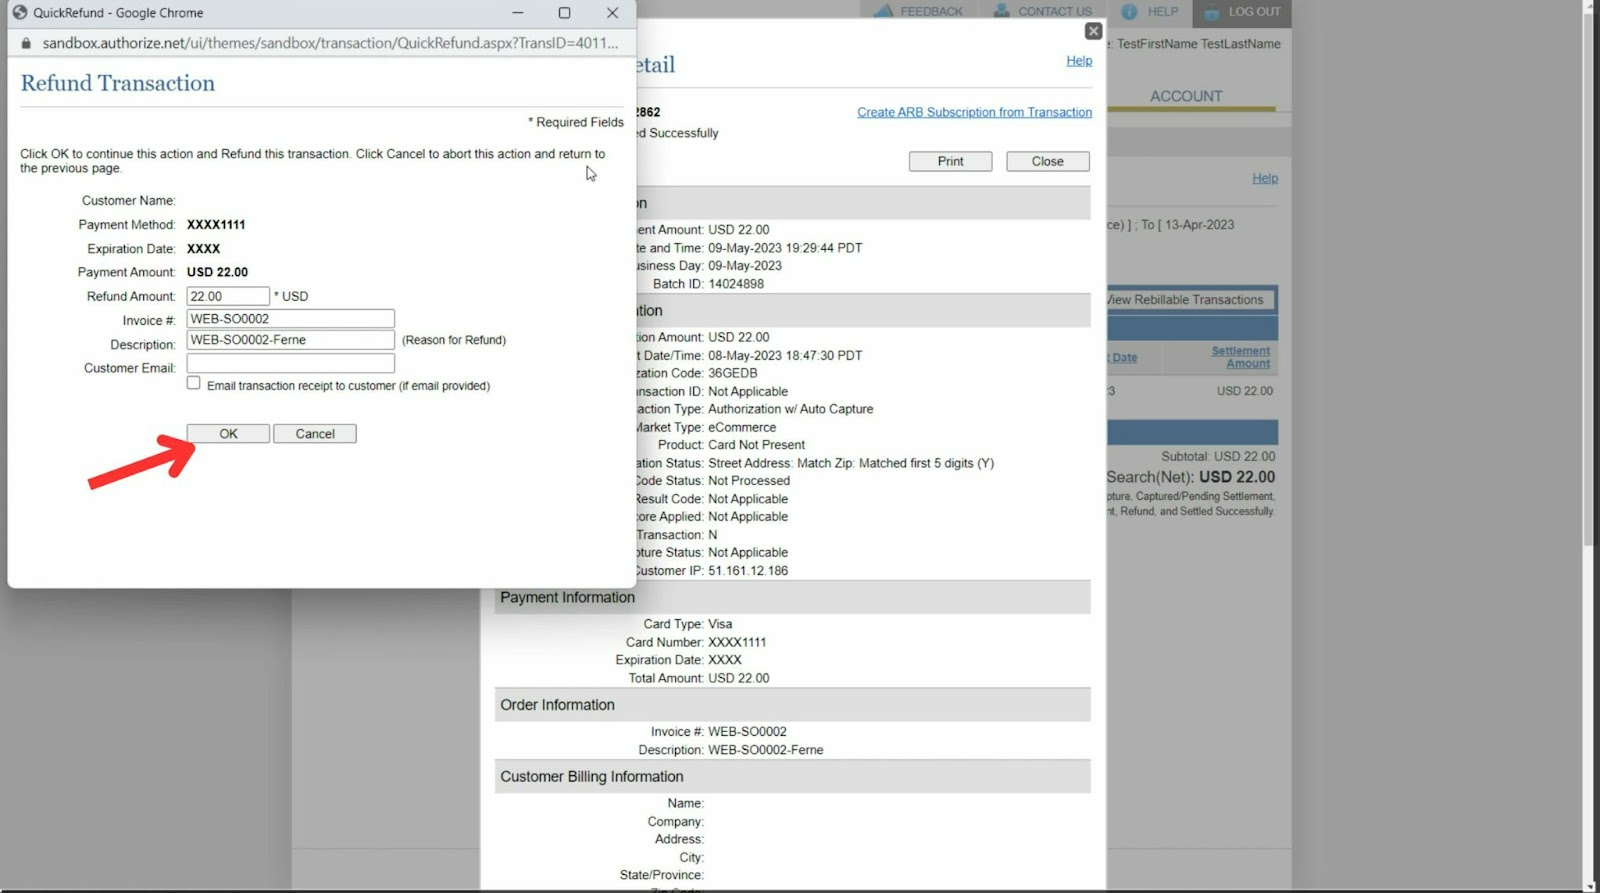
- Your customer gets their money back, and this automatically gets recorded in YoPrint.
You can learn more about initiating refunds in Authorize.net here.
Do note that refunds for Authorize.net are only available 24 hours after the payment is made