Tags
In this article
Tags allow you to quickly organize and sort through your Sales Orders and Quotes. In this article, we will walk you through how to create and use tags.
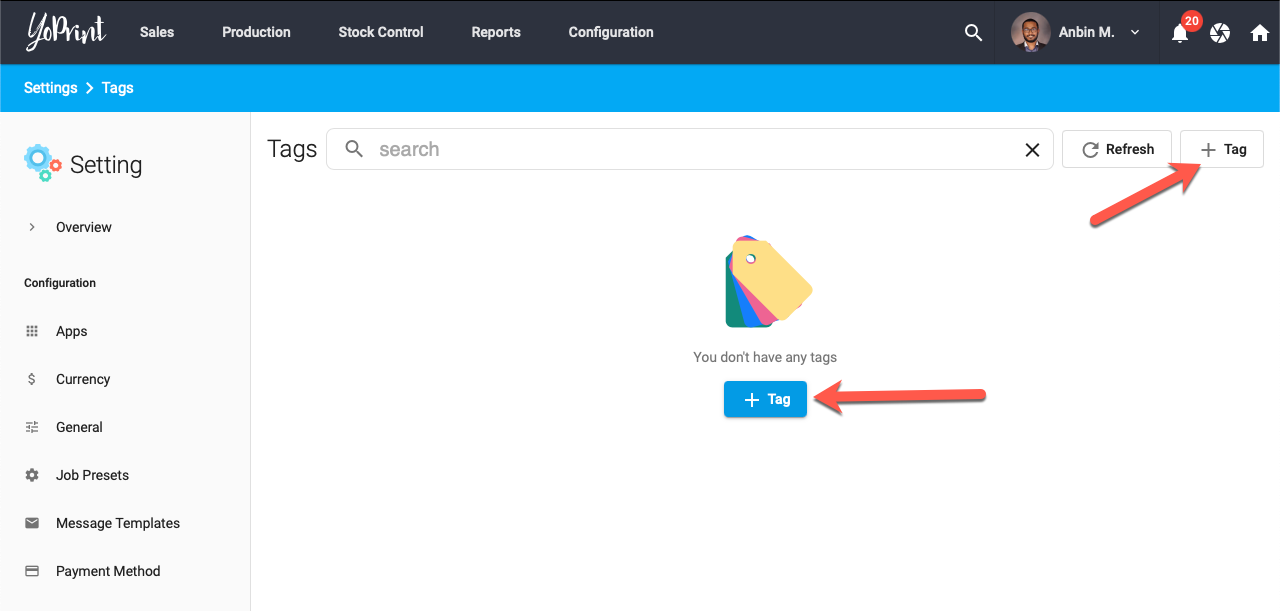
Creating a Tag
- Navigate to Configuration > Settings > Tags.
- Click on + Tag
- Fill in the required fields and select a color.
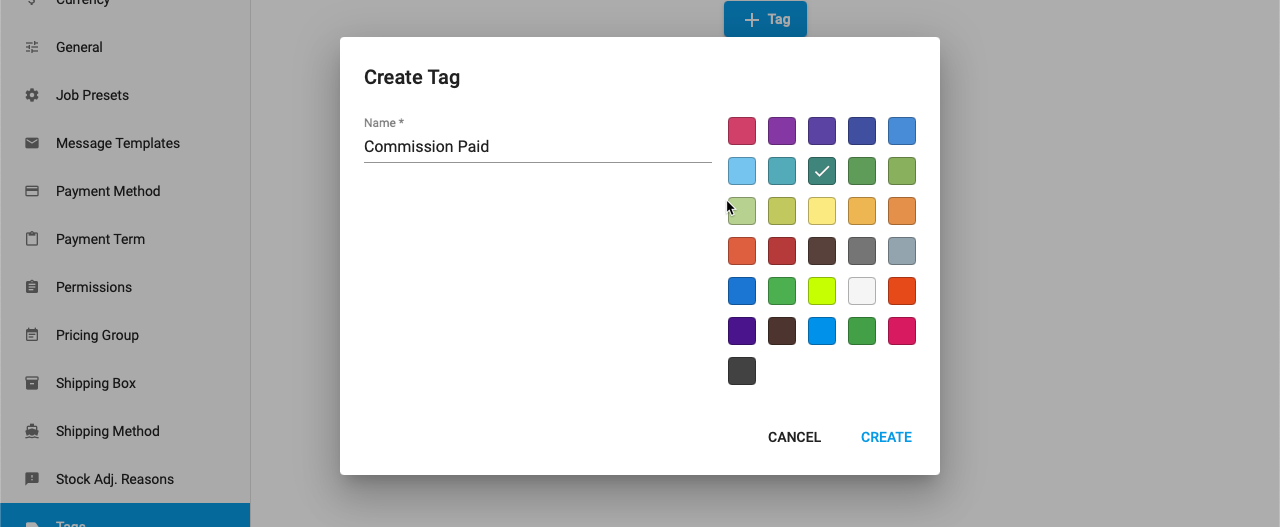
- Click Create.
Updating a Tag
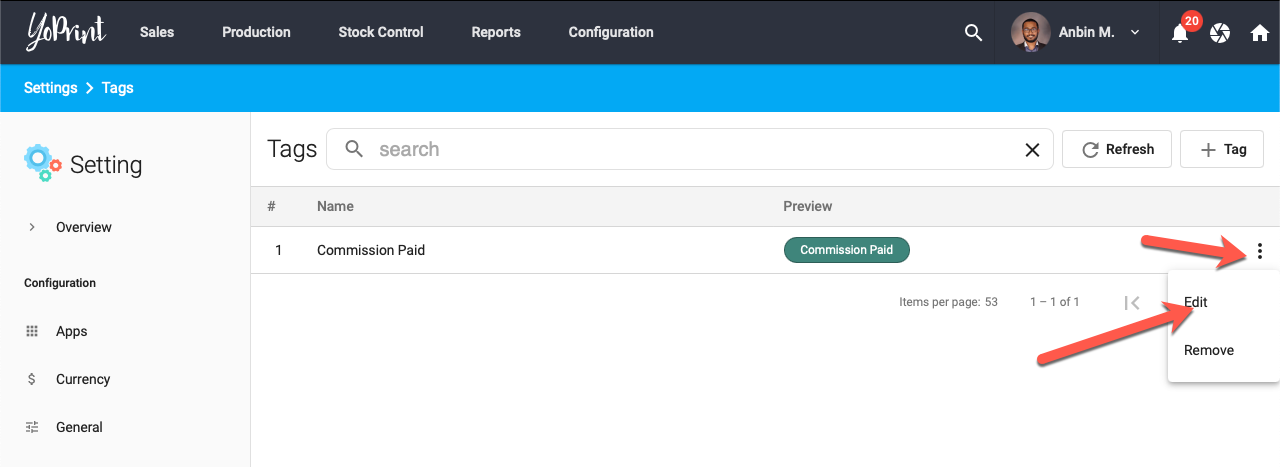
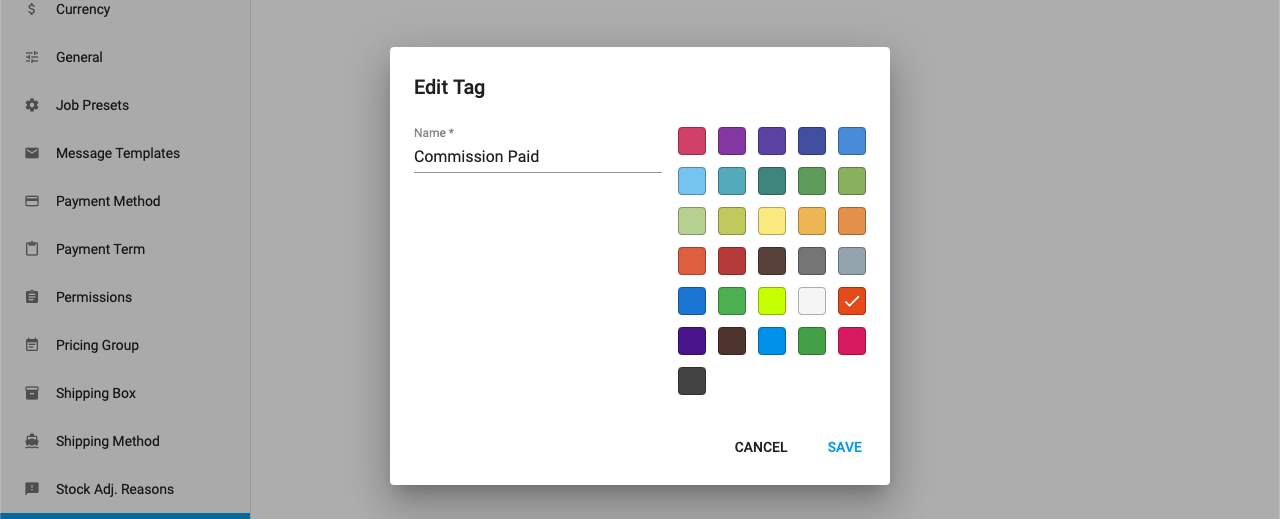
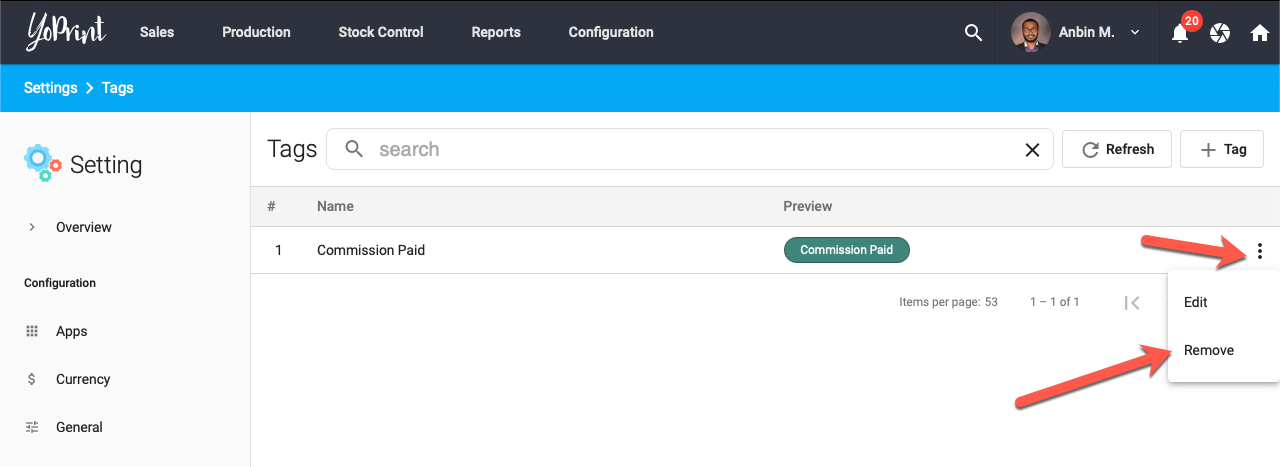
- Double click on the row or click ⋮ and click Edit.
- Update the fields you would like changed and click Save.
Deleting a Tag
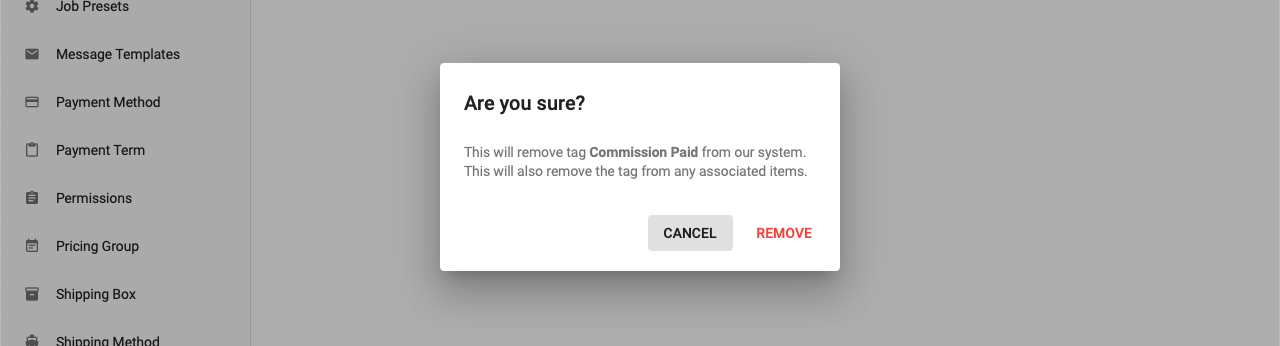
If you no longer need a tag, you can delete it from our system. When you delete a tag, the tag will be unattached from all related Sales Orders / Quotes.
- Click ⋮ and click Remove.
- Click Remove on the confirmation dialog.
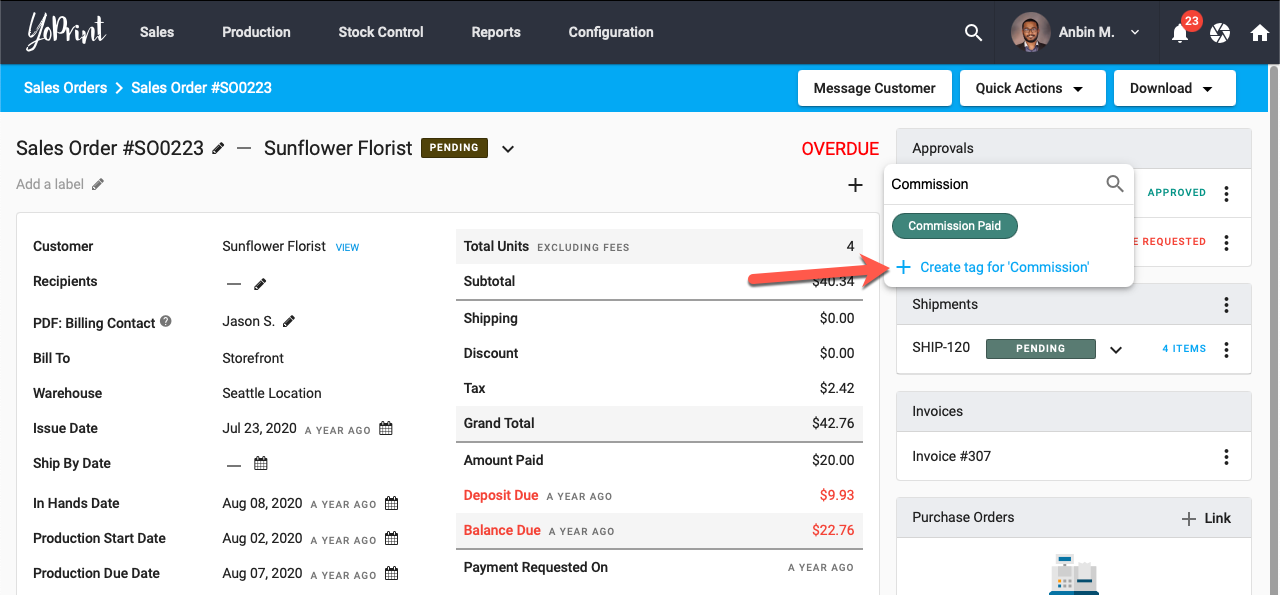
Adding a Tag to Sales Order / Quote
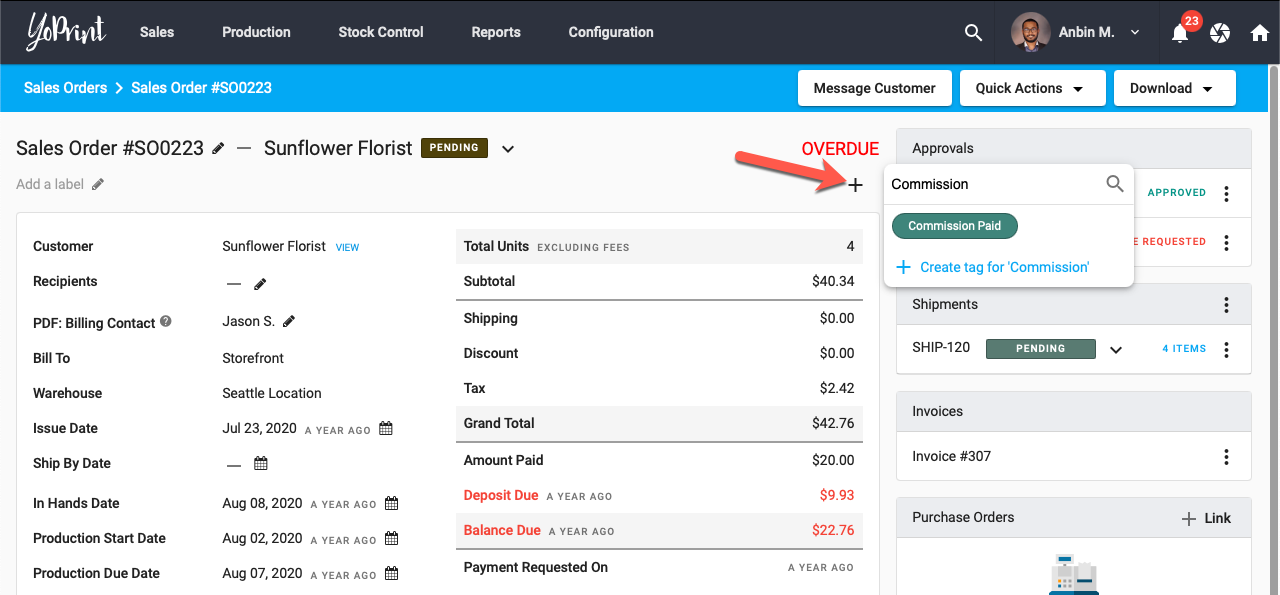
To add a tag from the Order Detail Page, just click on the + icon on the top right side. Search and select a tag to add it to the Sales Order.
You can also add a tag from the Sales Order / Quote List Page. Just click on the Tags cell, click the + icon, search and select a tag.
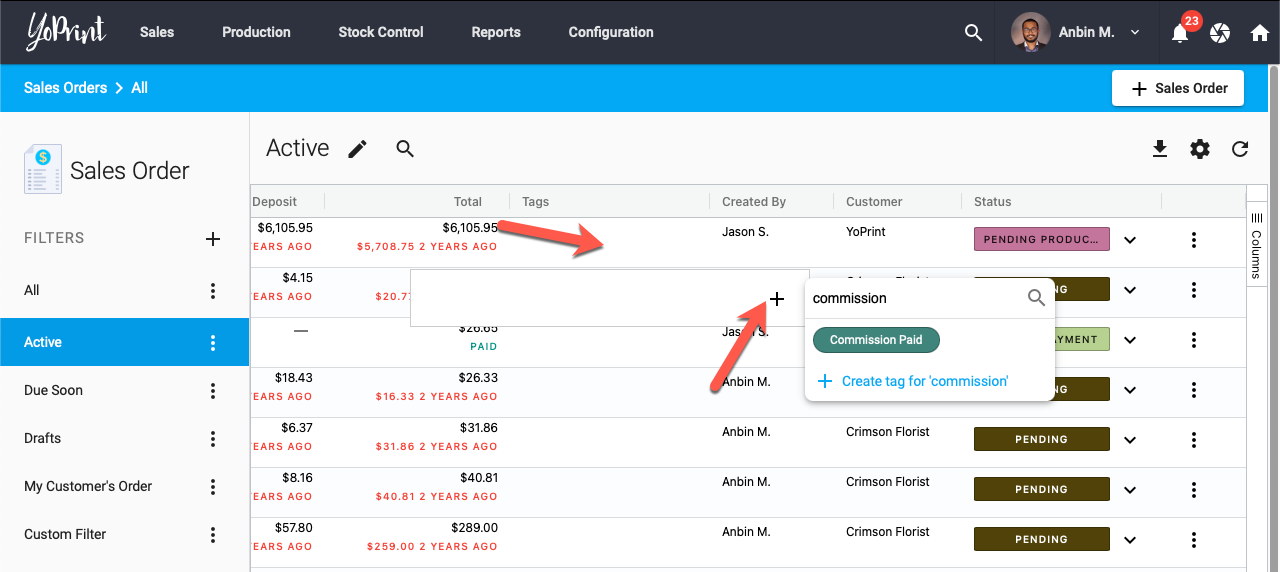
Creating a New Tag On-The-Fly
If the tag you are searching for is not present, you can simply click on the + icon at the bottom of the list to create one.