Troubleshooting Quickbooks Integration Issues, and More Tips
In this article
- Find the error message
- Duplicate Document Number
- Duplicate Name Exists
- String length is either shorter or longer than supported
- Invoice Sync - Invalid String
- Sync a sales order manually
- Check a synced invoice
- Pause or resume sync for one order
- Move a customer list from QuickBooks
- Disconnect QuickBooks
Find and resolve QuickBooks sync errors, check synced invoices, and maintain your QuickBooks Online connection. If you have not connected your company yet, start with Connect YoPrint with QuickBooks Online.
Find the error message
When an order or invoice fails to sync, check the error message to see what went wrong. You can view the message directly on the order or in your company's QuickBooks integration logs.
Check errors on an order
-
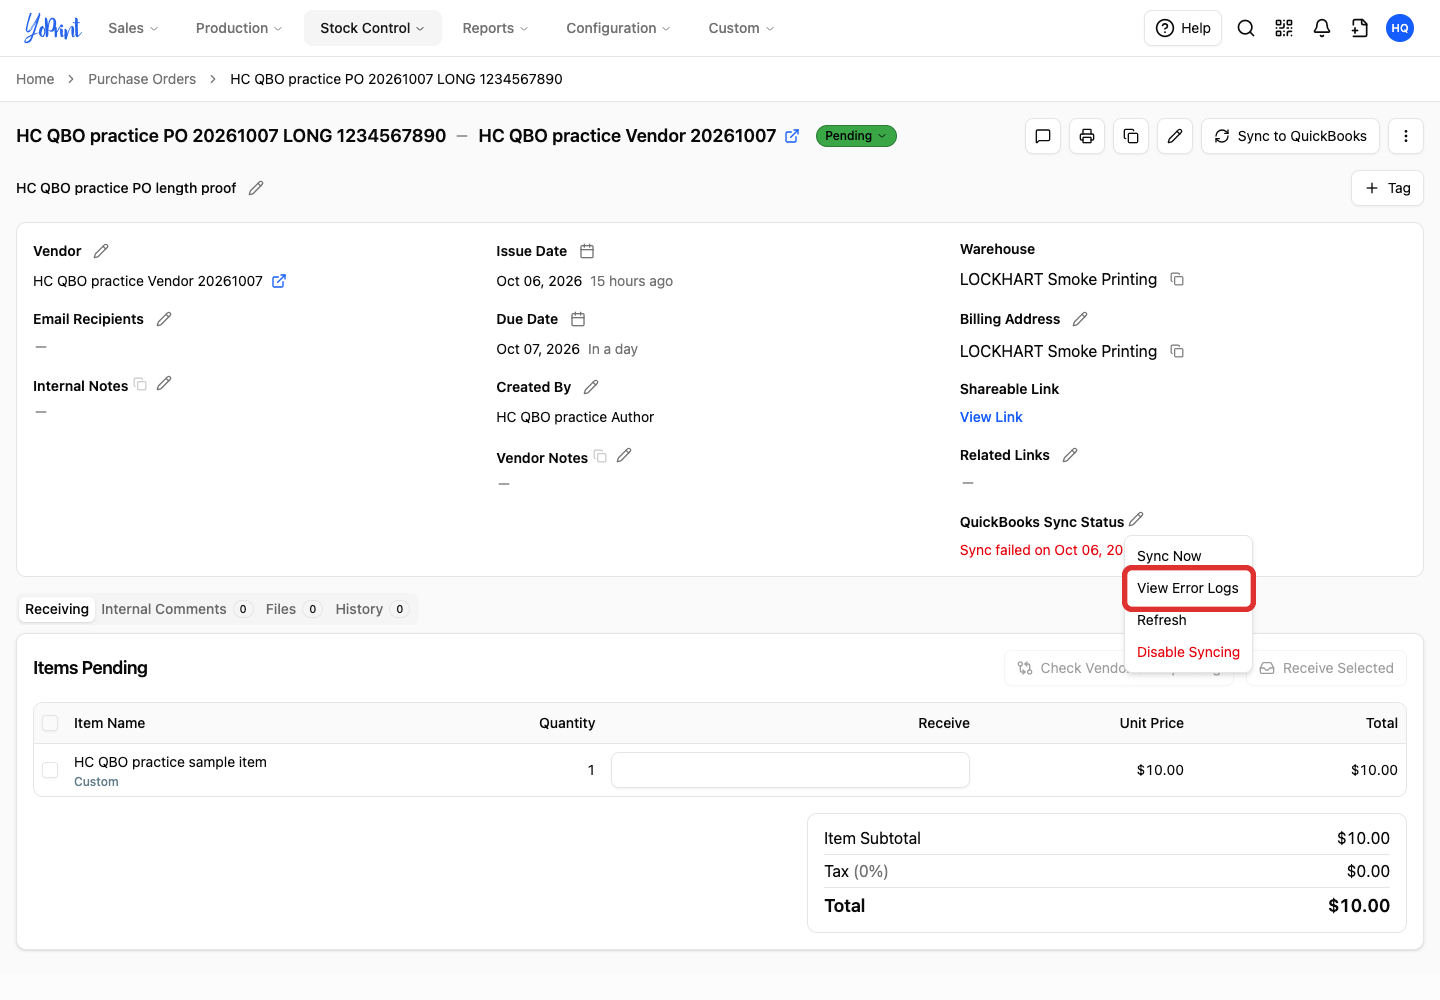
In the QuickBooks Sync Status menu on the order, select View Error Logs.
-
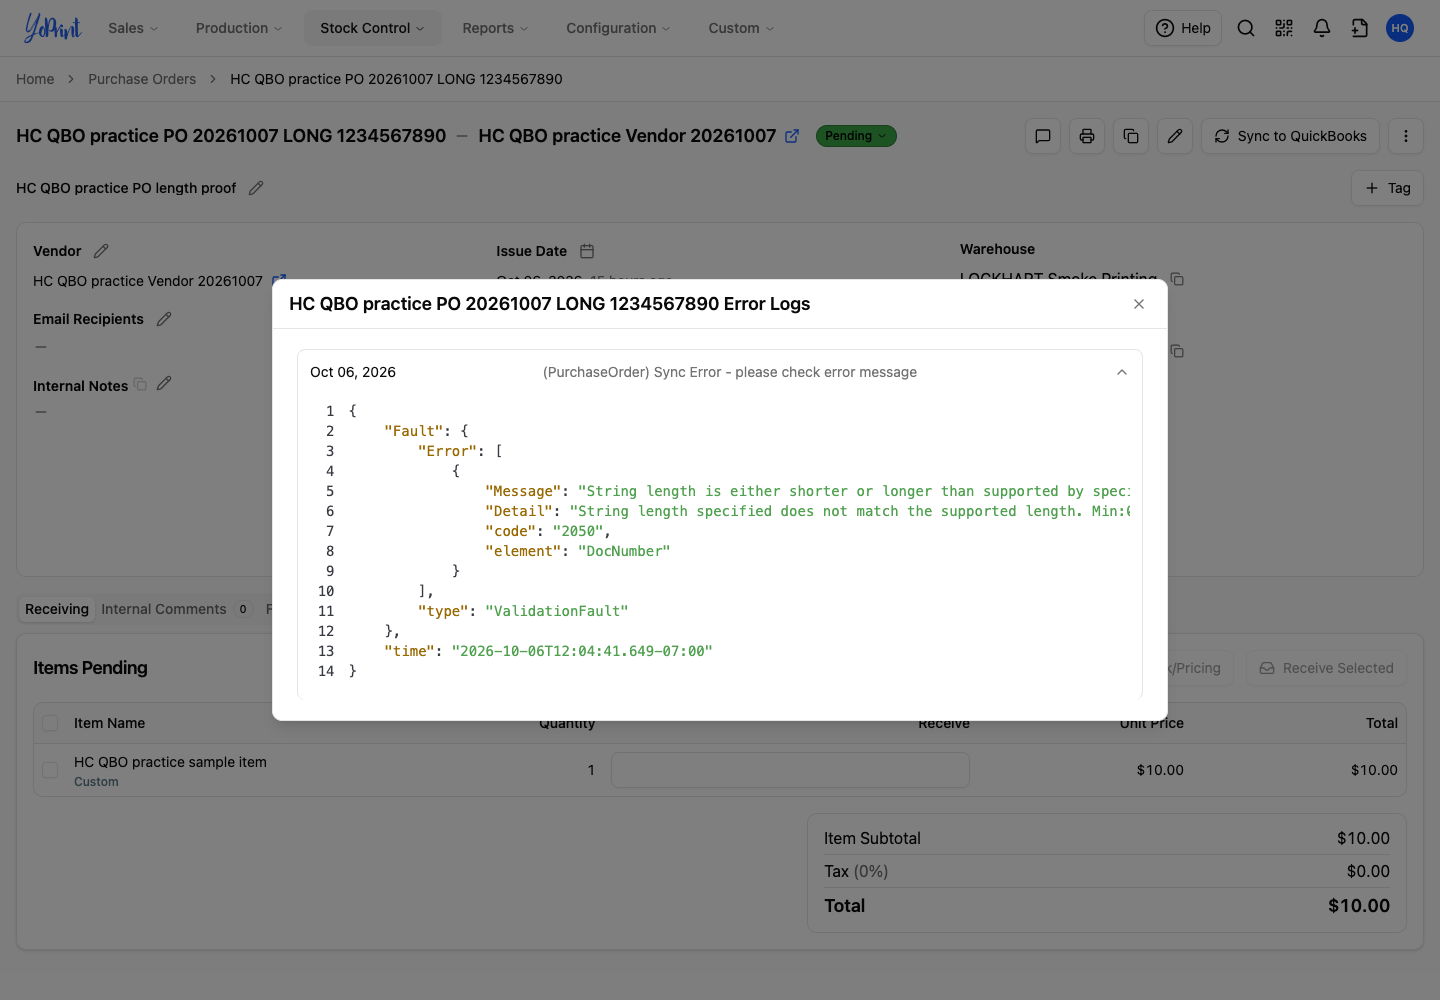
Expand the error row to read the message.
Check errors in integration logs
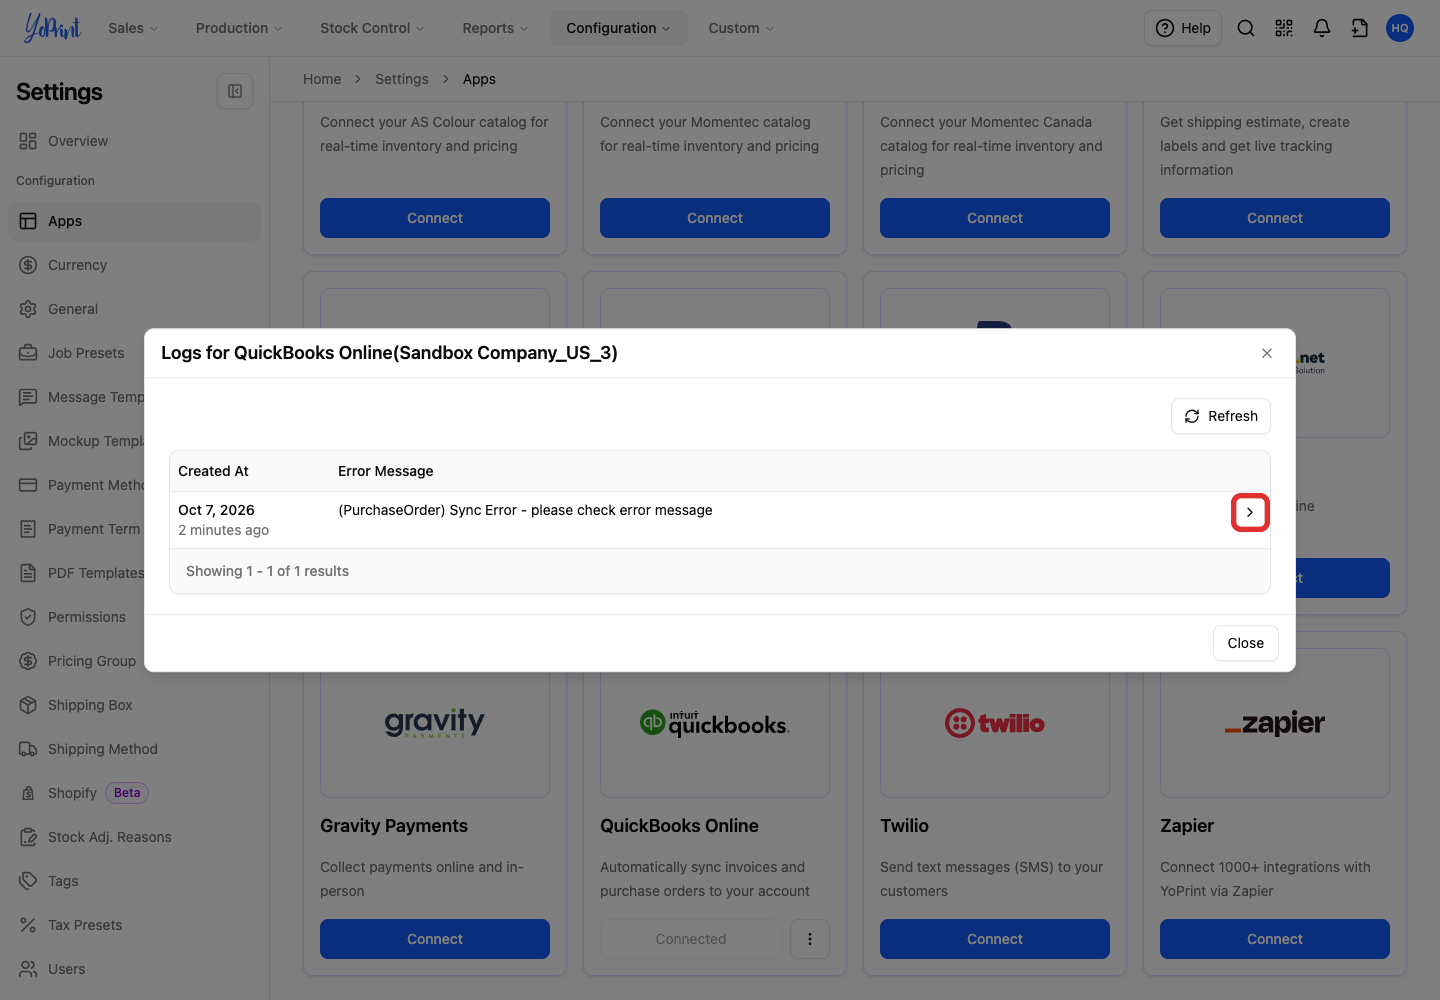
Each row in View logs has an Expand control that shows the full error.
-
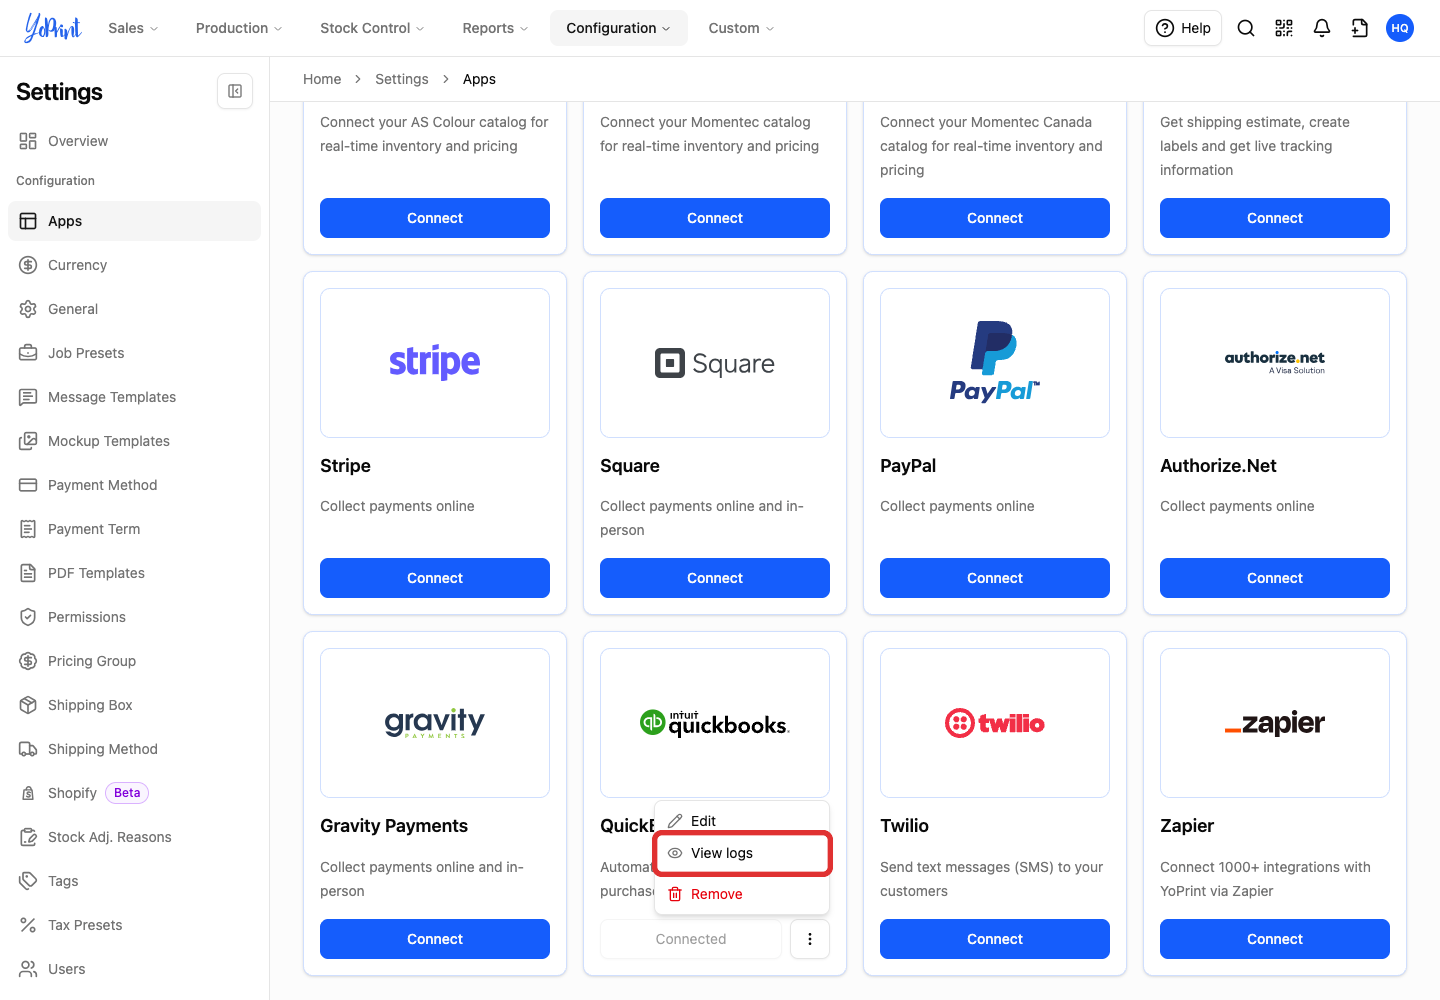
In Settings > Apps, open ⋮ on QuickBooks Online and select View logs.
-
Select Expand on the error row.
-
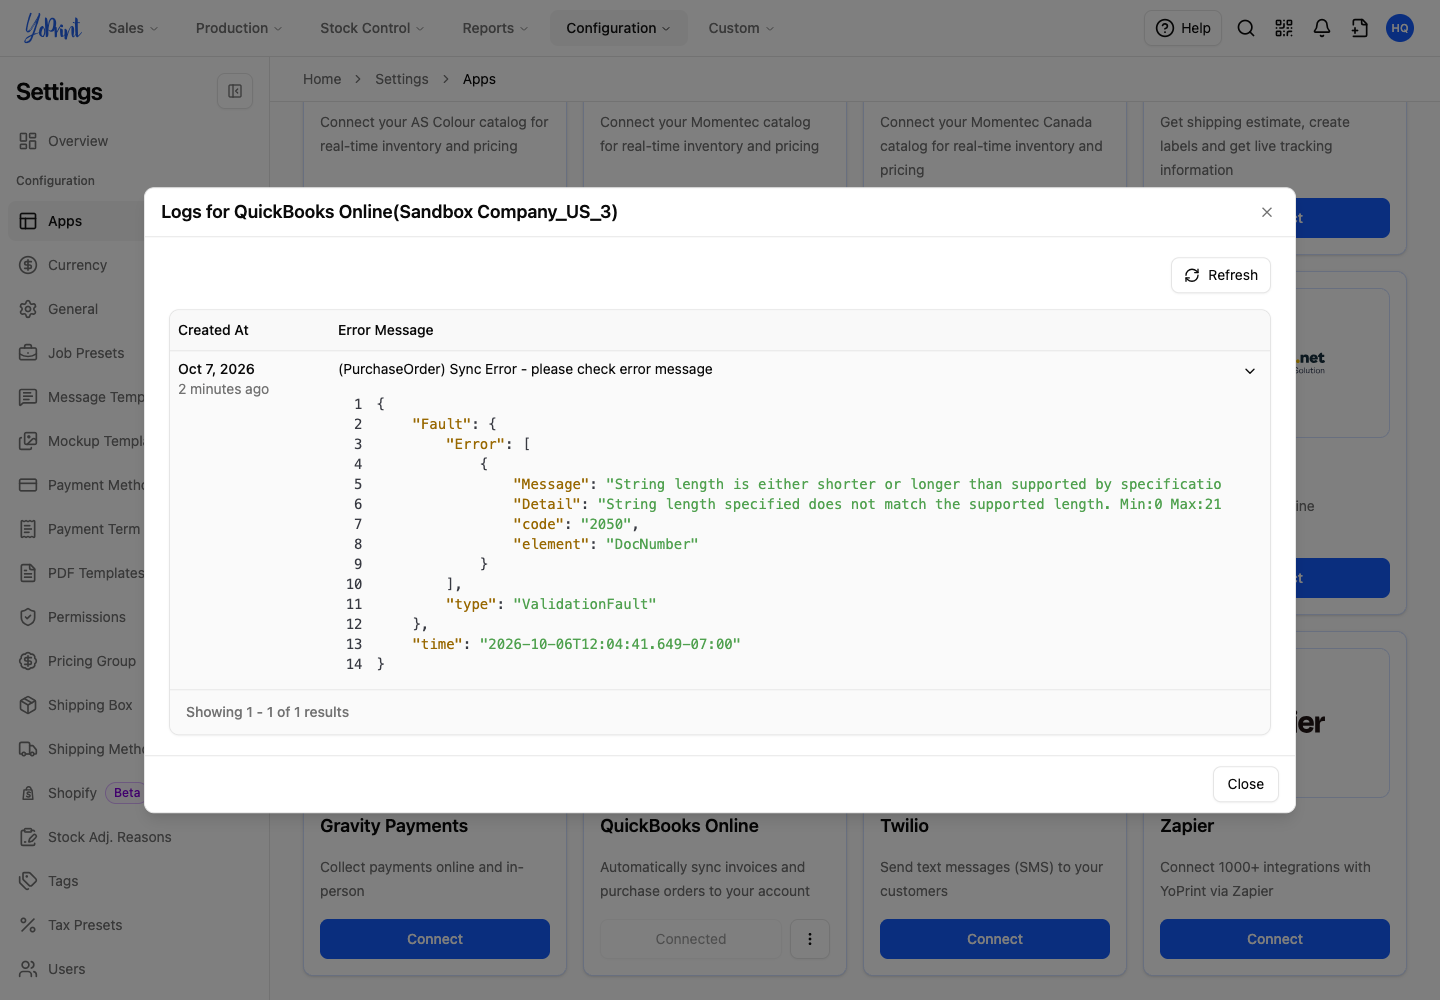
Read the error message in the expanded log.
Duplicate Document Number
Duplicate Document Number Error means an invoice with that number already exists in QuickBooks. YoPrint now checks for an existing number and adds a prefix before sending the invoice, so this error is rare.
In QuickBooks Online
This error appears when QuickBooks rejects a duplicate invoice number. Screens may have changed since this picture was taken. Use Intuit's Invoice API reference to learn how QuickBooks handles invoice numbers.

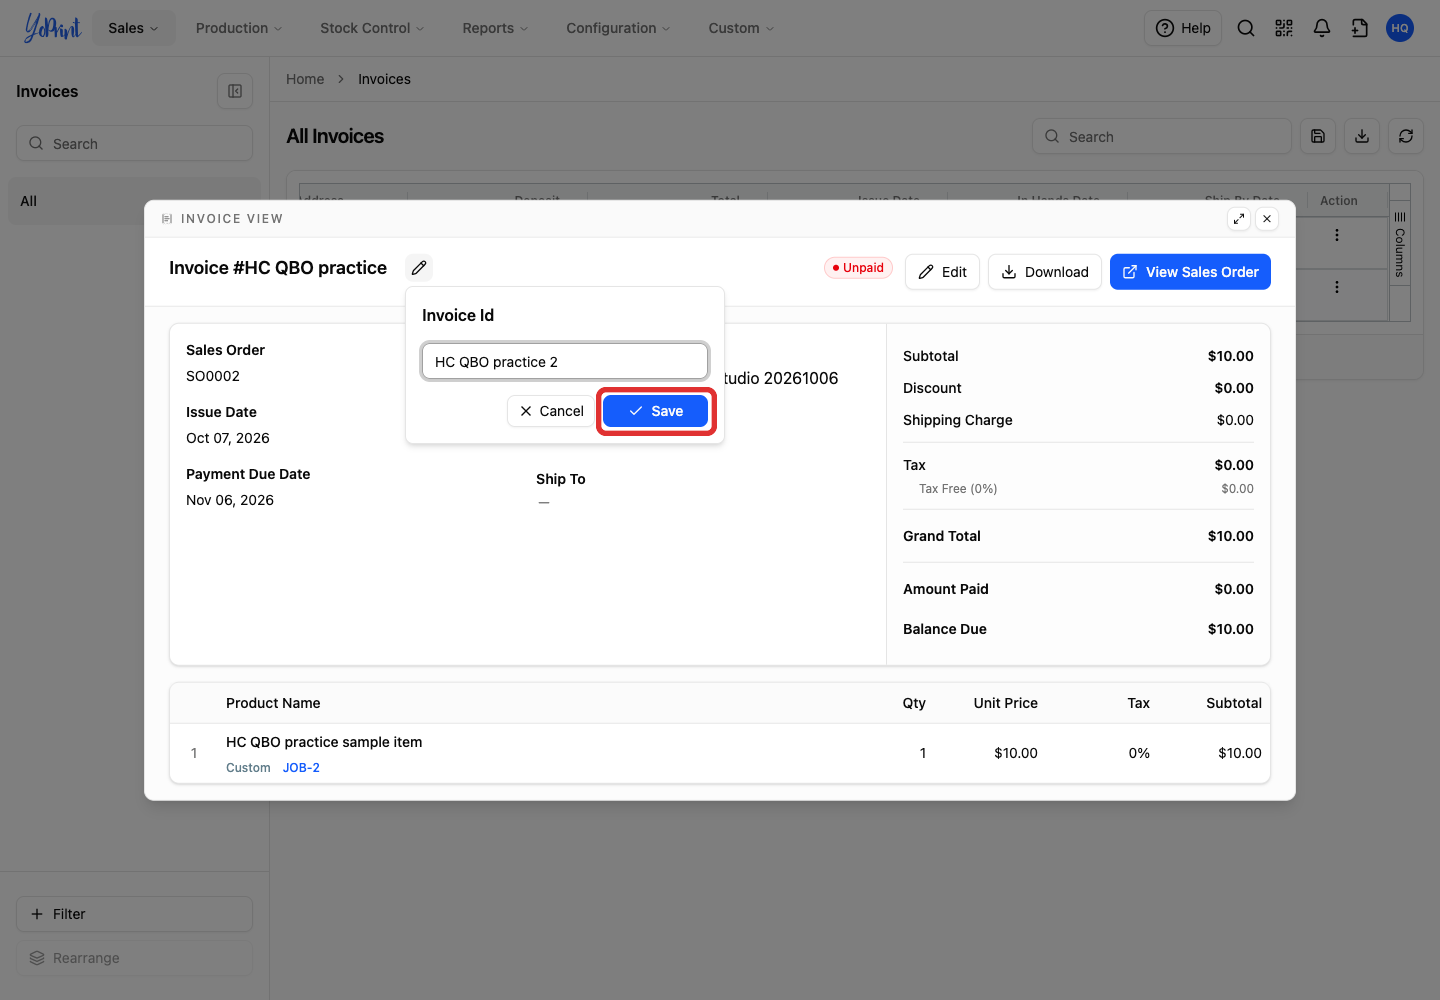
To correct the invoice number on the sales order, open the invoice row's ⋮ menu on the sales order, select View, and select the pencil beside the invoice number. For a duplicate, choose a number that is not already in use.
-
Enter a unique invoice number and select Save (the check mark).
-
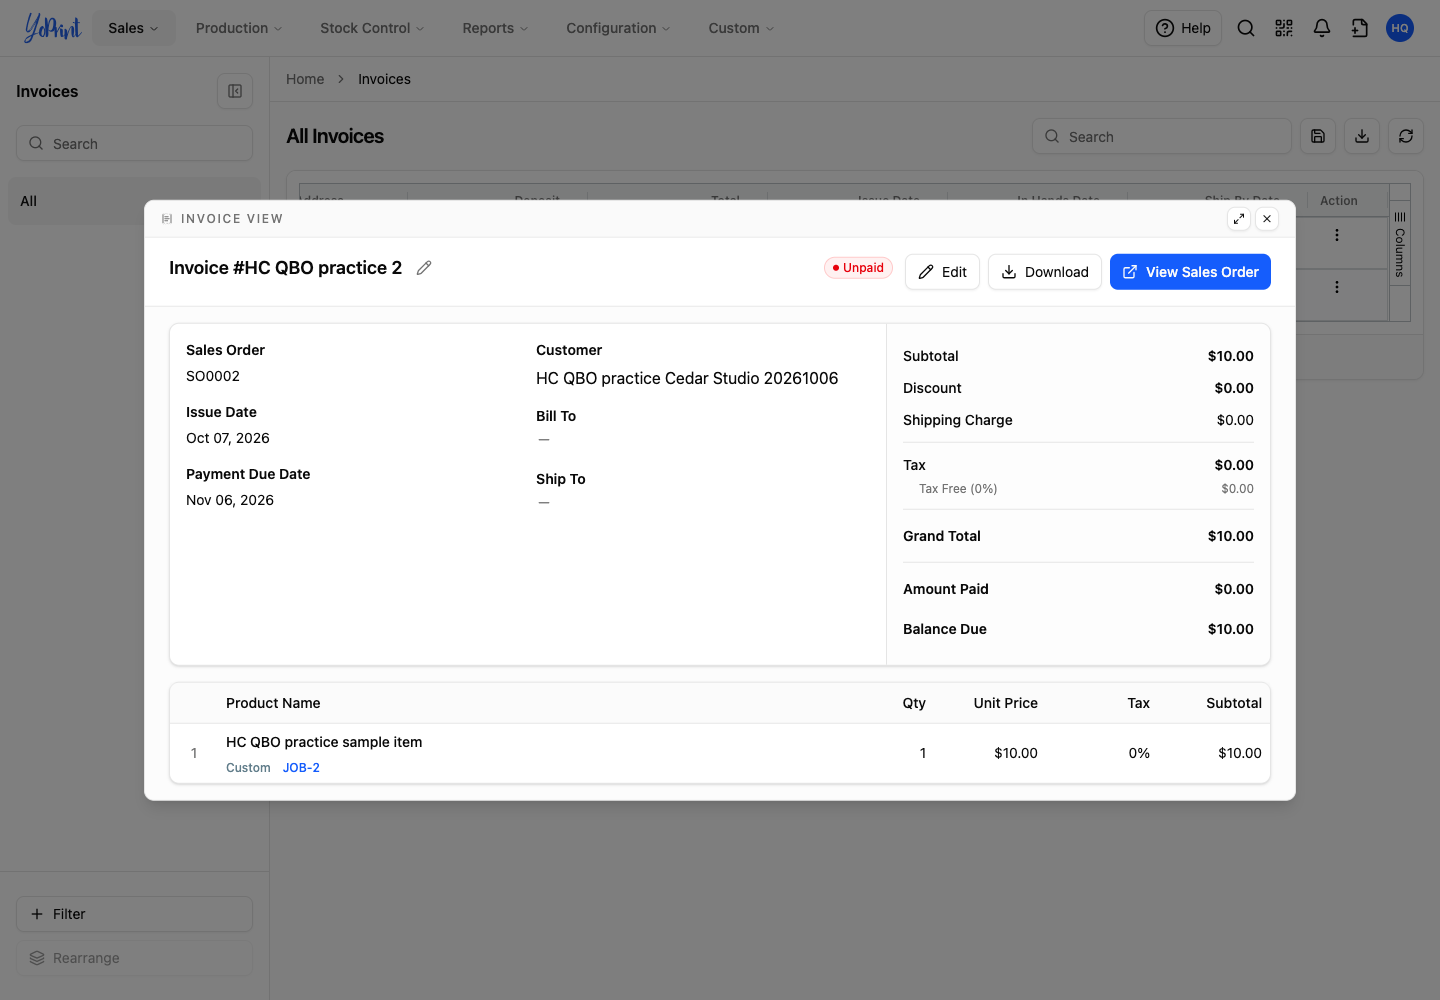
Check the updated invoice number, then close the invoice view to return to the order.
-
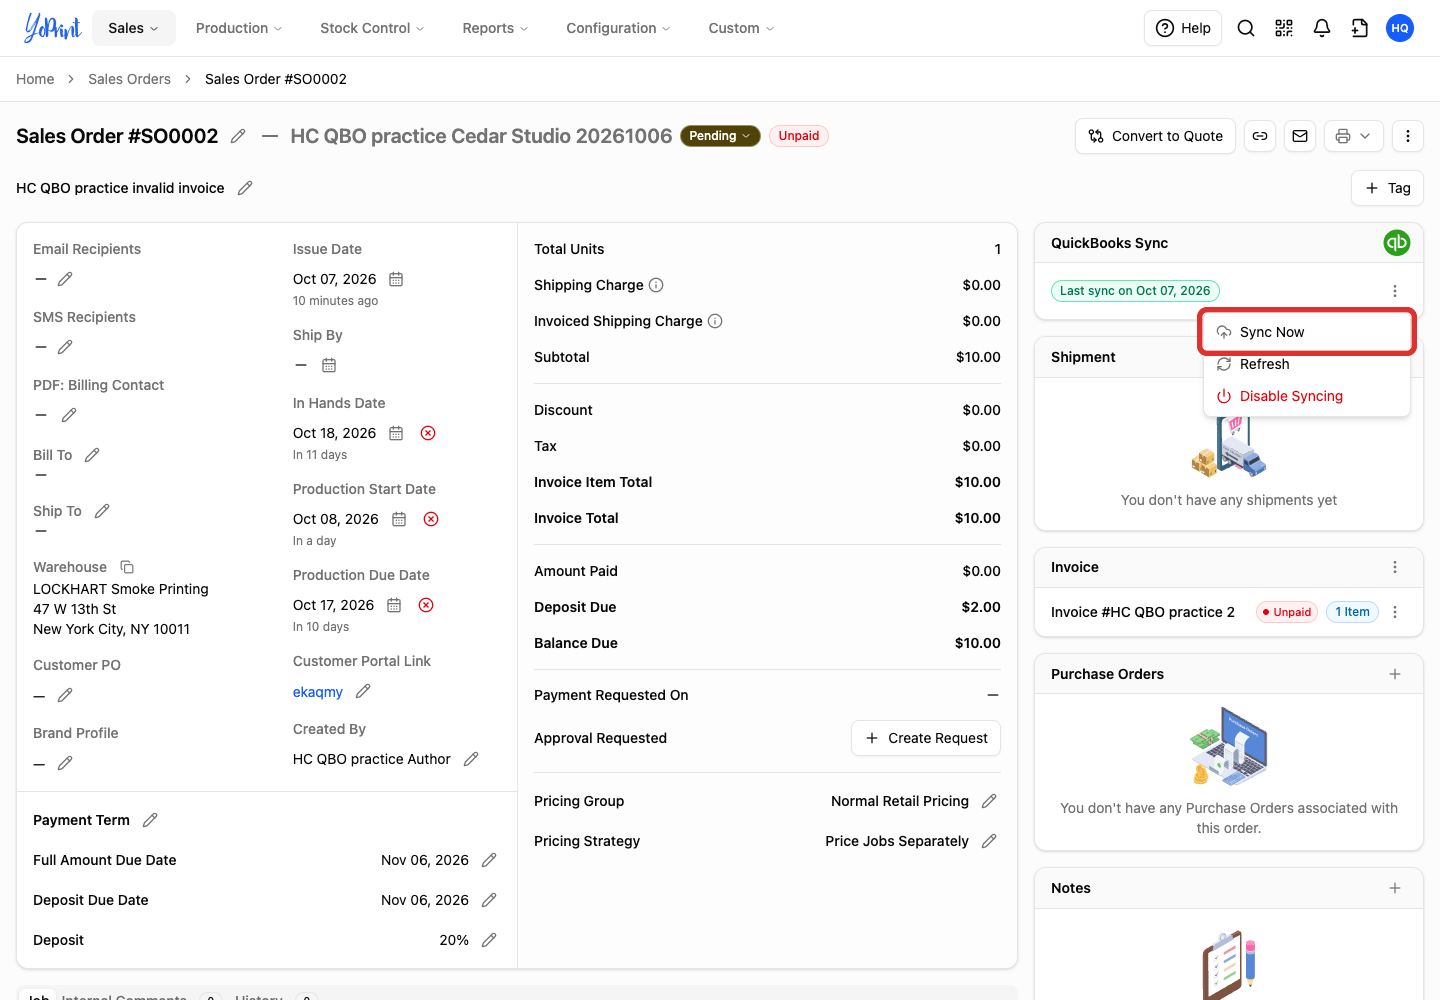
In the order's QuickBooks Sync panel, open ⋮ and select Sync Now.
-
Confirm that the status displays Last sync on and the current date.
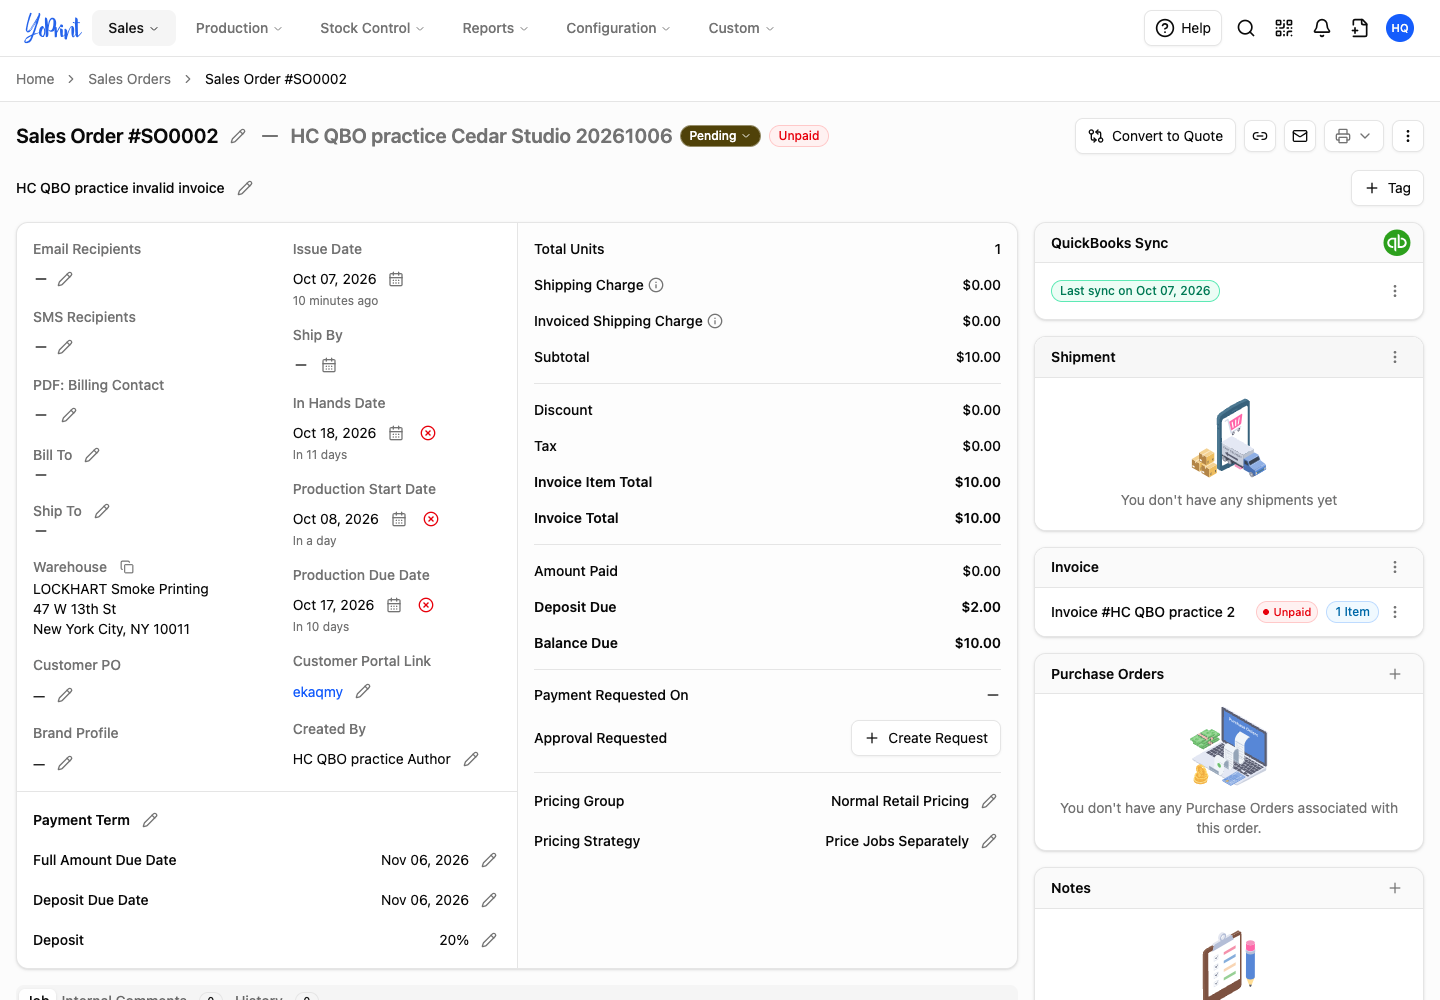
To set up a number sequence when moving from another system, see starting numbers in General settings.
Duplicate Name Exists
Duplicate Name Exists Error means a customer, vendor or employee in QuickBooks already uses that name.
In QuickBooks Online
This error appears when QuickBooks finds a record with the same display name. Screens may have changed since this picture was taken. Follow Intuit's guide to finding and fixing duplicate names.

To resolve the conflict, map the customer in YoPrint to the intended QuickBooks customer:
-
Open the sales order with the sync error and select the customer name.
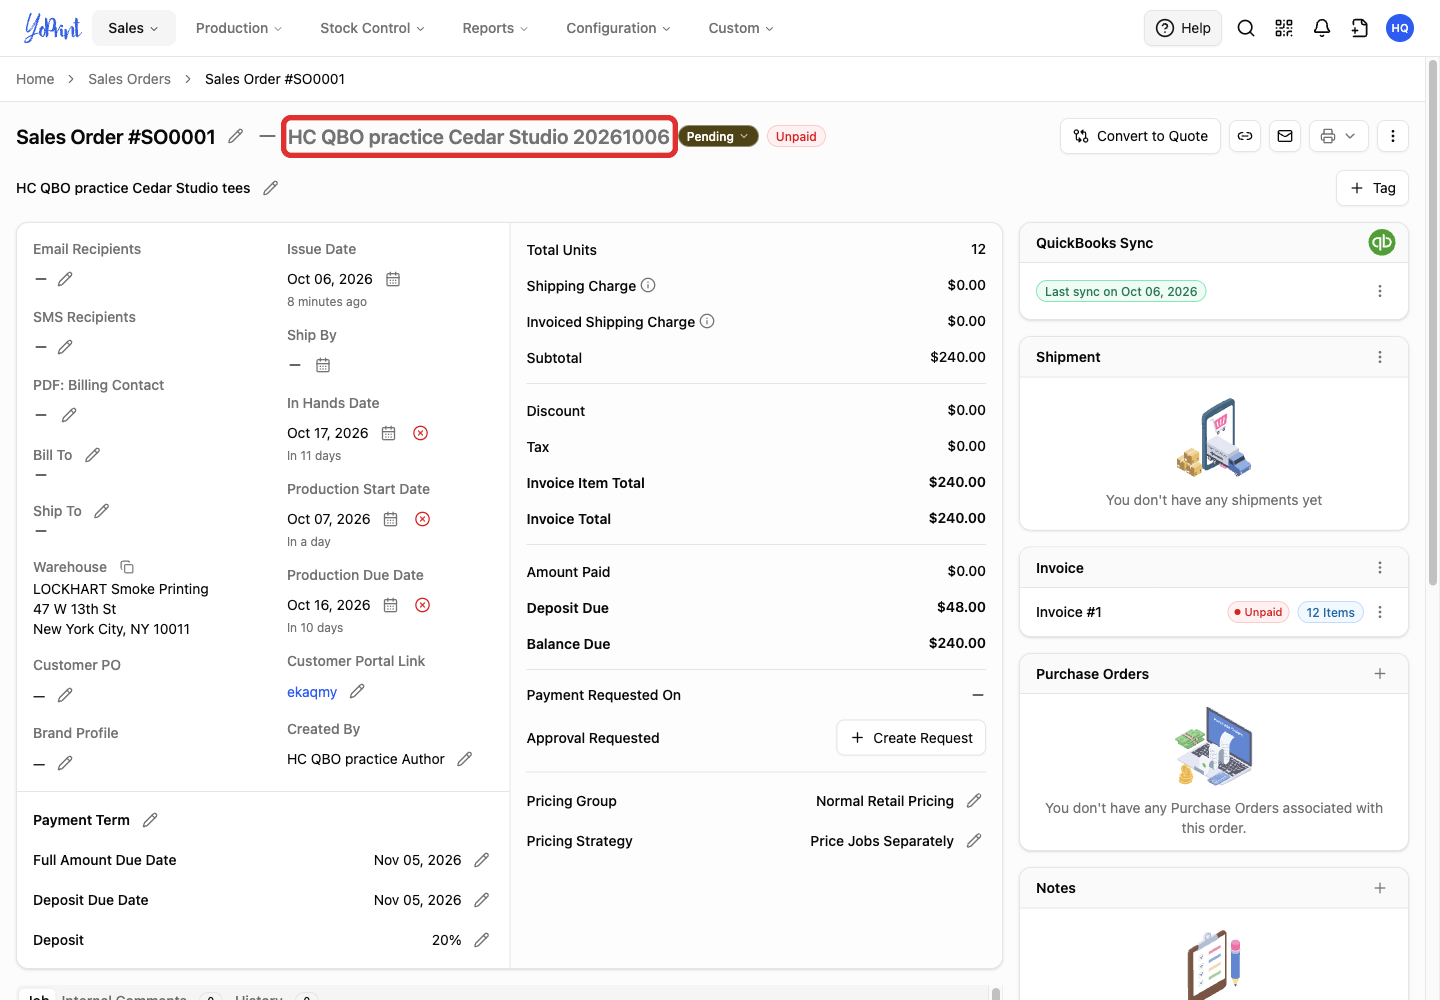
-
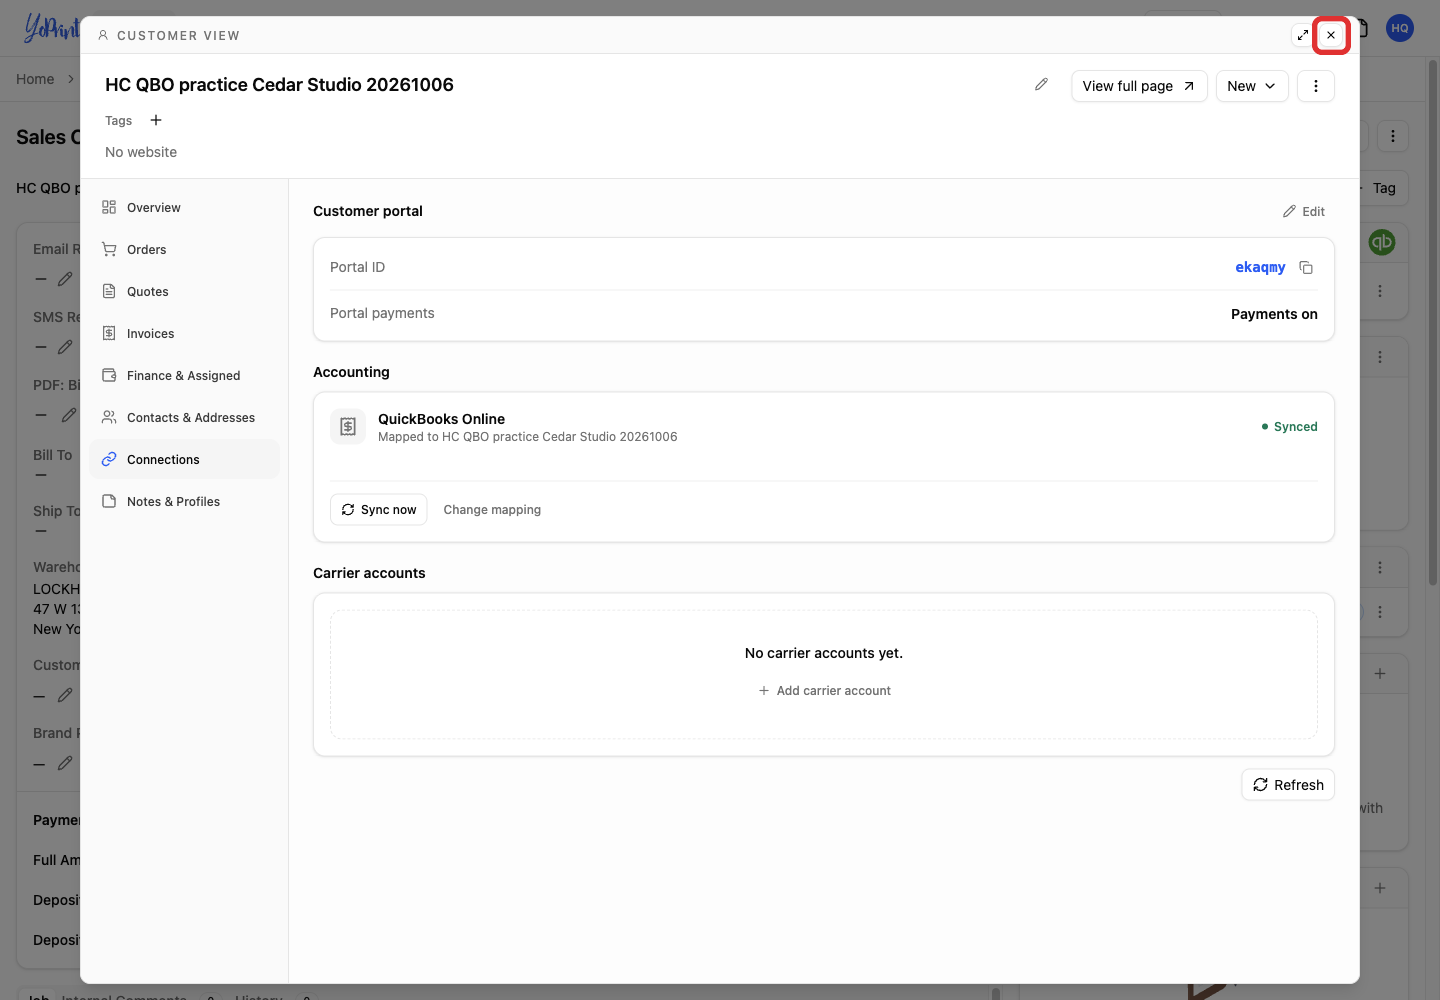
Select Connections in the customer view.
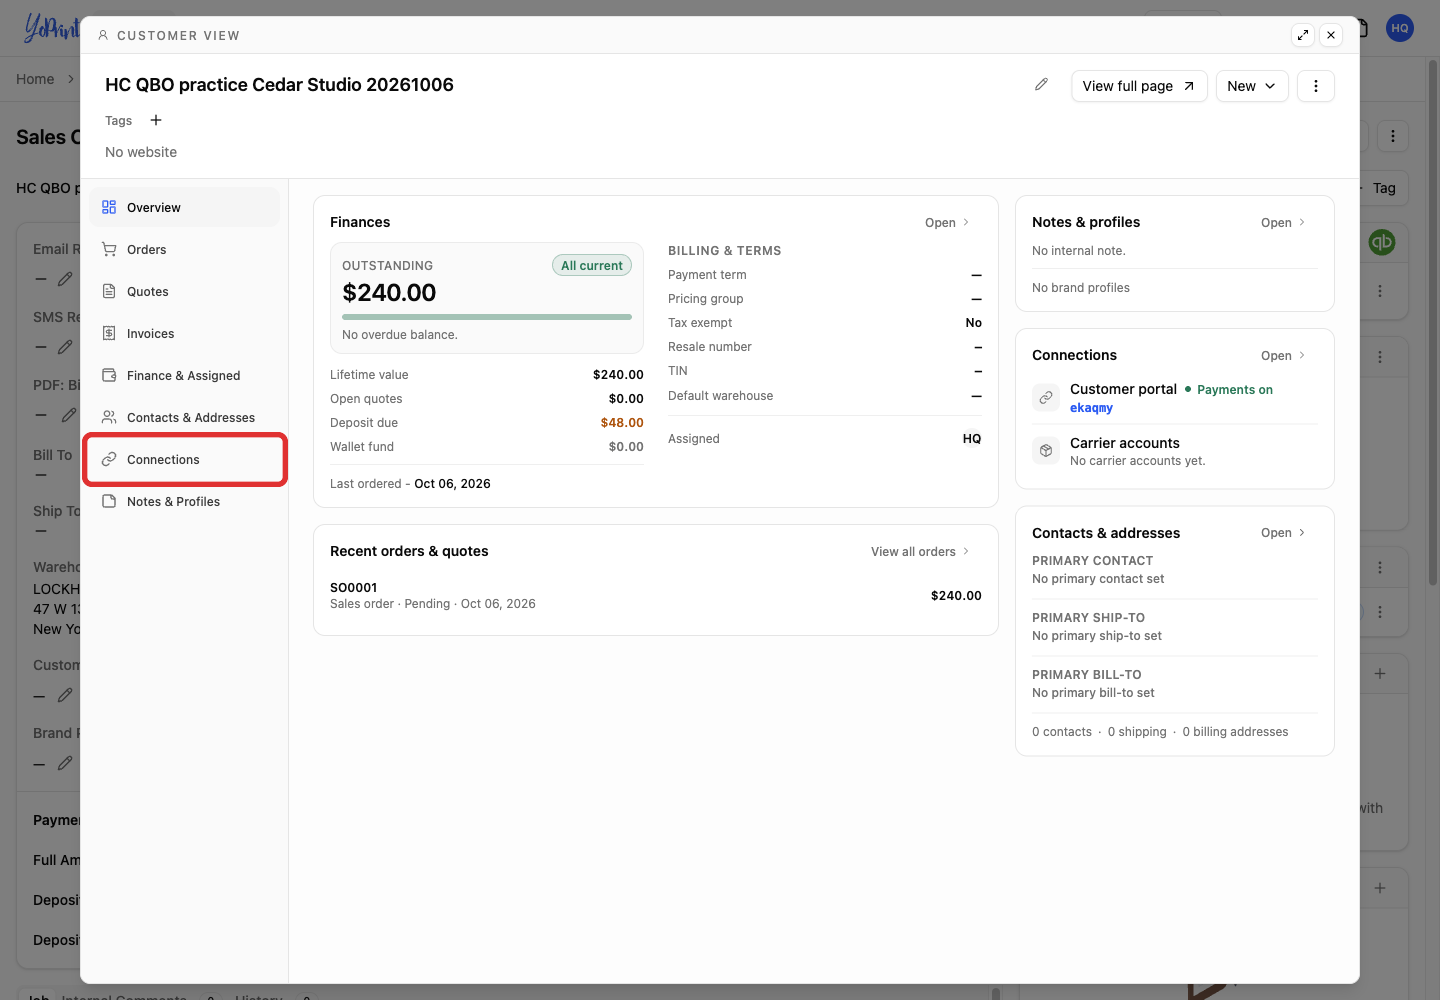
-
Under Accounting, select Map manually.
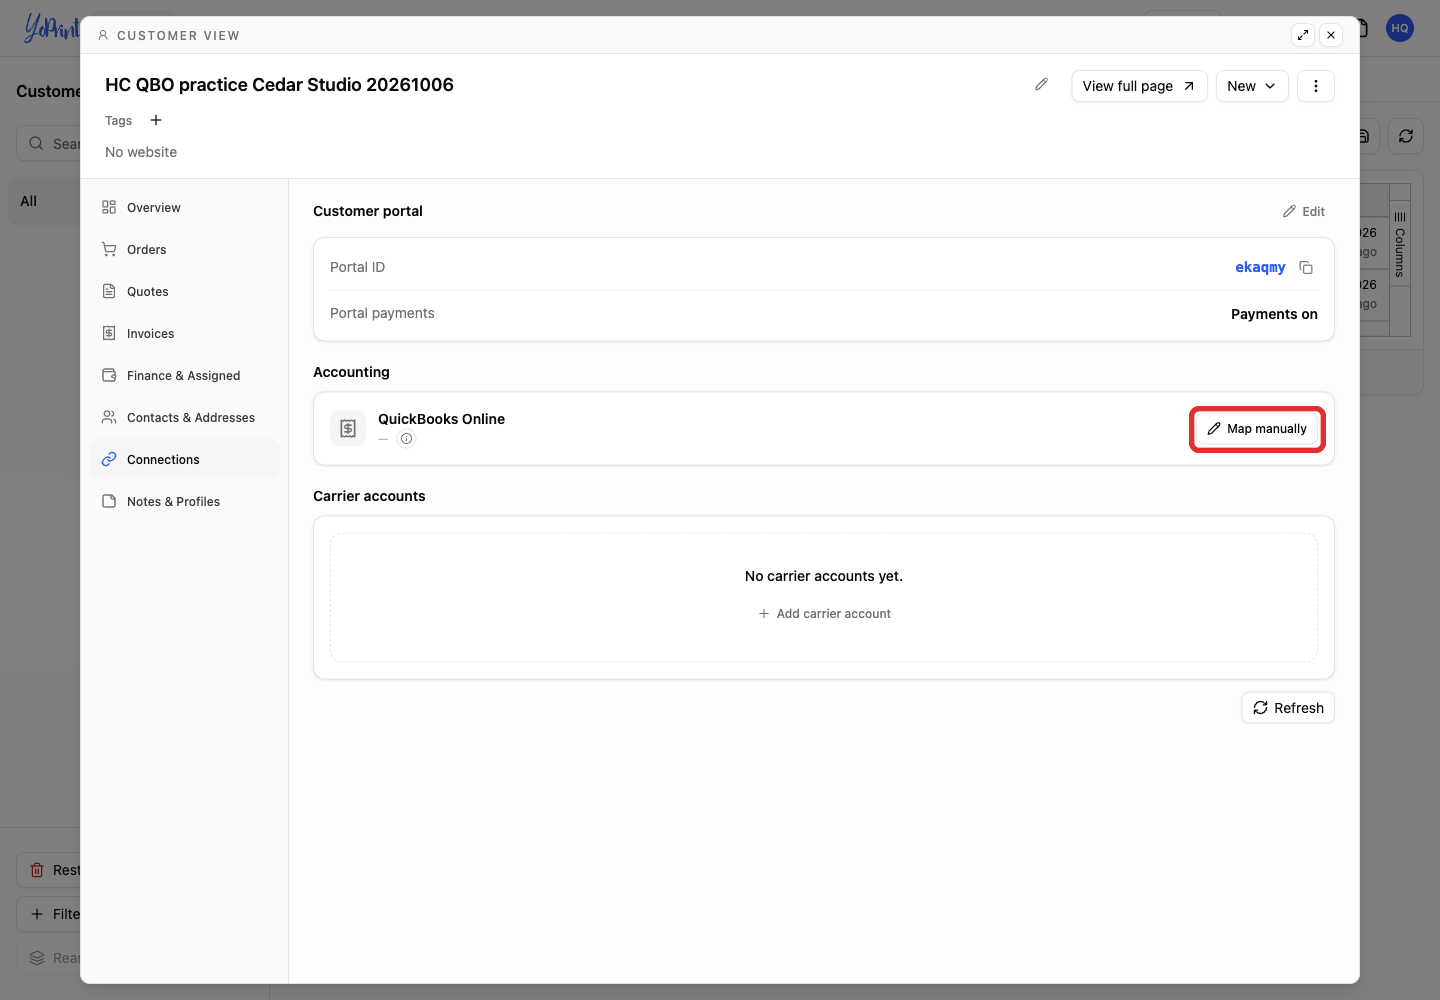
A customer is already mapped
Select Change mapping instead.
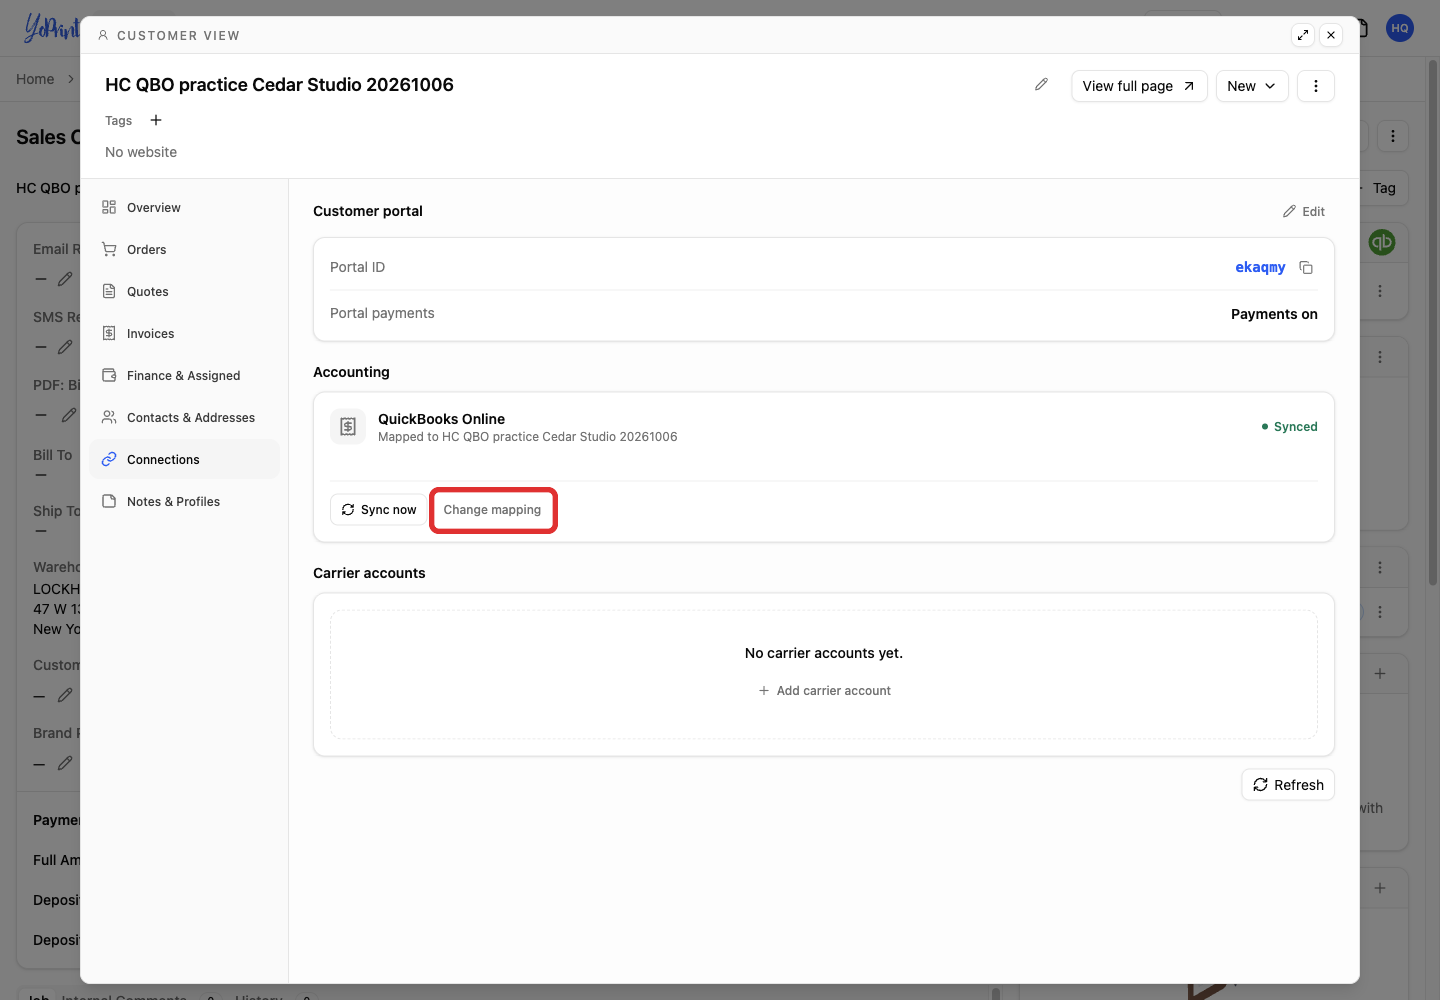
-
In QuickBooks override, search for the customer you identified in QuickBooks.
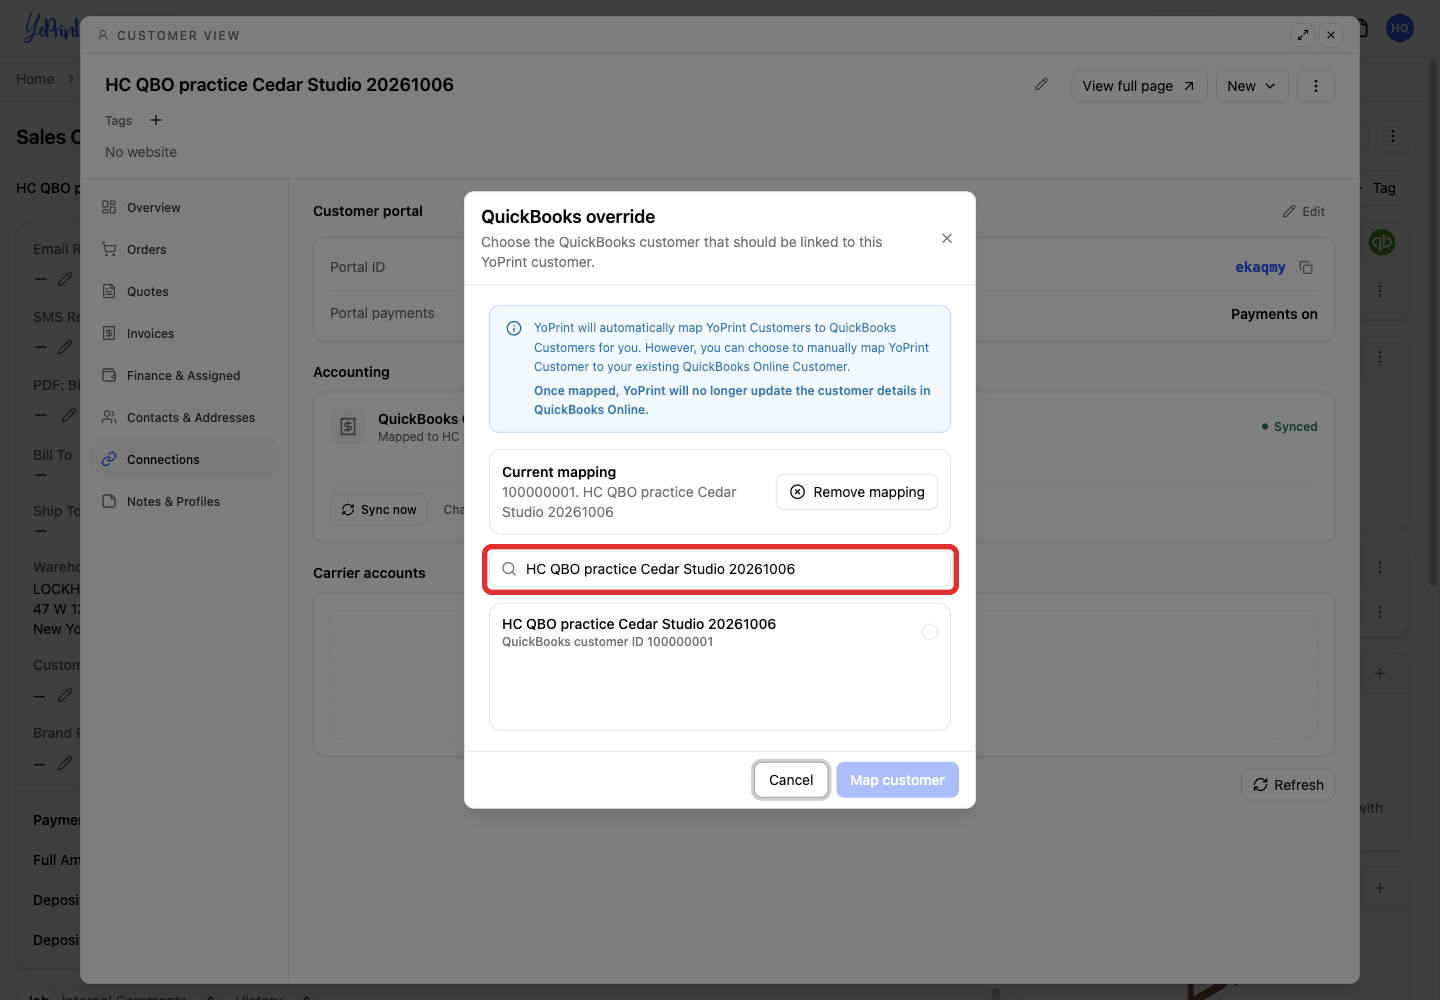
-
Select the matching customer.
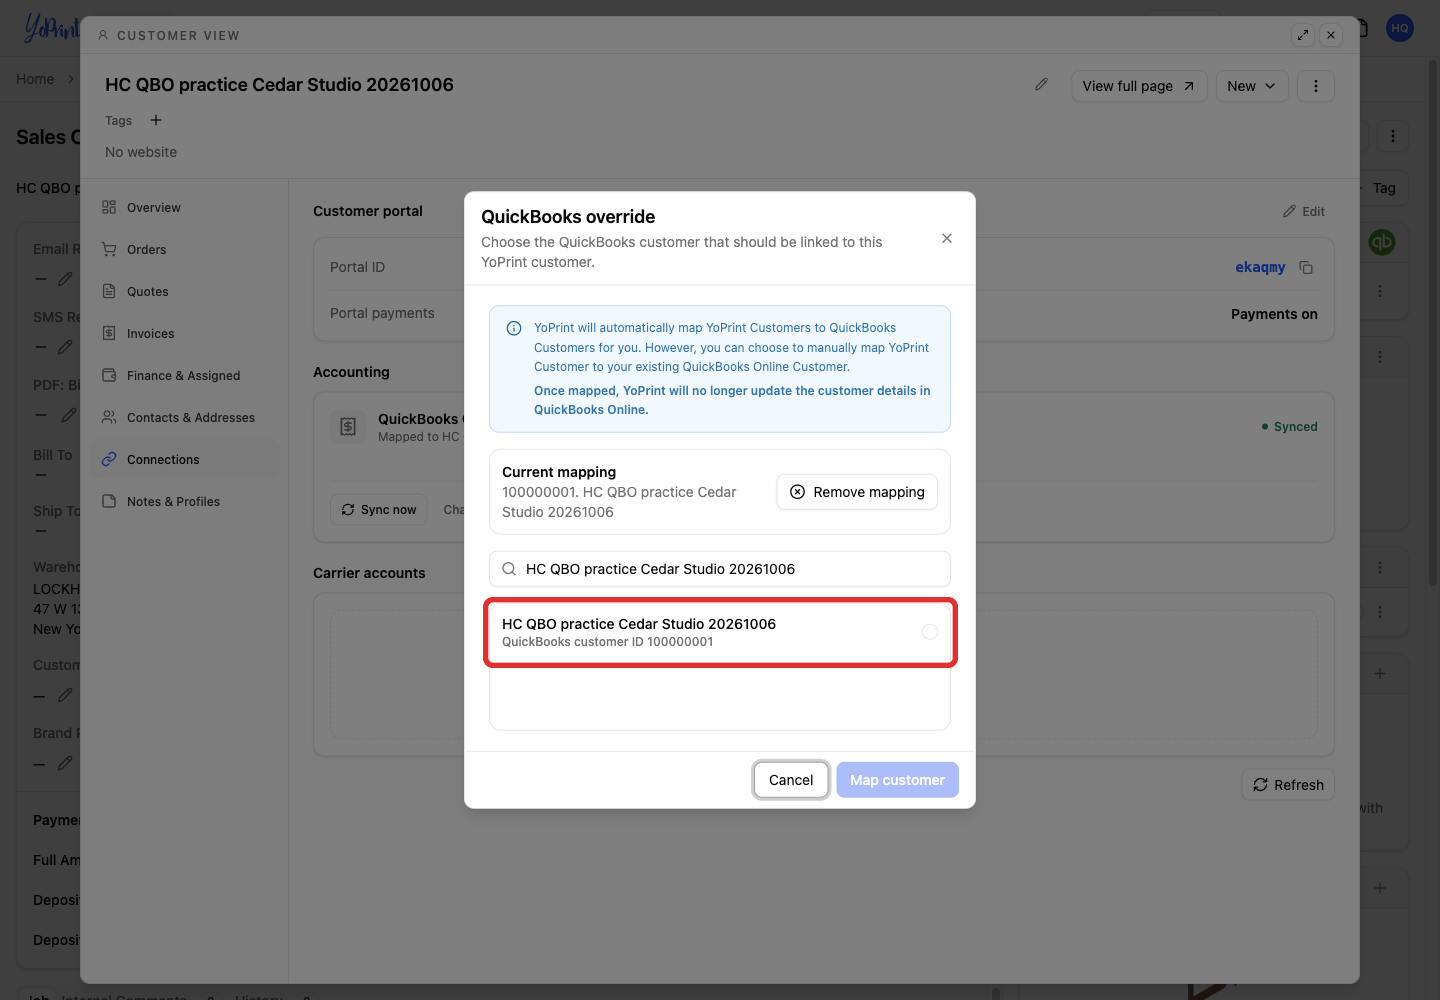
-
Select Map customer.
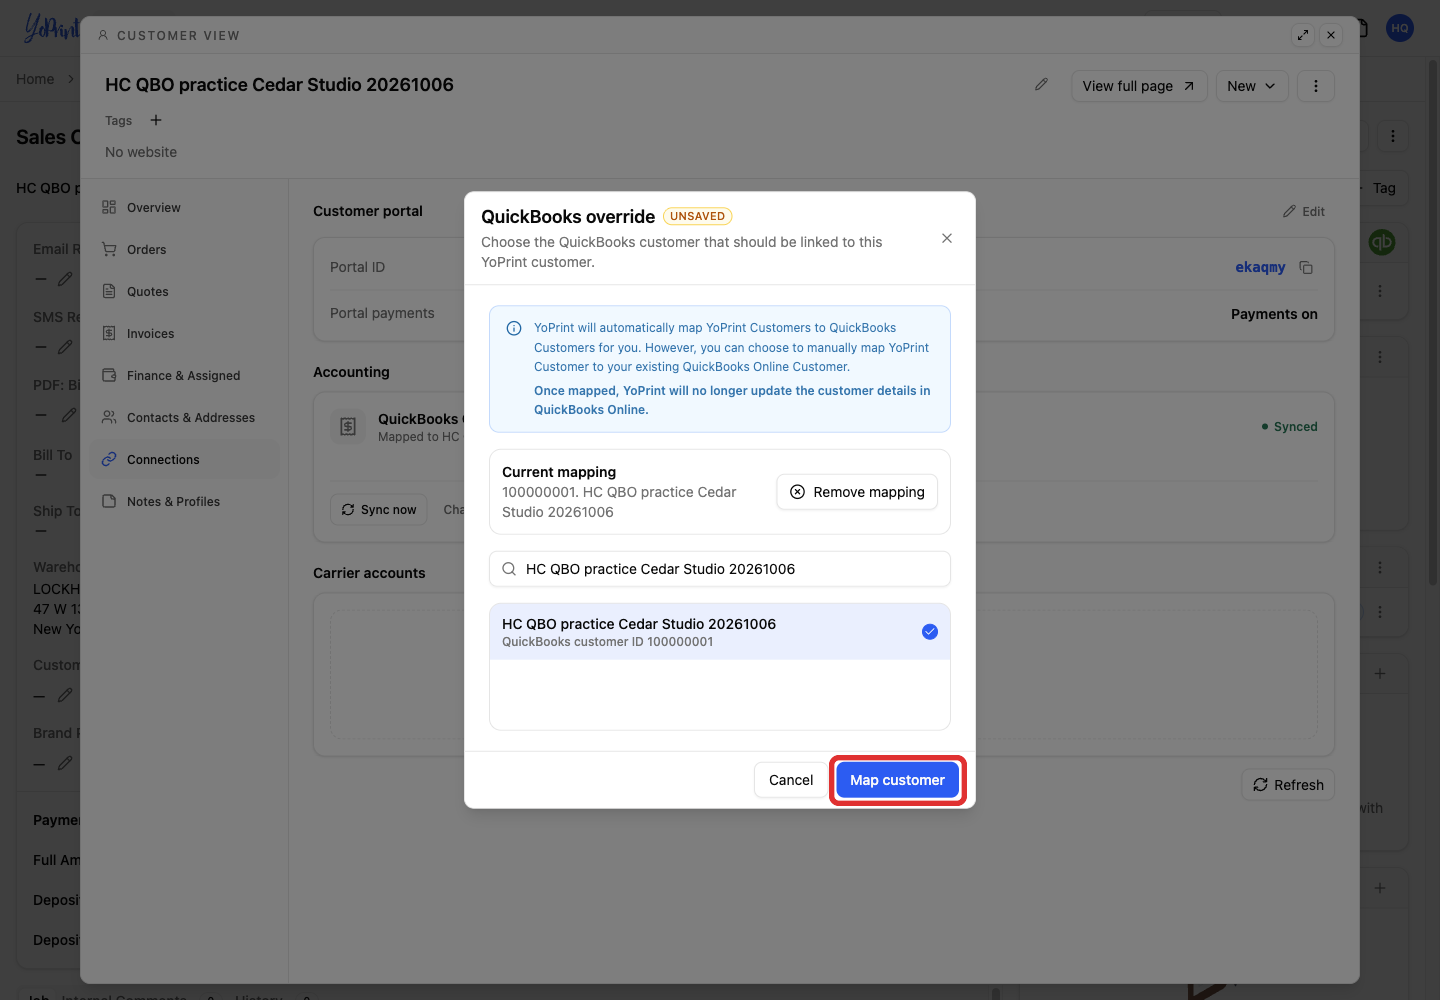
-
Close the customer view to return to the order.
-
In the order's QuickBooks Sync panel, open ⋮ and select Sync Now.
For the complete guide on resolving duplicate names, see QuickBooks Online Sync Error: 6240 - Duplicate Name Exists.
String length is either shorter or longer than supported
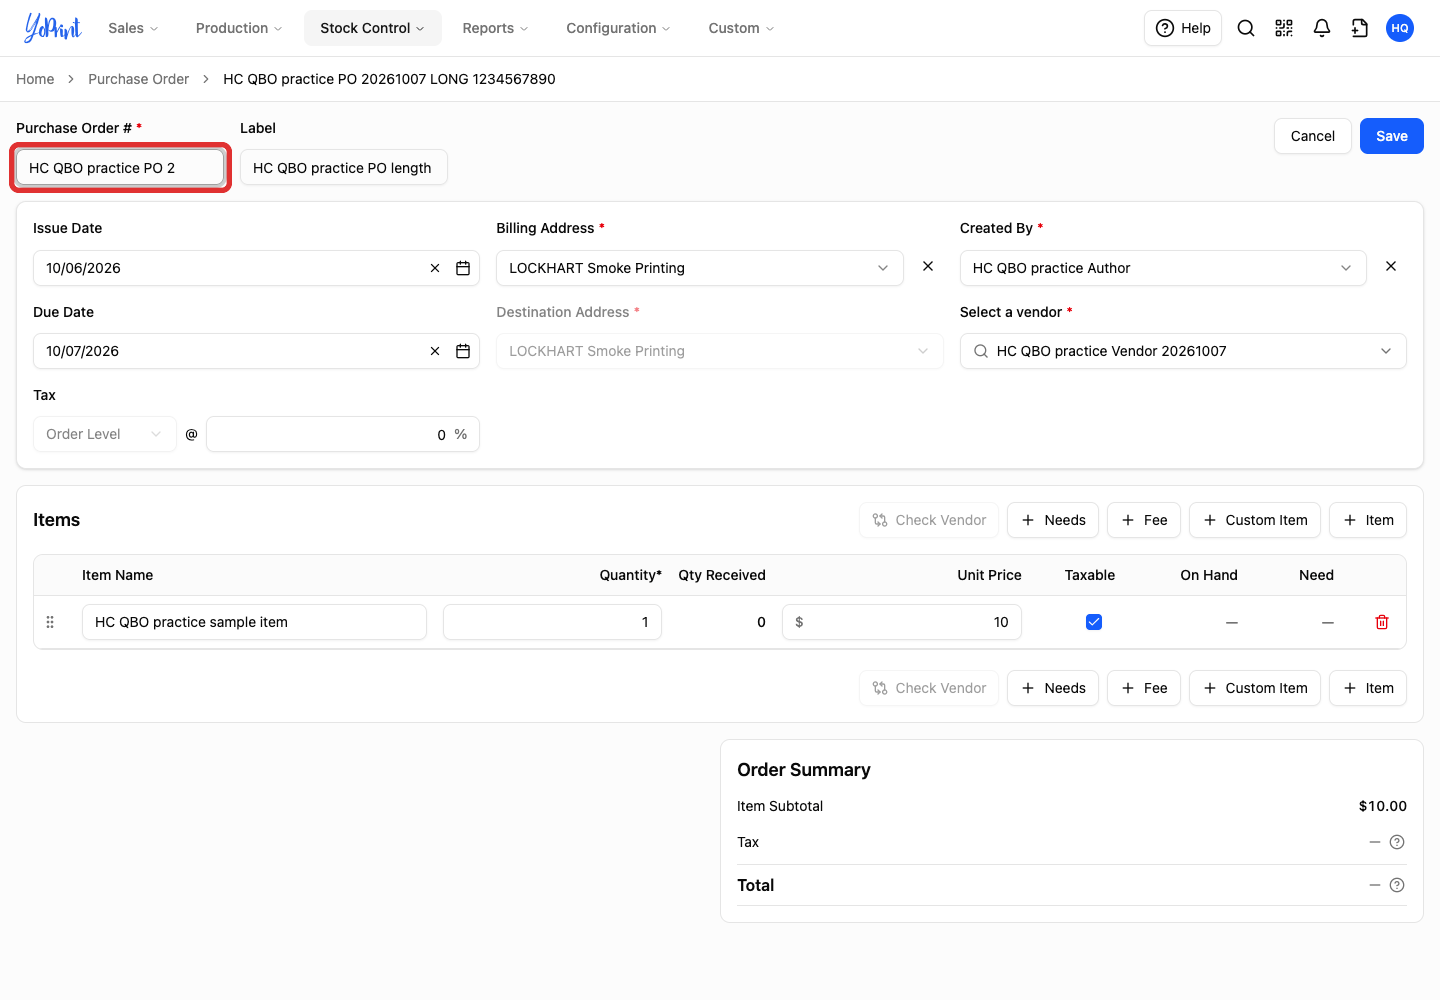
String length is either shorter or longer than supported by specification means QuickBooks rejected a purchase order number that exceeds 21 characters.
QuickBooks accepts purchase order numbers up to 21 characters, while YoPrint lets you type up to 50, so a longer number fails to sync.
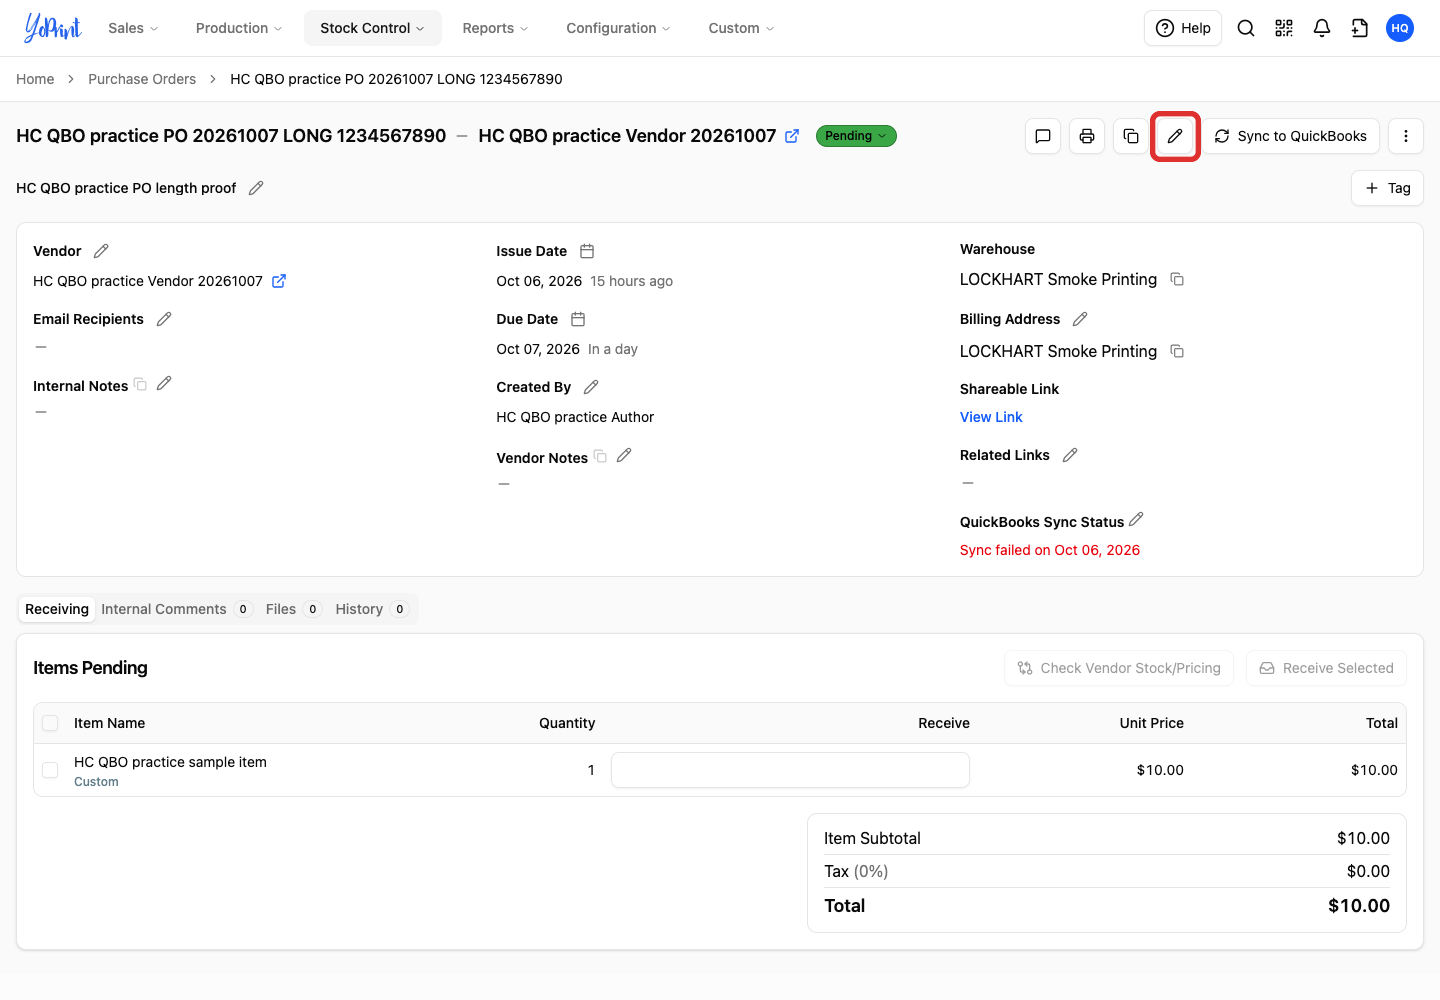
When a purchase order number is longer than 21 characters, the purchase order shows Sync failed.

The QuickBooks Sync Status menu offers View Error Logs.
Expanding the row shows the message String length is either shorter or longer than supported by specification, with Max:21 and the supplied length.
-
Open Edit on the purchase order.
-
Enter a purchase order number of 21 characters or fewer.
-
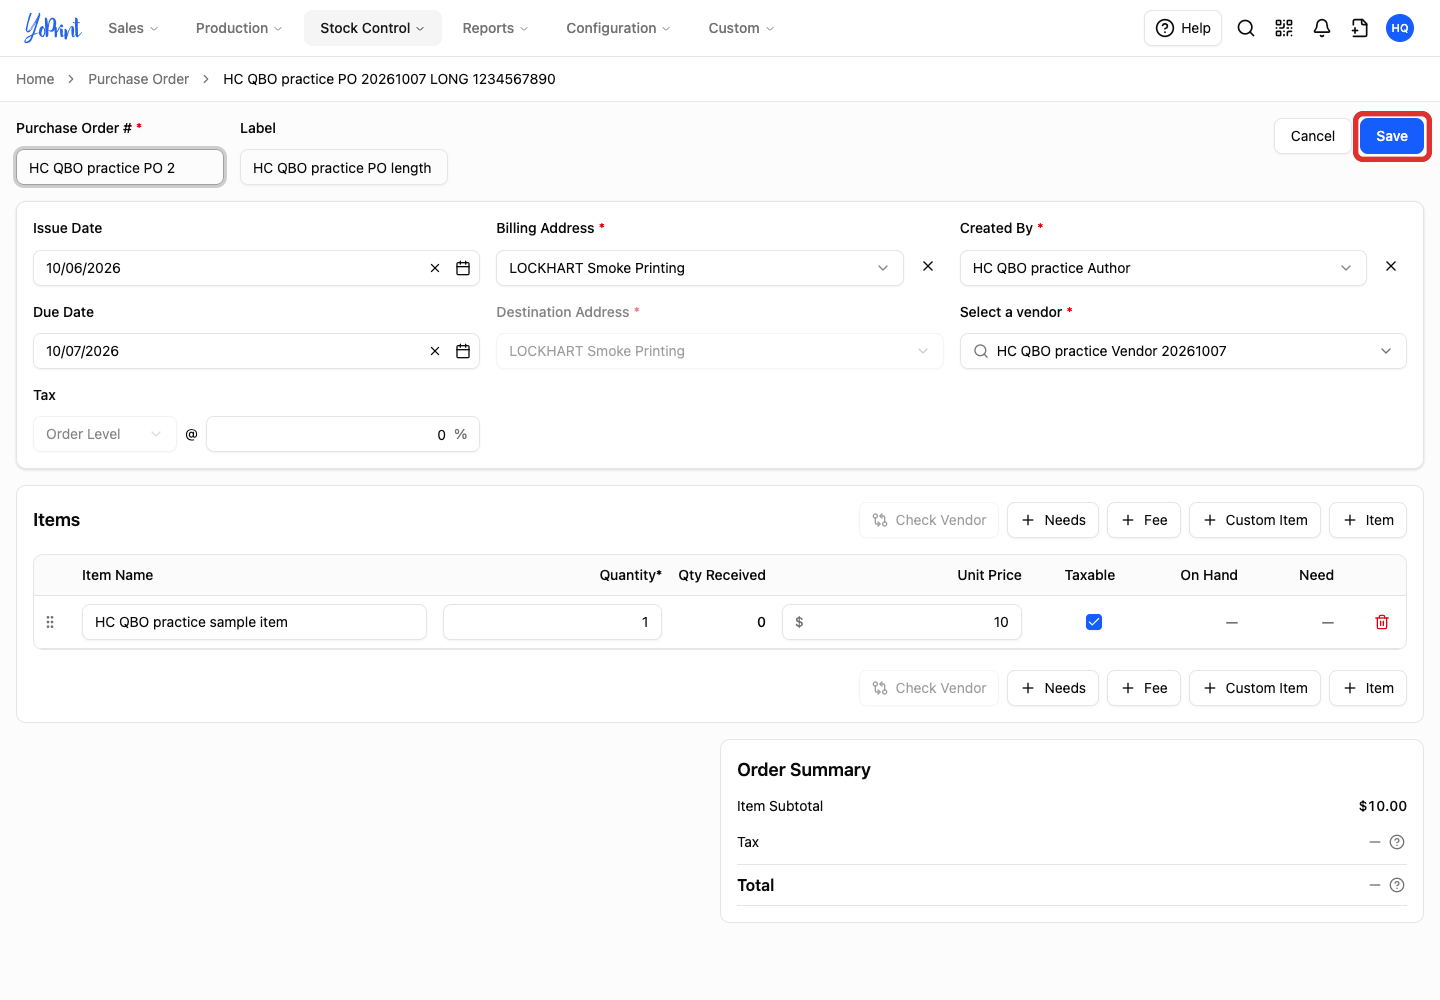
Select Save.
-
Select Sync to QuickBooks.
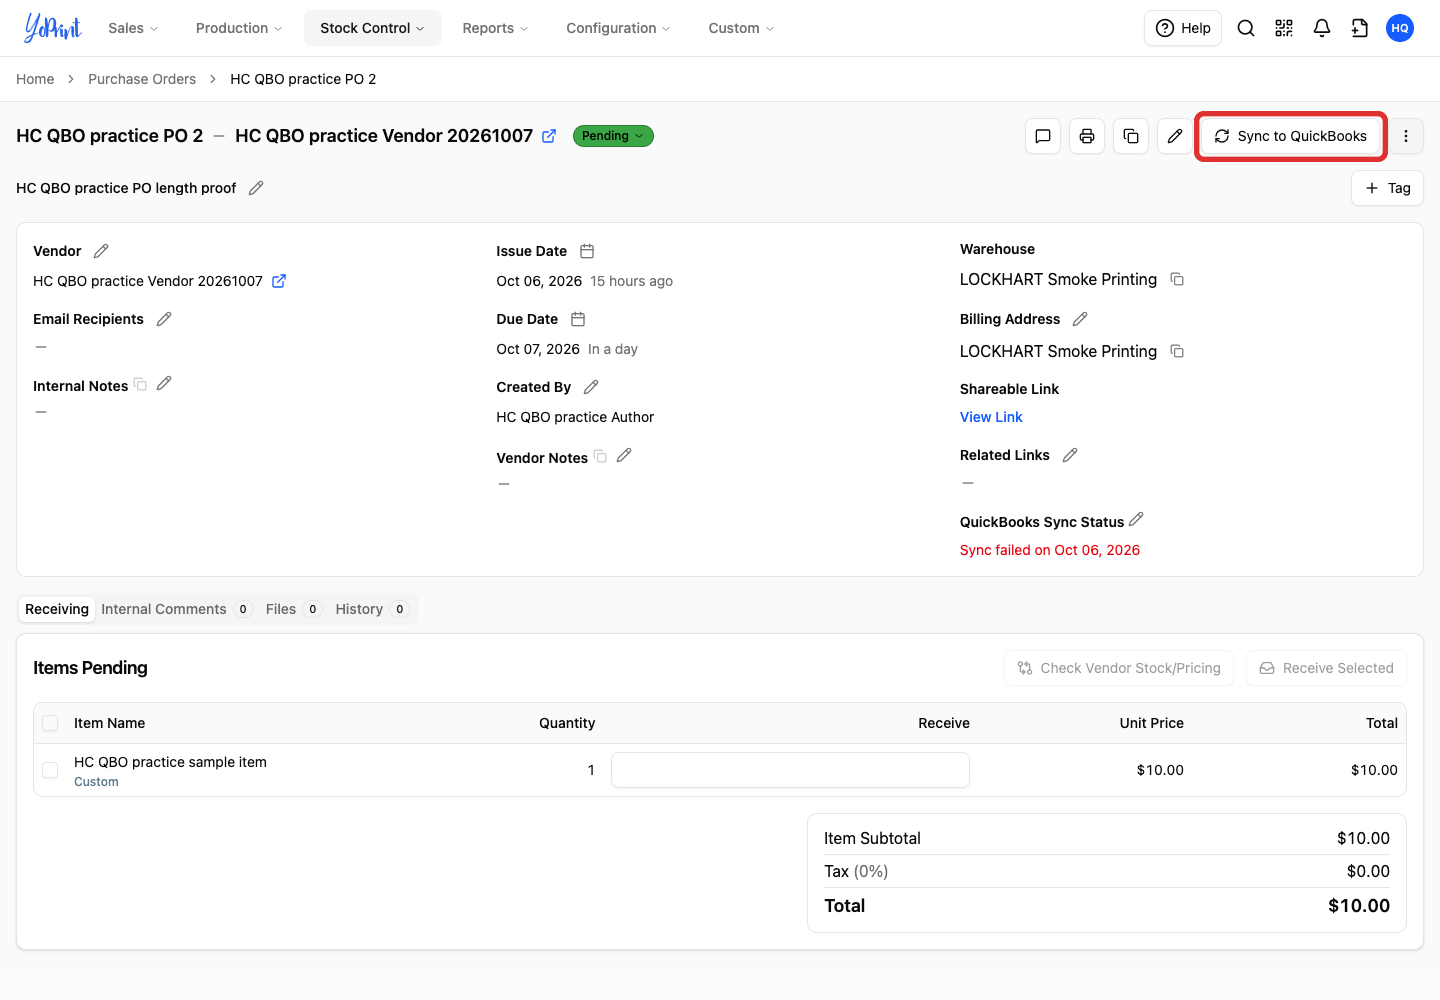
Check the QuickBooks Sync Status for Last sync on and its date.

Invoice Sync - Invalid String
Invoice Sync - Invalid String means QuickBooks rejected characters in the invoice number.
In QuickBooks Online
This error appears when the invoice number contains unsupported or illegal characters. Screens may have changed since this picture was taken. Use Intuit's Invoice API reference to check supported character formats.

To correct the number, open the invoice row's ⋮ menu on the sales order, select View, and select the pencil beside the invoice number.
-
Remove any unsupported characters from the invoice number and select Save (the check mark).
-
Check the updated invoice number, then close the invoice view to return to the order.
-
In the order's QuickBooks Sync panel, open ⋮ and select Sync Now.
-
Confirm that the status displays Last sync on and the current date.
Sync a sales order manually
Start with a sales order that has an invoice. Check your company's invoice sync settings if you need to change which events sync or which dates are used.
-
Open the sales order's Quick Actions menu.
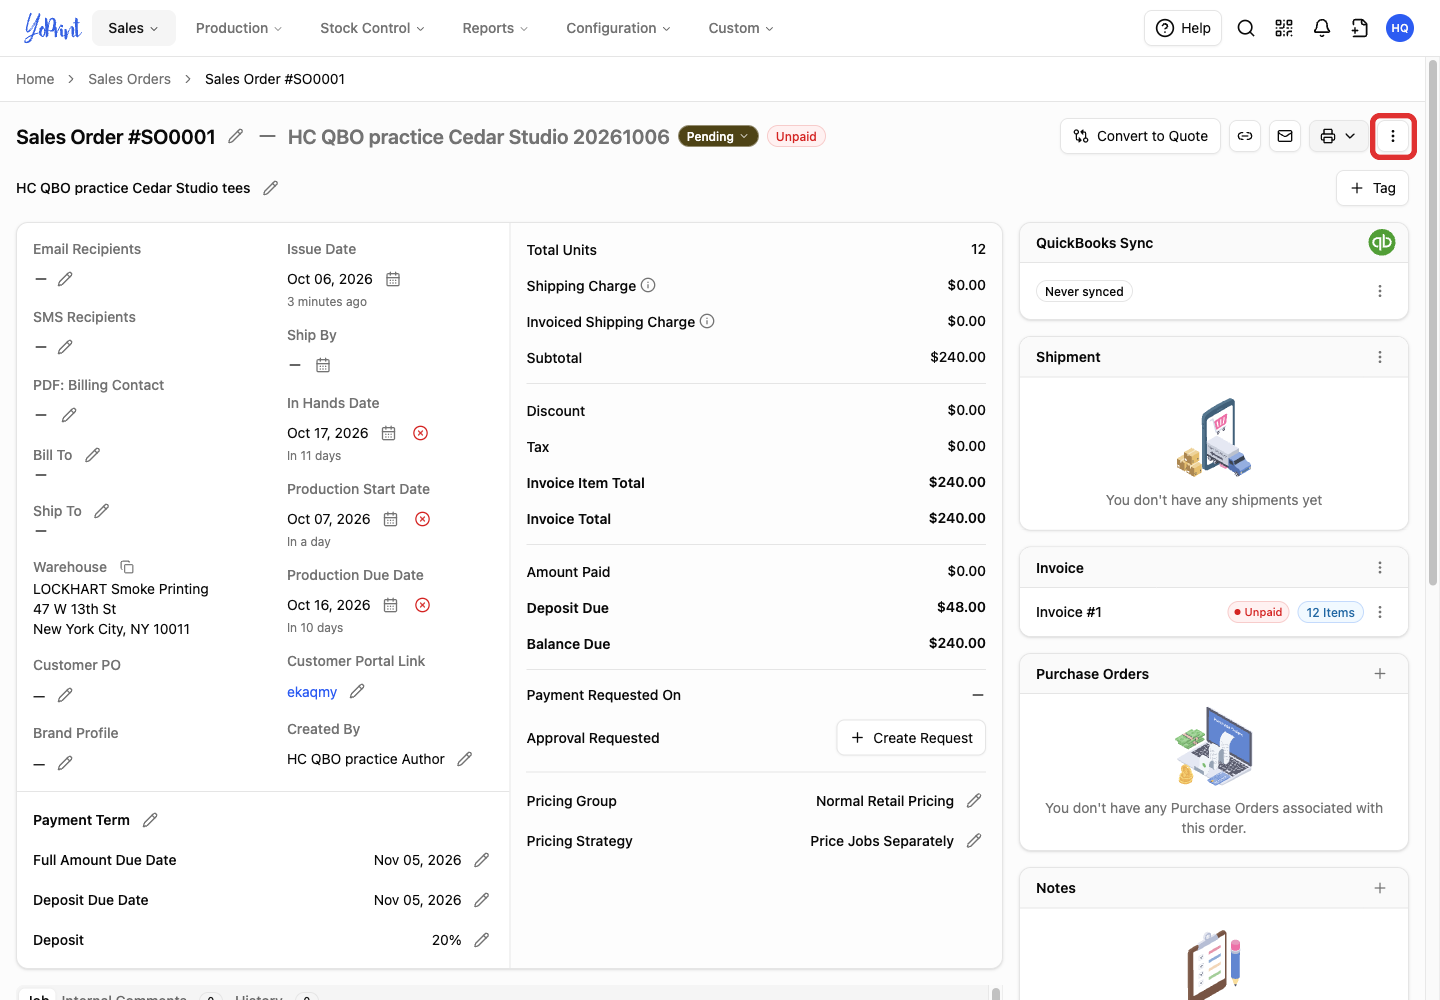
-
Select Sync to QuickBooks.
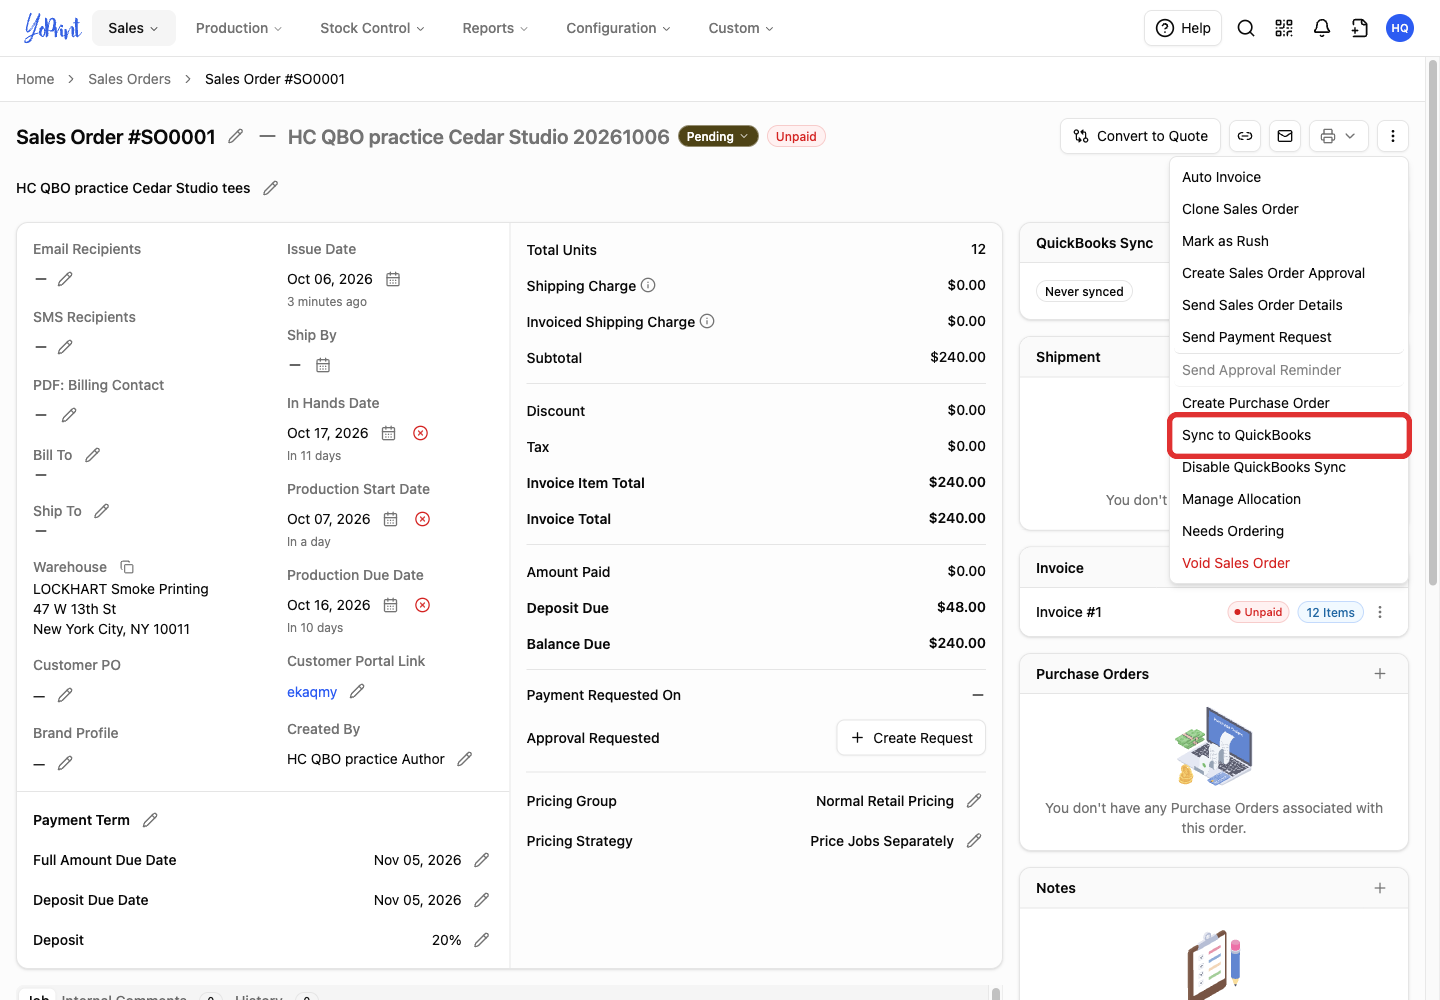
Check the QuickBooks Sync panel for Last sync on and its date. Then check the invoice in QuickBooks.

If an error appears, find its message and the matching correction before trying again.
Check a synced invoice
Check the customer, invoice number, invoice date, due date, line items and total in QuickBooks. For example, this order's 12 tees at $20 each appear on a $240 invoice. The invoice line uses YoPrint Item, with the tee name in its description.
In QuickBooks Online
These checks happen in QuickBooks Online. Its screens may have changed since these pictures were taken. Use Intuit's invoice guide to find and open the invoice in your company.


If the customer is linked to the wrong QuickBooks record, follow the customer mapping steps. Then sync the order again.
Pause or resume sync for one order
-
Open ⋮ in the order's QuickBooks Sync panel.
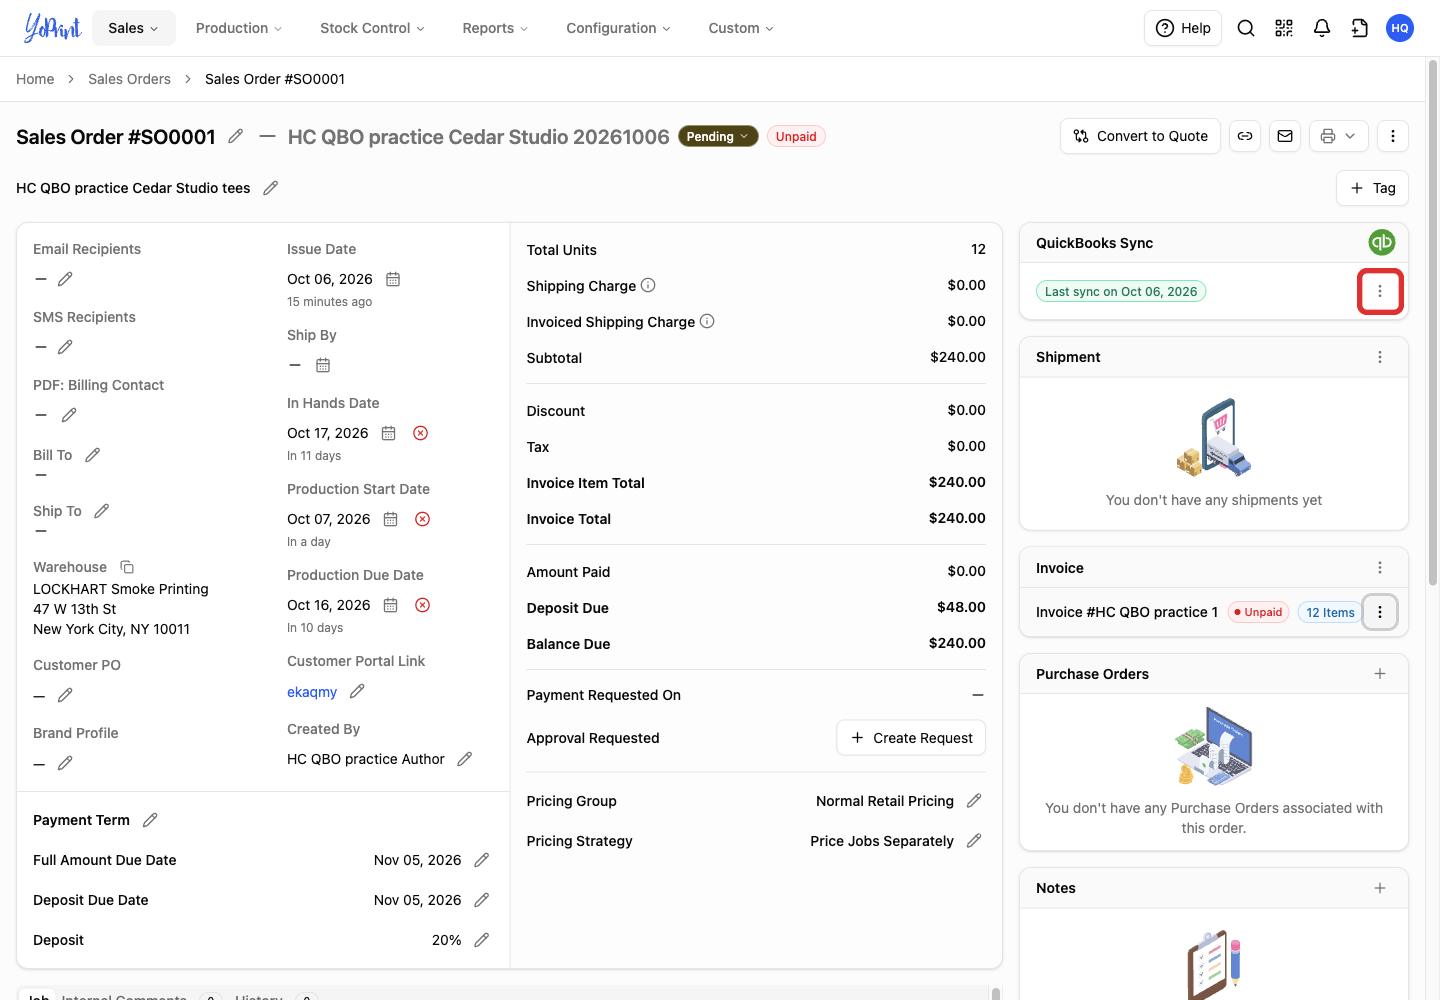
-
Select Disable Syncing.
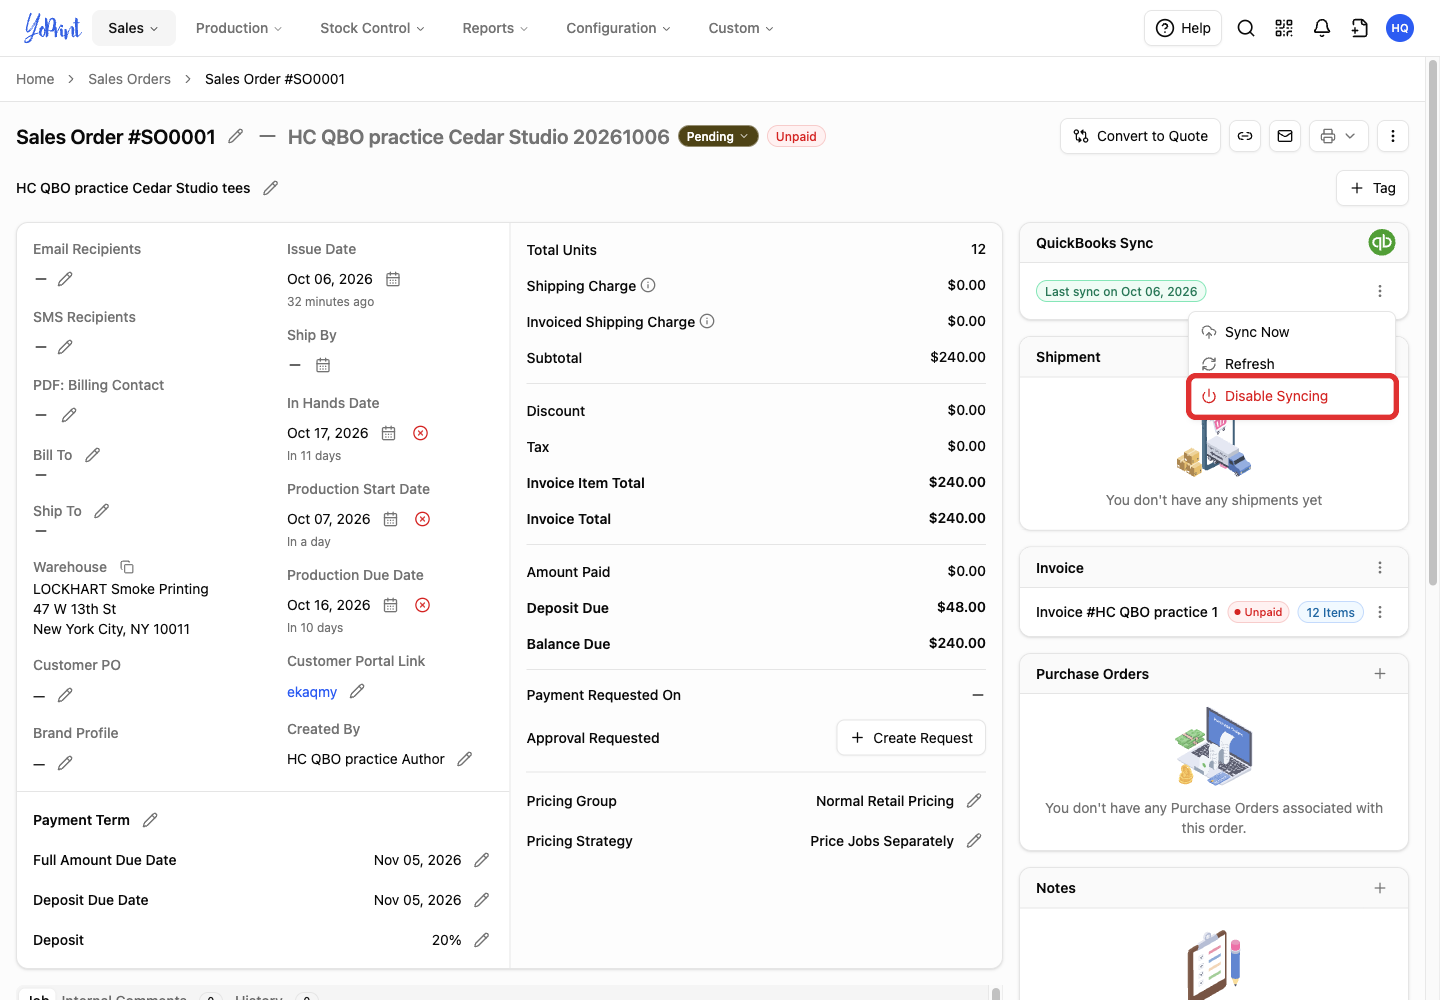
The panel shows Sync disabled for order.
-
To resume, open the panel's ⋮ menu.
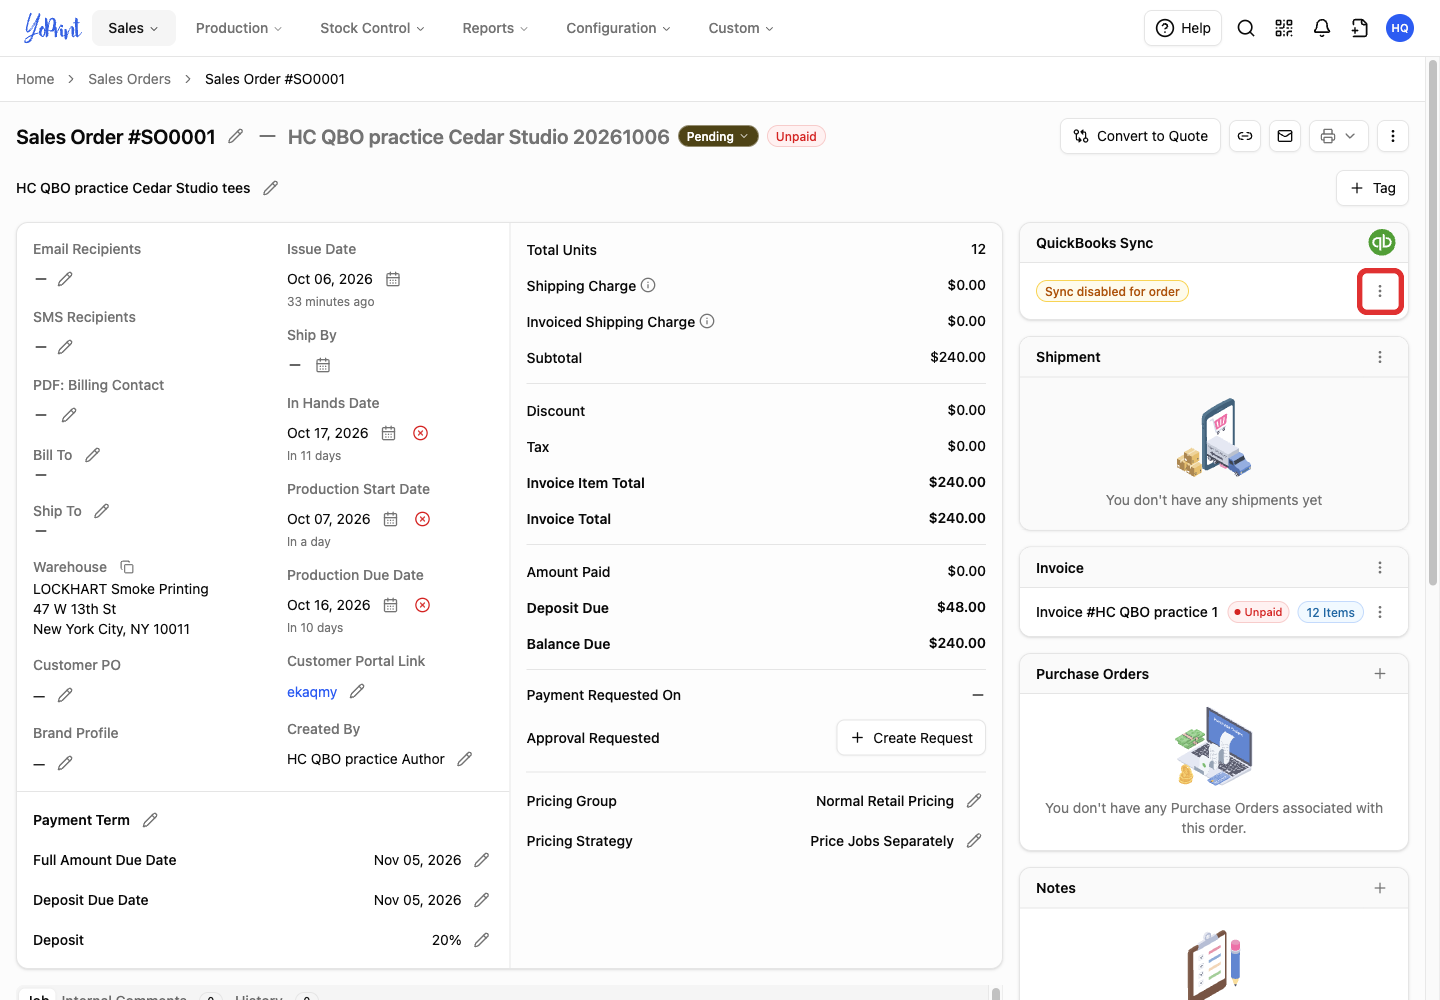
-
Select Enable Syncing.
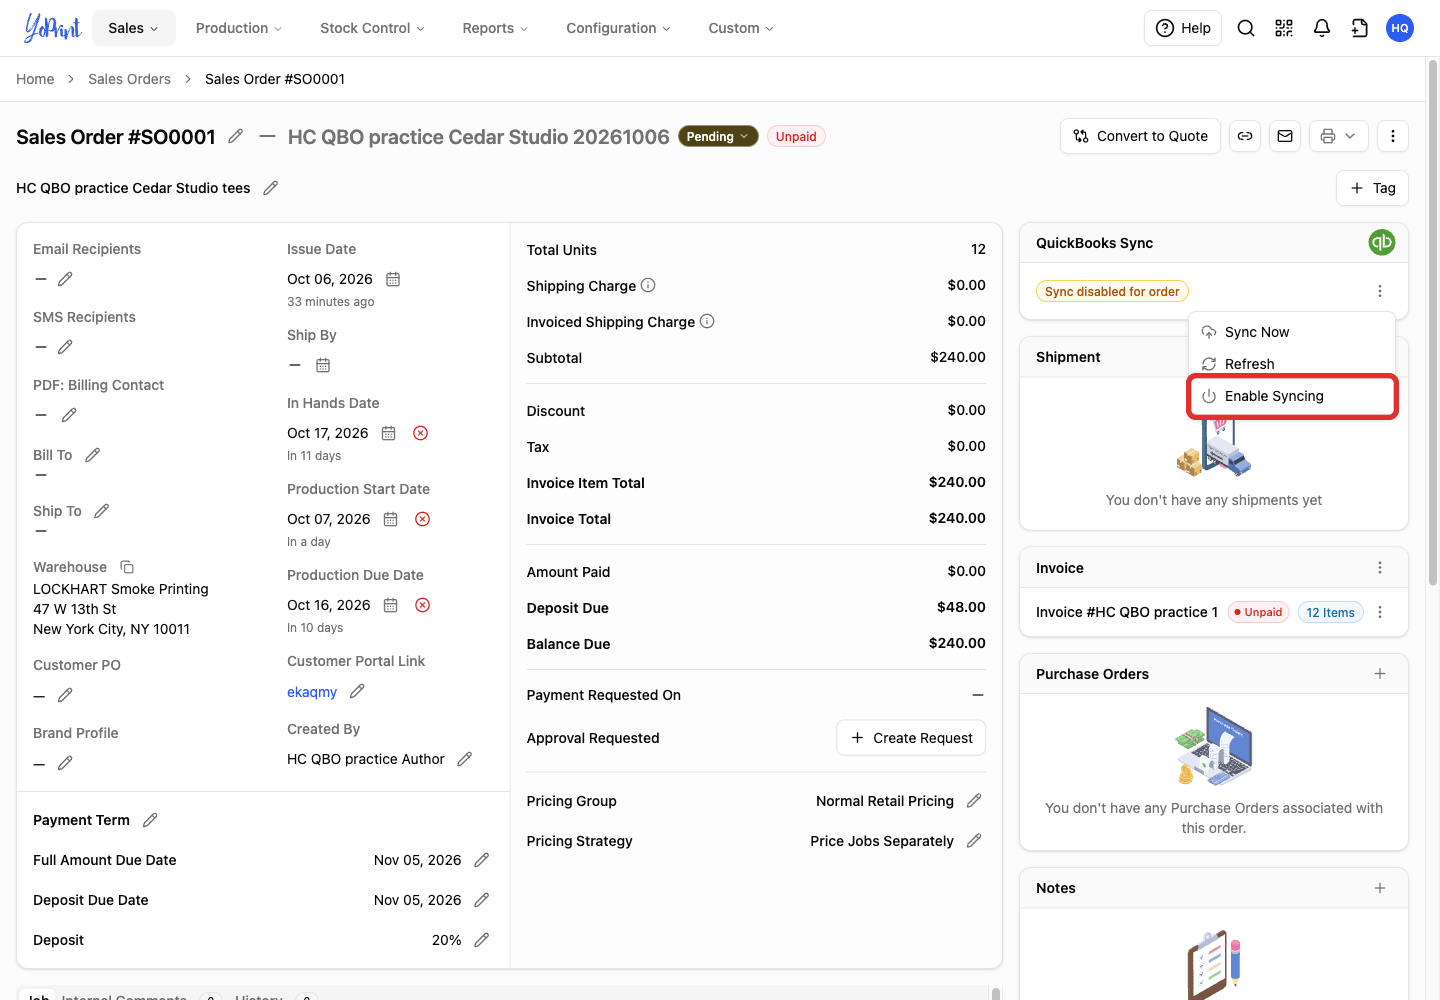
If you need to send a saved correction, open ⋮ in the QuickBooks Sync panel and select Sync Now.
Move a customer list from QuickBooks
To move a customer list from QuickBooks into YoPrint, contact YoPrint Support about the import. Support imports the customer details only, not the invoices. Intuit's customer export guide explains how to export the list to Excel. Keep that customer list available for the import discussion.
Disconnect QuickBooks
- In Settings > Apps, open the ⋮ menu on QuickBooks Online.
- Select Remove.
- Confirm Remove in the confirmation dialog.
To connect again, follow Connect YoPrint with QuickBooks Online.