Customize Status Workflow
In this article
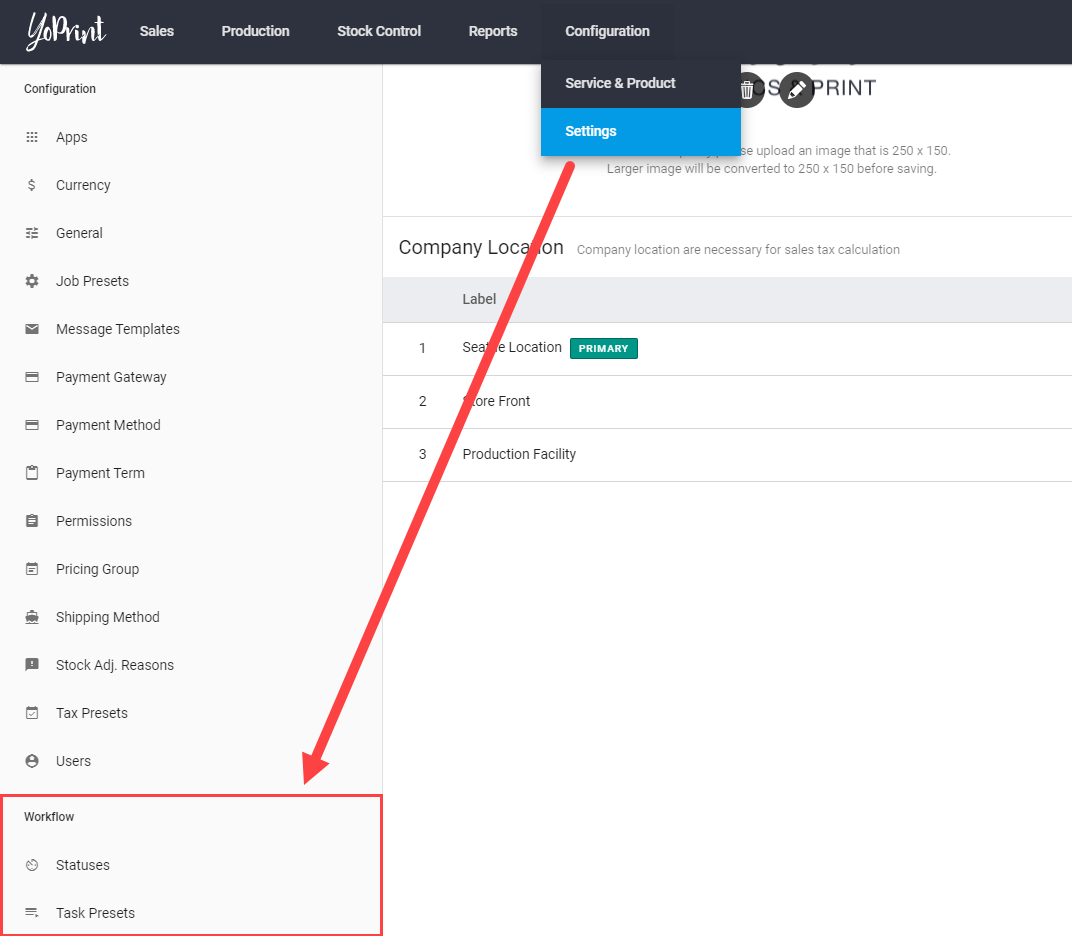
Under the Workflow tab in the Settings Sidebar, there are Statuses and Task Presets.
Statuses
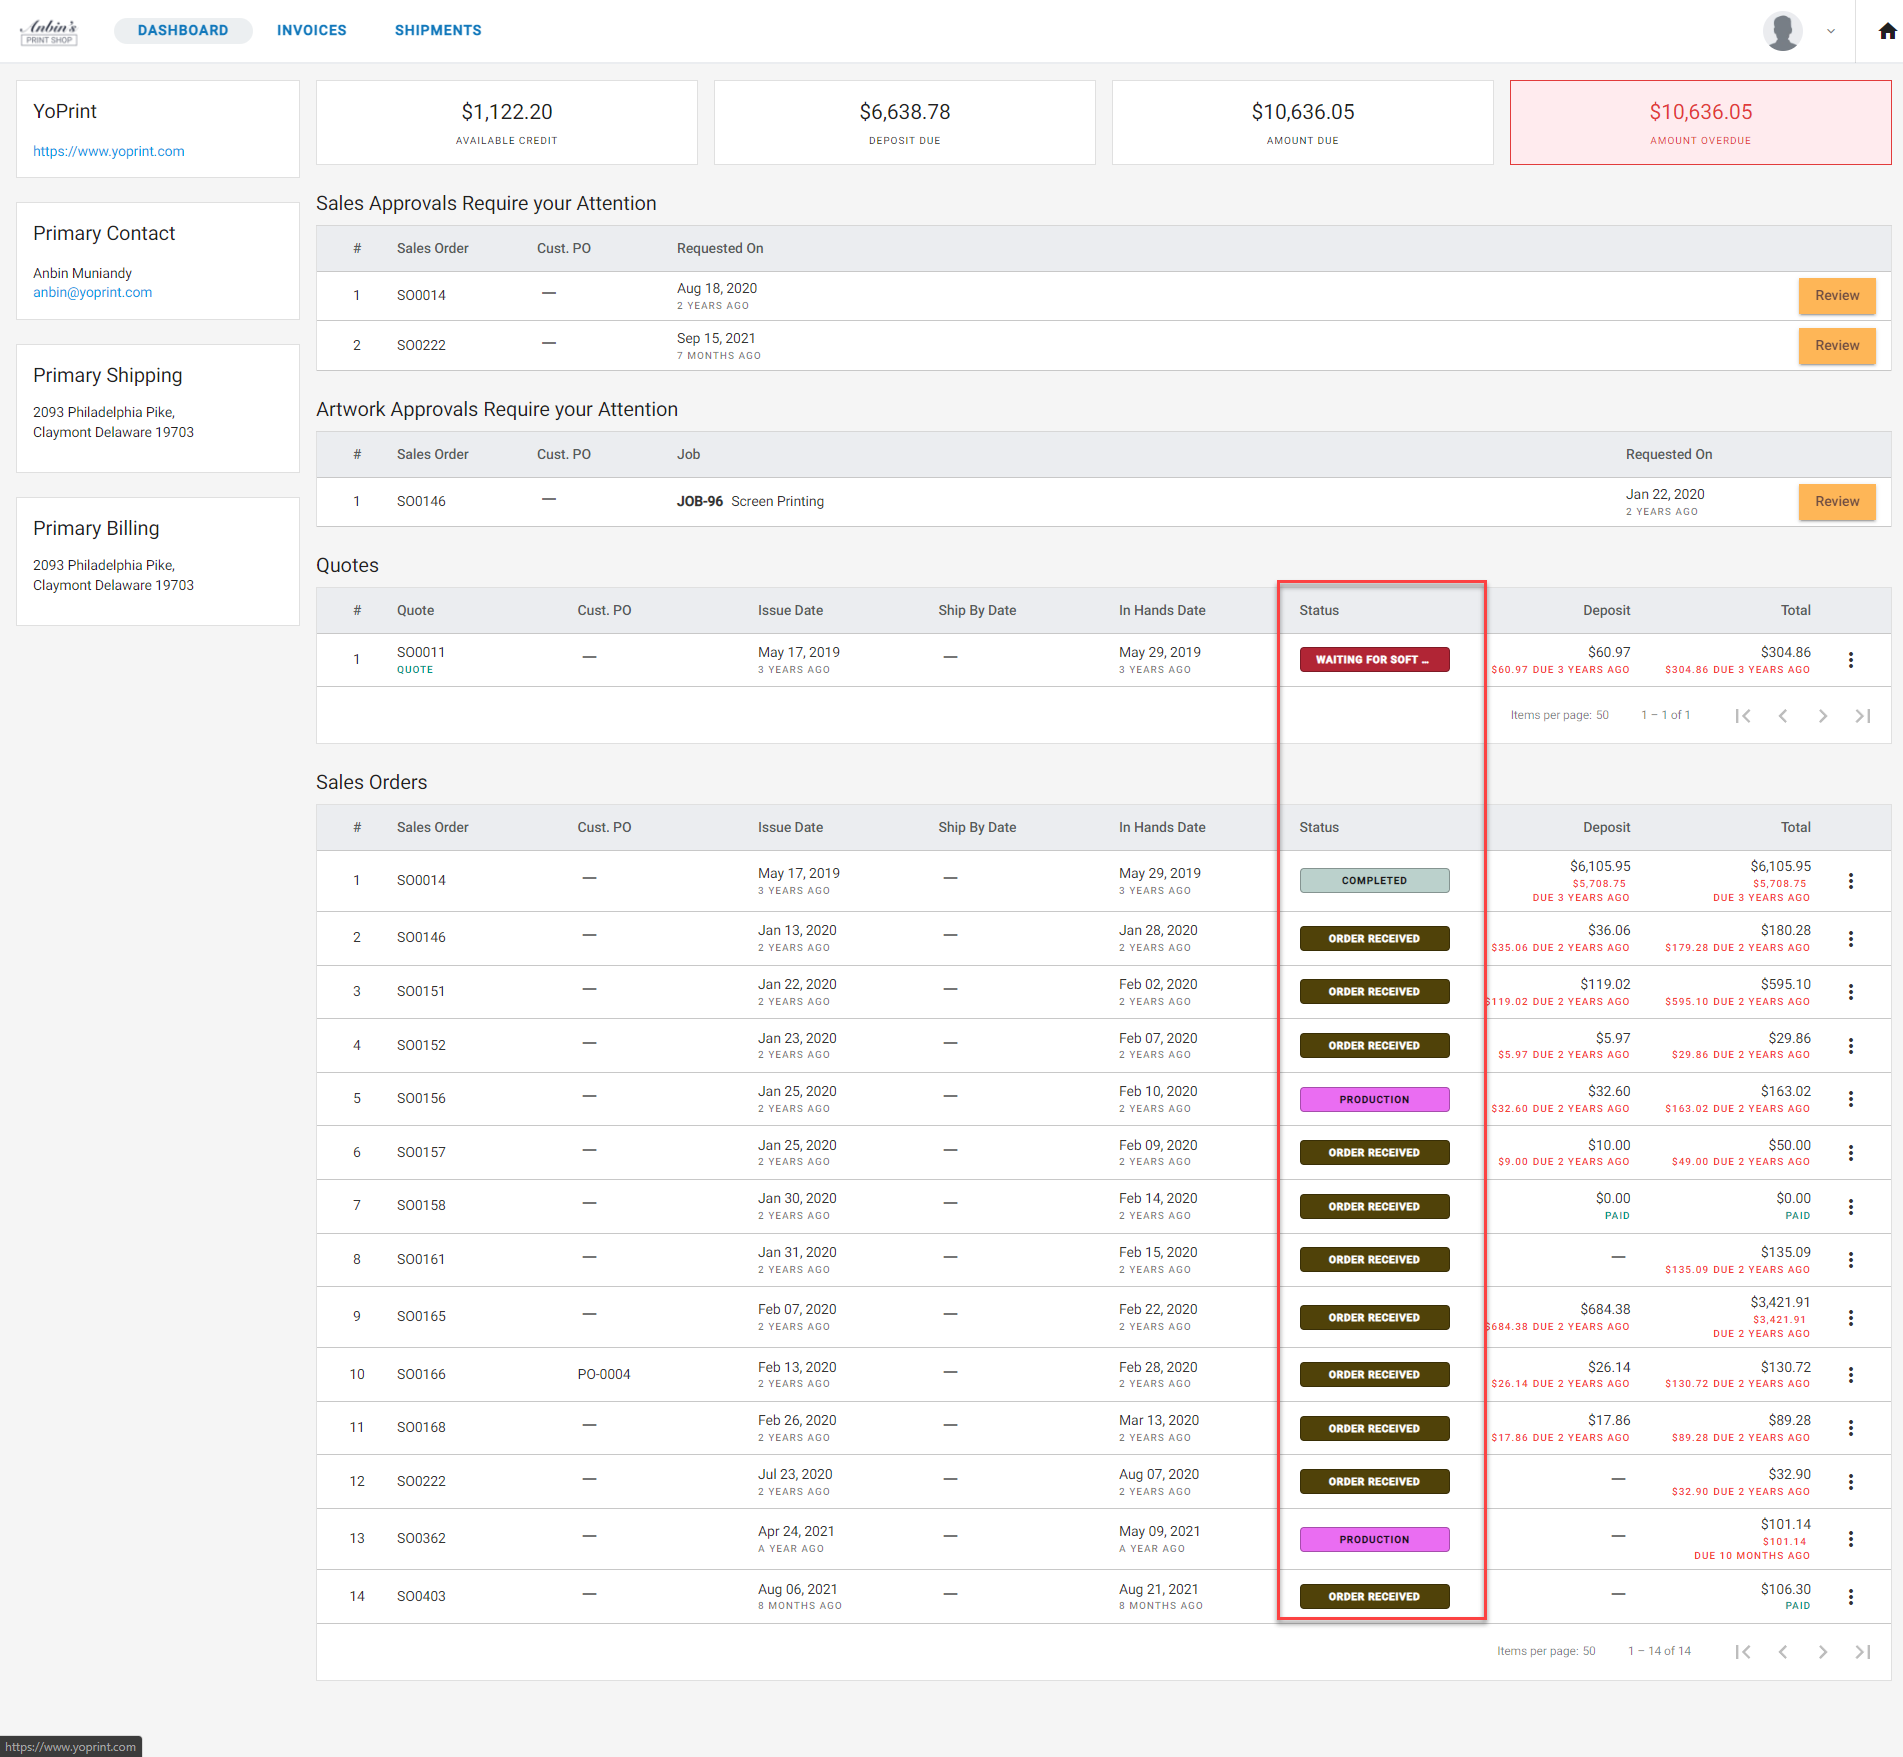
Statuses show the stages of progress of core sections in your workflow (e.g. Sales Order, Job, Shipment).
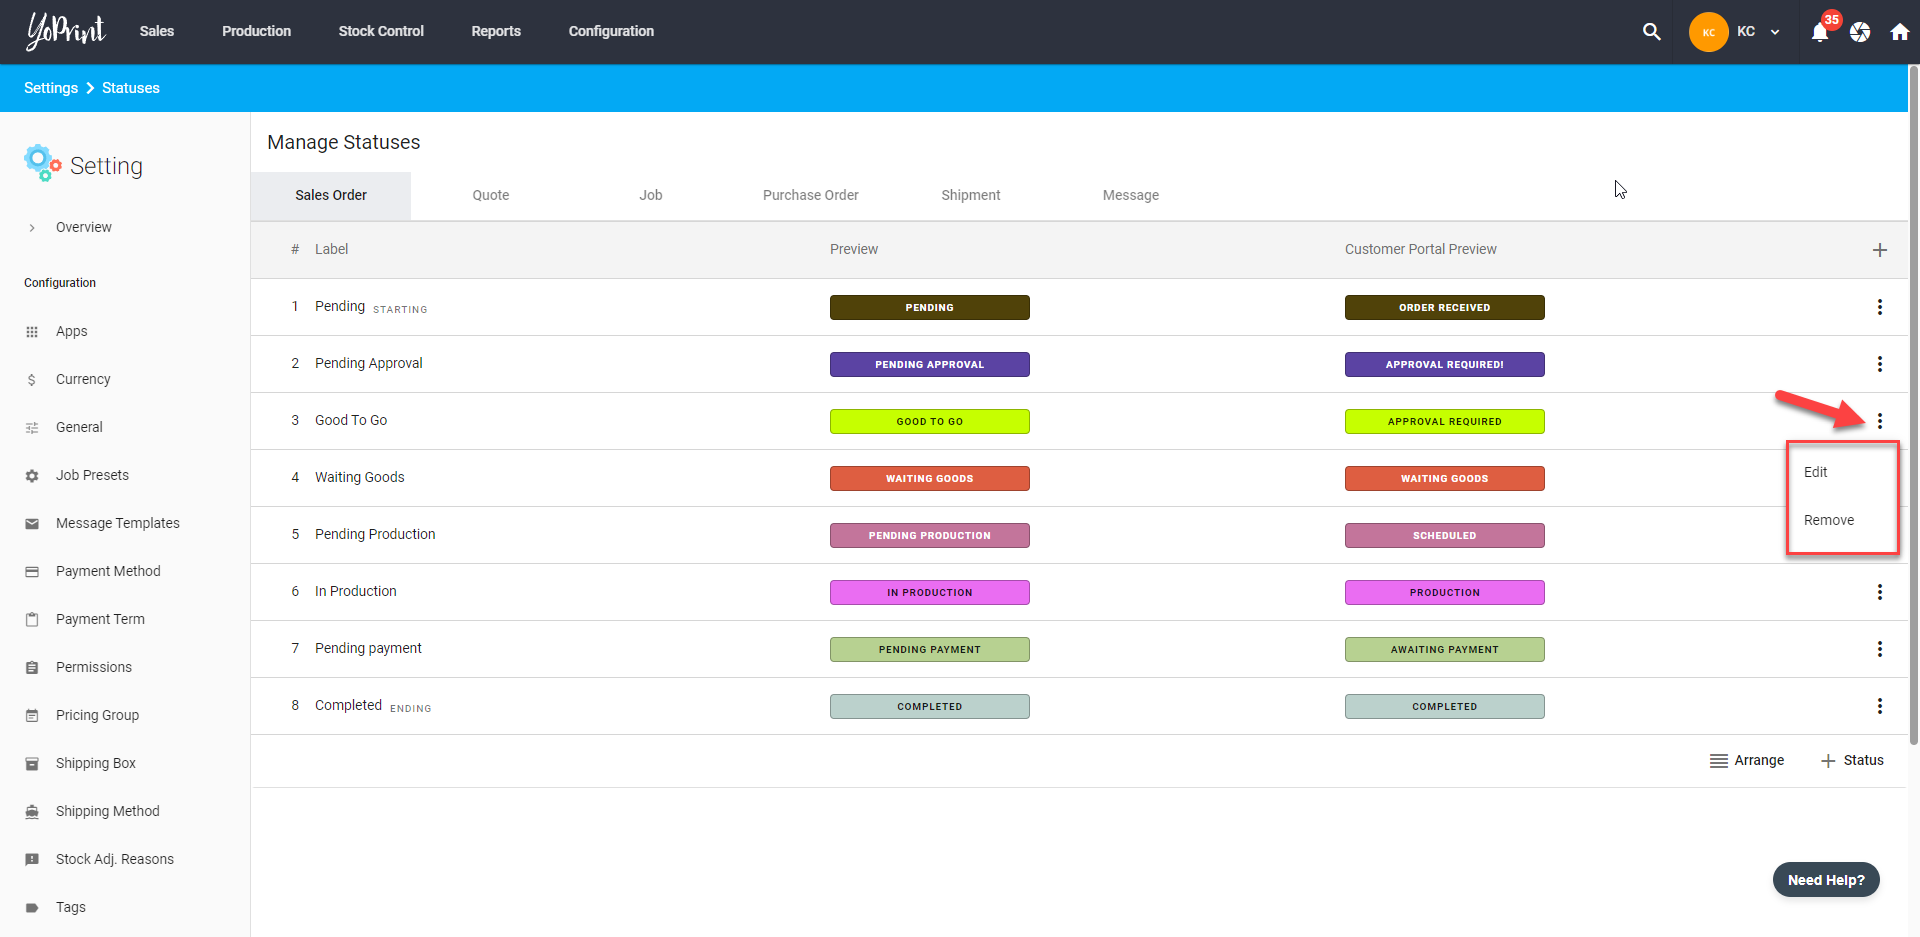
Here is an example of a Sales Order with multiple status labels.
Notes: Starting / Ending / Pre-Production status
Pre-production status is used in jobs to indicate NOT to pull from an inventory. Any other status except Starting will automatically allocate stock to the job.
Create Status Labels
1. Navigate to https://app.yoprint.com/setting/
2. At the Settings sidebar under Workflow tab, select Status.
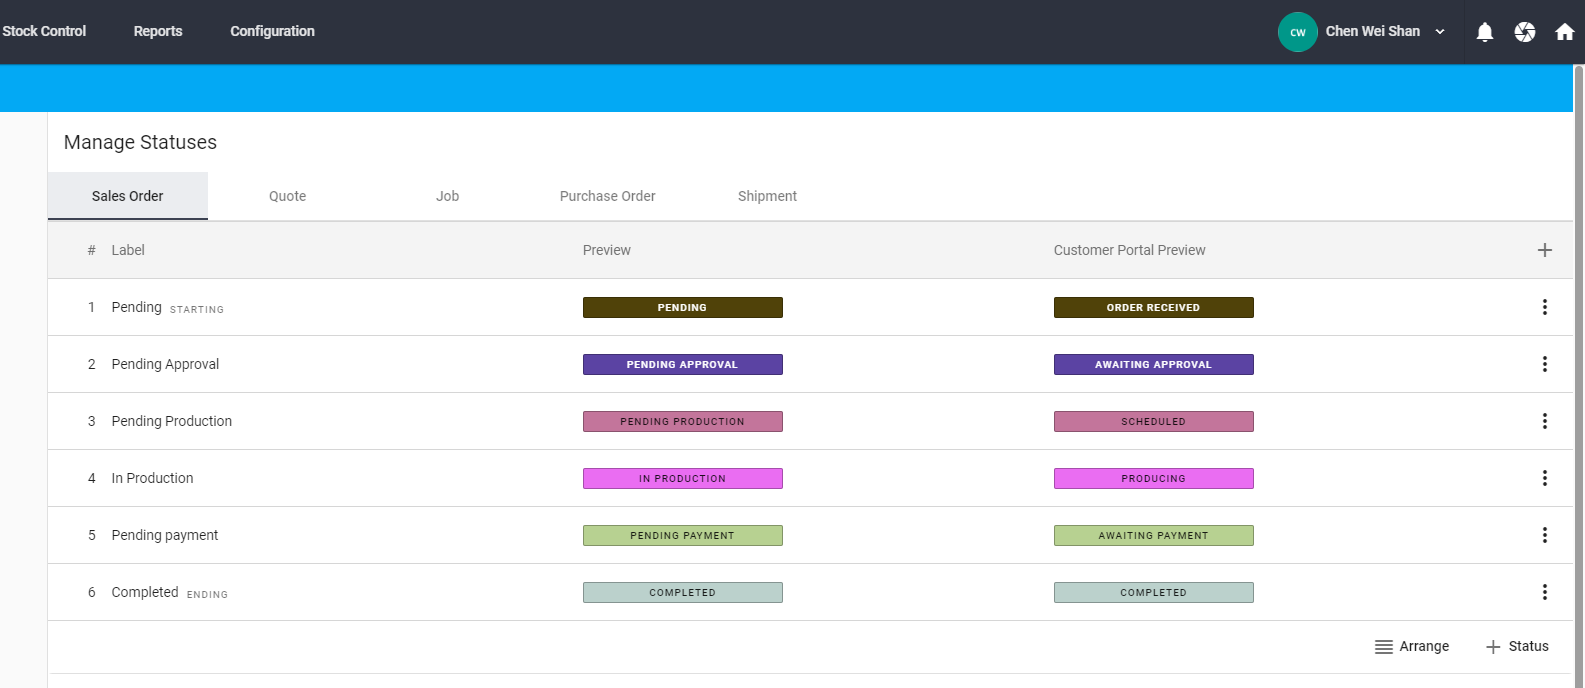
3. Select a core section to manage the status labels. Click + Status.
4. Name your Labels accordingly and select a color for your status. Then click Create.
Note:
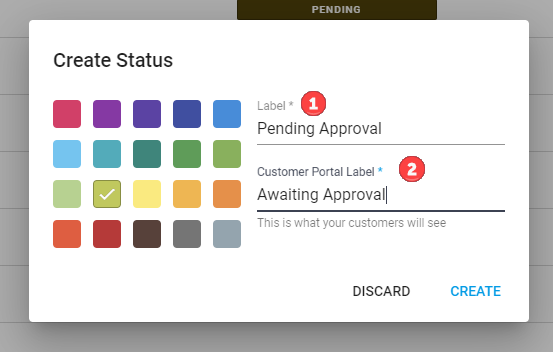
1) This status label is previewed on your end (user end).
2) This status label is previewed on the Customer Portal Page.
Edit, Remove and Arrange the Statuses
Click ⋮ and choose Edit or Remove. Be careful, removing a status is a permanent action and can't be undone. But you can always add them again.
Note: For both Statuses and Task Presets, the Starting and Ending labels are auto-generated by the system. They can be edited but cannot be deleted.
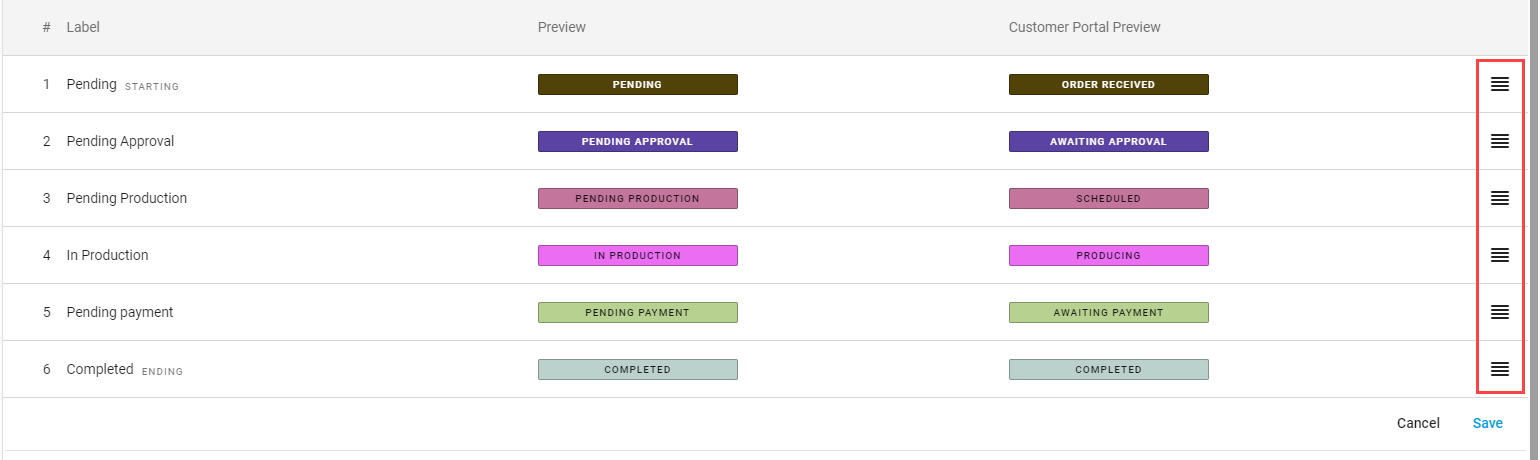
1. Click Arrange.
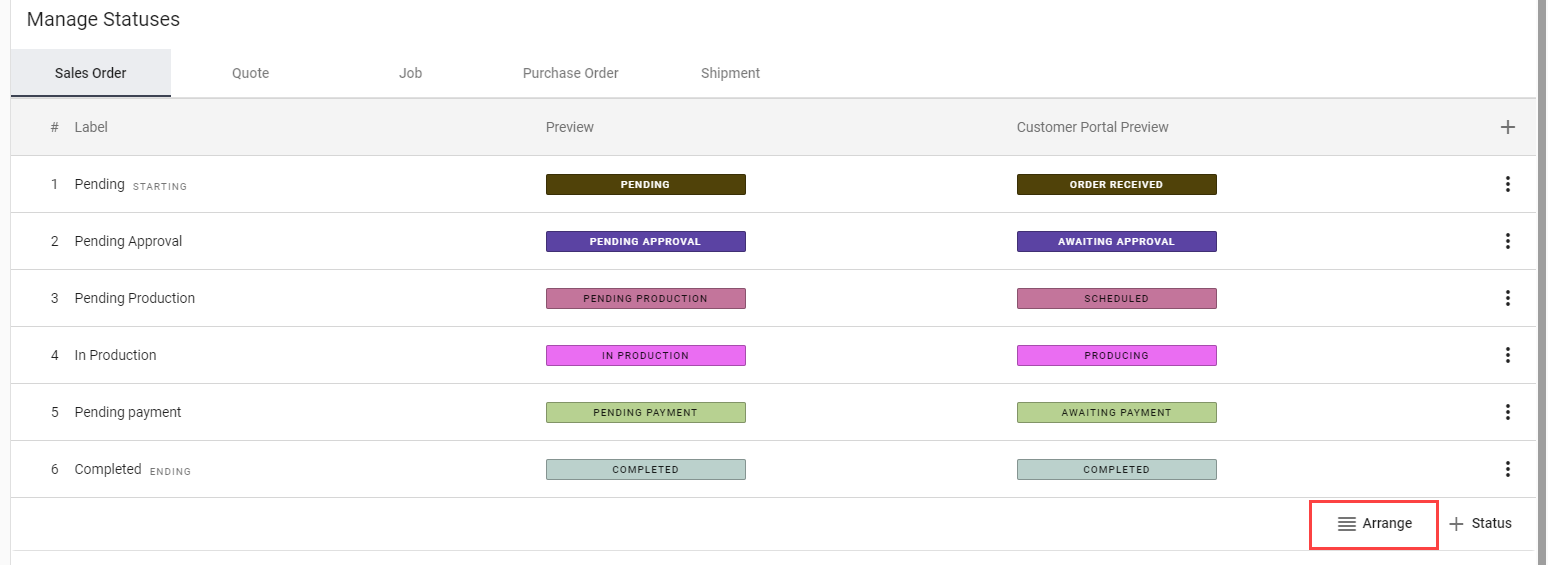
2. Drag the status to rearrange the progress flow. Once done, click Save.
Task Presets
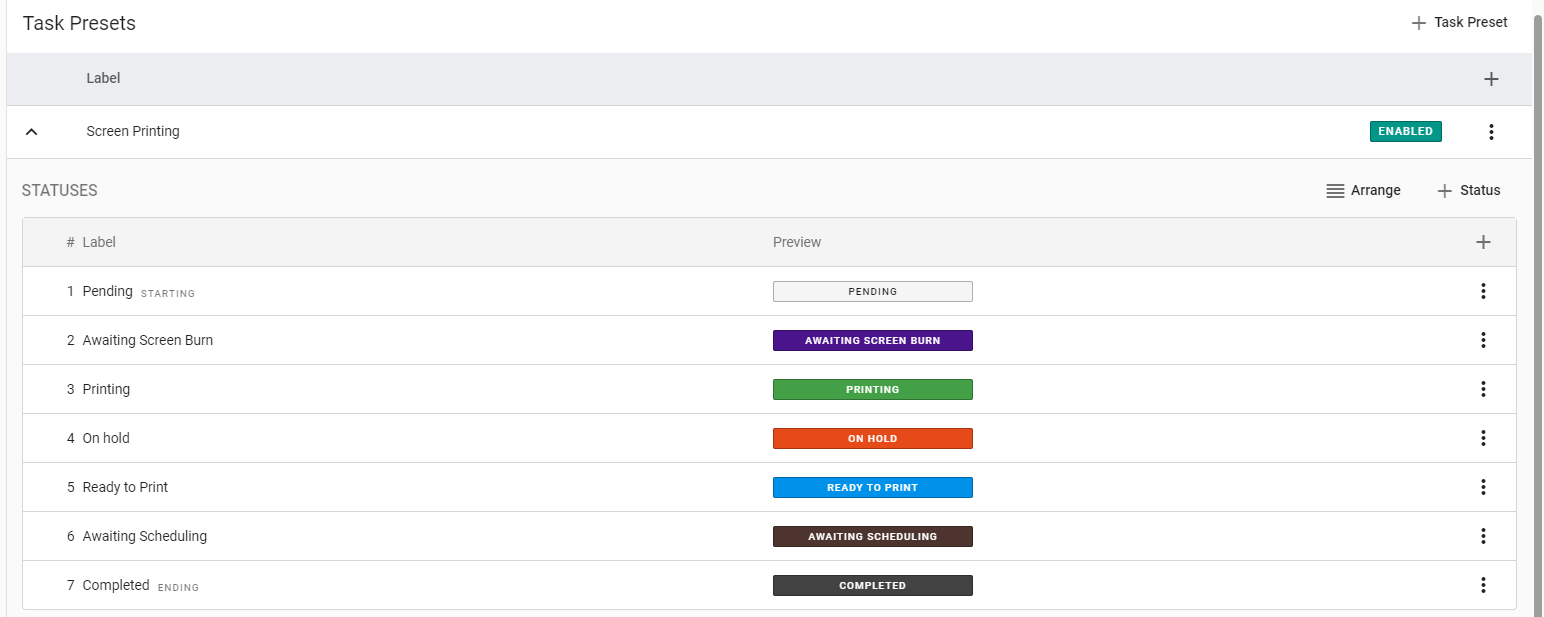
Task Preset status show stages of progress of a particular job depending on your workflow.
Here is an example of a Screen Printing Task with multiple status labels.
Learn how to create Task Preset here.
Customer Portal
This is how the statuses will appear in the Customer Portal.