How to Get Shipping Rates and Create Labels
In this article
Choose your shipping route
A shipping rate is the carrier's price for sending your parcel. A shipping label contains the delivery details and tracking barcode you attach to the parcel.
Choose the route that matches what you need:
- Save an estimate to keep a shipping price with the shipment without buying a label.
- Buy a label when you are ready to ship a published sales order.
- Add external tracking when you already bought the label elsewhere.
Rates and label purchases use your Shippo connection. Set it up in Settings > Apps before getting rates. See Configuring Shippo Integration. Start with an existing shipment. To add one, see Plan a shipment.

Prepare the shipment
-
Open Sales > Sales Orders.
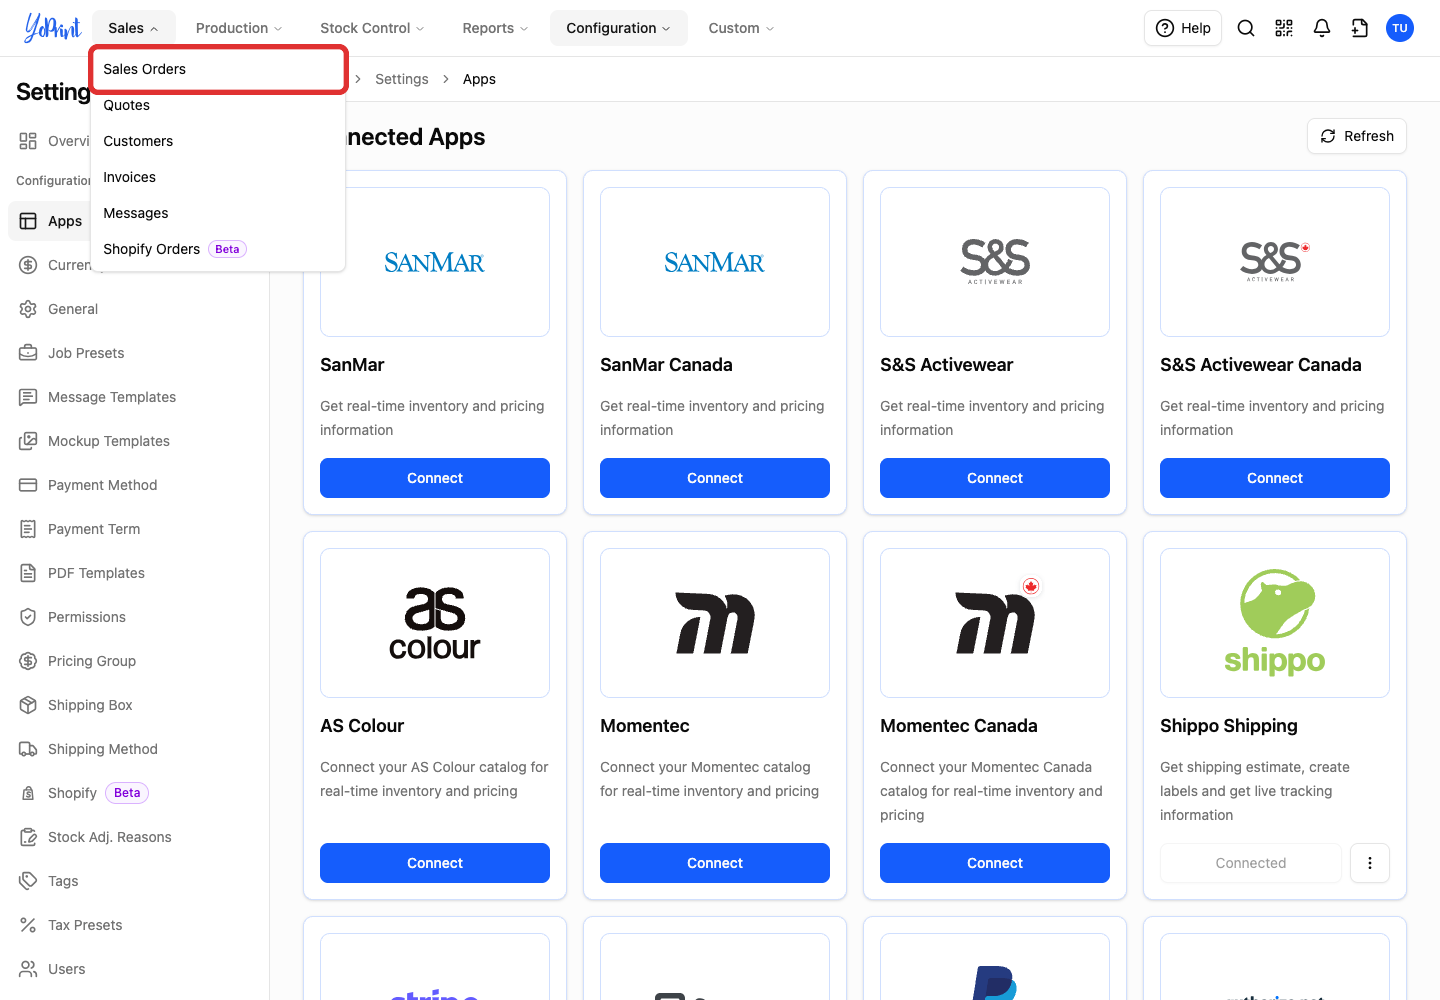
-
Double-click the order row.
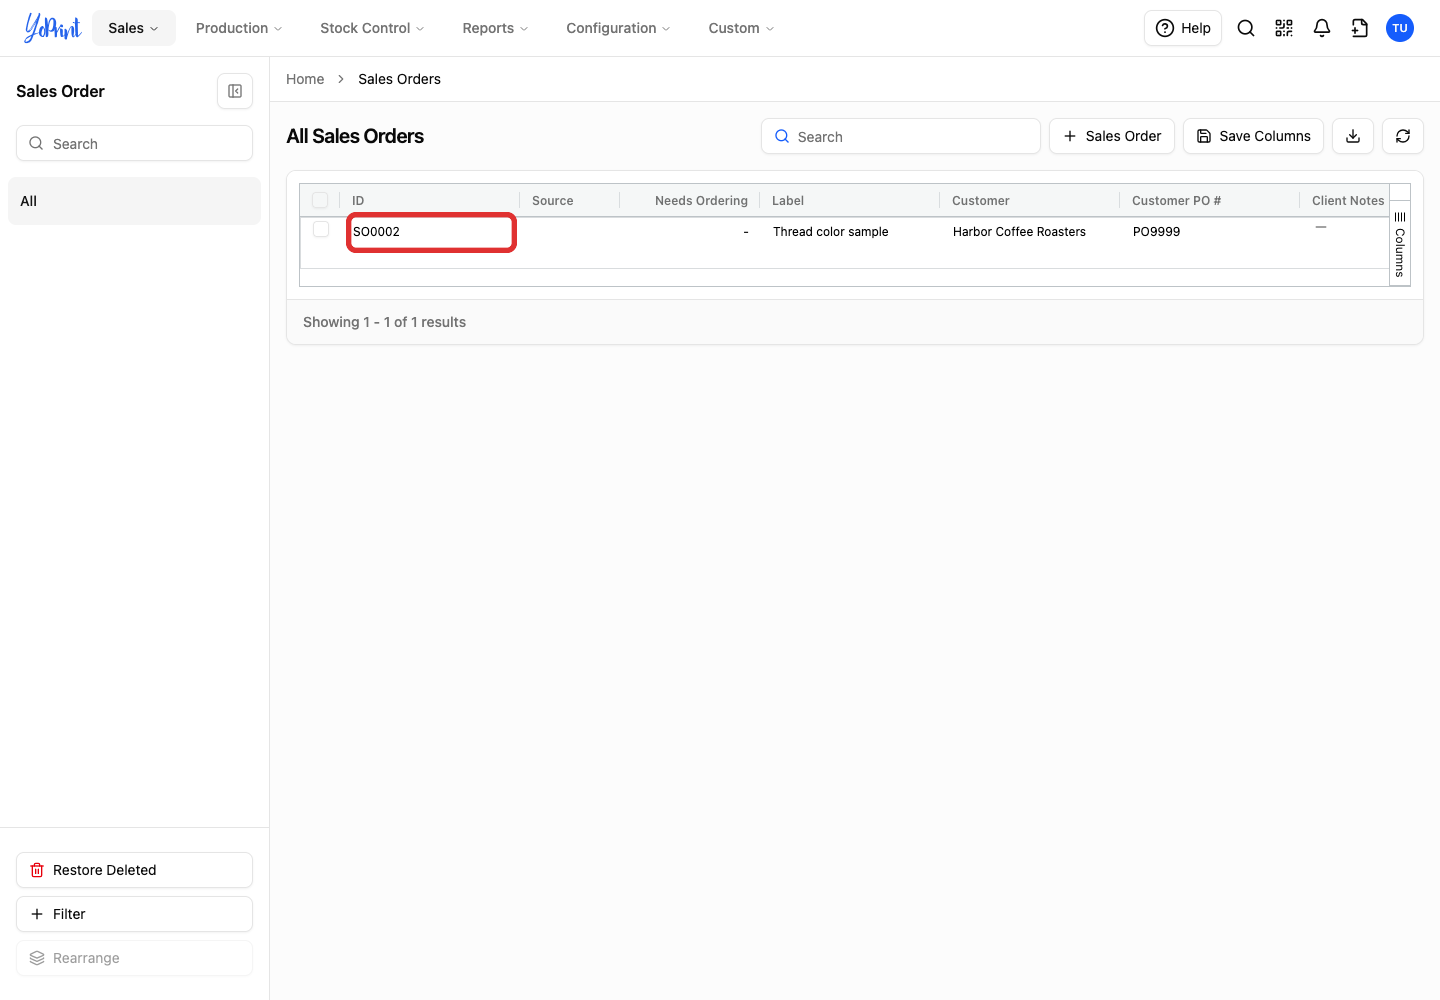
-
In the drawer, click View Sales Order.
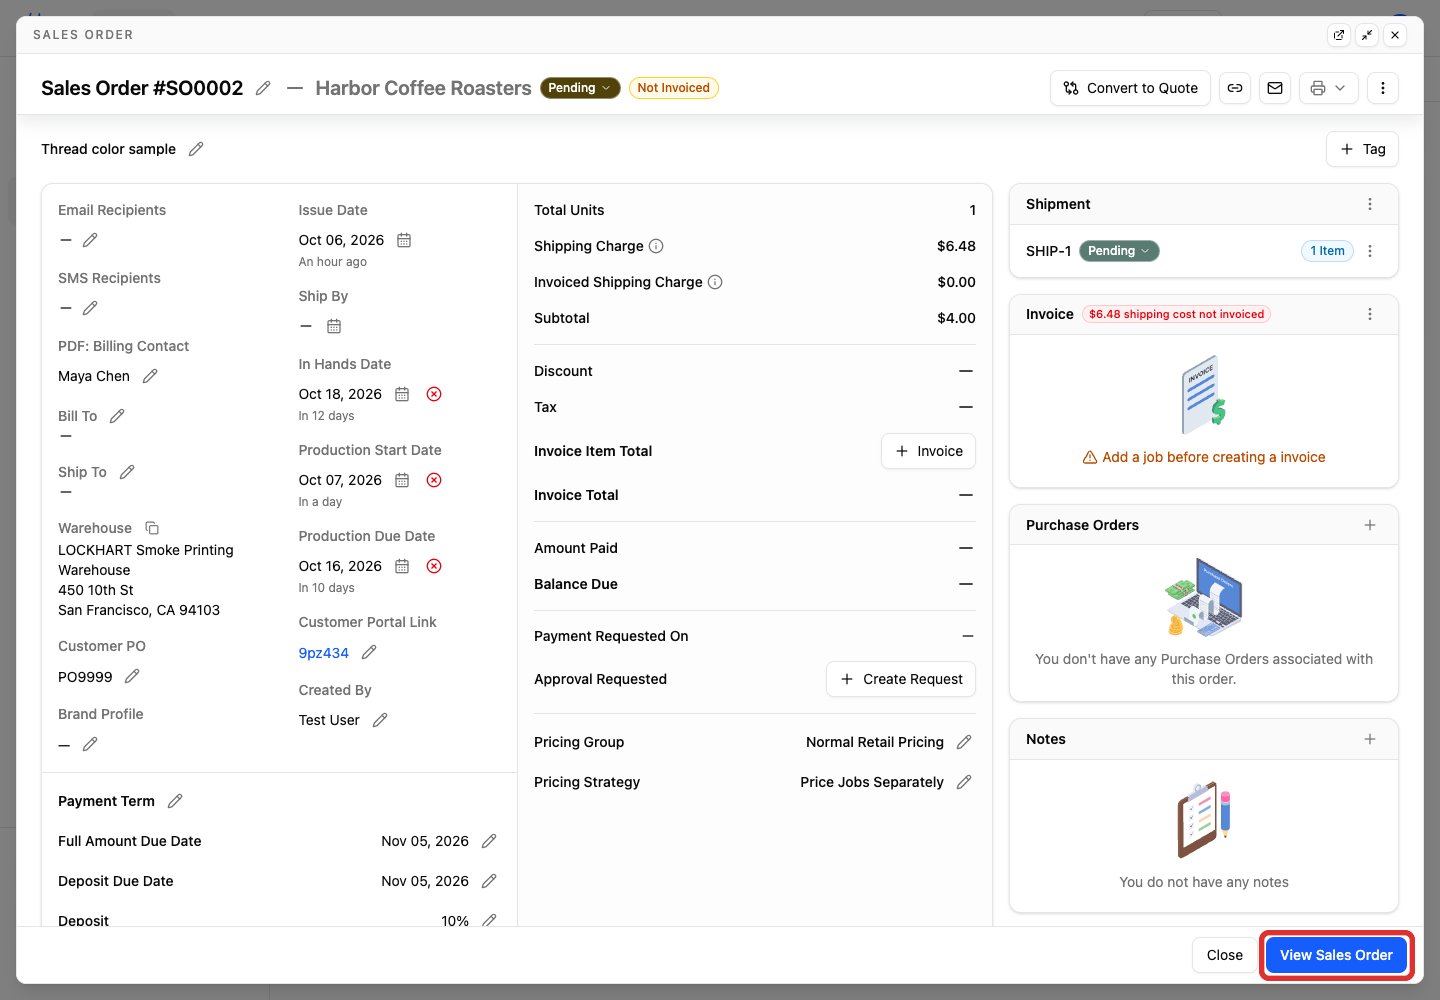
-
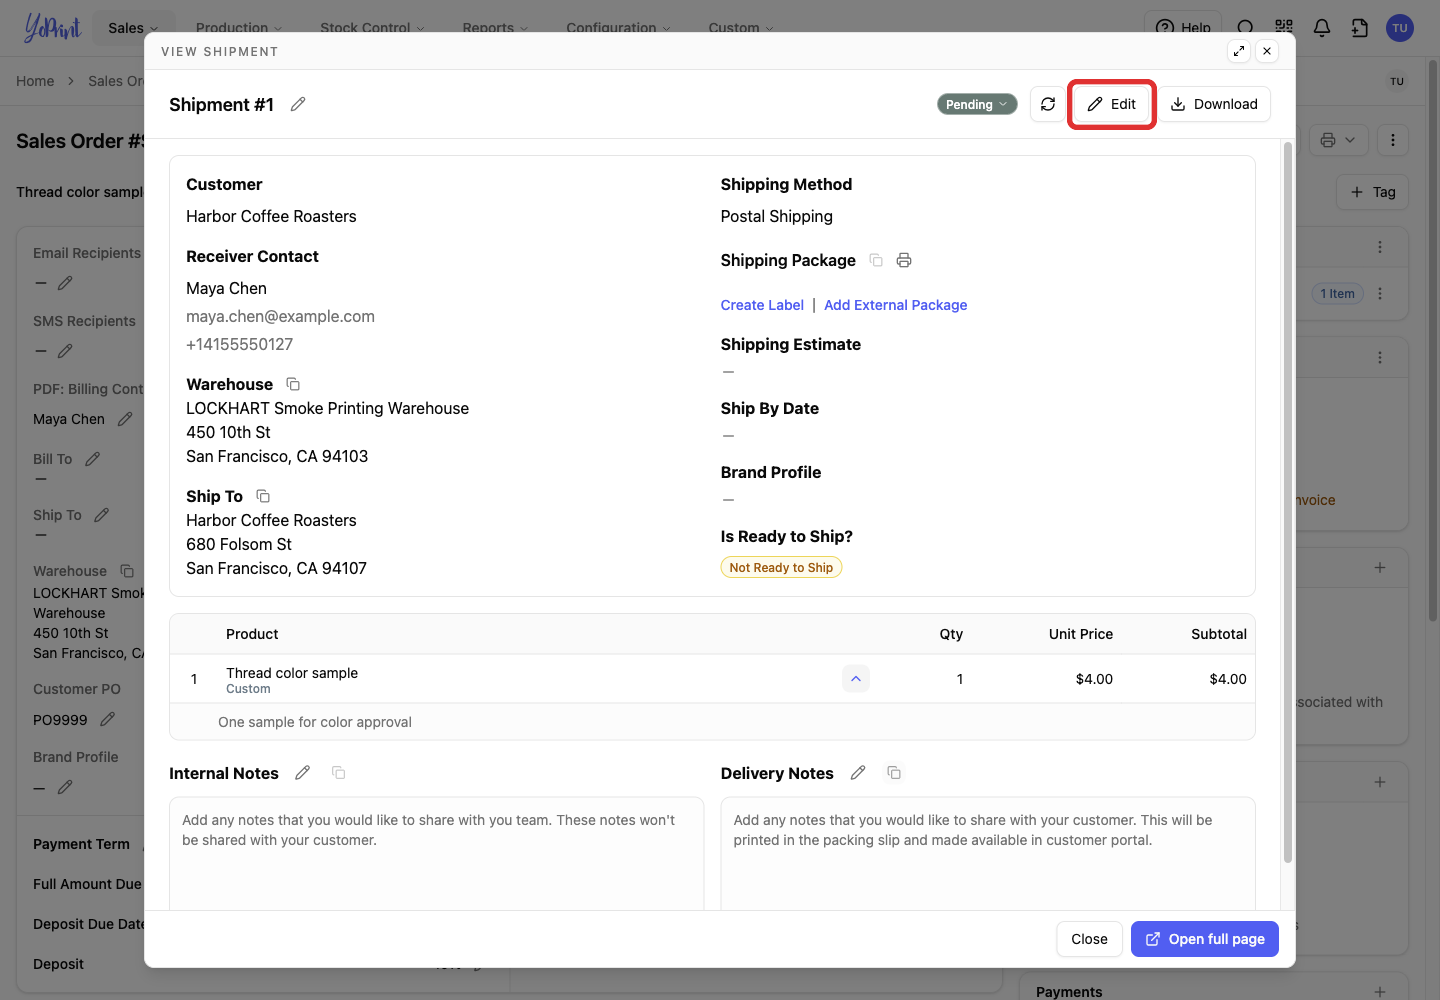
In the Shipment section, open the shipment from its Actions menu with View, or double-click the row.
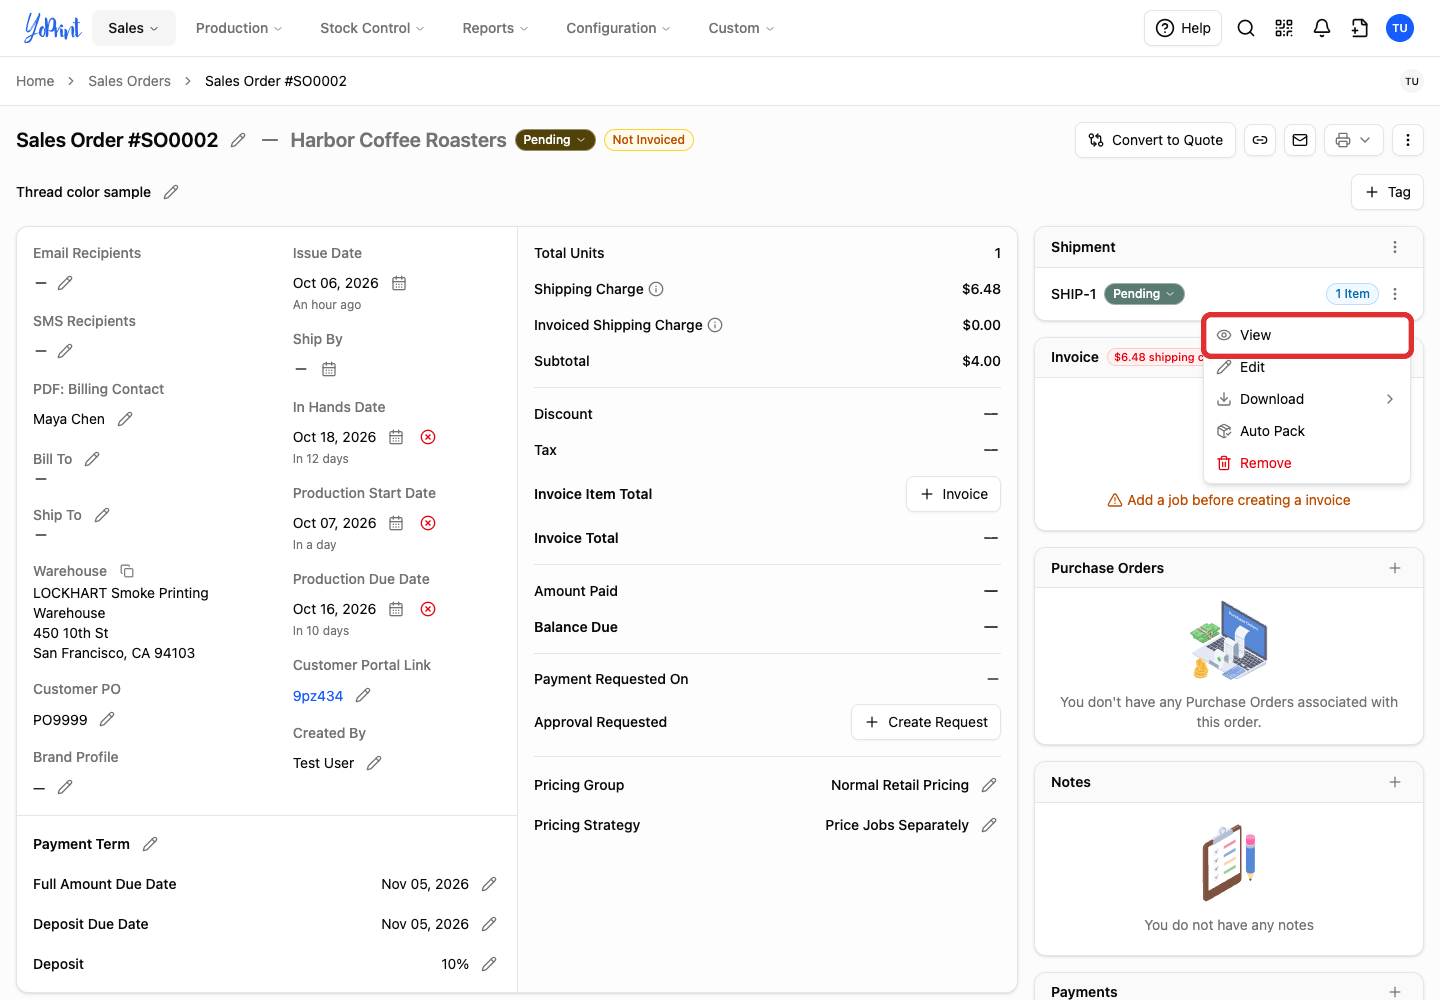
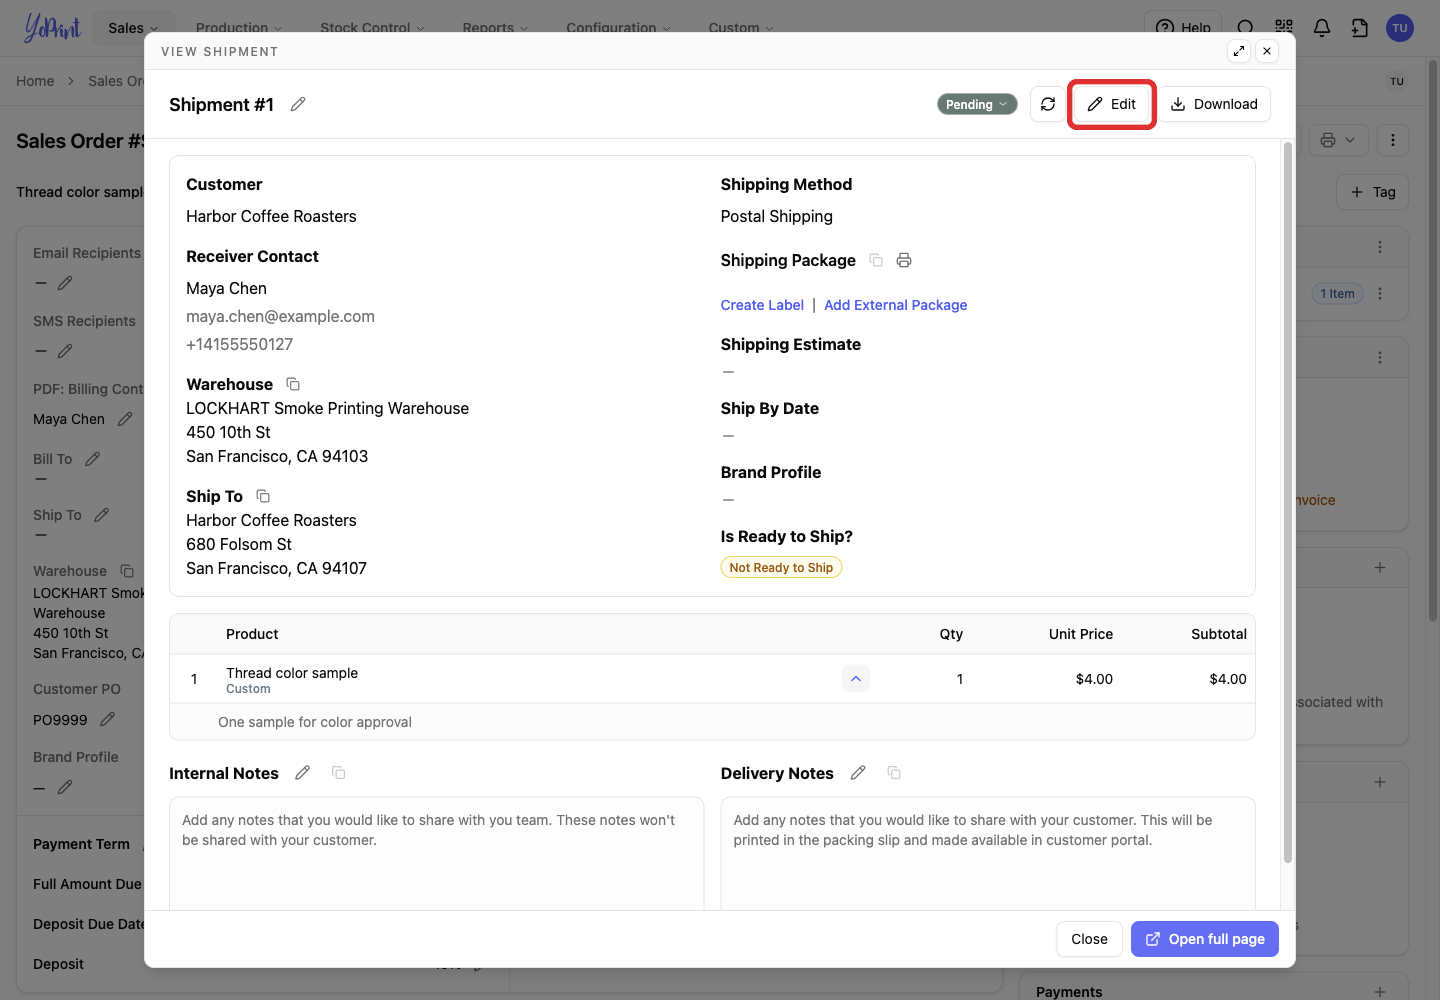
The shipment shows its shipping method, receiver contact, warehouse, destination and packed items. Check these details before getting a rate. Our example is a single thread color sample for Harbor Coffee Roasters.
-
Click Edit if you need to change the shipment.
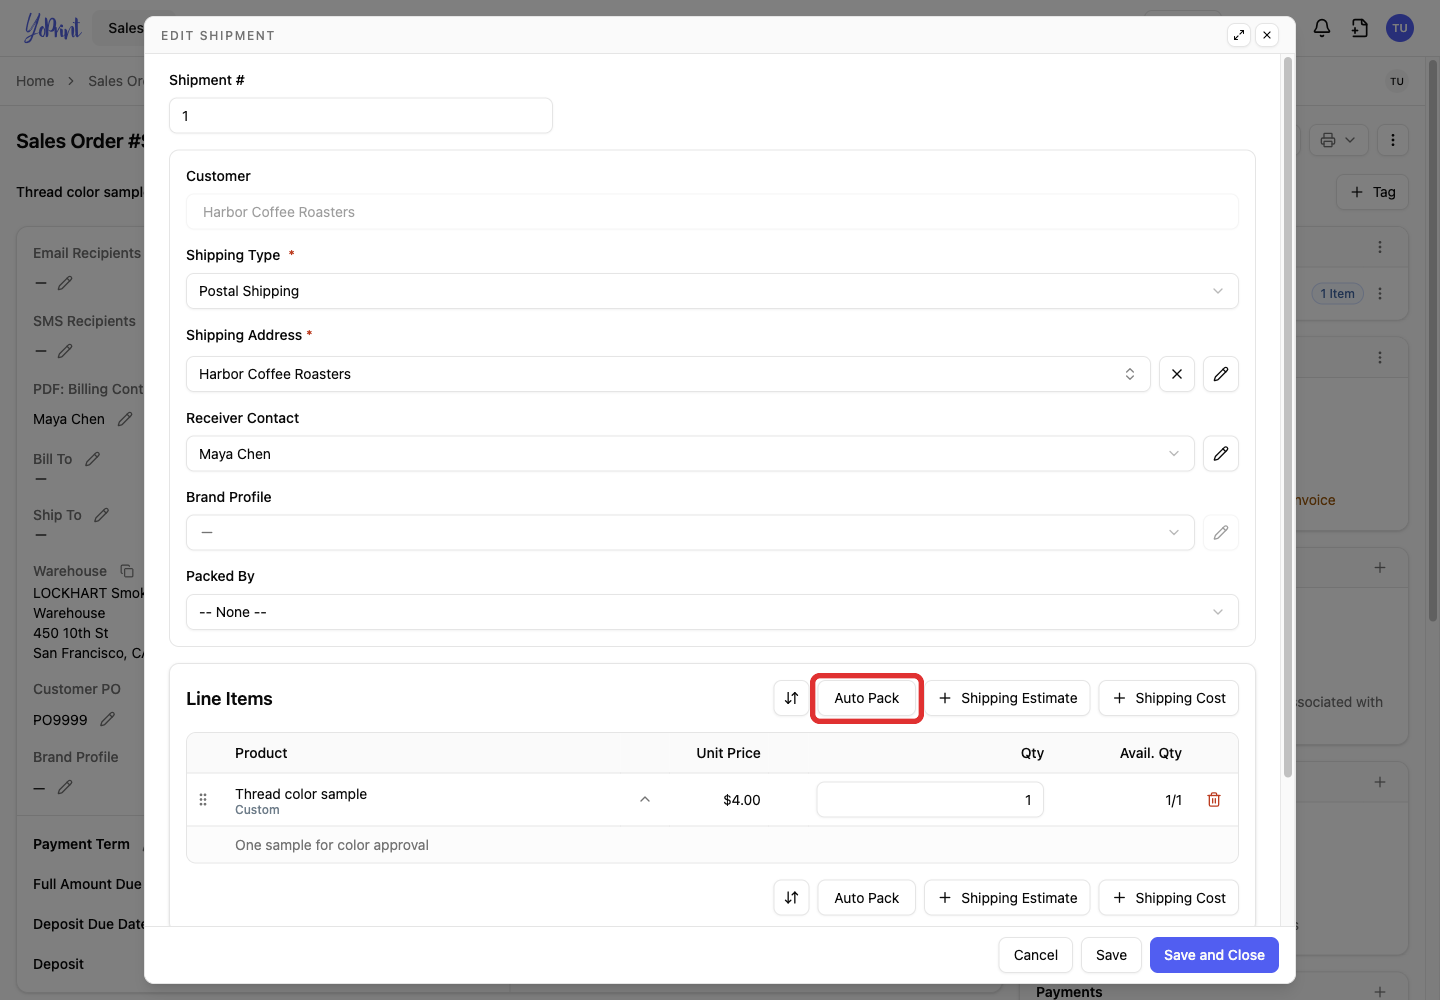
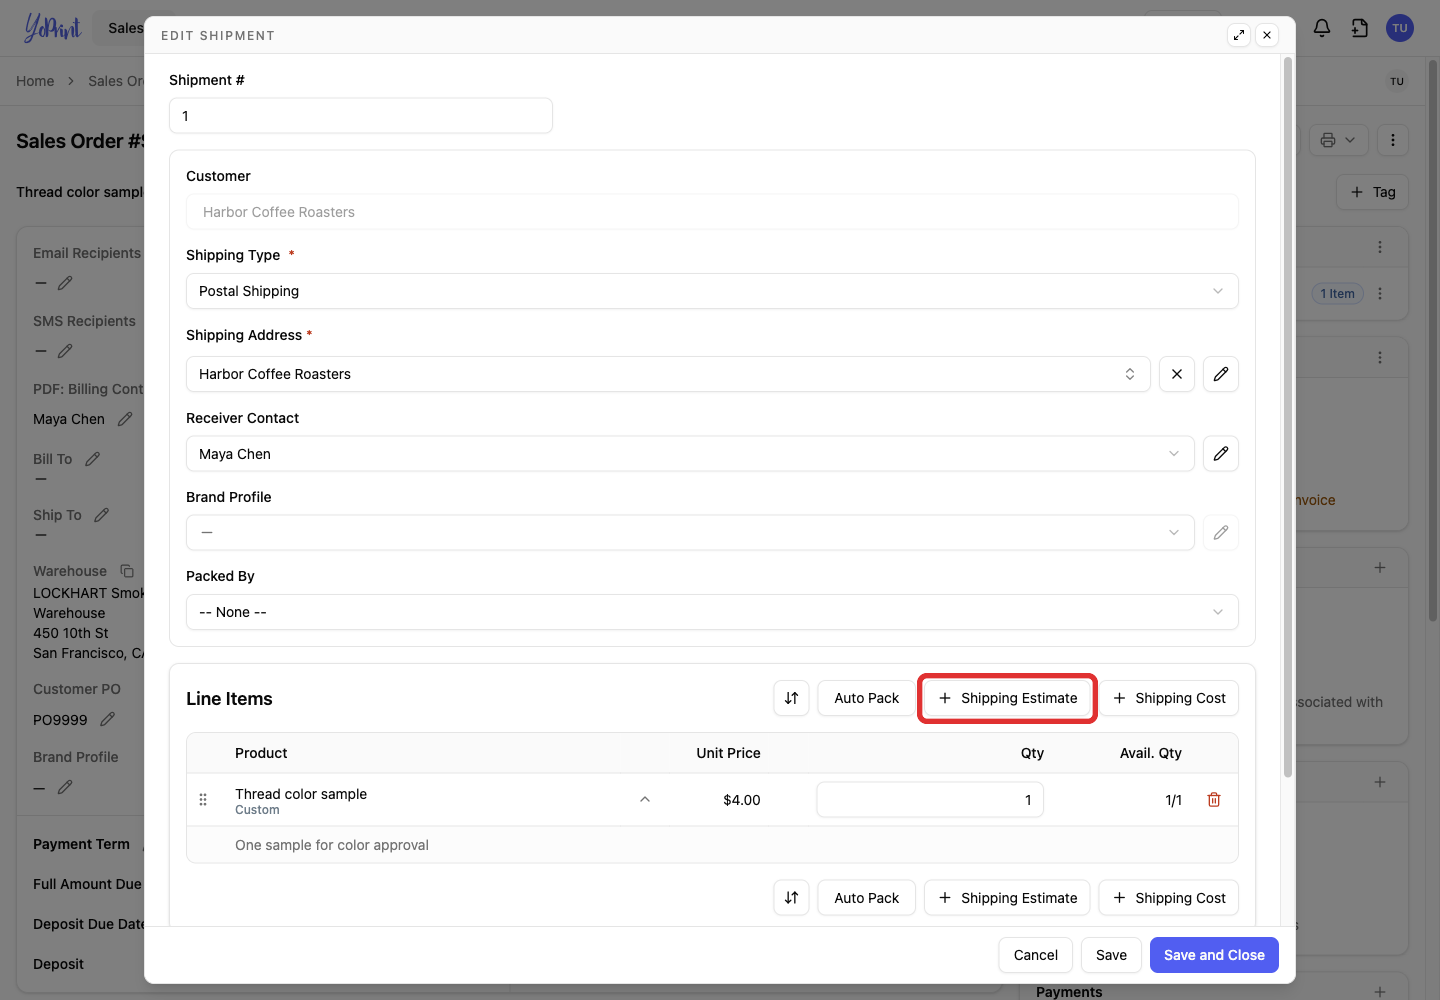
The edit form includes Shipping Type, Shipping Address, Receiver Contact and the item quantities. Parcel dimensions and weight are entered later, in the estimate or label dialog.

-
Use Auto Pack to add the remaining available quantities to this shipment.
-
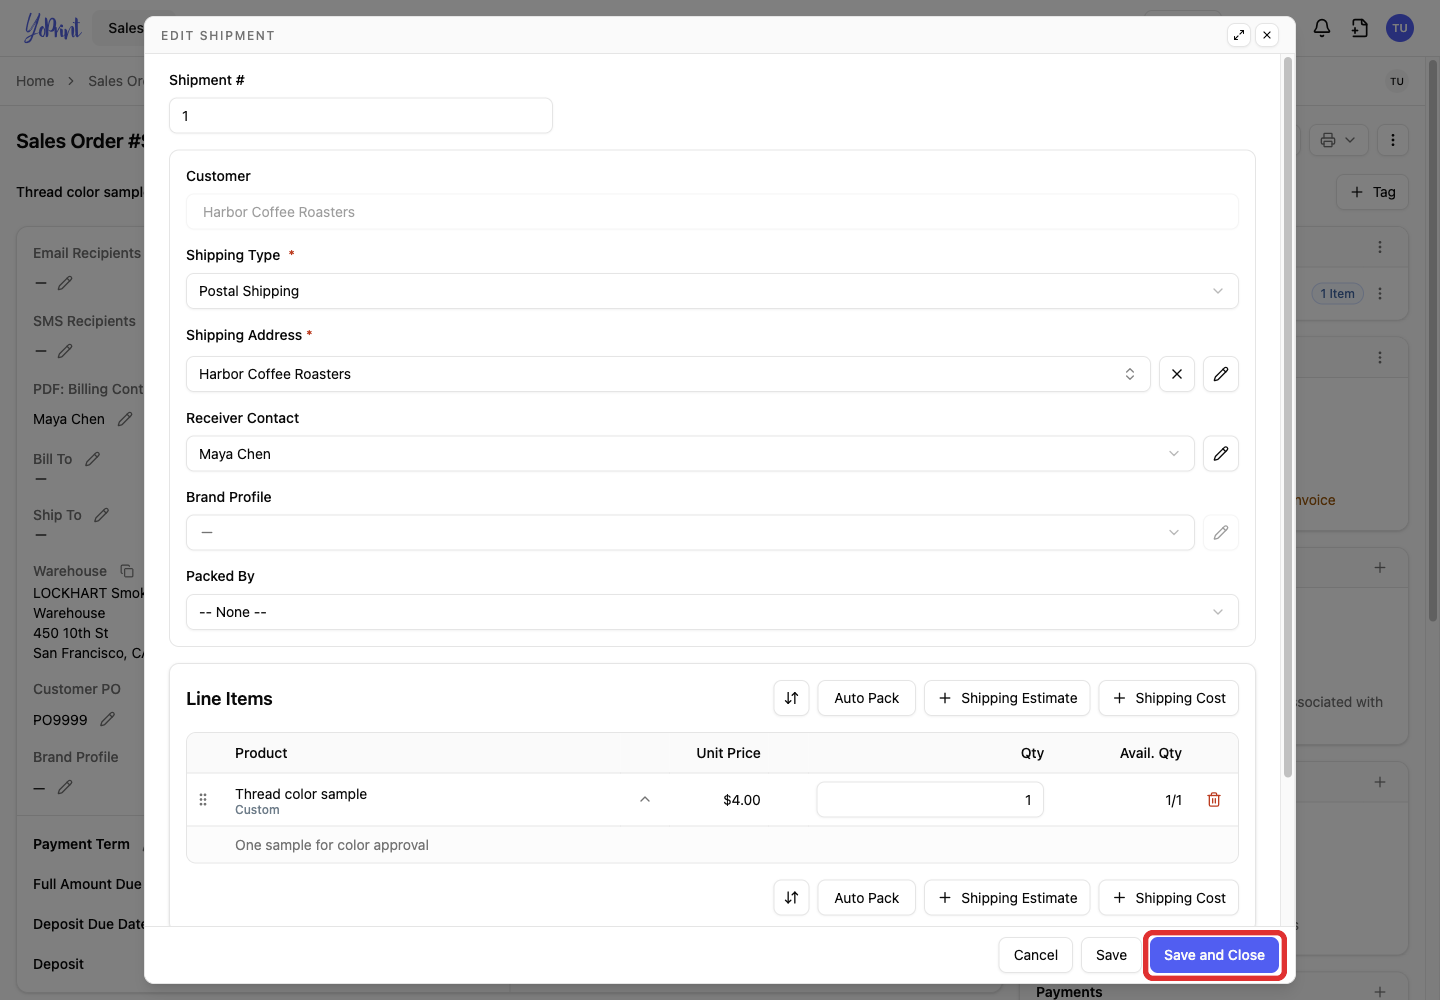
Click Save and Close to keep the shipment changes.
Get a rate and buy a label
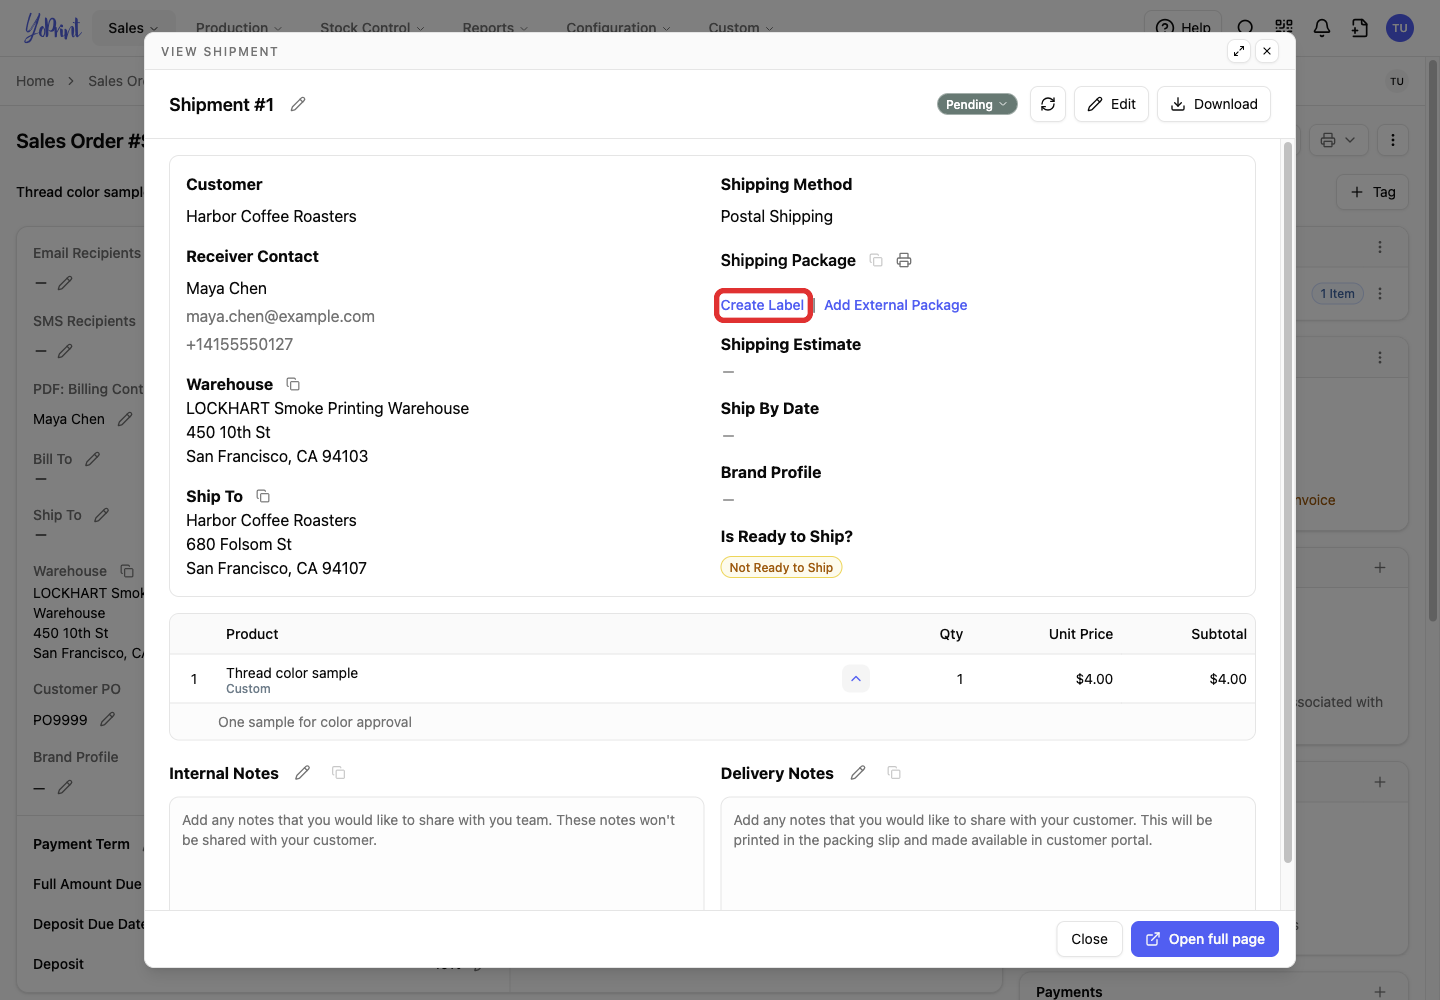
A label purchase needs a published sales order. If Shipping Package already lists a tracking number, open it first to check whether you already have the label you need. Create Label starts another purchase.
-
In the shipment, click Create Label.
Check the Sender, Recipient, Shipment Date and Time. If an address needs correcting, follow Correct an address. The optional fields include a label Reference, Signature, Third Party Account and insurance. Leave the insured amount blank when you do not need insurance. Reference prints on the label, up to 30 characters. Third Party Account bills the label to a carrier account saved for this customer, and you can add one from the list.

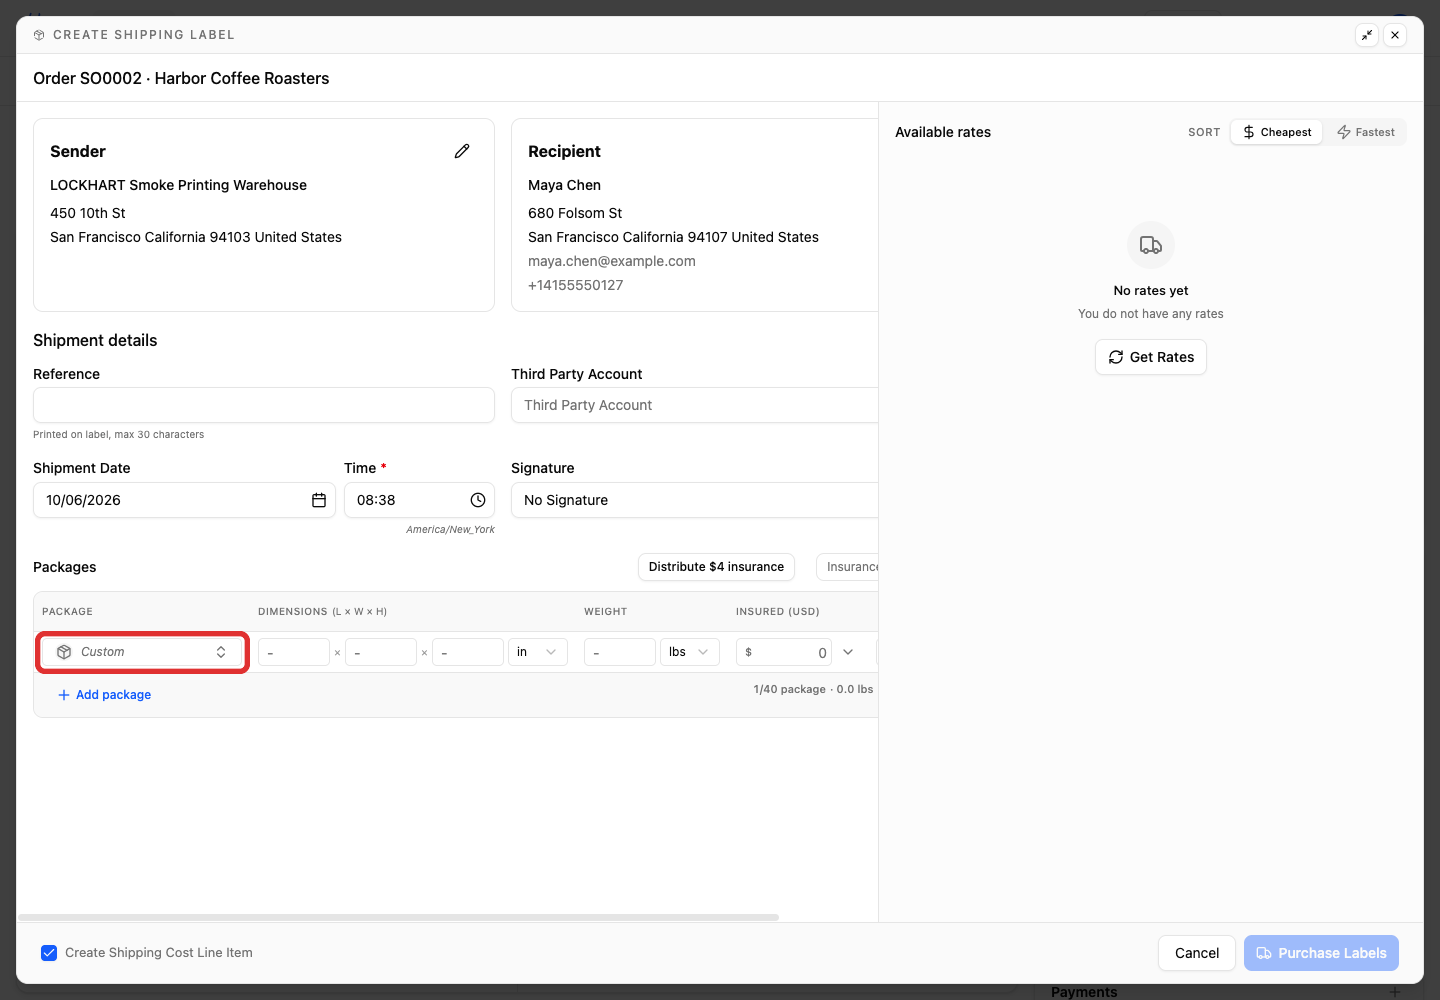
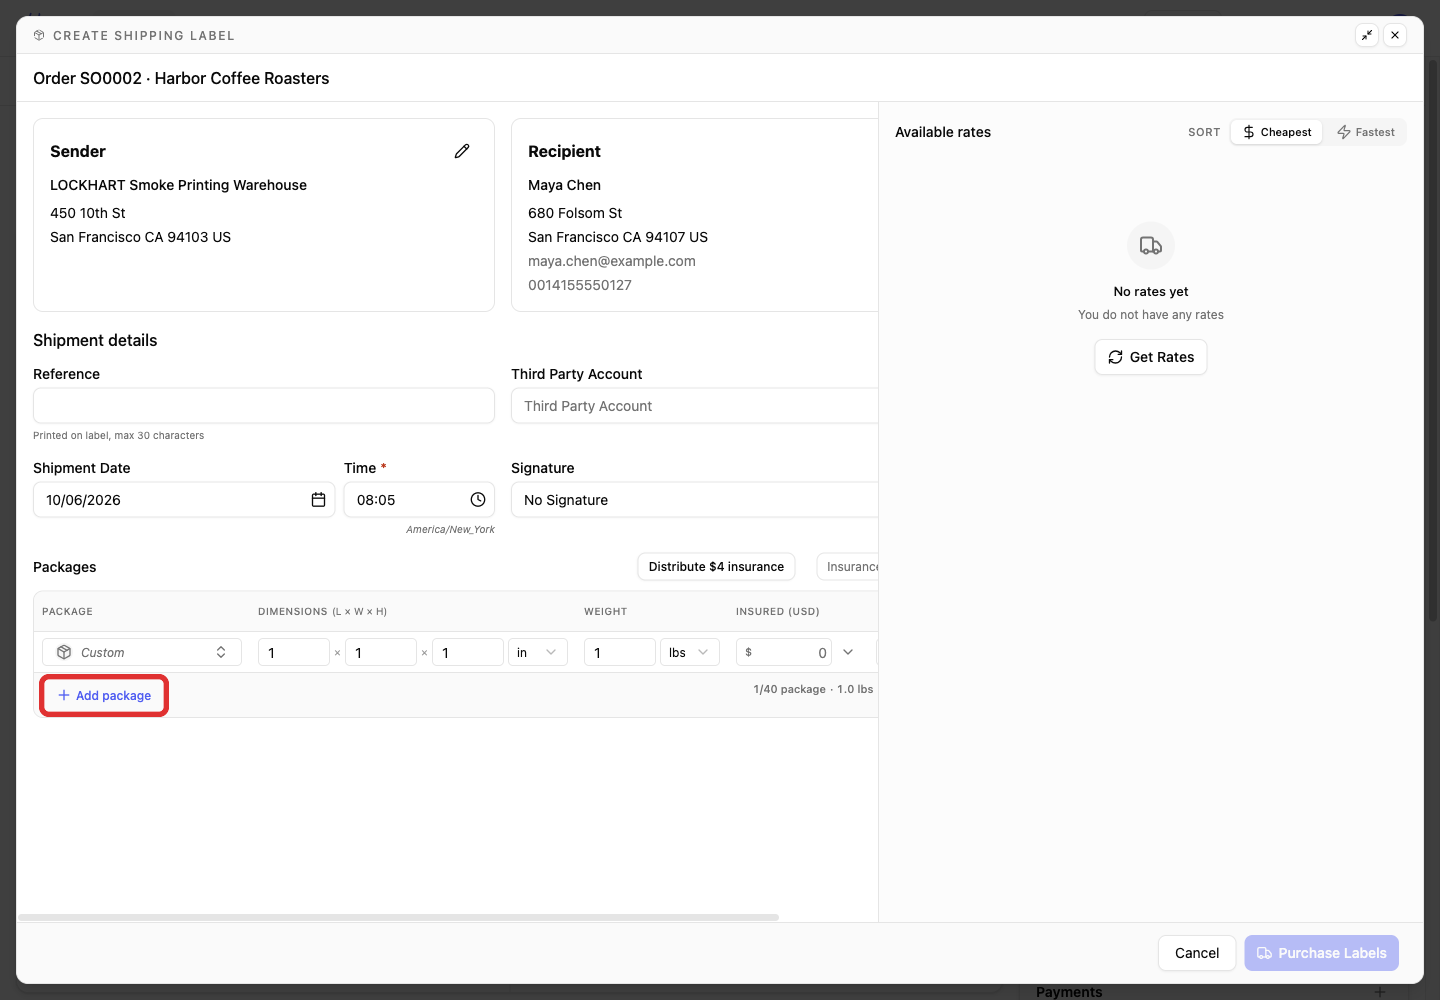
The Package row already says Custom when the dialog opens unless your shop has a default box.
-
Keep Custom to measure the parcel yourself, or open the Package menu for a saved box.
-
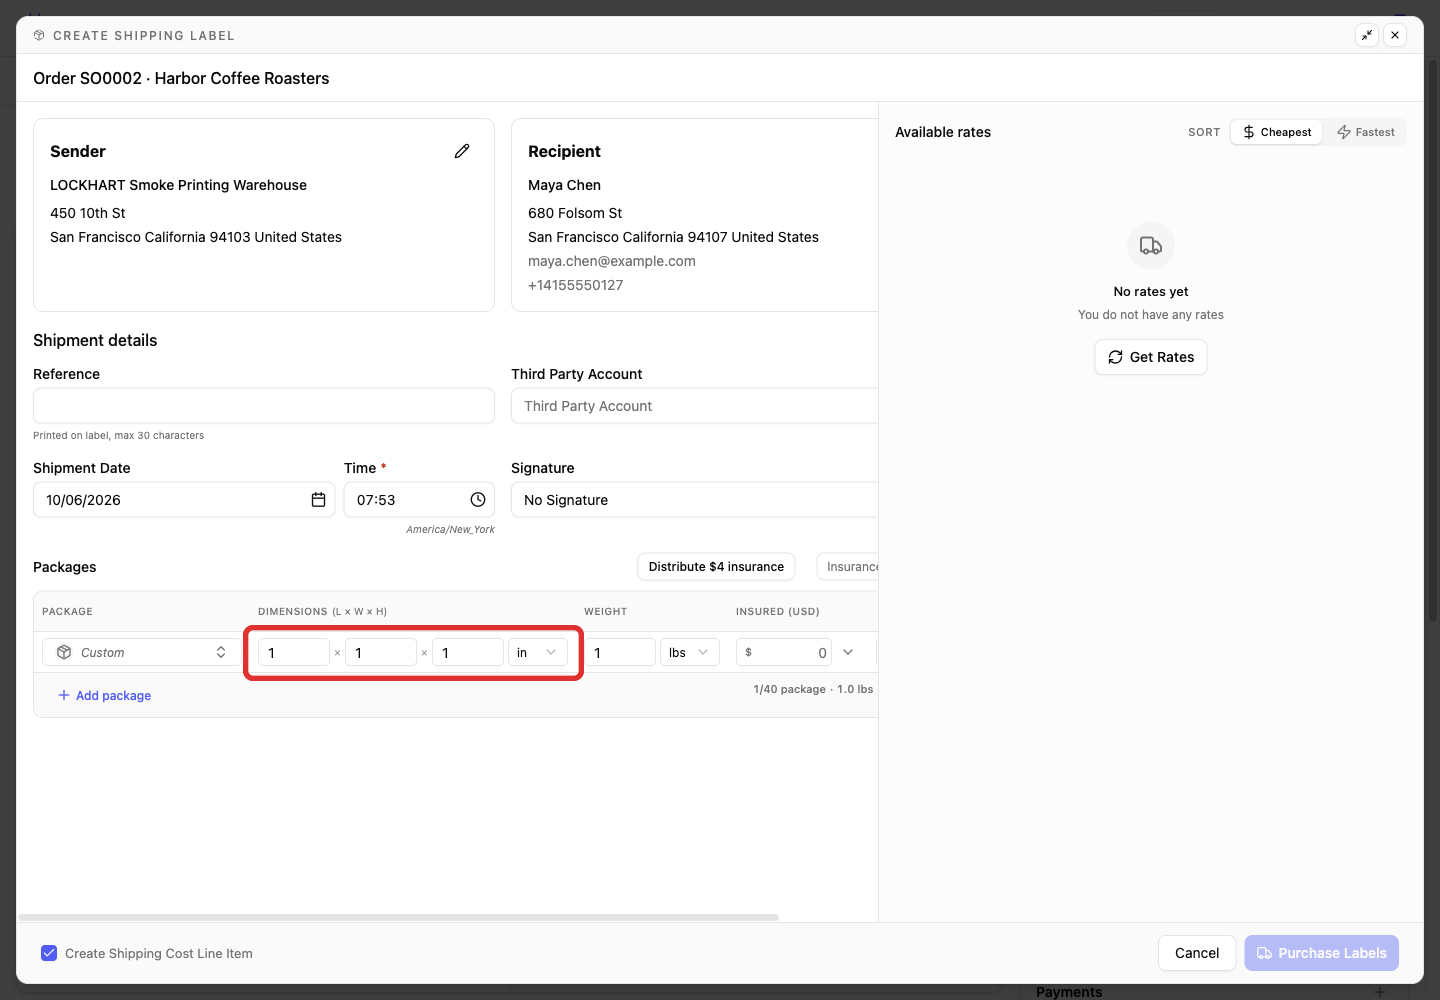
Enter the packed parcel's length, width and height, with the correct unit.
-
Enter the parcel's total weight, including its packaging.
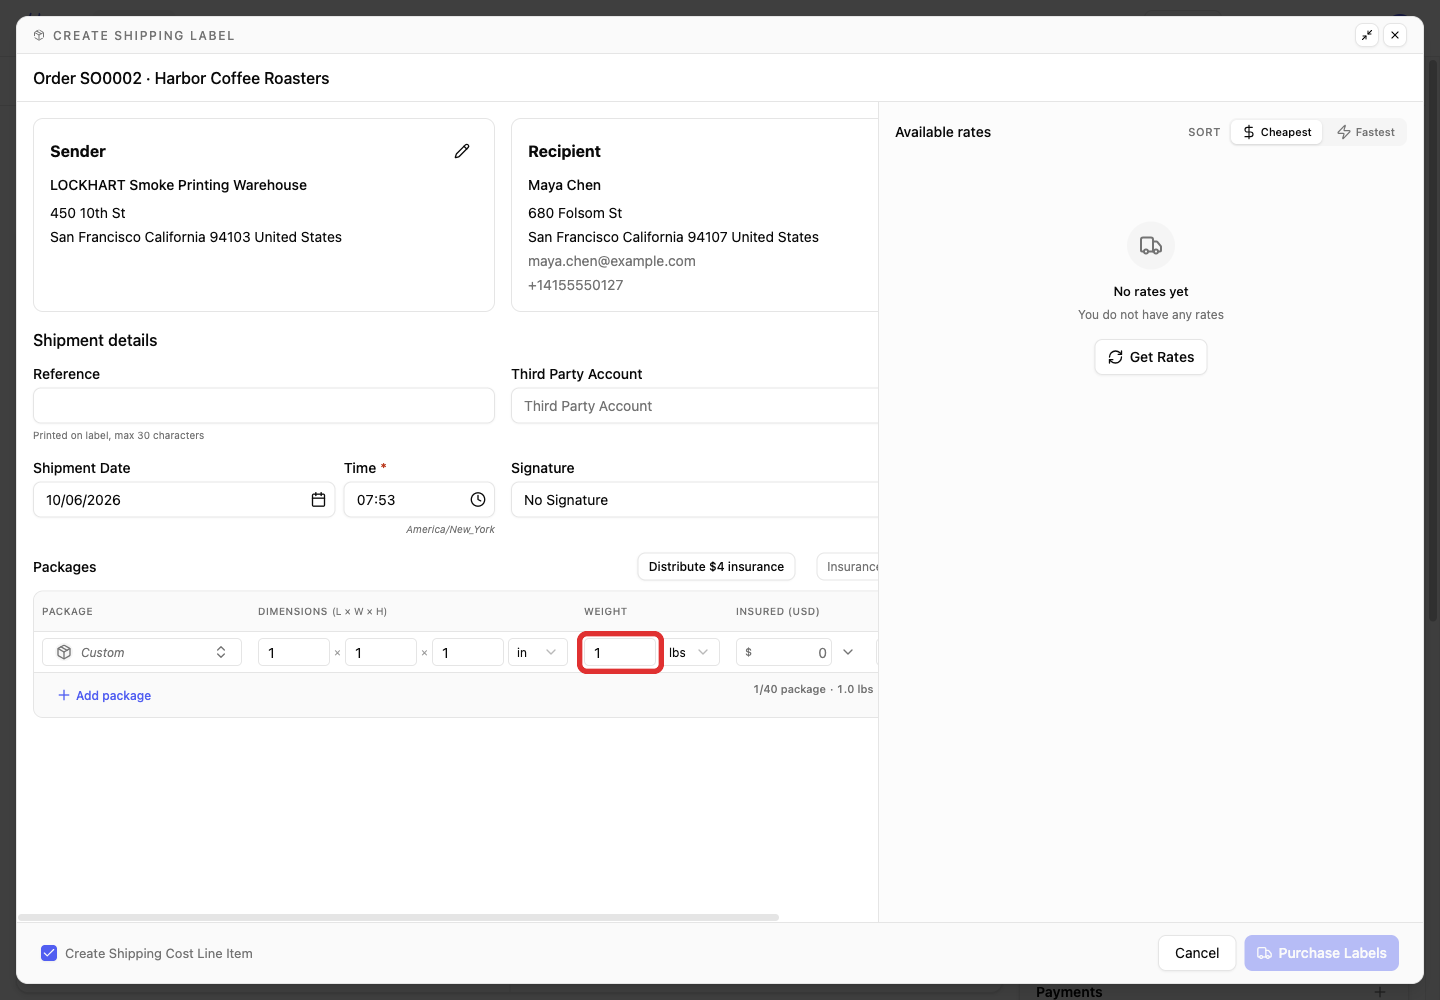
The dimensions and weight shown here belong to our small sample. Use your parcel's measurements.
-
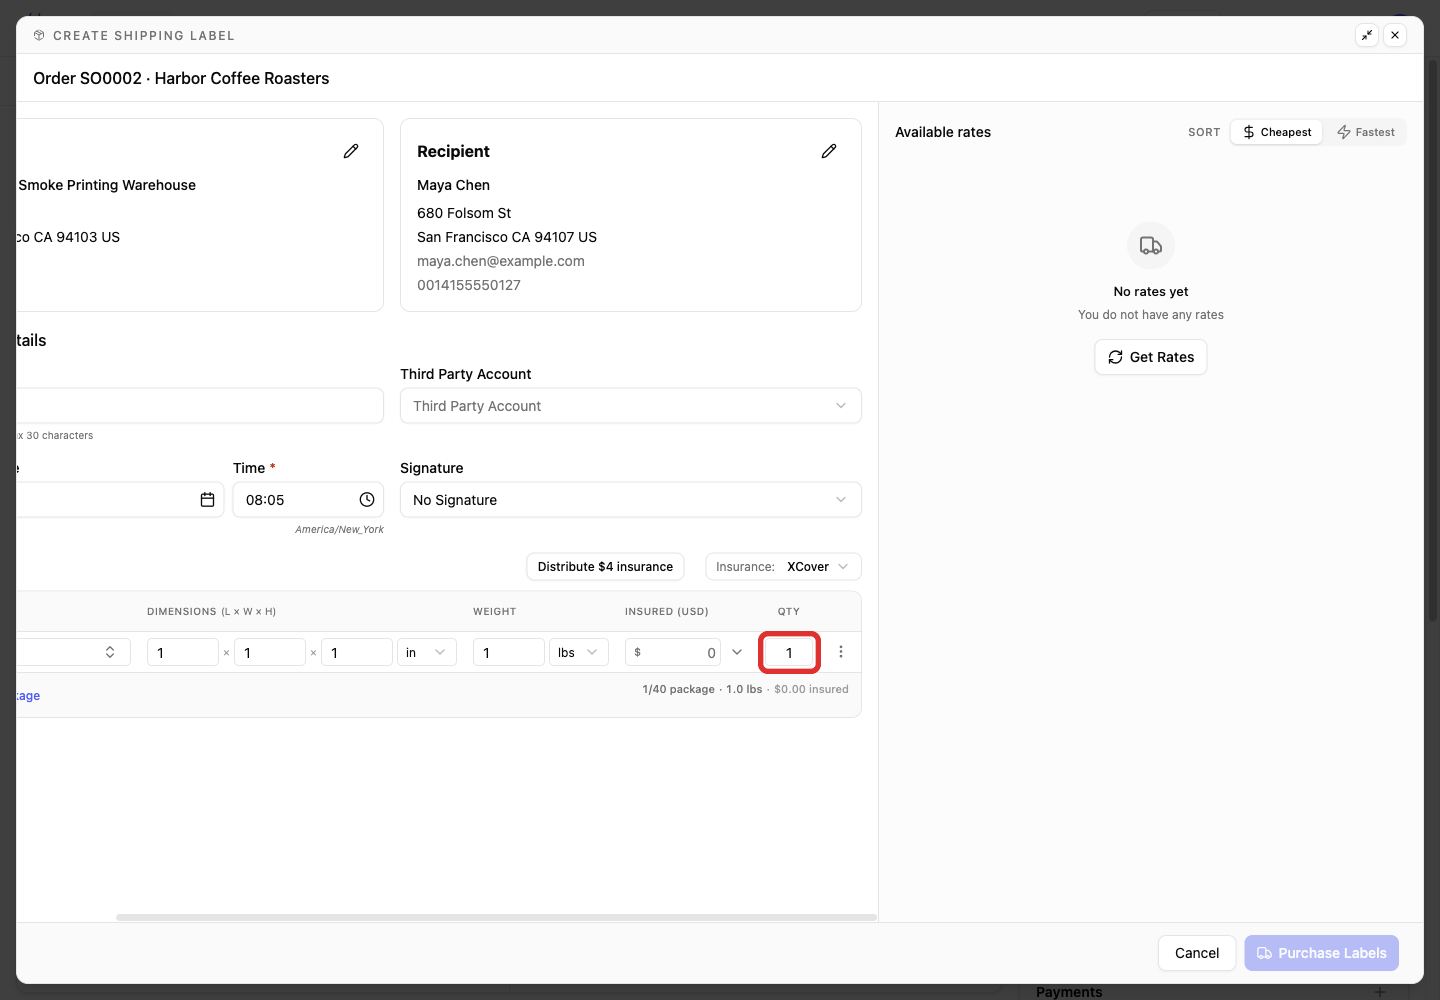
Set Qty to the number of parcels with these same measurements. Scroll horizontally to reach the column if needed.
-
If another parcel has different measurements, click Add package for another row.
-
Click Get Rates.
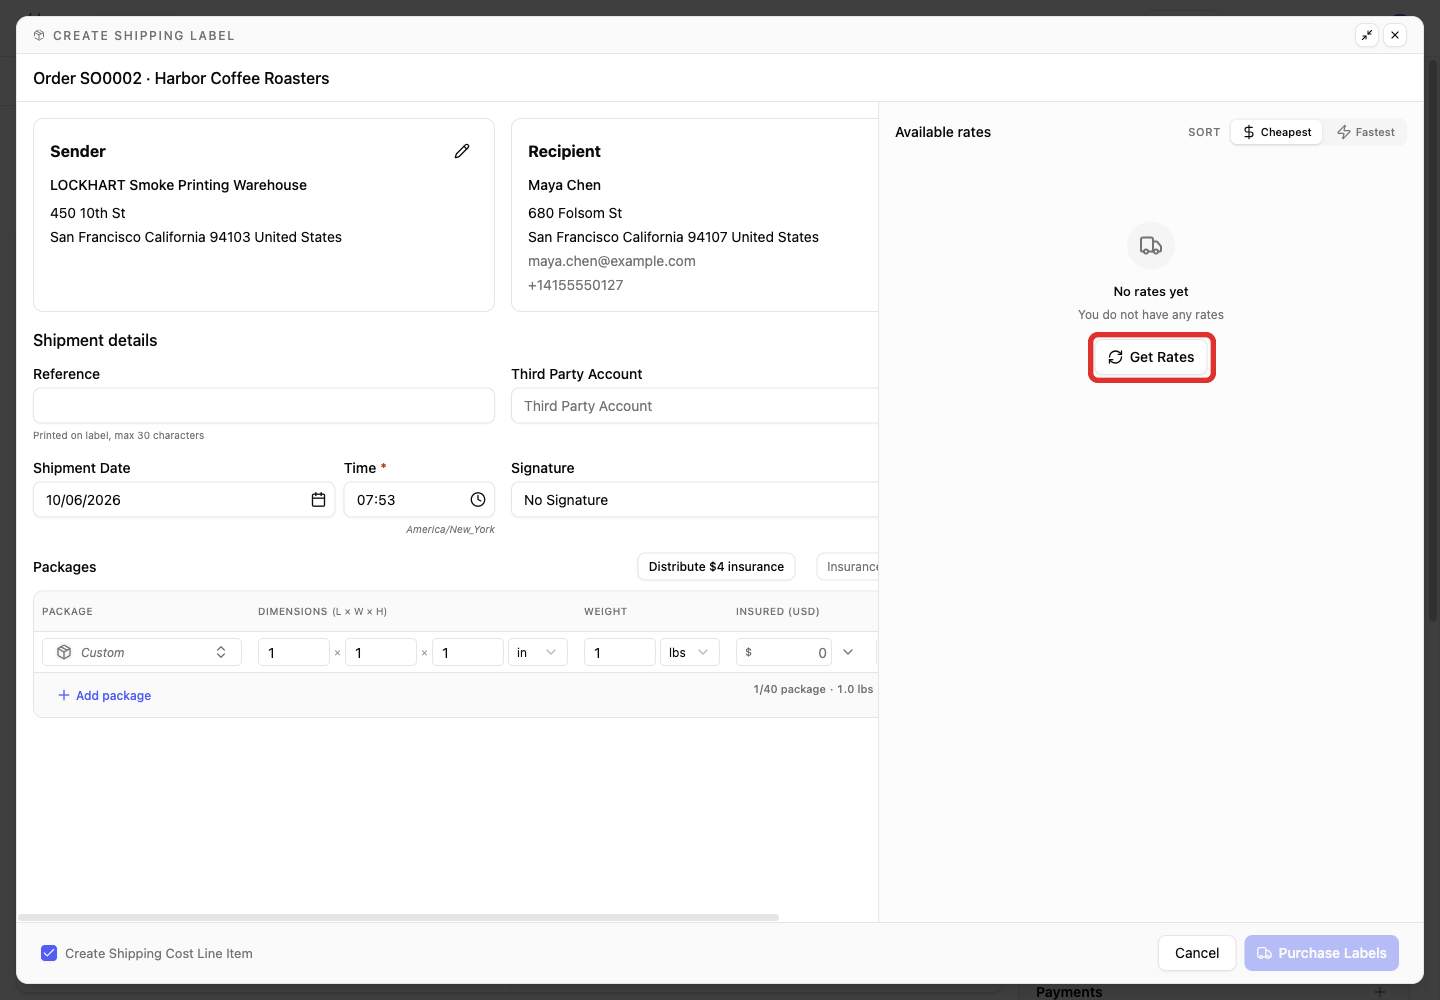
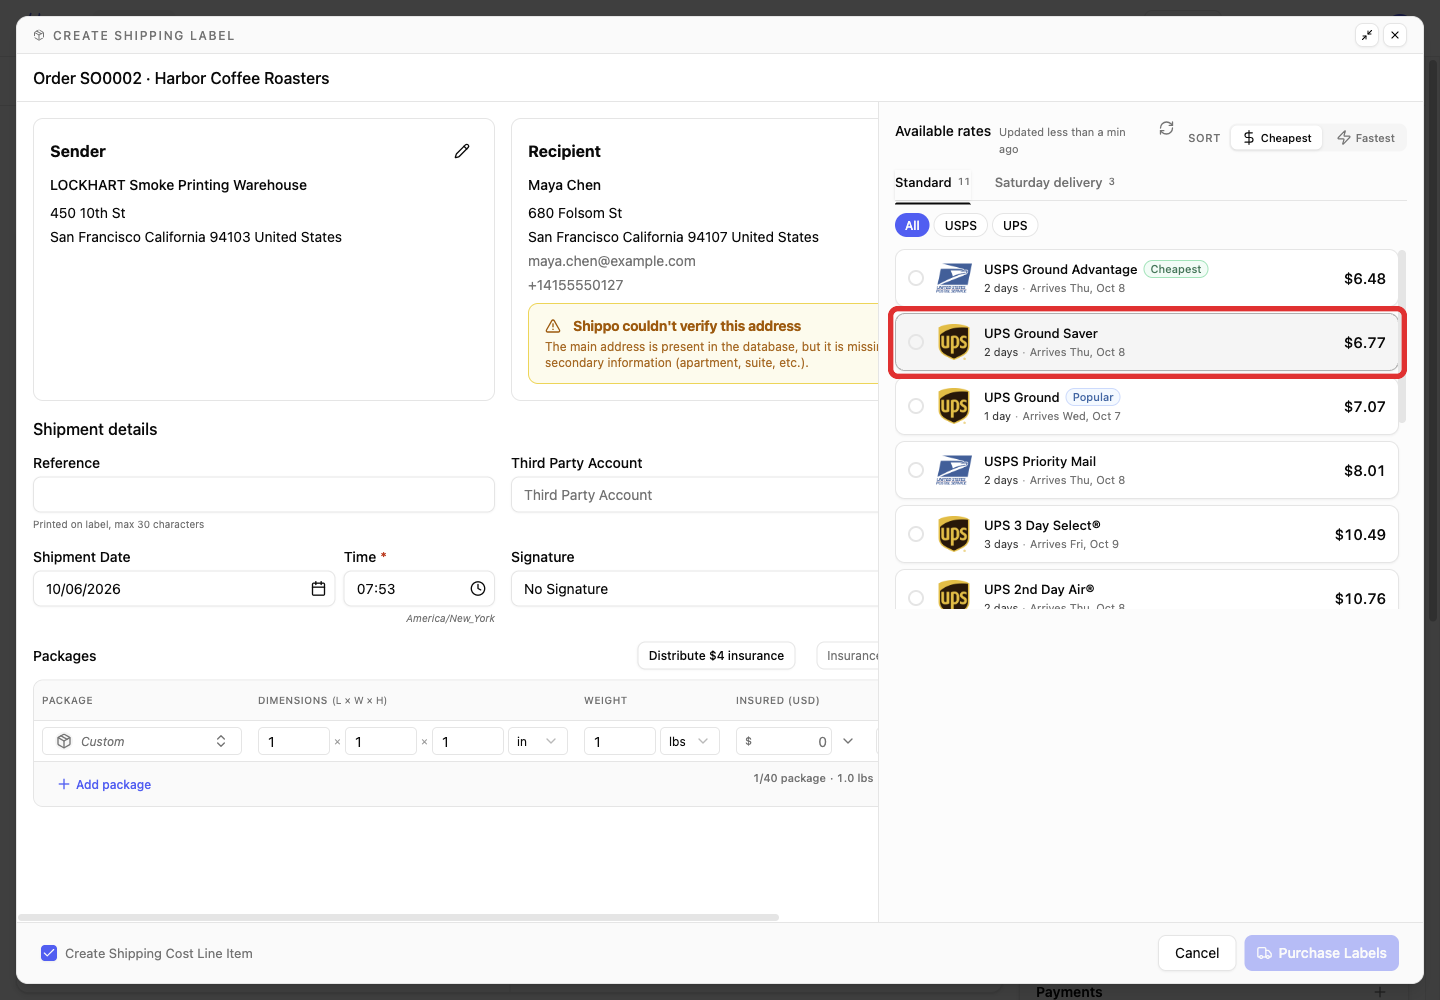
The rate list shows each service's price and estimated delivery time. Cheapest and Fastest change the sort order; the carrier buttons narrow the list. Standard and Saturday delivery have separate rate lists.

The notes from Shippo are the carriers' messages about these rates, such as services an account cannot use or a surcharge. Read them before you choose.

-
Select the service you want.
-
Leave Create Shipping Cost Line Item selected to record the cost with the shipment, or clear it if you do not need that cost line.
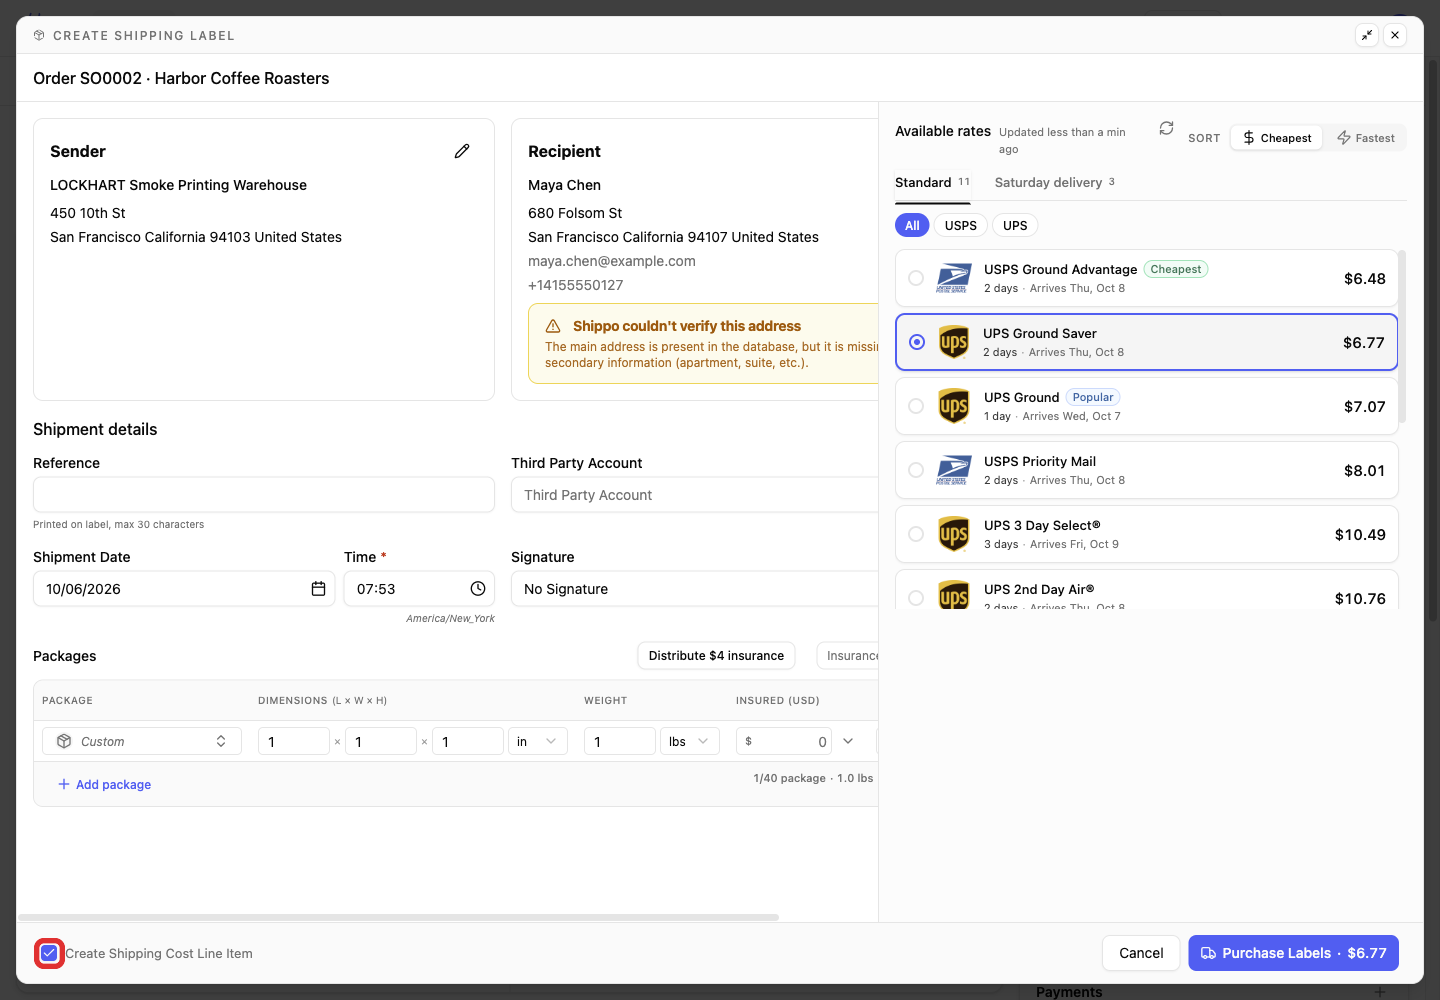
It records what you paid as a Shipping Cost row on the shipment. It is not a charge to the customer on its own. When Auto Invoice is on, YoPrint can add the shipping charge to the invoice.

-
Check the service and total, then click Purchase Labels.
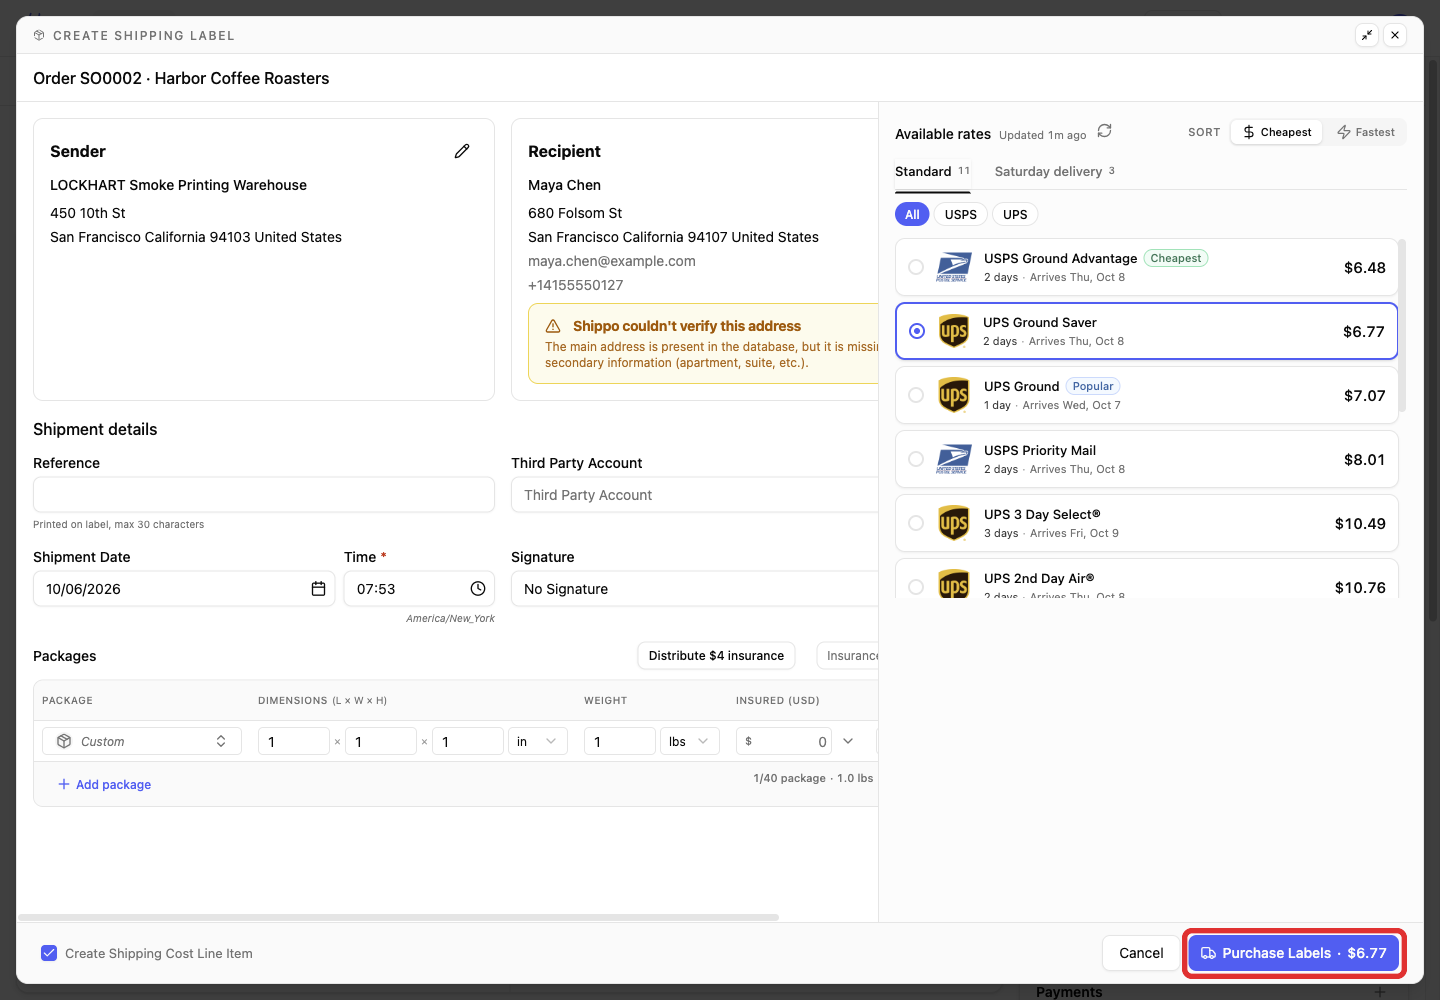
Purchase Labels buys the label as soon as you click it. There is no second confirmation.
Package Details opens with the carrier, service, parcel size and tracking number.

Print and track the label
After purchase, Package Details opens with the new label.
-
Click the printer icon beside the carrier and service.
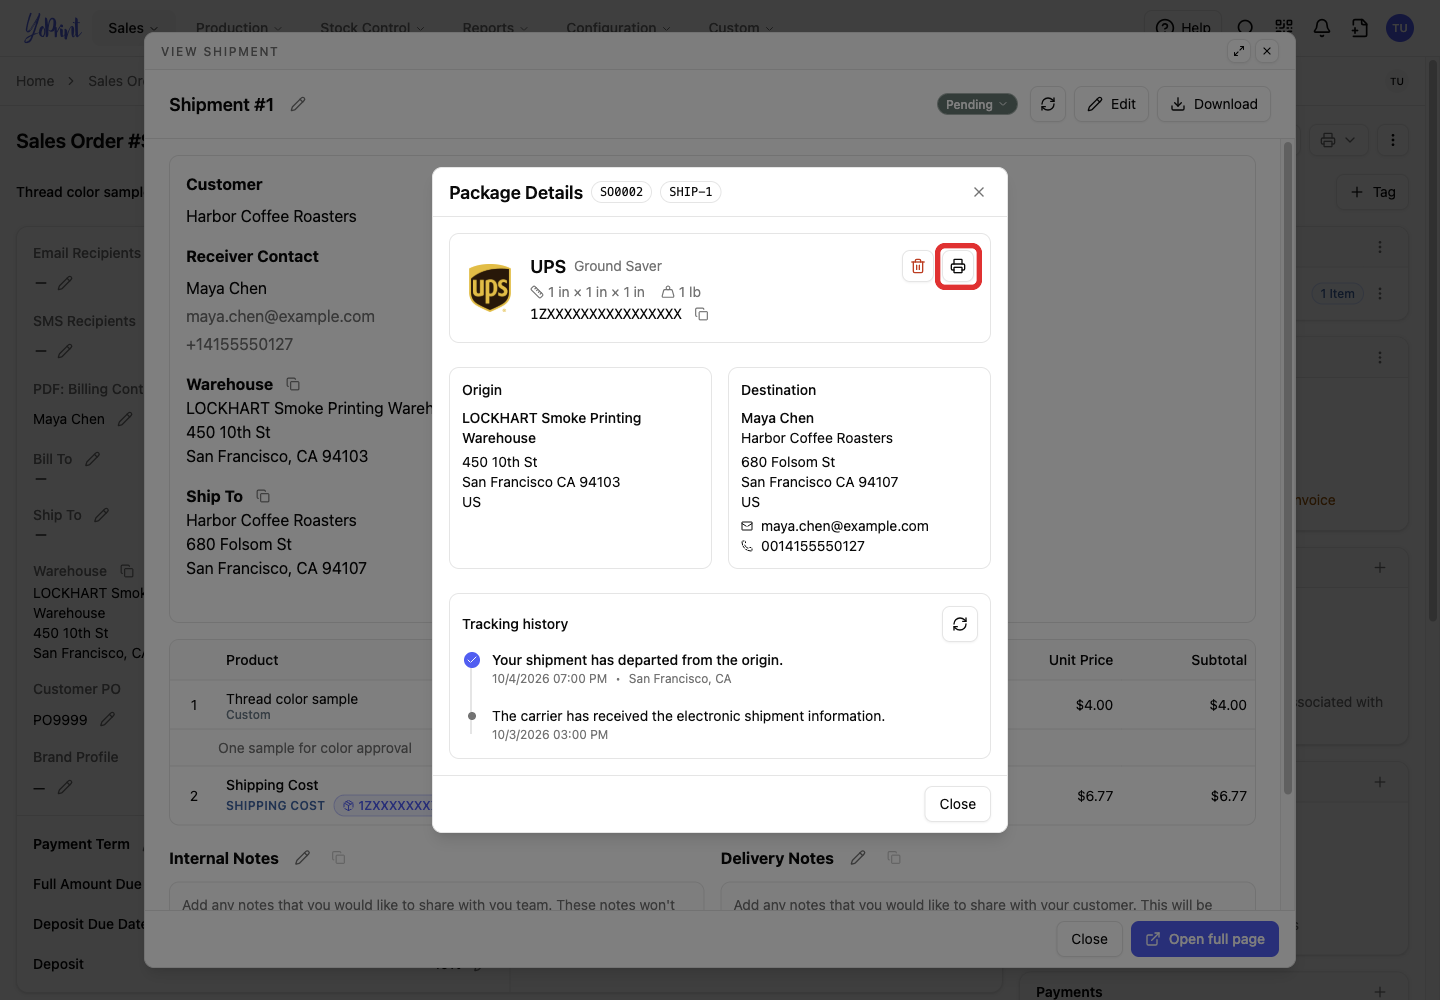
The label PDF opens in another browser tab. Use the PDF viewer's print or download controls to keep a copy. The label PDF is 4 x 6 inches, the size thermal label printers use.

-
Back in Package Details, use the refresh icon beside Tracking history to check for updates.
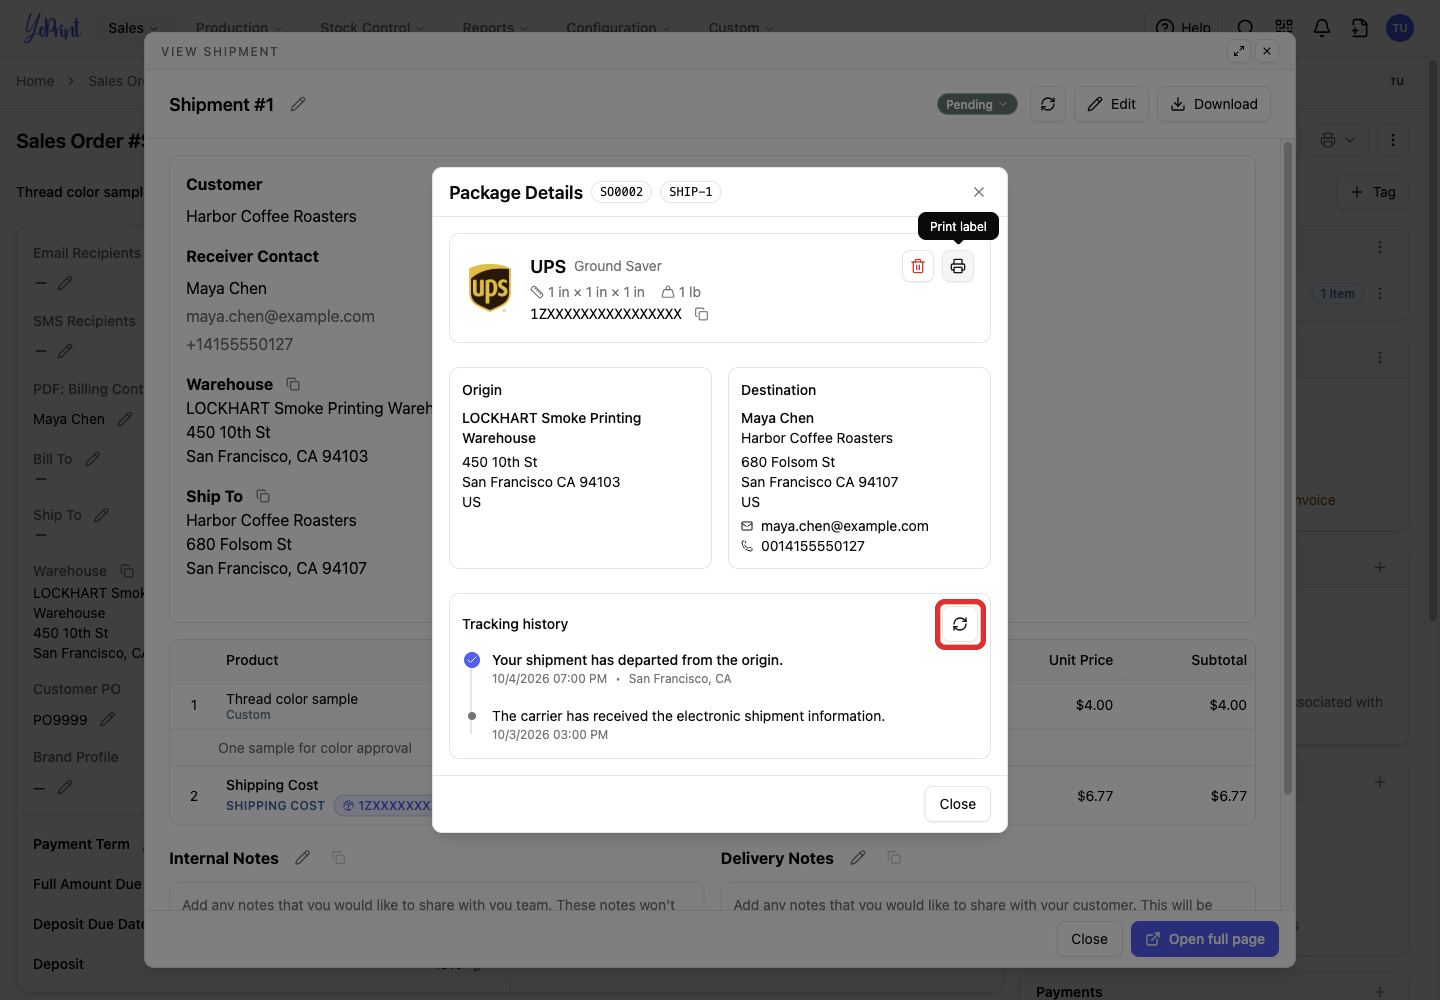
-
Click Close to return to the shipment.
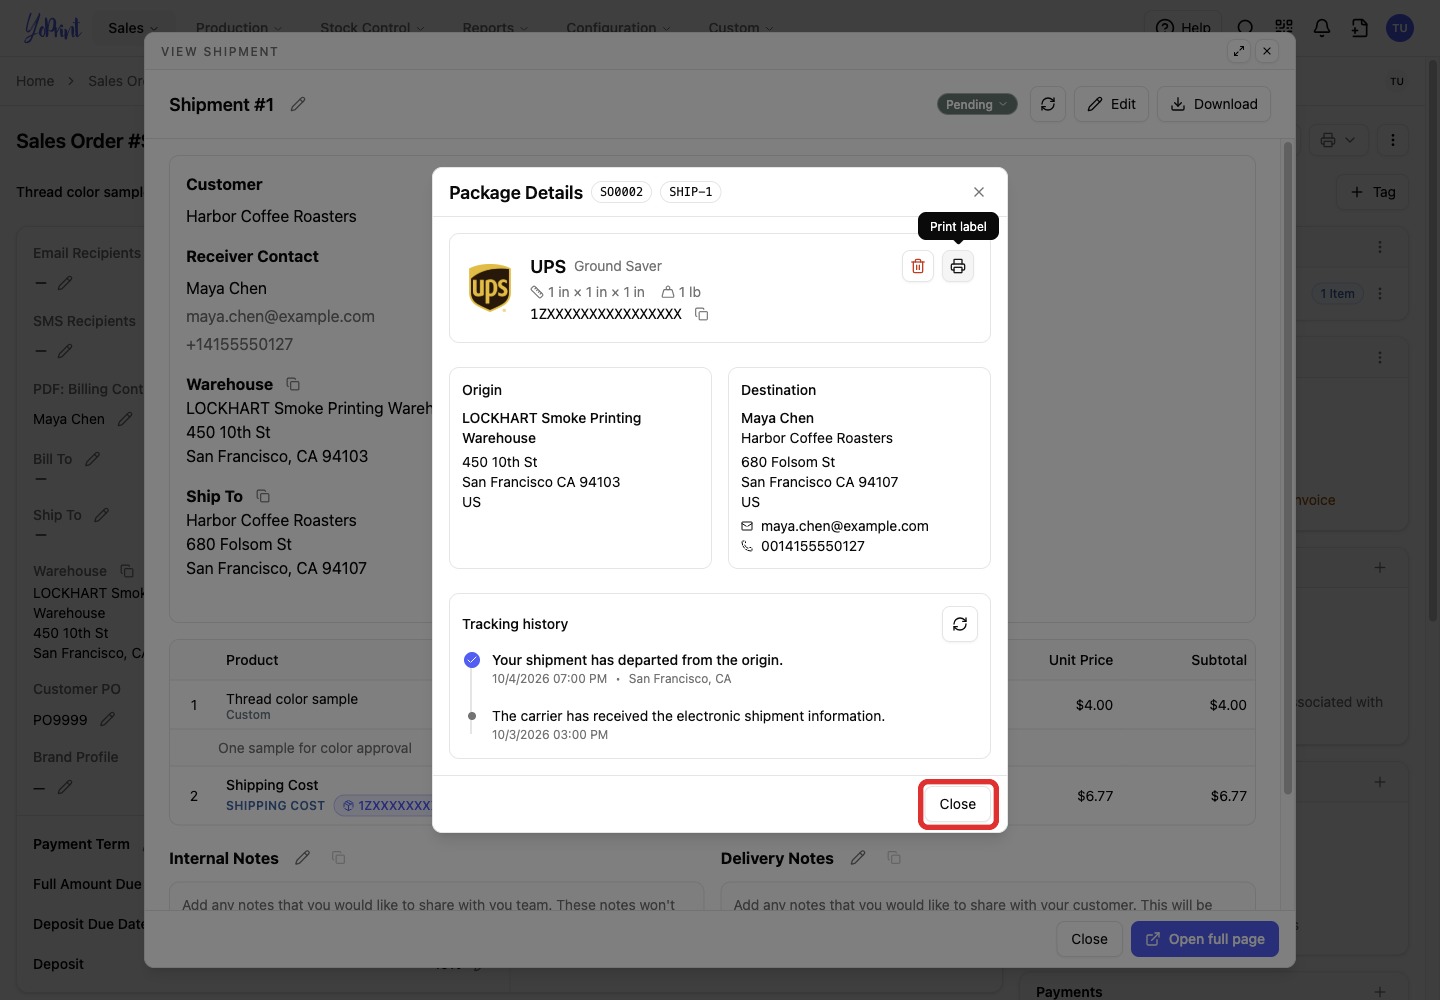
The tracking number appears under Shipping Package. If you selected the cost-line option, Shipping Cost also appears in the shipment's items. Buying a label does not email or text your customer the tracking number. For Shopify orders, see Ship a Shopify Order and Send Tracking Back to Shopify.
-
To return to the label later, click its tracking number under Shipping Package.
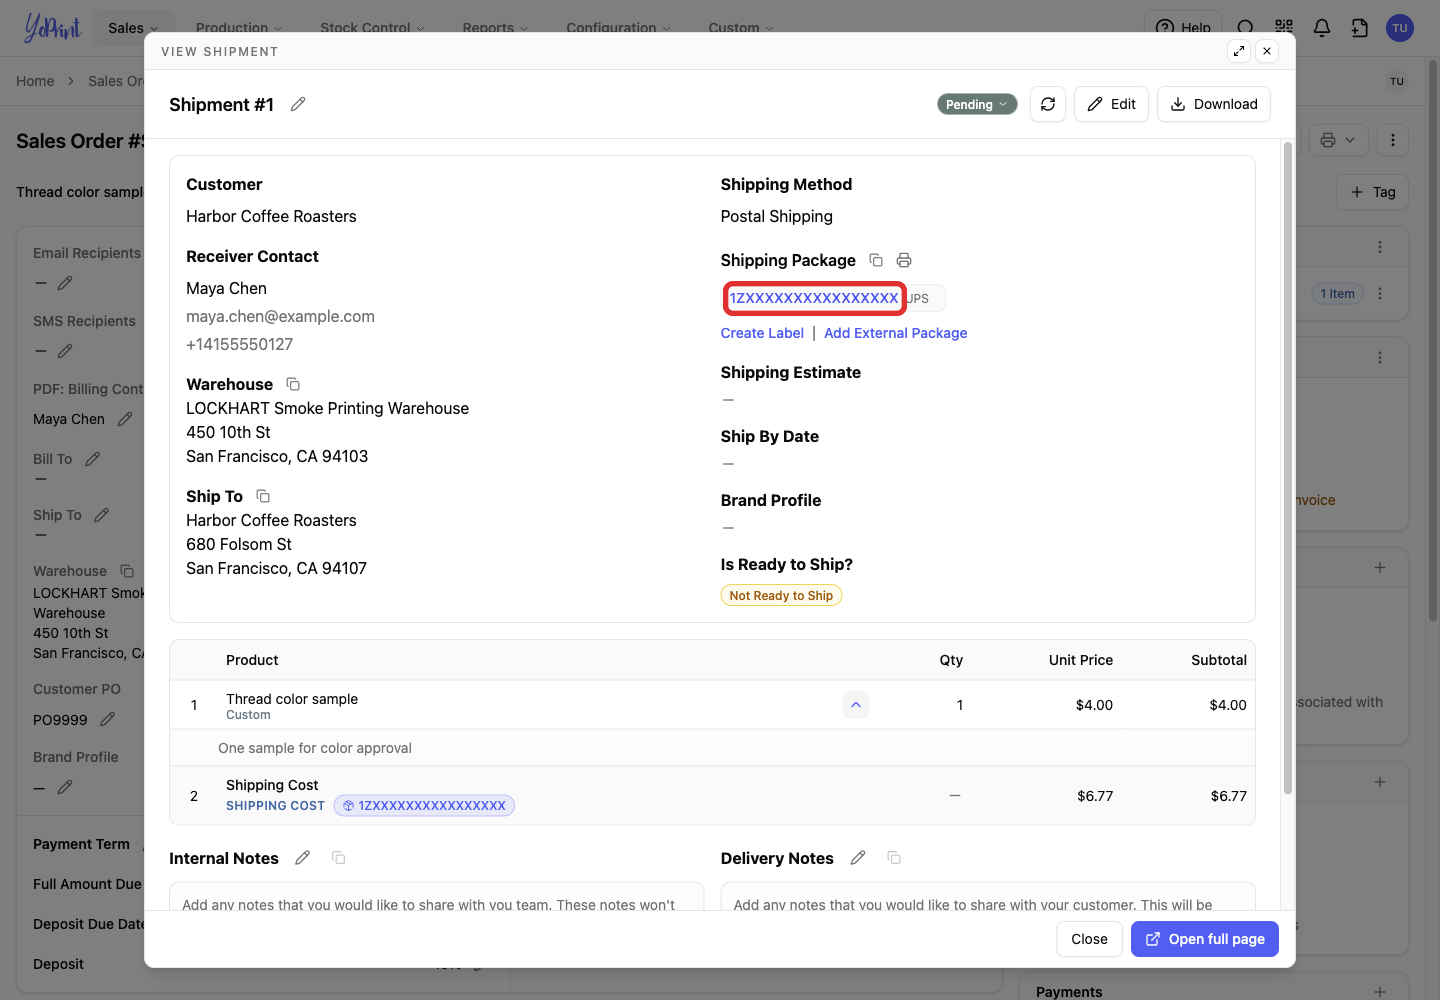
View Packages shows the label and tracking history, with the same print and refresh controls.
Void a label you no longer need
To change a purchased label's address, parcel details or service, void the unwanted label and get a fresh rate for its replacement.
From the label’s View Packages screen:
-
Click the trash icon beside the label you want to remove.
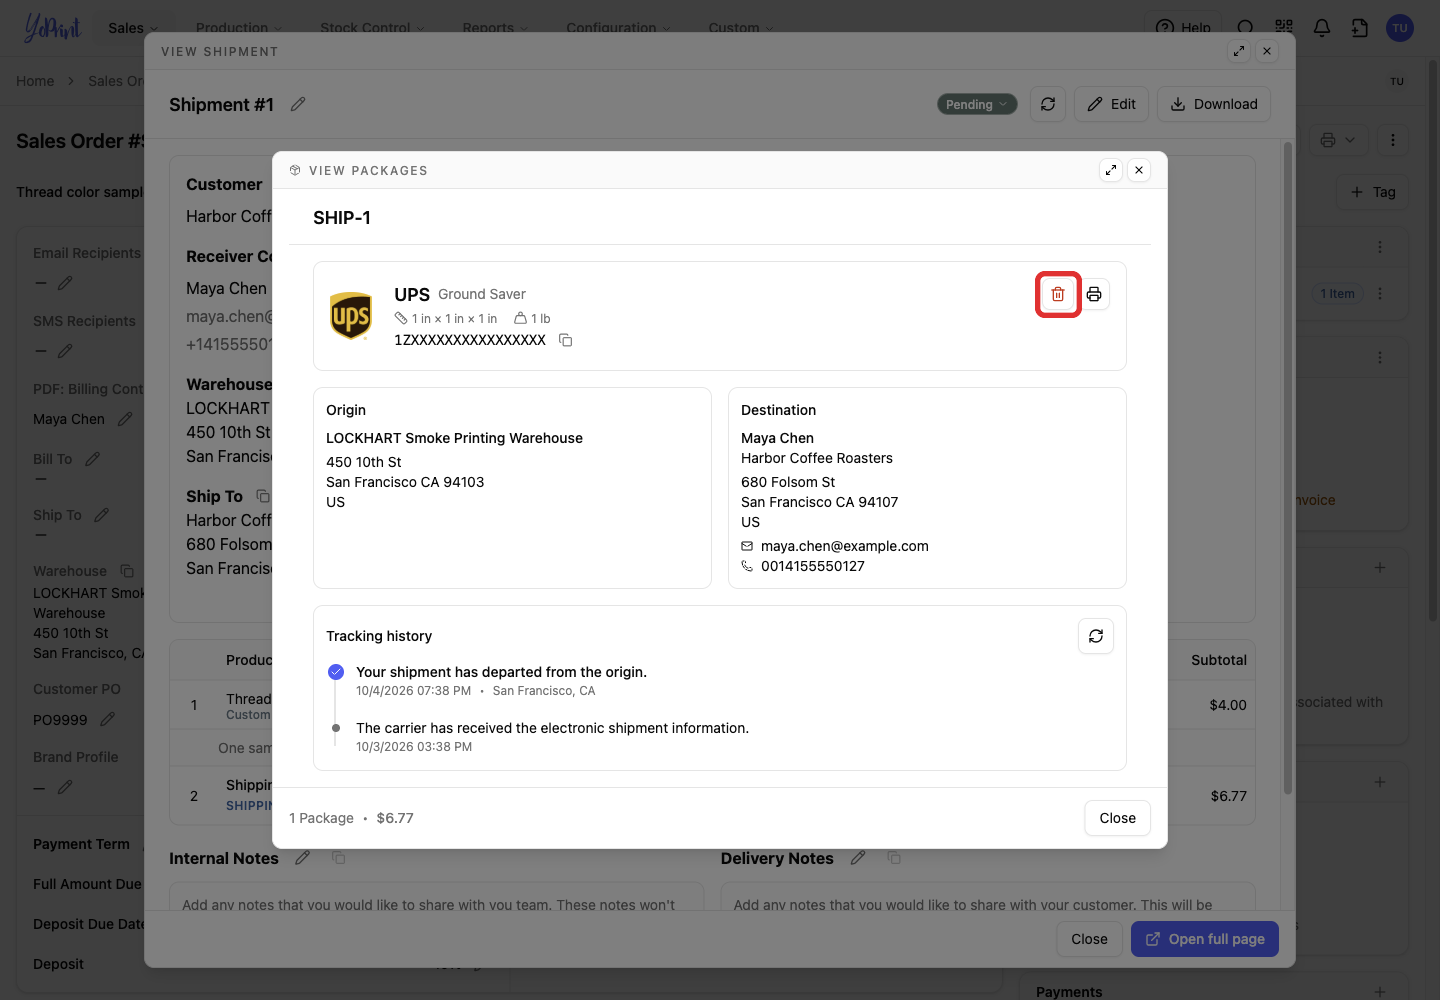
-
Choose Keep Shipping Cost to retain the cost line without its label link, or Delete Shipping Cost to remove both.
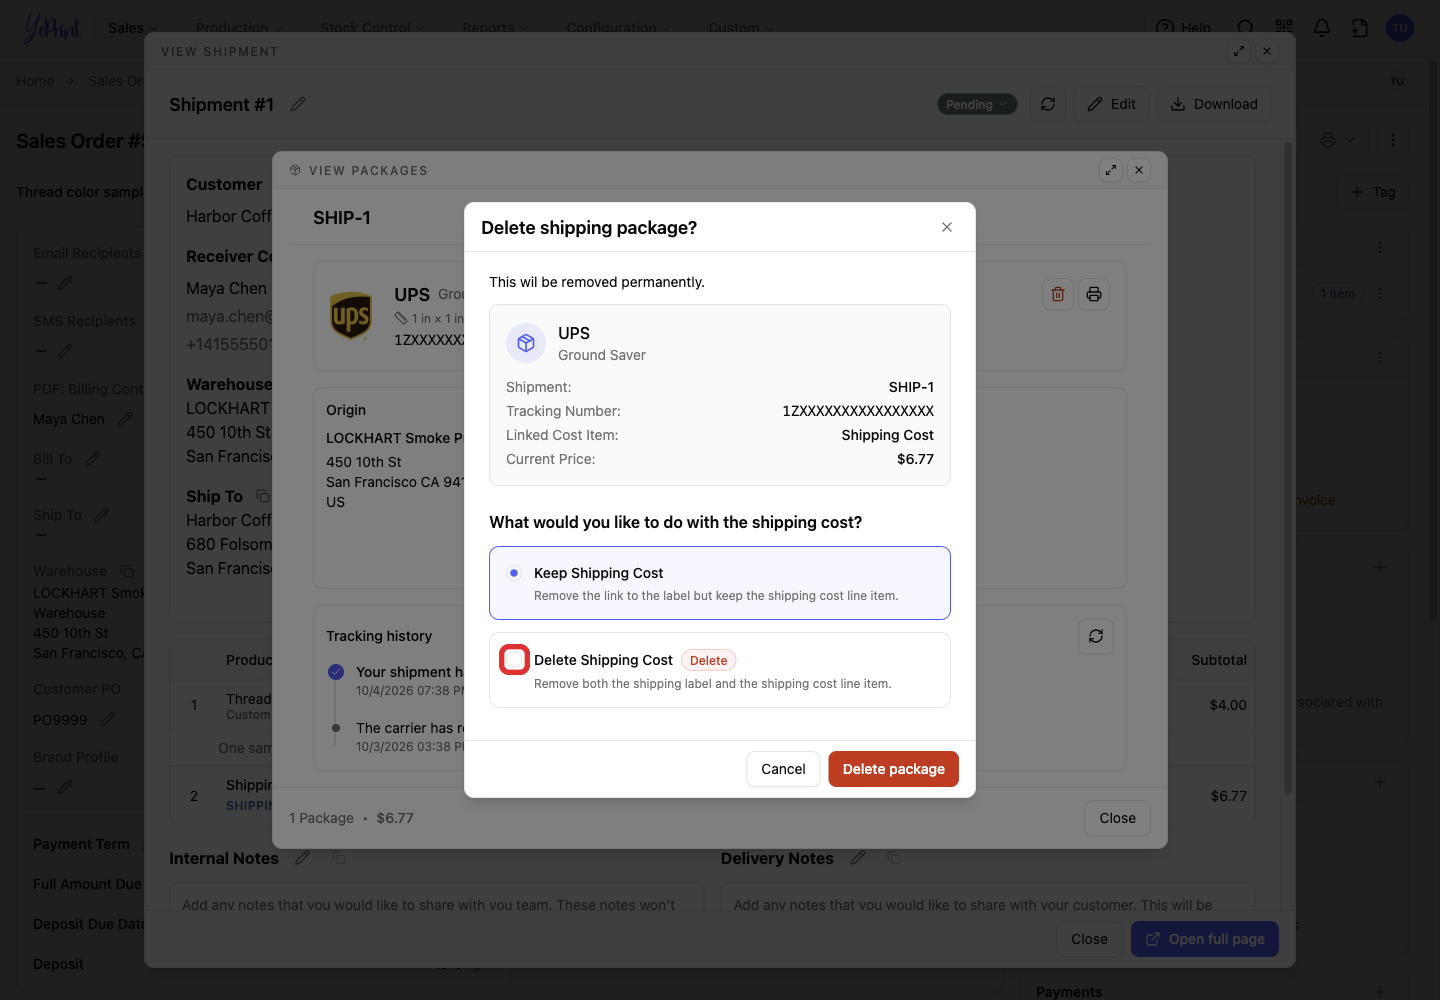
-
Check the tracking number in the confirmation, then click Delete package.
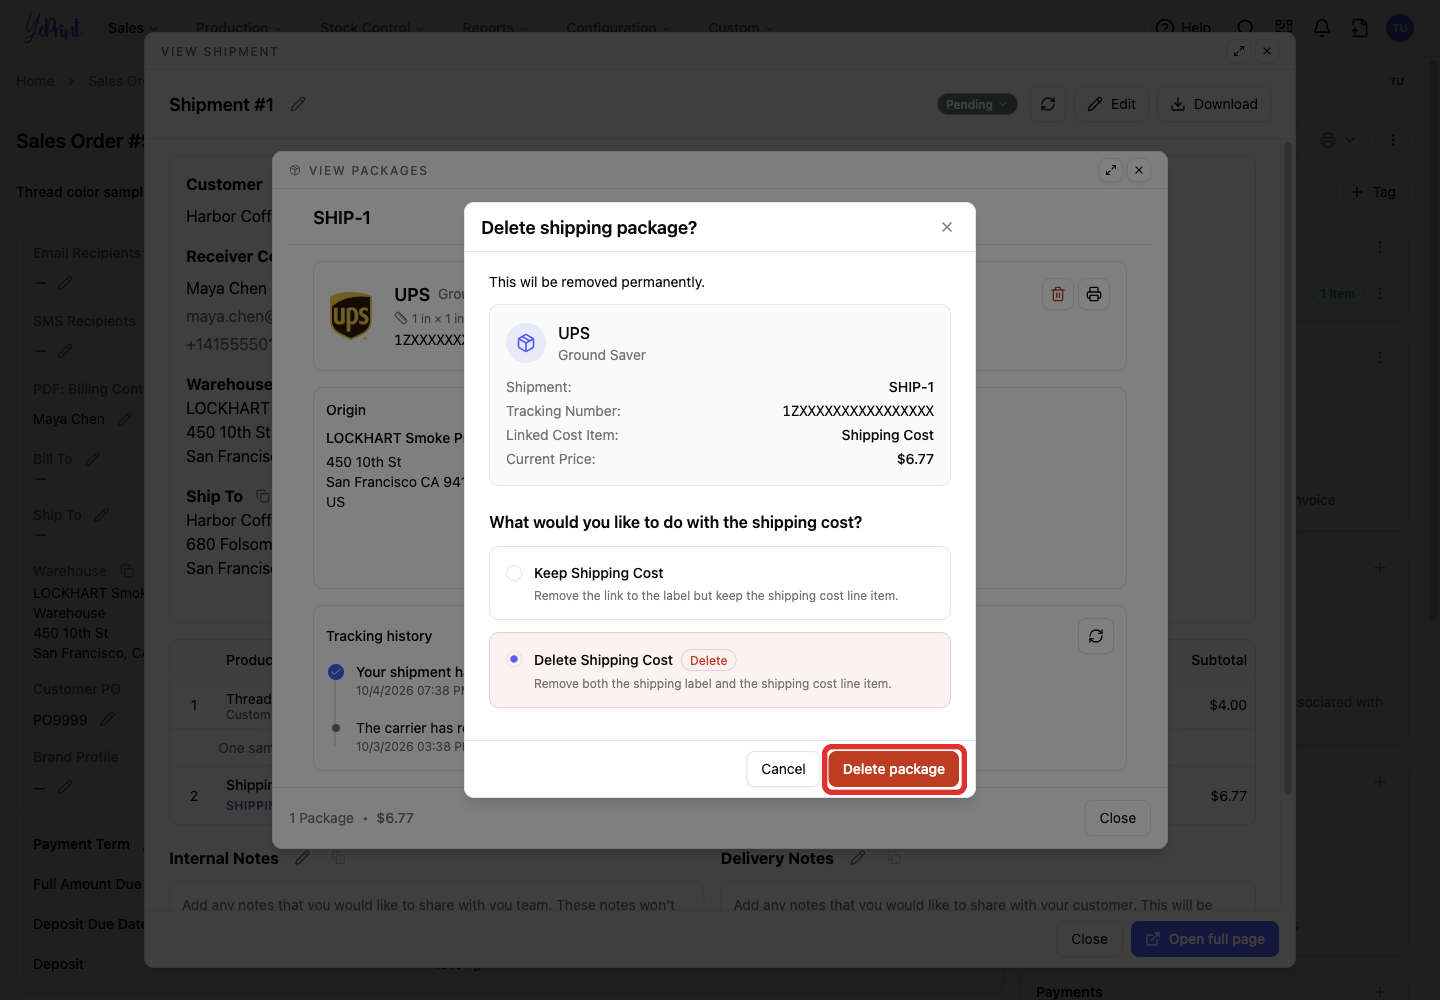
The package is removed from the shipment. With Delete Shipping Cost, its linked cost line is removed too. YoPrint also requests a refund from Shippo; removing the package does not mean the carrier refund has completed. How long a carrier allows a refund and where the money goes are the carrier's and Shippo's rules.

Save a shipping estimate
An estimate is useful while planning the shipment. It does not create a shipping label. The estimate dialog has the same sender, recipient, date and package fields as the label dialog. The estimate lives inside the shipment editor, so it starts with Edit.

-
On the shipment, click Edit.
-
Click Shipping Estimate.
-
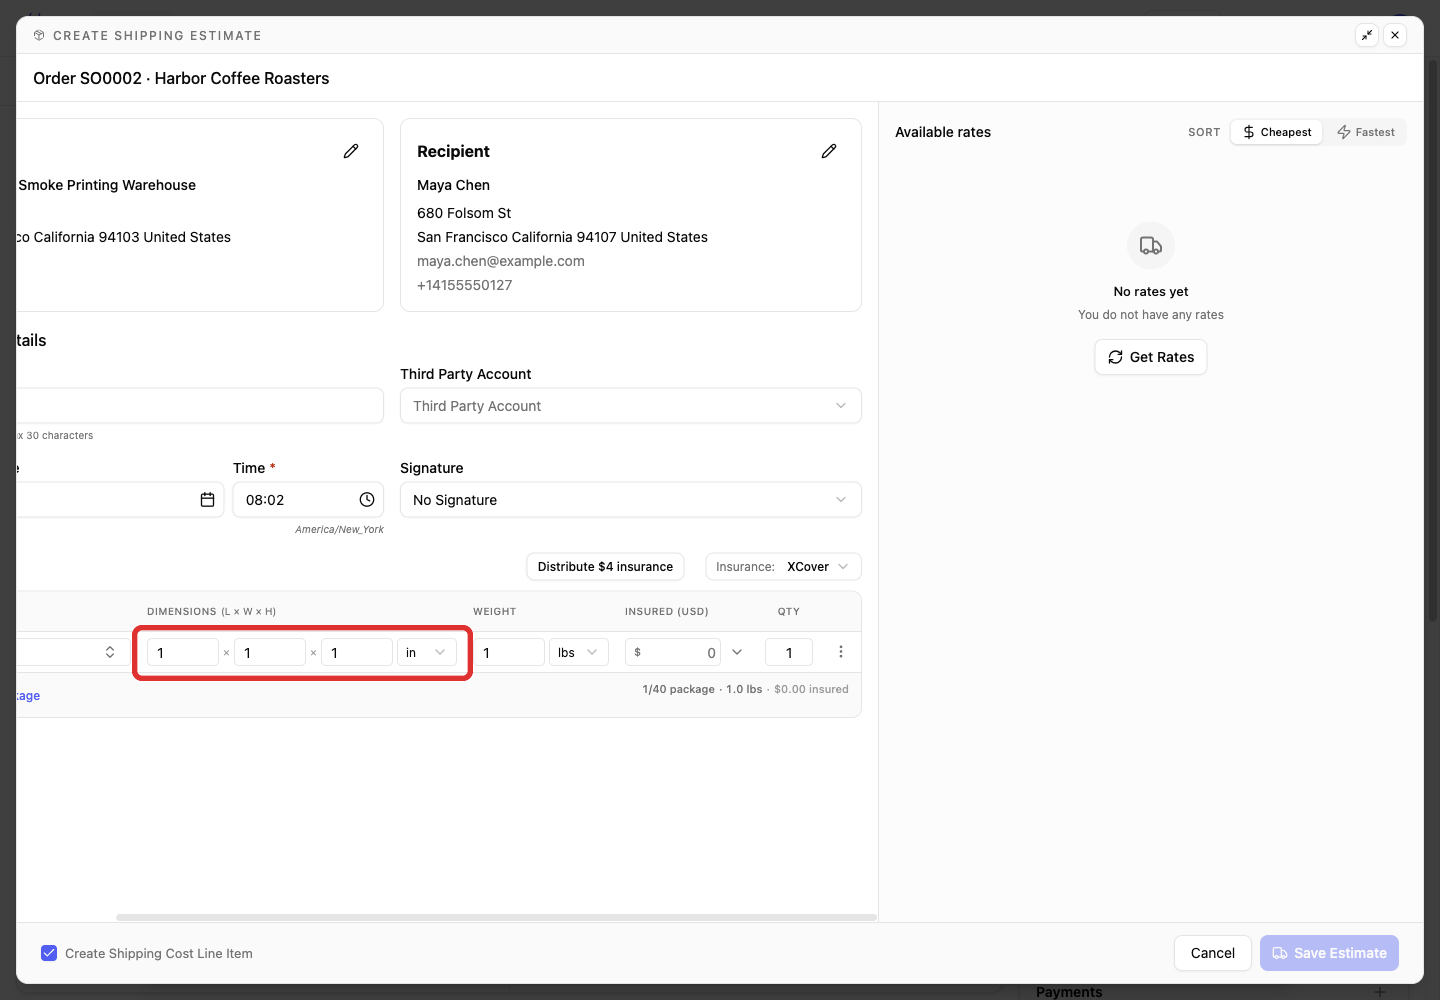
For a Custom parcel, enter its length, width and height with the correct unit.
-
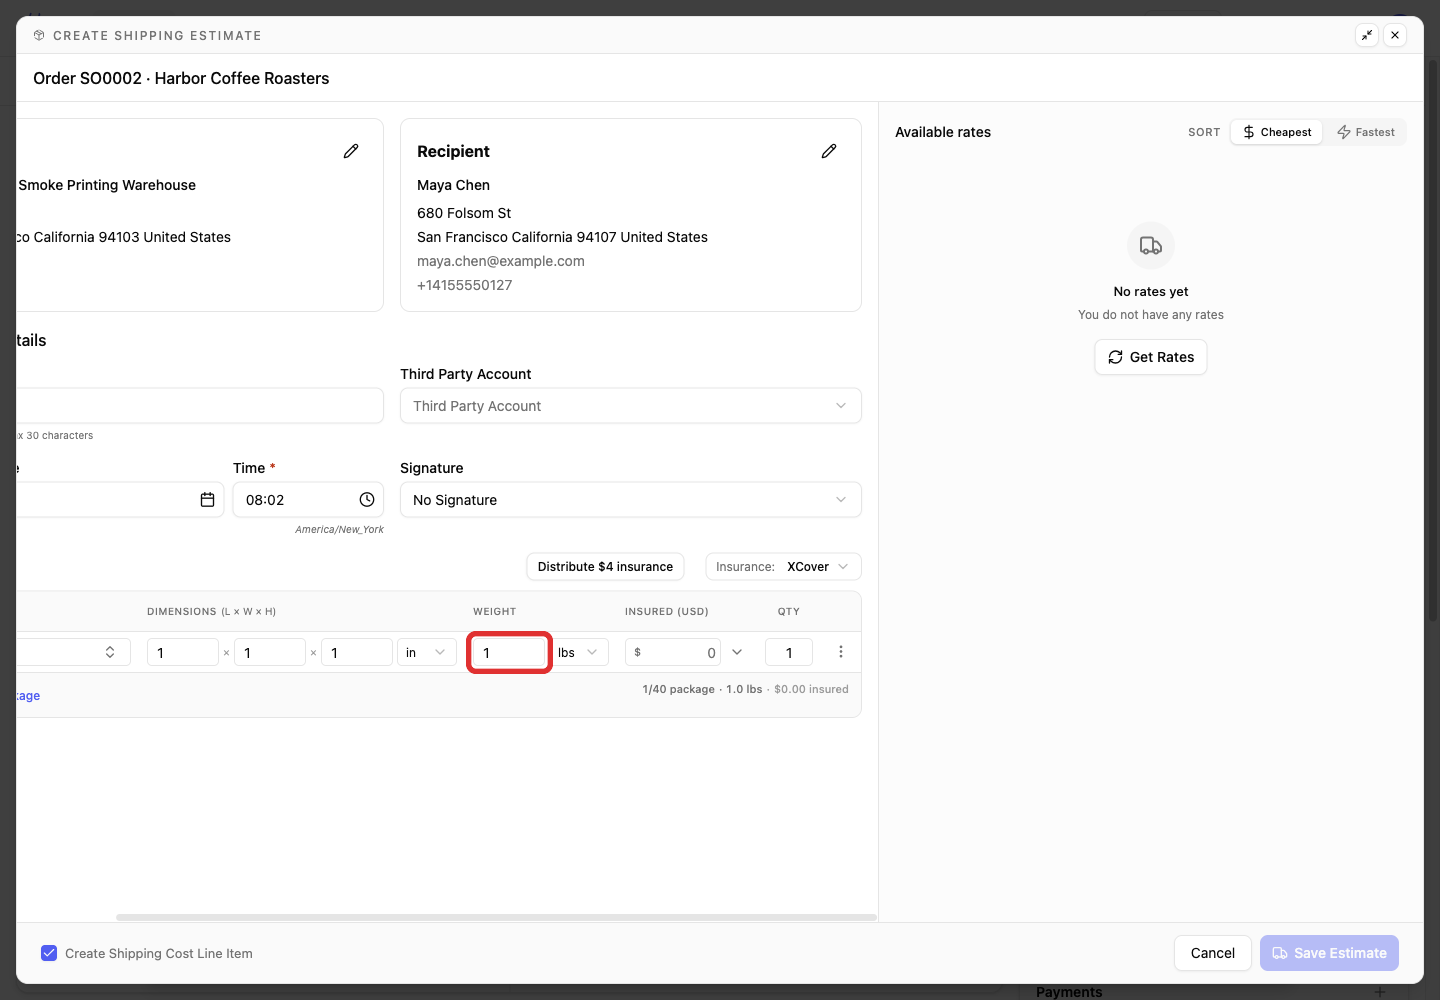
Enter the packed parcel's actual weight.
-
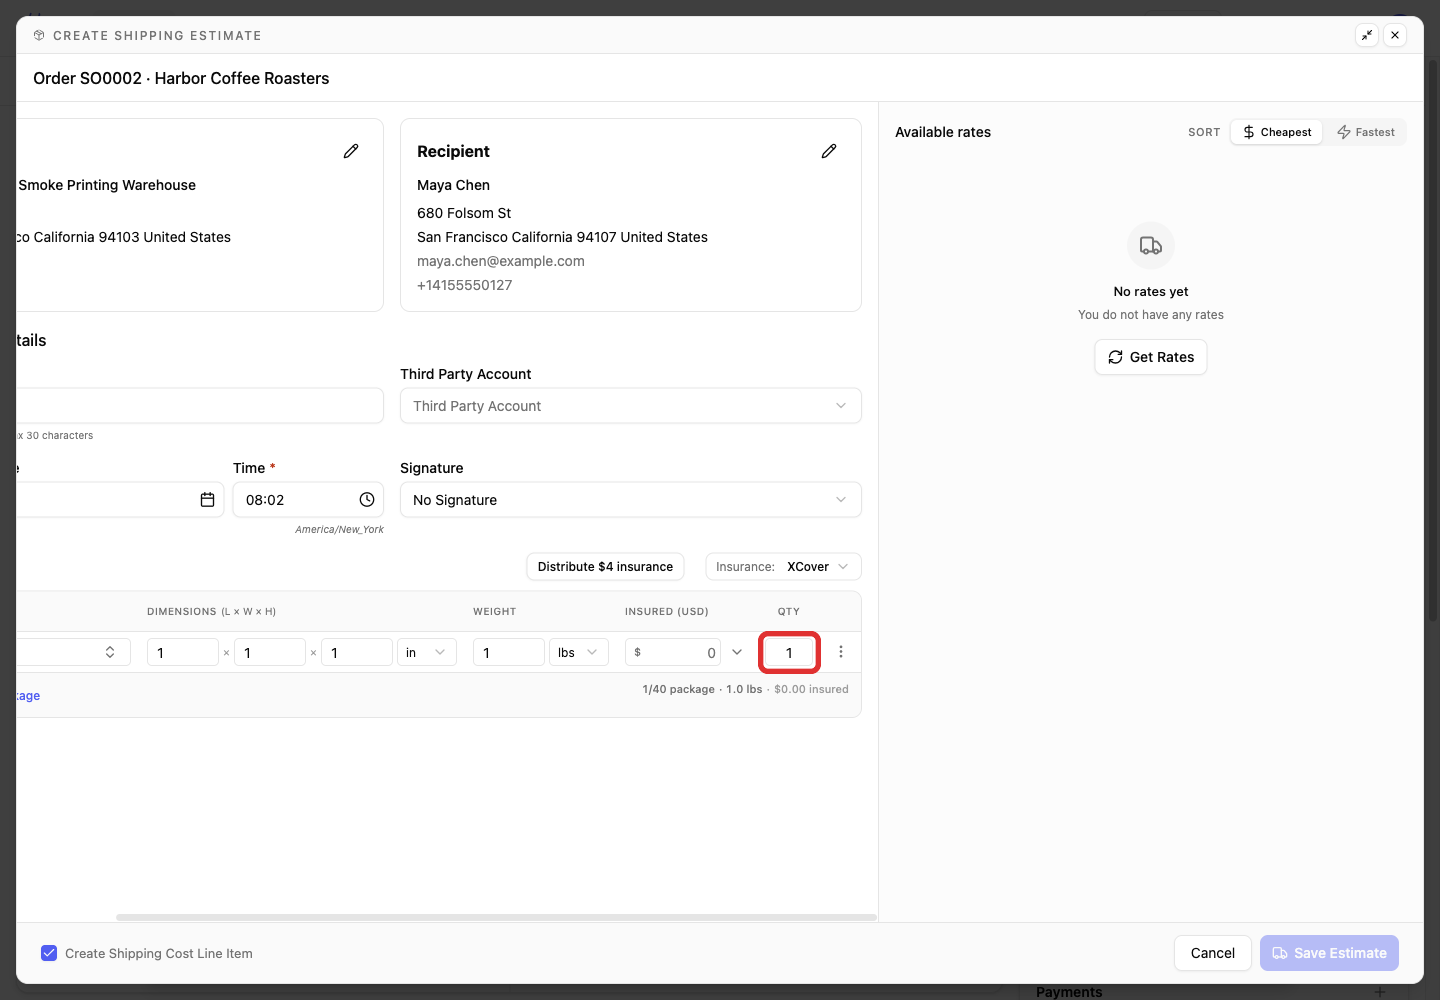
Set Qty for parcels with the same measurements.
-
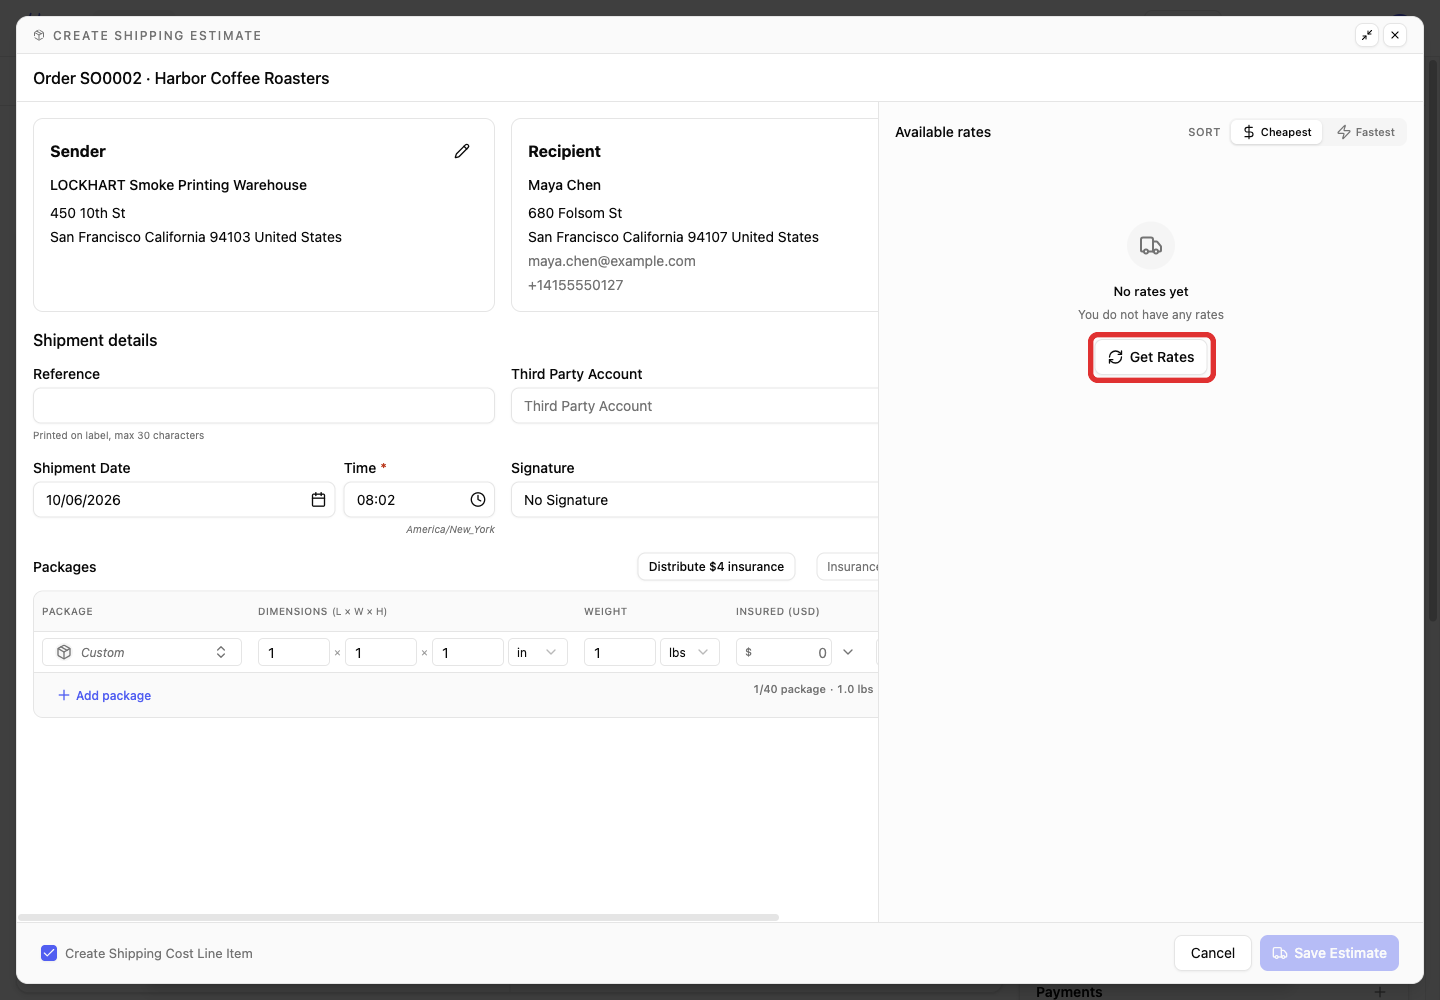
Click Get Rates.
-
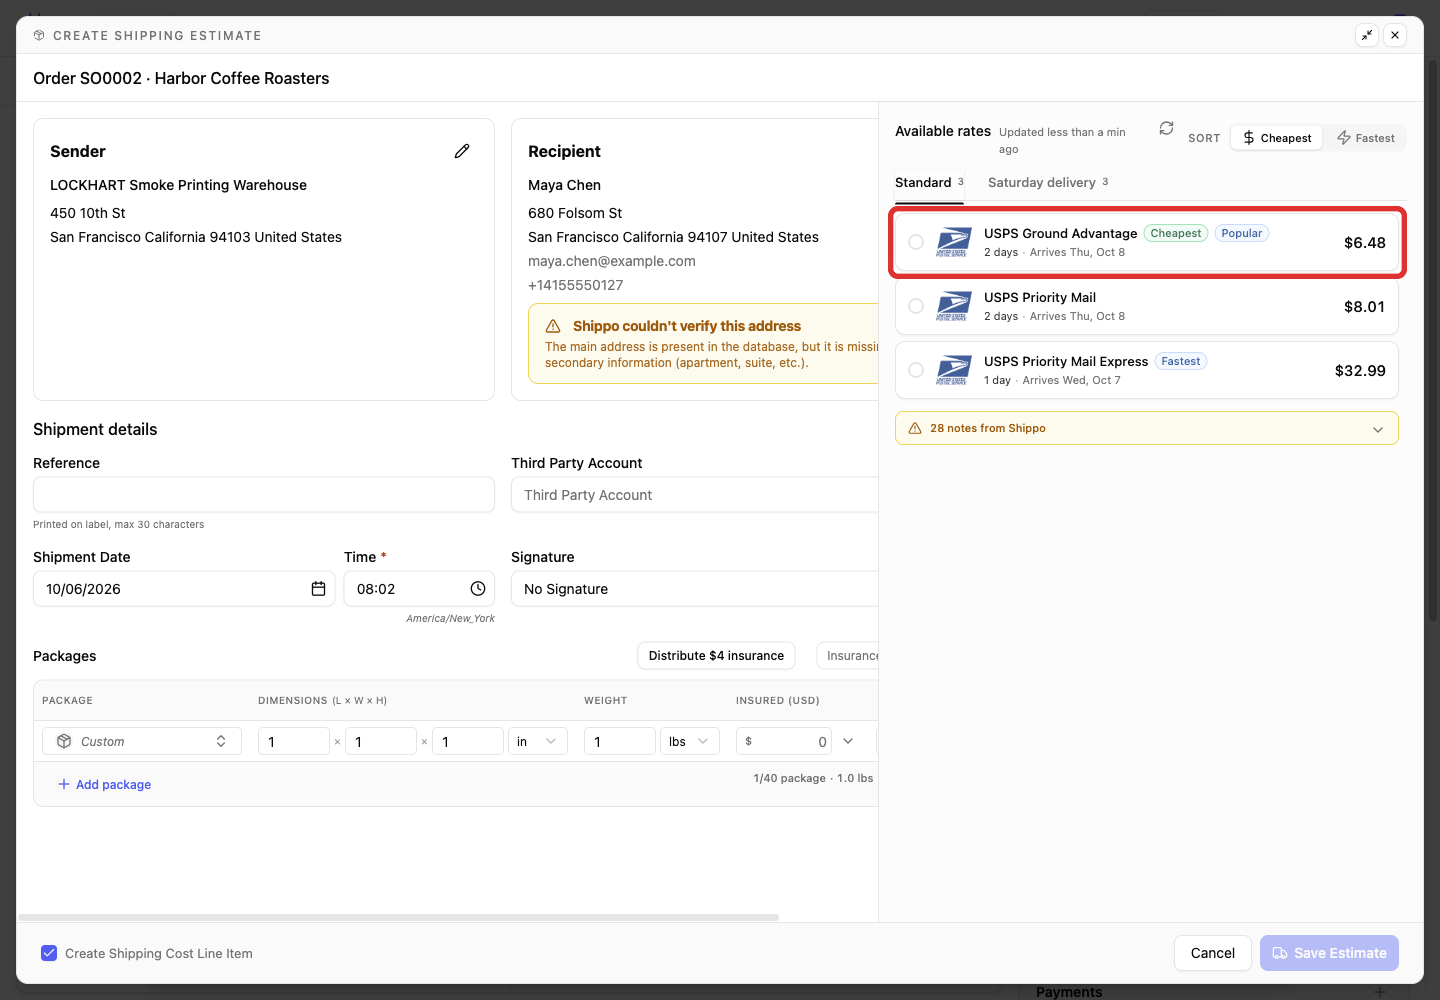
Select a service and price.
-
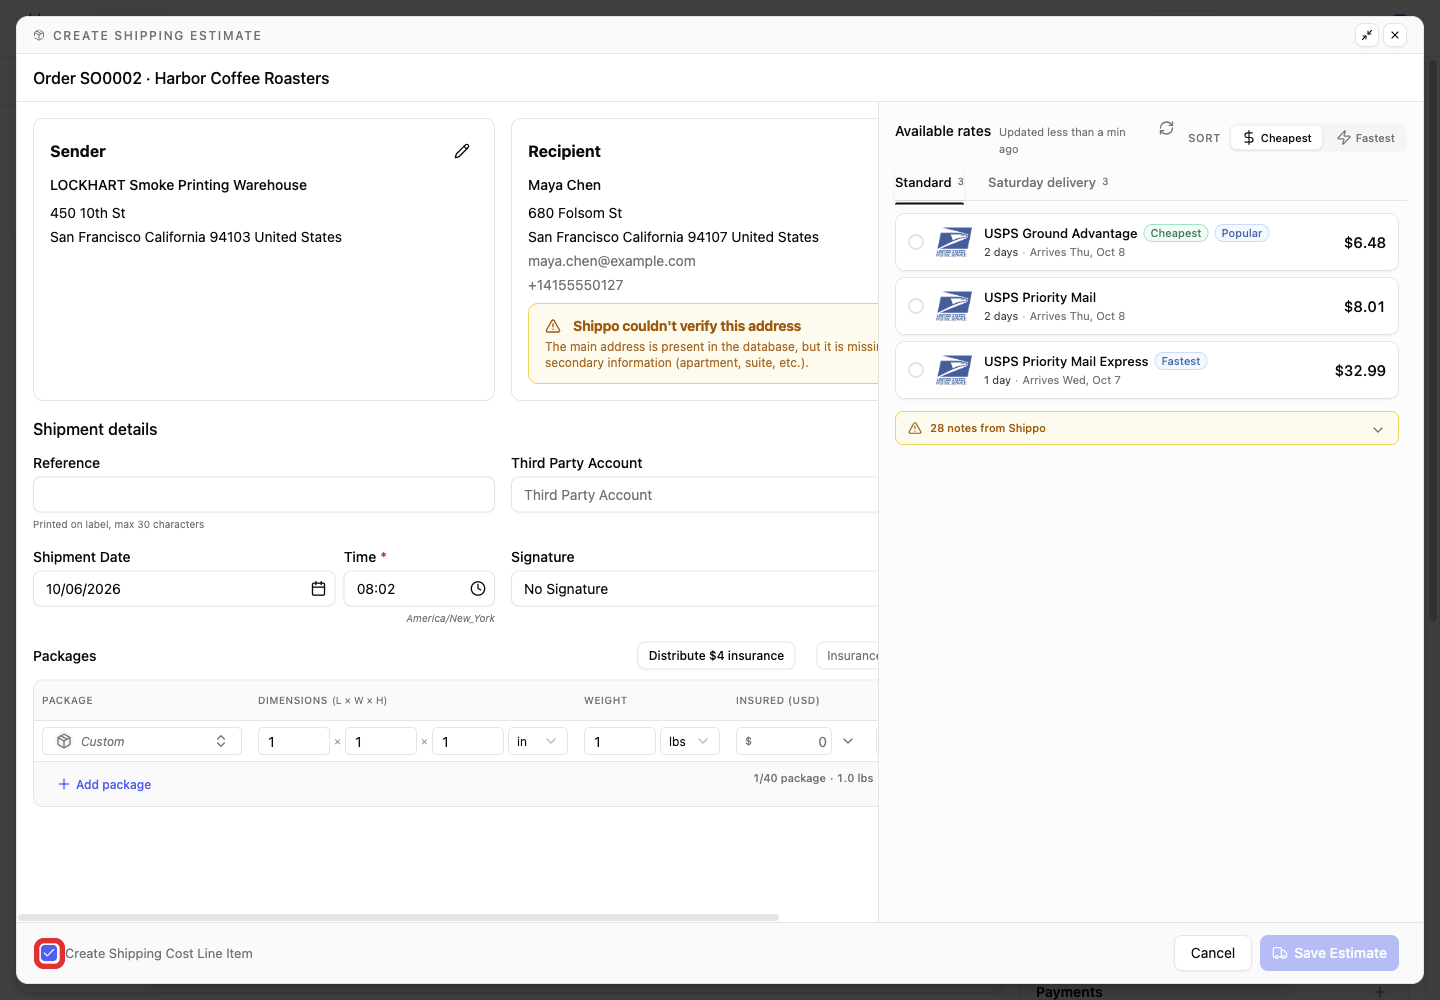
Keep Create Shipping Cost Line Item selected if you want an internal shipping-cost line with the estimate.
-
Click Save Estimate to return to the shipment editor.
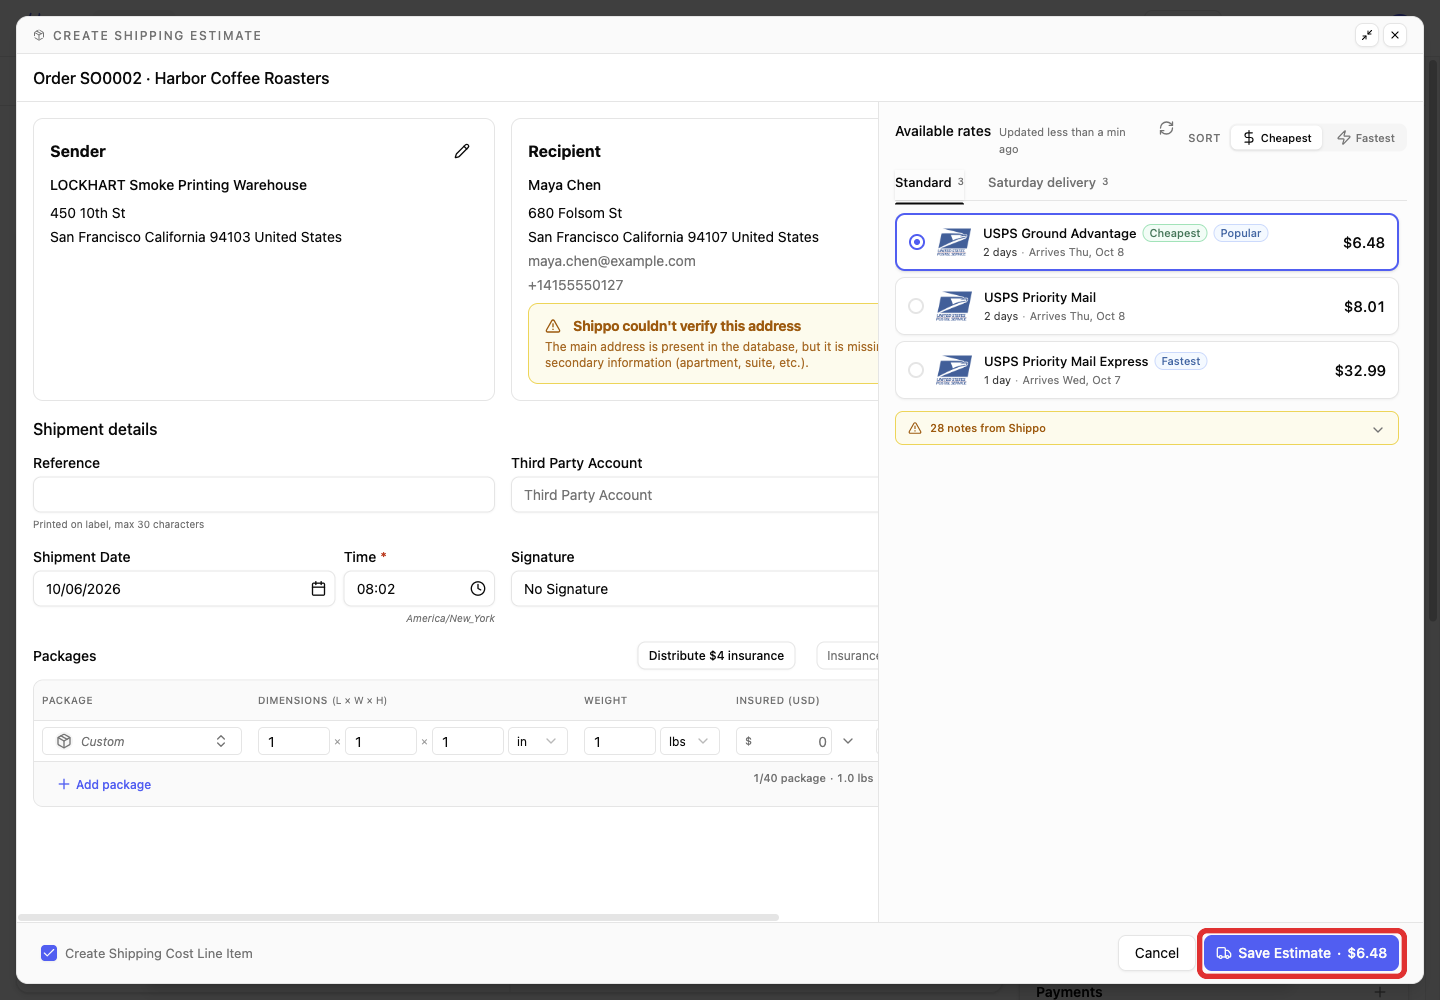
-
Click Save and Close to save the shipment and its estimate.
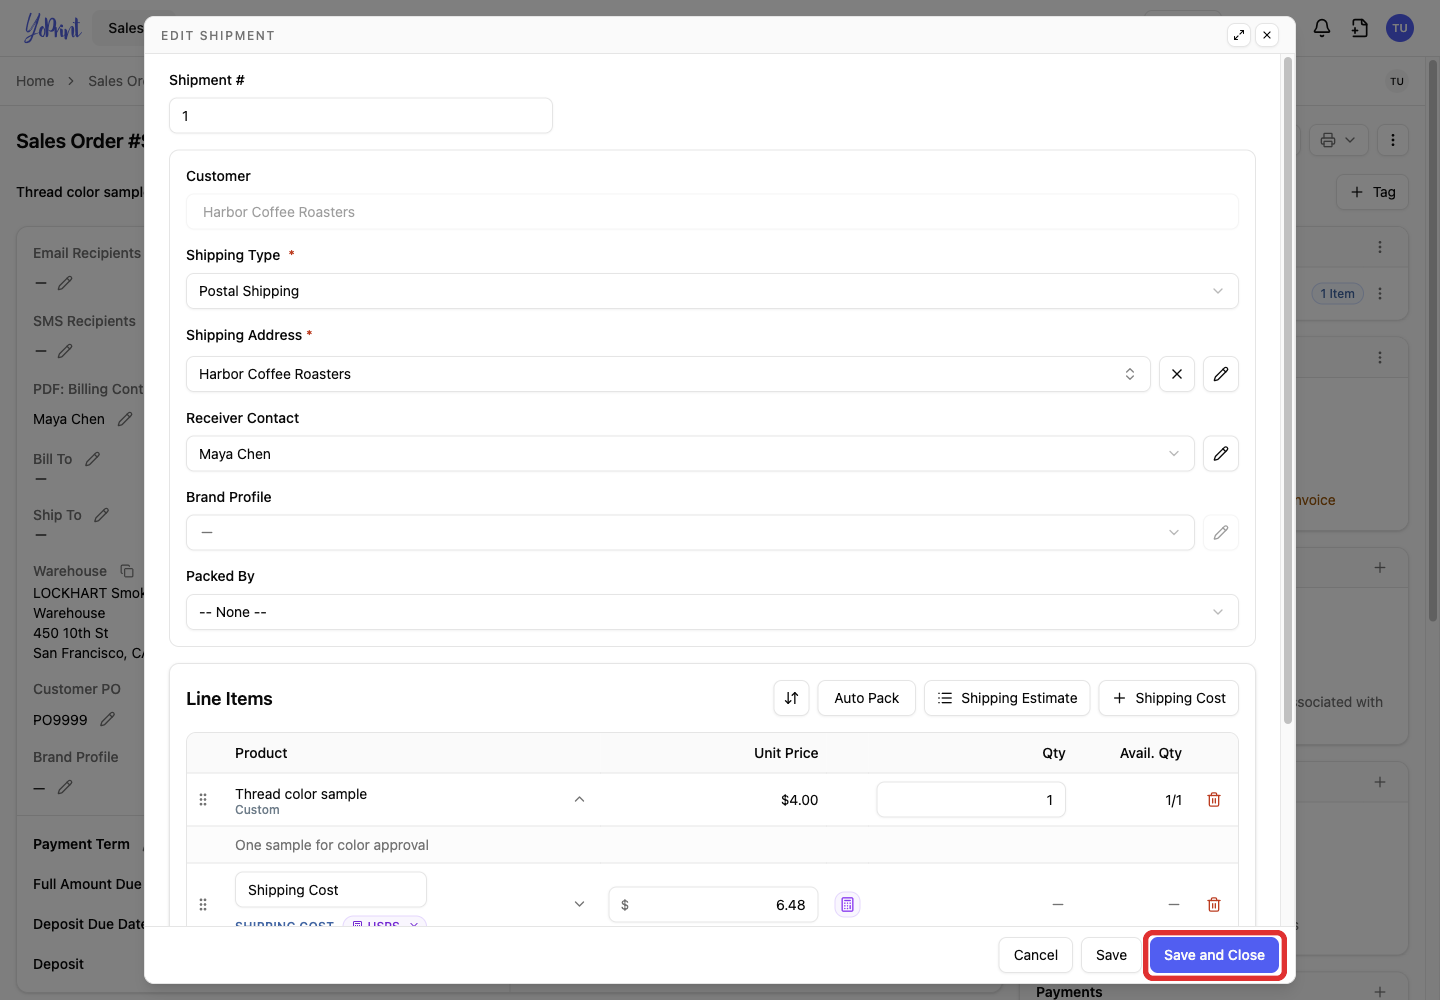
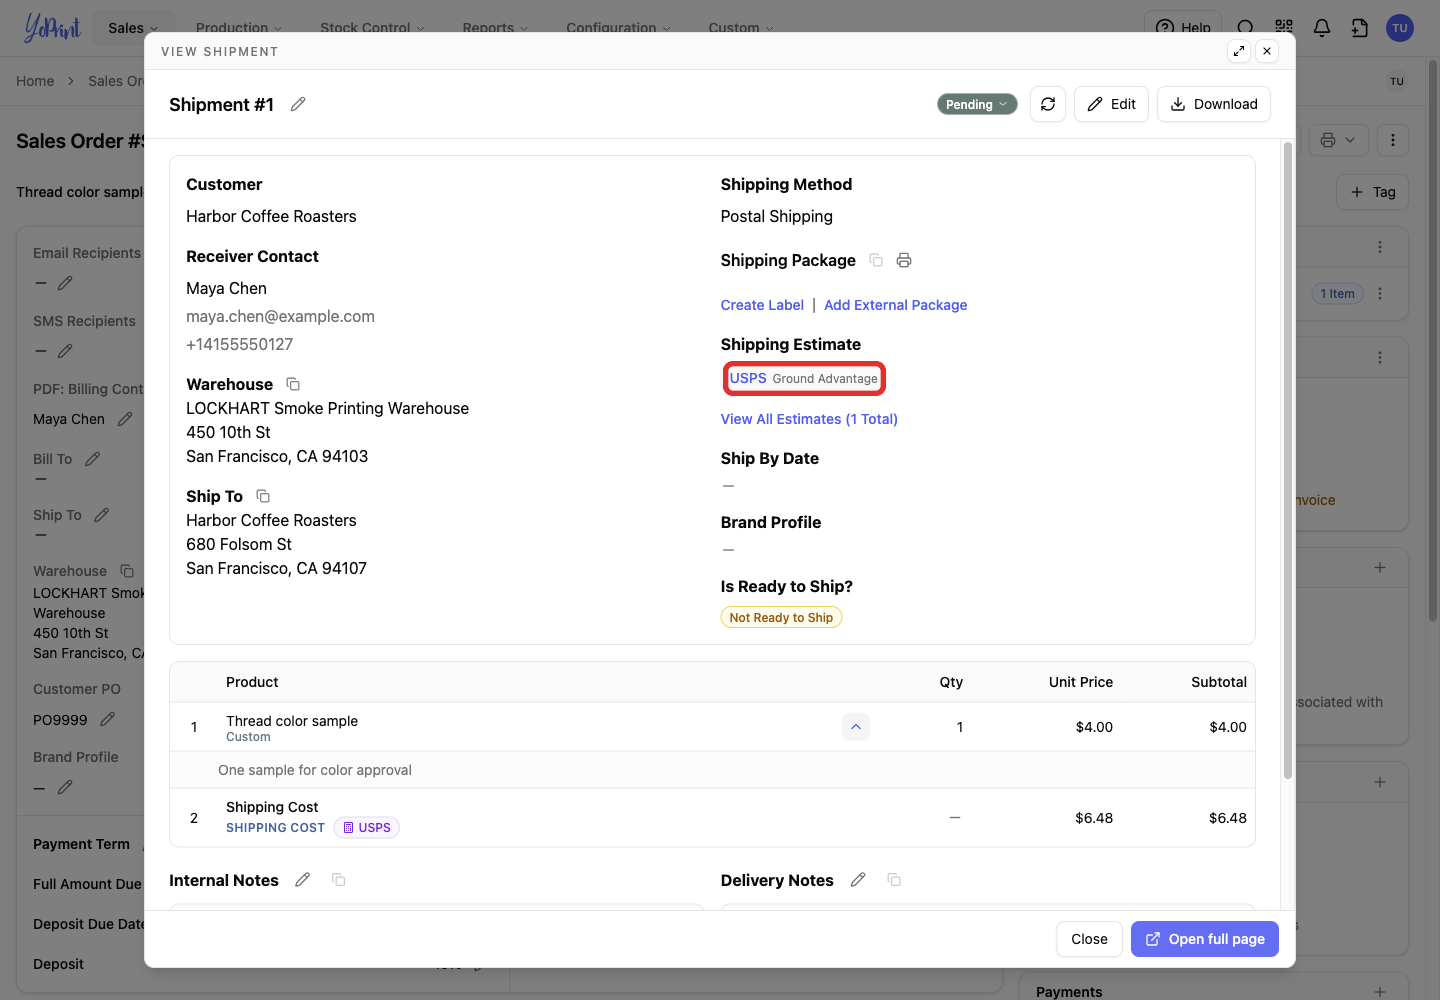
The saved service appears under Shipping Estimate.

-
Click the saved service to review its parcel details and amount.

-
When you are ready to buy from that estimate, click the blue Create Package icon.
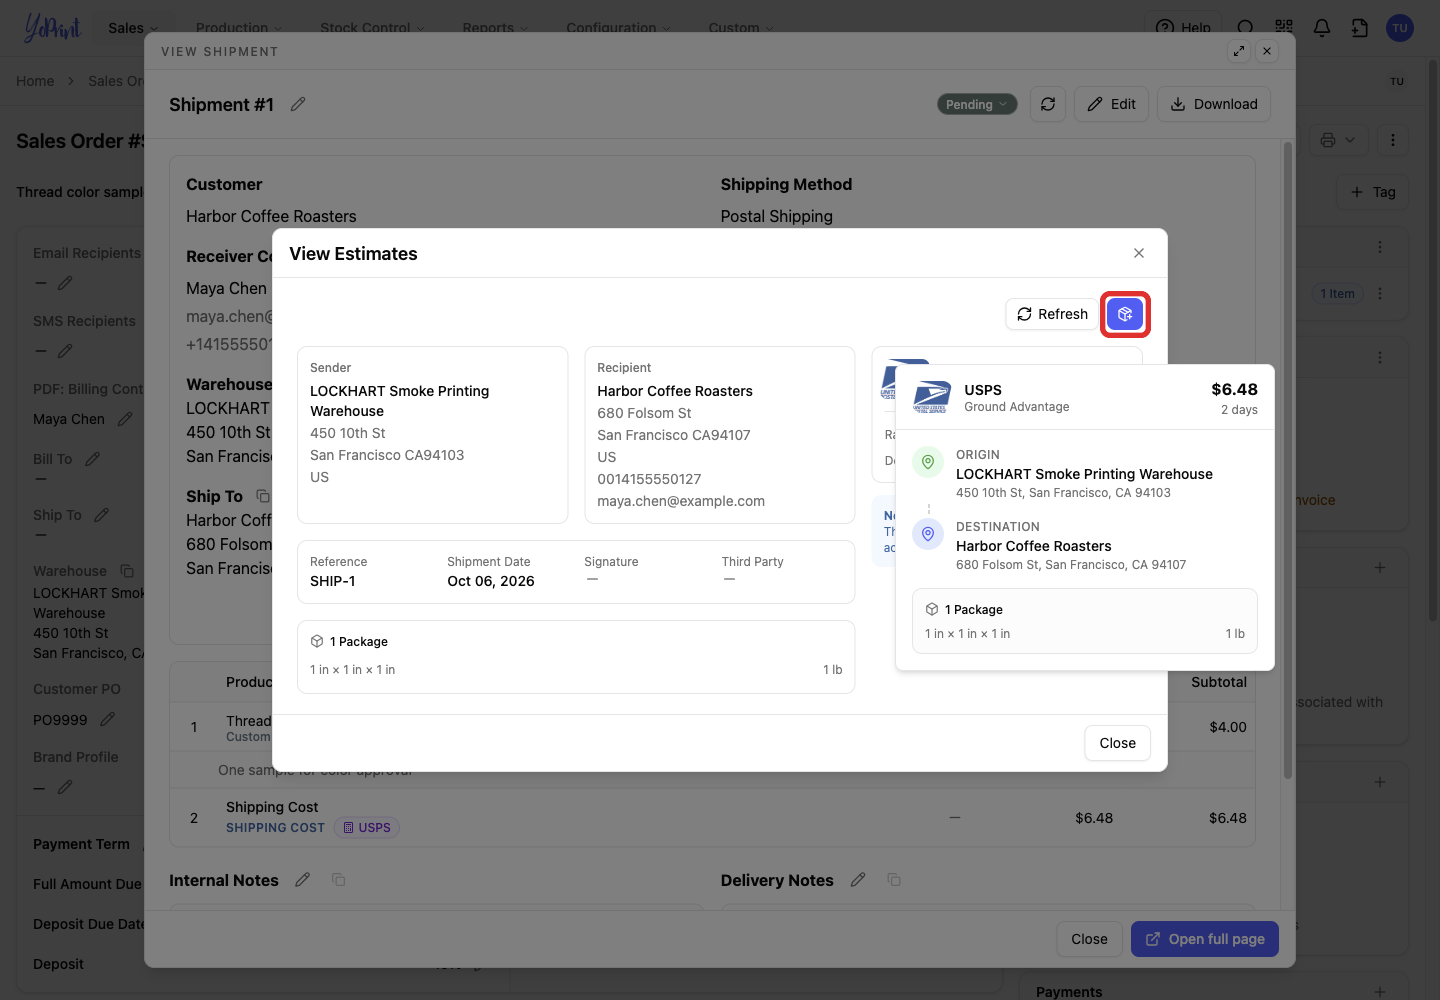
The label dialog opens with the saved parcel details. Continue from Get Rates in Get a rate and buy a label.

An estimate is a price for the details you supplied. Get a fresh rate after changing the address, dimensions, weight or shipment date.
Correct an address
Review any address message before buying. If the street address or contact is wrong, correct it in the estimate or label dialog.
-
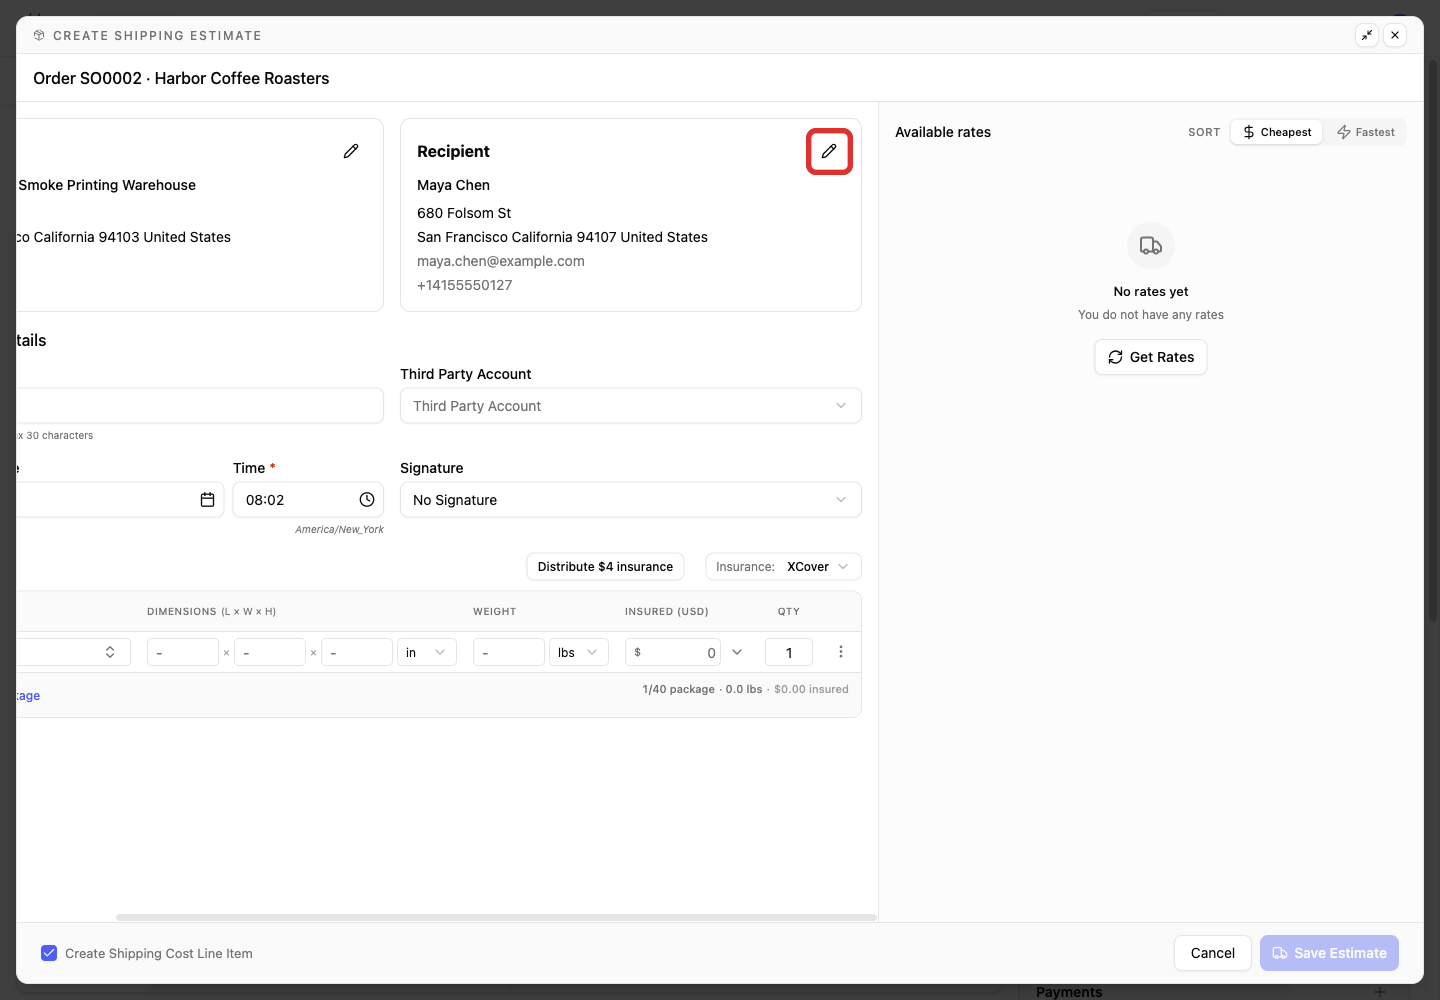
Click the pencil beside Recipient. Use the pencil beside Sender for the origin address.
-
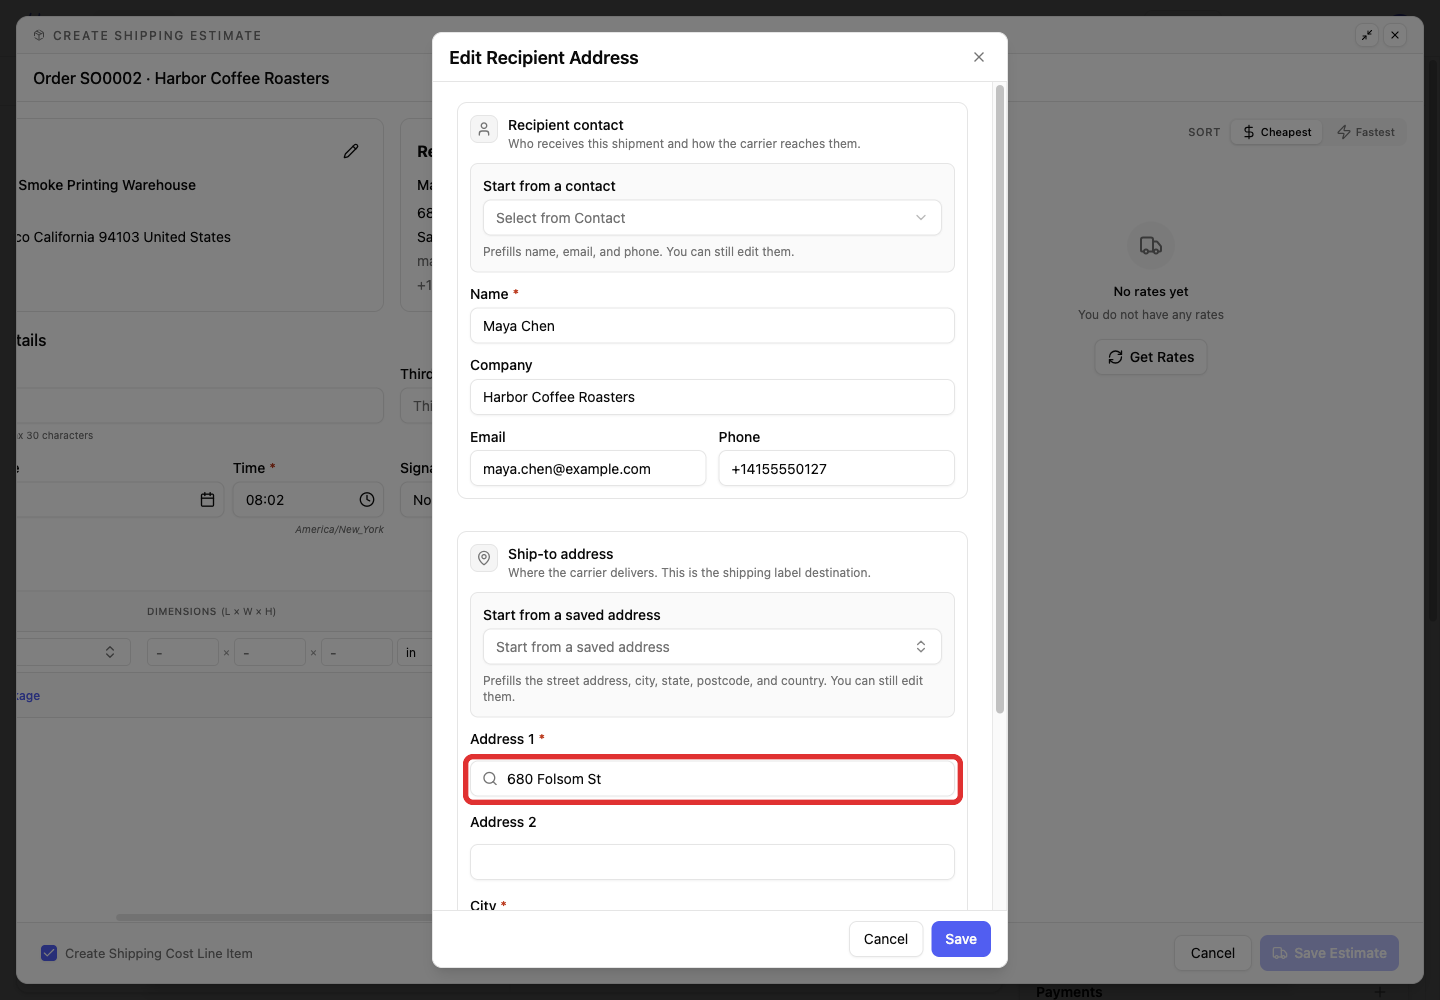
Correct Address 1 and any other address details that need changing.
-
Click Save to return to the estimate or label dialog.
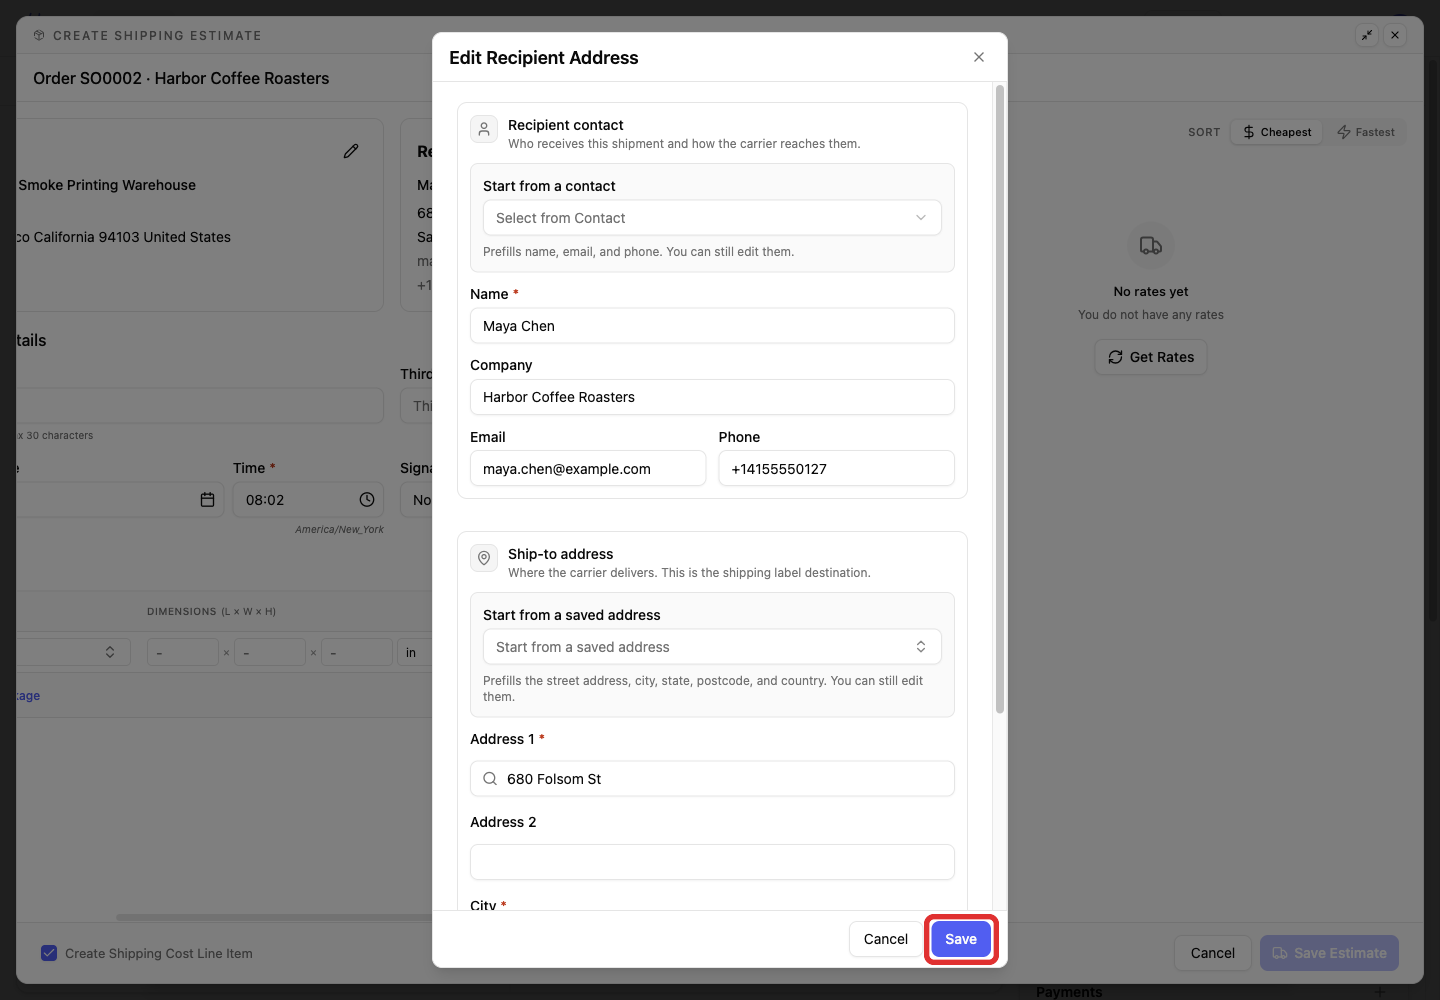
The change applies to this label or estimate only. The customer's saved address and the order do not change. Get rates again after changing an address, parcel, date, signature or insurance setting, then select a service for the revised shipment.
Add tracking for an external label
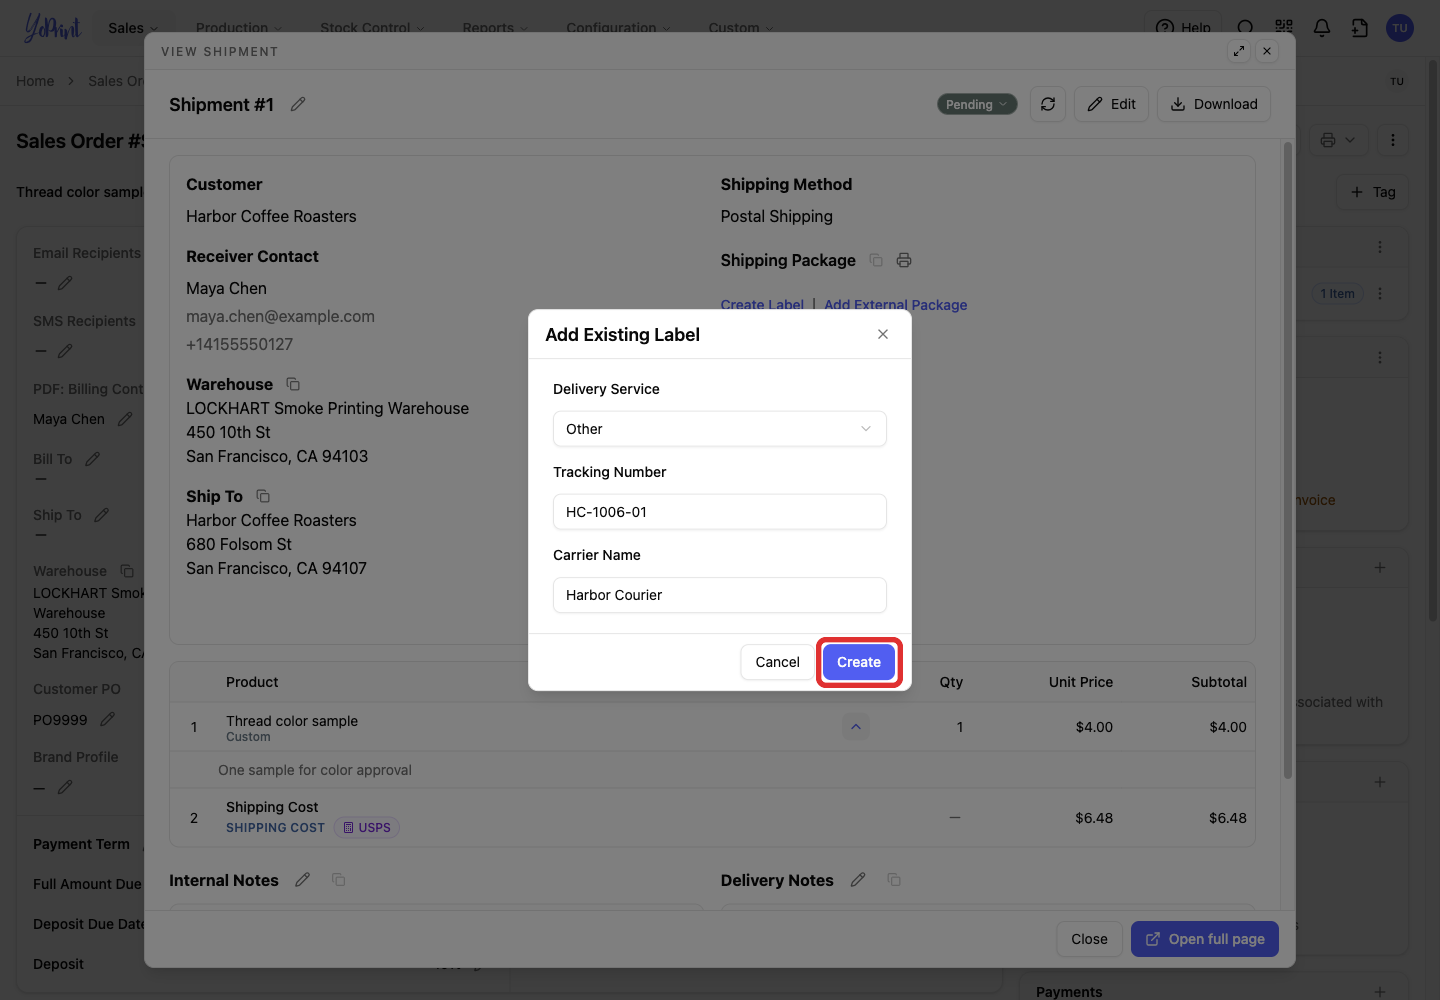
Use this route when the label already exists outside YoPrint. It records the tracking information without buying or generating another carrier label.
-
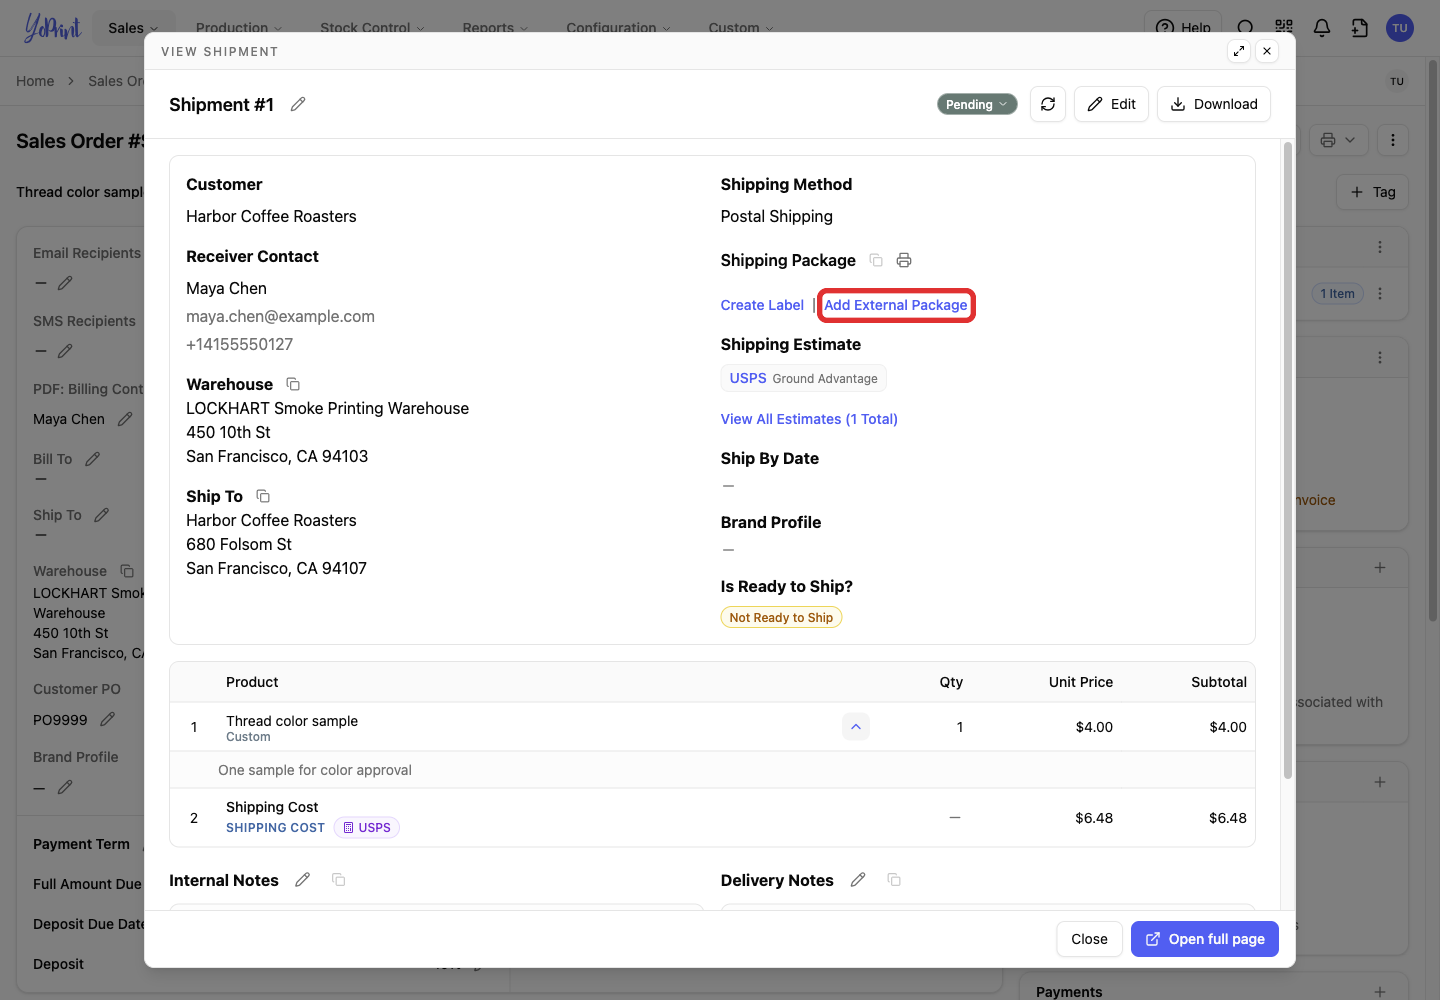
On the shipment, click Add External Package.
-
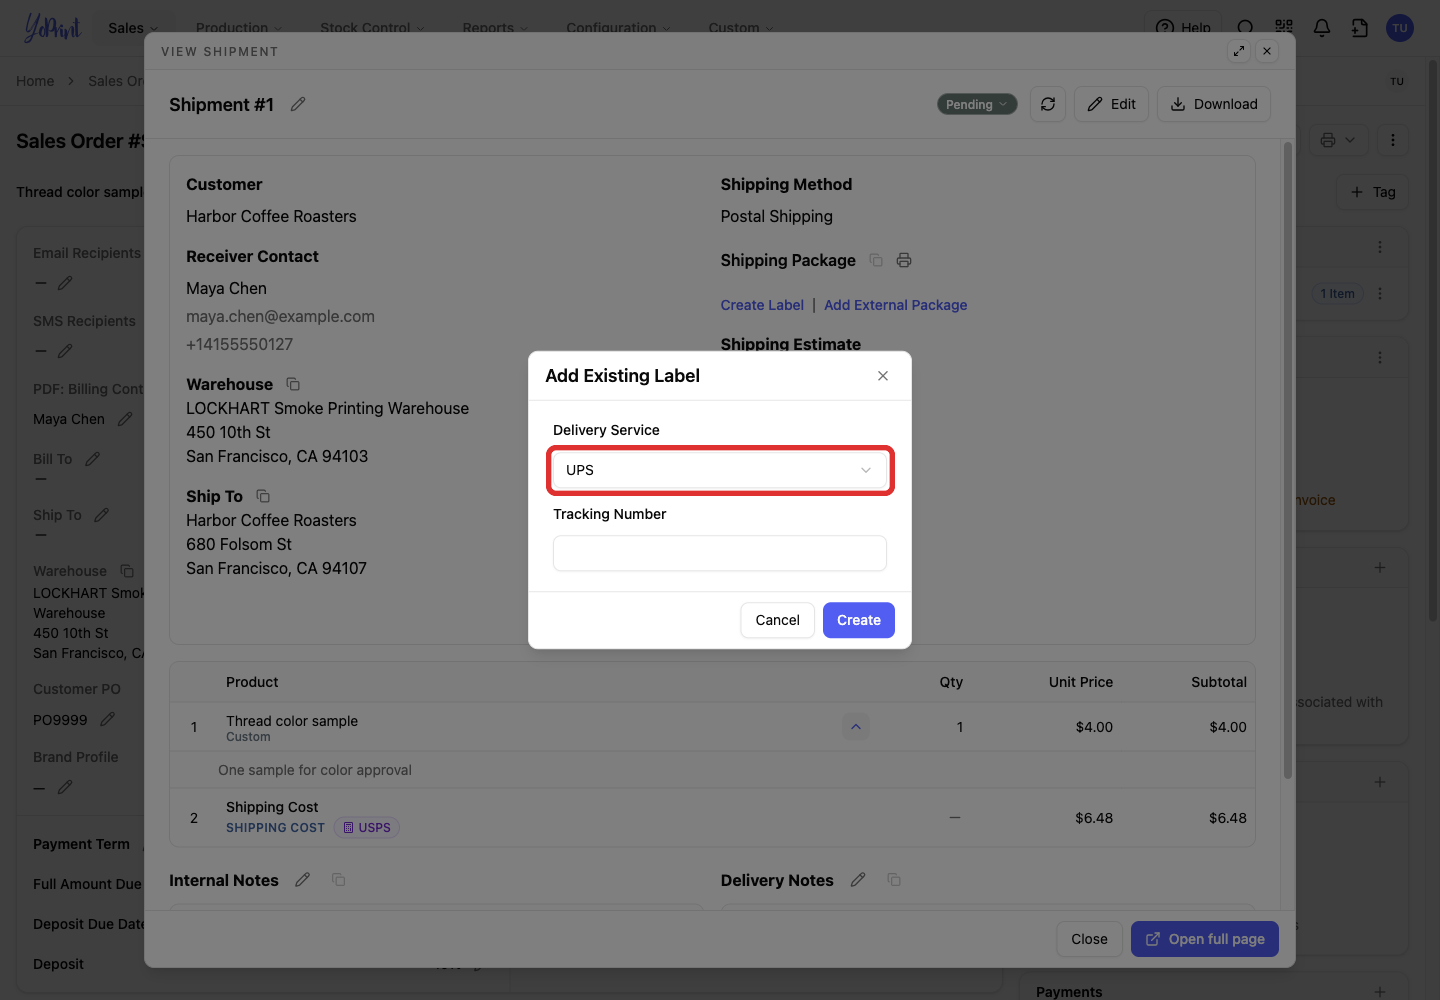
Open Delivery Service.
-
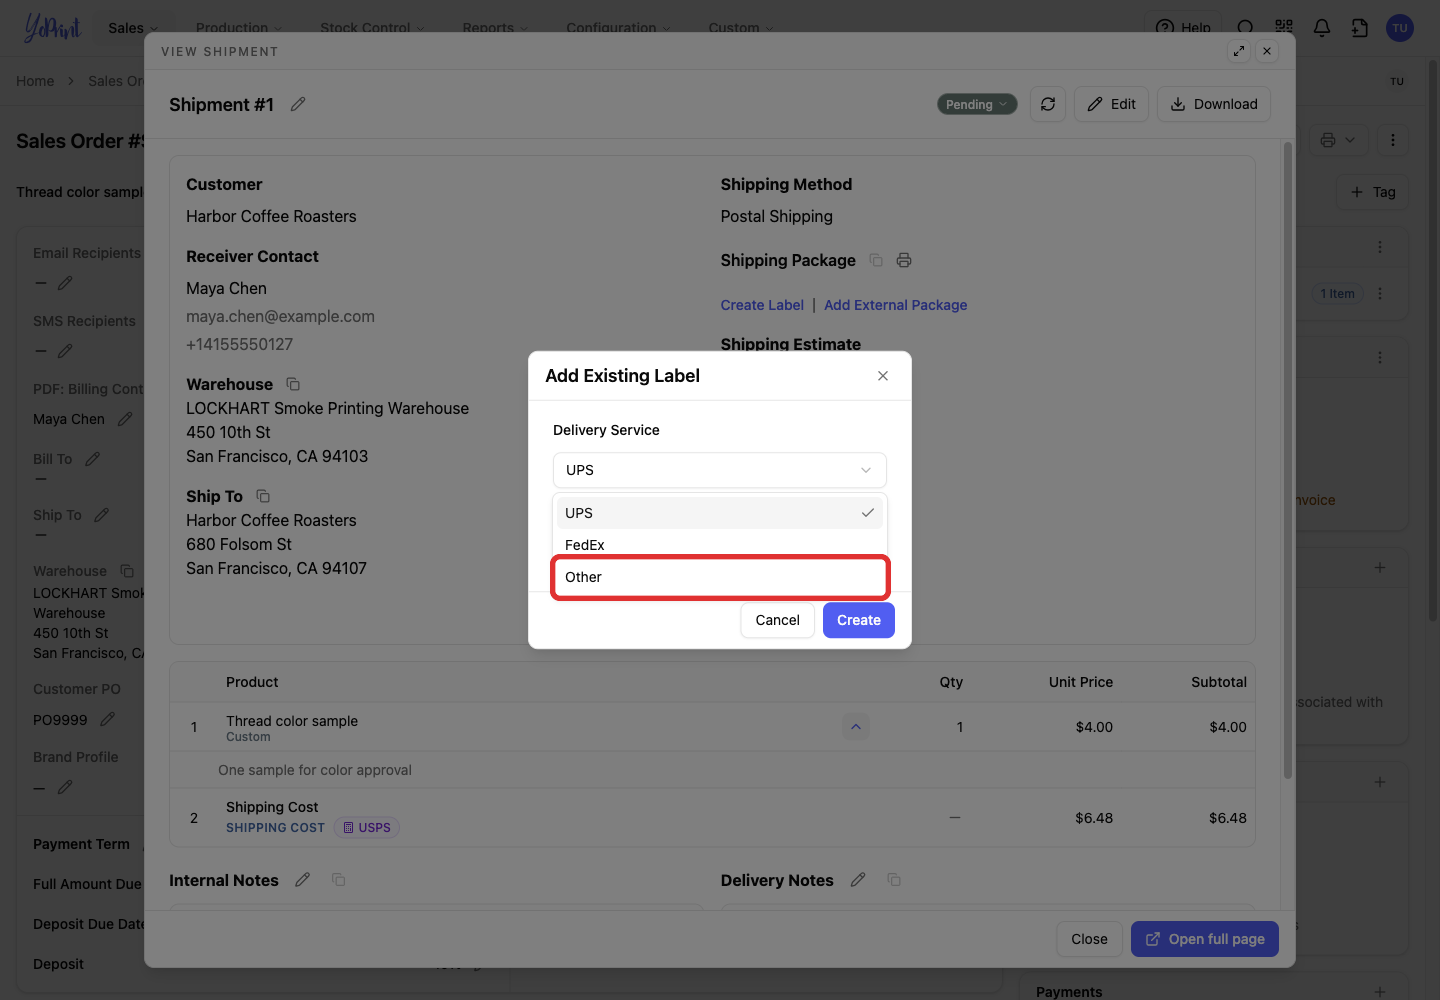
Choose UPS or FedEx, or Other when the carrier is not listed.
-
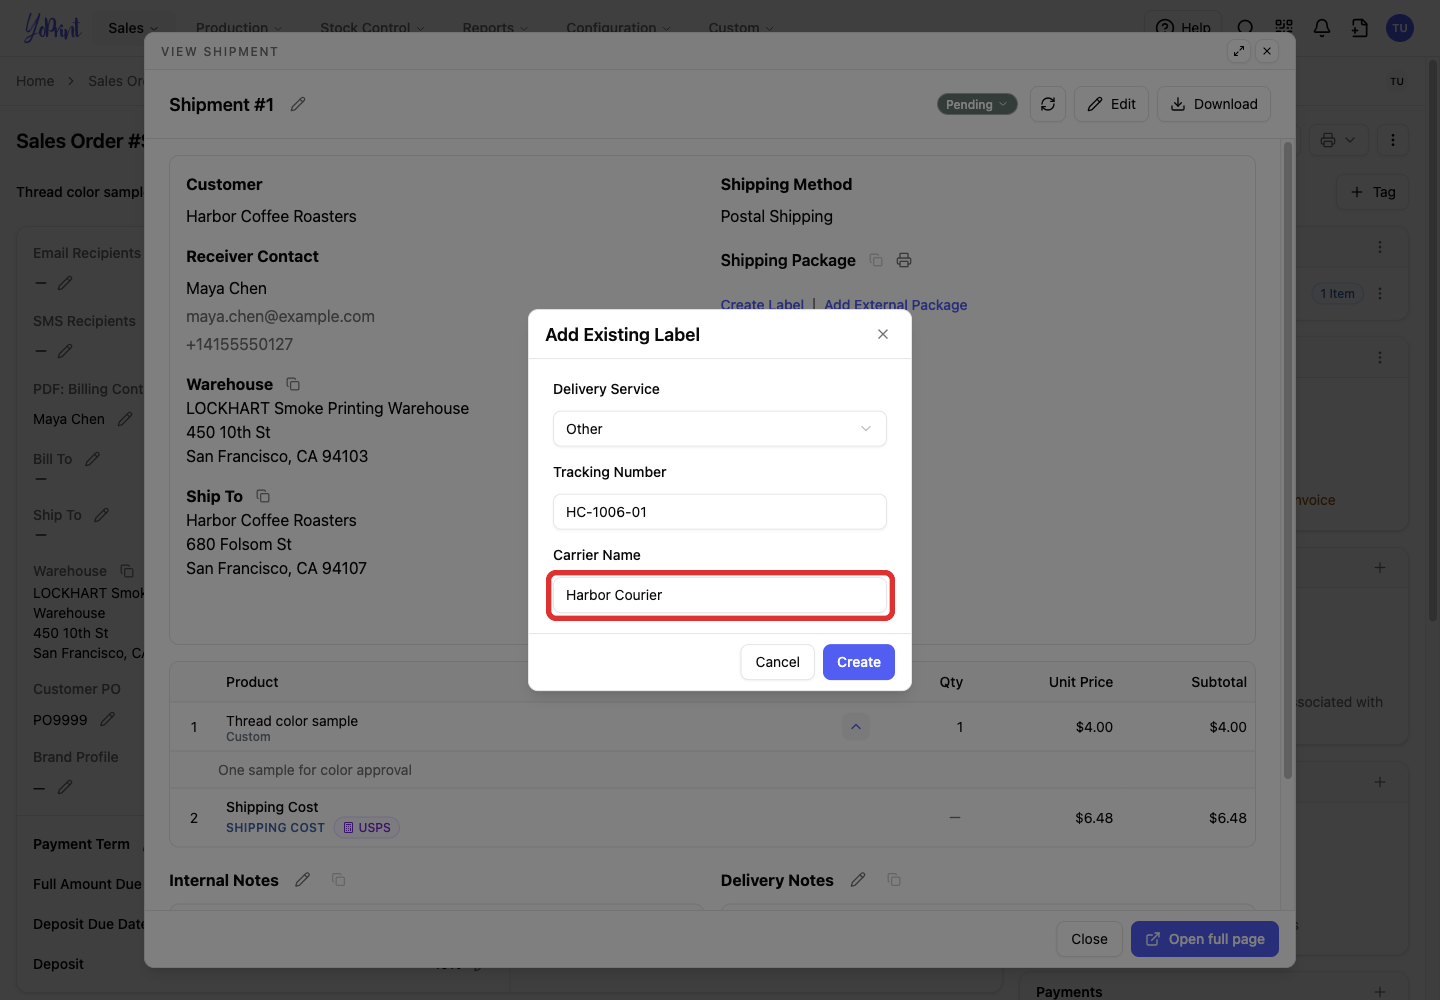
If you chose Other, enter Carrier Name.
-
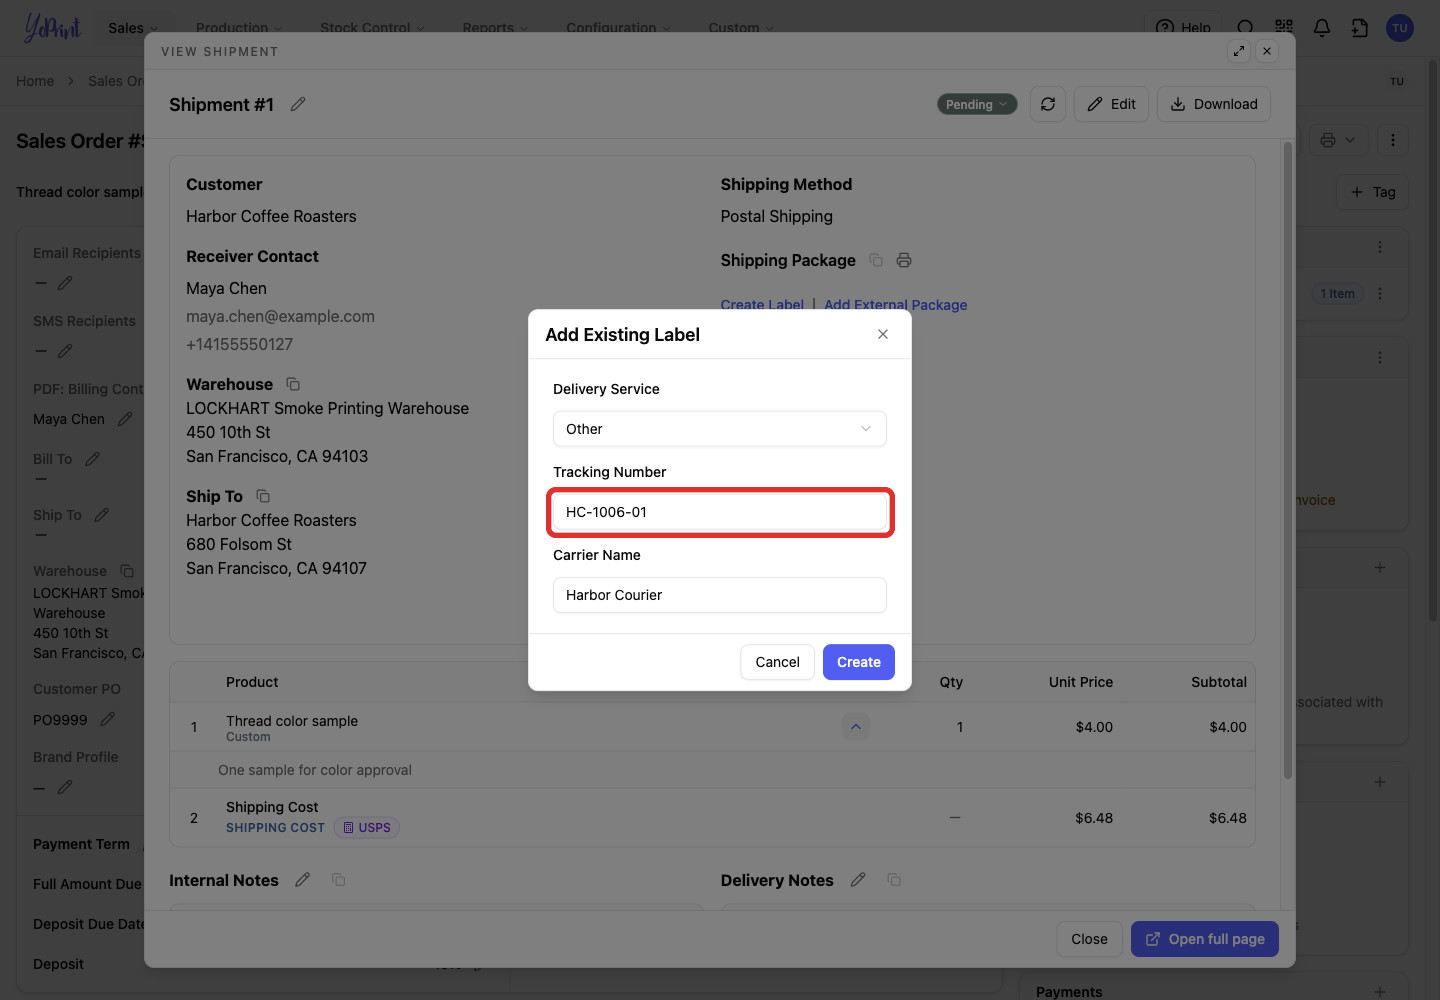
Enter the label's Tracking Number.
-
Click Create to save the package record.
-
Click the external tracking number under Shipping Package to reopen the record.
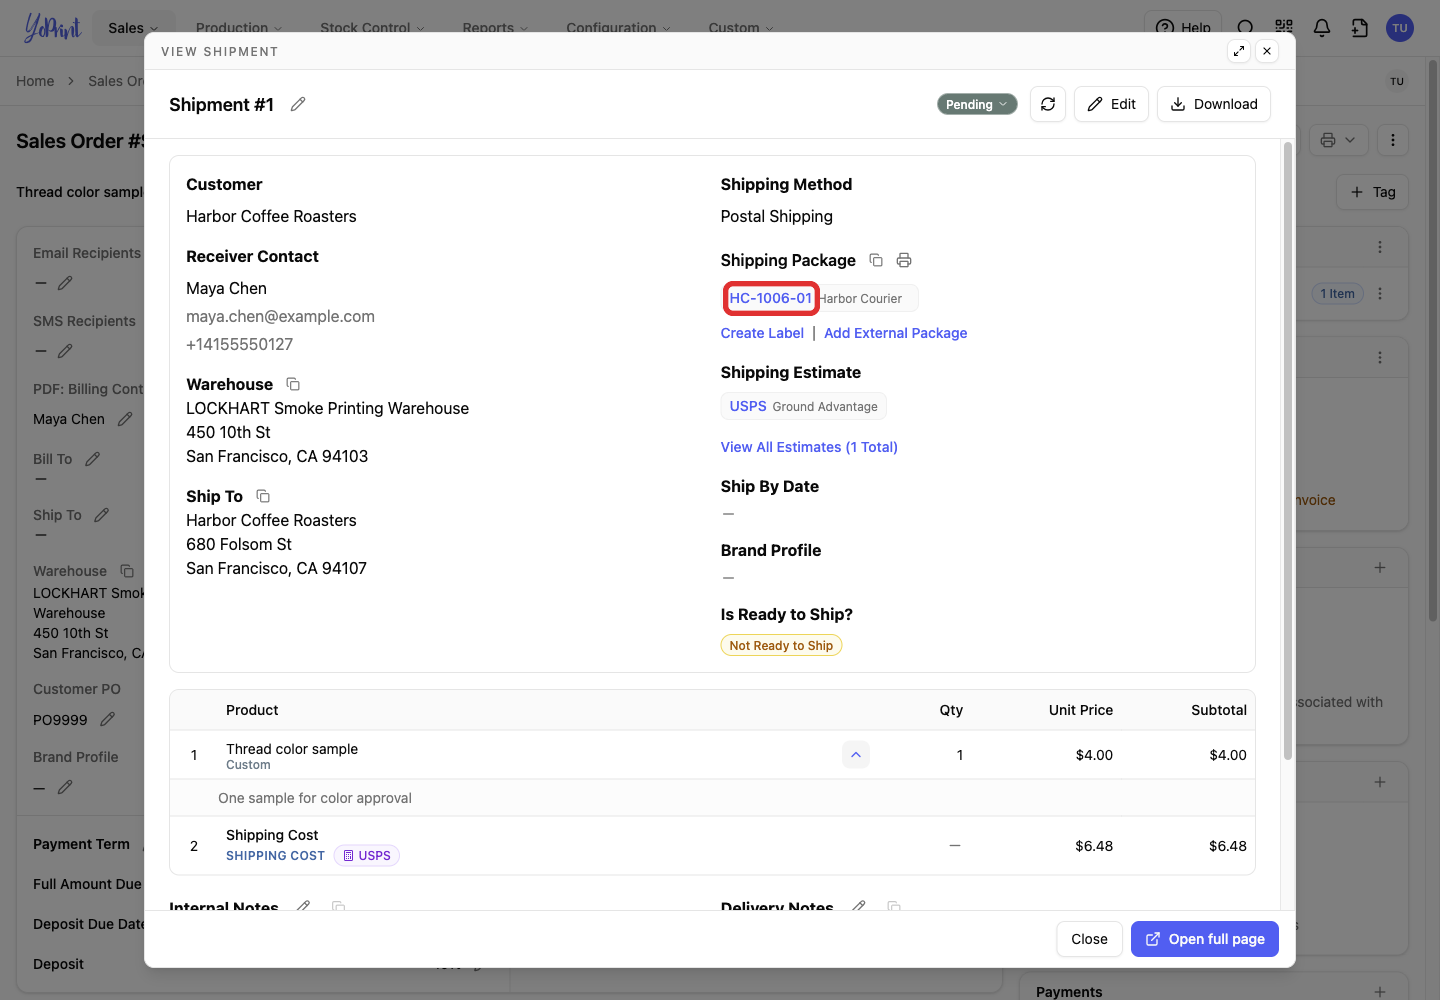
The package shows the carrier and tracking number you entered.

To record what you paid, click Edit on the shipment and add a Shipping Cost line.

Related information
- Configuring Shippo Integration: connect your account.
- Shipping Method: set up shipping methods.
- Shipping Box: set up saved package sizes.