Whitelisting An Email In Gmail
Create a filter in Gmail
These steps happen in Gmail on the web on a computer, outside YoPrint. Google's screens may have changed since these pictures were taken. See Google's guide to keeping valid emails out of Spam for current steps, including the route through the search bar.
If you or your customers use Gmail and miss quotes, invoices, or notifications, create a filter in Gmail so incoming messages stay in the inbox. In Gmail, you can whitelist a sender by creating a filter with Never send it to Spam selected. Have the sender's email address ready before you begin, or use message.yoprint.com for default YoPrint notifications.
-
In Gmail, click the Settings gear in the upper-right corner.

-
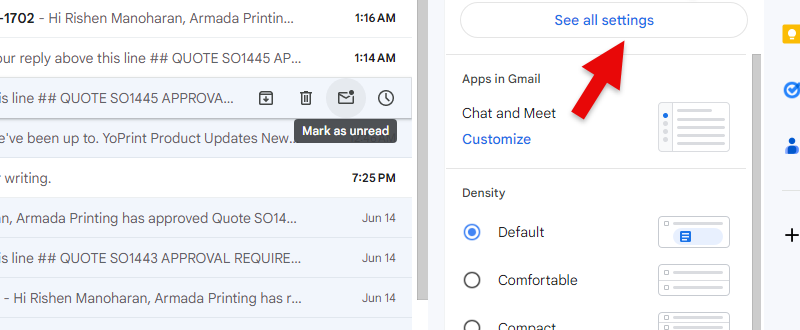
Click See all settings.
-
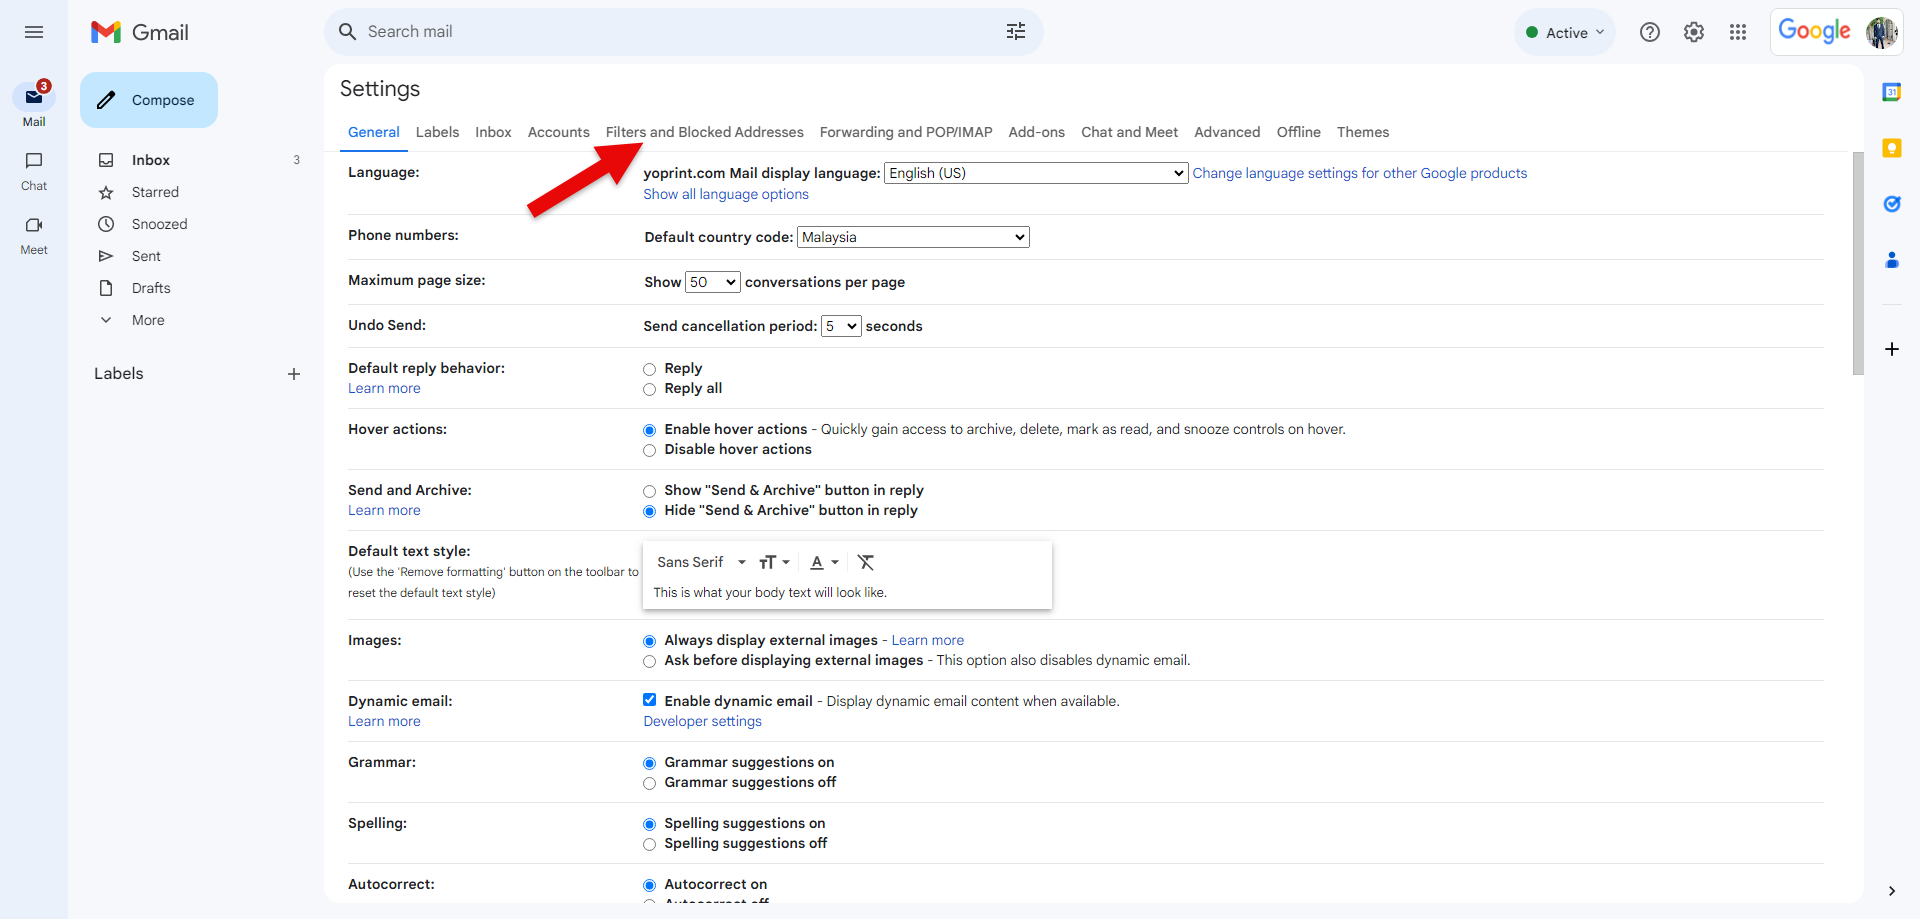
Select Filters and Blocked Addresses.
-
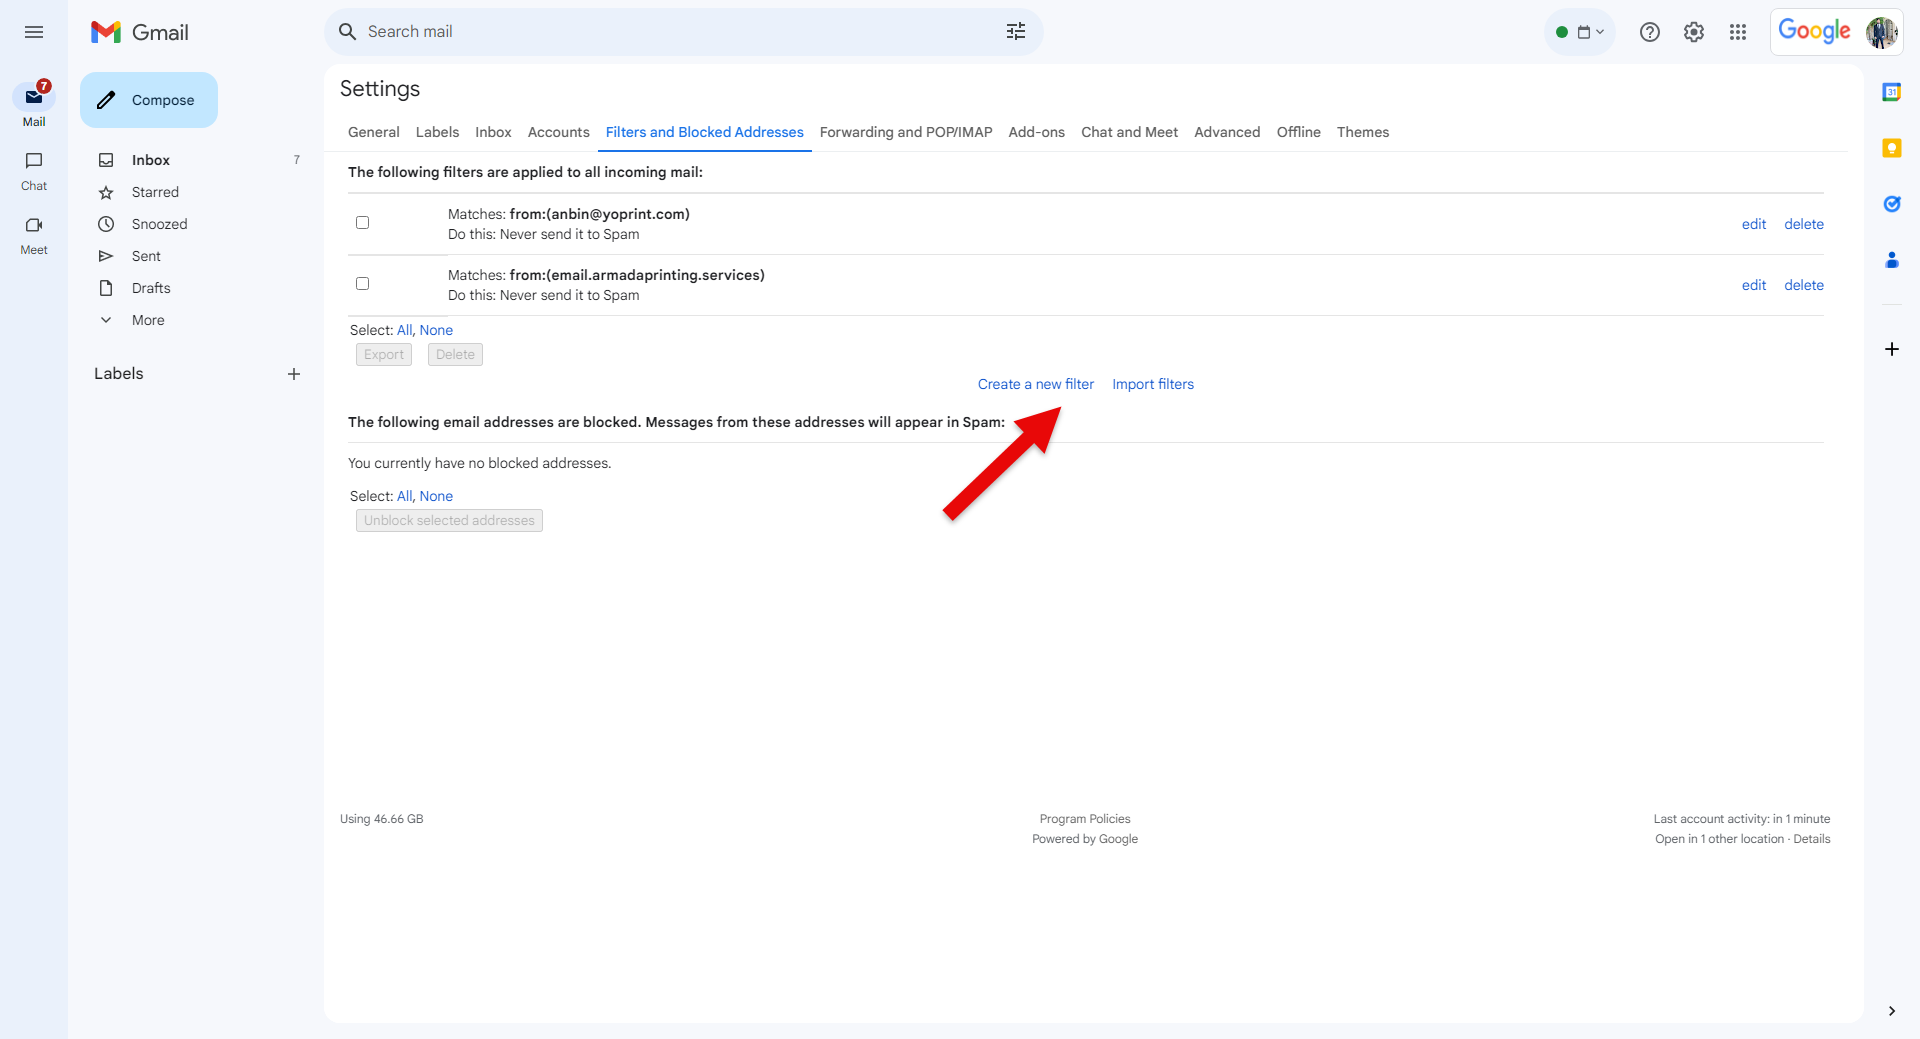
Click Create a new filter.
-
In From, enter the sender's email address. To allow all messages from a domain, enter the domain name instead, such as
message.yoprint.com. Leave the other criteria blank if you want the filter to cover all messages from that address.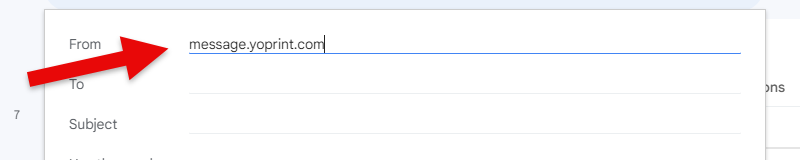
The picture uses
message.yoprint.comas an example search term. Use the sender address from the email you received, especially if your shop uses a custom sending domain. To change your shop's sending domain, see Customize Email Sending Domain. -
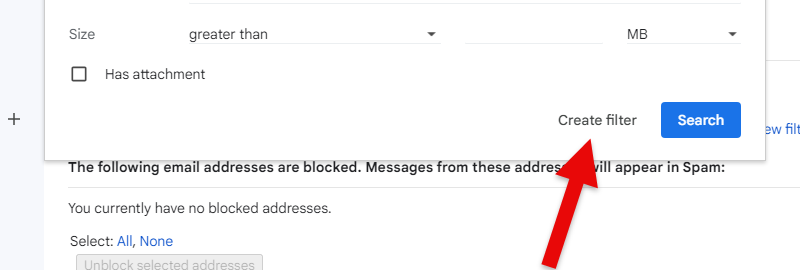
Click Create filter at the bottom of the search window.
-
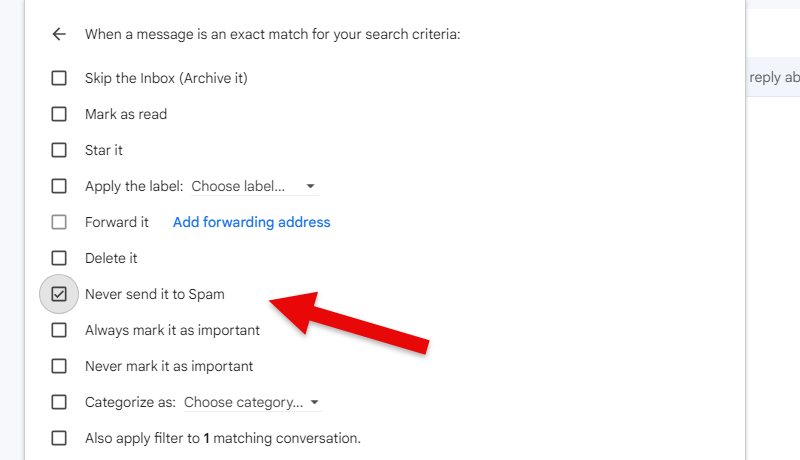
Select Never send it to Spam.
-
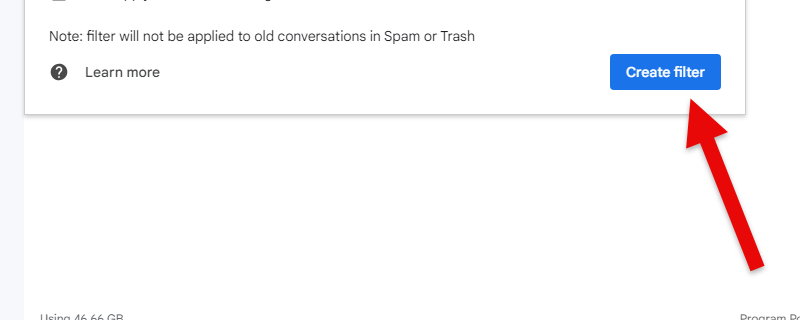
Click Create filter again to save the filter.
Filters apply to future incoming messages. For an email already in Spam, open Spam, select the message, and click Report not spam, or follow Google's Remove the email from Spam instructions. You can also select Categorize as > Primary when creating the filter to keep messages in your main inbox tab. If you previously blocked the sender, use Google's unblock a sender guide. To change or remove this filter later, see Edit or delete filters.