Customizing Payment Method
In this article
A payment method is the label you choose when you record payments received outside an online payment gateway, such as cash, a physical check, or a credit card swiped on an external countertop terminal. YoPrint provides standard methods like Cash, Check, Bank Transfer, and Credit Card, and you can add any custom method your shop accepts. Recording a manual payment writes down the transaction in YoPrint for your records. It does not charge a customer's card through an online payment processor.
Add a payment method
-
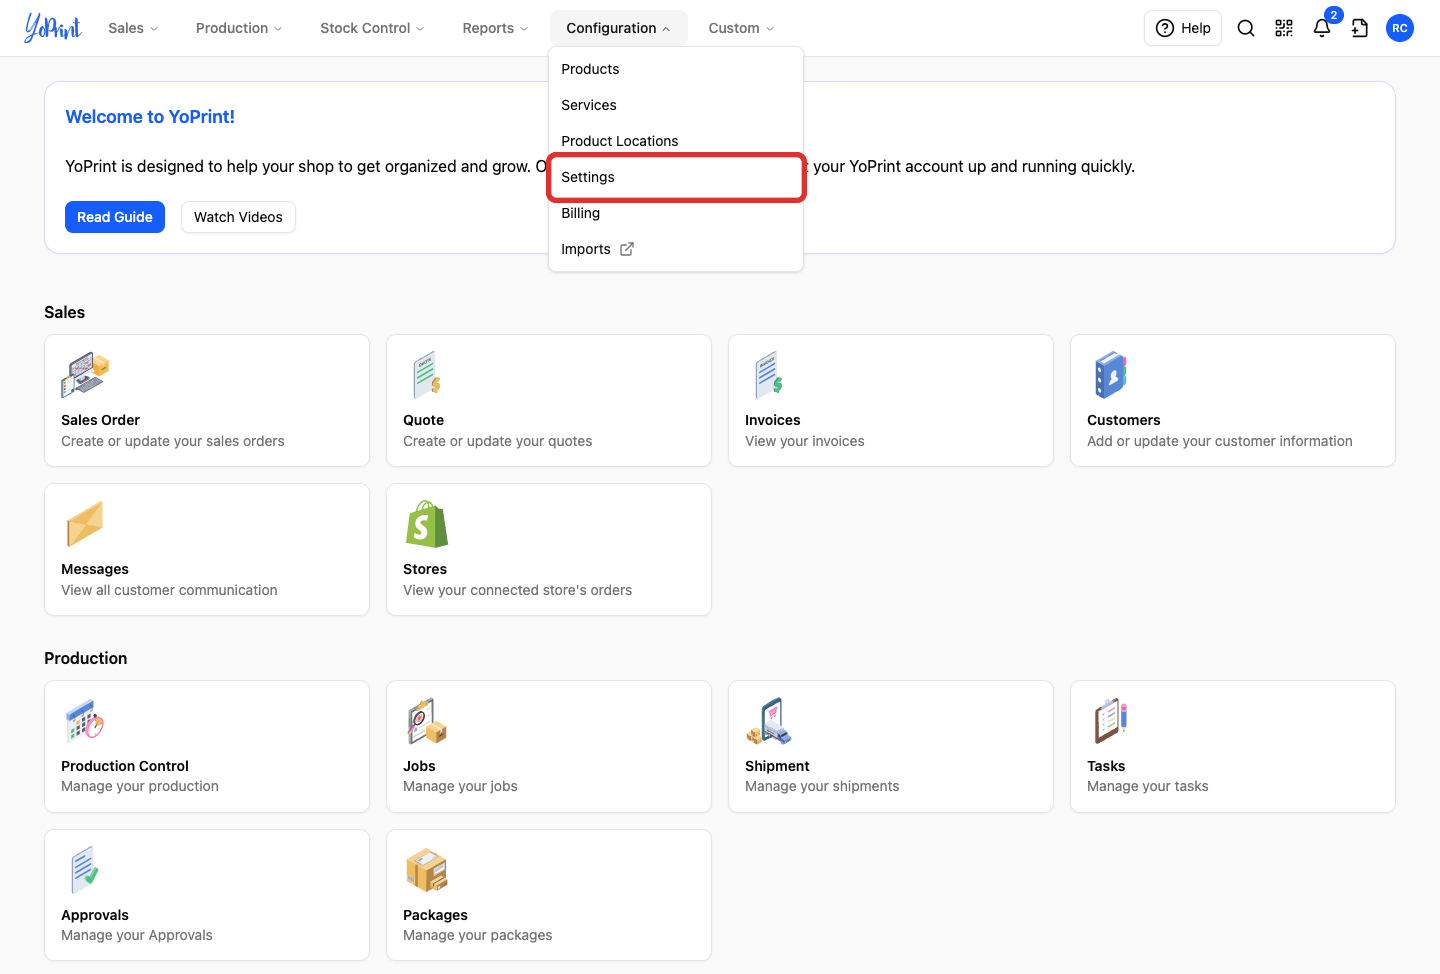
Go to Configuration > Settings.
-
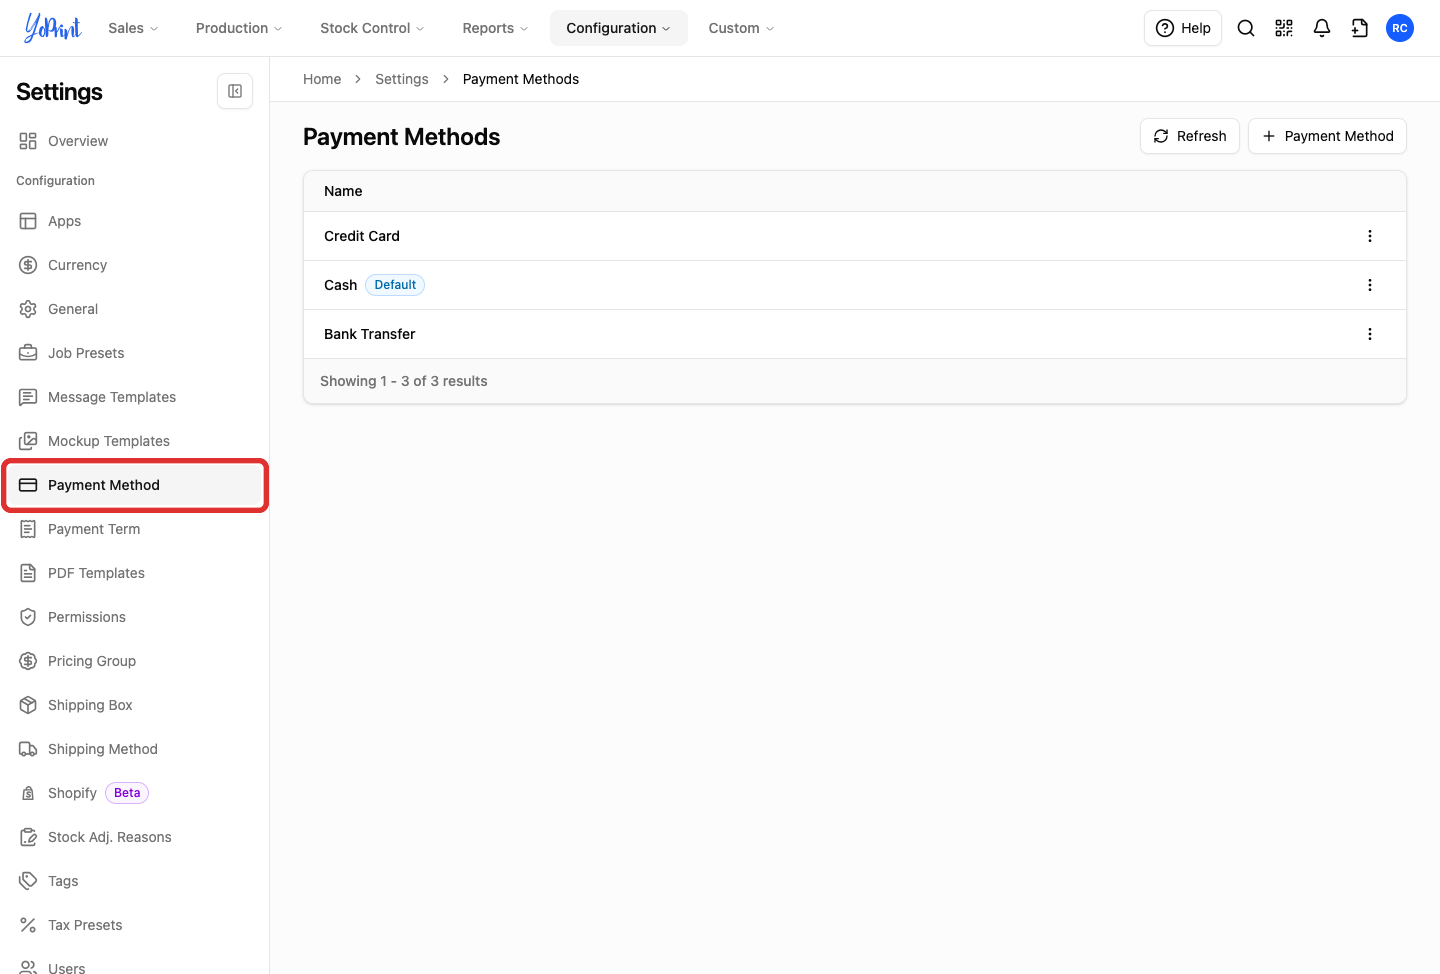
In the settings sidebar, click Payment Method.
-
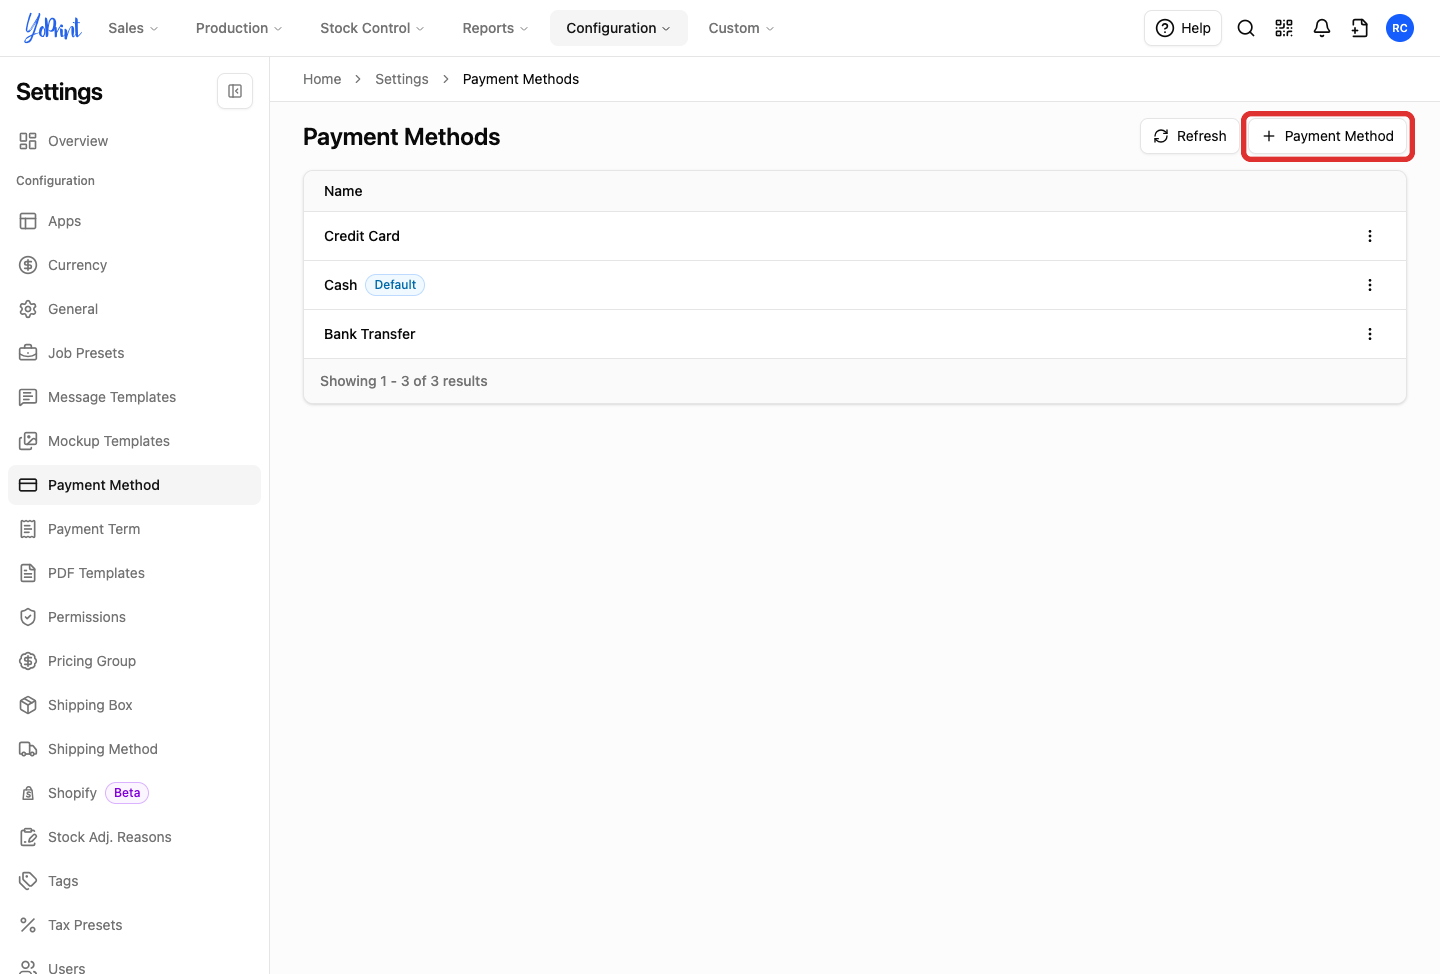
Click + Payment Method.
-
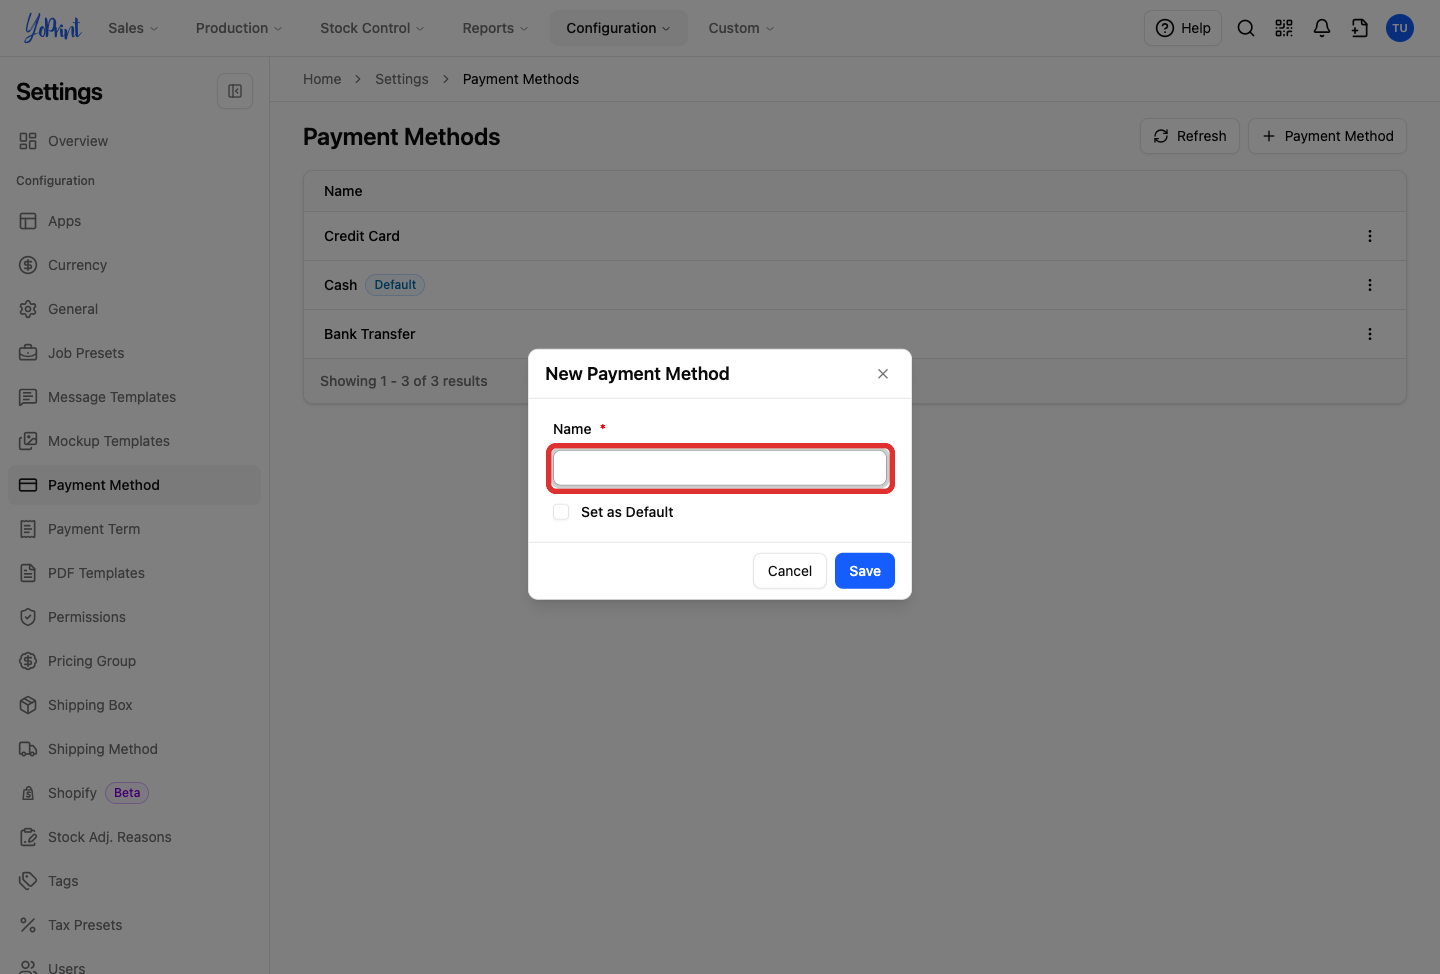
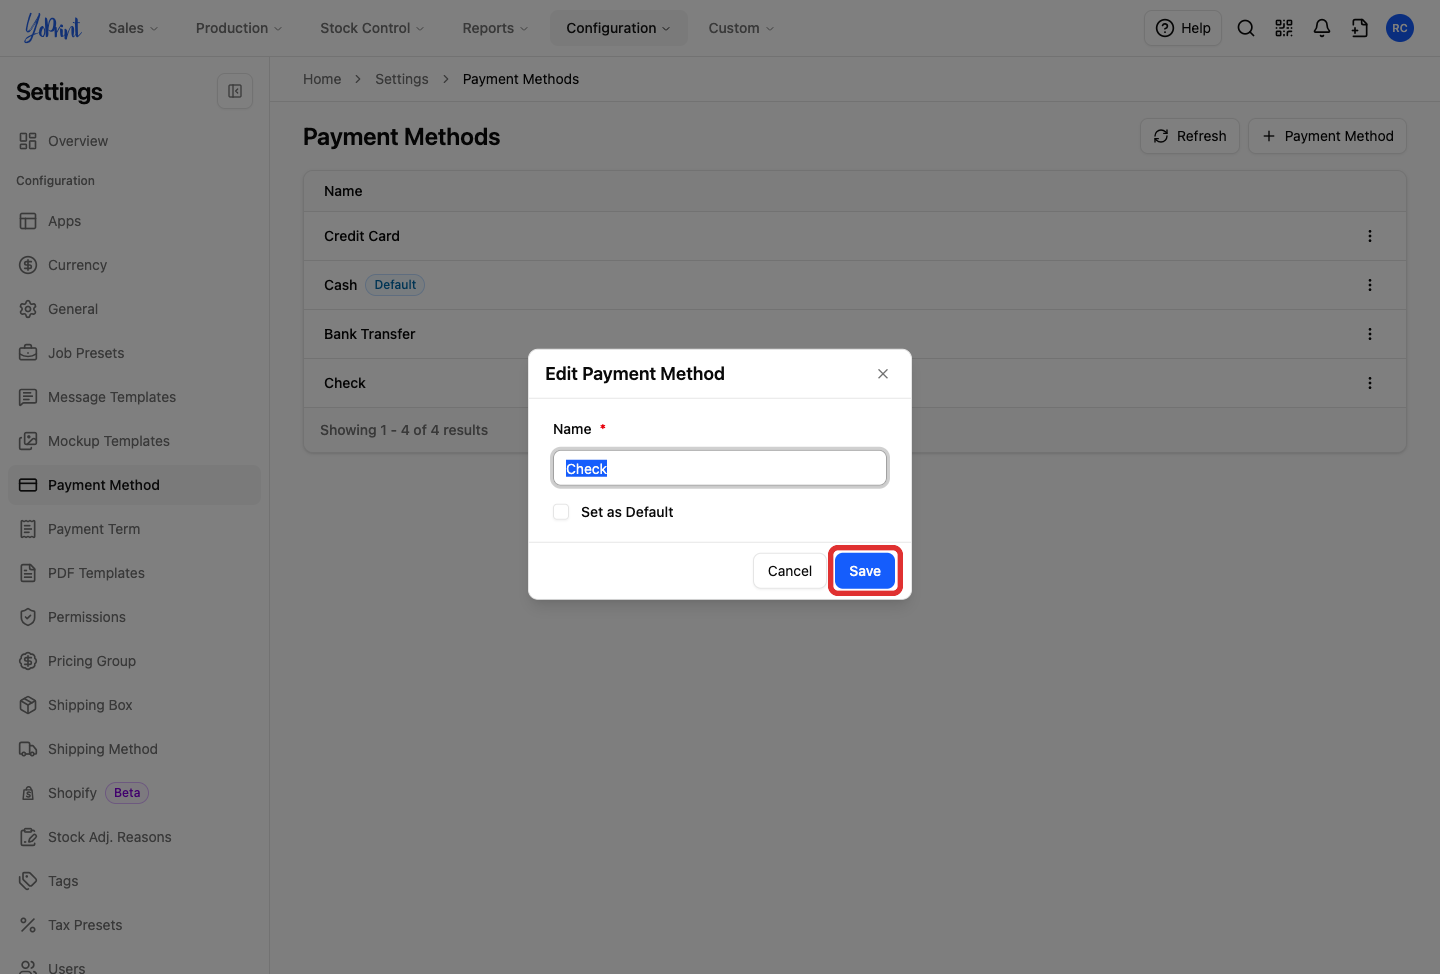
In the Name field, enter the name of the payment method, such as
Check.Turn on Set as Default if your shop uses this method most often and you want it preselected when recording manual payments. Setting your most common method as default saves manual selection on daily orders.
-
Click Save.
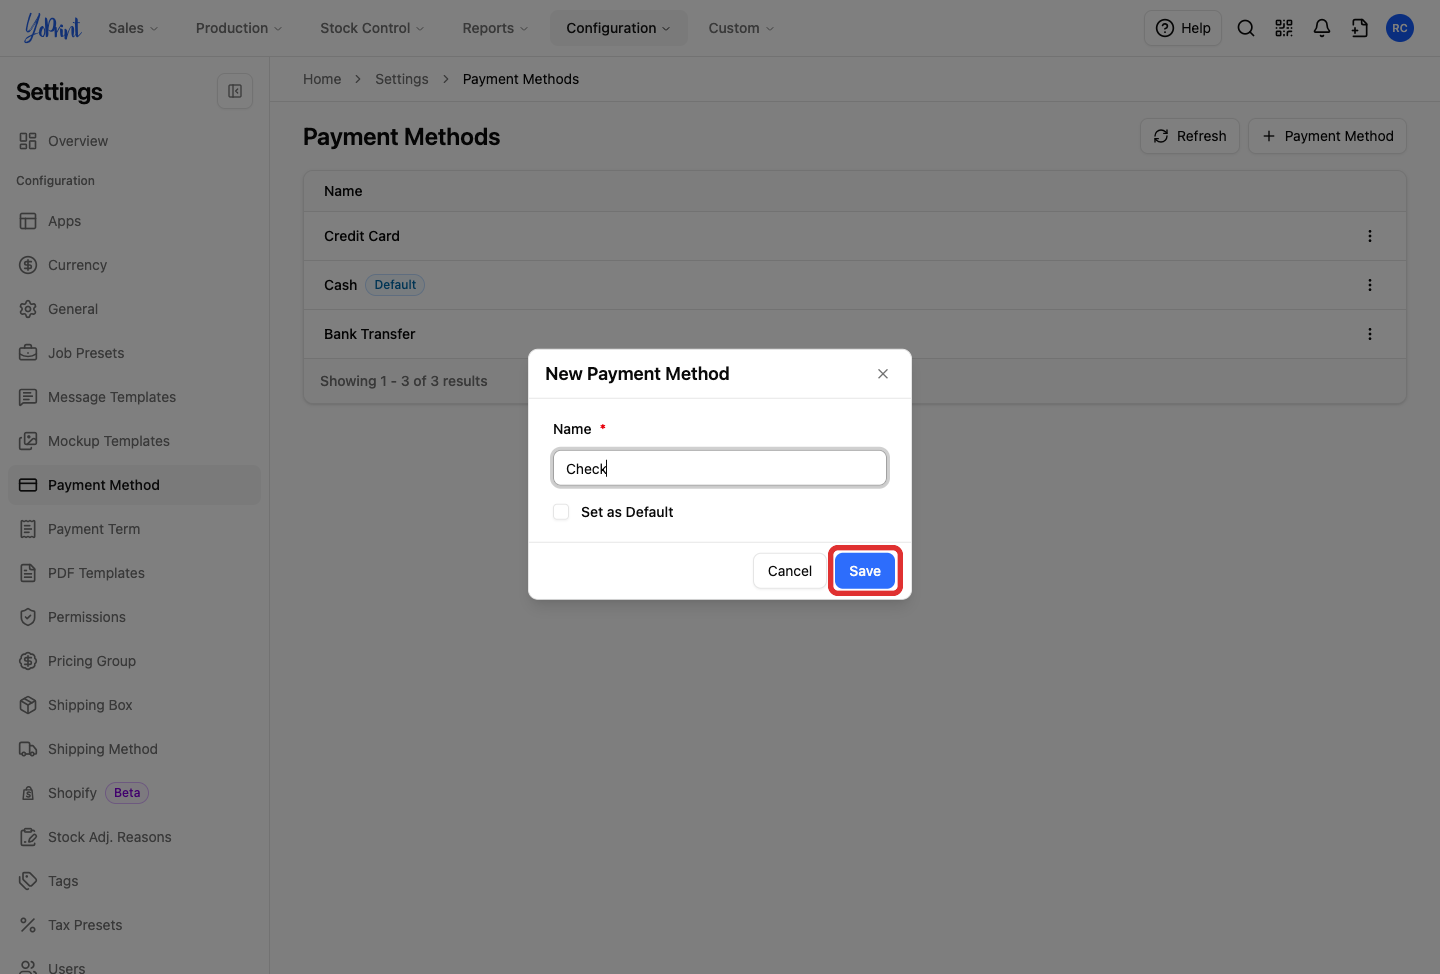
The list starts with Credit Card, Cash, and Bank Transfer. Cash remains the default until you choose another method. Setting another method as default automatically removes the default status from the previous one. To set an existing method as default later, open its three-dot row menu and select Set as Default, or edit the method and turn on Set as Default.
Rename or remove a method
-
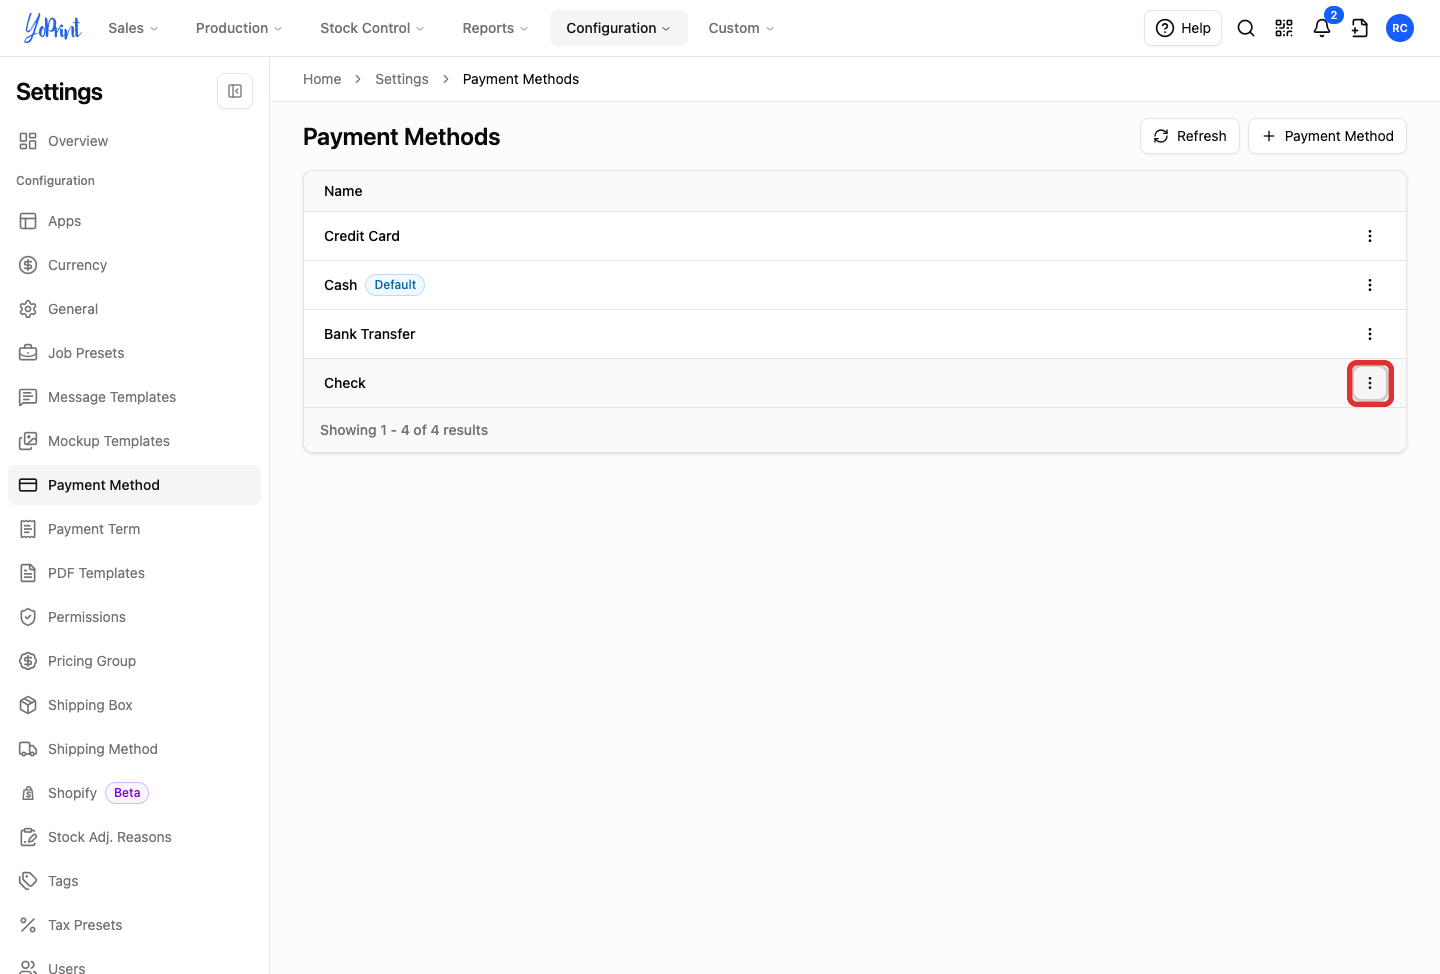
Open the three-dot row menu on the payment method you want to change.
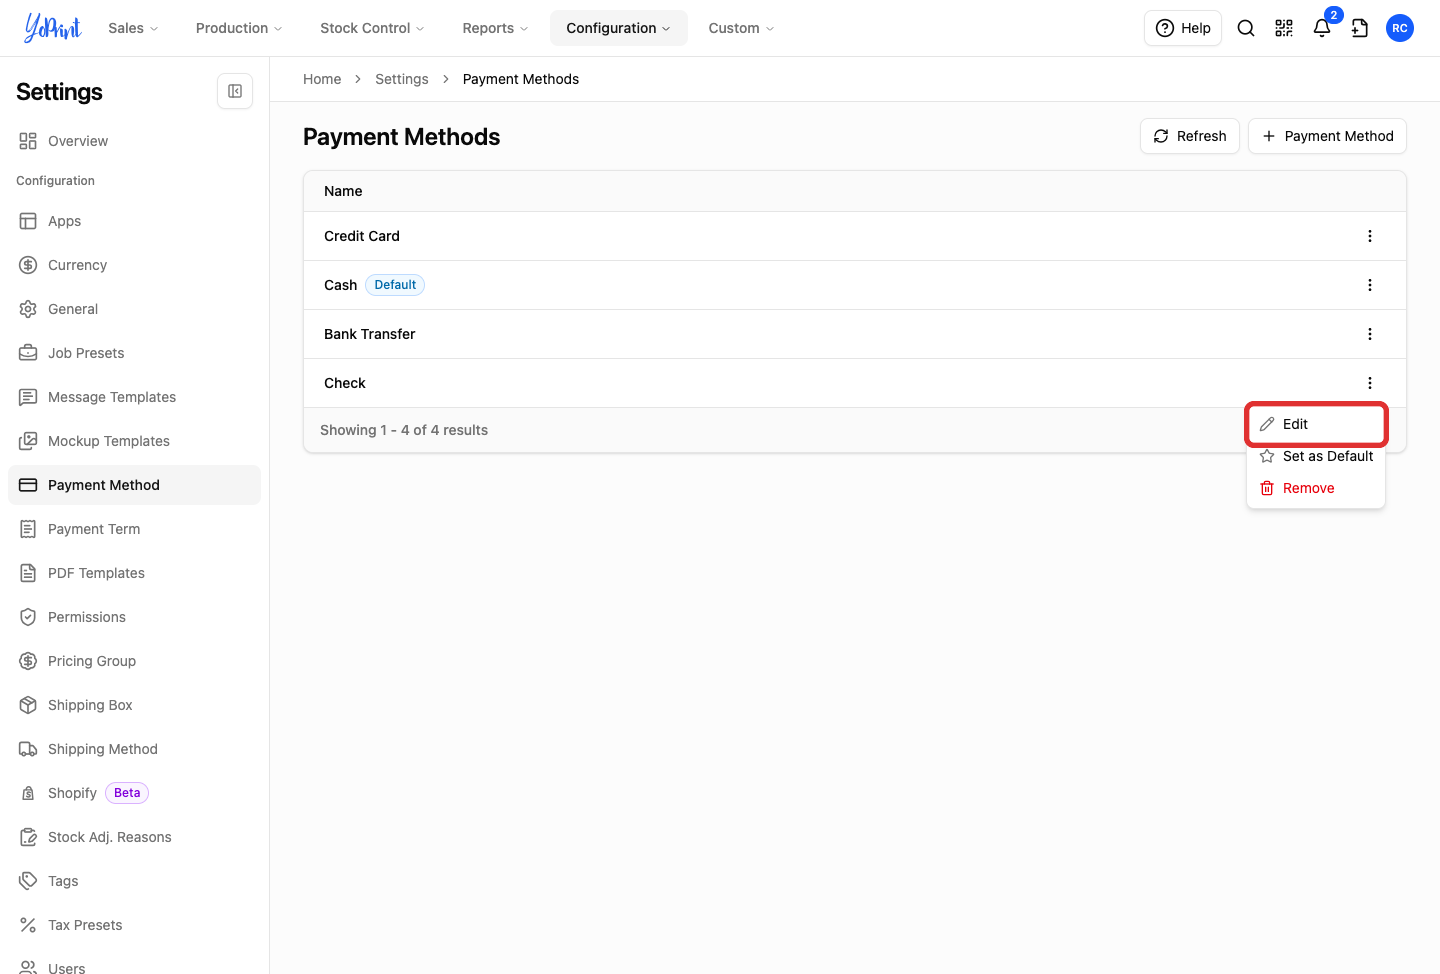
The default payment method cannot be removed; its row menu displays only Edit. To remove a method currently marked as default, set another method as the default first.
-
Click Edit.
-
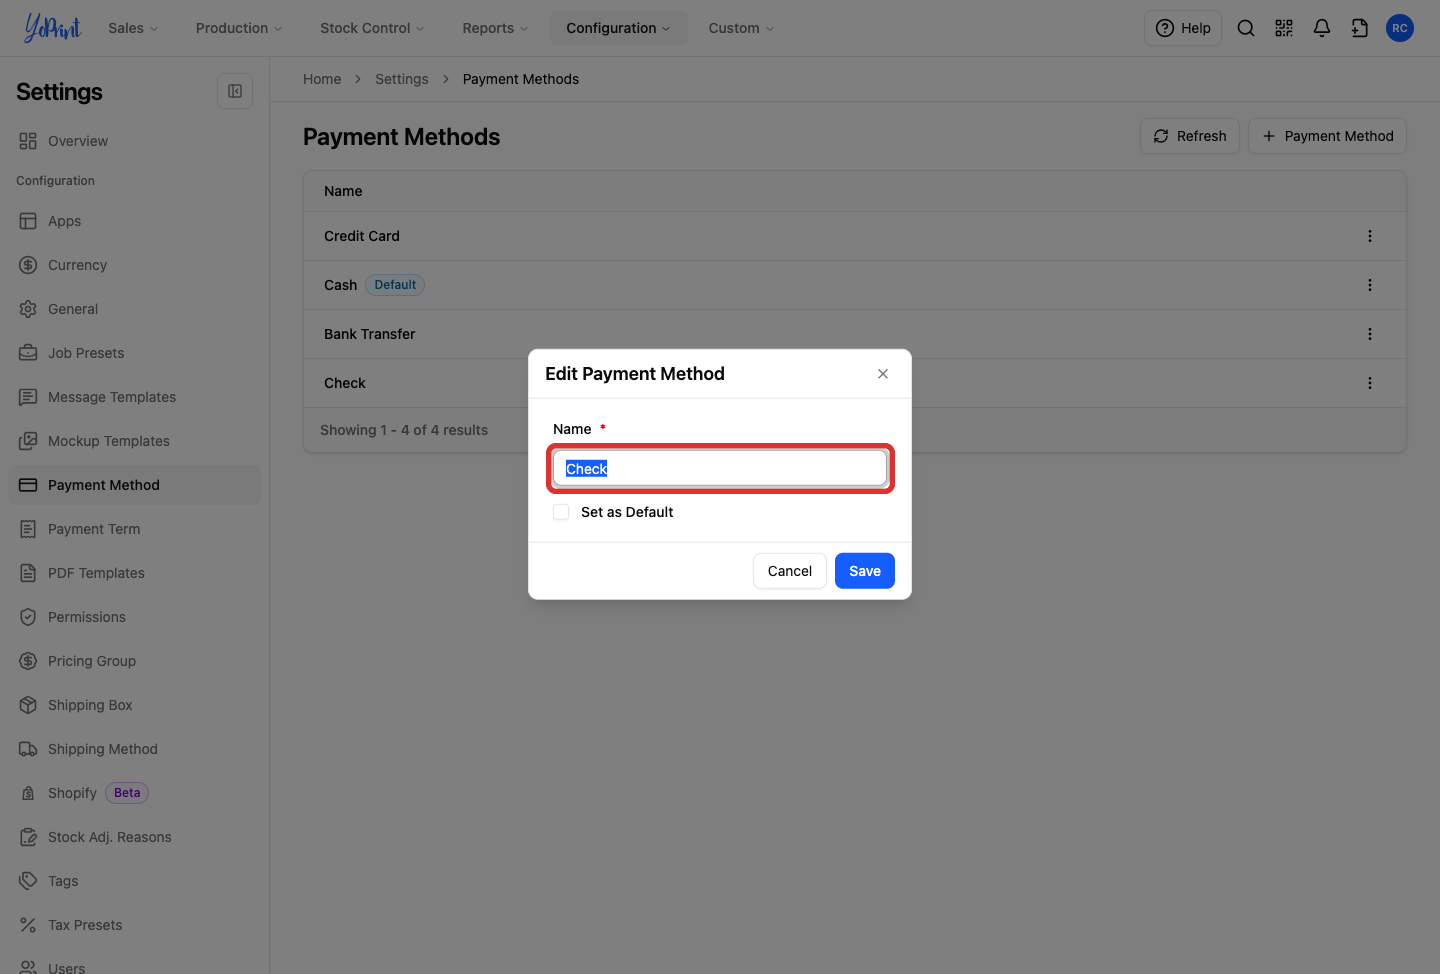
In the Name field, enter the new name.
-
Click Save.
Remove a payment method
To delete a payment method your shop no longer accepts:
-
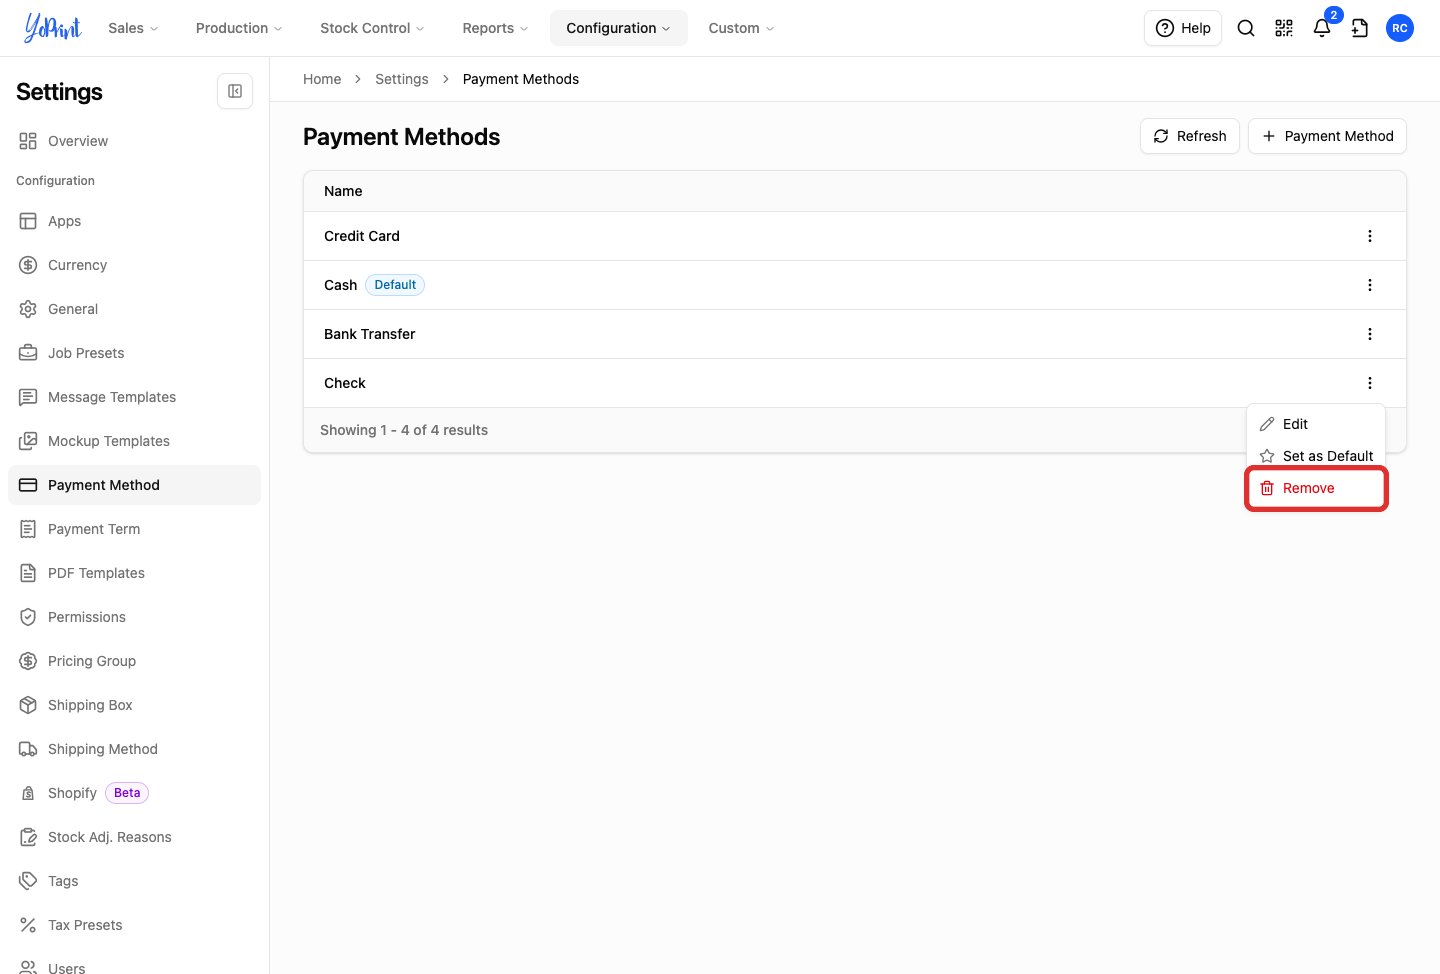
Open the three-dot row menu and select Remove.
-
In the confirmation dialog, click Remove to permanently delete the method.
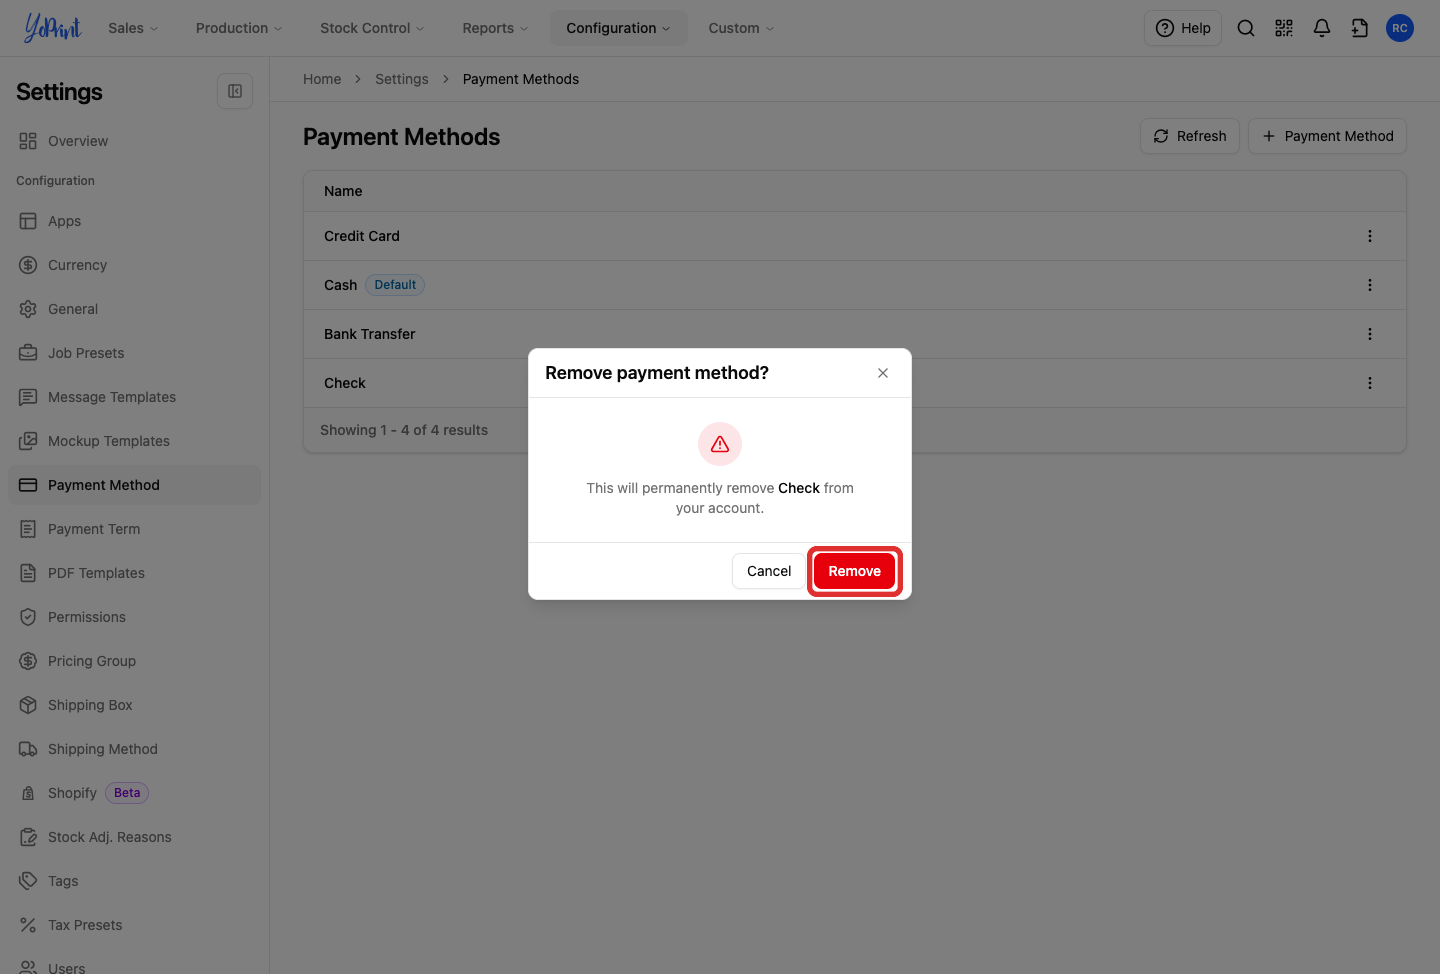
Removing a payment method removes it from future payment selections. Any past payments, invoices, or transactions recorded with that method remain unchanged in your accounting records. If needed, you can add the same payment method again at any time.
Record a check or a cash payment
In the top navigation, go to Sales > Quotes (or Sales Order), and open the order you want to record a payment for. Create an invoice for the line items before recording payments. While you can record a payment before invoicing, creating the invoice first establishes the order total so YoPrint can calculate and display Deposit Due and Balance Due (which otherwise show as blank or unallocated). To set or adjust deposit percentages and terms, see Manage Payment Terms.
-
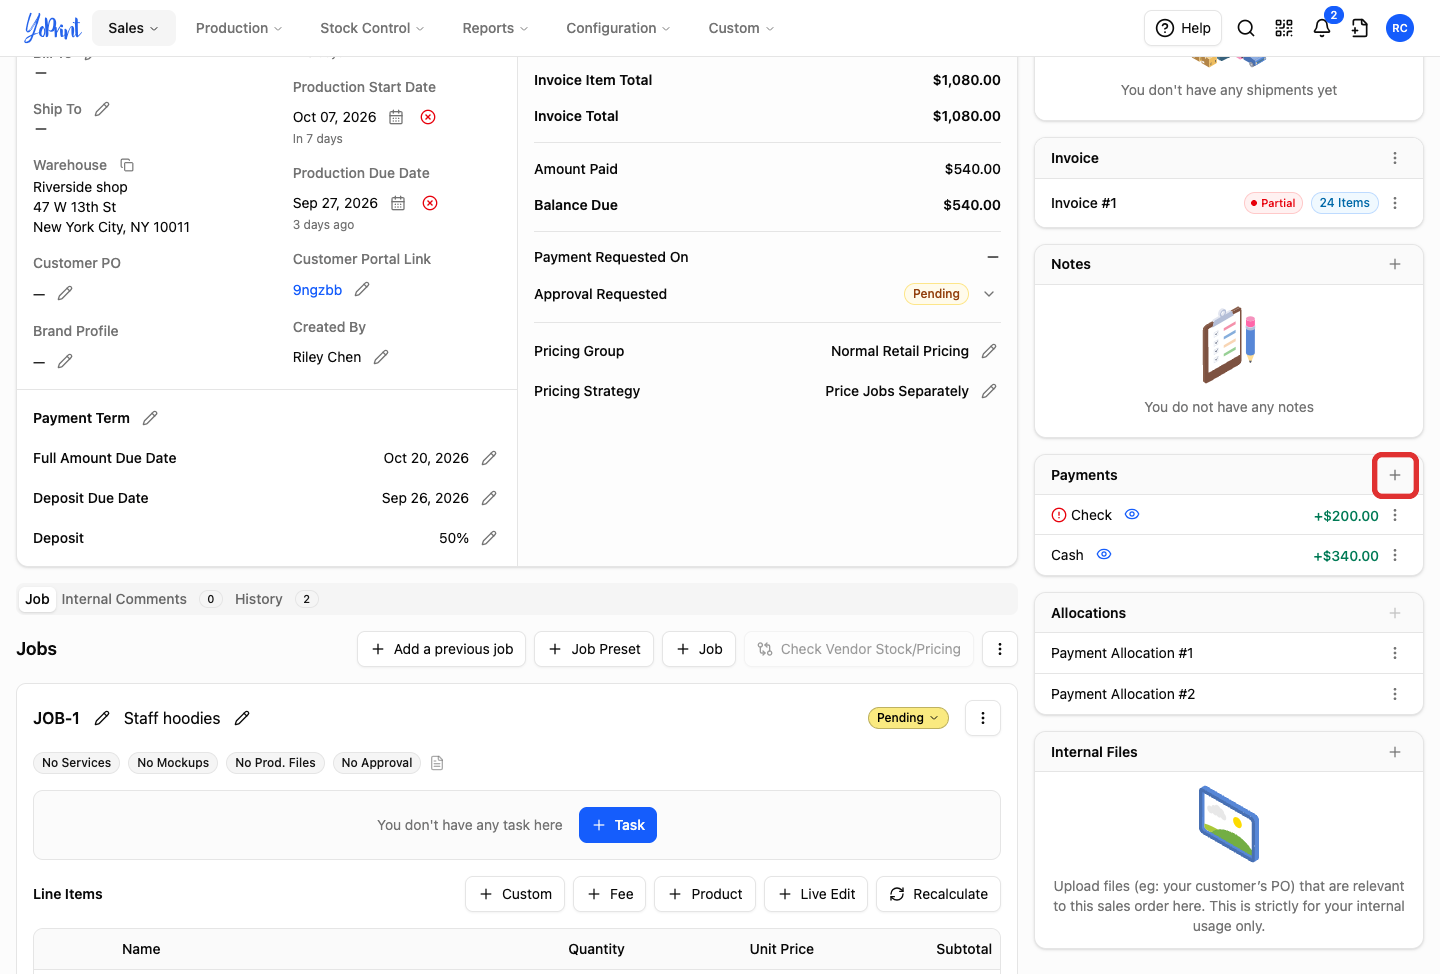
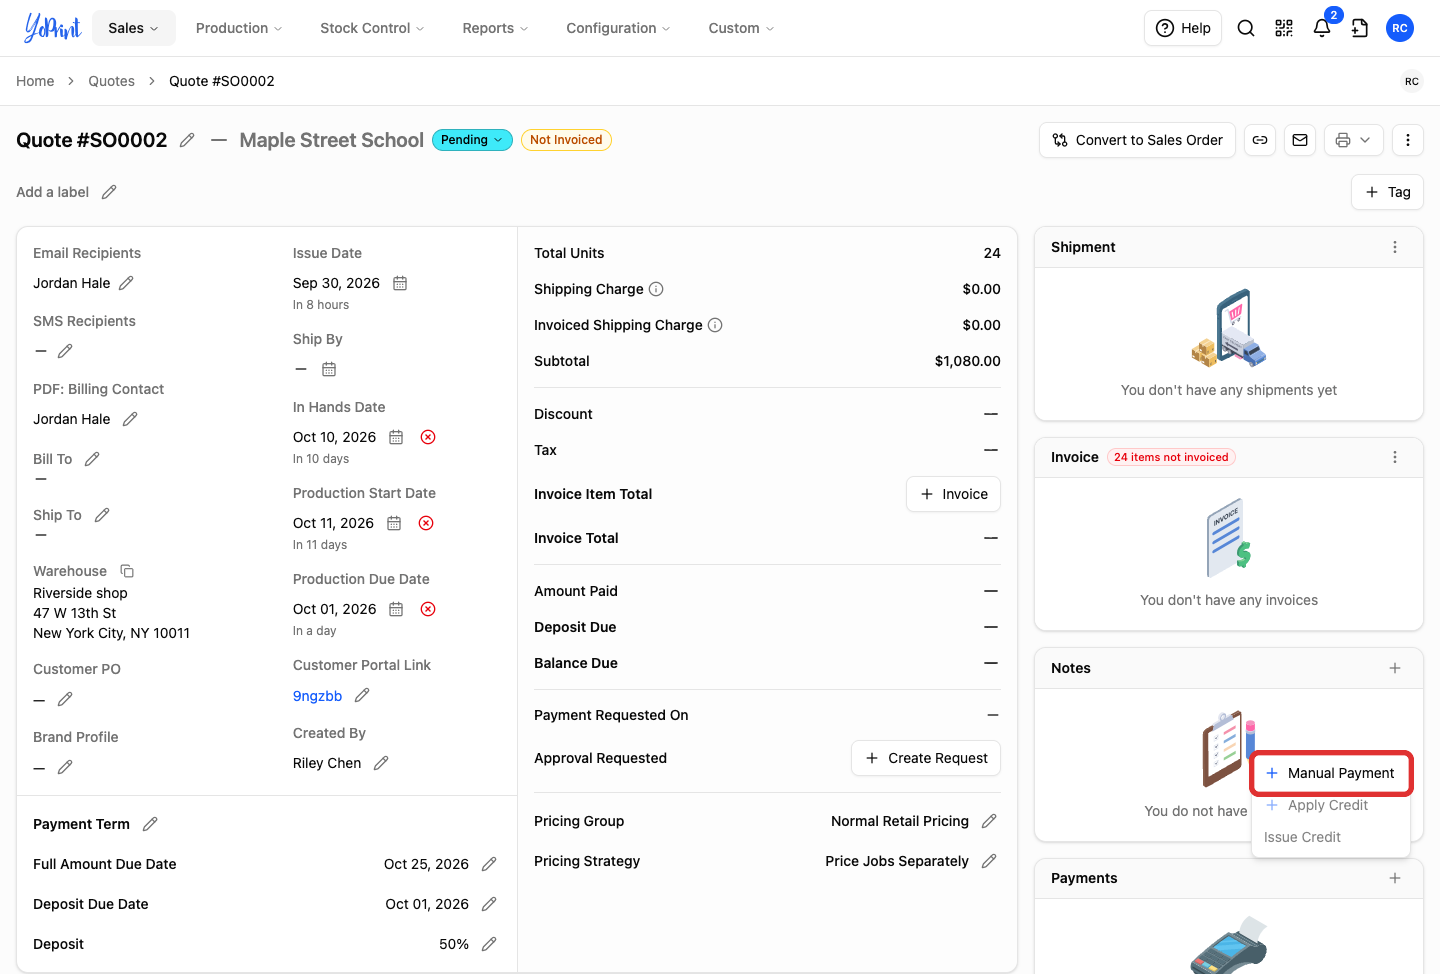
In the Payments section, click + (Add).
-
Select Manual Payment.
-
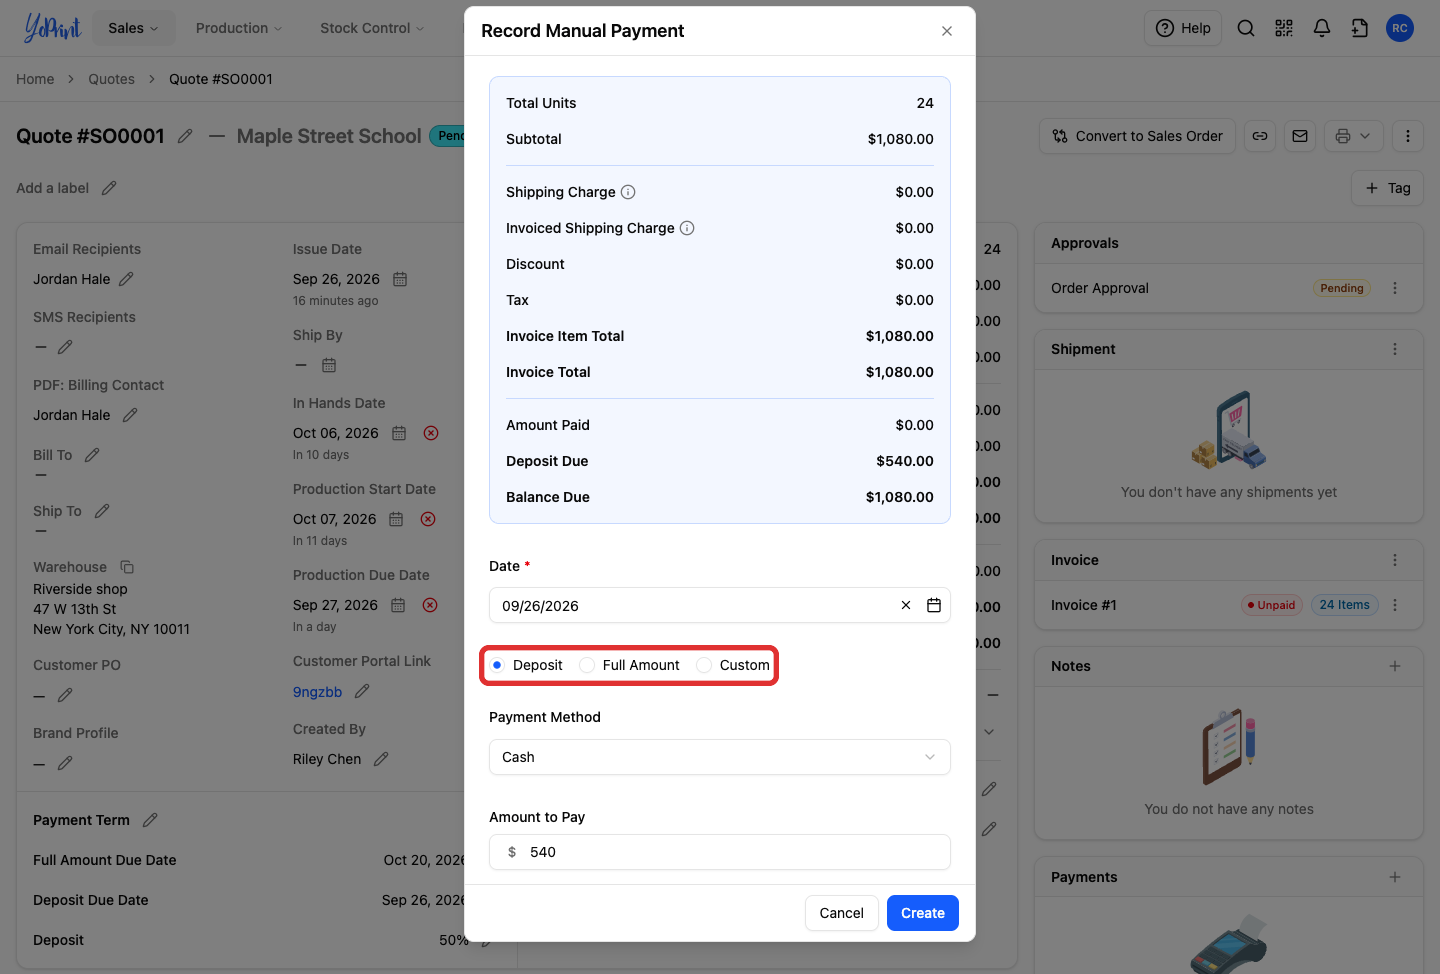
Select Deposit, Full Amount, or Custom.
Deposit automatically fills in the deposit amount still due. Full Amount fills in the entire balance due. Custom lets you enter any specific payment amount.
-
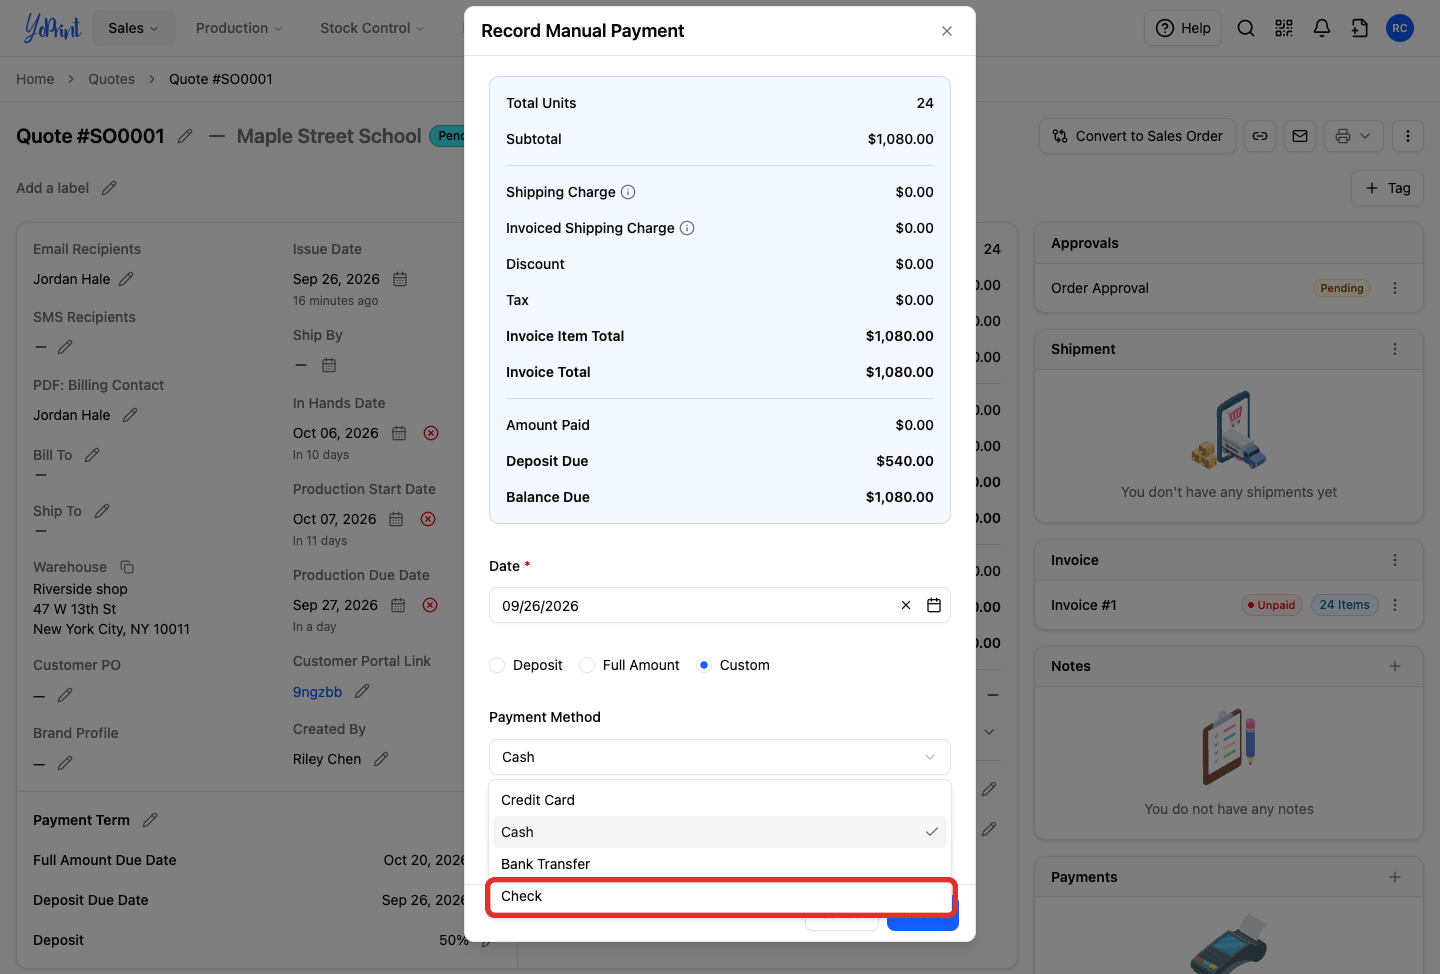
In the Payment Method dropdown, select your payment method (such as Check).
-
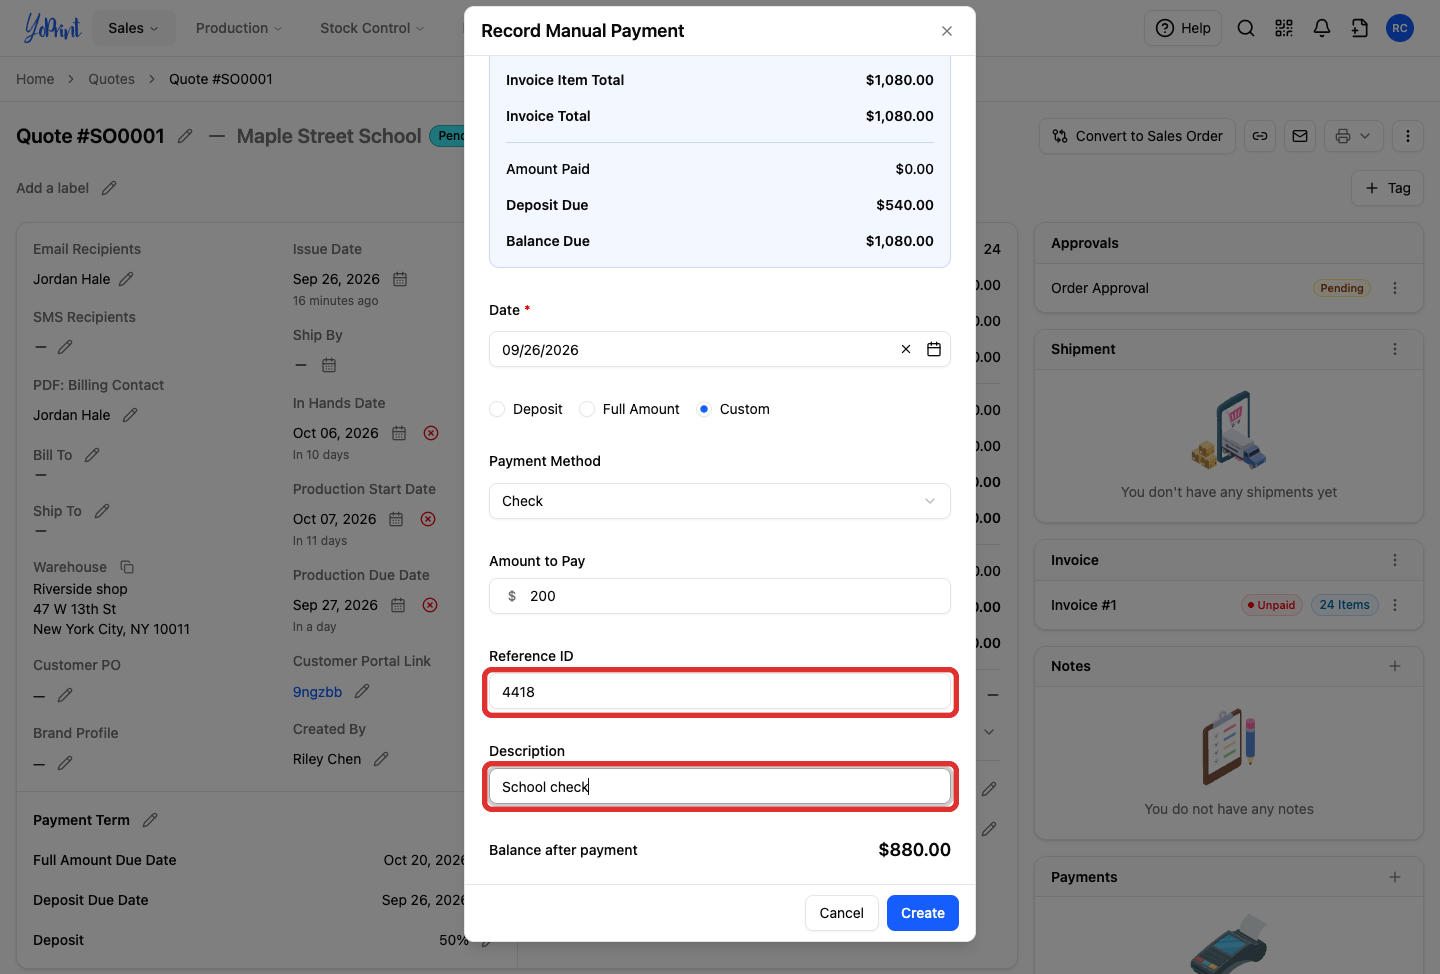
Enter the payment details. The Date defaults to today, but you can change it if you need to backdate the payment. Enter the amount to pay. For a check or bank transfer, enter the check number or wire code in Reference ID and an optional note in Description; for cash, you can leave these optional fields blank or note the register.
Use Reference ID to record check numbers, bank wire codes, or receipt numbers so your team can verify deposits later.
-
Click Create.
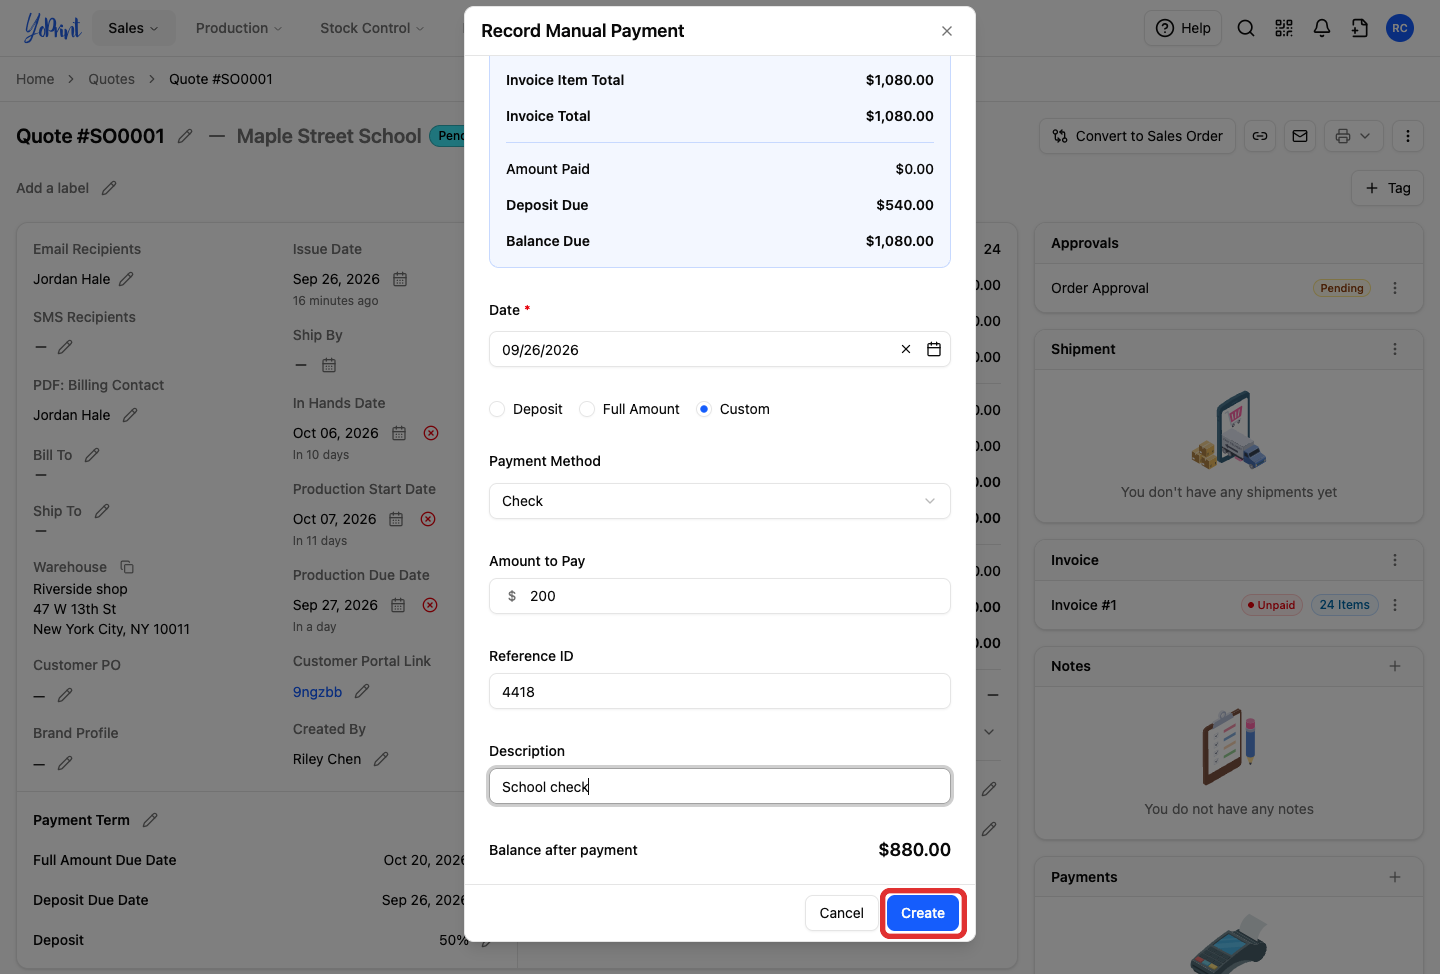
In the quote's financial breakdown panel, Deposit Due appears between Amount Paid and Balance Due while an invoiced deposit requirement remains unpaid. Recording a $200.00 check on a $1,080.00 quote updates Amount Paid to $200.00, reduces Deposit Due to $340.00, and leaves Balance Due at $880.00. When recording the next payment, selecting Deposit automatically suggests the remaining $340.00 deposit due. Recording that $340.00 as cash updates Amount Paid to $540.00 and Balance Due to $540.00. Once the deposit is fully satisfied, Deposit Due drops off the financial summary, leaving only Balance Due.

-
Click the eye icon beside the recorded payment to view its details.
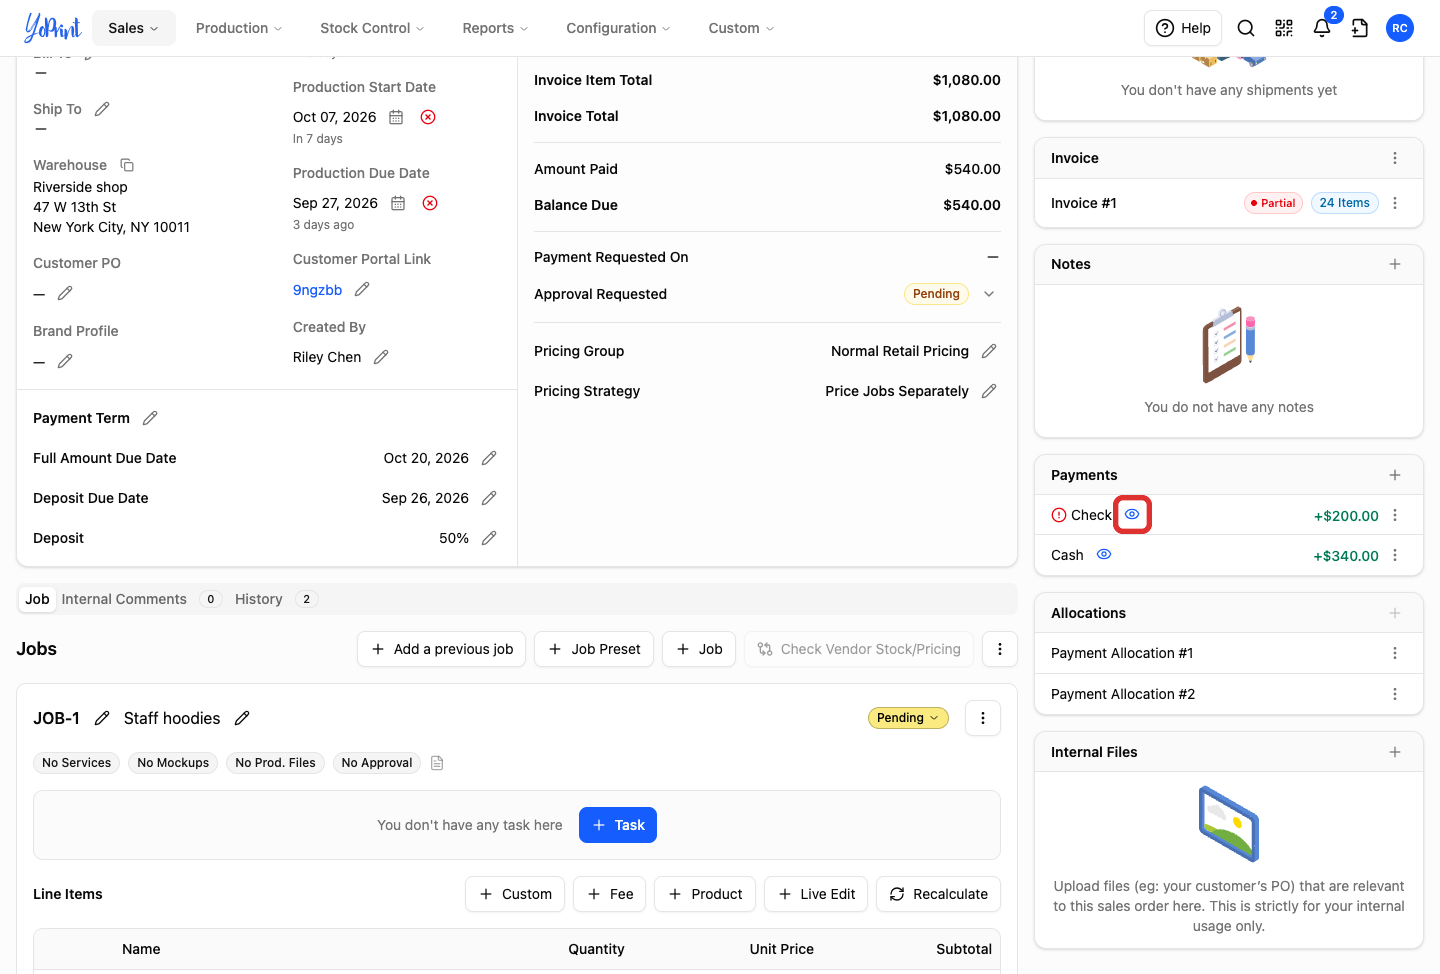
-
Review the payment details in the Transaction Details popup. The window confirms the transaction Type (PAYMENT), Amount, Payment Method, Transaction Date, Reference Id, and Reference Description.
Correct a payment entry
Recorded payments cannot be edited directly. If you need to correct an entry, open the three-dot row menu beside the payment in the Payments section, select Remove to delete the mistaken entry, and record the payment again.
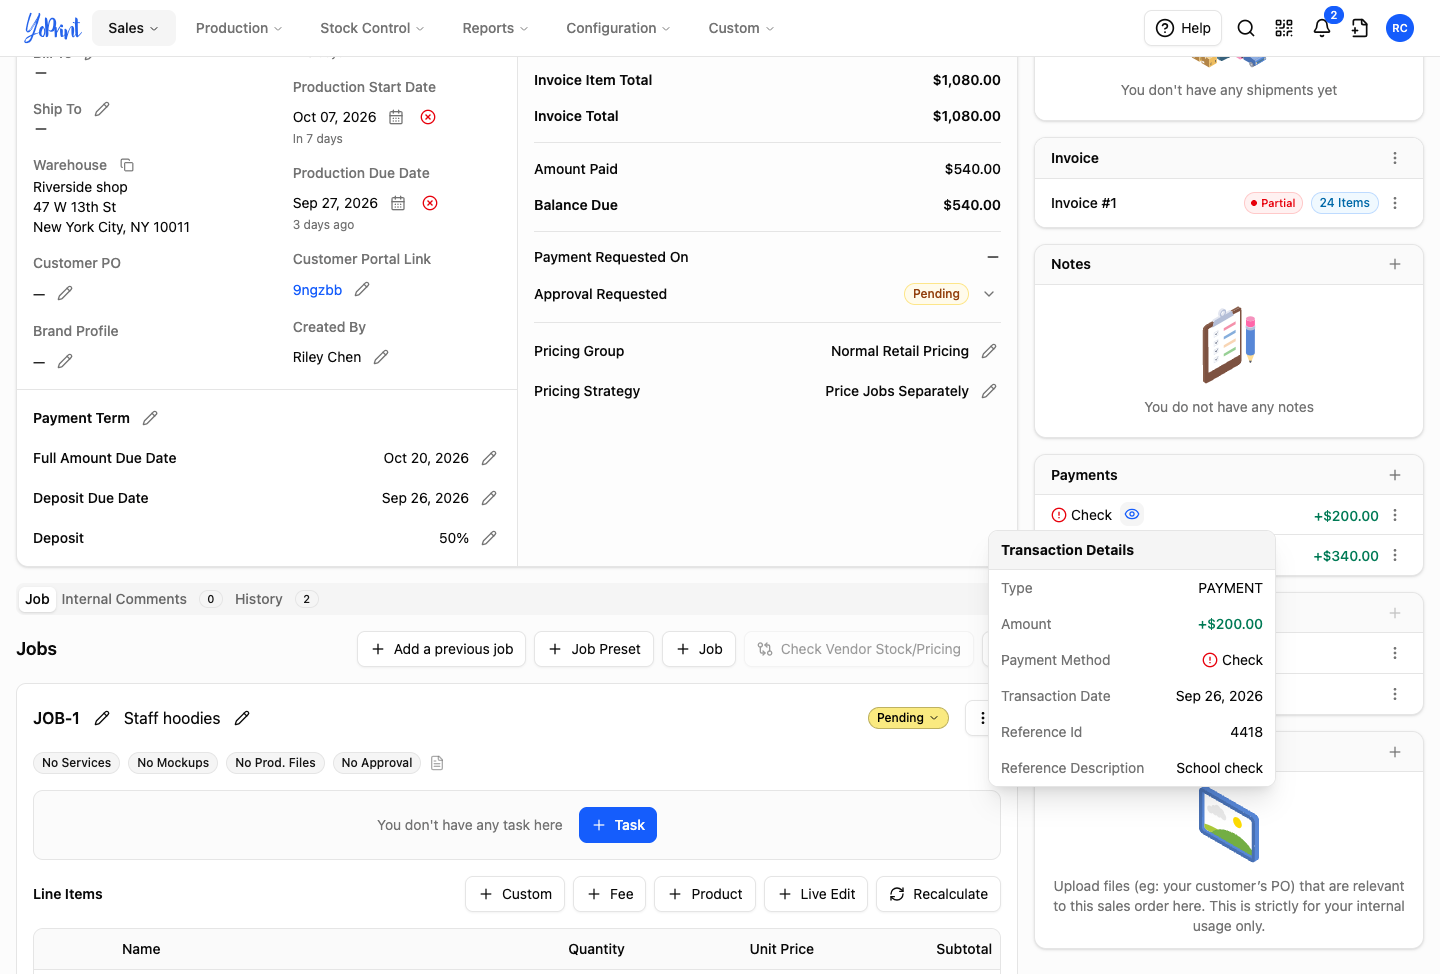
To email the customer a payment request for the remaining balance, see Collect and Record Payments. Customers can also view recorded manual payments in their customer portal; see Customer Portal Overview.