Send Messages Through a Sales Order or Quote
In this article
Send order updates, questions, and files from the order they belong to. The conversation stays with that order, so your team can return to it later.
YoPrint sends emails directly to your customer's email inbox. Customers can reply to the email from their usual email app, and YoPrint brings their replies back into the order's conversation thread. For notes only your team should see, use internal comments instead.
Open the order's messages
In the top navigation bar, open Sales > Sales Orders or Sales > Quotes, or click Sales Order or Quote under Sales on the Home page. This example uses sales order SO0001. Both use Customer Message. The same Customer Message envelope icon is at the top right of the full sales order or quote page.
-
Click the order number you want to open.
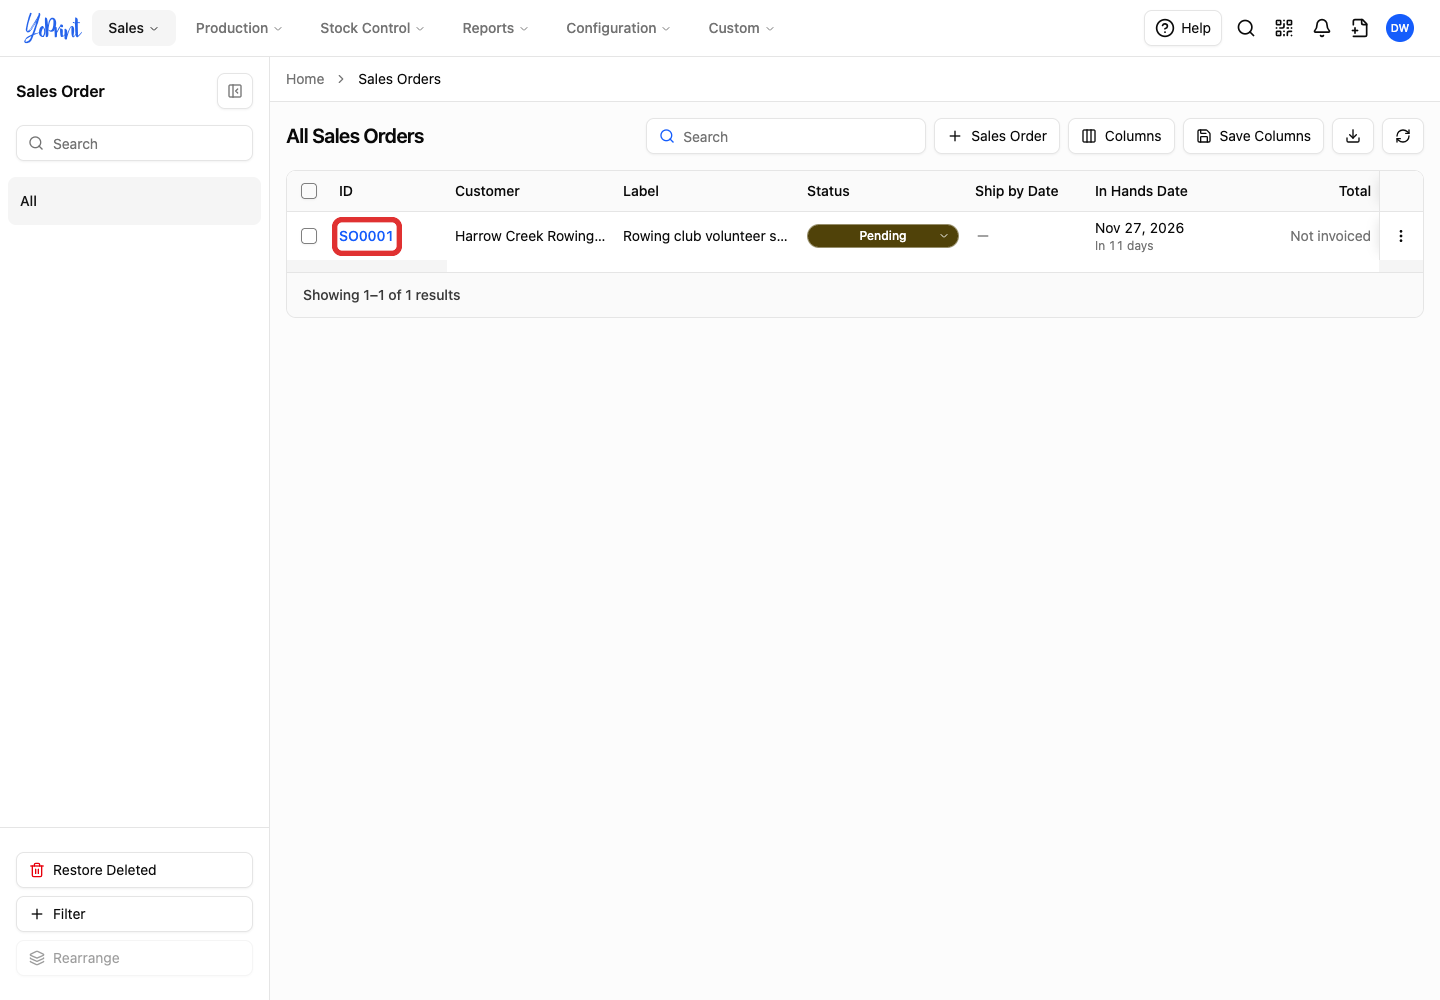
The order opens in a window over the list.
-
Click the Customer Message envelope icon.
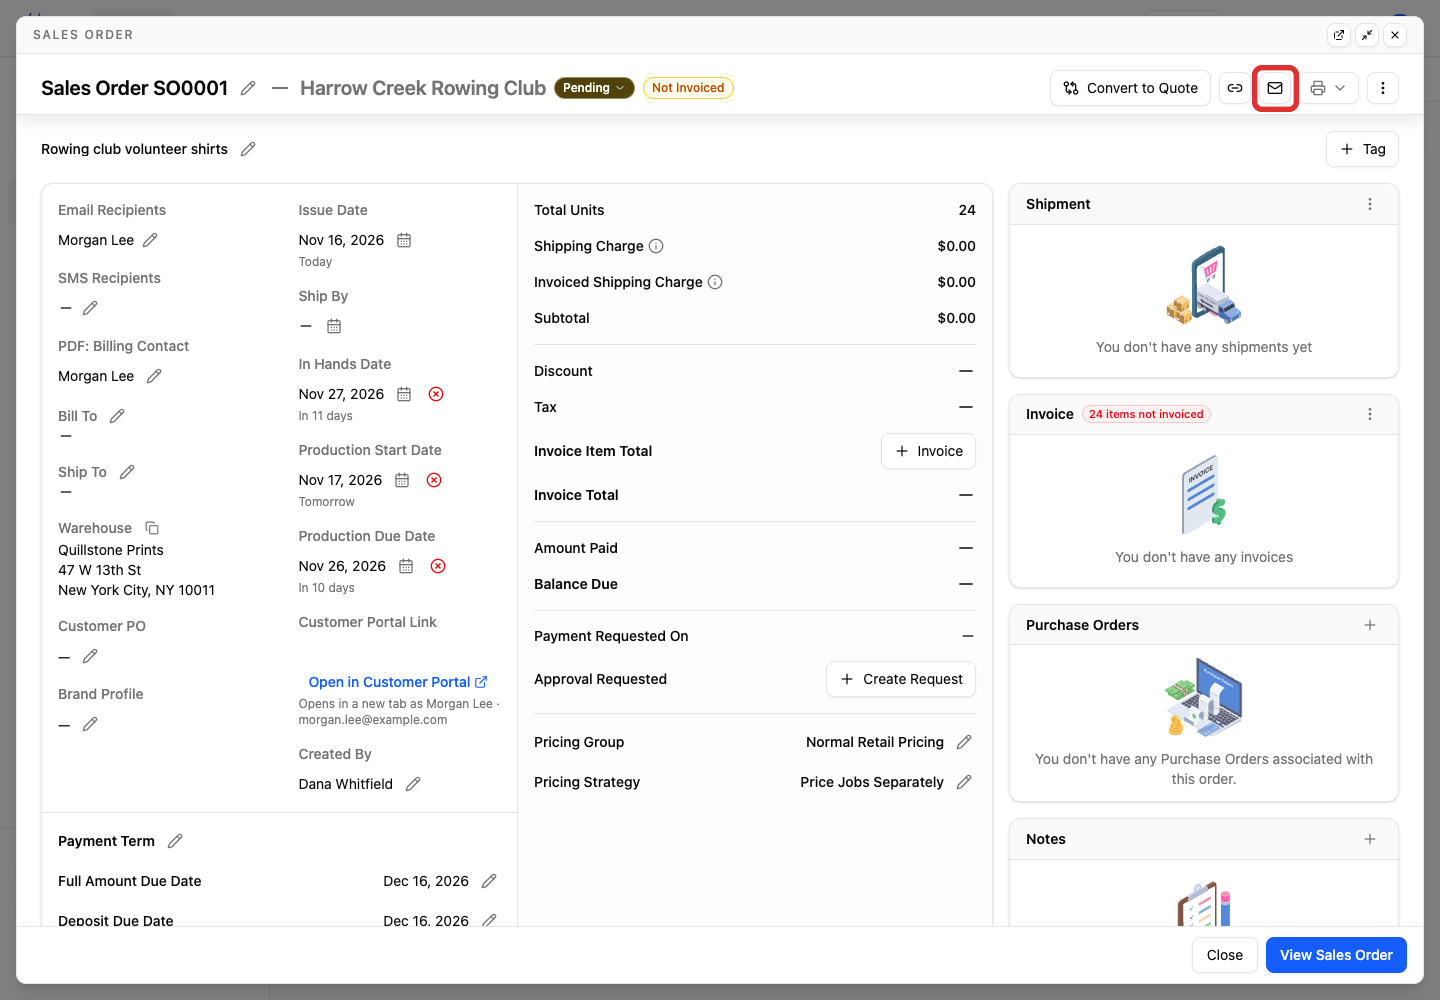
The Customer Message composer opens in a dialog.
Choose the email recipients
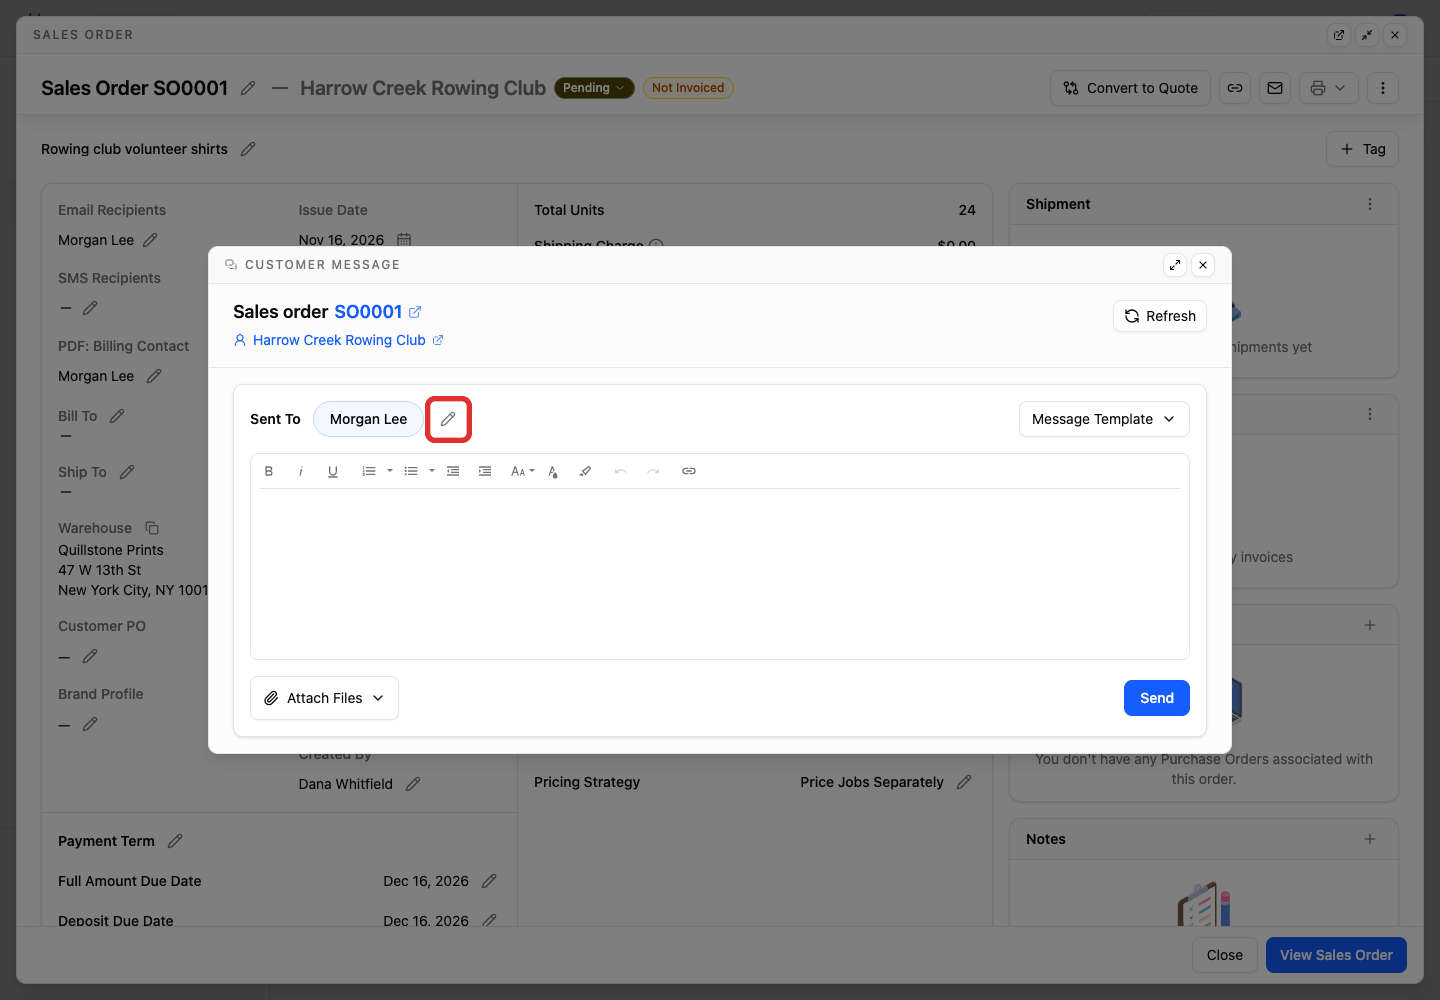
The names beside Sent To are the selected recipients. If they are already correct, continue to Write and send your message.
-
Click the pencil beside Sent To to edit the recipients.
-
Make sure each contact who should receive this email is selected.
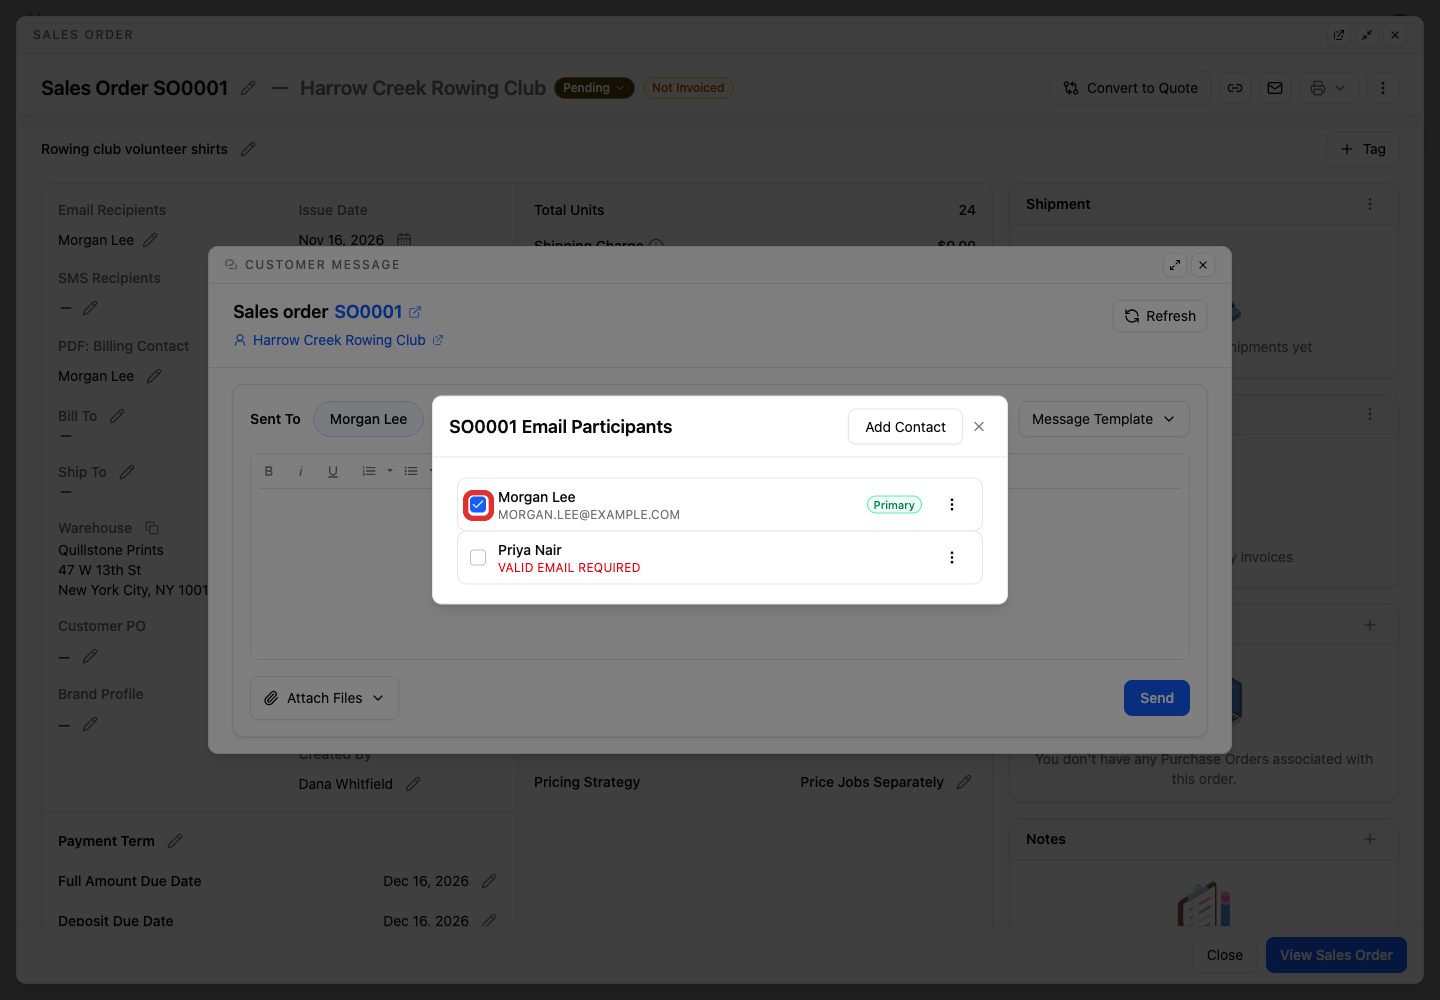
Valid email required
A contact without an email address is disabled and labelled Valid email required. Add an email address to their contact before selecting them: open the three-dot menu beside the contact, choose Edit Contact, enter the Email and click Save. To add someone new, click Add Contact; after you save, the new contact is selected. You do not need to leave the order.
-
Close the Email Participants window.
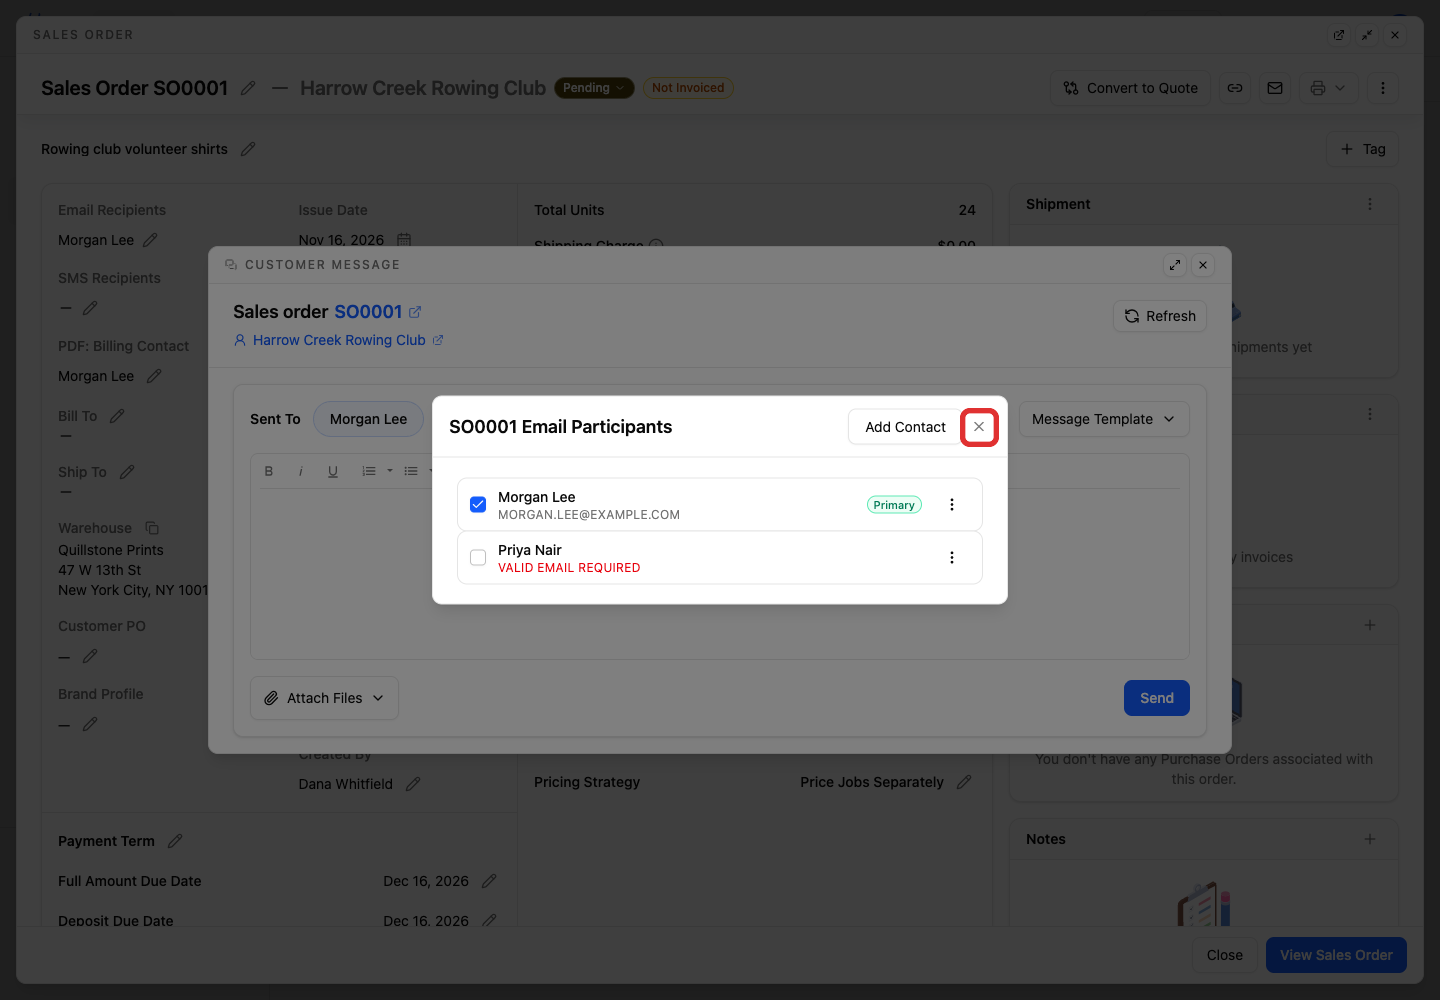
Click Close (X) in the upper corner. Your selections are saved automatically, and they become the order's Email Recipients. Check that the intended names appear beside Sent To before sending.
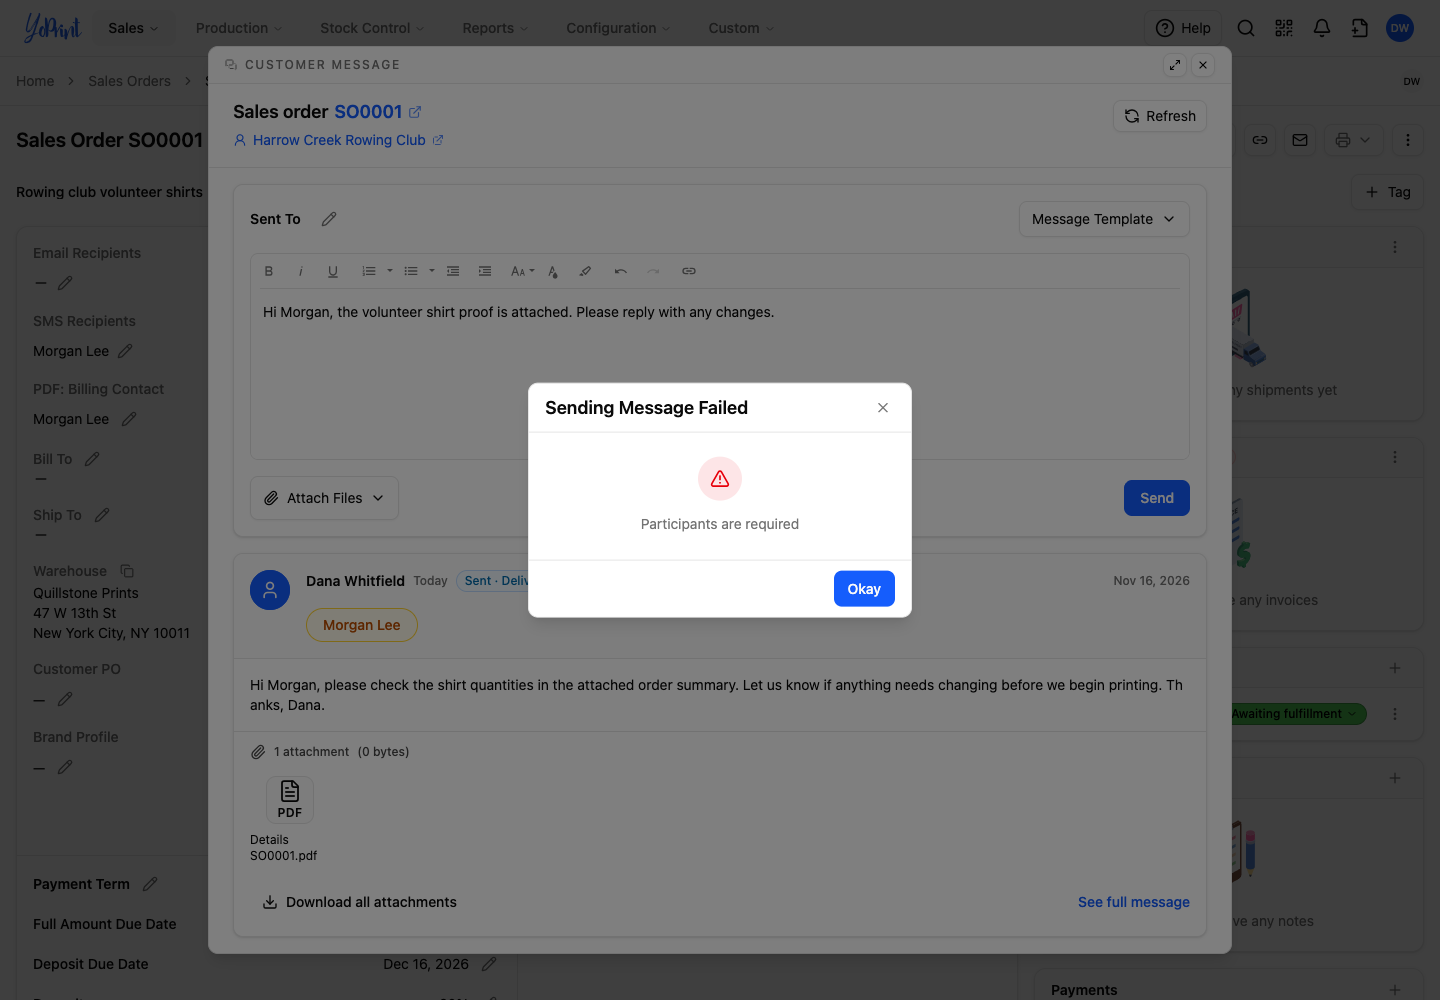
At least one recipient is required
You must select at least one recipient. If you try to send without one, Sending Message Failed shows Participants are required.
Write and send your message
Email or text message
These steps send email. Shops with SMS set up also have an email/SMS choice beside Send. For text messages, see Sending text messages.
-
Type your message in the text box.
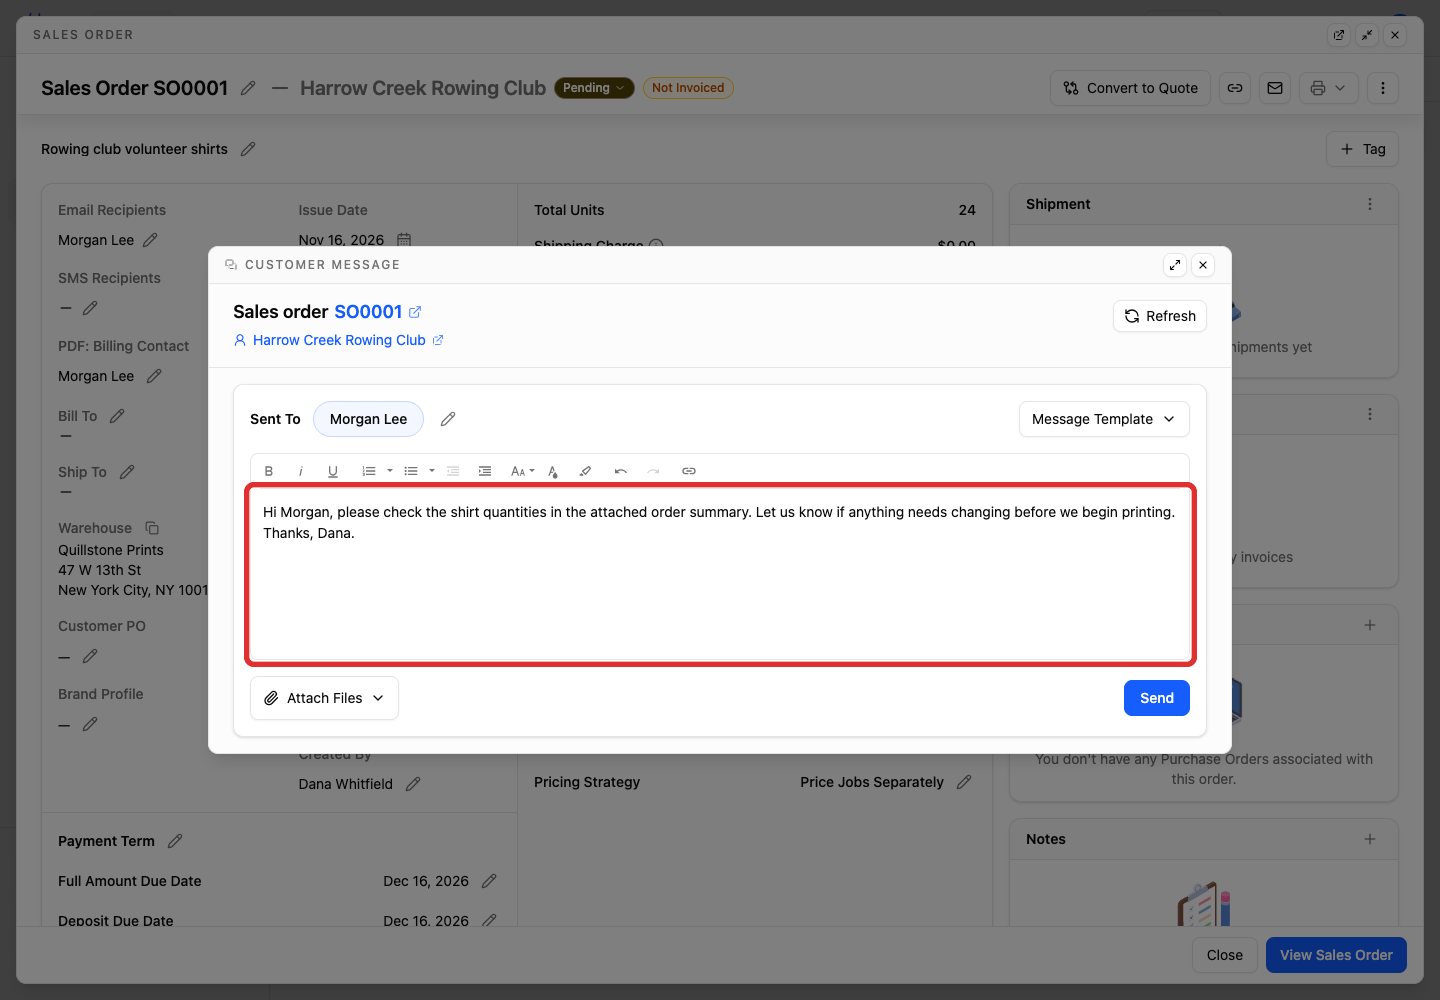
Use the formatting toolbar to add styling such as bold text, numbered lists, bulleted lists, and links. YoPrint sends formatted emails that keep these styles.
For wording you use regularly, manage templates in Configuration > Settings > Message Templates. Choosing a template from Message Template above the message box replaces any text already in the box. See Create and use a message template.
Attach files before sending
If you want to include files, upload files from your computer or attach files from the order before you click Send.
-
Click Send.
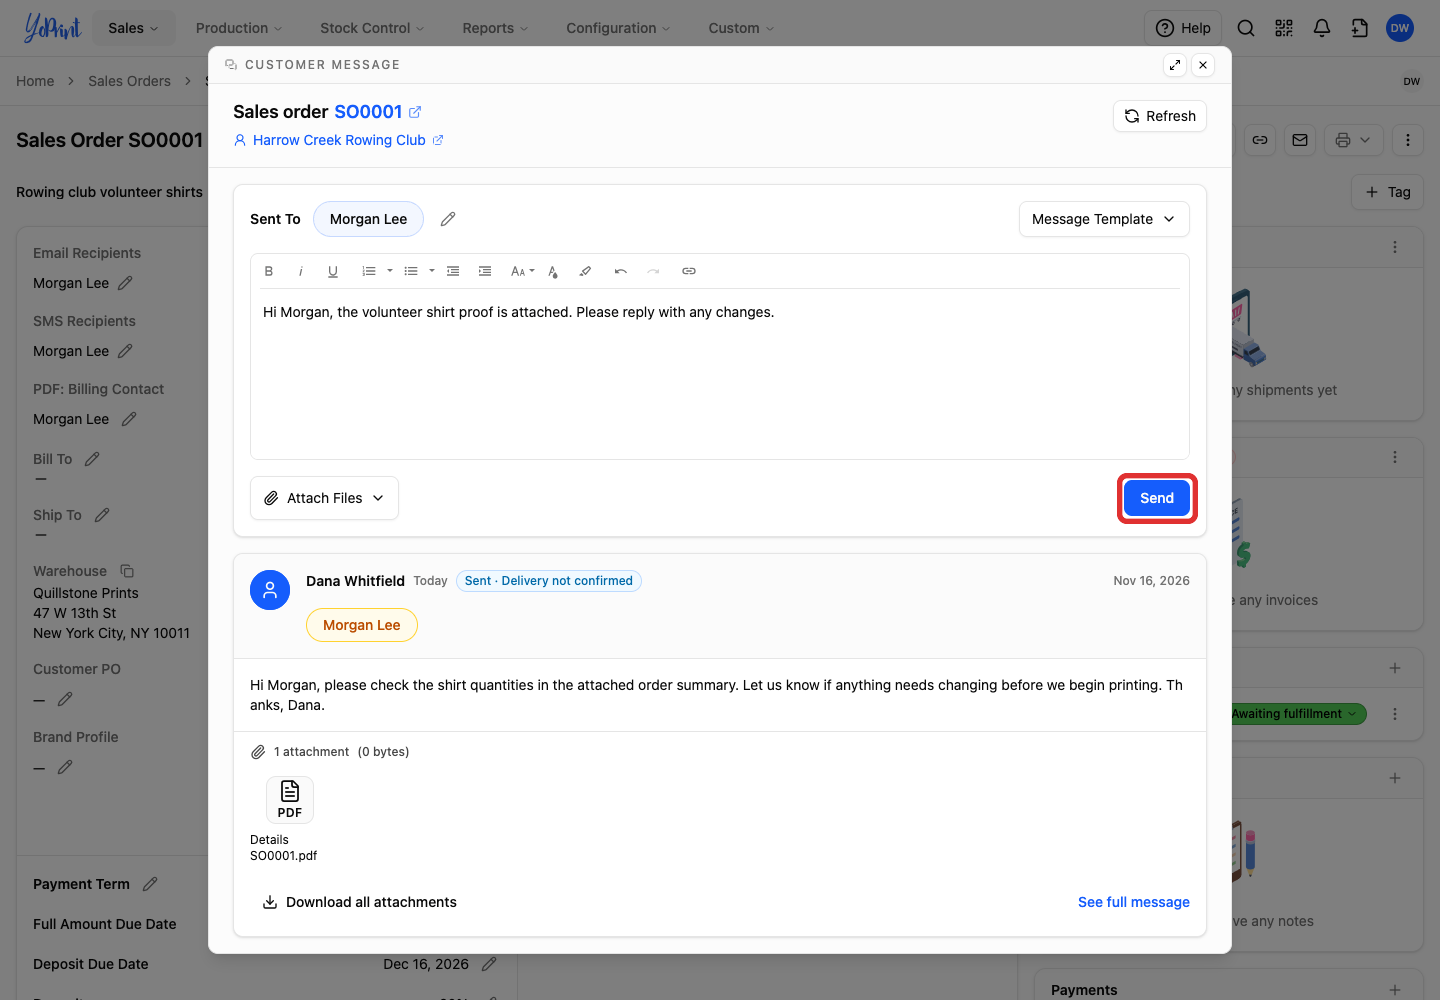
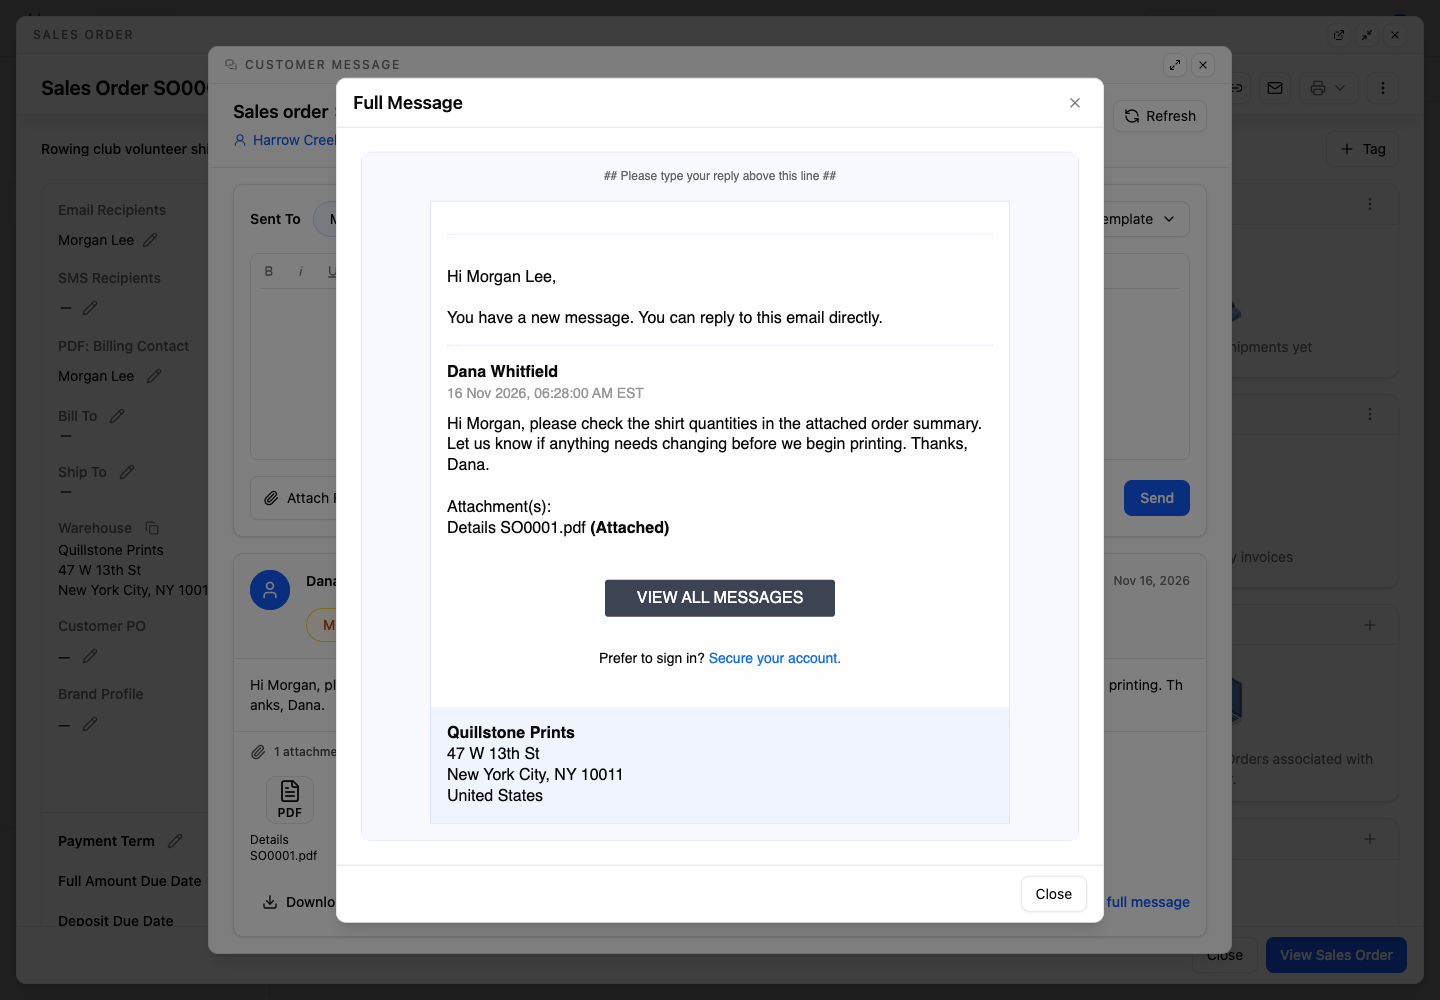
Your message appears below the composer. If it does not appear right away, click Refresh at the top of the message window instead of sending it again. The customer receives an email with your message and can reply directly to it. It comes from your shop's name followed by via YoPrint, with a subject such as [Sales Order-SO0001] You got a New Message! To send from your own domain, see Customize Email Sending Domain. The email also includes View All Messages, which opens the conversation in the Customer Portal.
Email restricted during your trial
If YoPrint says email is restricted during your trial, click Help in the top navigation bar to contact customer support and enable email for your account.
Attach files from your computer
Use this route for a file on your computer. For a document already available on the order, use Attach files from the order.
-
Open Attach Files below your message.
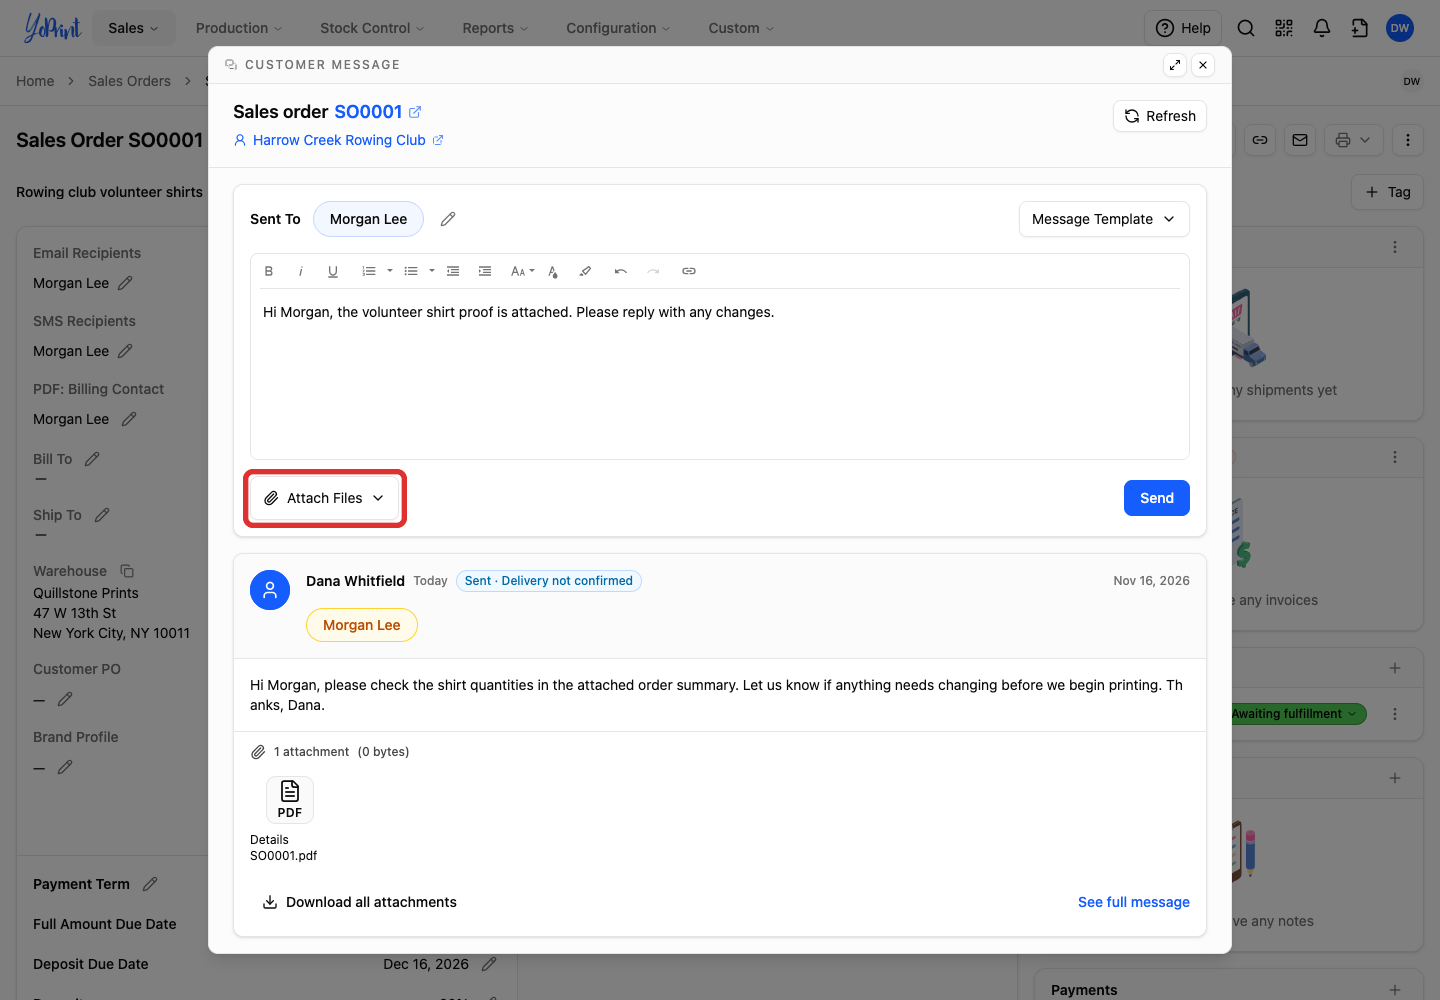
-
Choose Upload Files.
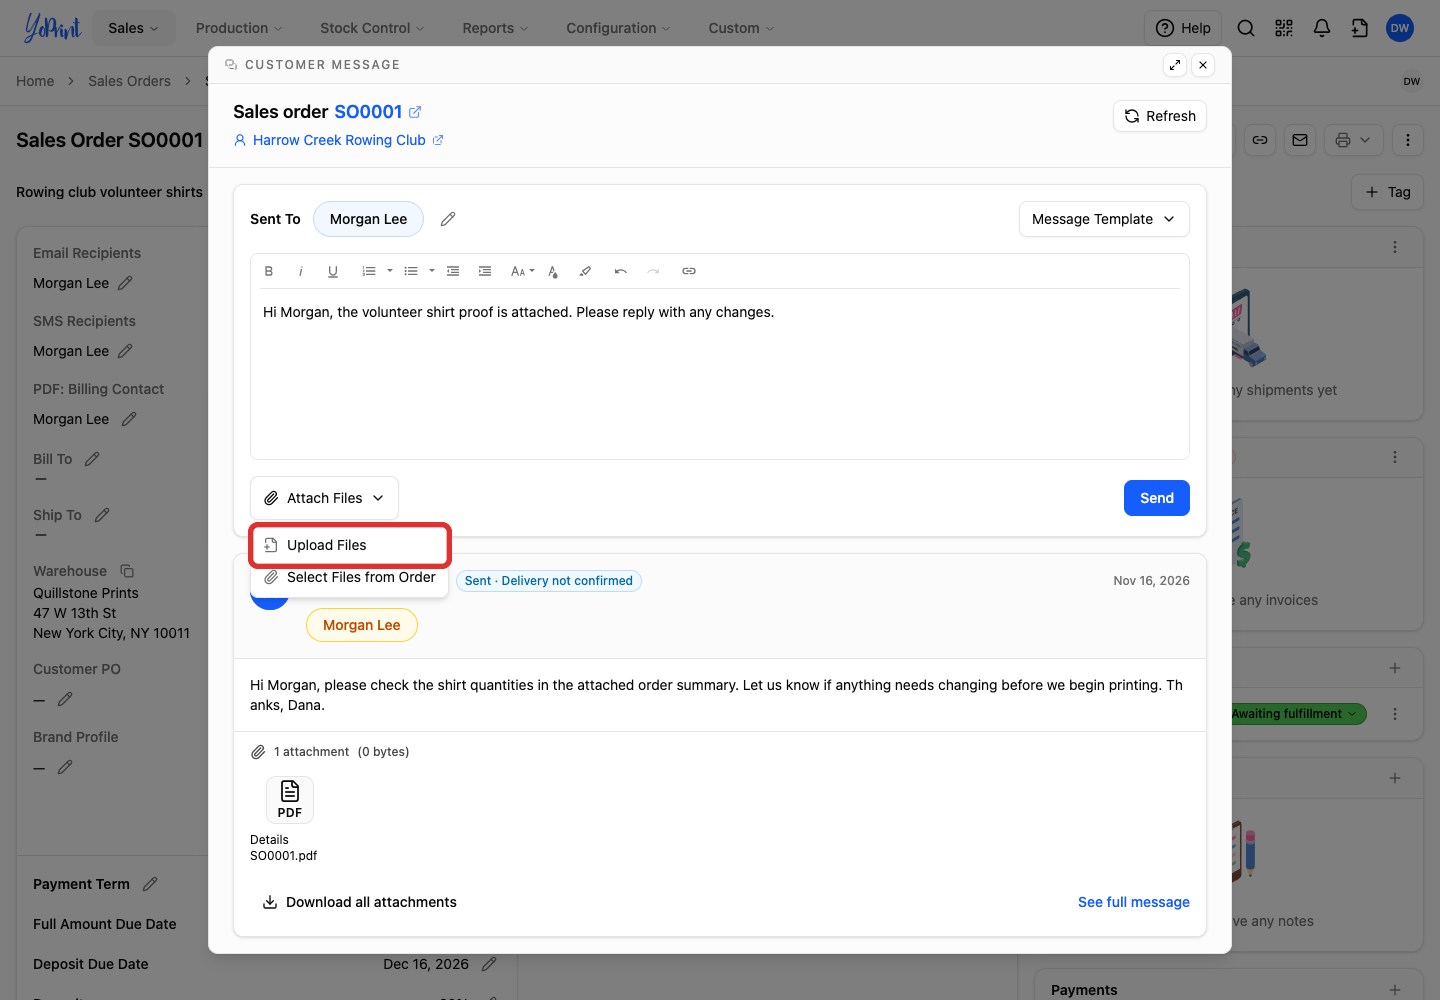
-
Click Choose files, or drag files into the upload area. You can also paste them. Any file except programs and scripts is accepted, up to 100 MB each.
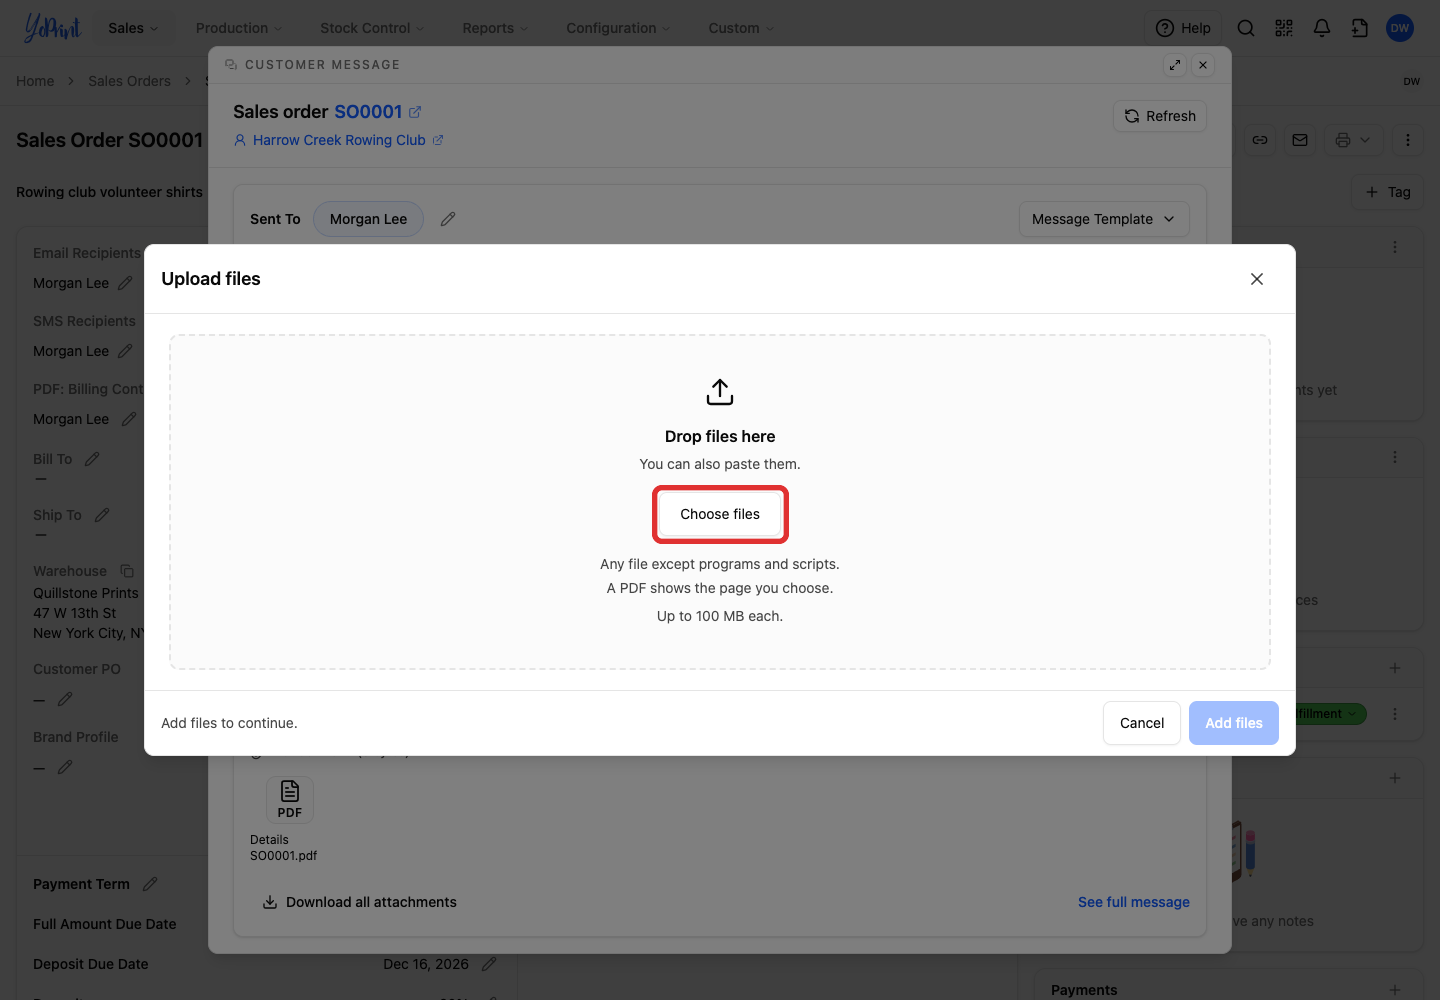
-
Once your files show Uploaded, click Add 1 file.
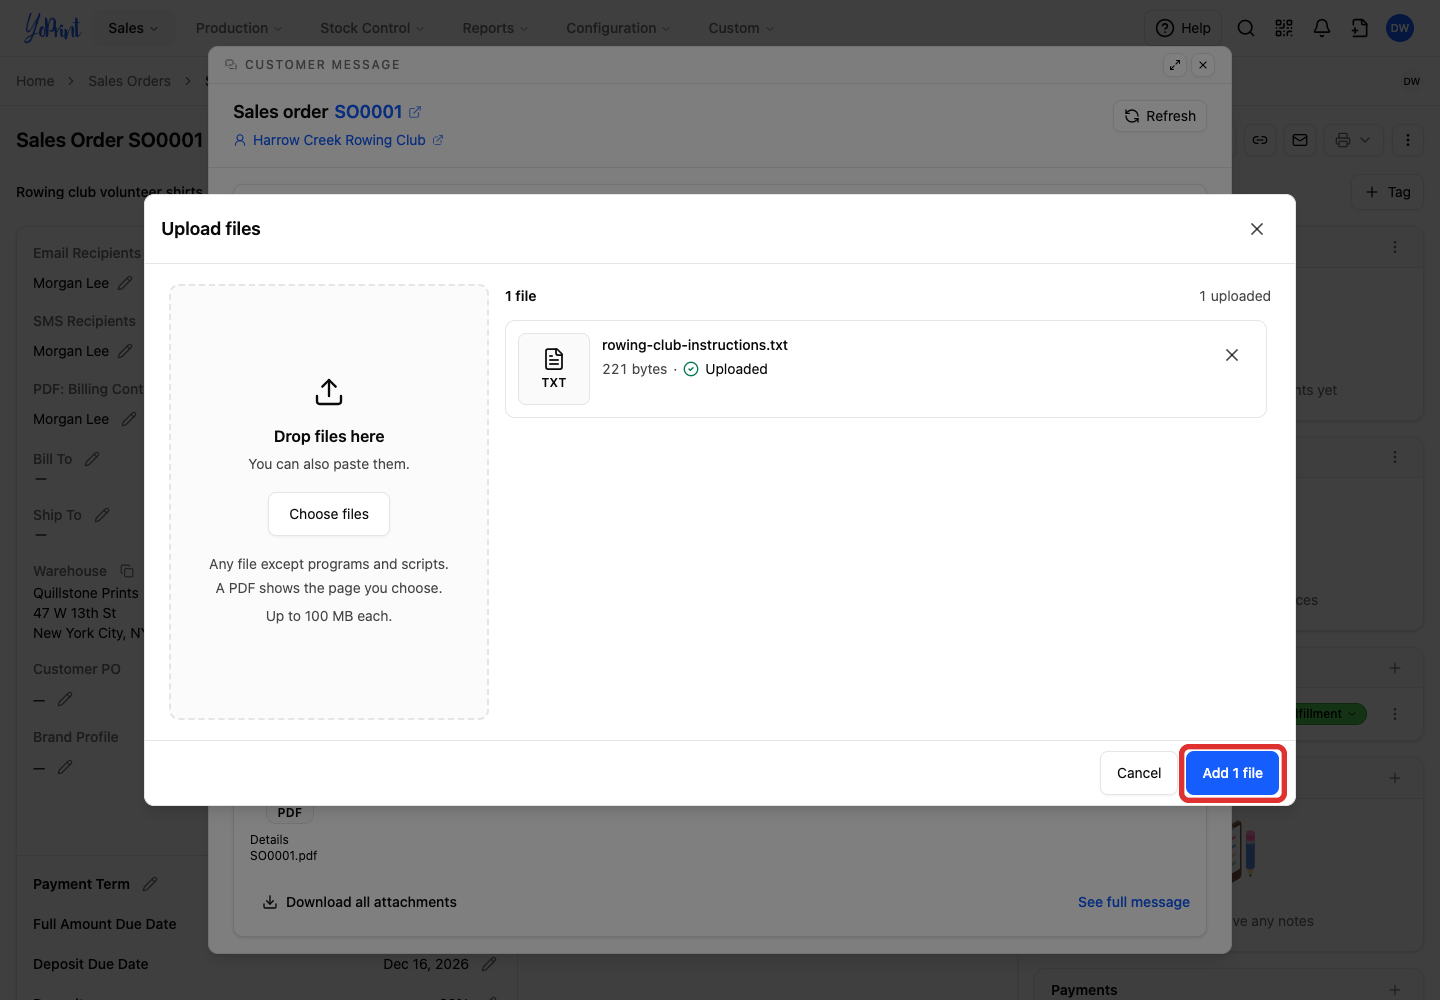
The button label shows how many files you are adding, such as Add 2 files for two uploads.
Uploading a PDF
A PDF shows one page as its preview picture. To pick a different page, click Change page before you add the file. Your customer still receives the whole PDF.
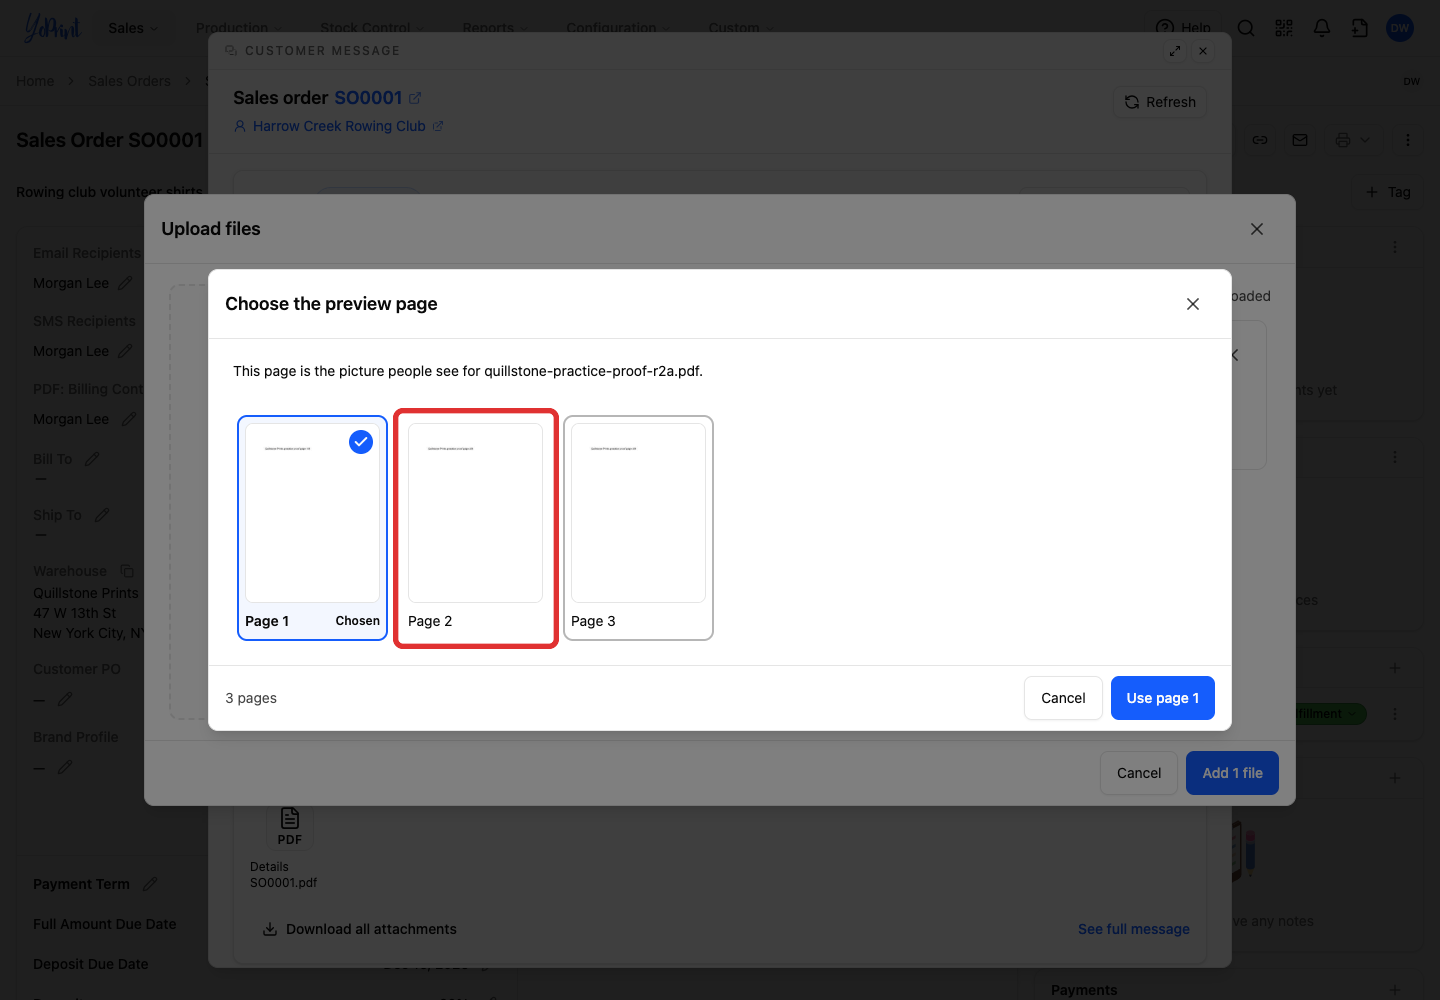
YoPrint attaches the files to your draft message. Each attached file appears as a chip below the message text.
Remove an attachment
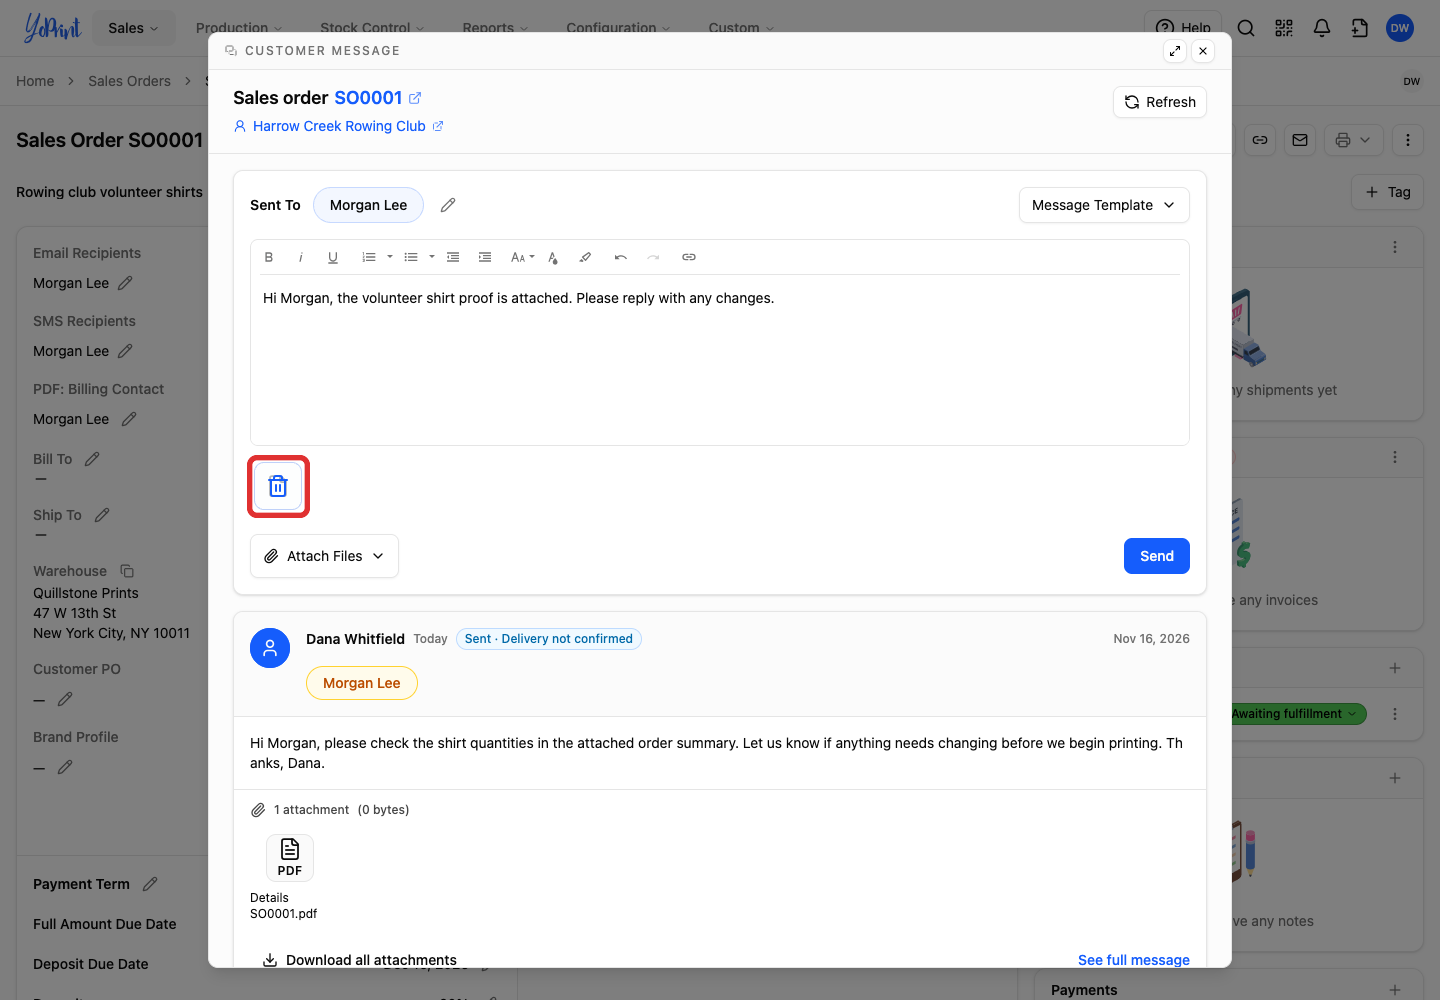
To remove an attached file or document before sending, hover over its chip below the message and click the trash can icon (Remove Attachment).
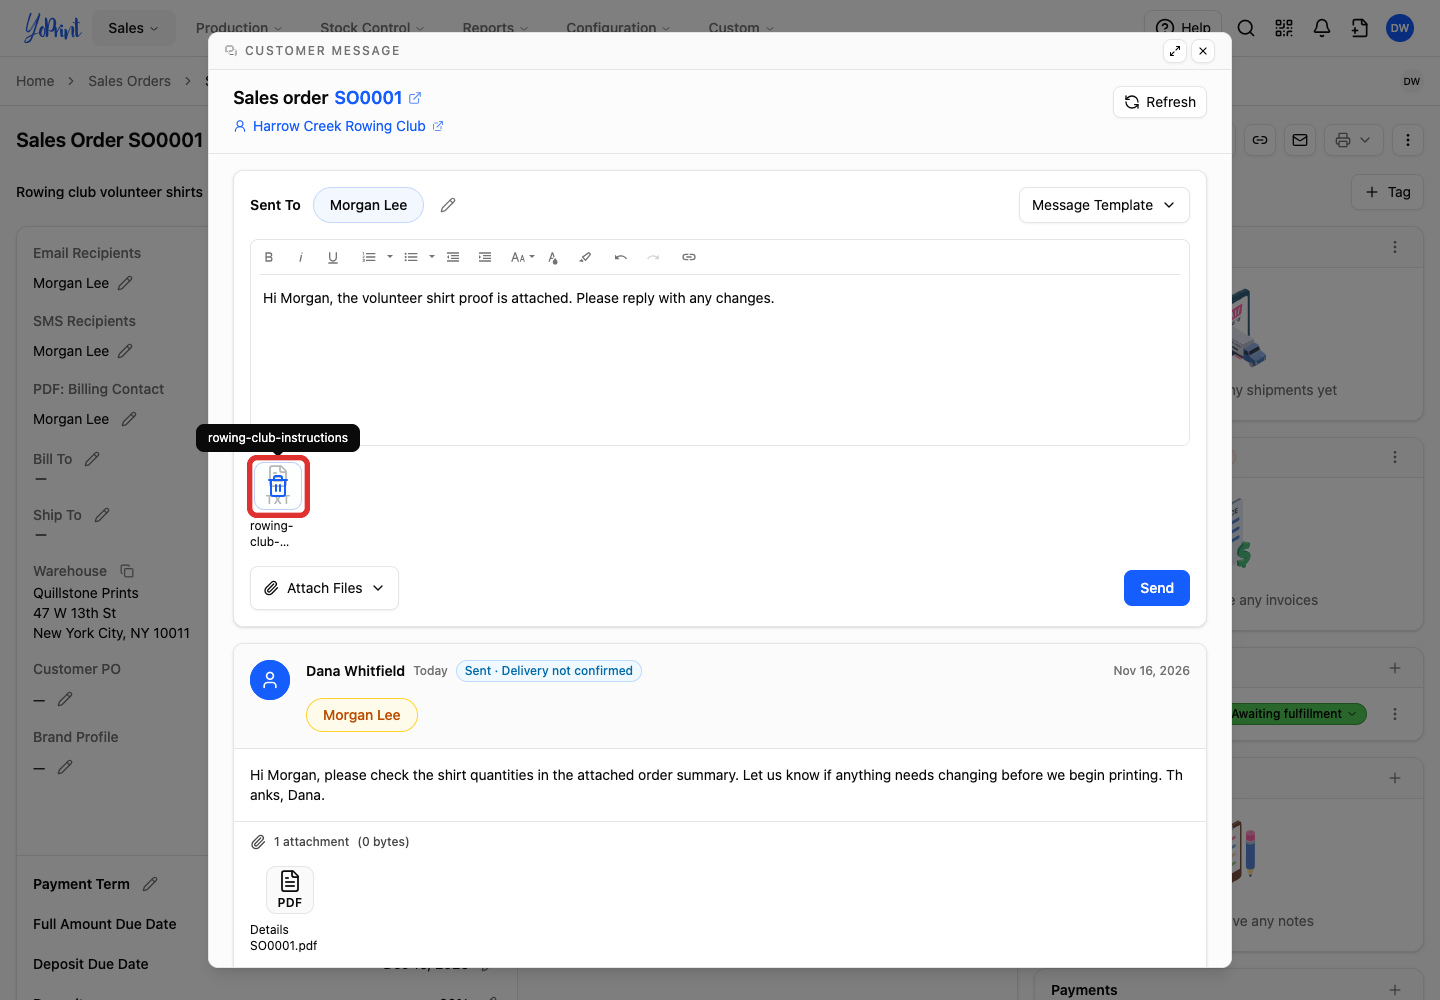
Return to Write and send your message when you are ready to send.
Attach files from the order
Messaging from a quote
On a quote, Select Files lists Quote and Quote Compact in place of the sales order documents. The job and invoice cards are the same.
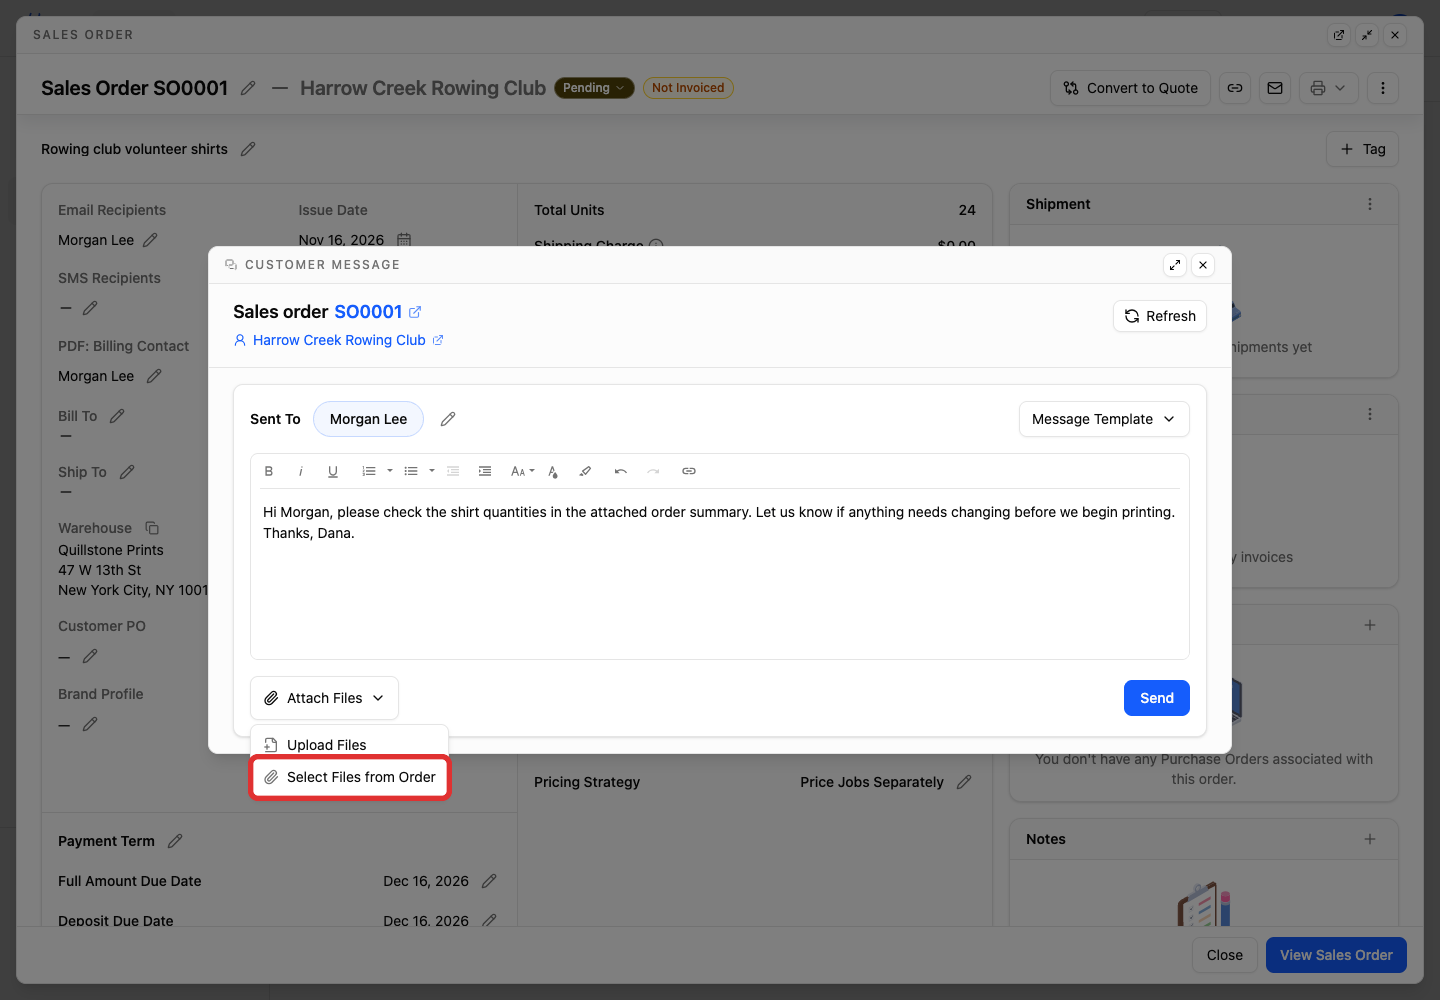
Click Attach Files below your message to open the attachment menu, then use this route instead of Upload Files.
-
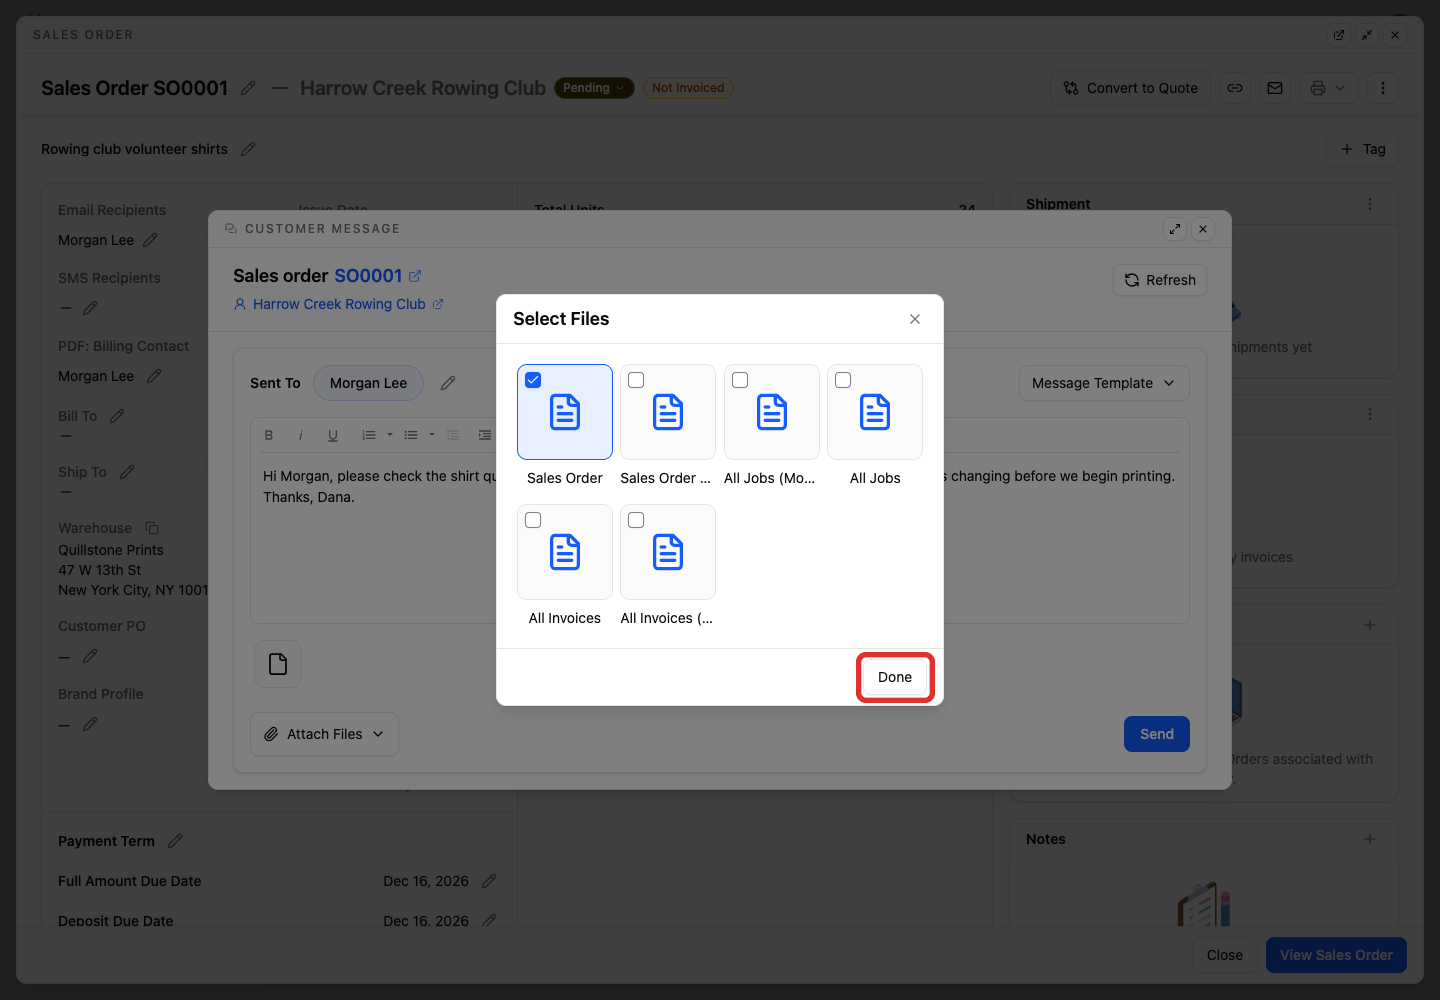
Choose Select Files from Order.
-
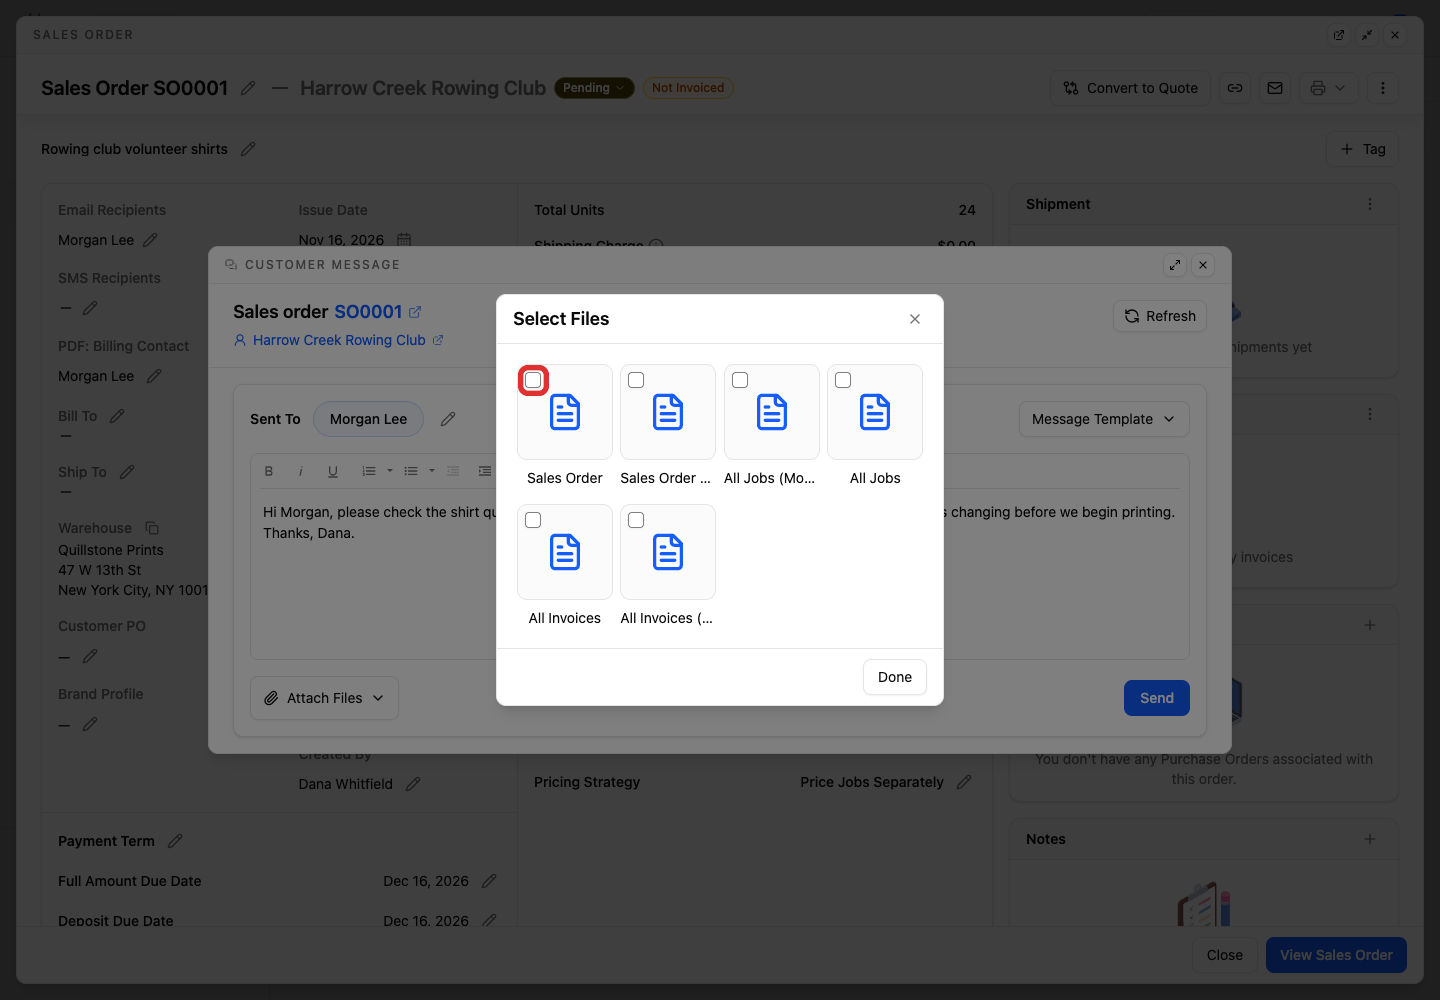
Select the checkboxes for the documents you want to attach, such as the Sales Order summary, jobs, or invoices.
The cards are Sales Order, Sales Order Compact, All Jobs (Mockup Incl.), All Jobs, All Invoices and All Invoices (Compact). Long names are cut short on the cards.
-
Click Done.
The selected documents appear below the message as copies for reference. To collect a decision or a payment, send an artwork approval, quote approval, sales order approval or payment request instead. To remove one, hover over it and click its trash can icon.
Return to Write and send your message when you are ready to send.
Review the conversation later
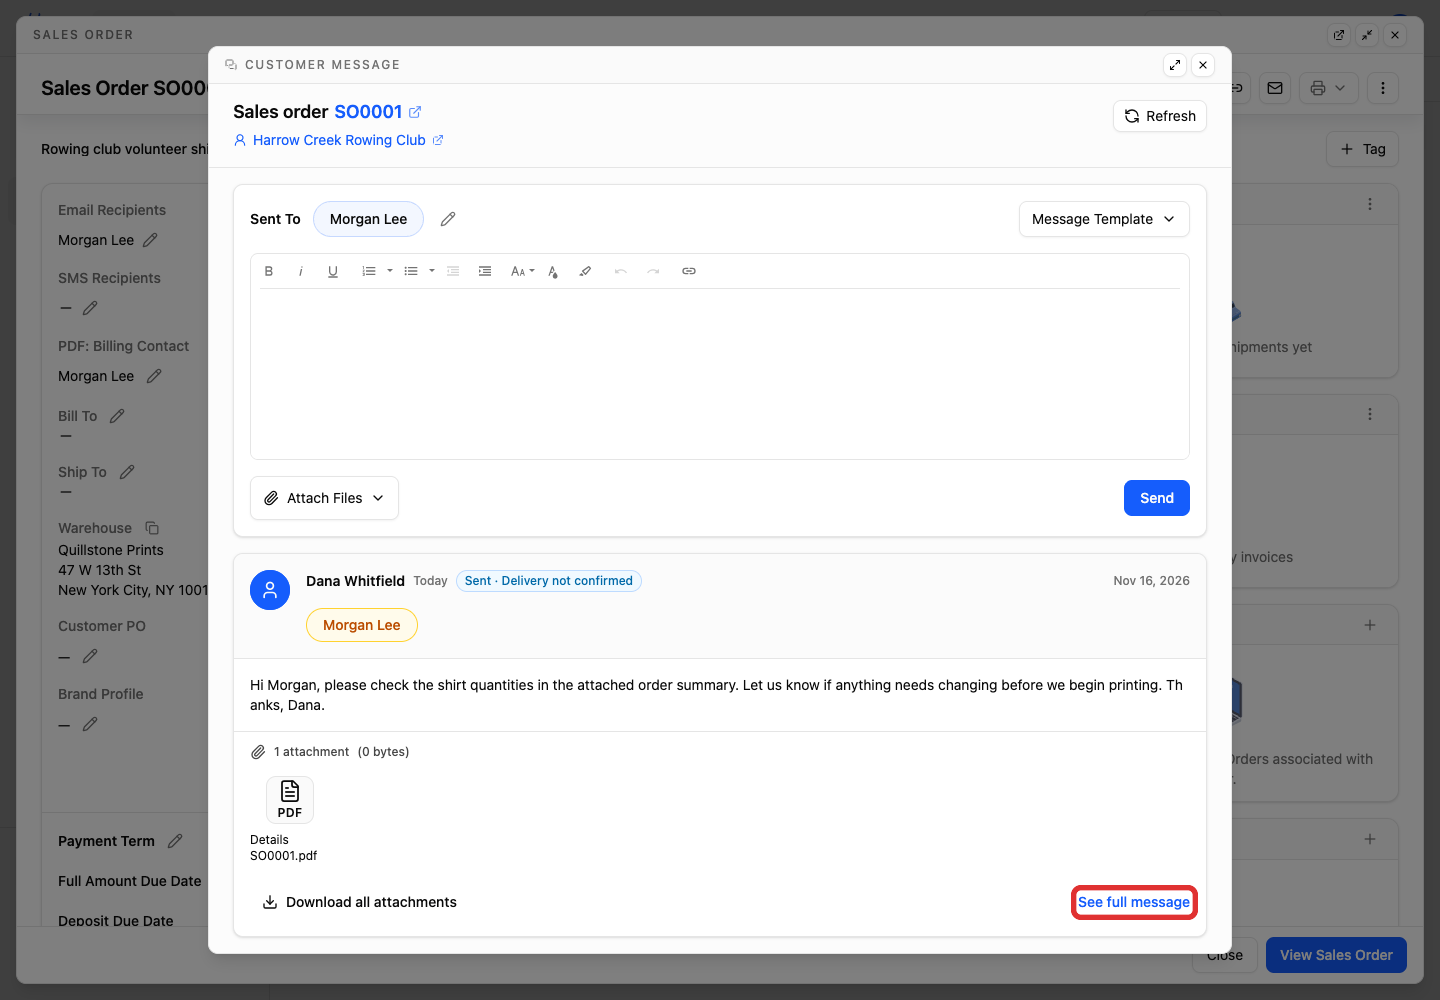
Reopen Customer Message on the order to return to its conversation. Messages appear below the composer; scroll down if needed.
Refreshing newly sent messages
If a newly sent message does not appear in the thread immediately, click Refresh at the top of the message window.
-
Click See full message beneath the message you want to read.
Full Message shows the email, including its View All Messages conversation link.
Check message delivery status
A message appearing in the conversation does not by itself mean it reached the recipient. See Message delivery status for delivery results and troubleshooting.
You can also view all customer and vendor communication across your shop on the Messages page under Sales > Messages. To label messages that need a reply and filter for them, see Manage Customer Message Statuses. To message a vendor, see Send Messages Through a Purchase Order.