Customizing and Using Purchase Order Statuses
In this article
YoPrint allows you to customize purchase order statuses, so you'll know each order's progress. In this article, we will walk you through how to customize Purchase Order Statuses.
Customizing Purchase Order Statuses
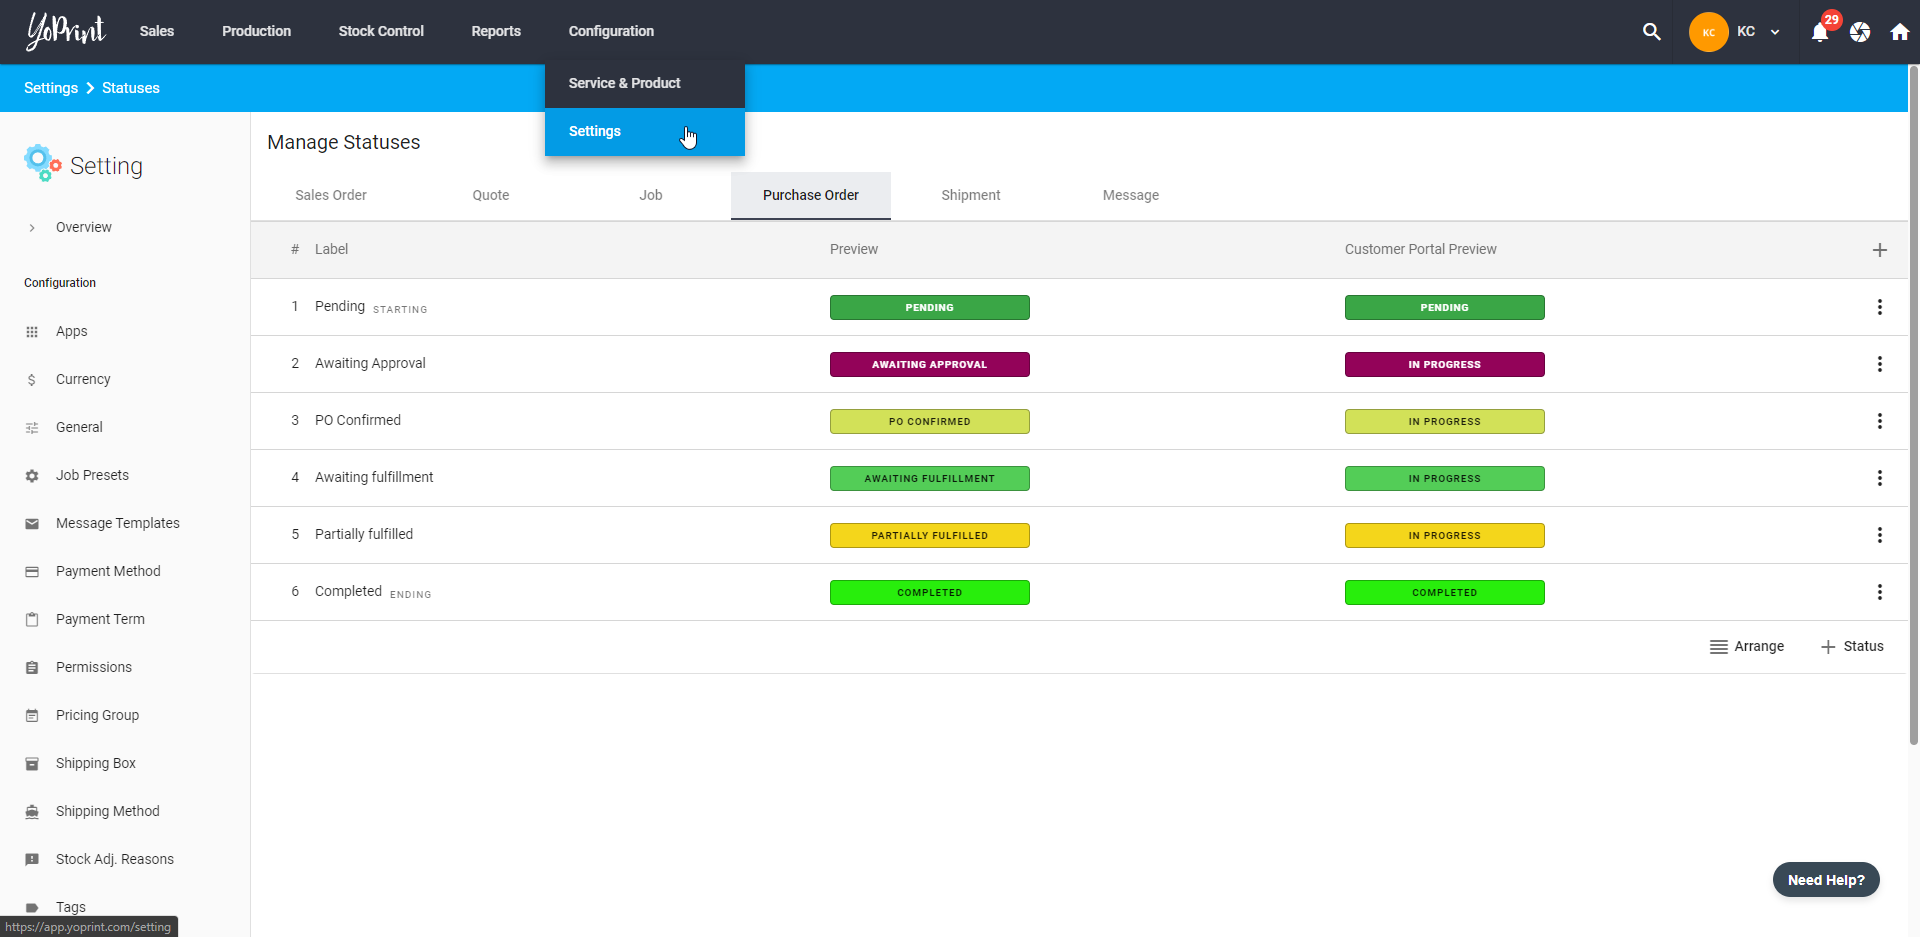
- Navigate to https://app.yoprint.com/setting/status?show=purchase_order.
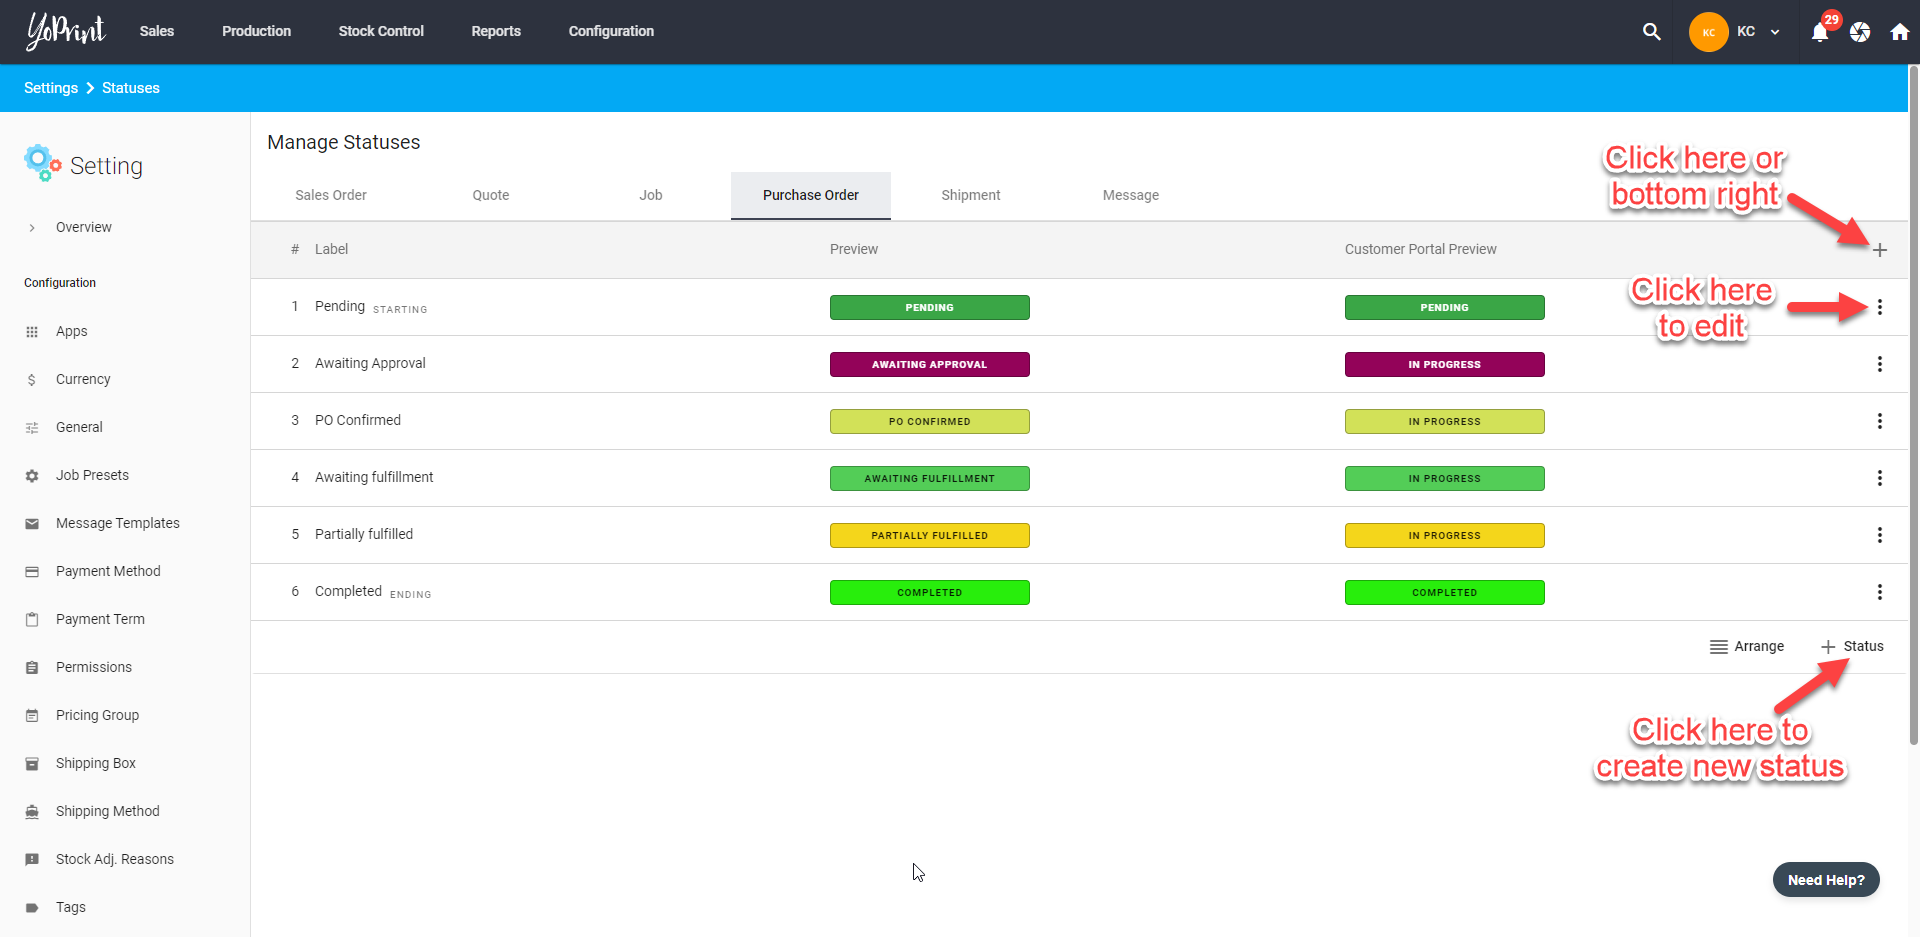
- Here, you can create more statuses for Purchase Order. You can also edit existing statutes by clicking ⋮ on the right side. To create a new status, click + on the top or bottom right to get started.
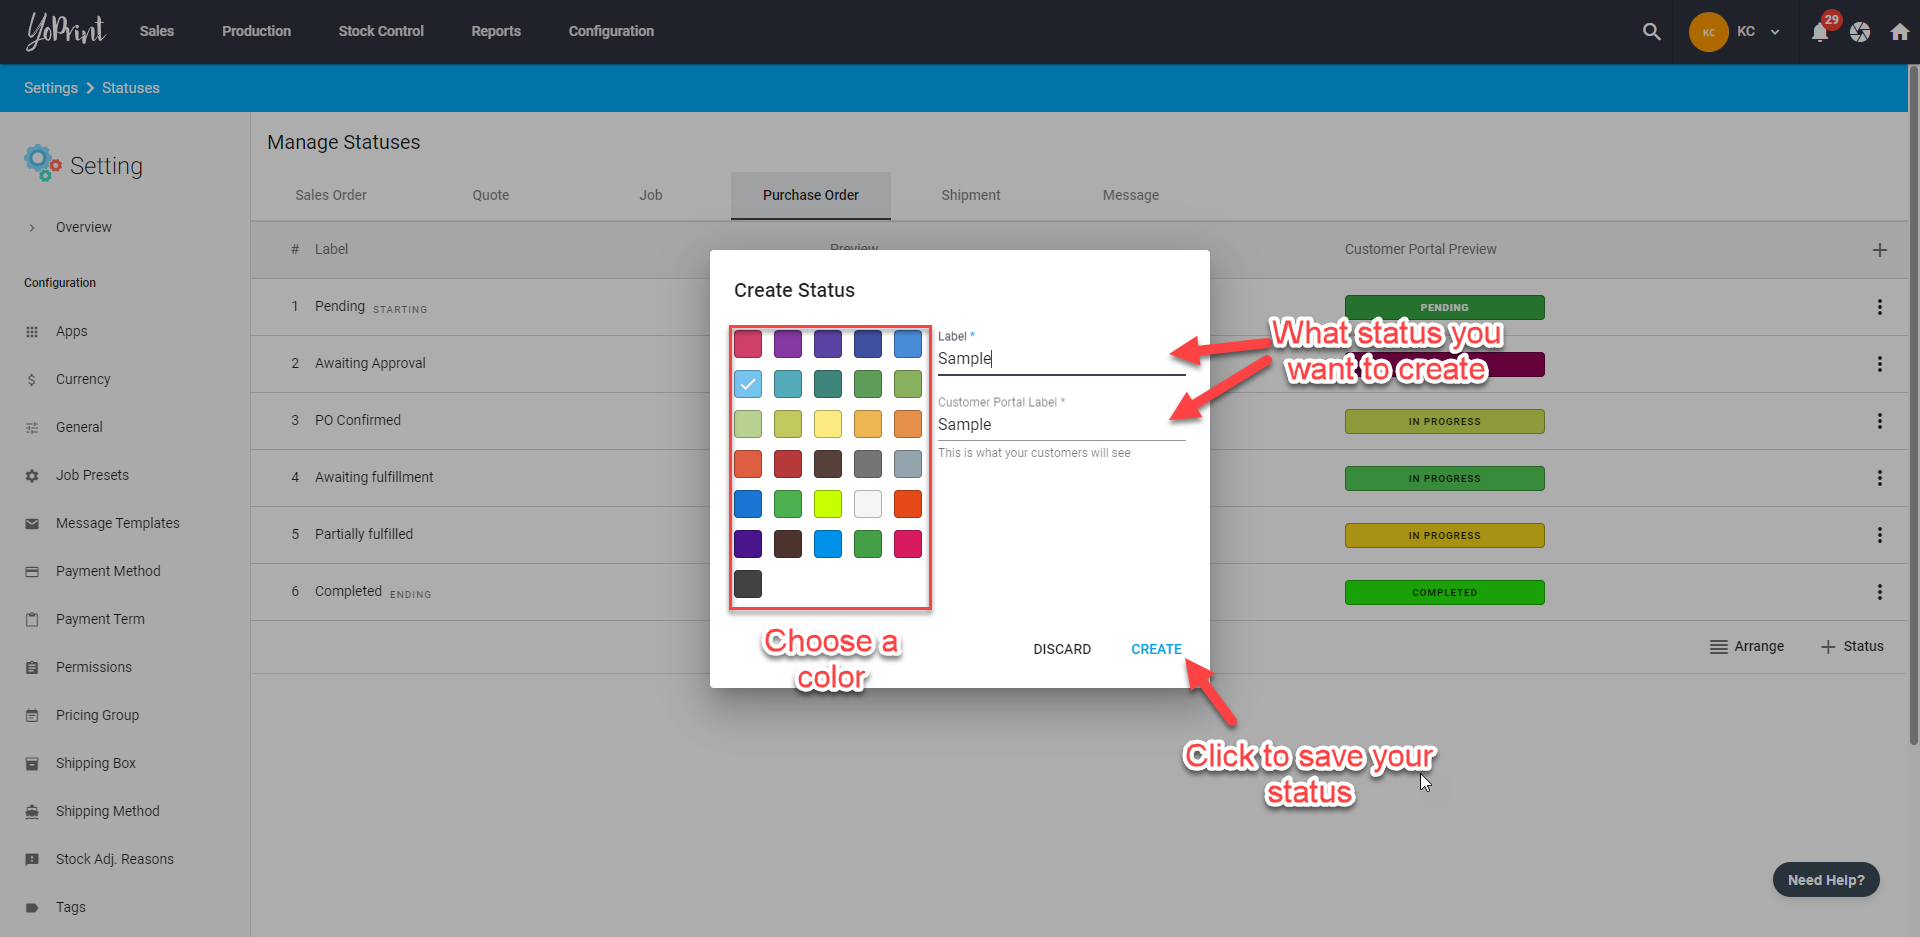
- You can choose a color and create what status you want it to be by filling in the Label and what you want your vendor to see by filling in the Customer Portal Label.
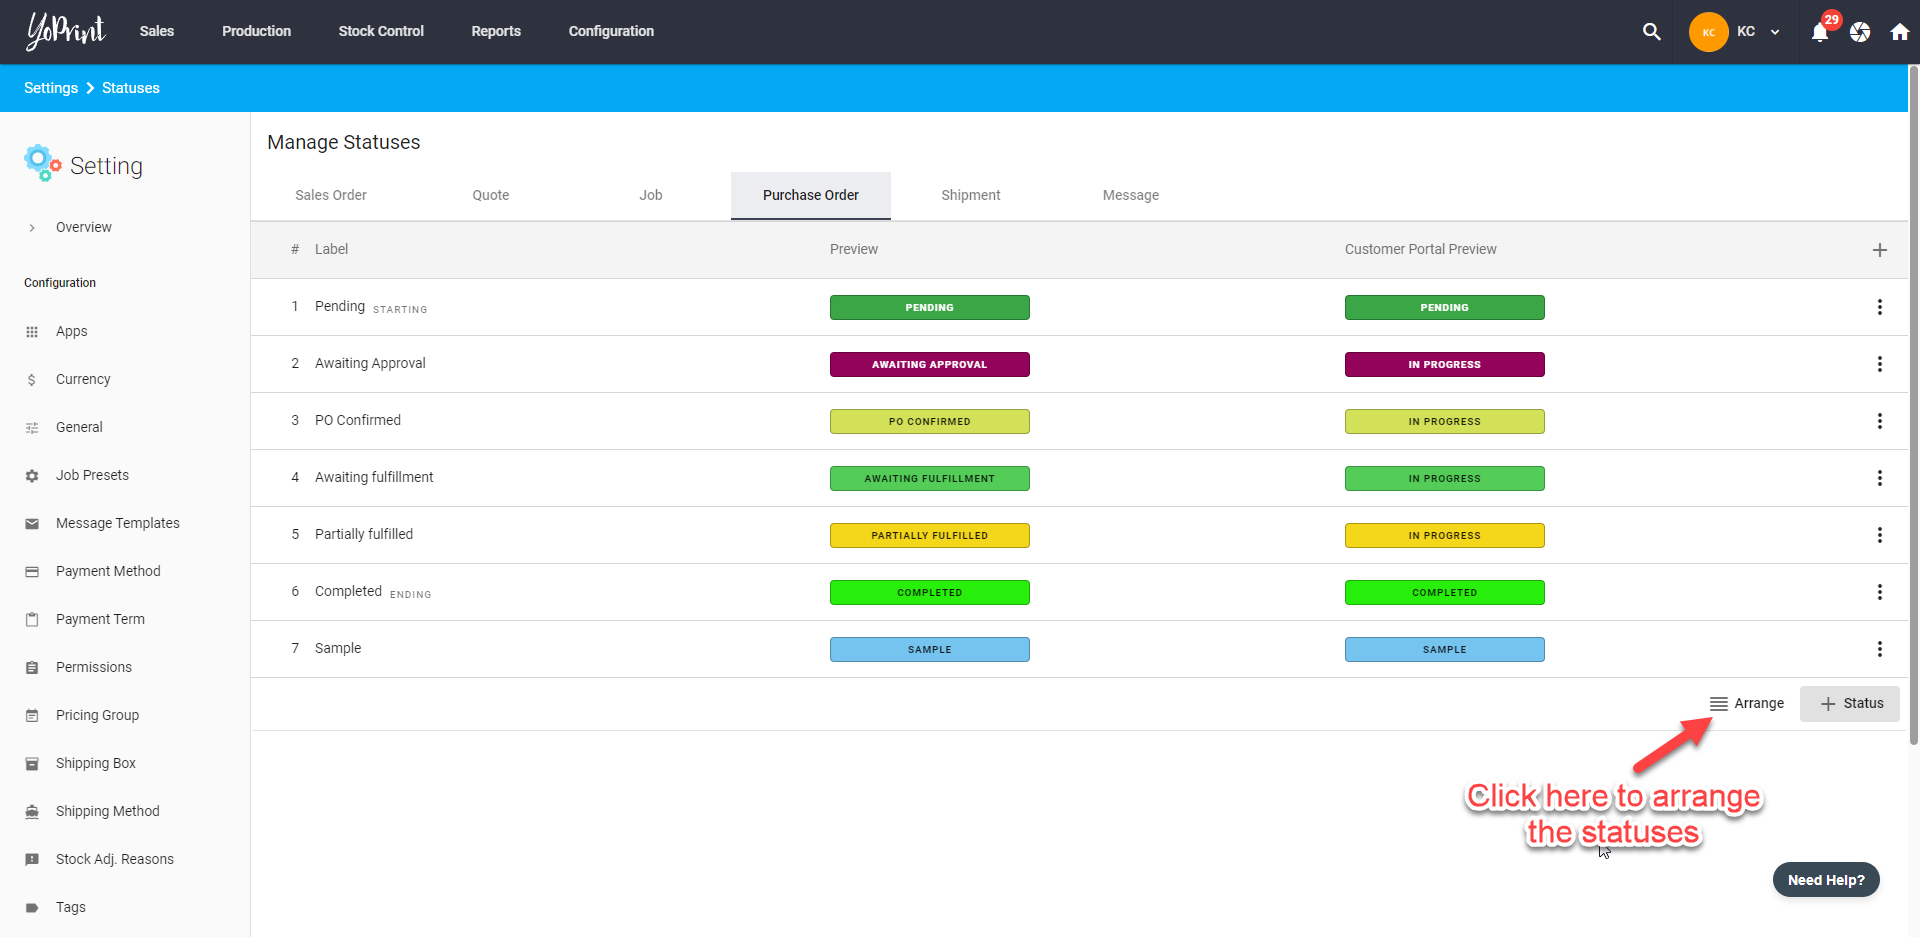
- You can also arrange the statuses to your liking by clicking the ≣ Arrange.
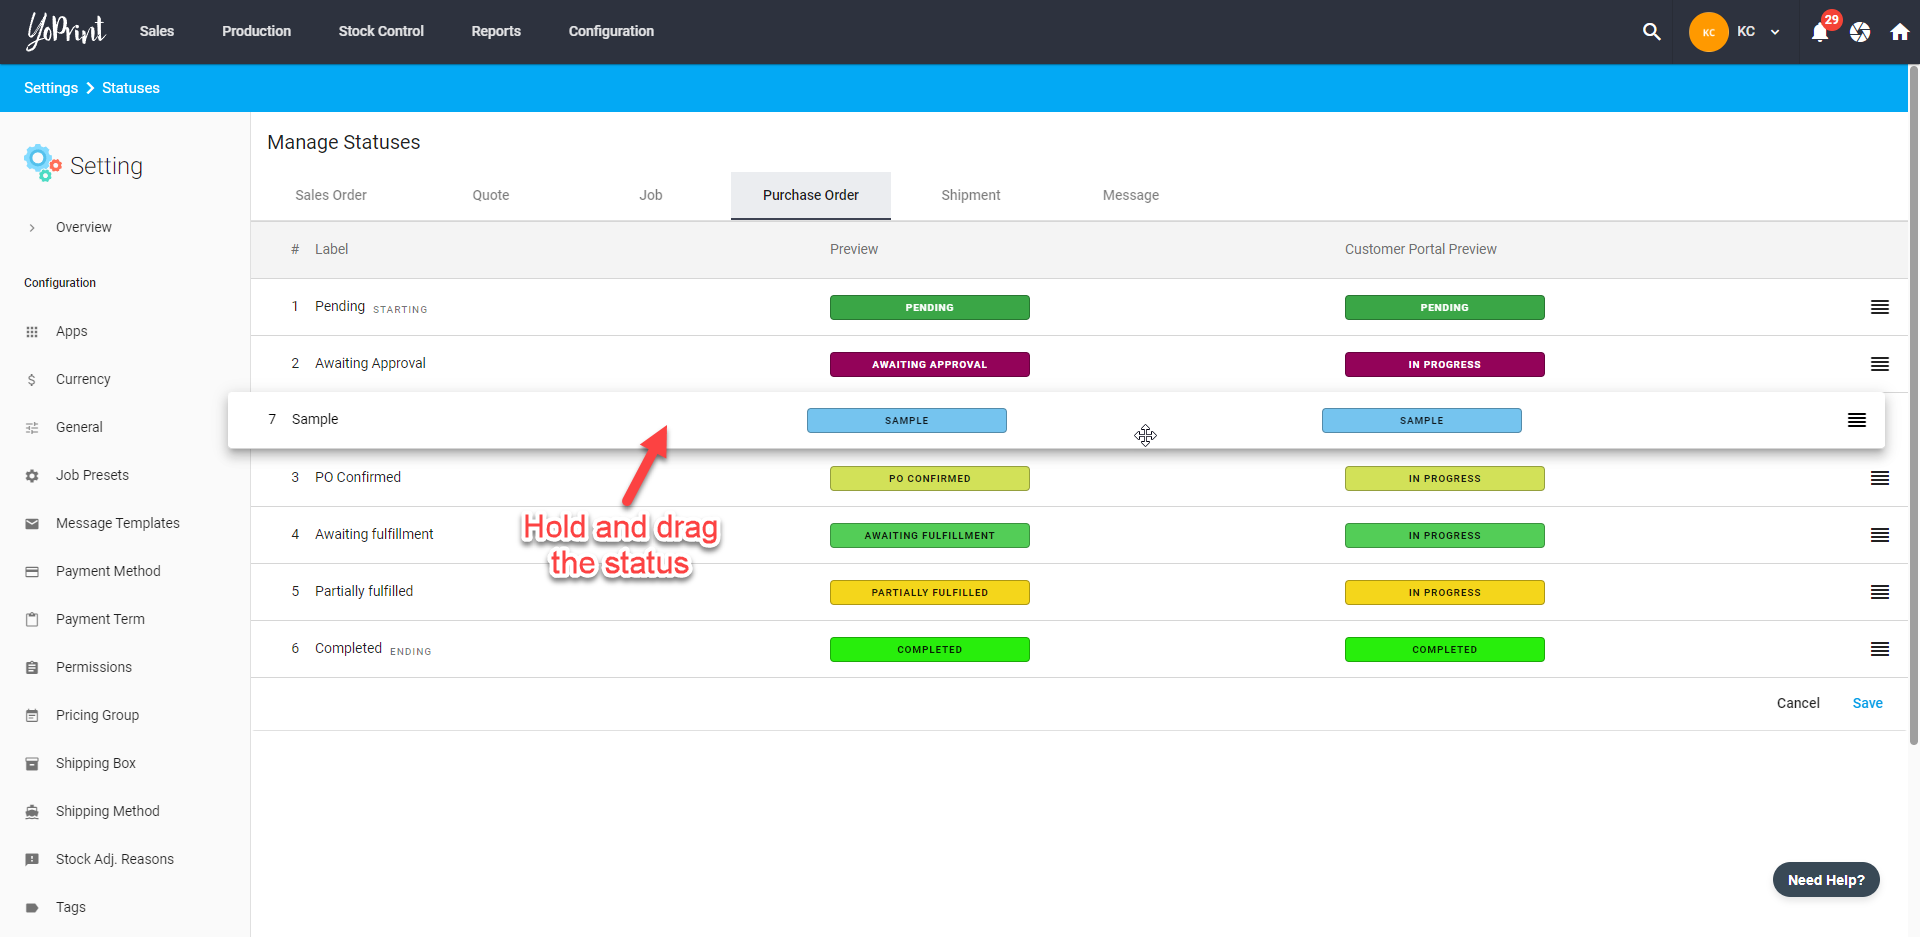
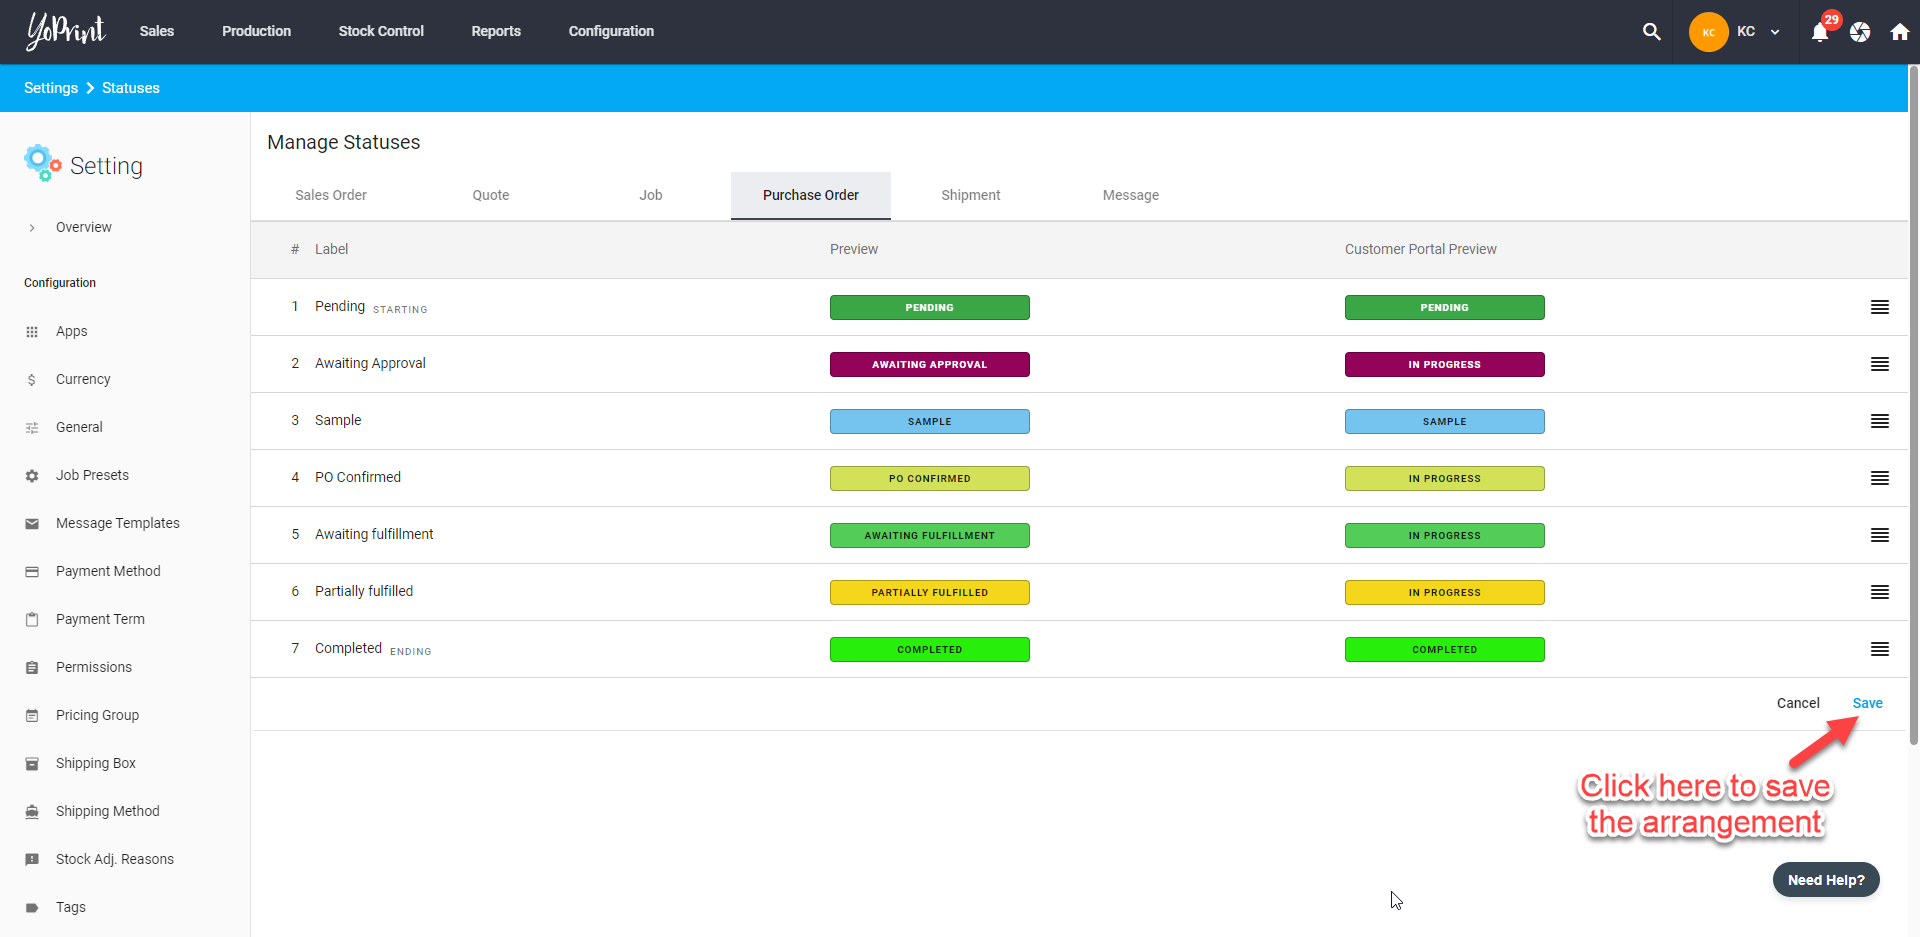
- Hold and drag the status to where you want it to be. Release and click Save to save the arrangement.
Assigning a Status to Purchase Order
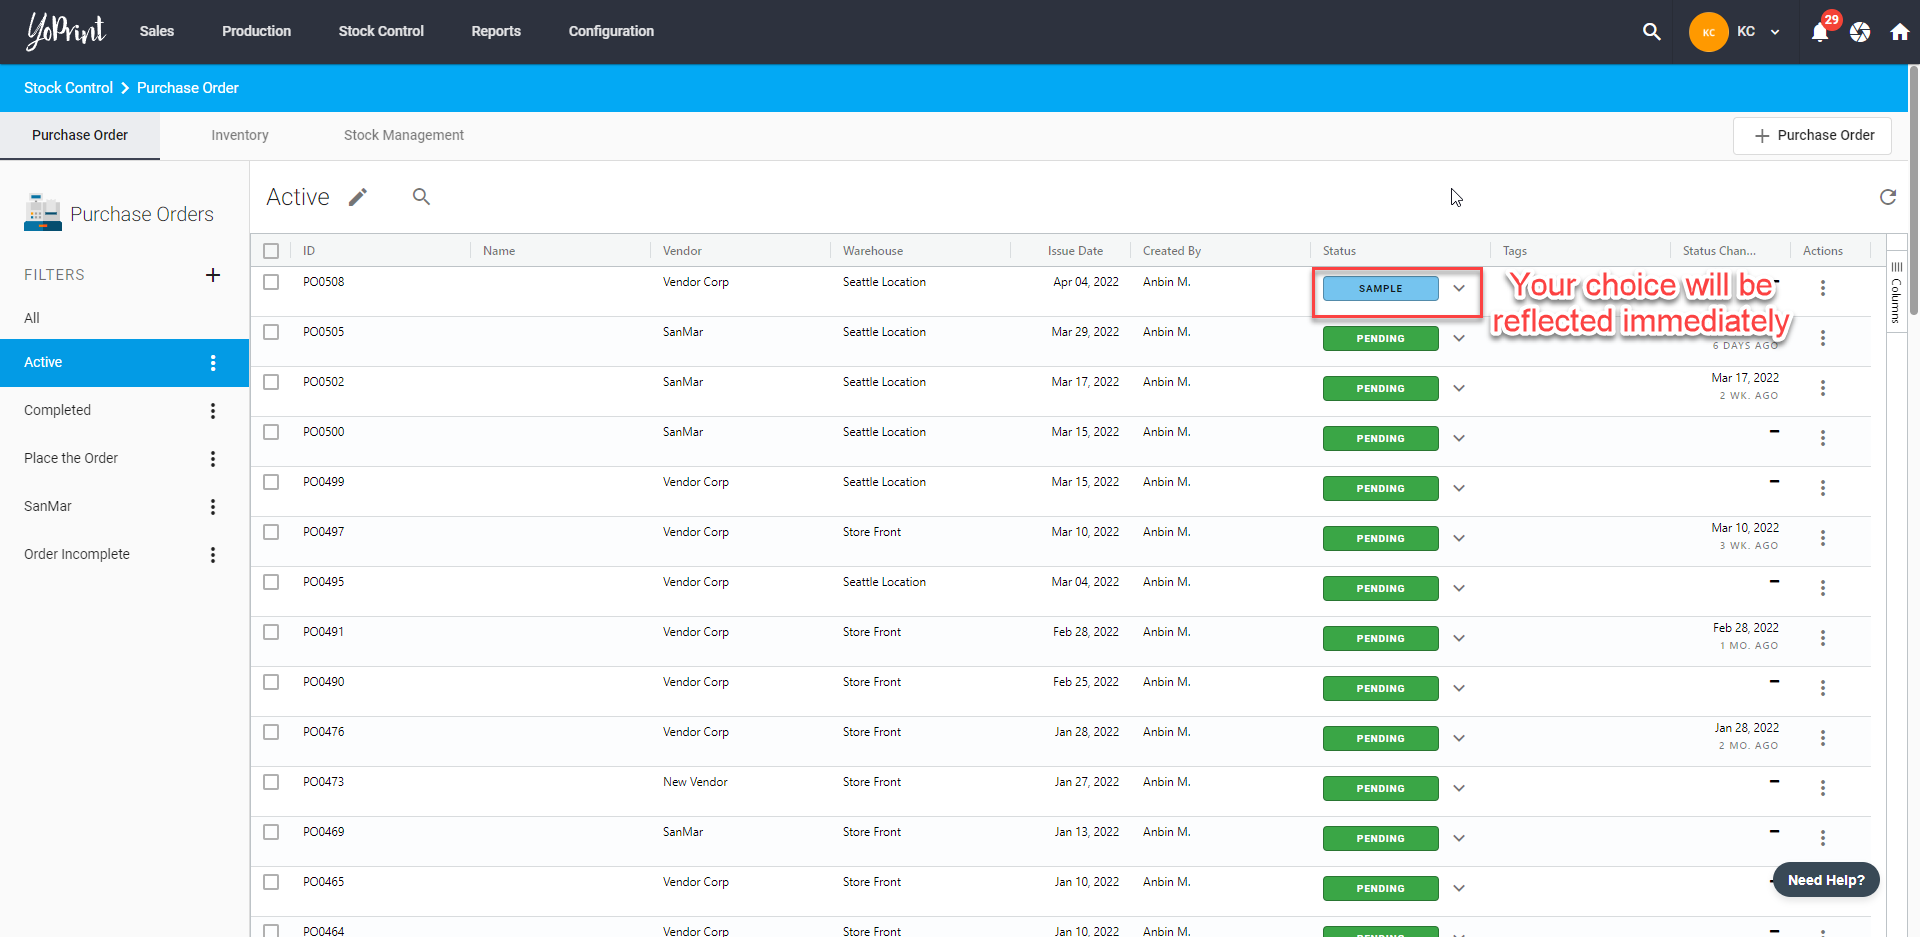
- Navigate to https://app.yoprint.com/stock-control/purchase-order and choose a purchase order that you would like to assign a status. On the Status column, click ﹀ next to a status.
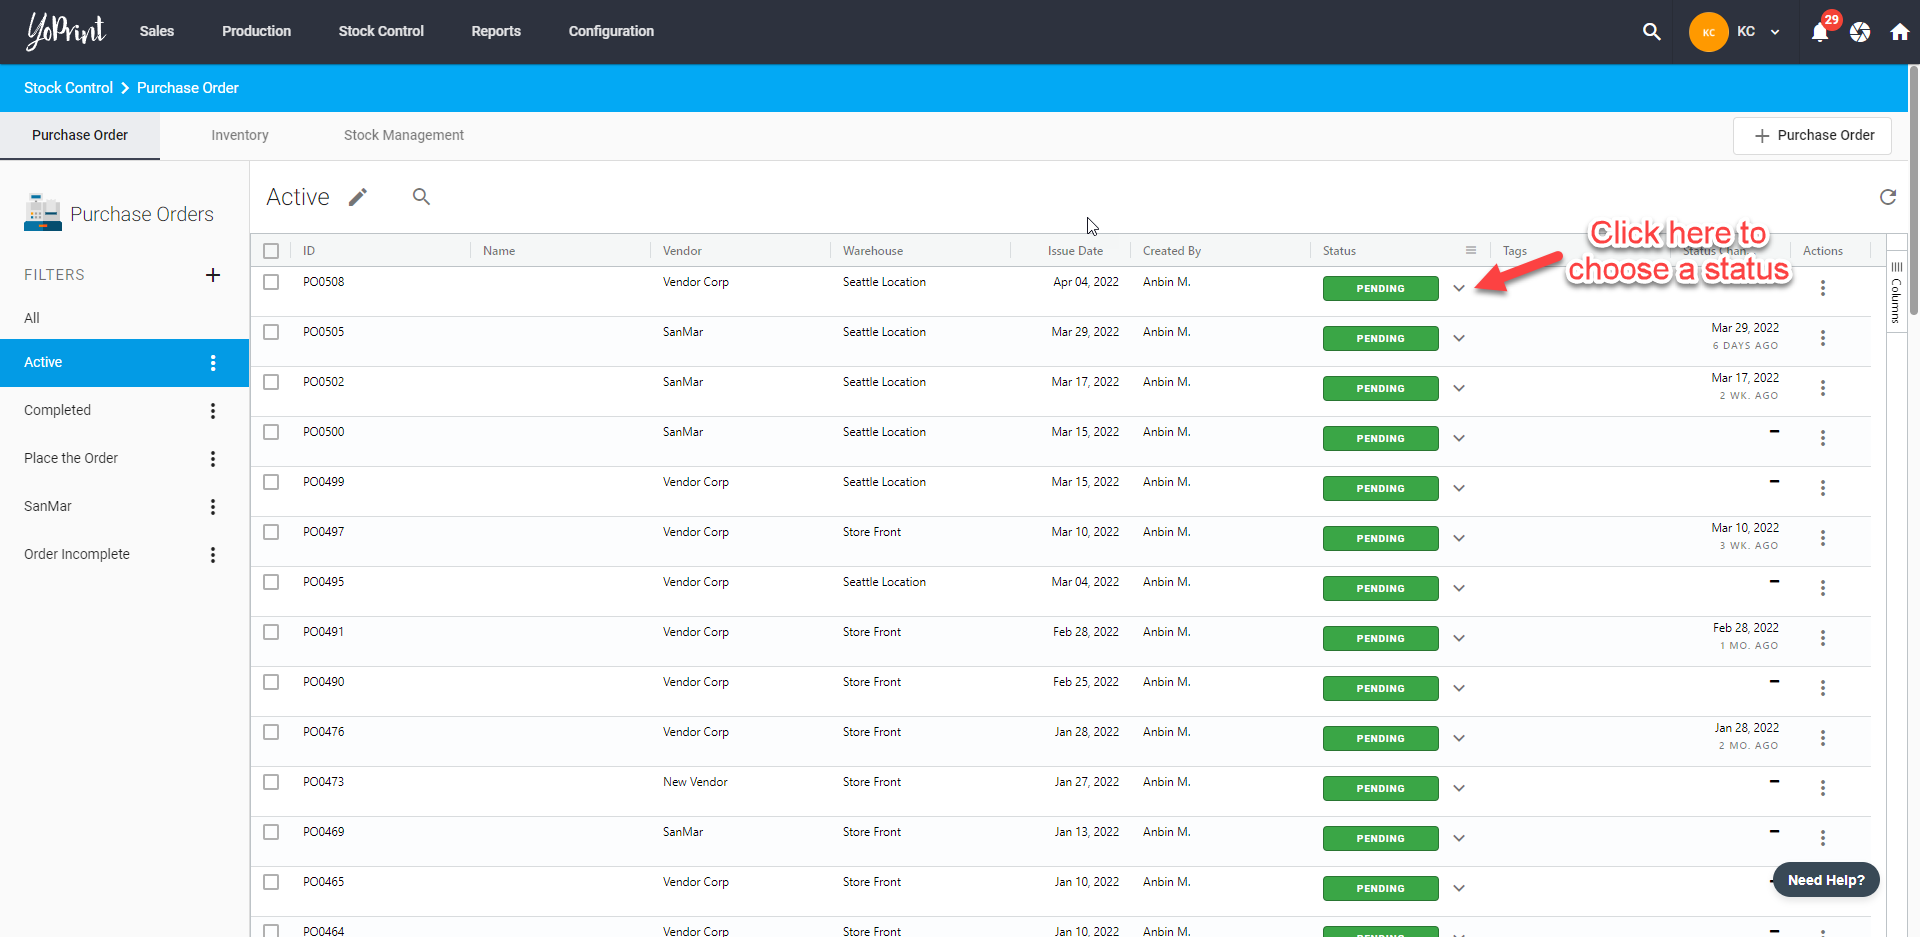
- Choose a status that you want to assign to a purchase order. You can only assign one status at a time and all your created statuses will appear here.
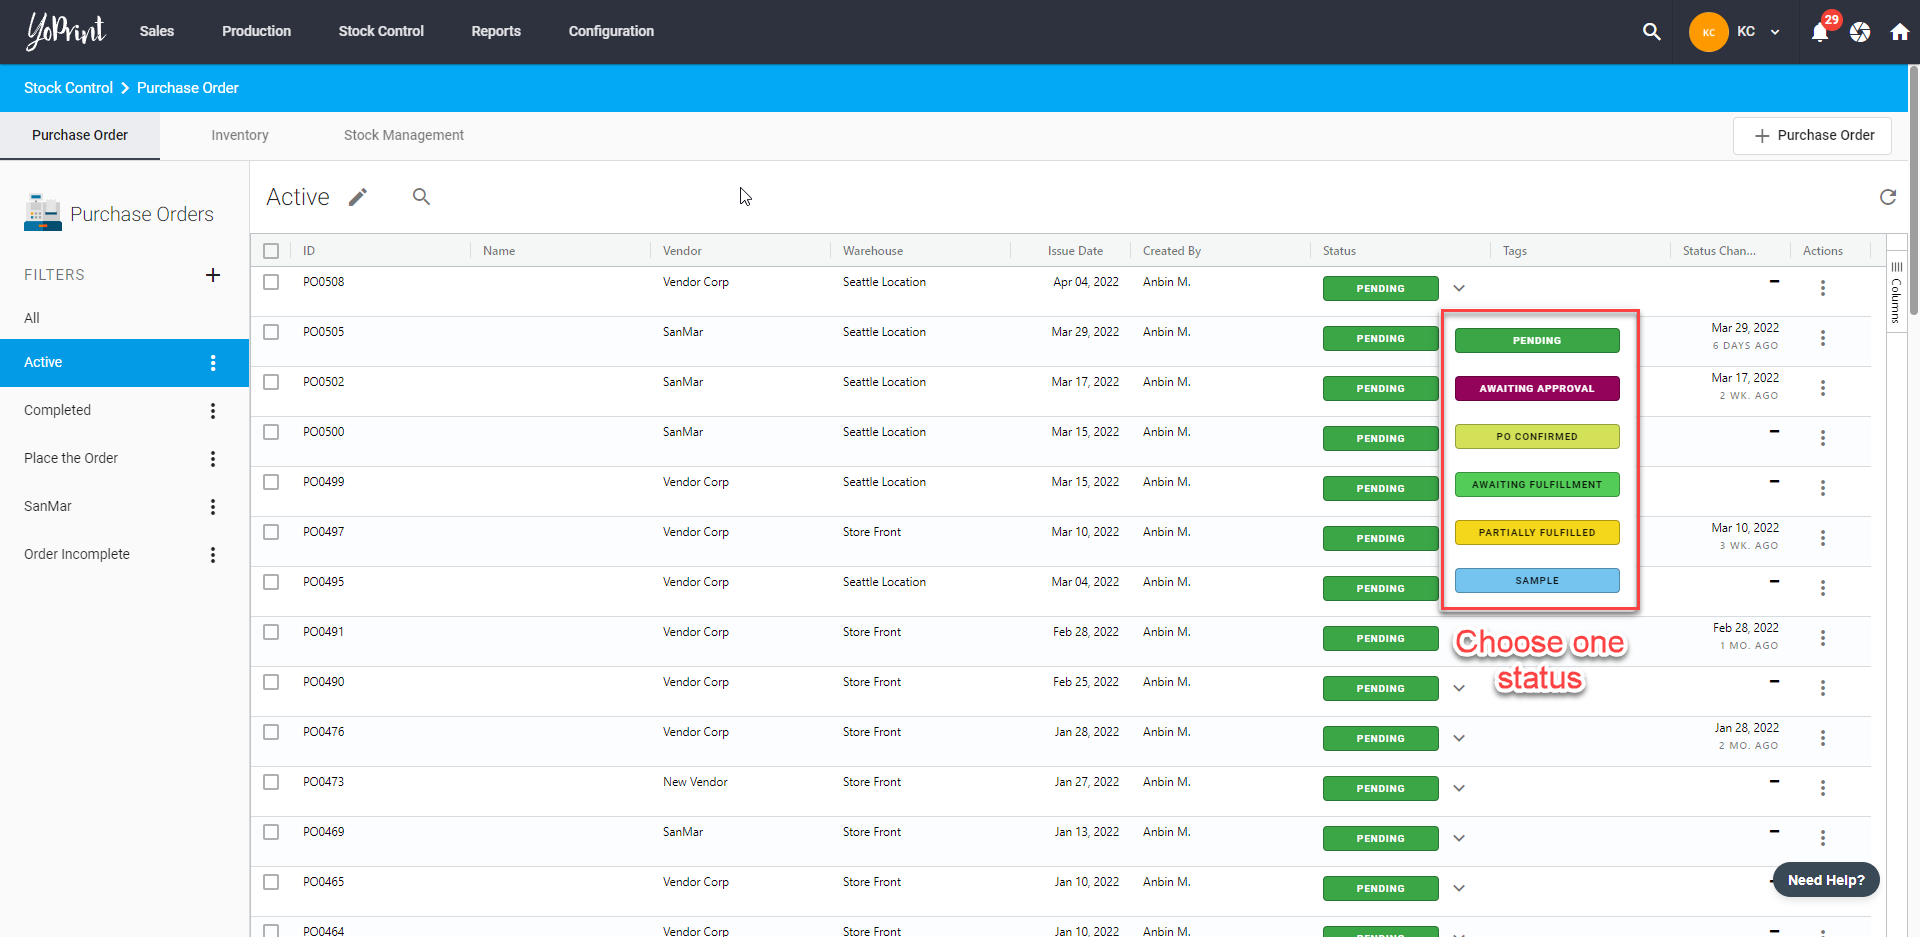
- Once you've selected a status, it will automatically saved your choice. You can change the status anytime you prefer.