Configure and Use a Job Preset
In this article
Create a job preset
A job preset stores services, tasks and notes that you use together. For example, a screen-print preset can include a one-color front print and a production task. Applying it creates a job you can adjust without changing the preset.
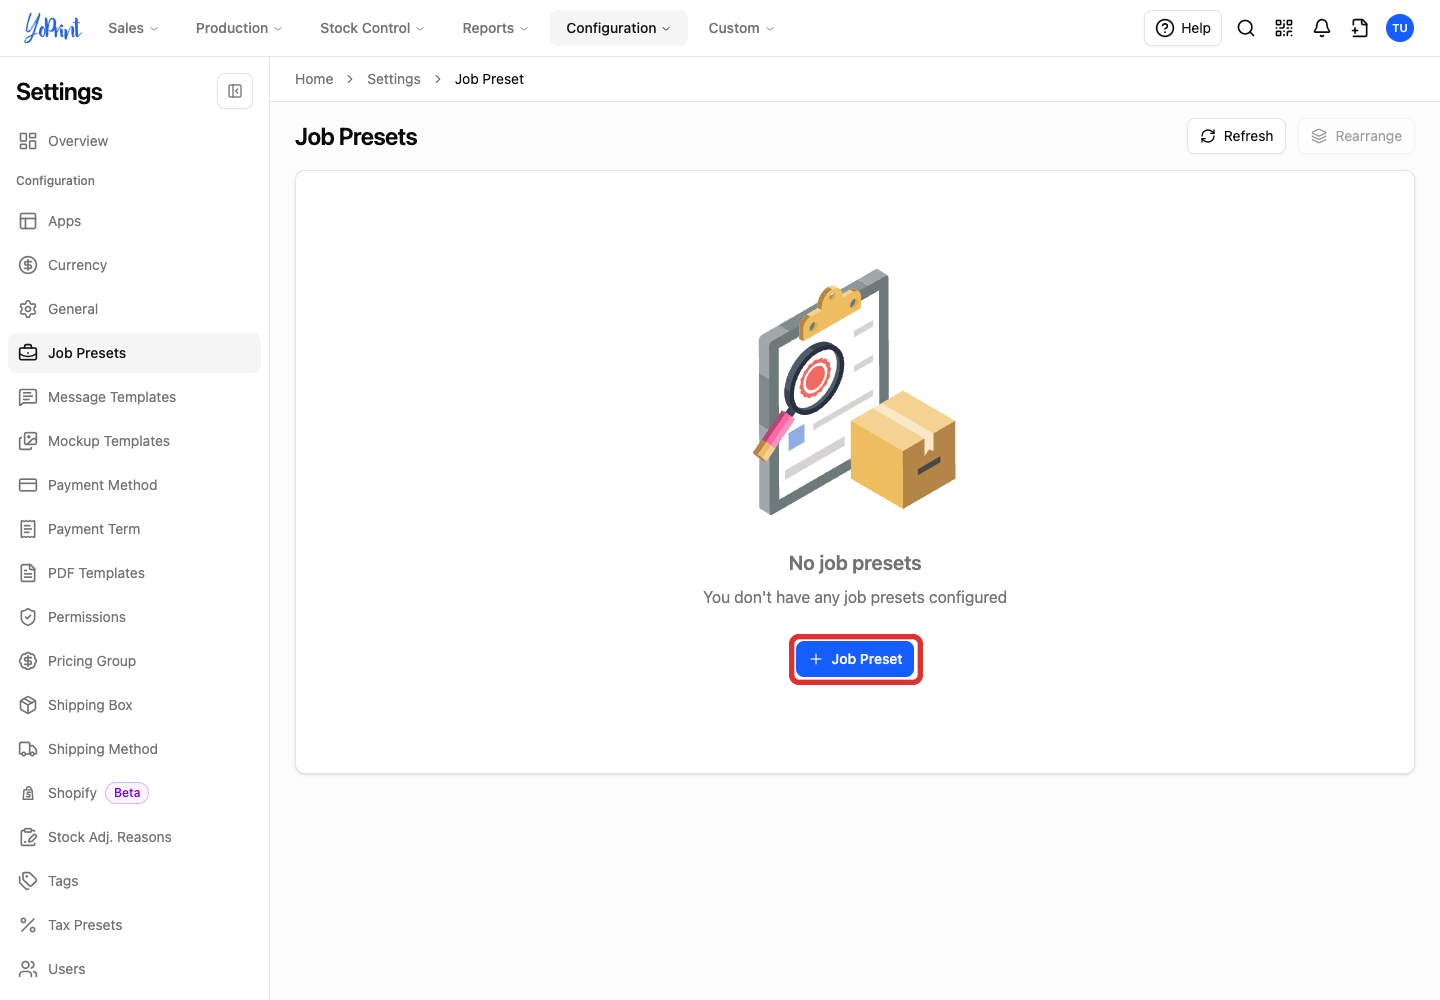
Open Settings > Job Presets.
-
Click Job Preset.
-
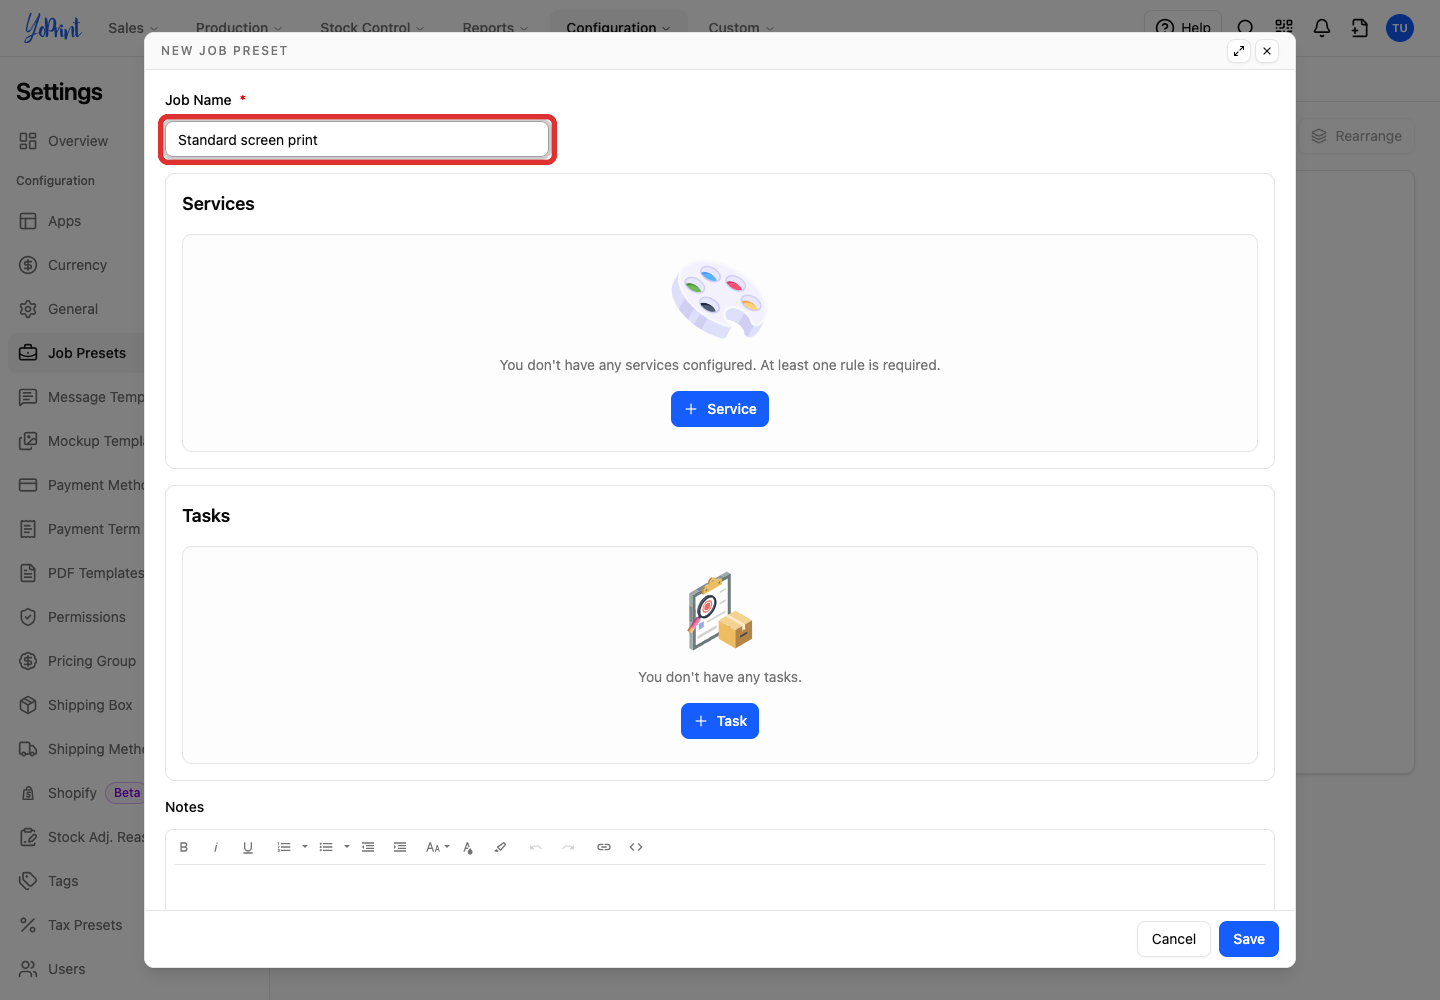
Enter a Job Name that your team will recognize.
Add services
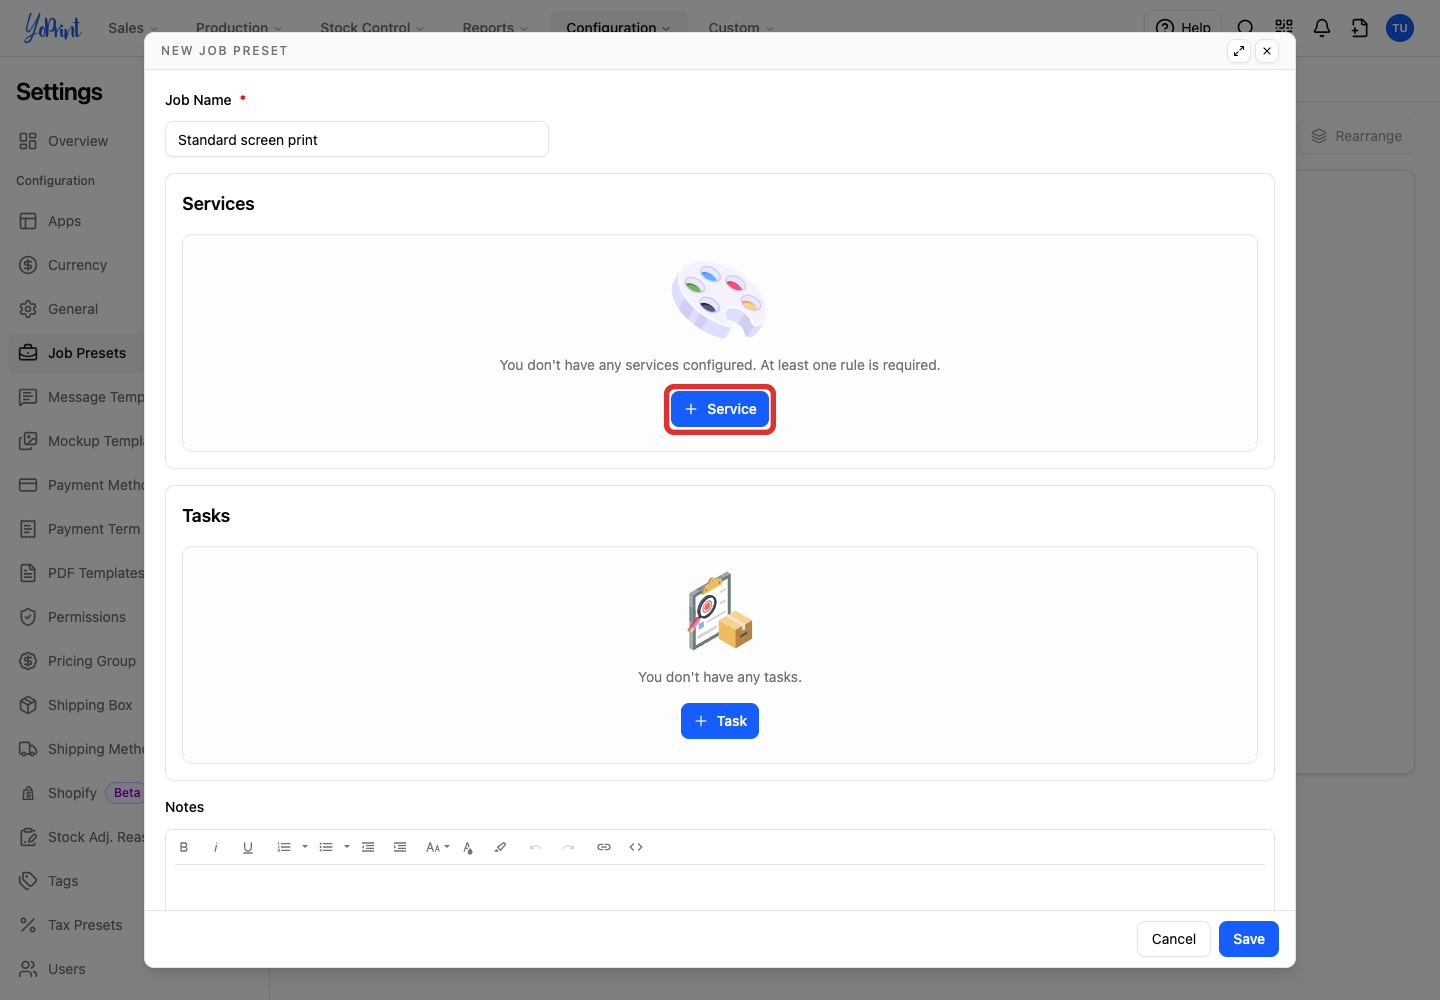
You can include more than one service in a preset. The choices come from the services configured in your account.
-
Click Service.
-
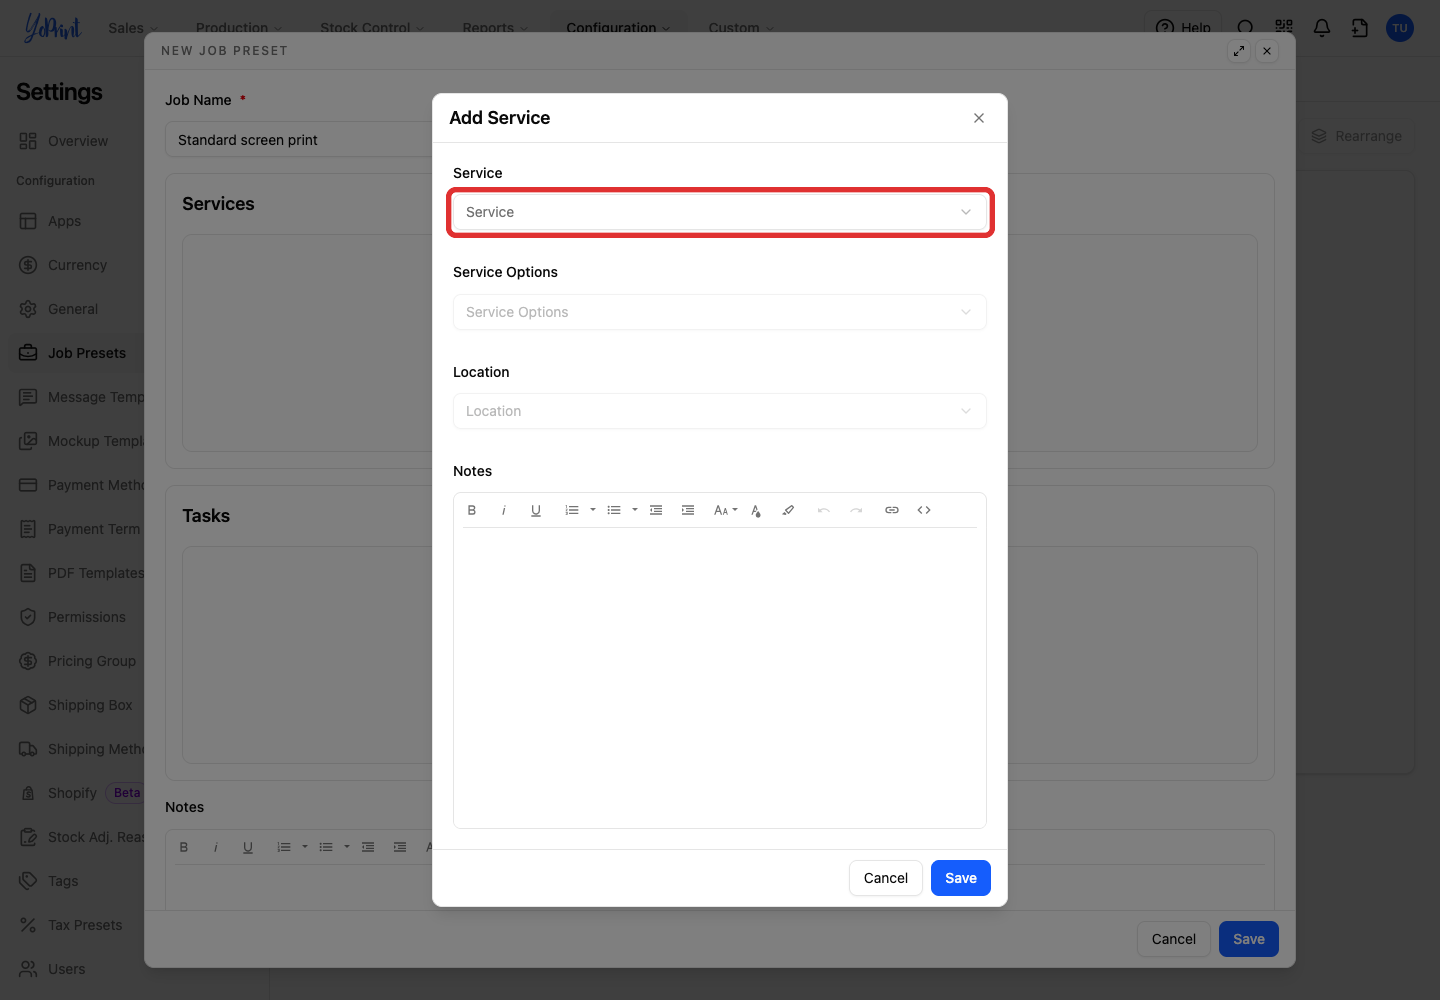
Open the Service dropdown.
-
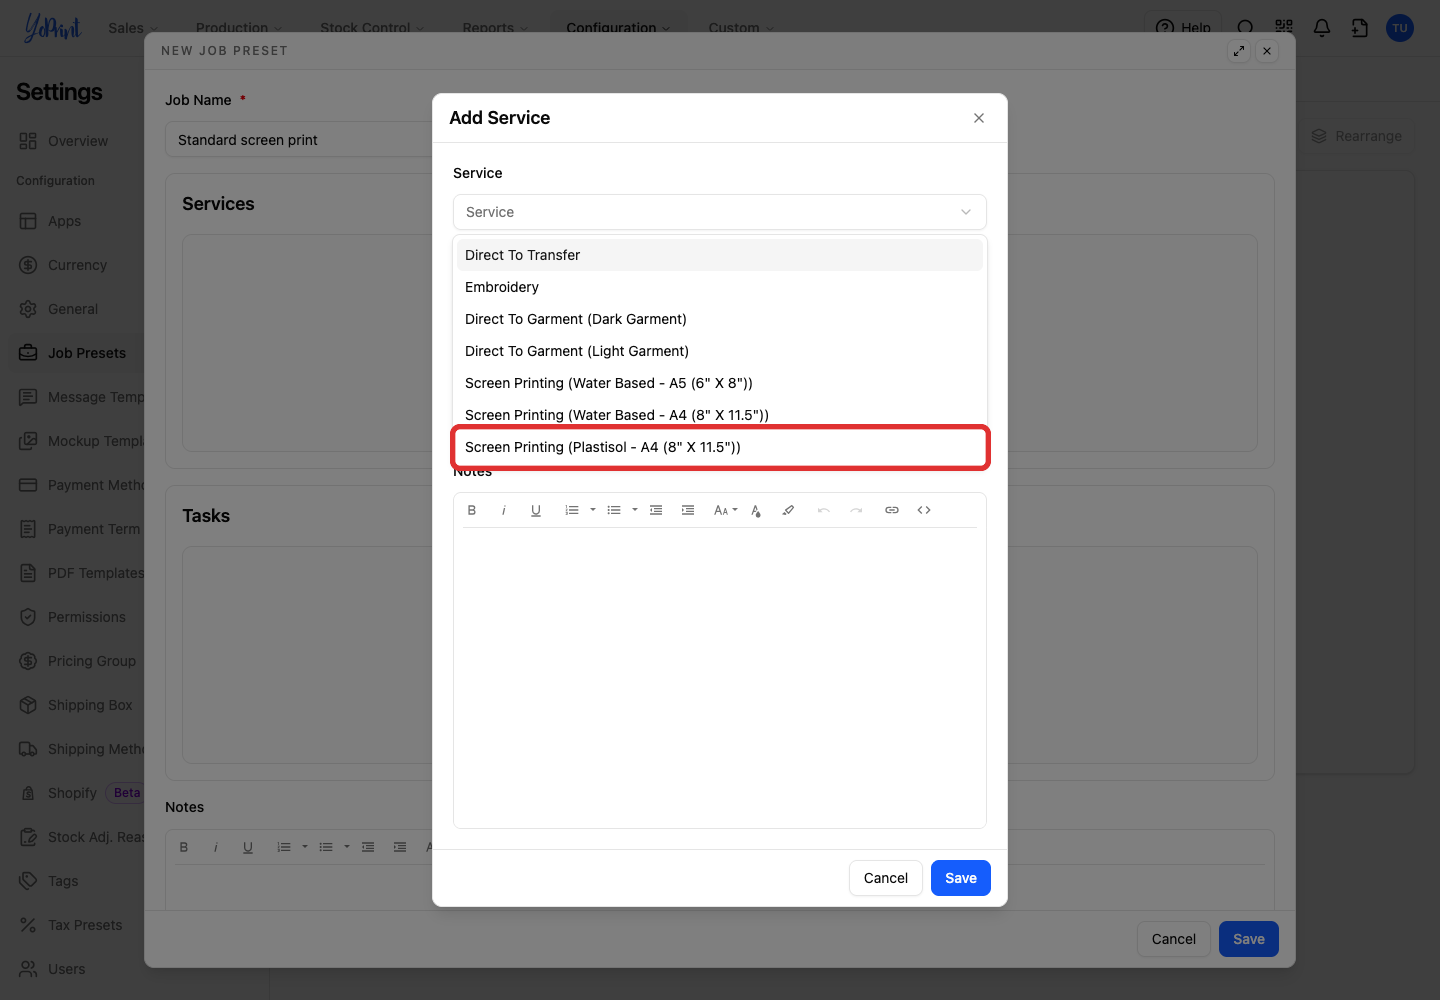
Choose the service you want to include.
-
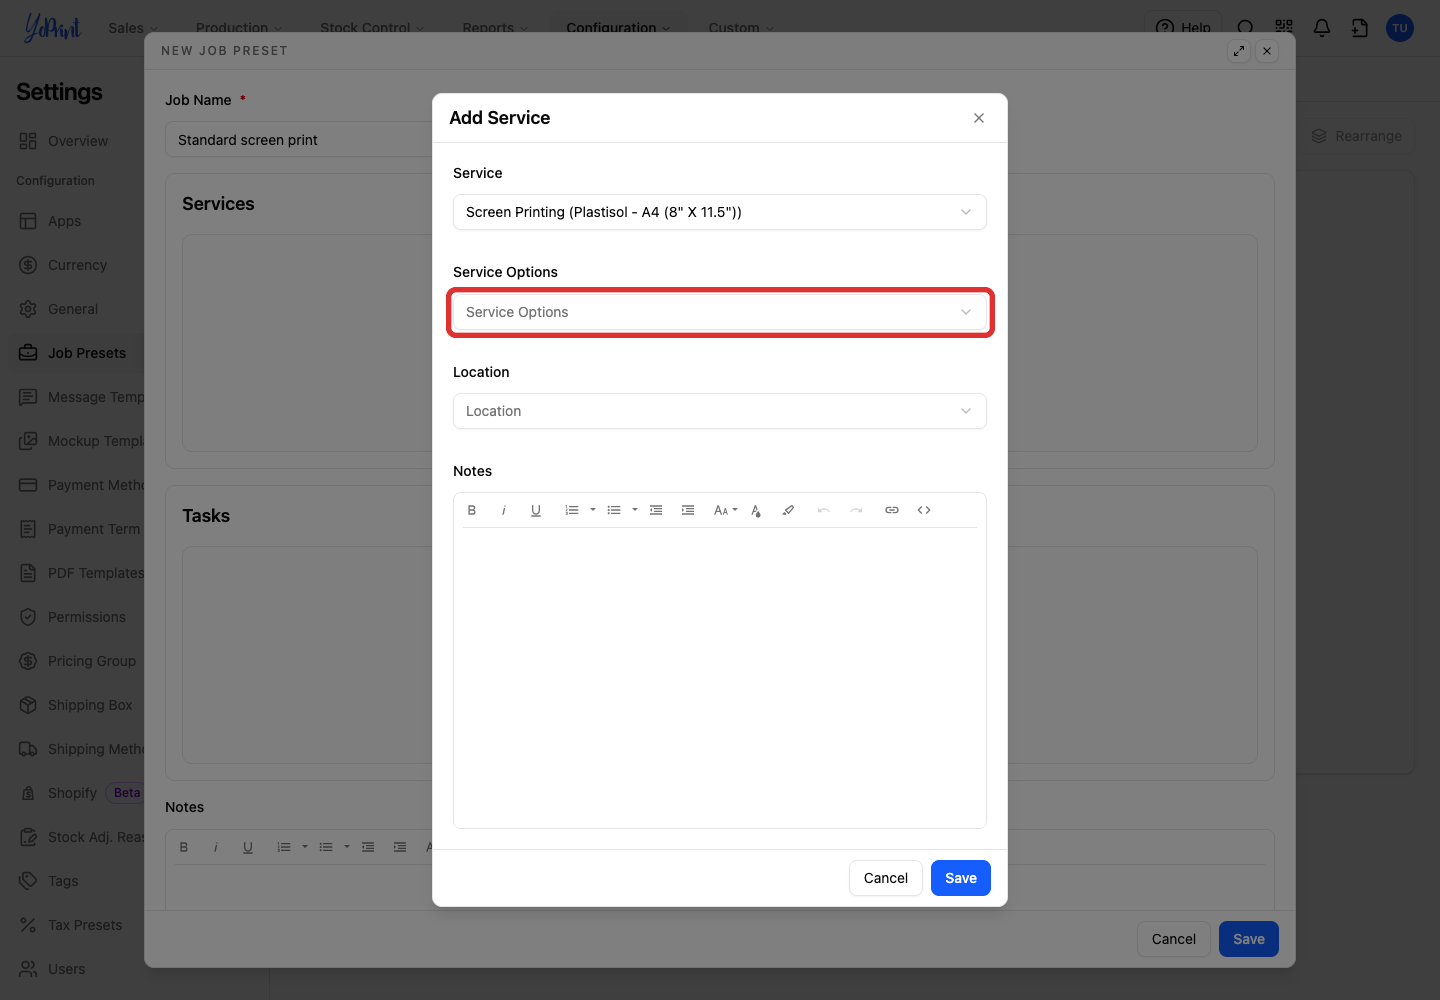
Open Service Options.
-
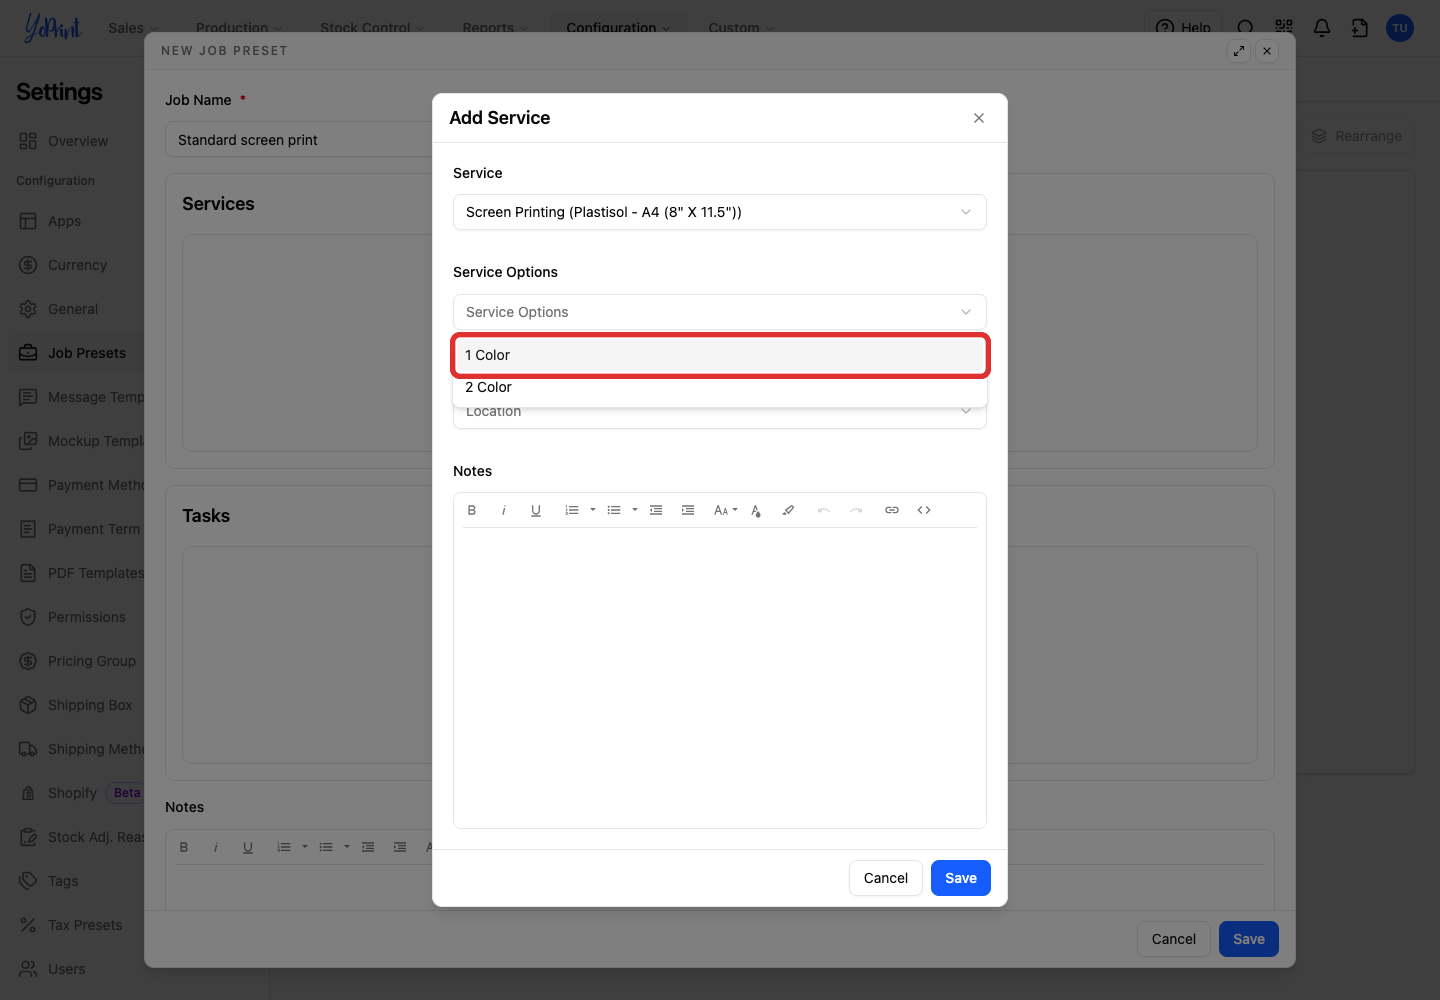
Choose an option, such as 1 Color.
-
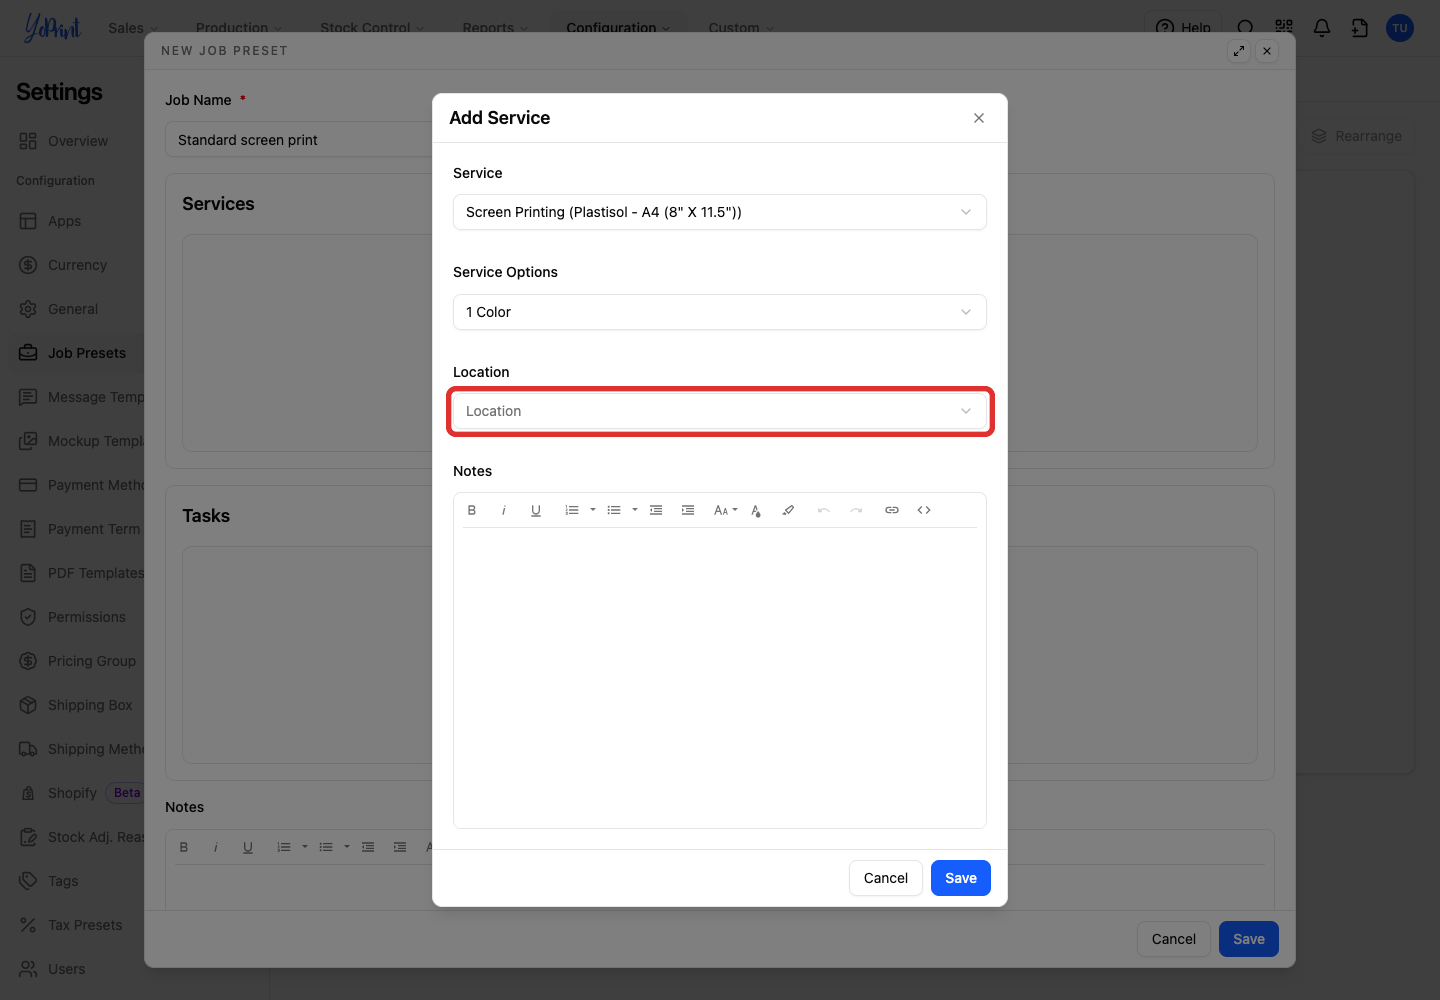
Open Location.
-
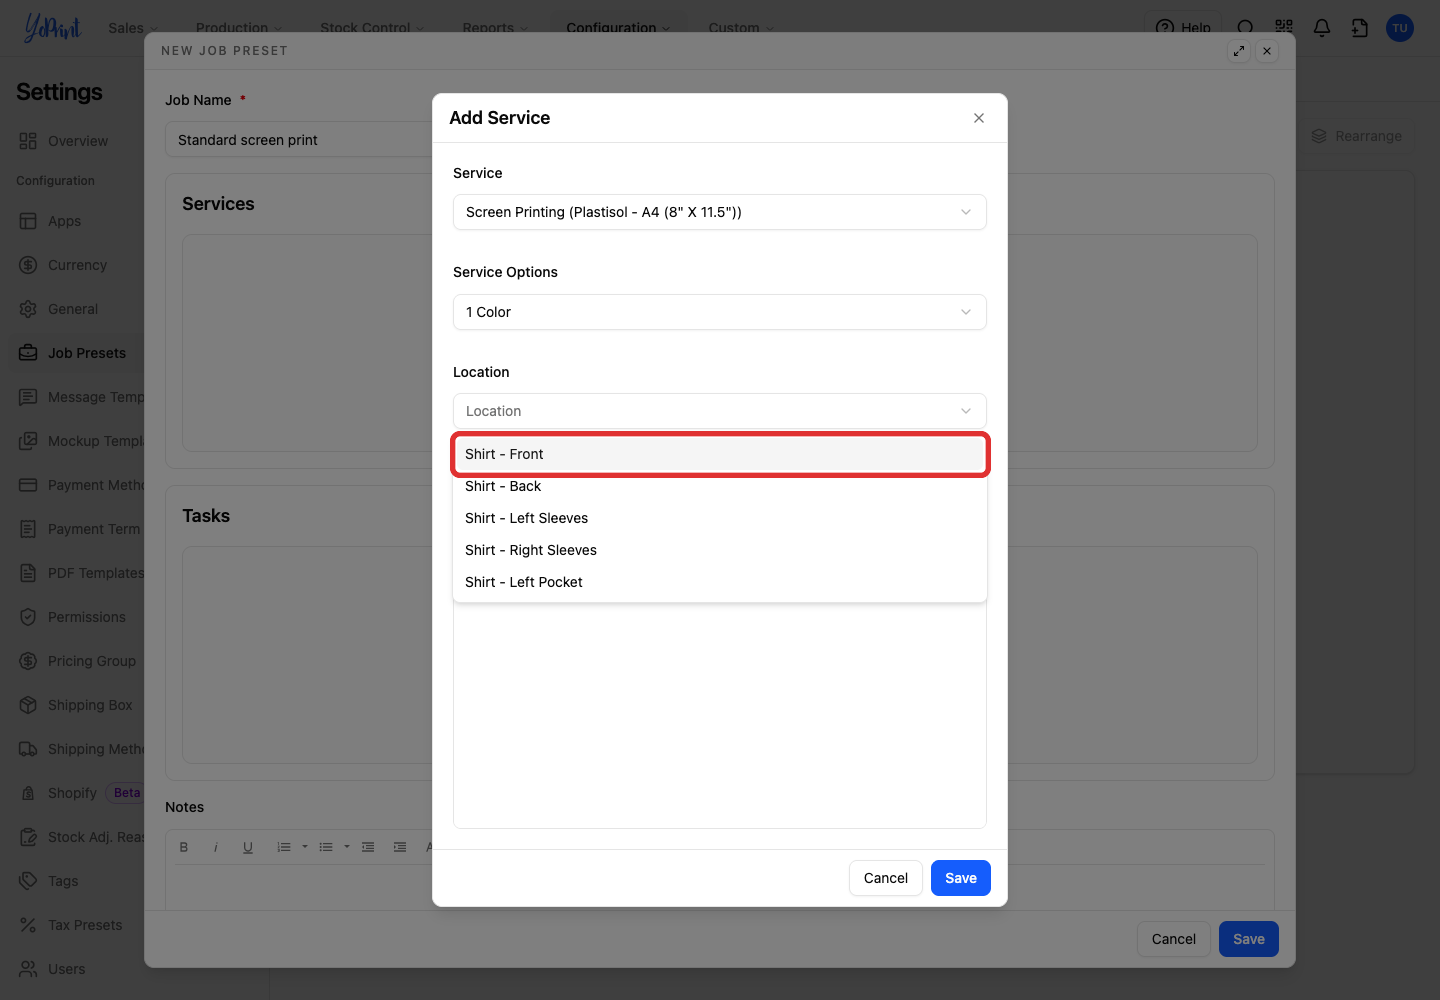
Choose where the service is applied, such as Shirt - Front.
-
Click Save to add the service to the preset. You can enter service instructions in the notes area, or leave it empty.
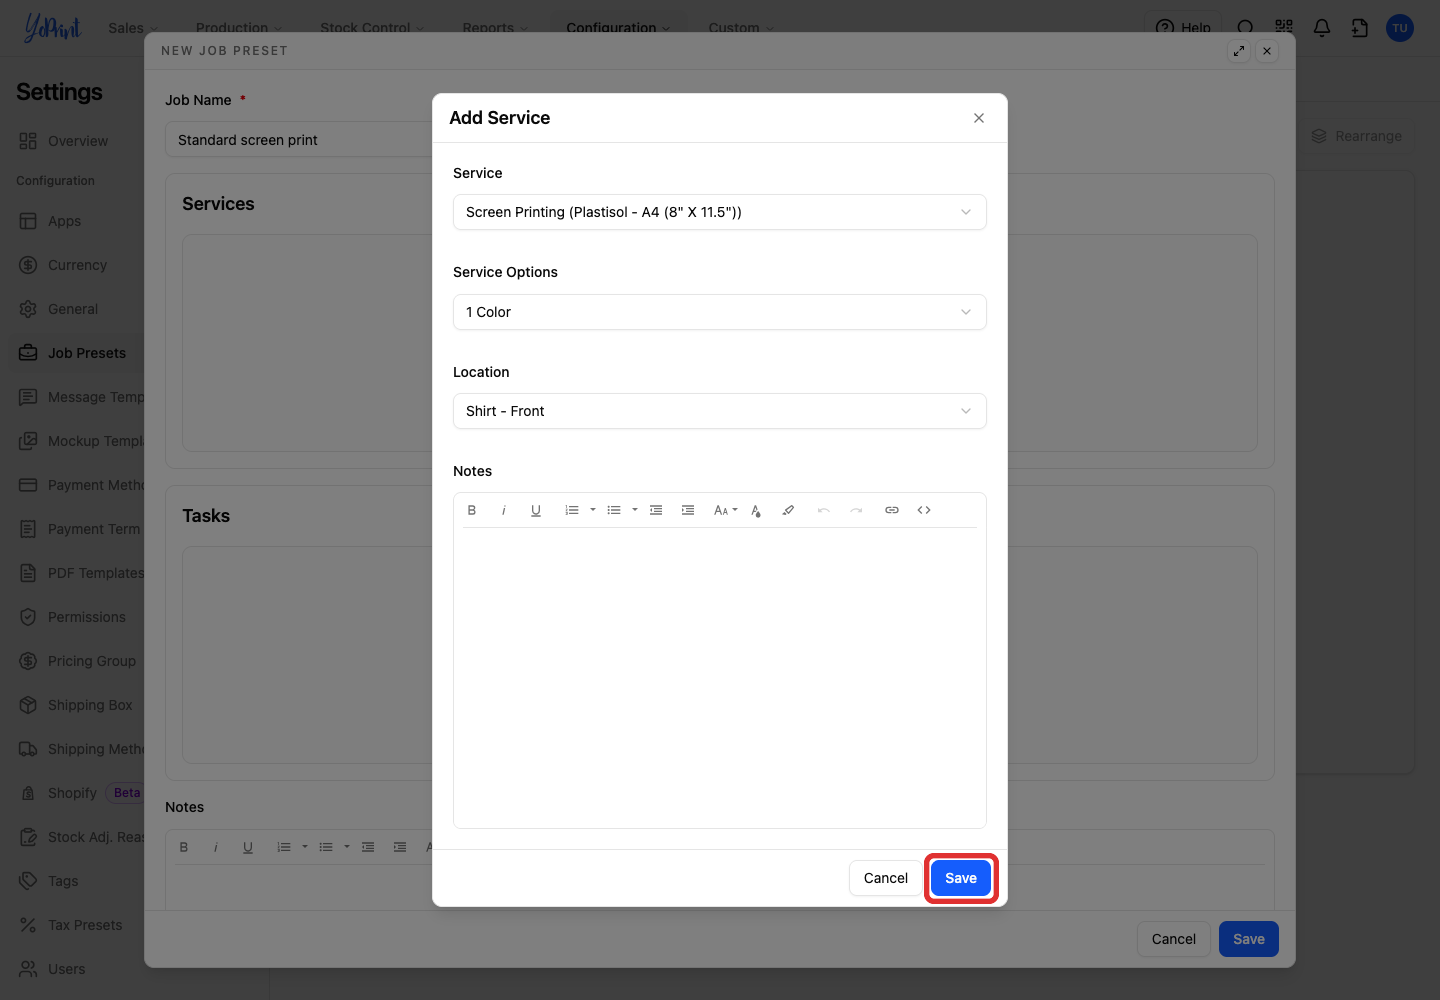
Repeat these steps for another service. Services, tasks and notes can be added as your preset takes shape.
Add tasks
Tasks are optional. If the job needs no preset tasks, continue to Save the preset.
-
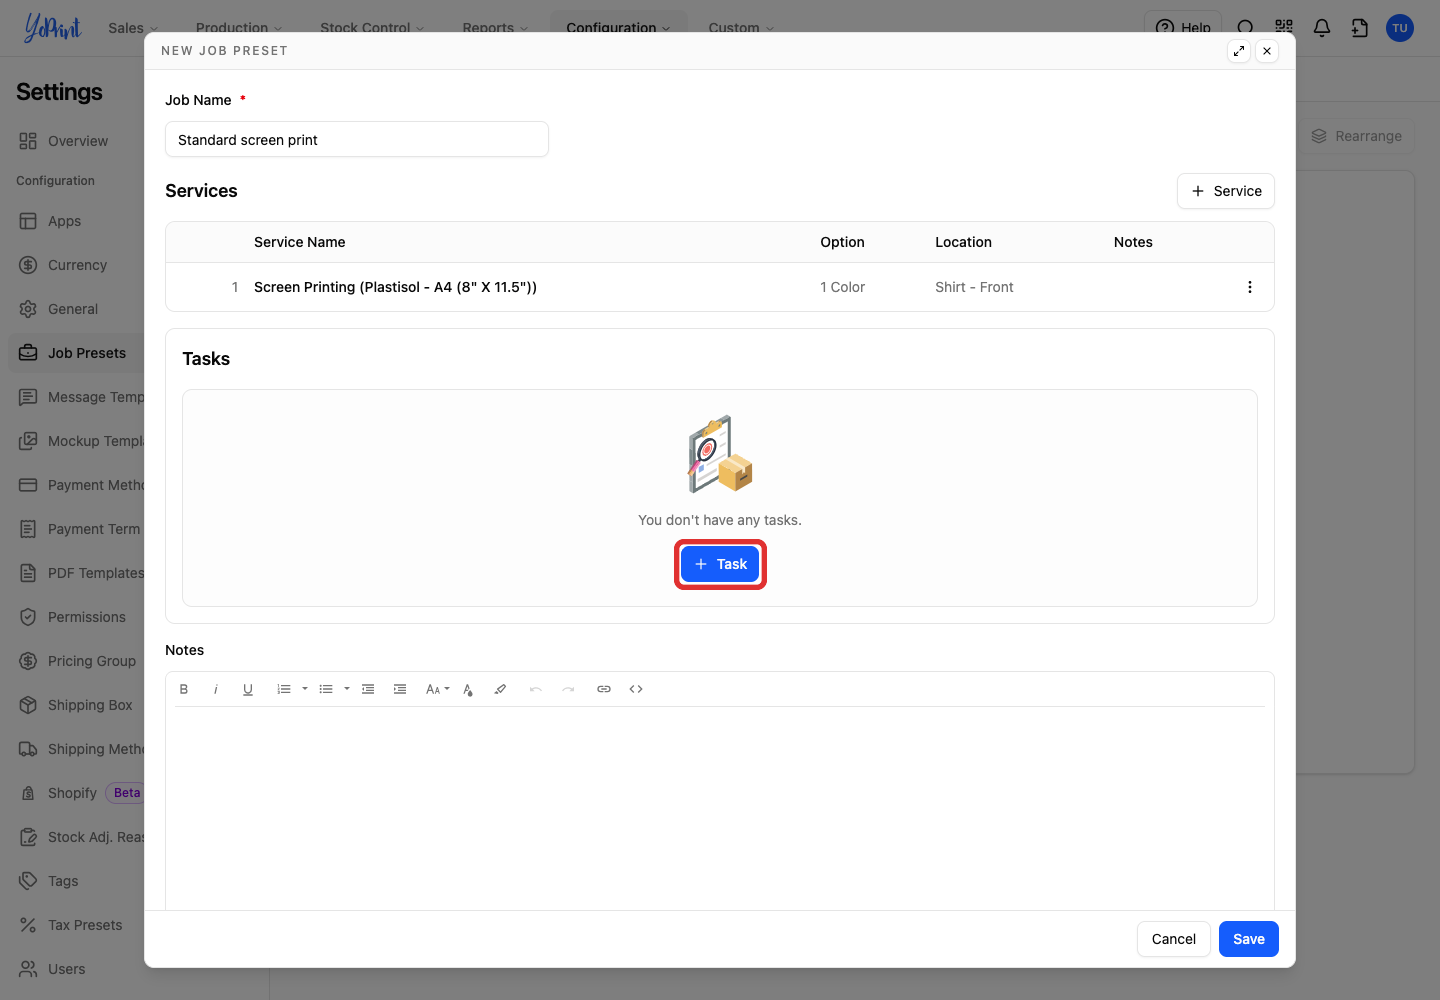
Click Task.
-
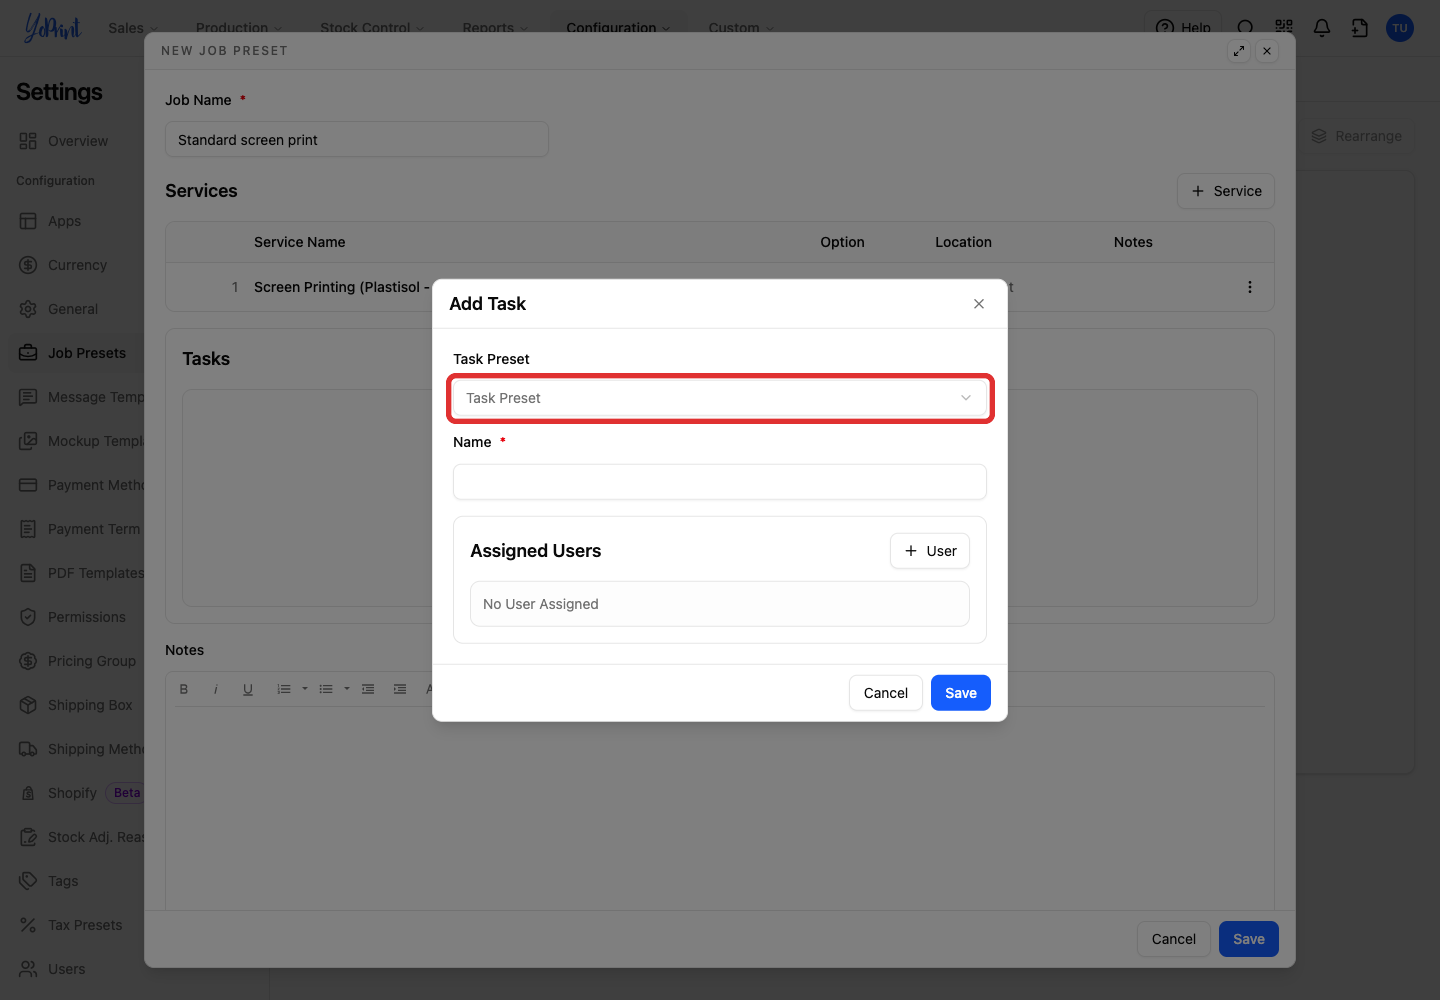
Open Task Preset.
-
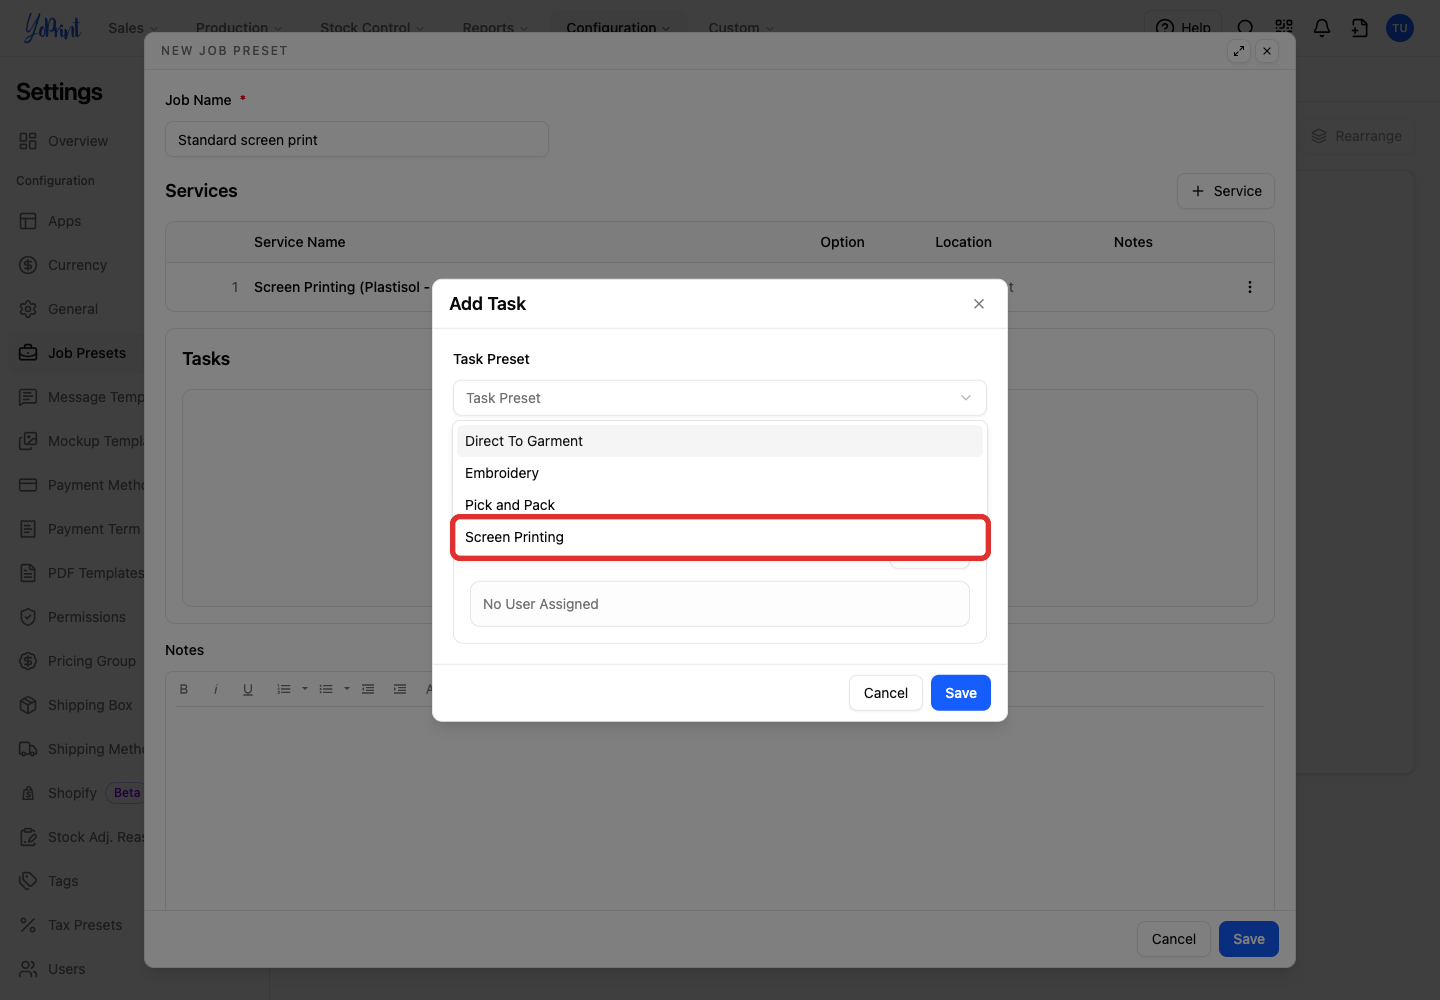
Choose the task preset that matches the work.
-
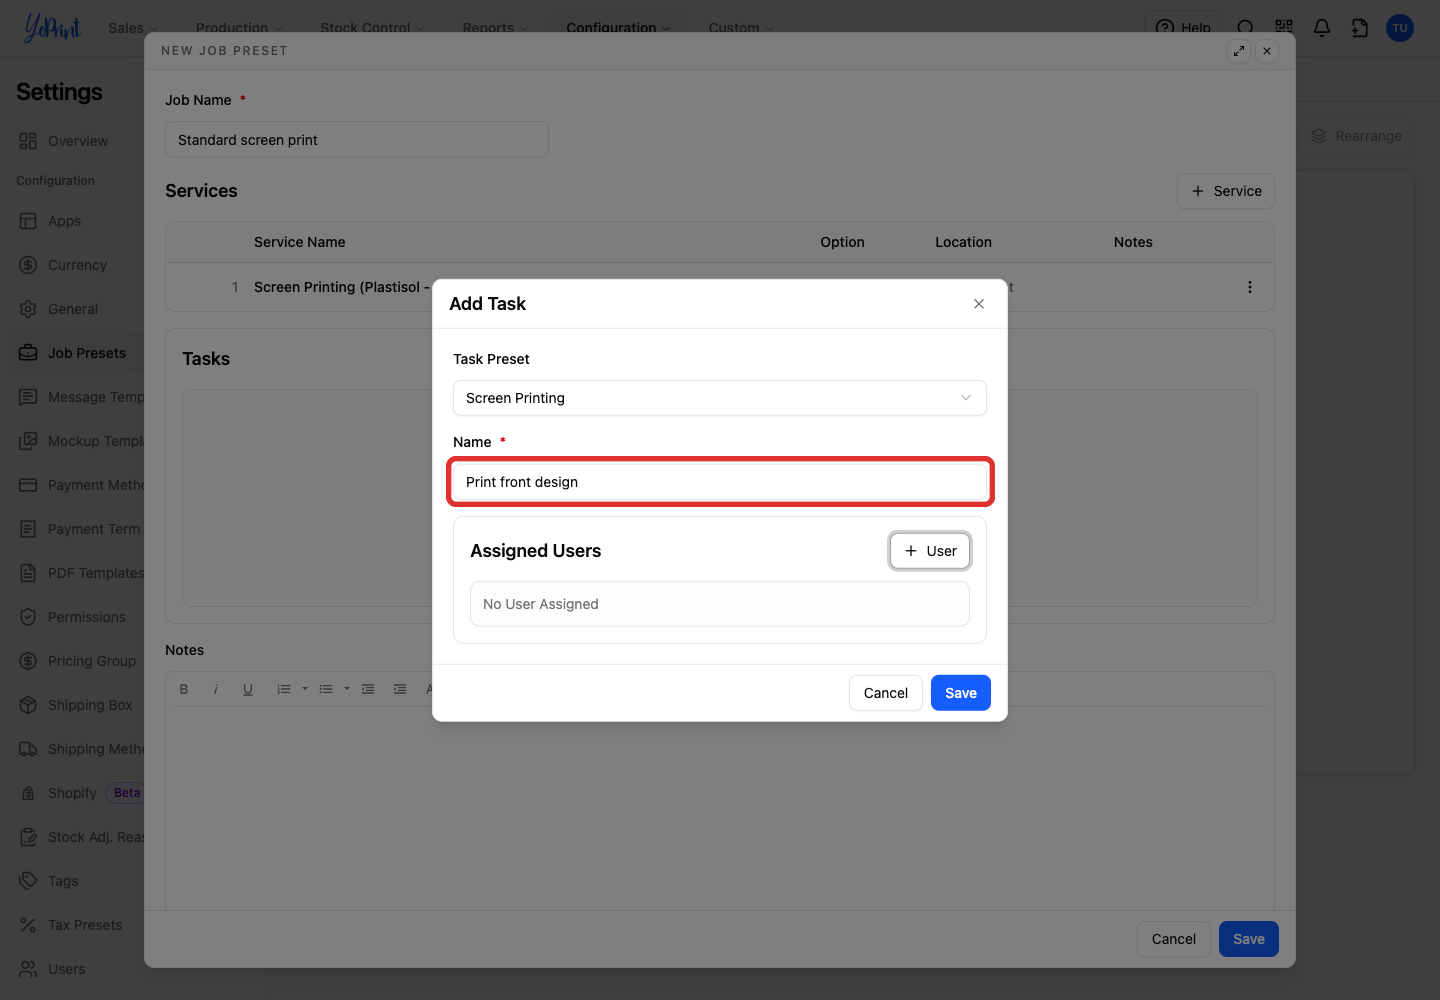
Enter the task Name, or keep the suggested name.
-
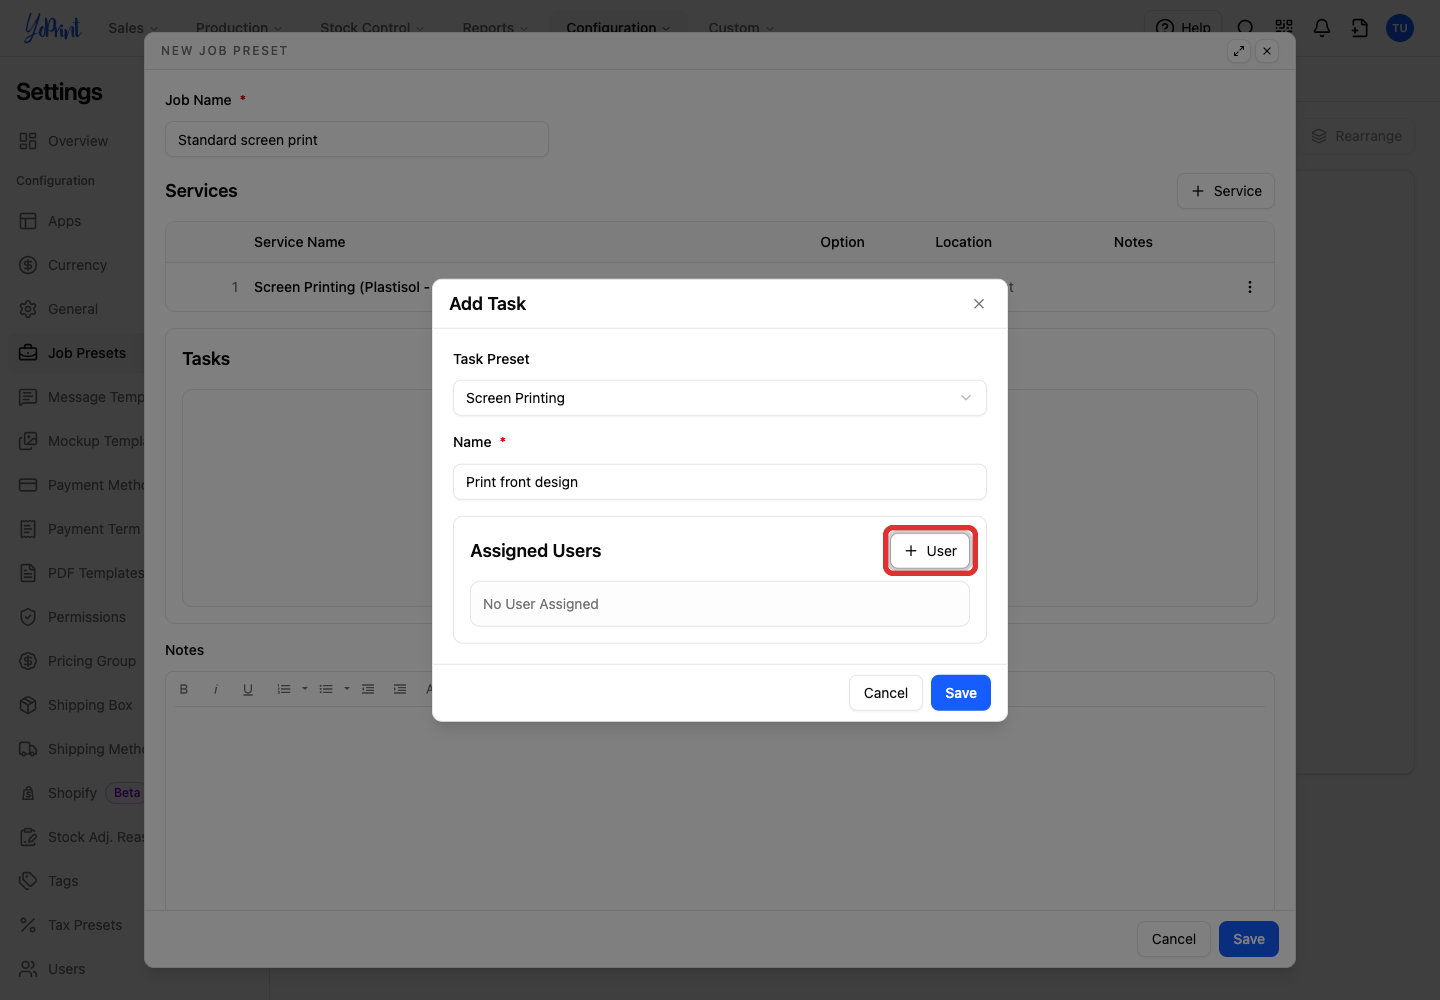
If the same people usually do this work, click User. This assigns the default team member on new orders, and your team can change it later. Otherwise, skip to step 8.
-
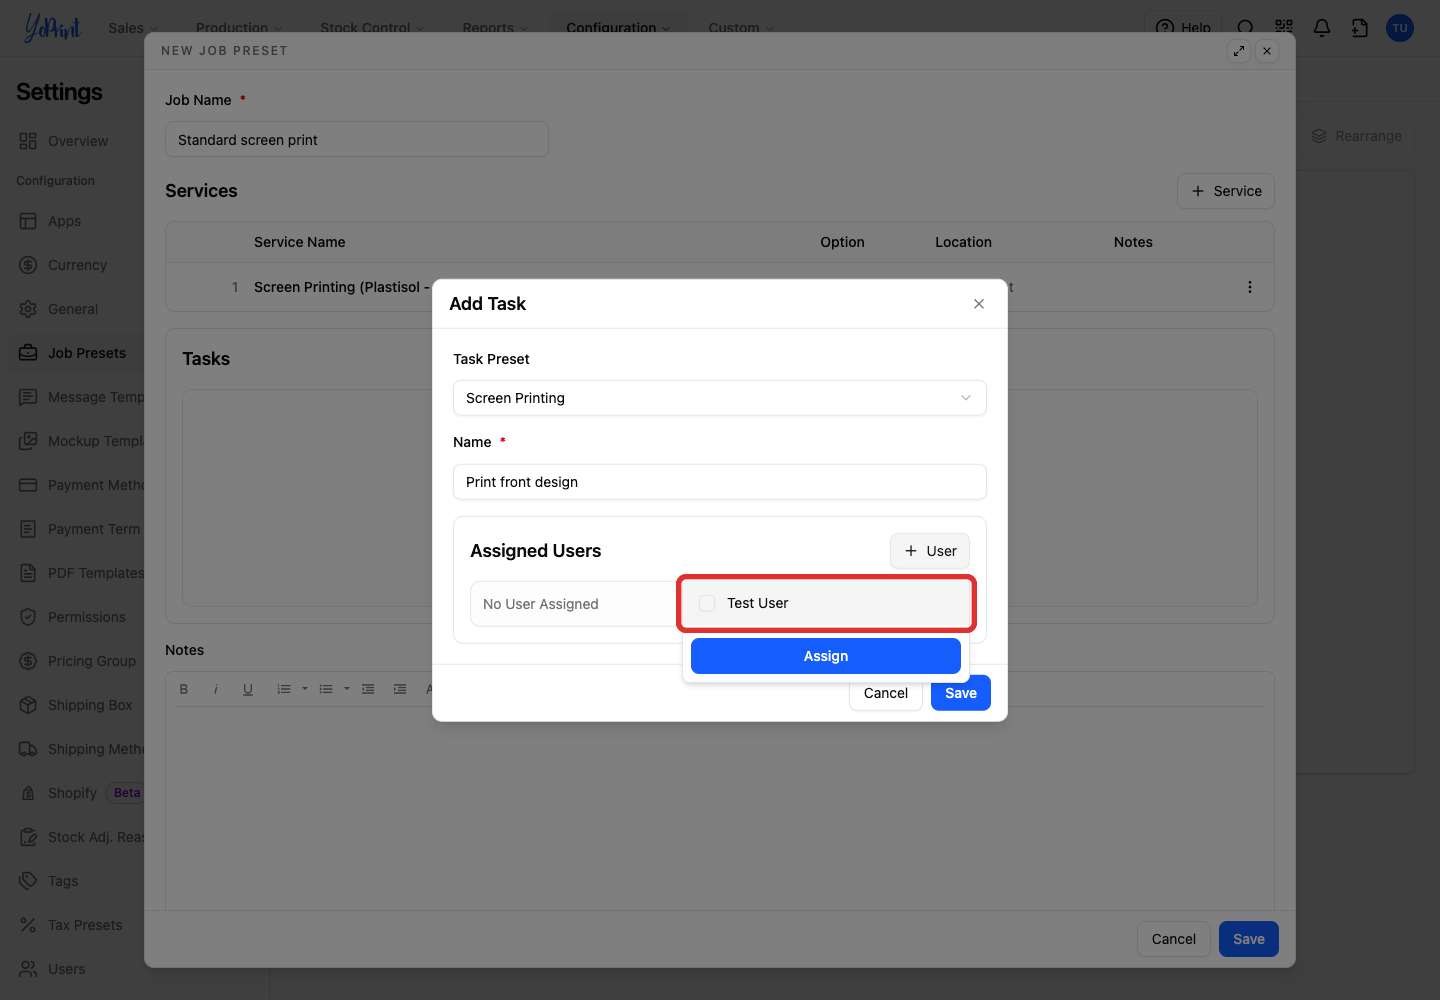
Select the team members to assign.
-
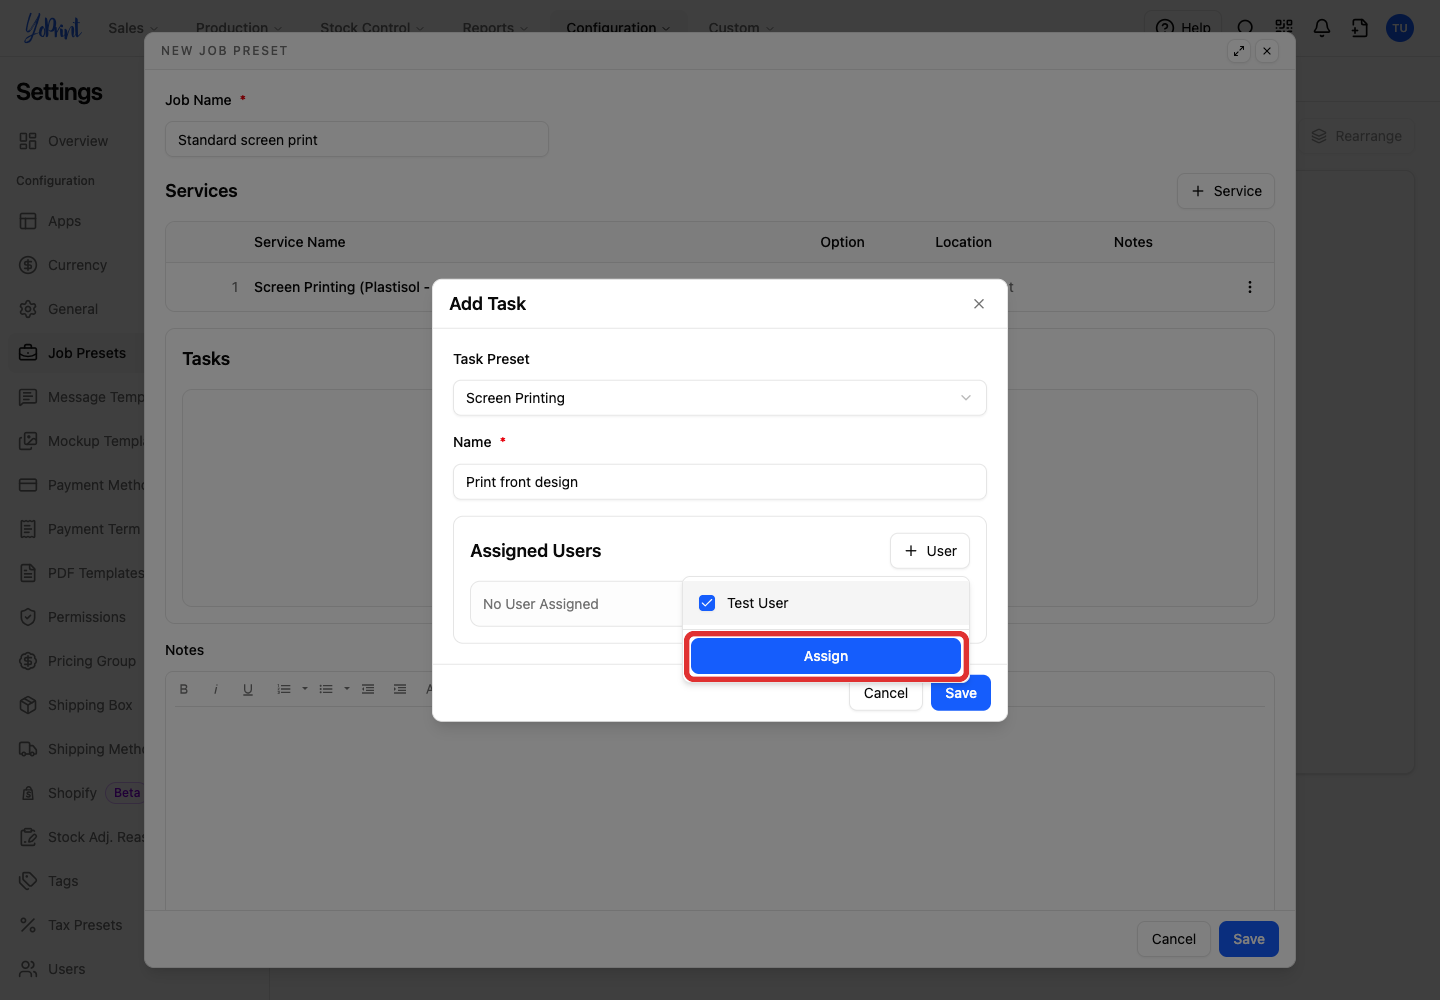
Click Assign.
-
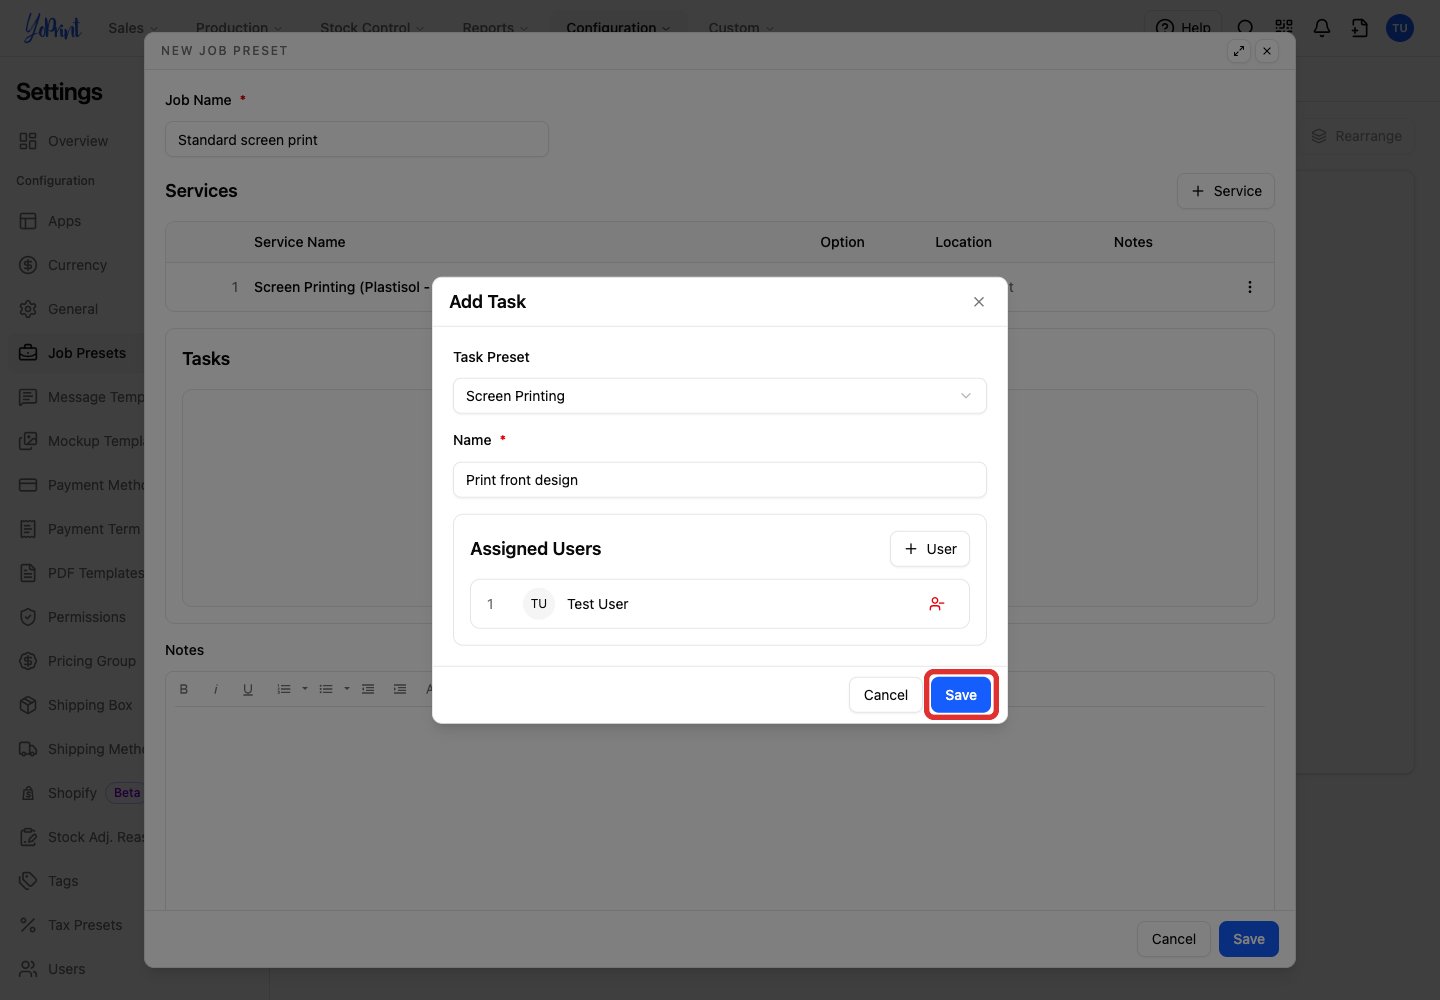
Click Save to add the task to the preset.
Save the preset
-
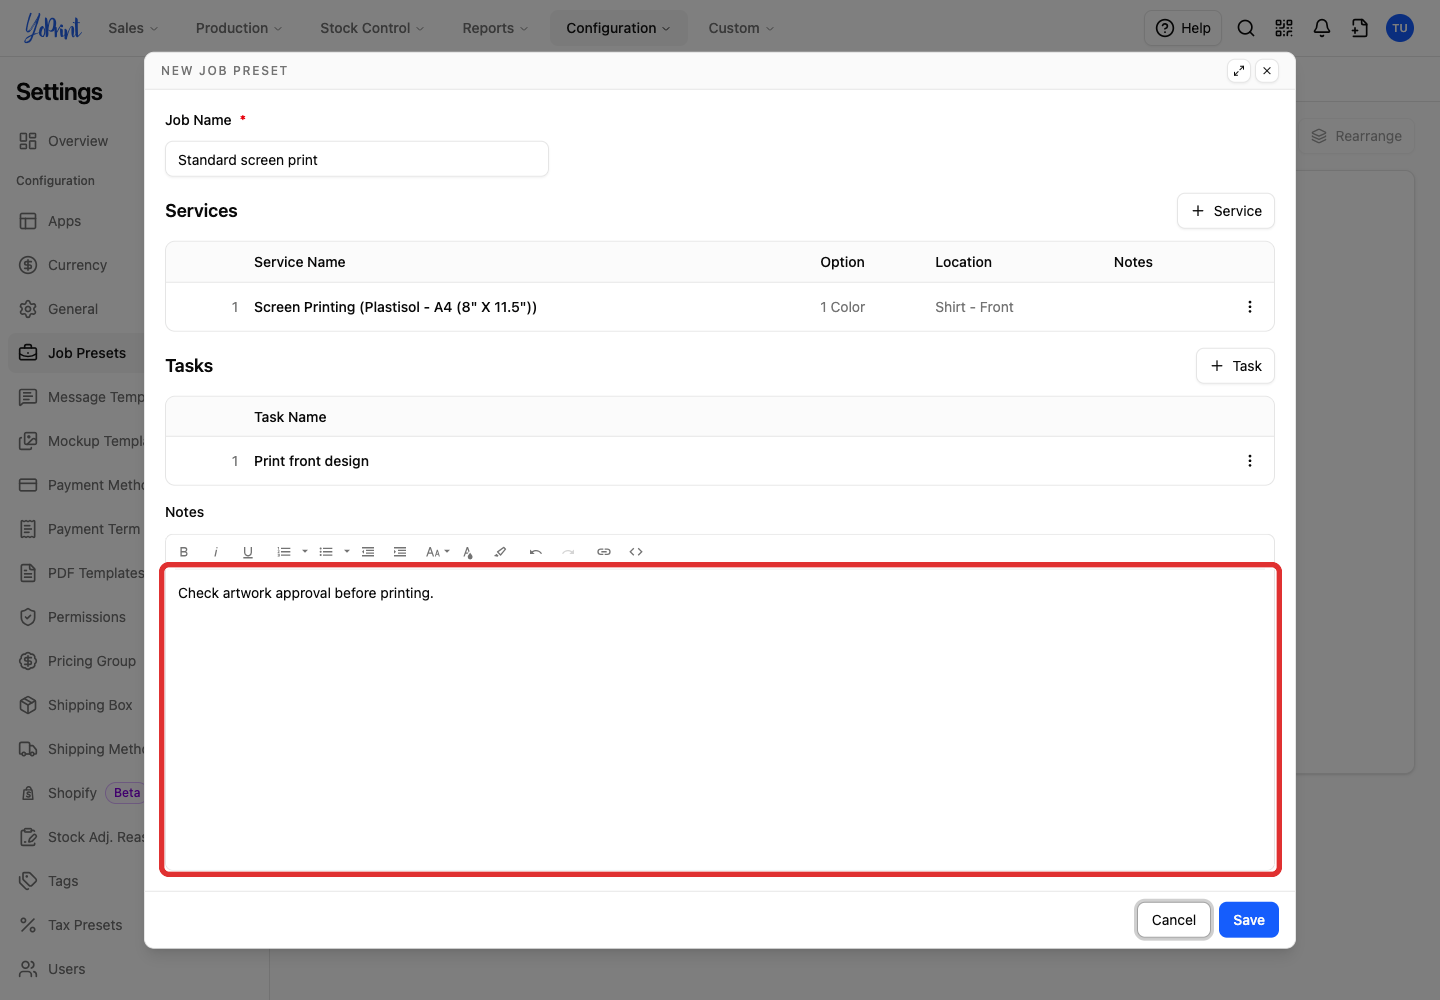
Add any instructions for the whole job in Notes. These notes appear on internal production worksheets.
-
Click Save.
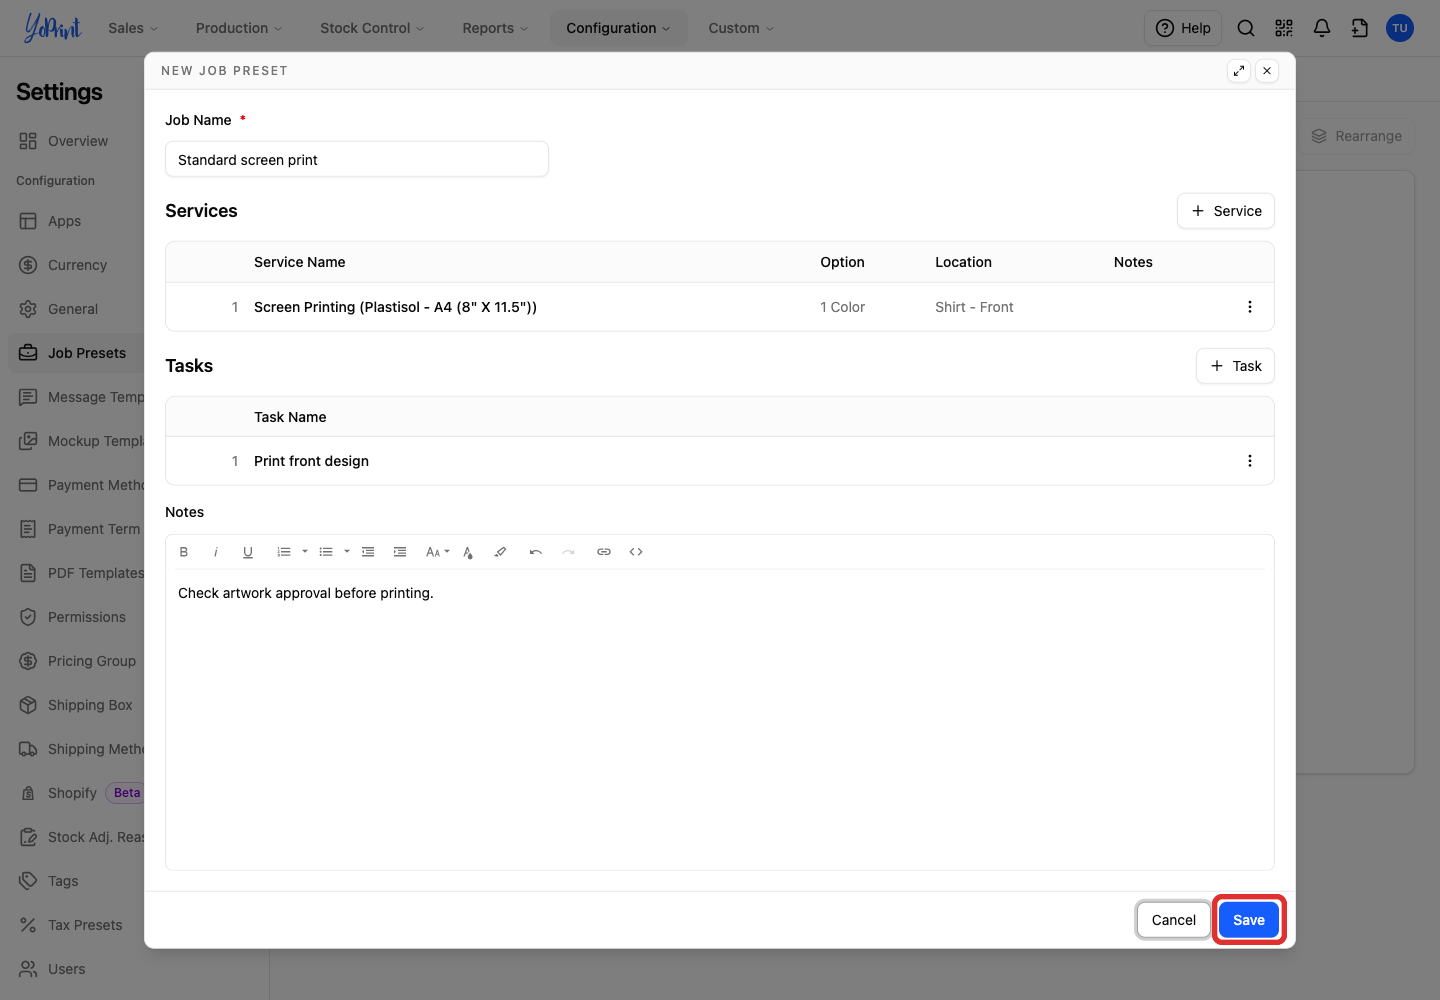
The preset now appears in the Job Presets list.
Use a preset in an order or quote
Open the order or quote you are building. For a new quote, follow Create a Quote to start it and choose a customer.
-
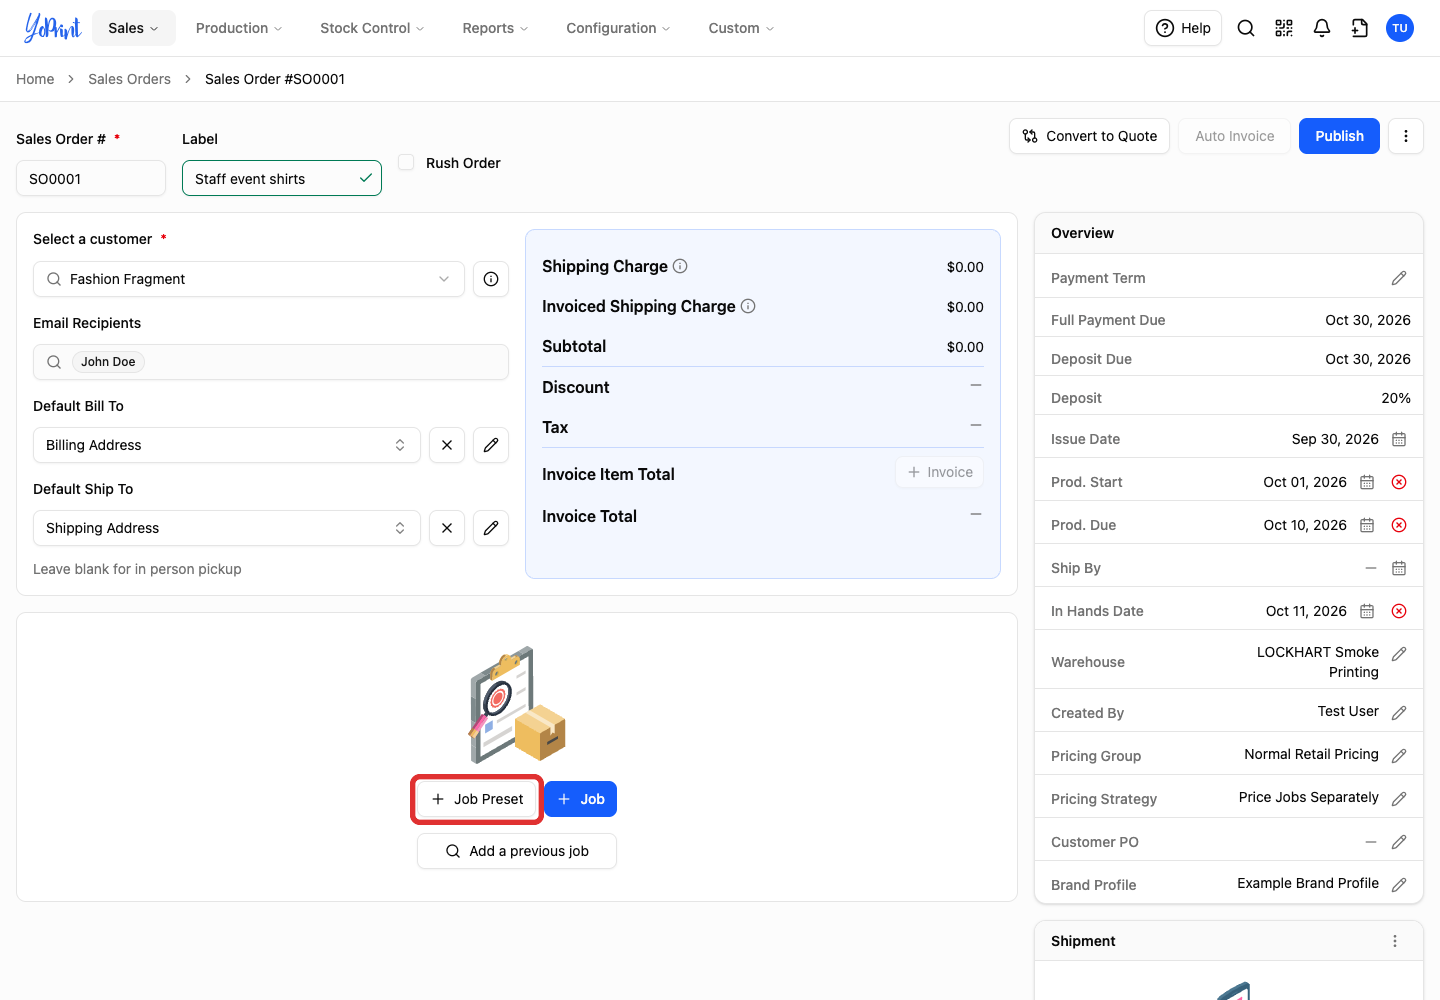
Click Job Preset above the items table.
-
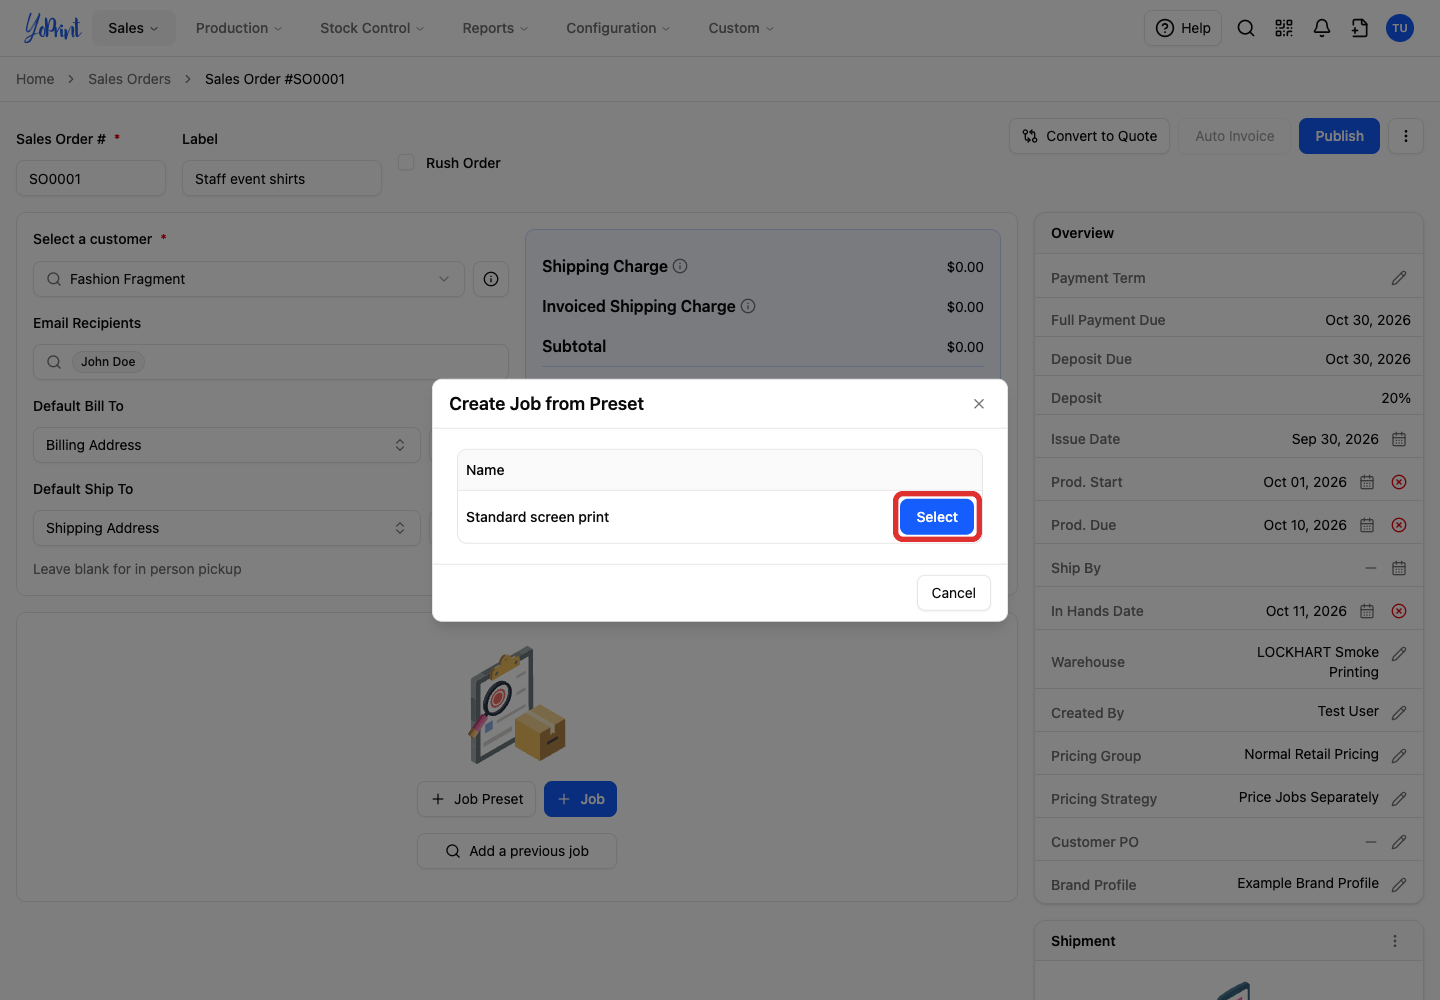
Click Select beside the preset.
-
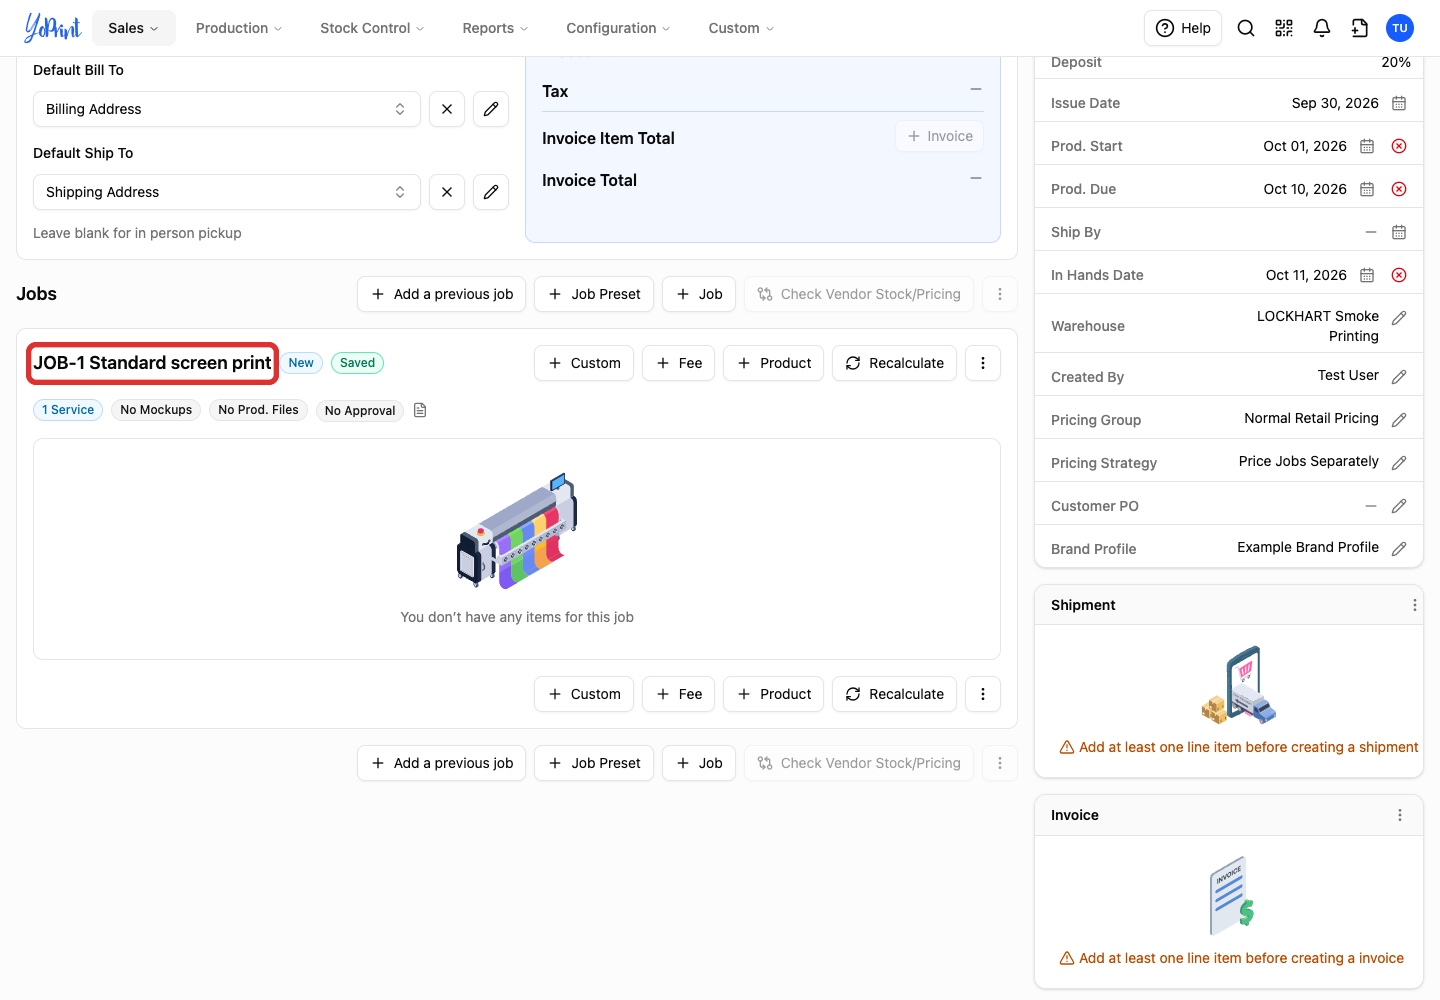
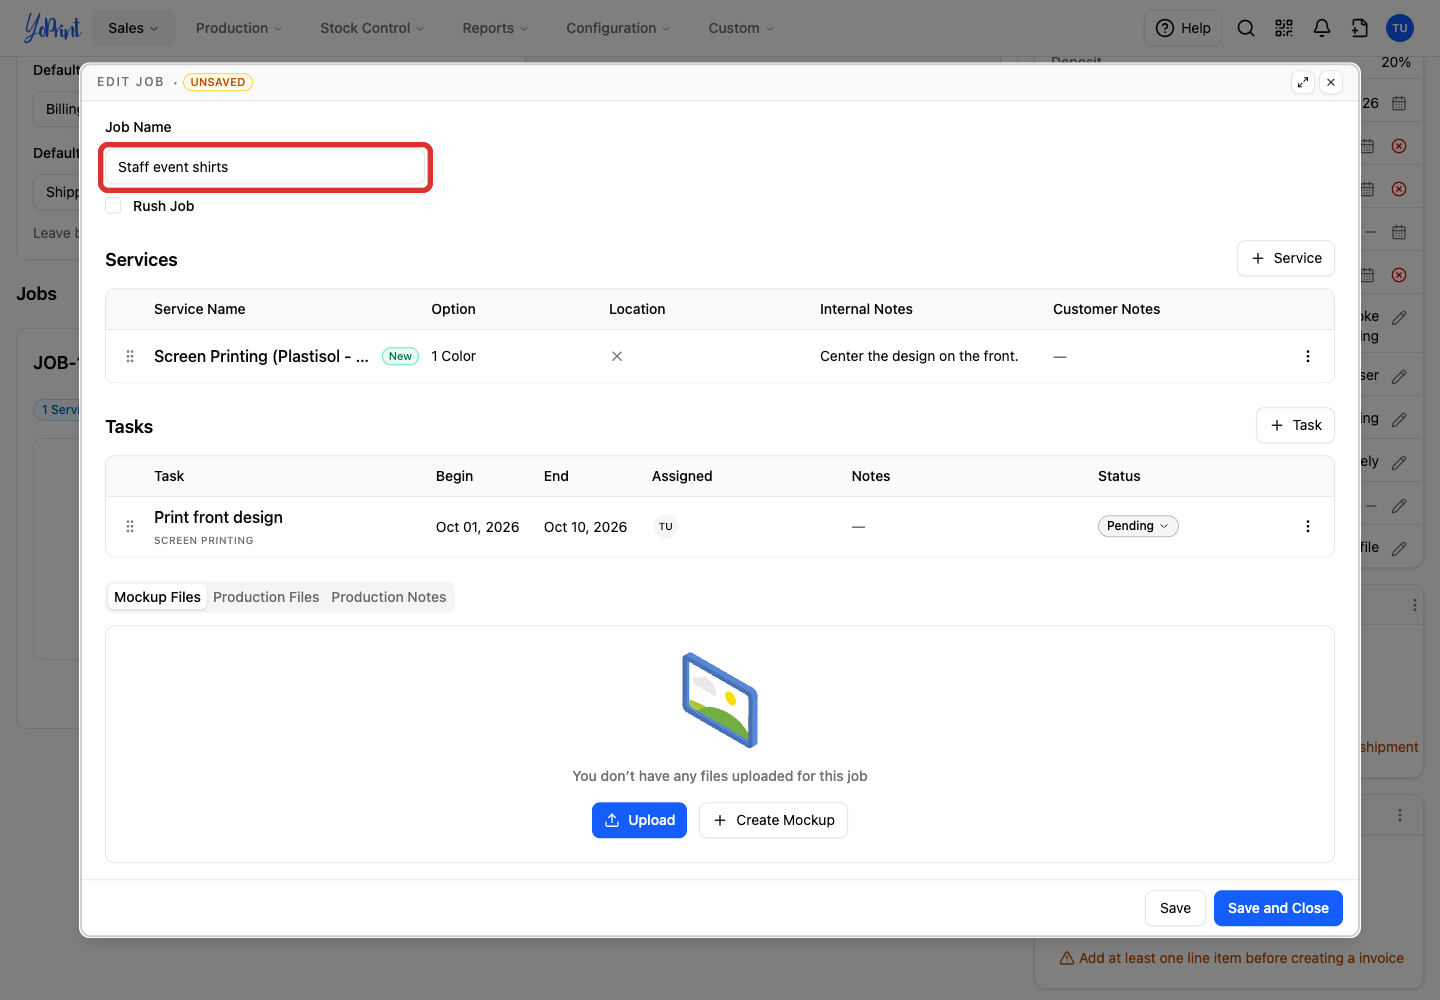
To adjust the new job for this order, click its name.
-
Change Job Name to describe this order’s work.
-
Click Save and Close.
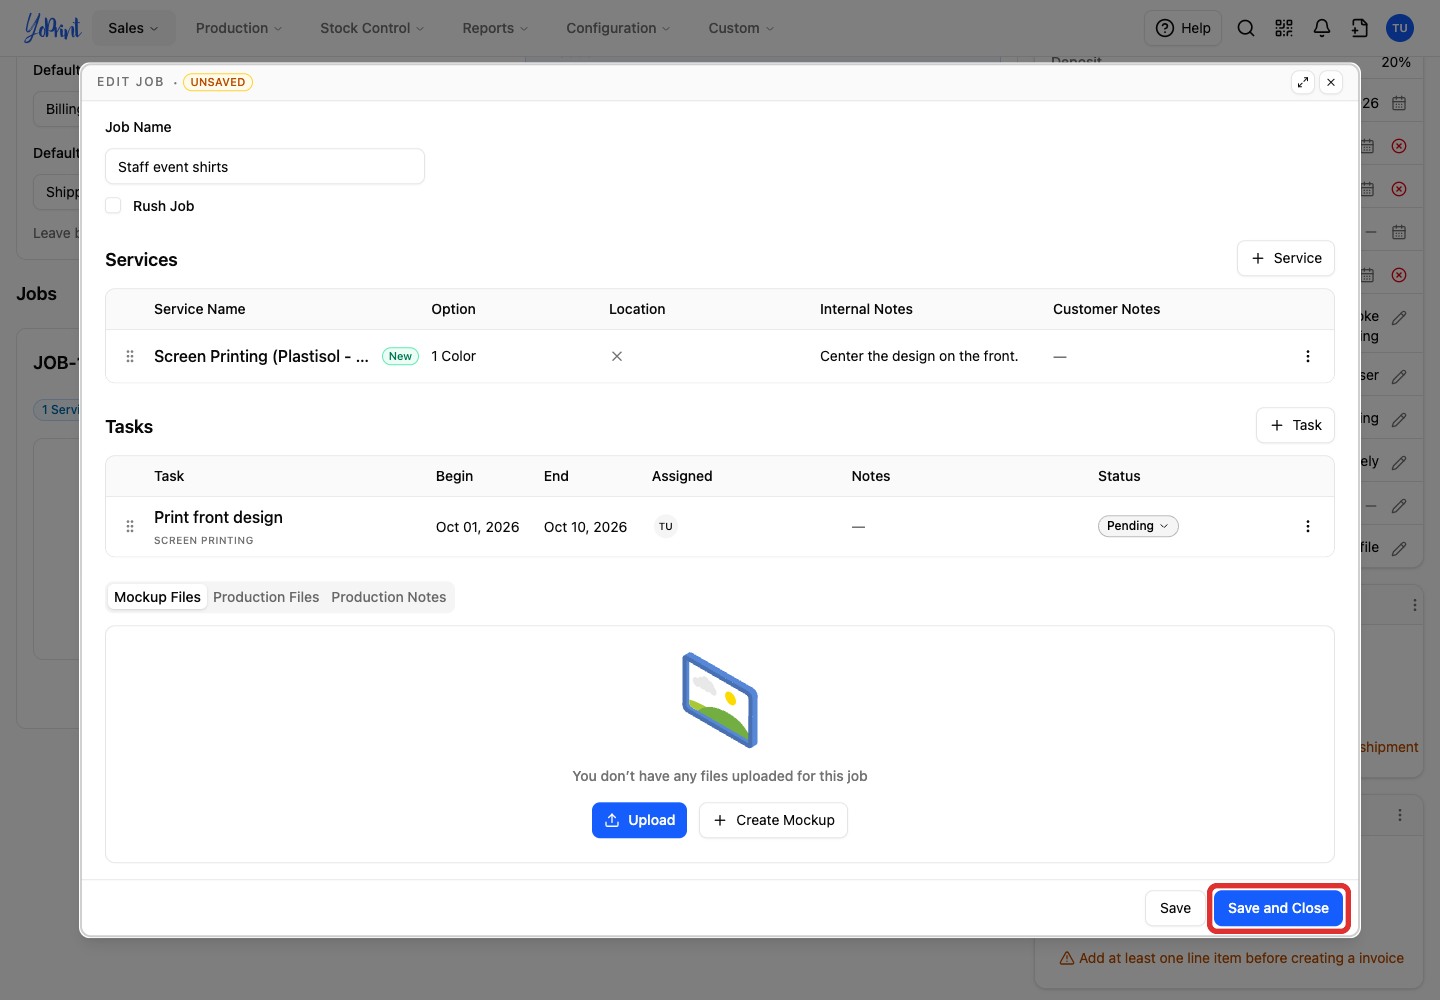
Changing this job does not change the saved preset. The preset sets up the work; products you add to the job use its services.
Edit a preset
In Settings > Job Presets, open the preset you want to change. This example adds a note for one service.
-
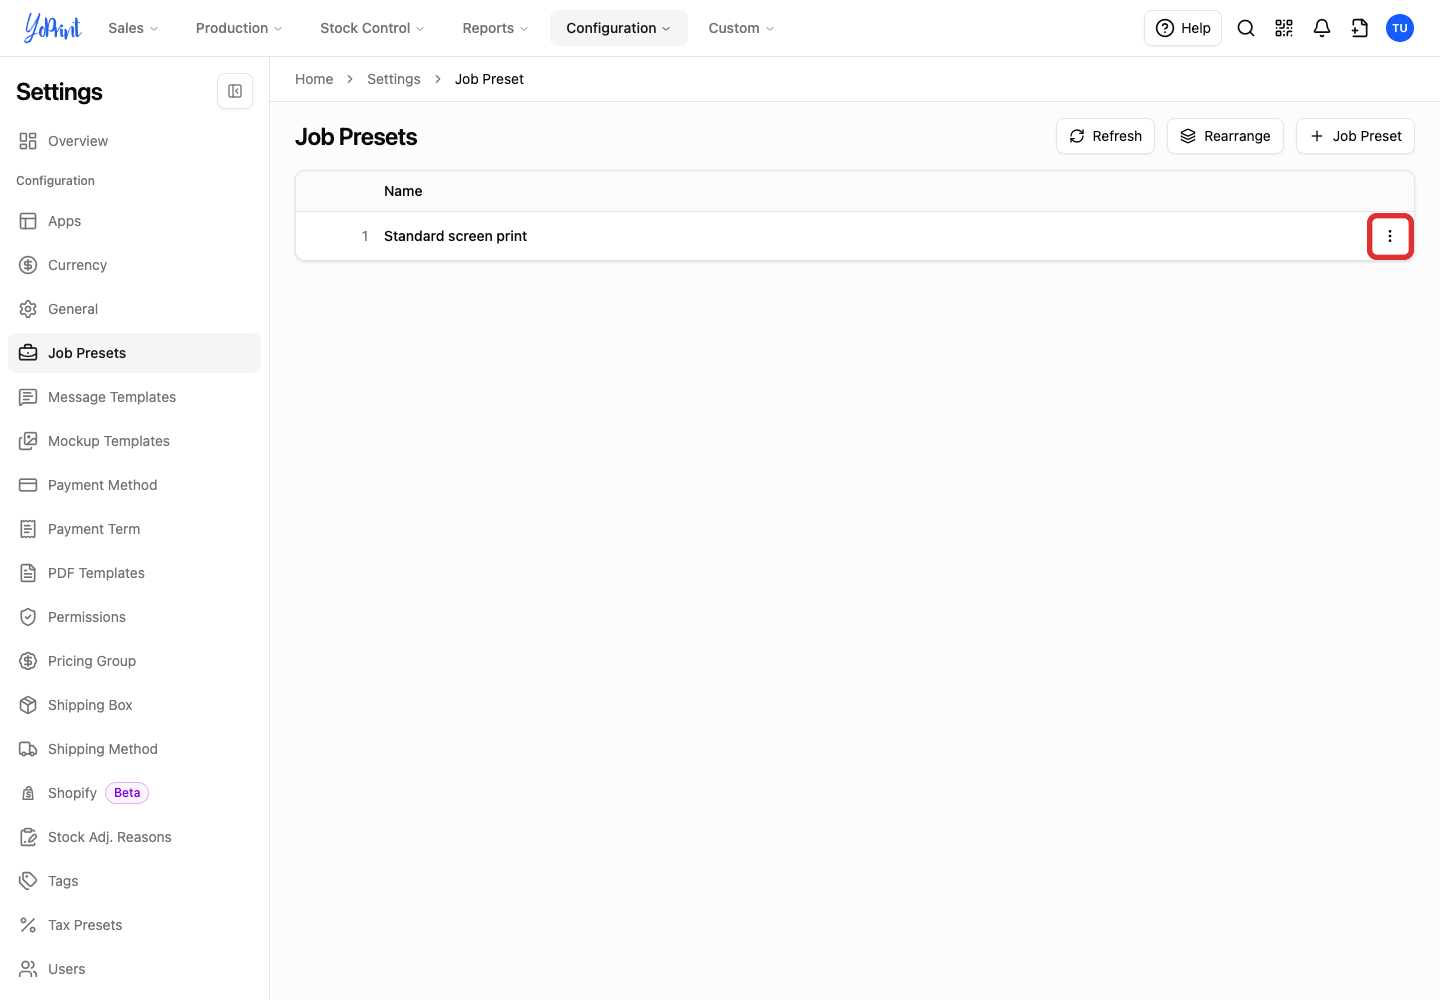
Click the preset’s three-dot More actions button.
-
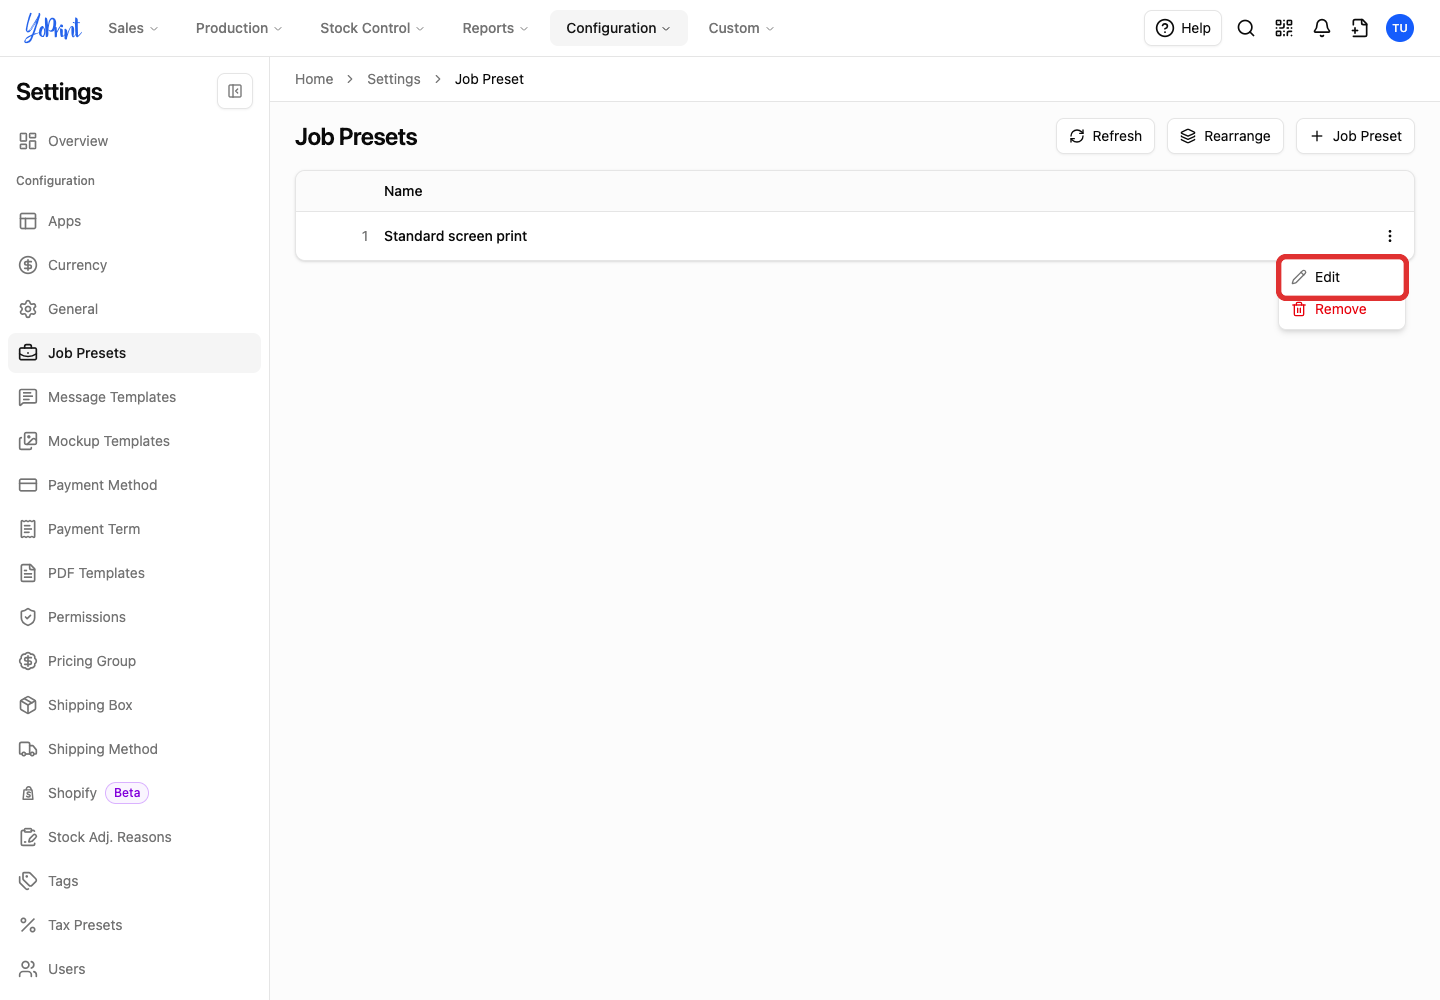
Choose Edit.
-
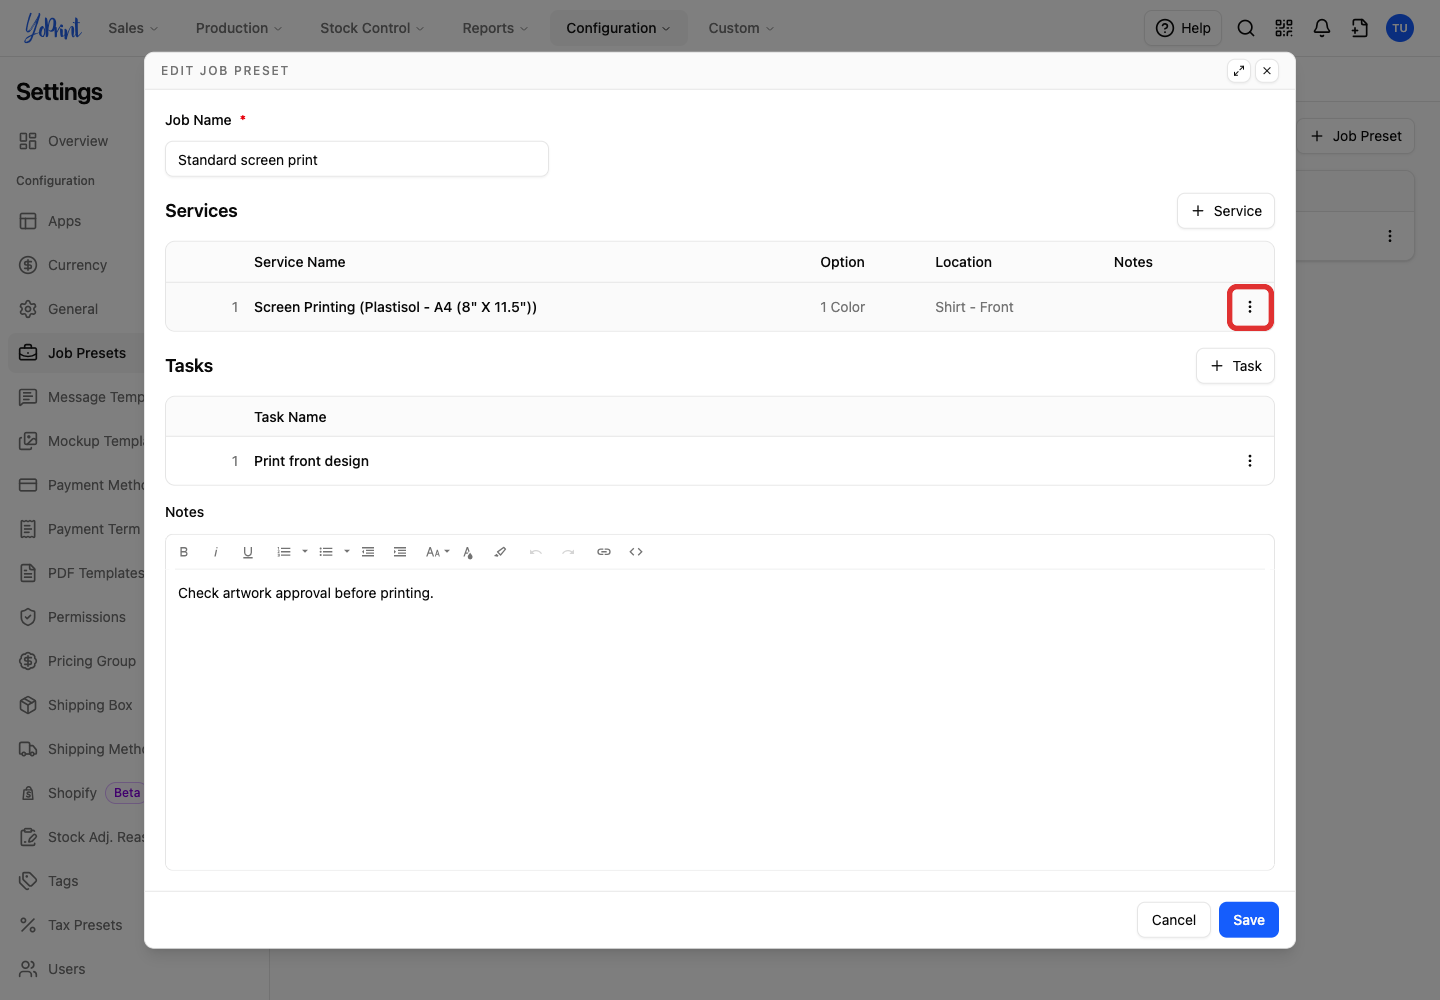
Click More actions on the service row.
-
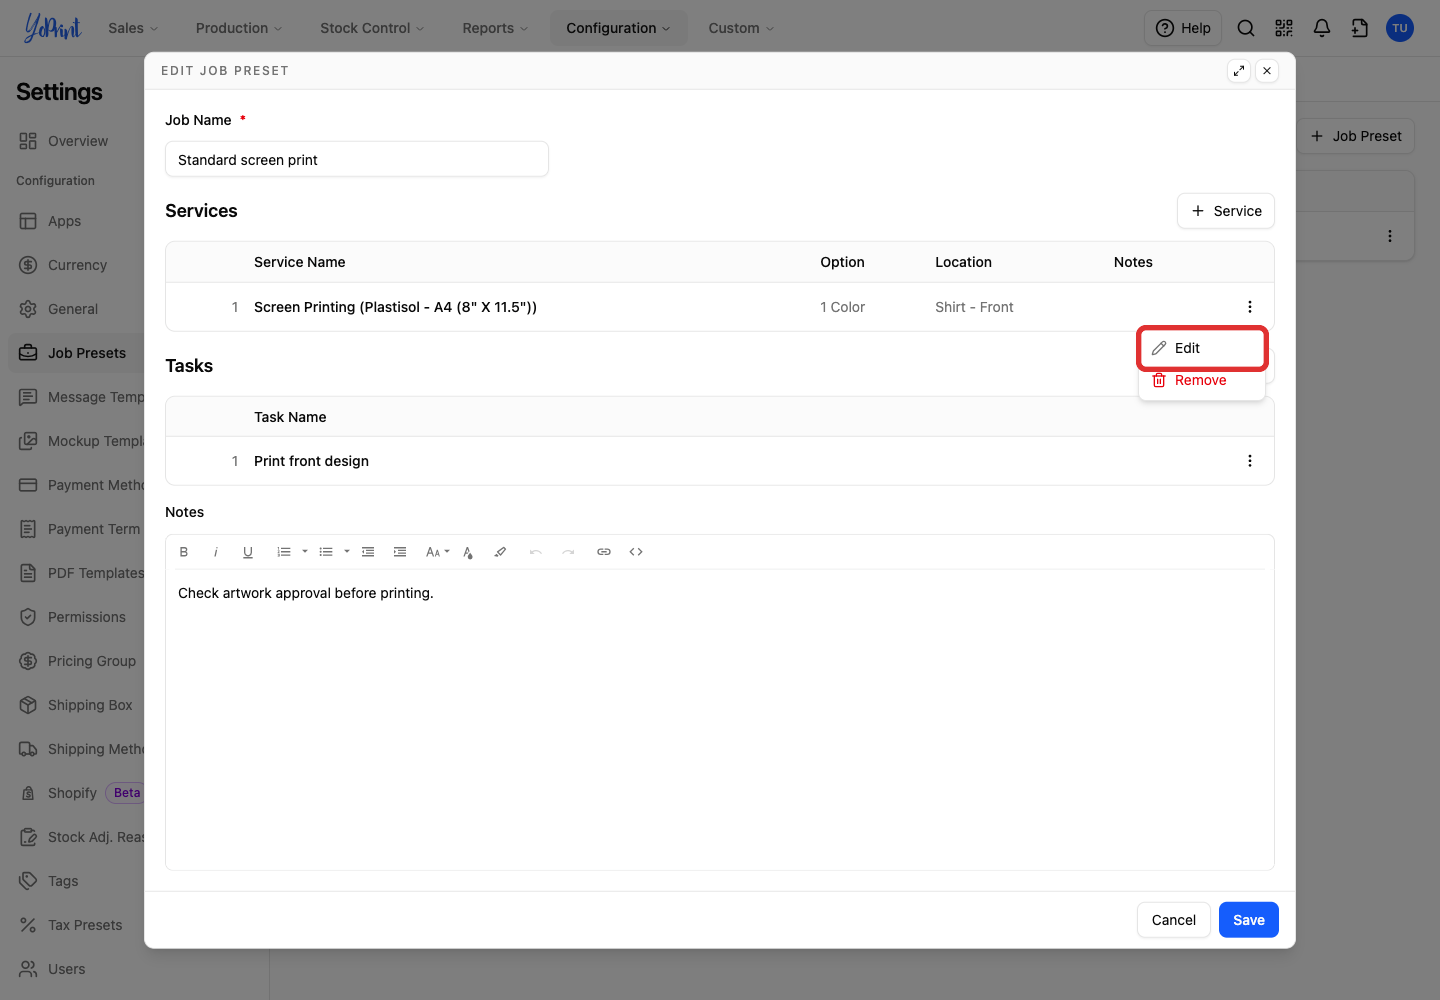
Choose Edit.
-
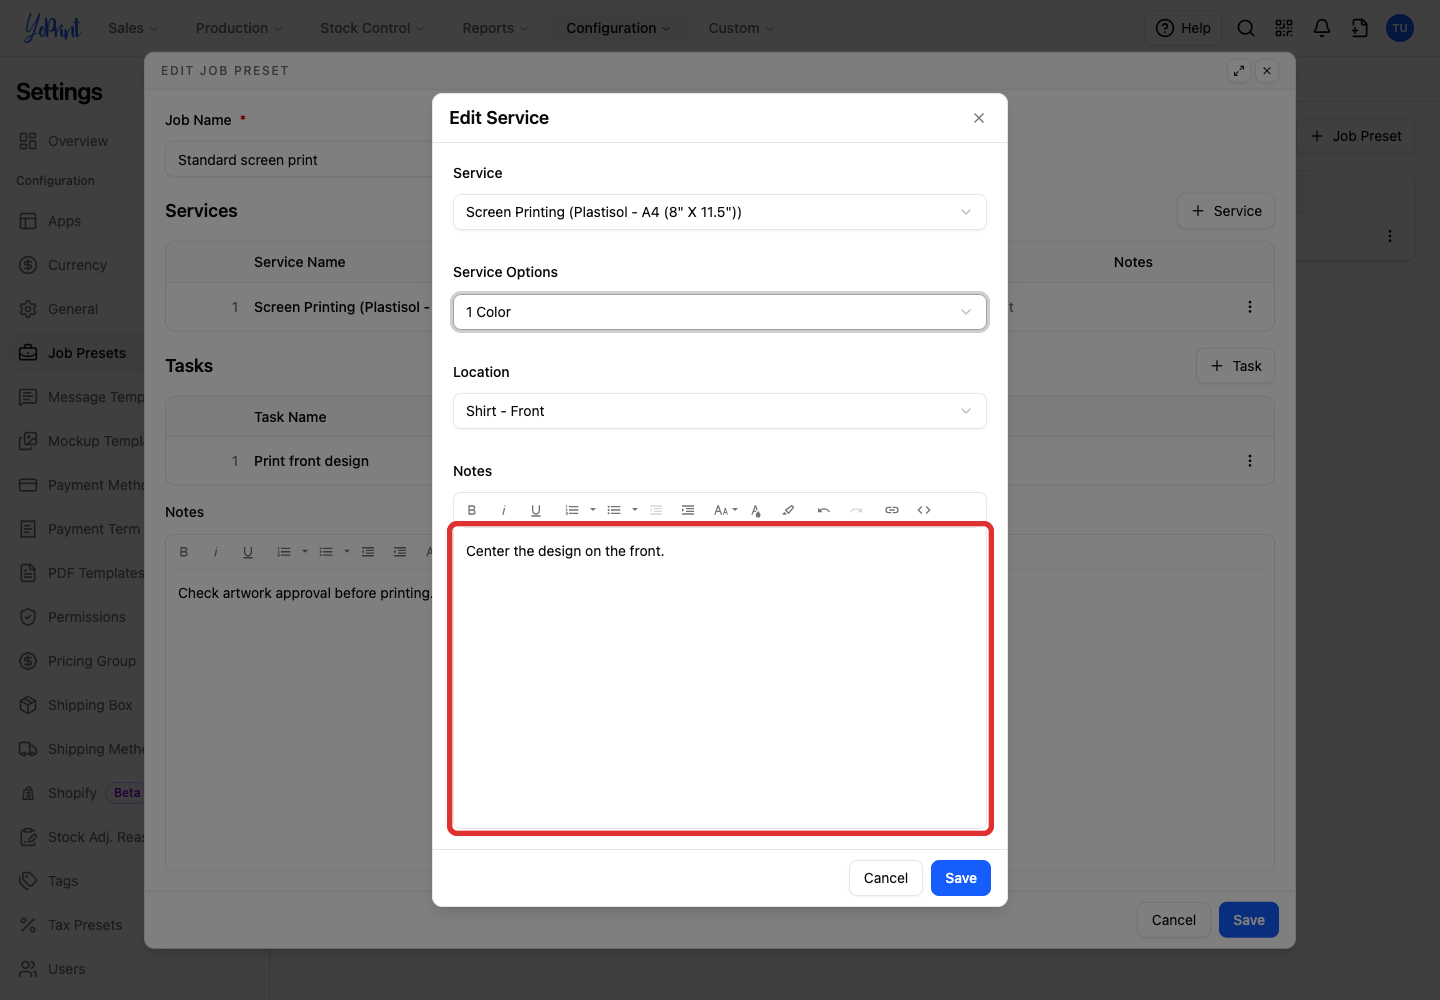
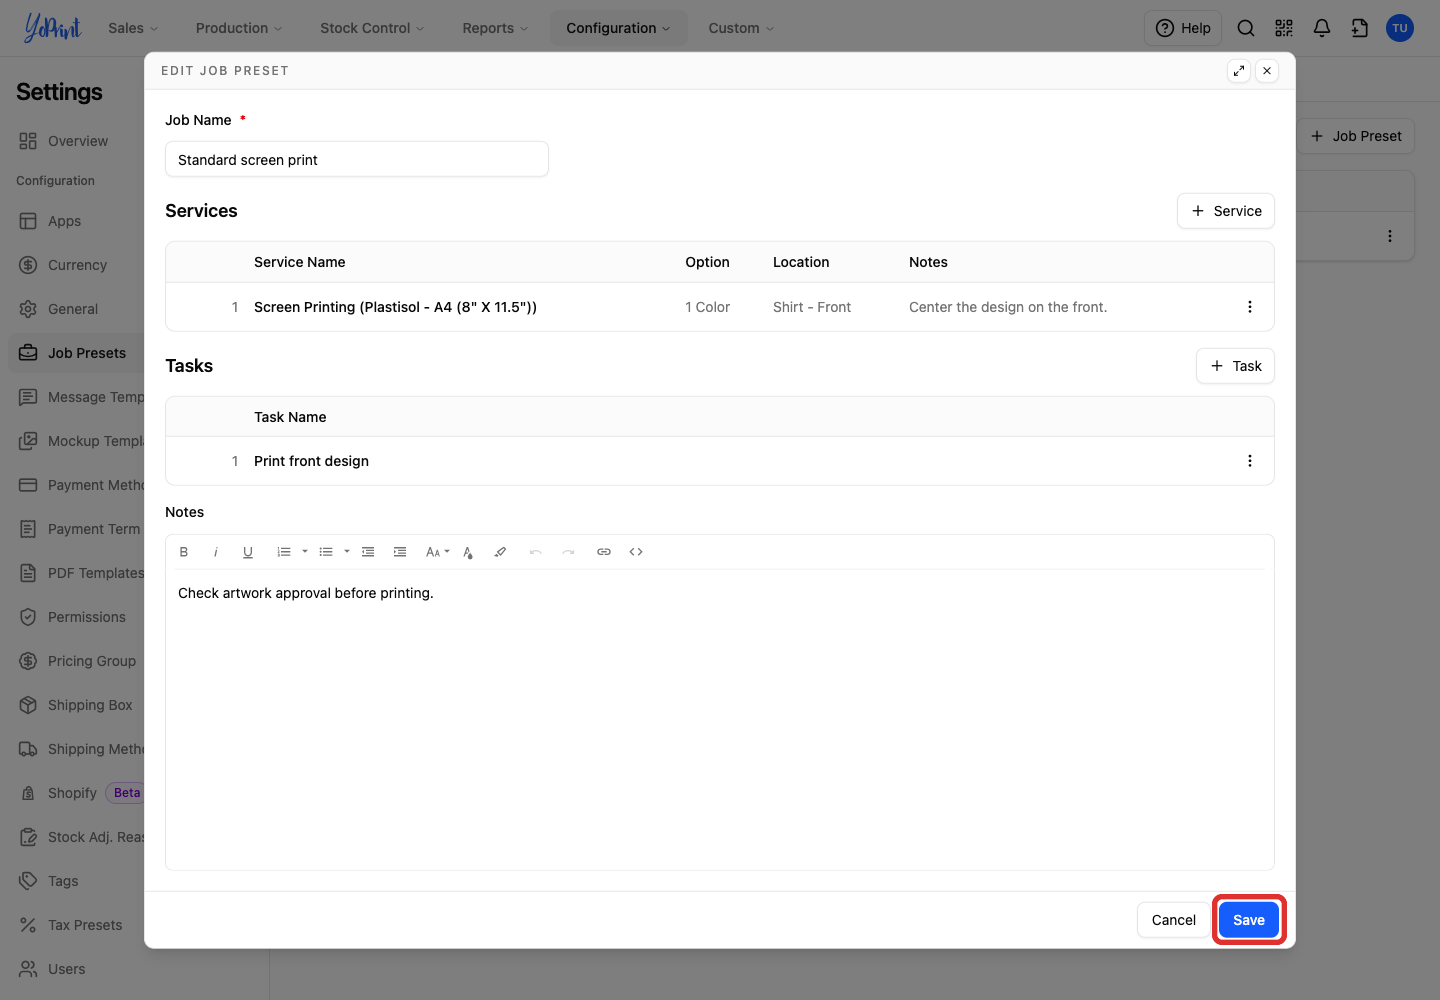
Enter instructions for that service in Notes.
-
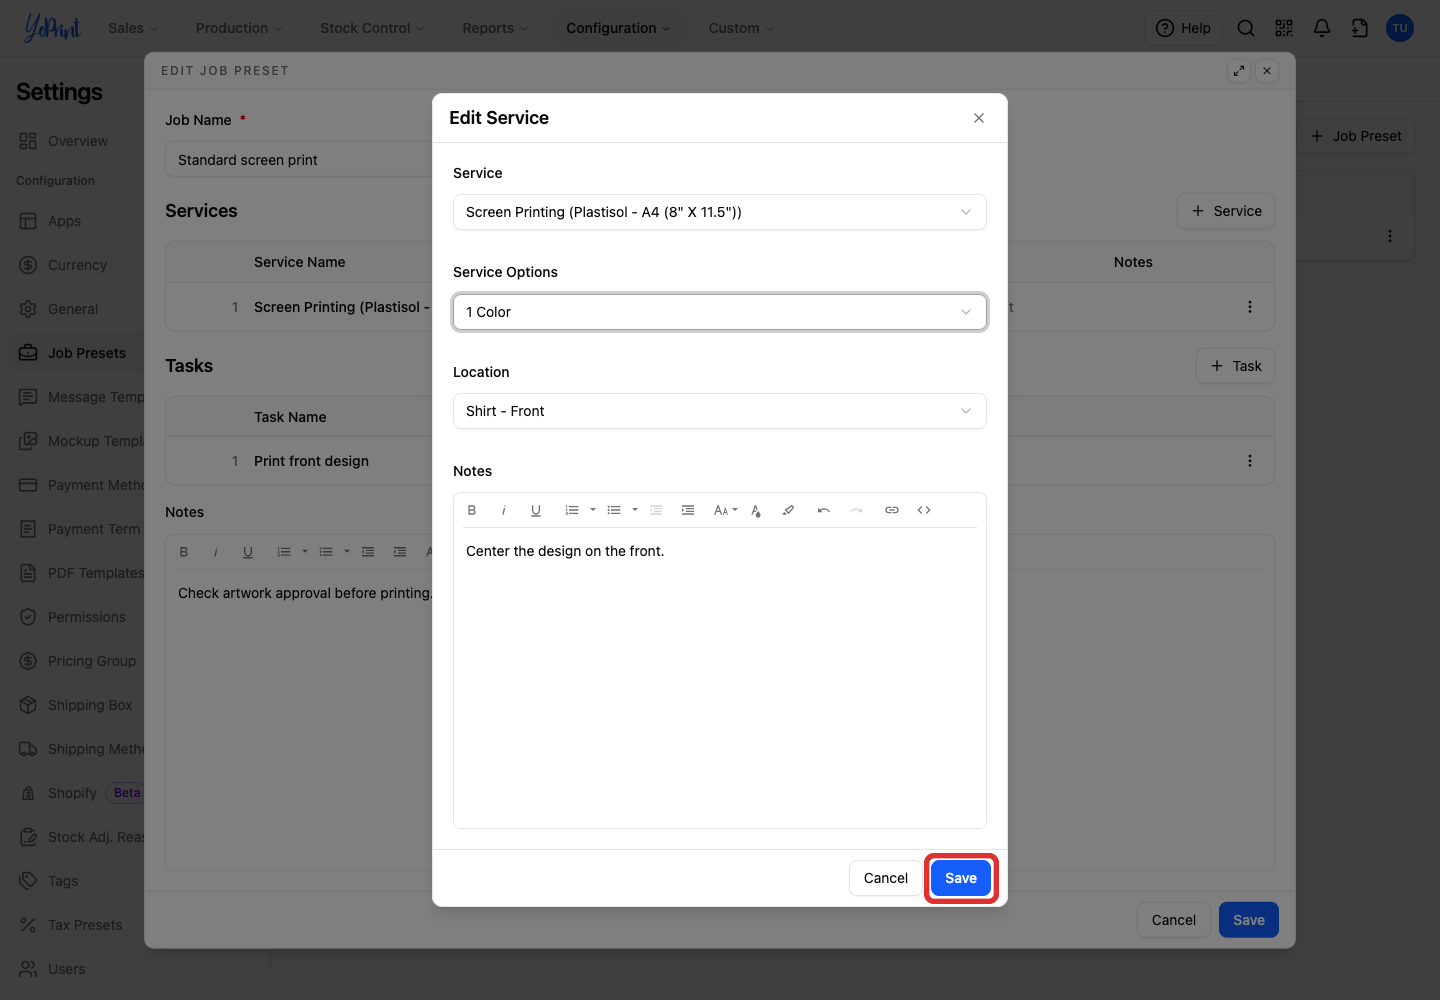
Click Save in the service dialog. If Service Options appears empty, choose your option again before saving.
-
Click Save in the job preset dialog.
Reorder presets
In the Job Presets list:
-
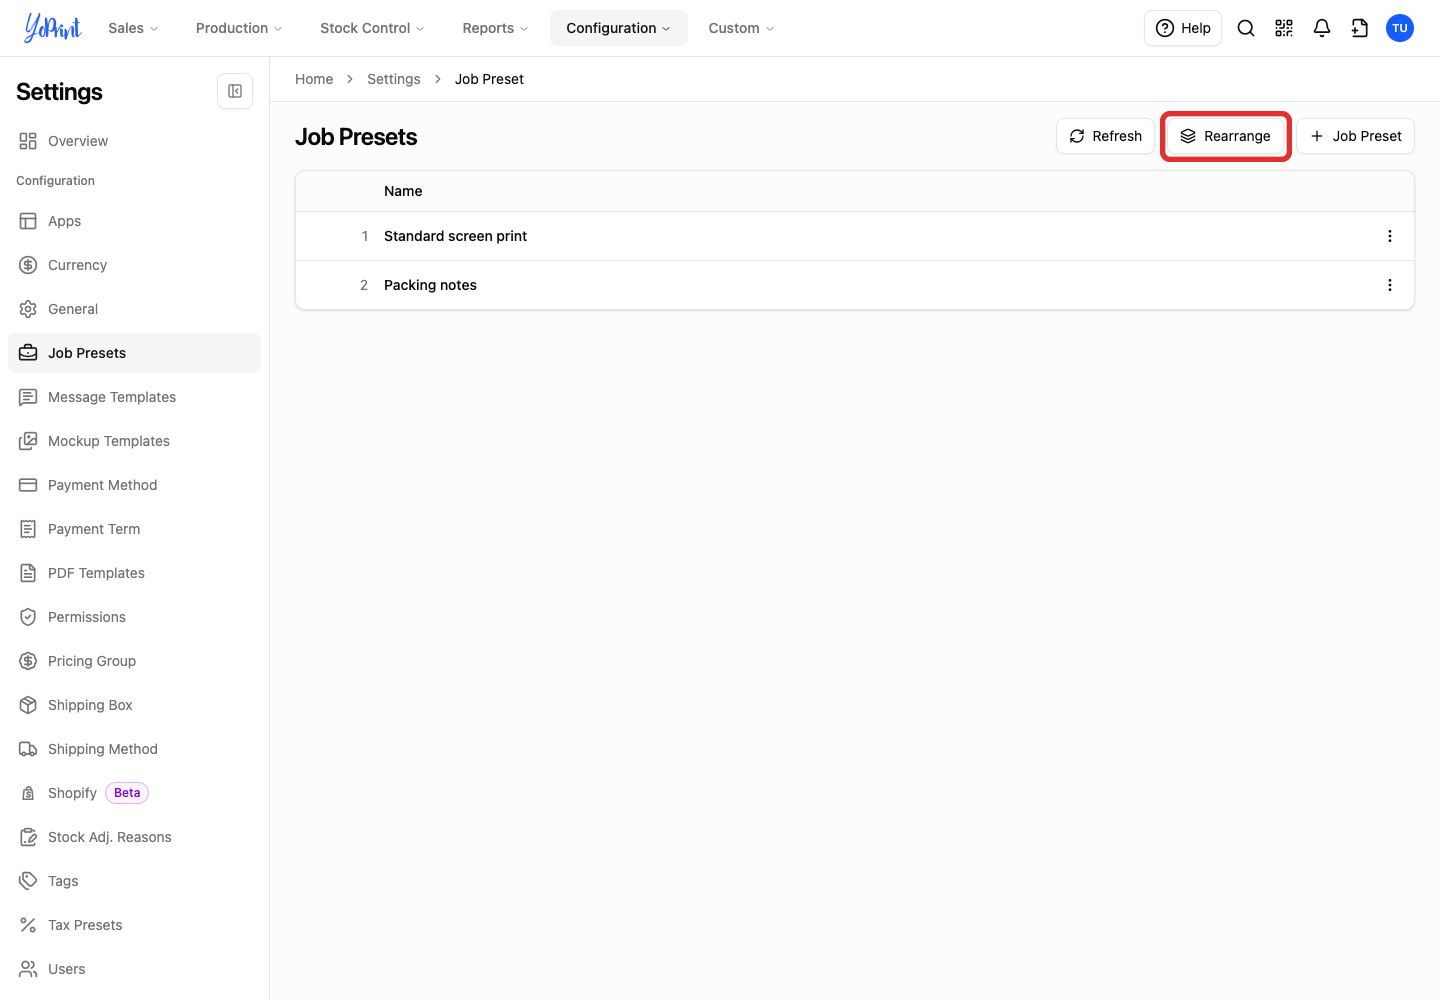
Click Rearrange.
-
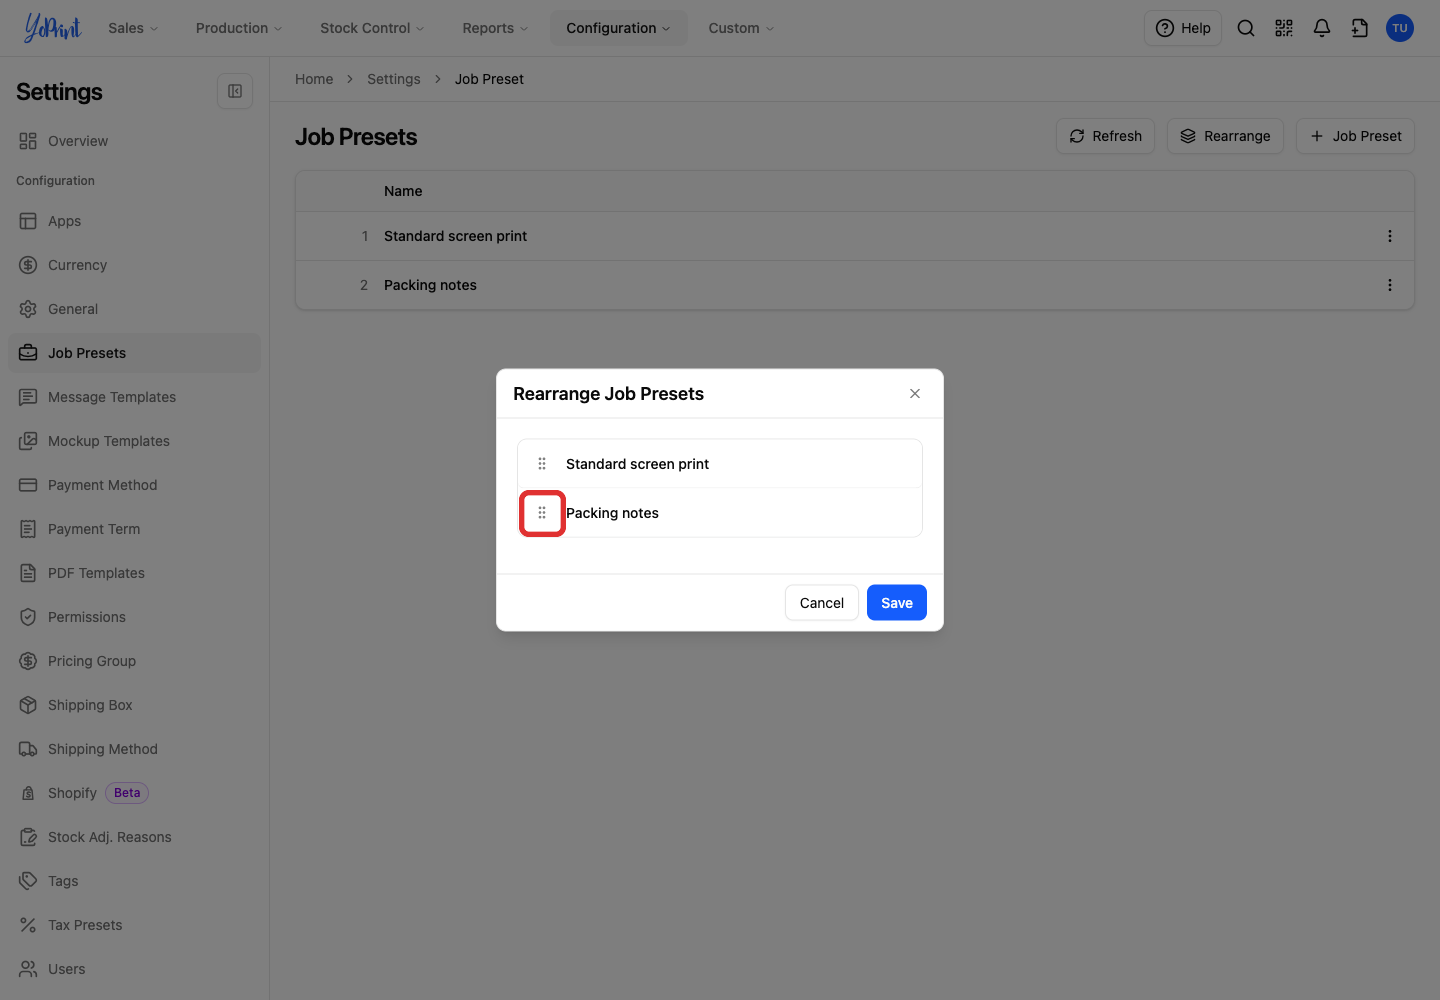
Drag the handle beside a preset to its new position.
-
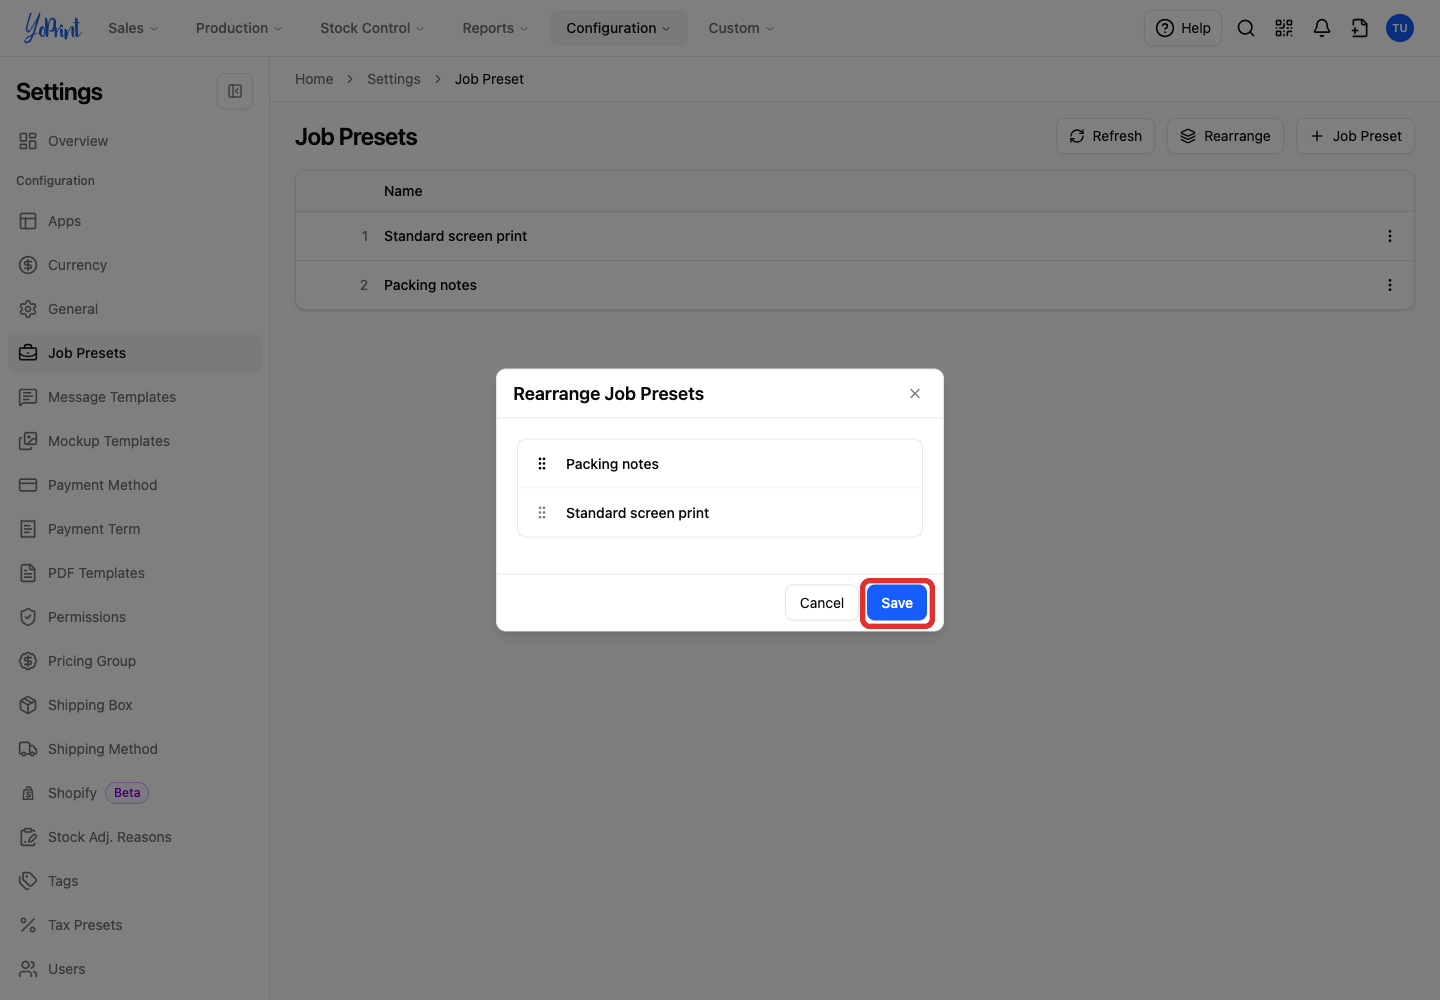
Click Save.
Remove a preset
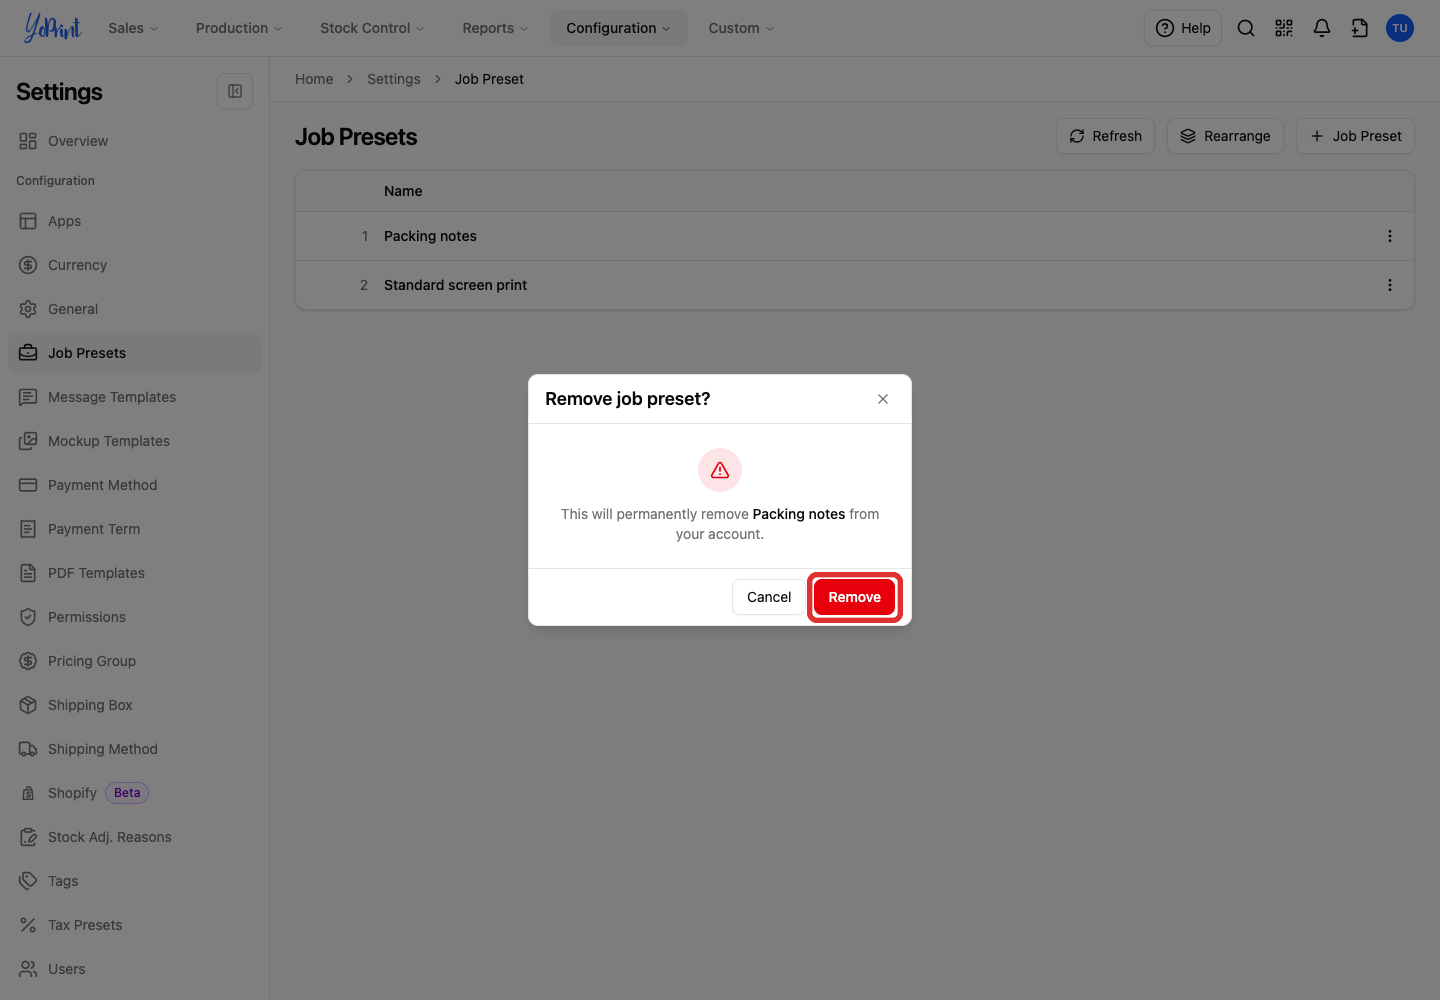
Removal permanently deletes the preset from your account. In the Job Presets list:
-
Click More actions beside the preset.
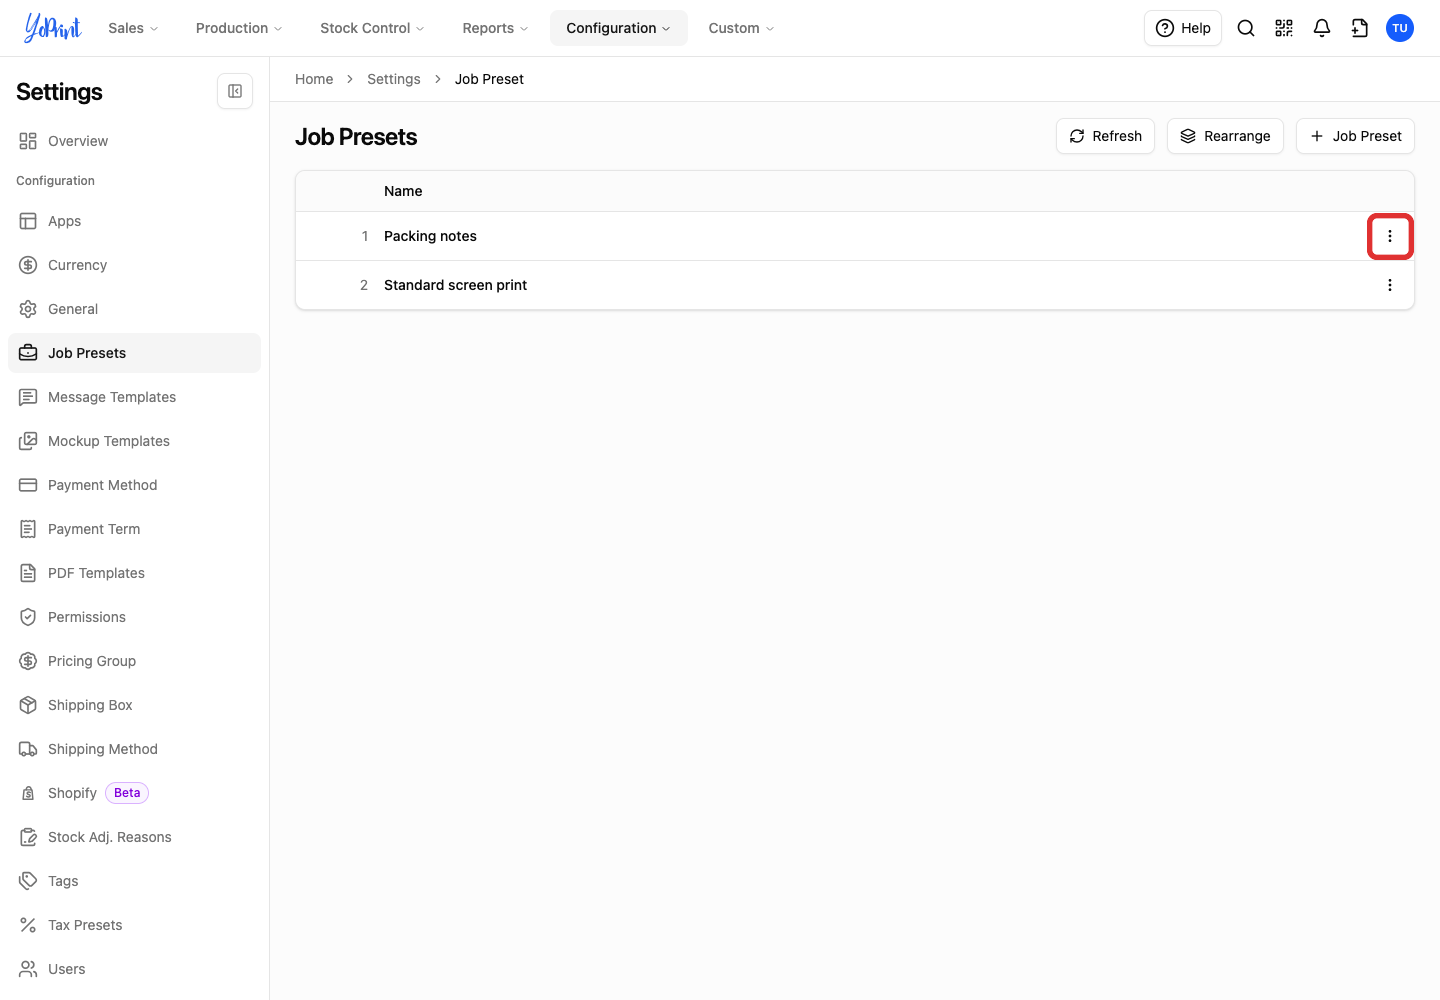
-
Choose Remove.
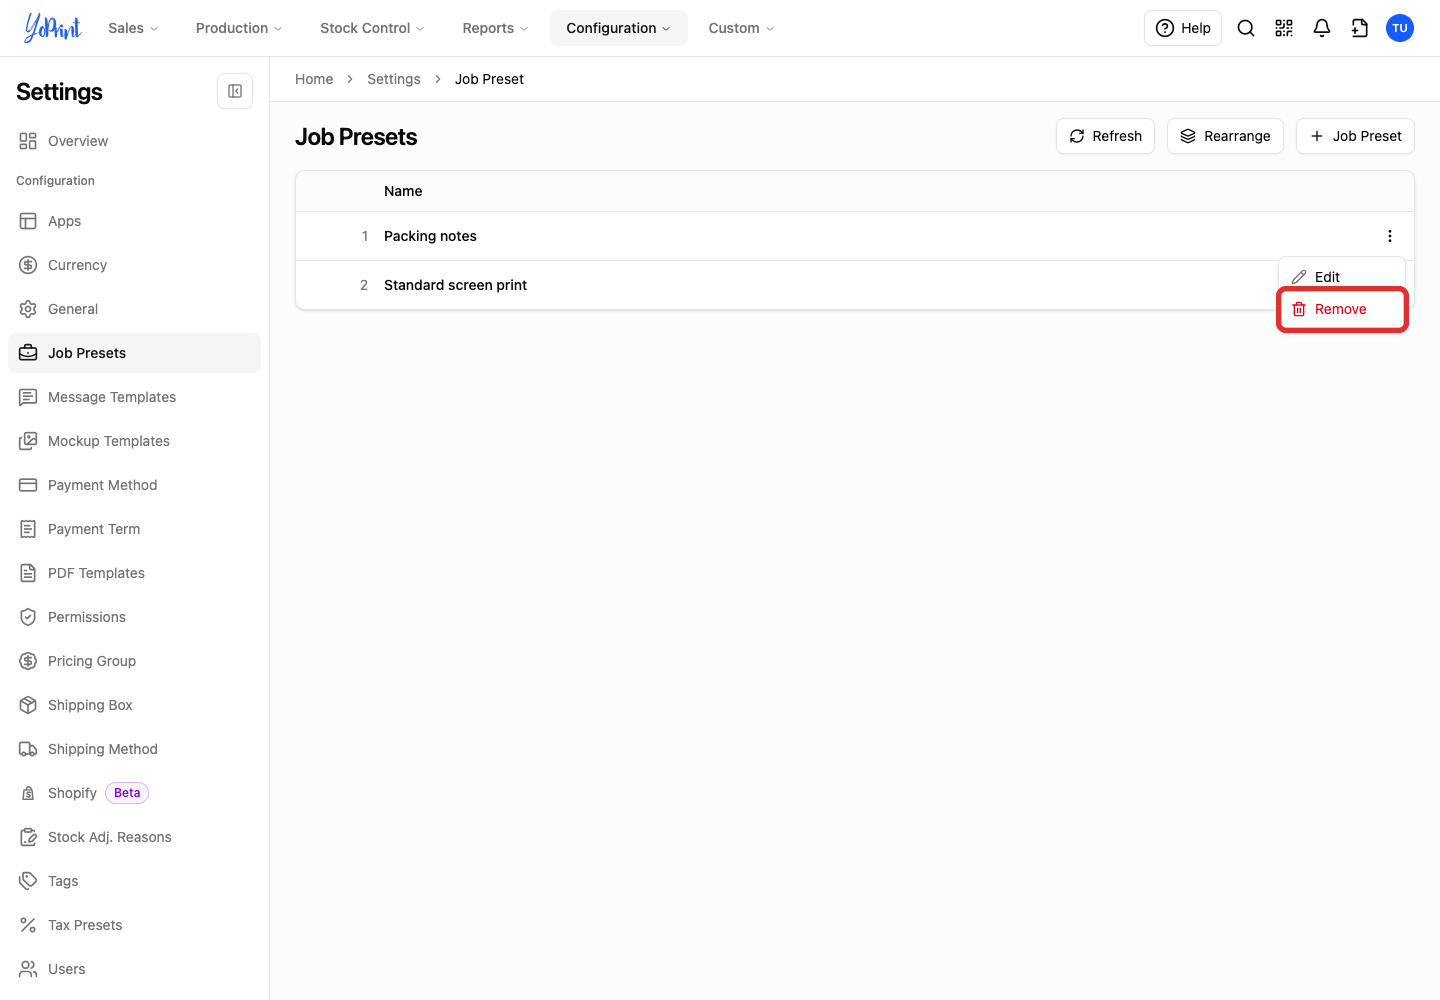
-
Check the preset name, then click Remove to confirm.