Vendor Management
In this article
YoPrint allows you to add vendors of your choice and you can edit and remove them as well. In this article, we will walk you through how to use our Vendor feature.
Create a New Vendor
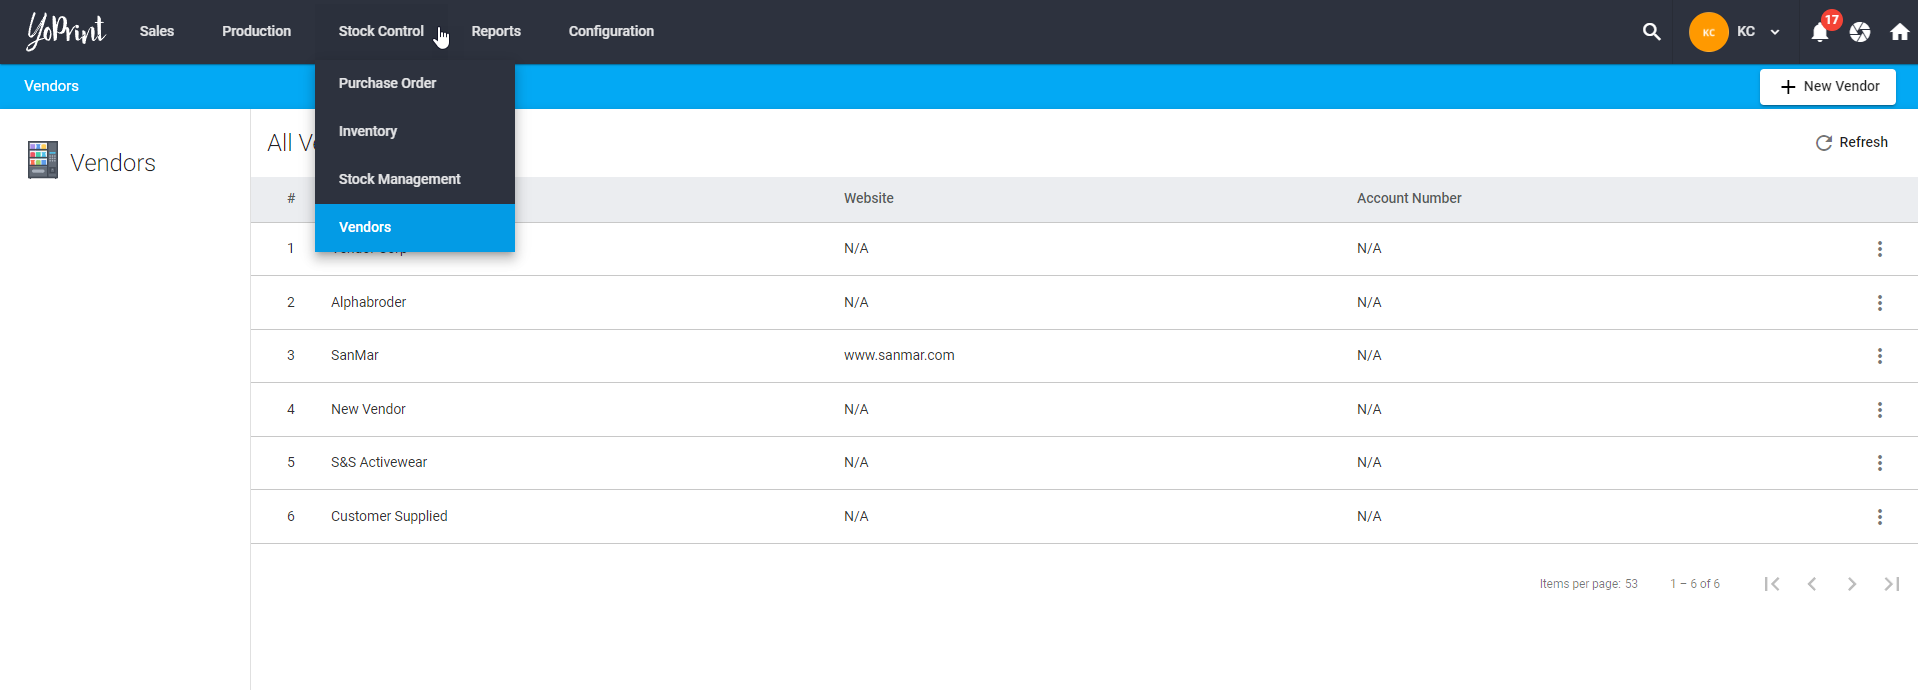
- Navigate to https://app.yoprint.com/vendor.
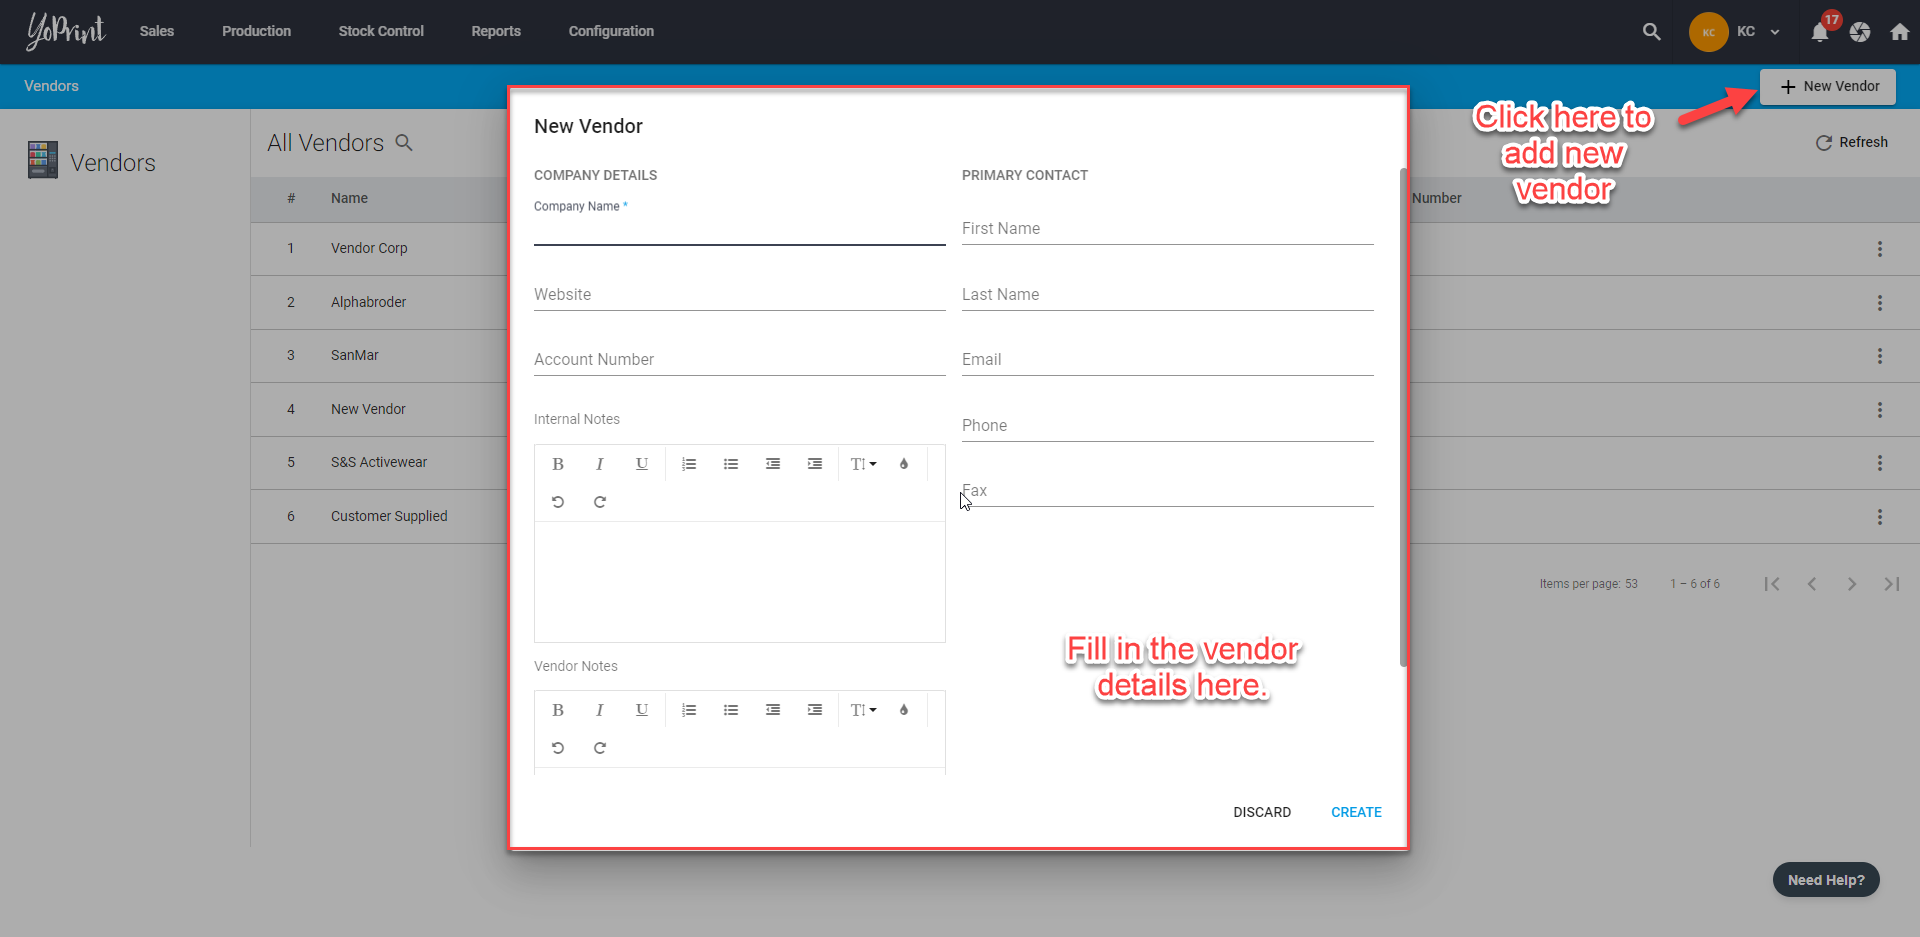
- Click + New Vendor to add new vendors to the list.
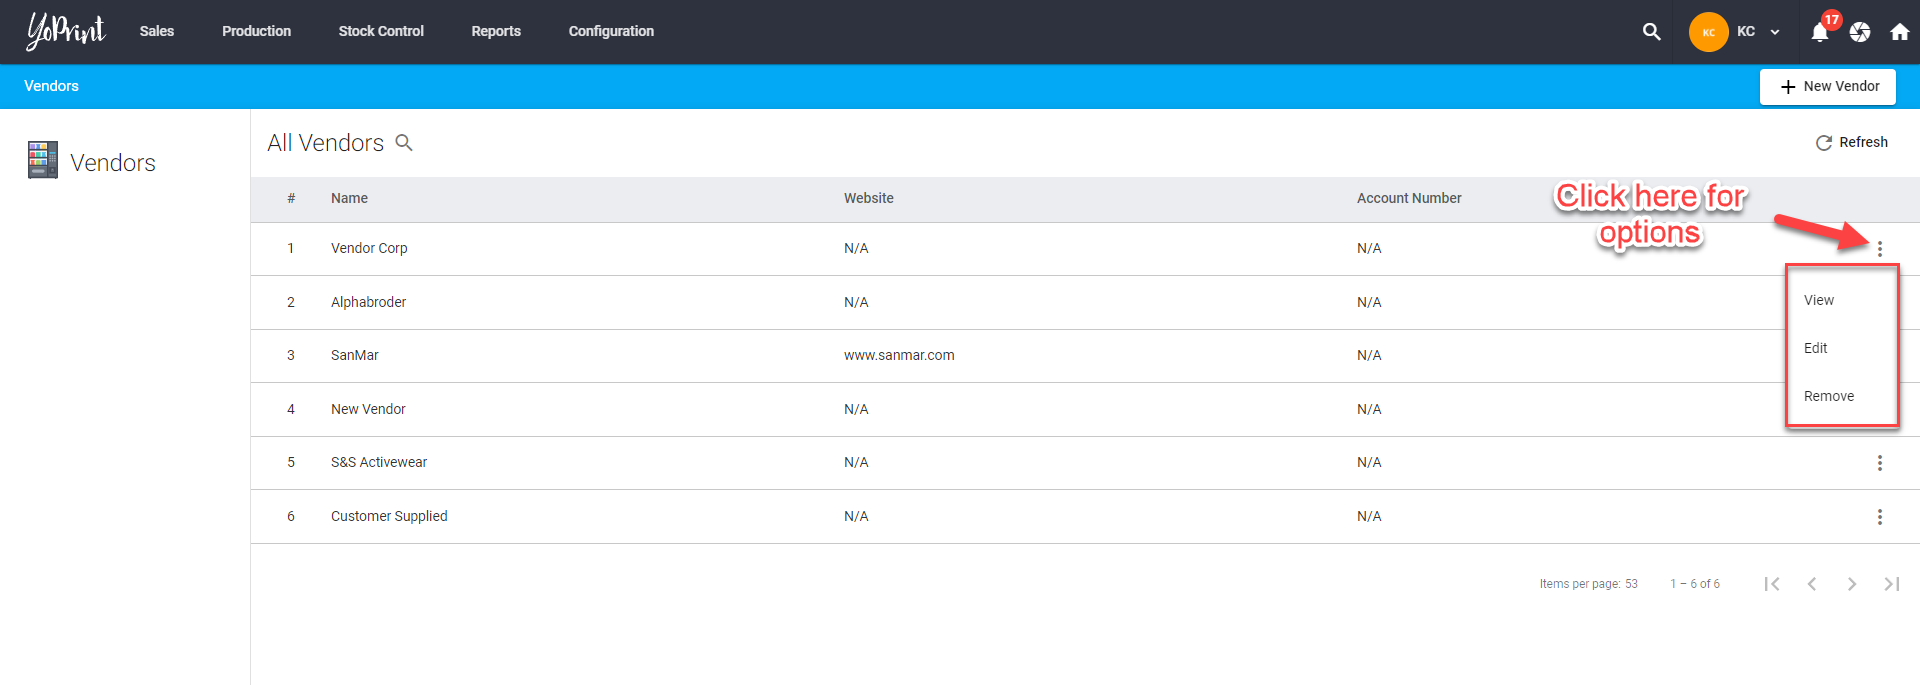
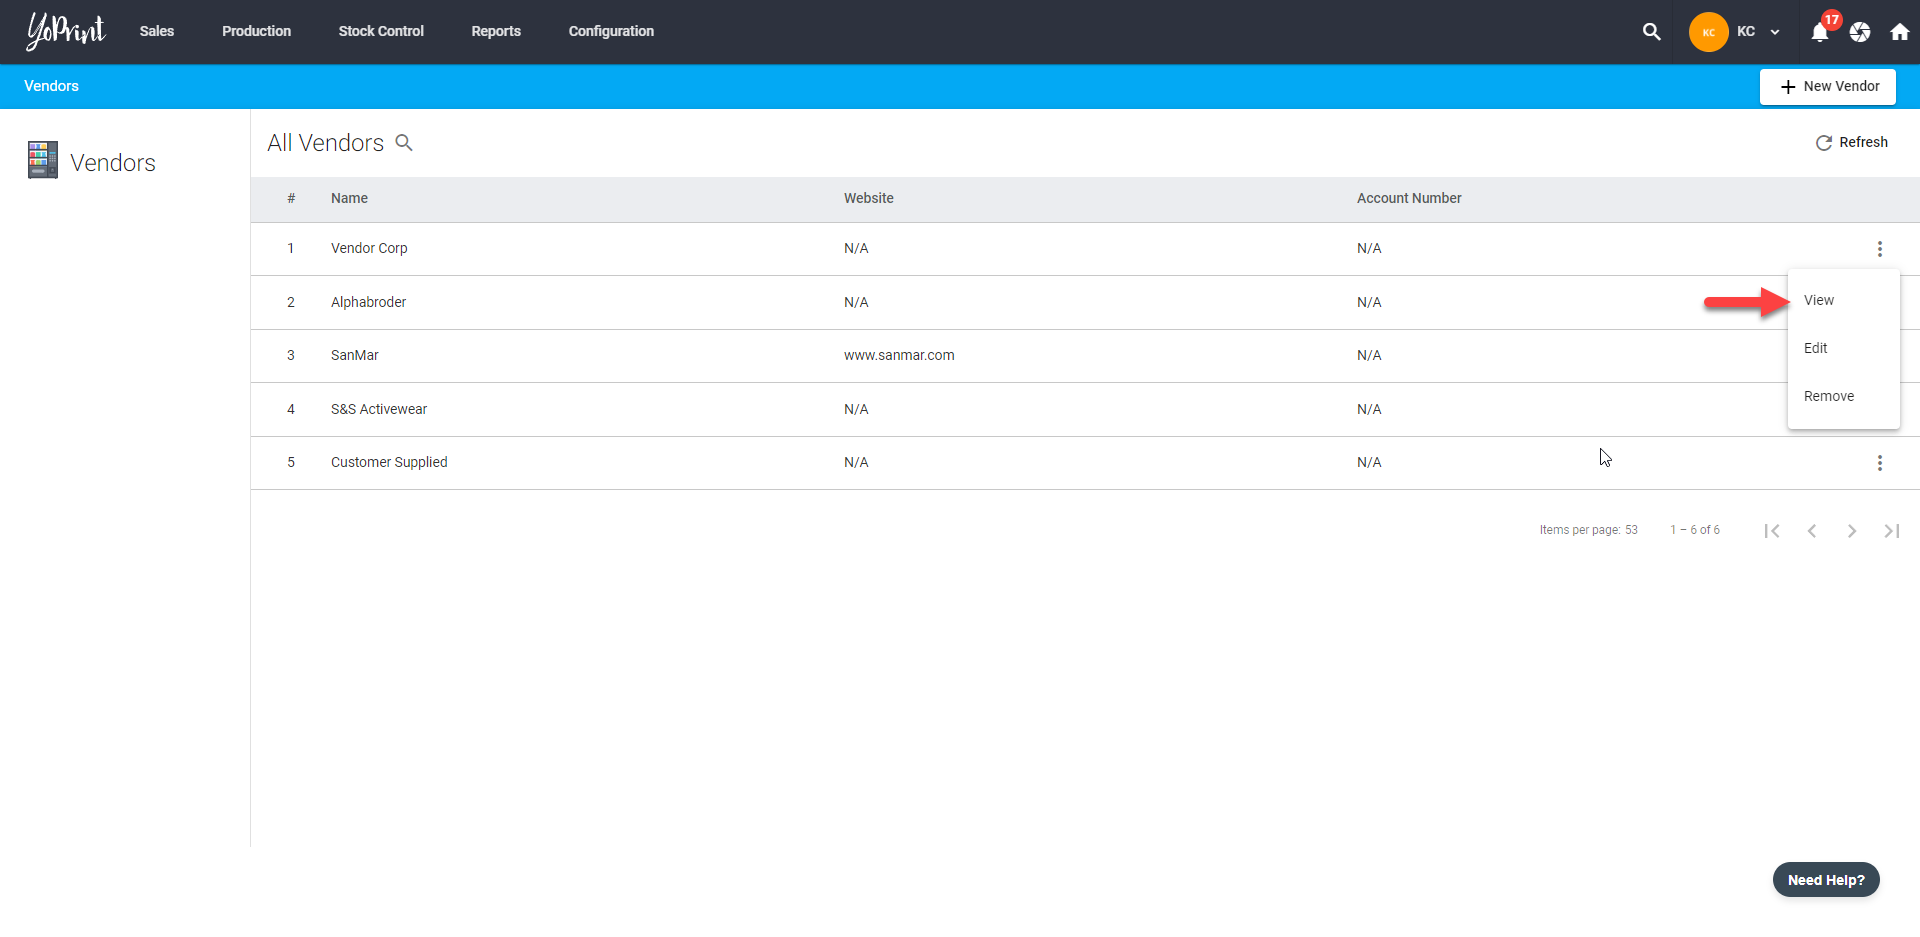
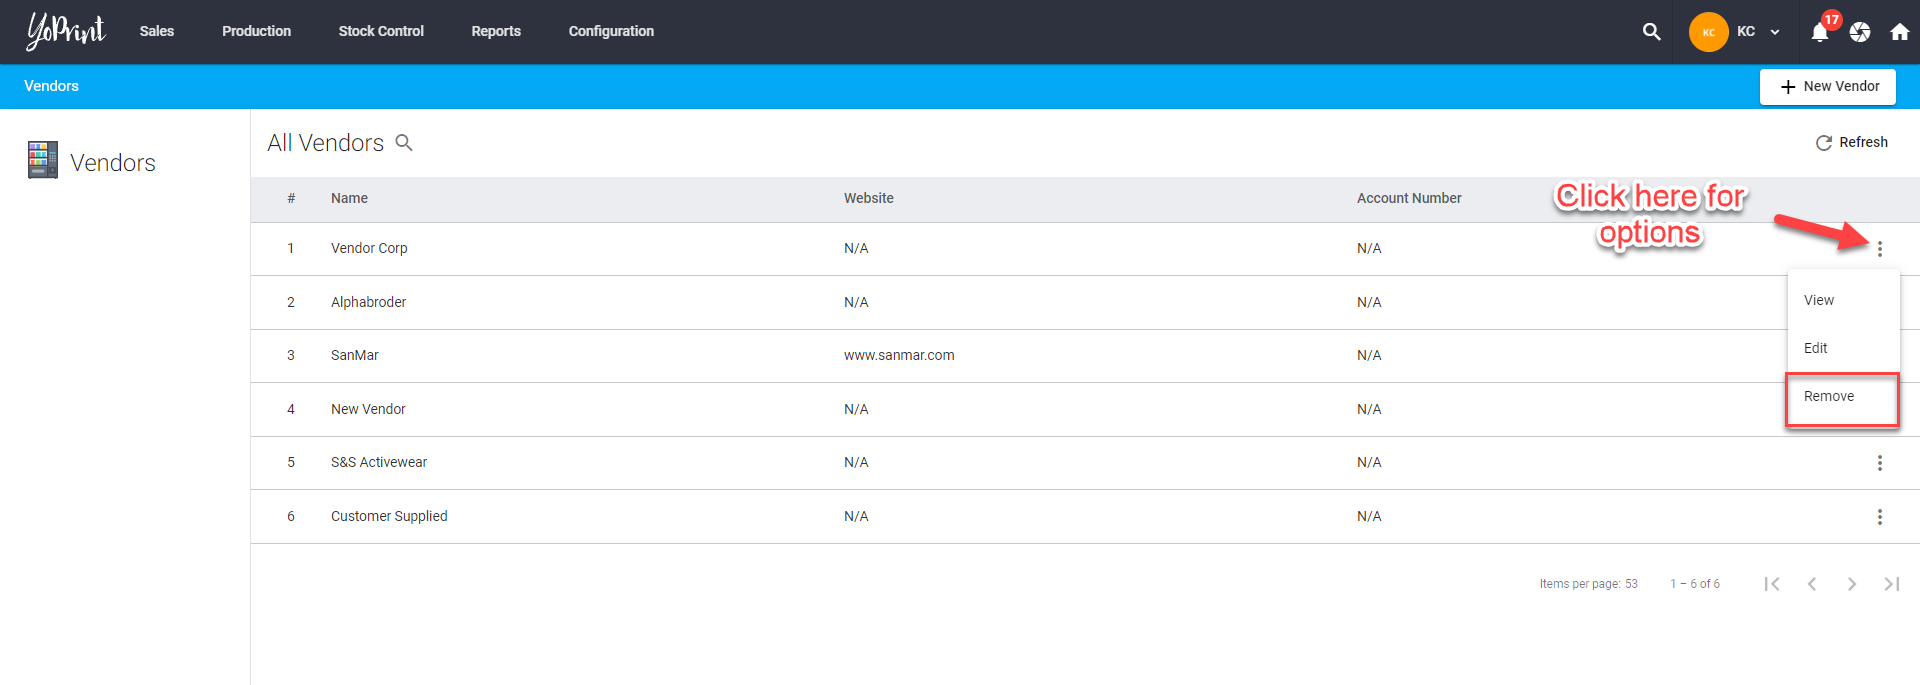
- Click on ⋮ to see more options. This will allow you to make changes or remove a specific vendor.
Viewing & Editing Vendors
- Click on View to see more information about the vendor.
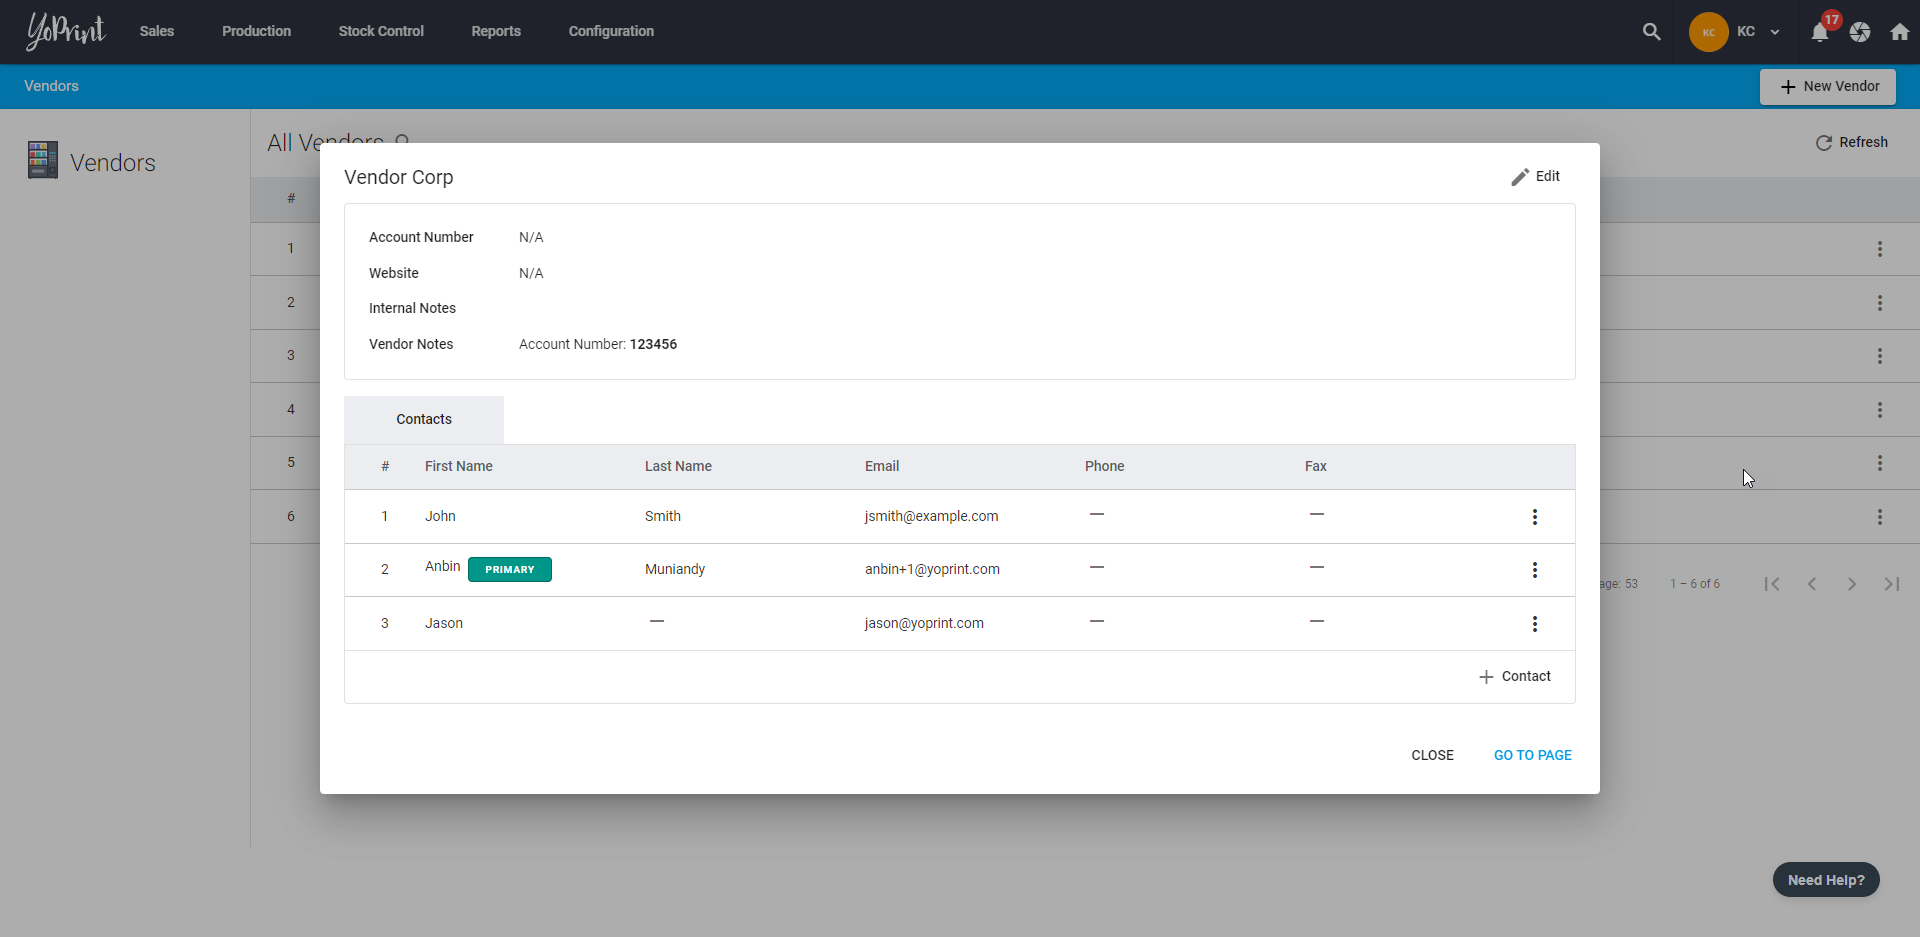
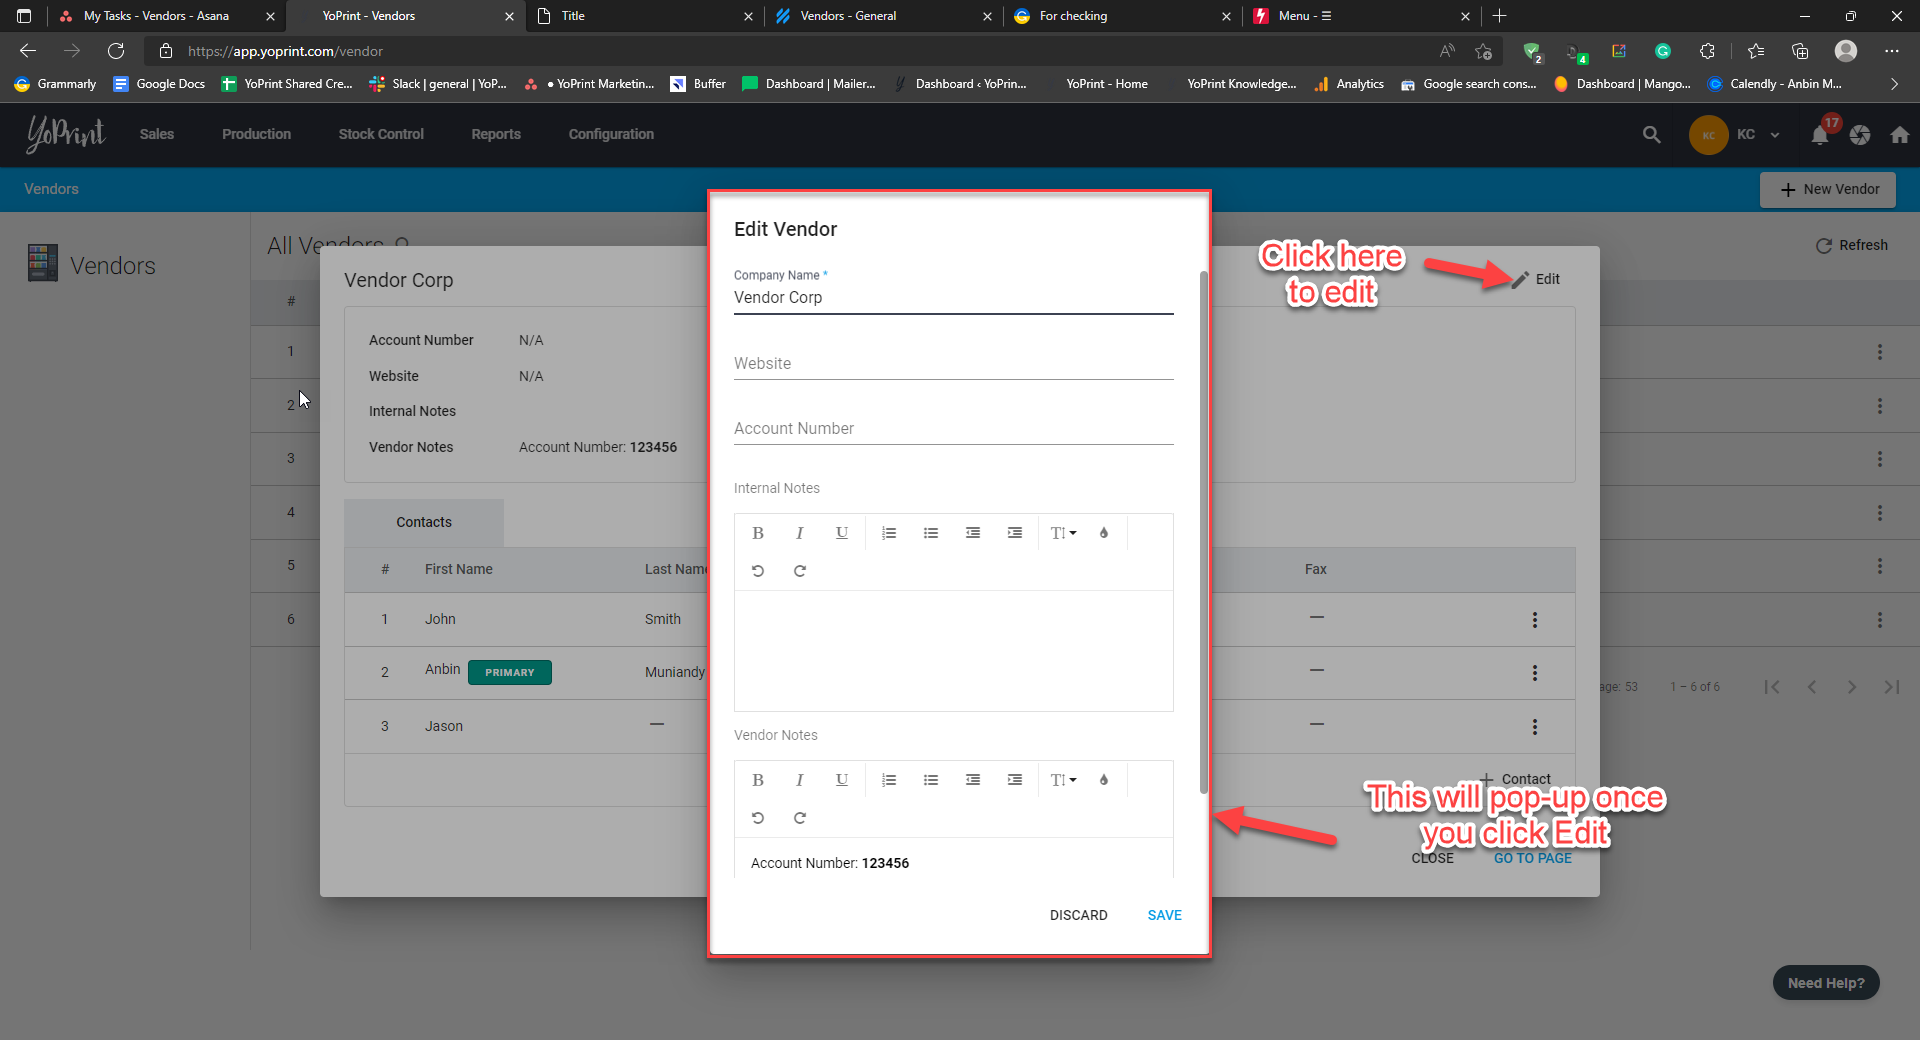
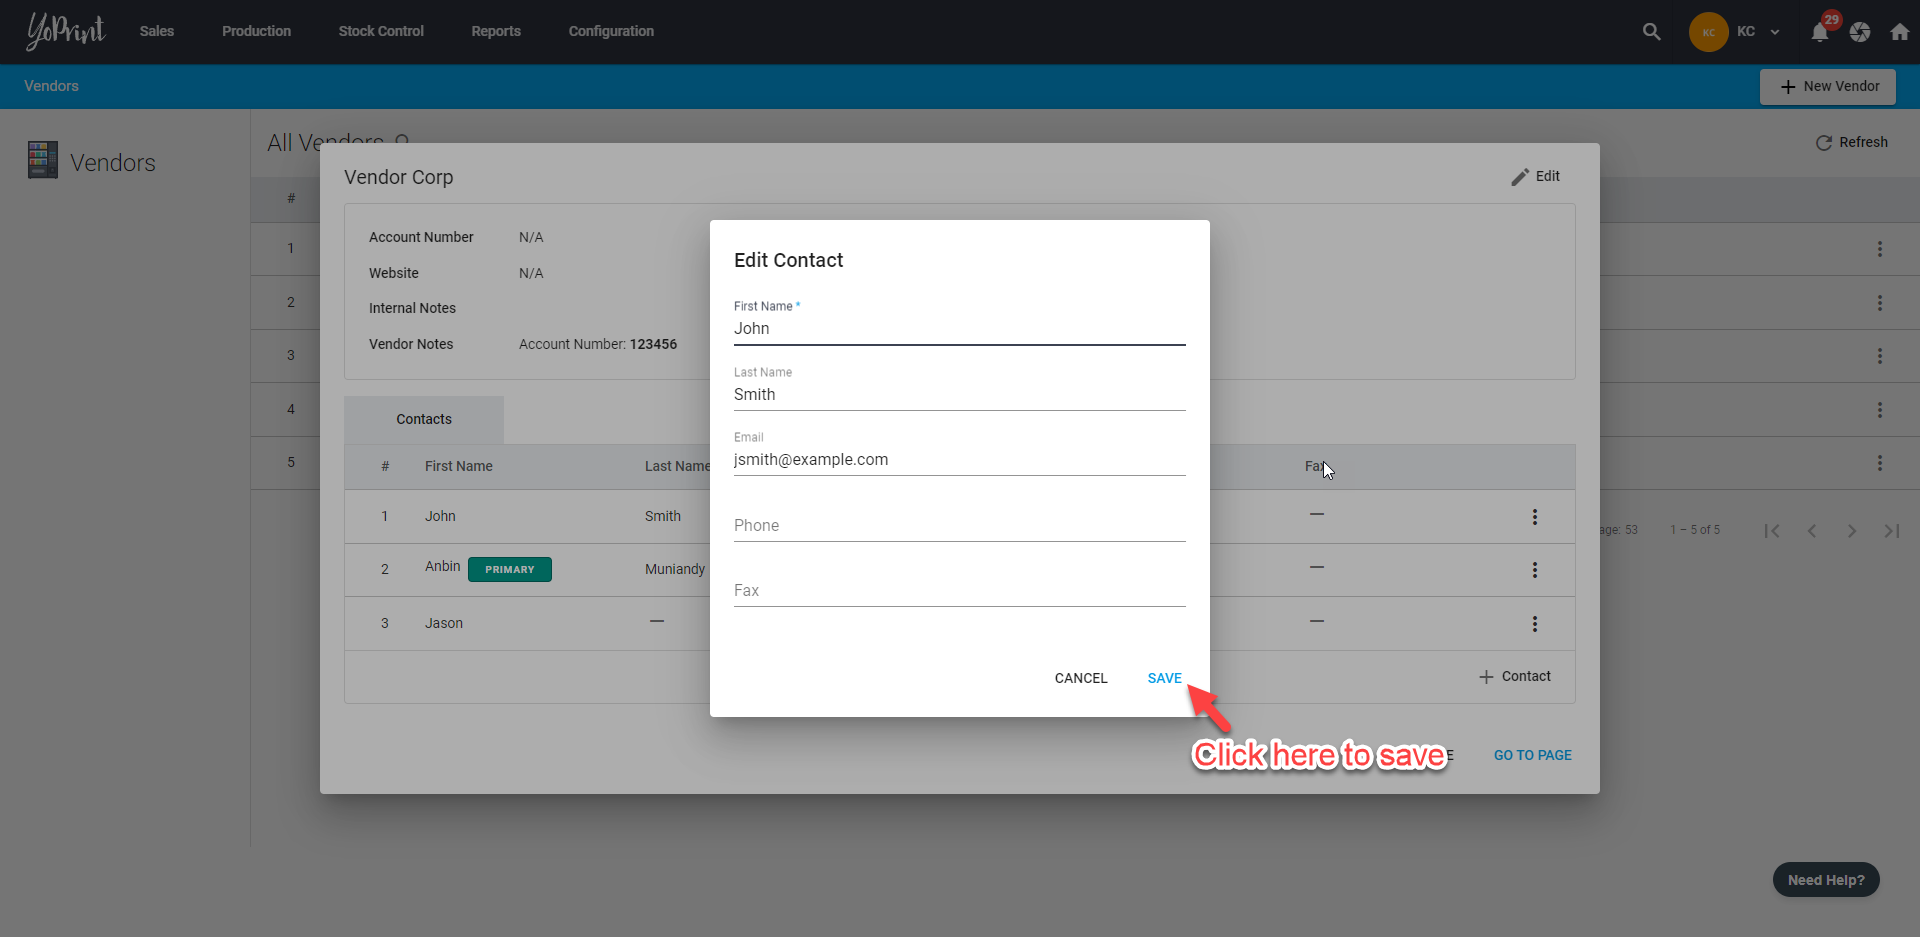
- You can make changes to the Vendor details such as Company Name, Website, and Account Number by clicking on Edit. You can also write Internal and Vendor Notes here.
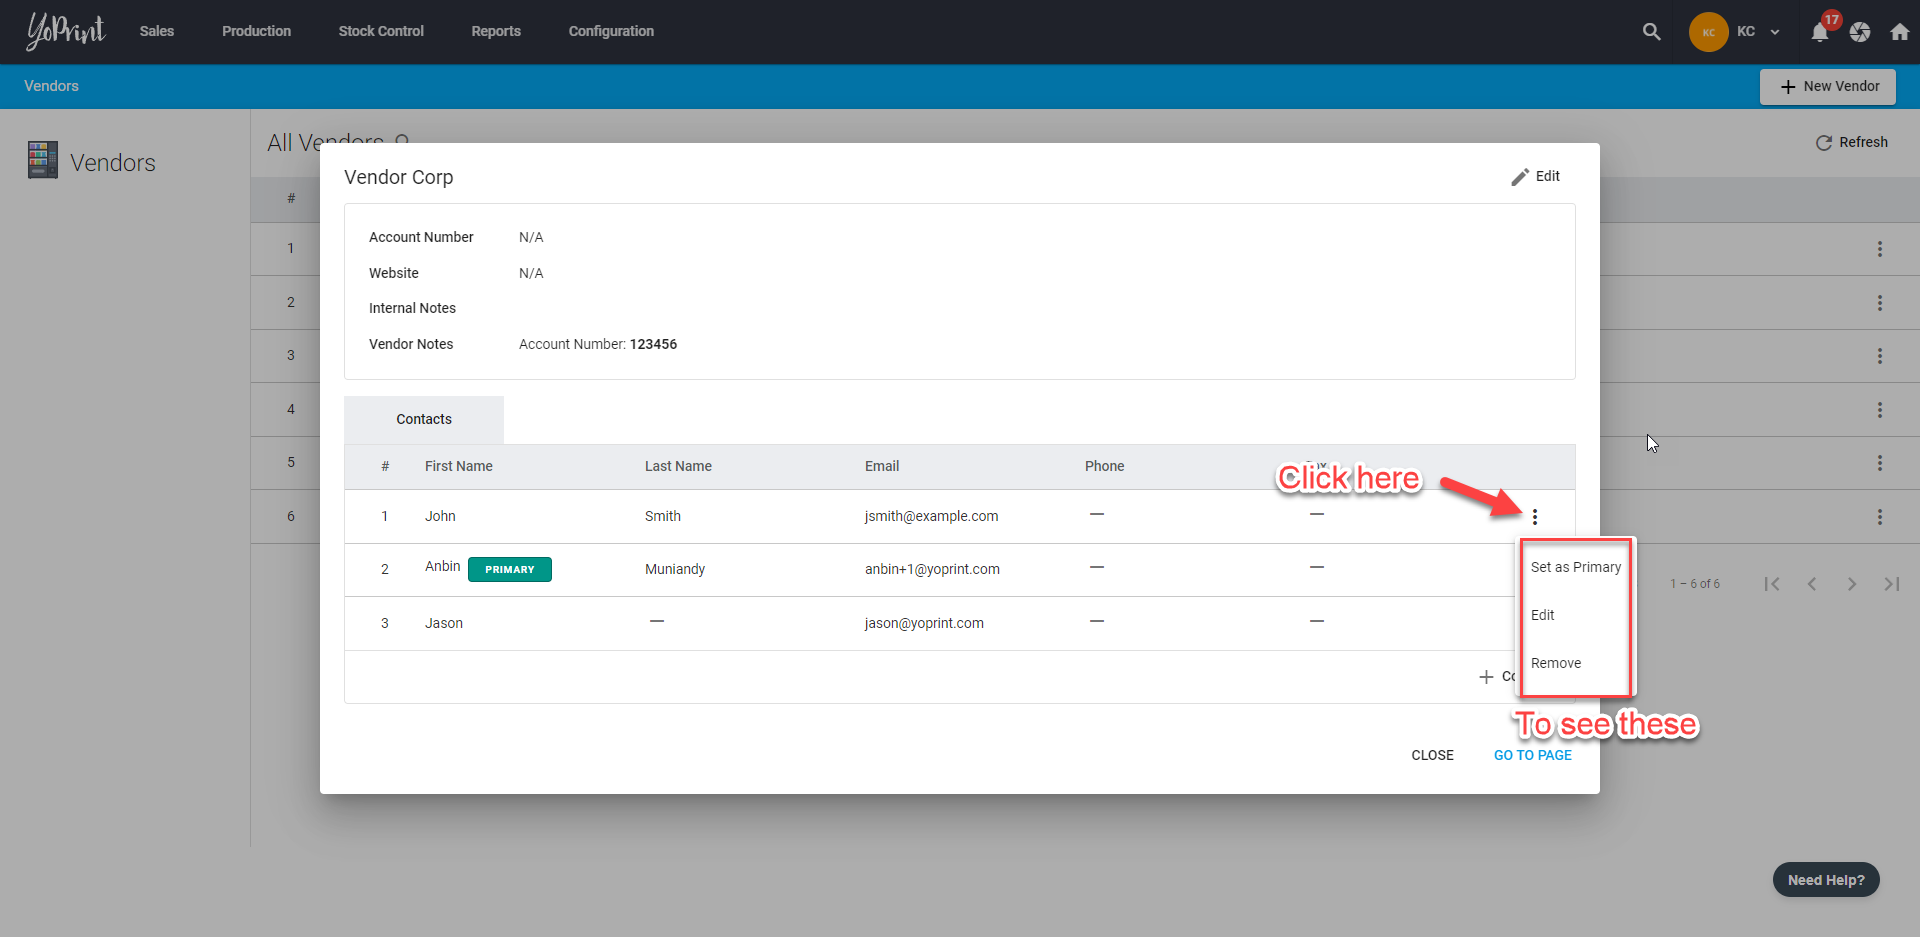
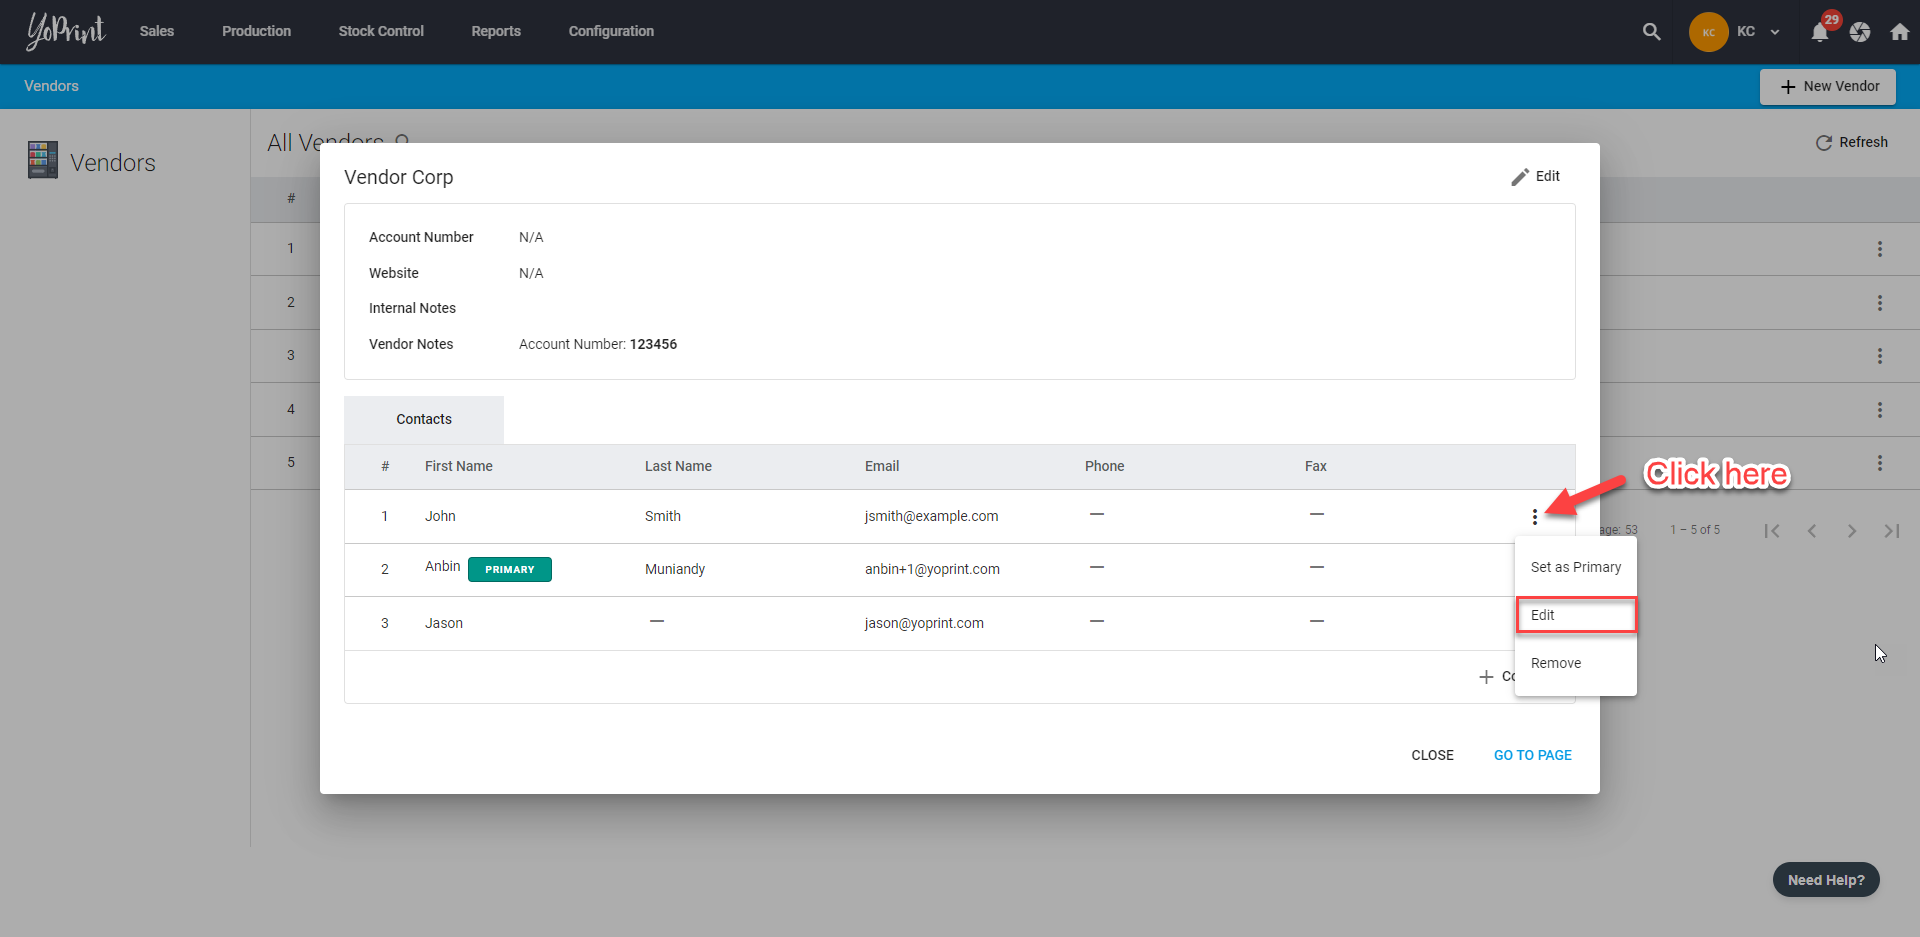
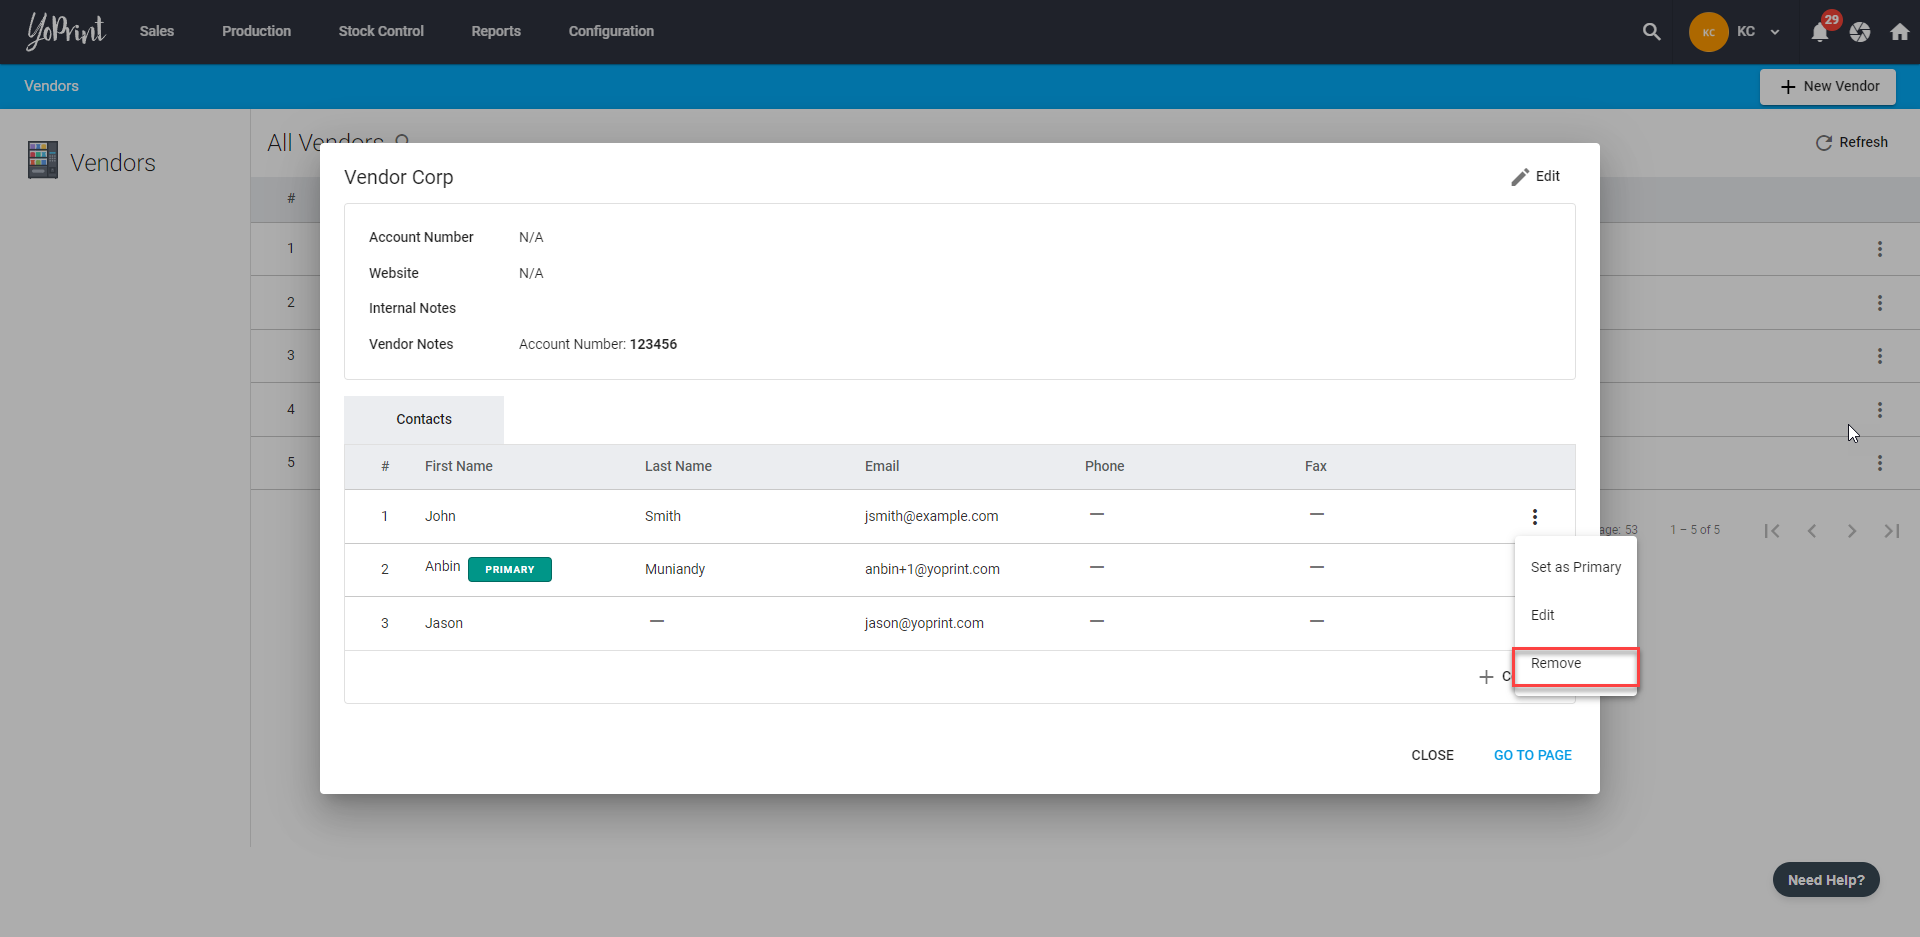
 Click ⋮ on the right side of a person's name will reveal more options. You can set someone as the Primary contact, Edit his/her details or Remove them from the Vendor Contacts list.
Adding, Editing, and Removing Contacts
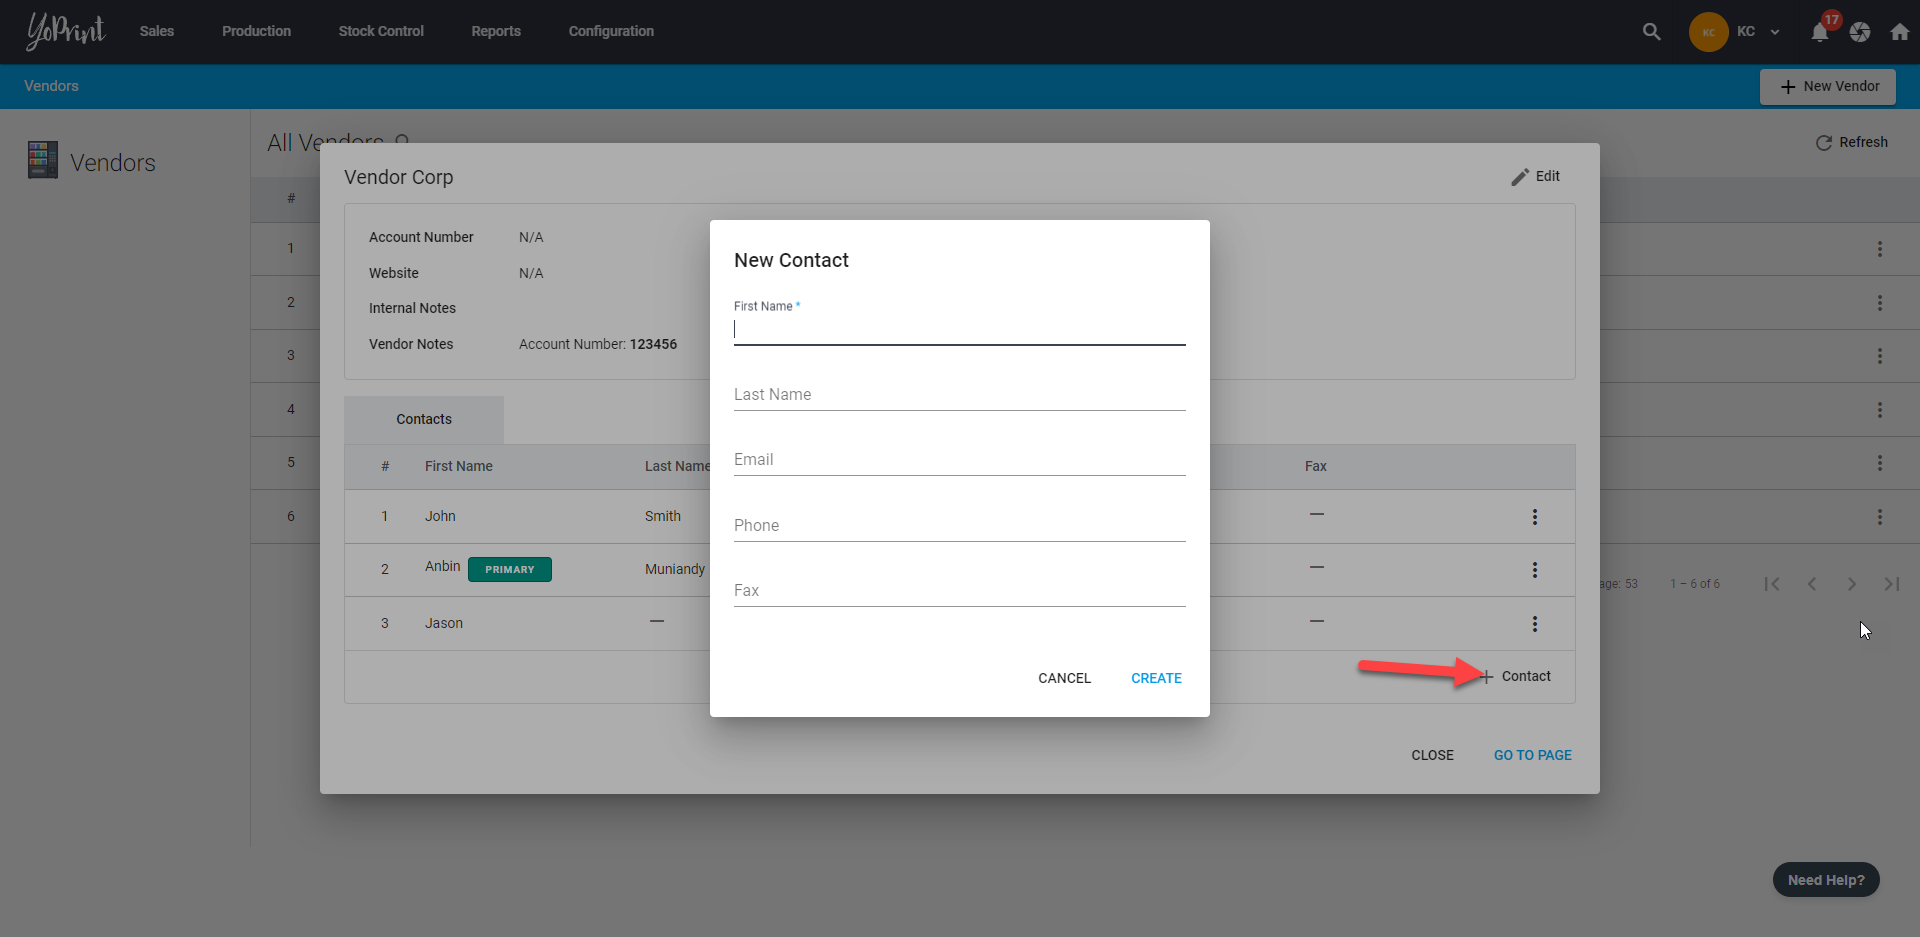
- You can also add more contacts to the list by clicking on + Contact.
- You can edit the Contacts anytime you like by clicking ⋮ on the right side of a person's name and choosing Edit.
- To remove a contact, choose Remove. Be warned, that this action is permanent and cannot be undone. But you can add the contact again.
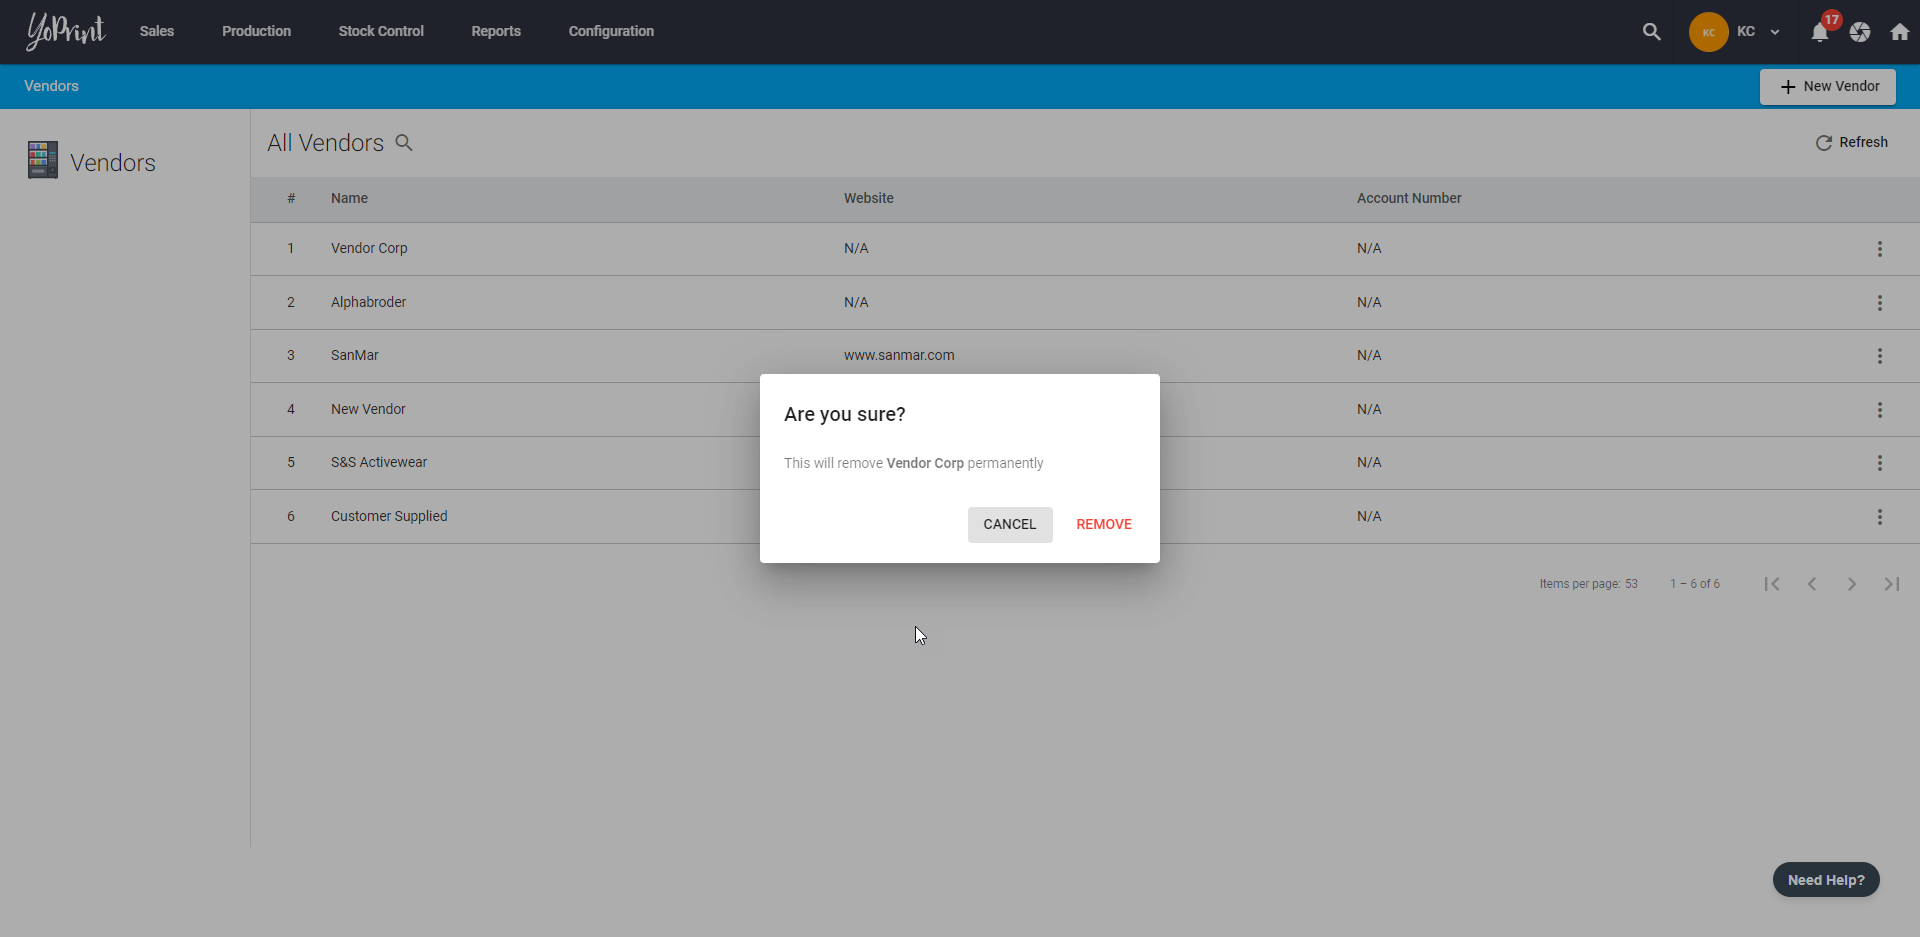
Removing Vendors
- Click on ⋮ to view more options and select Remove.
- Make sure the vendor you've selected is correct. Once confirmed, the removal of the vendor is permanent and cannot be undone. However, you can add the vendor again by using the + New Vendor.