Managing Auto Invoices for Sales Orders
In this article
The Auto Invoice feature is a powerful addition to YoPrint that automatically tracks all order changes and updates the invoice in real time. Once enabled, any adjustments to line items and shipping costs will be automatically invoiced, ensuring accuracy and consistency.
You can enable Auto Invoice before or after publishing a Sales Order. In this article, we will show you how it works with a published Sales Order.
Creating an Auto Invoice
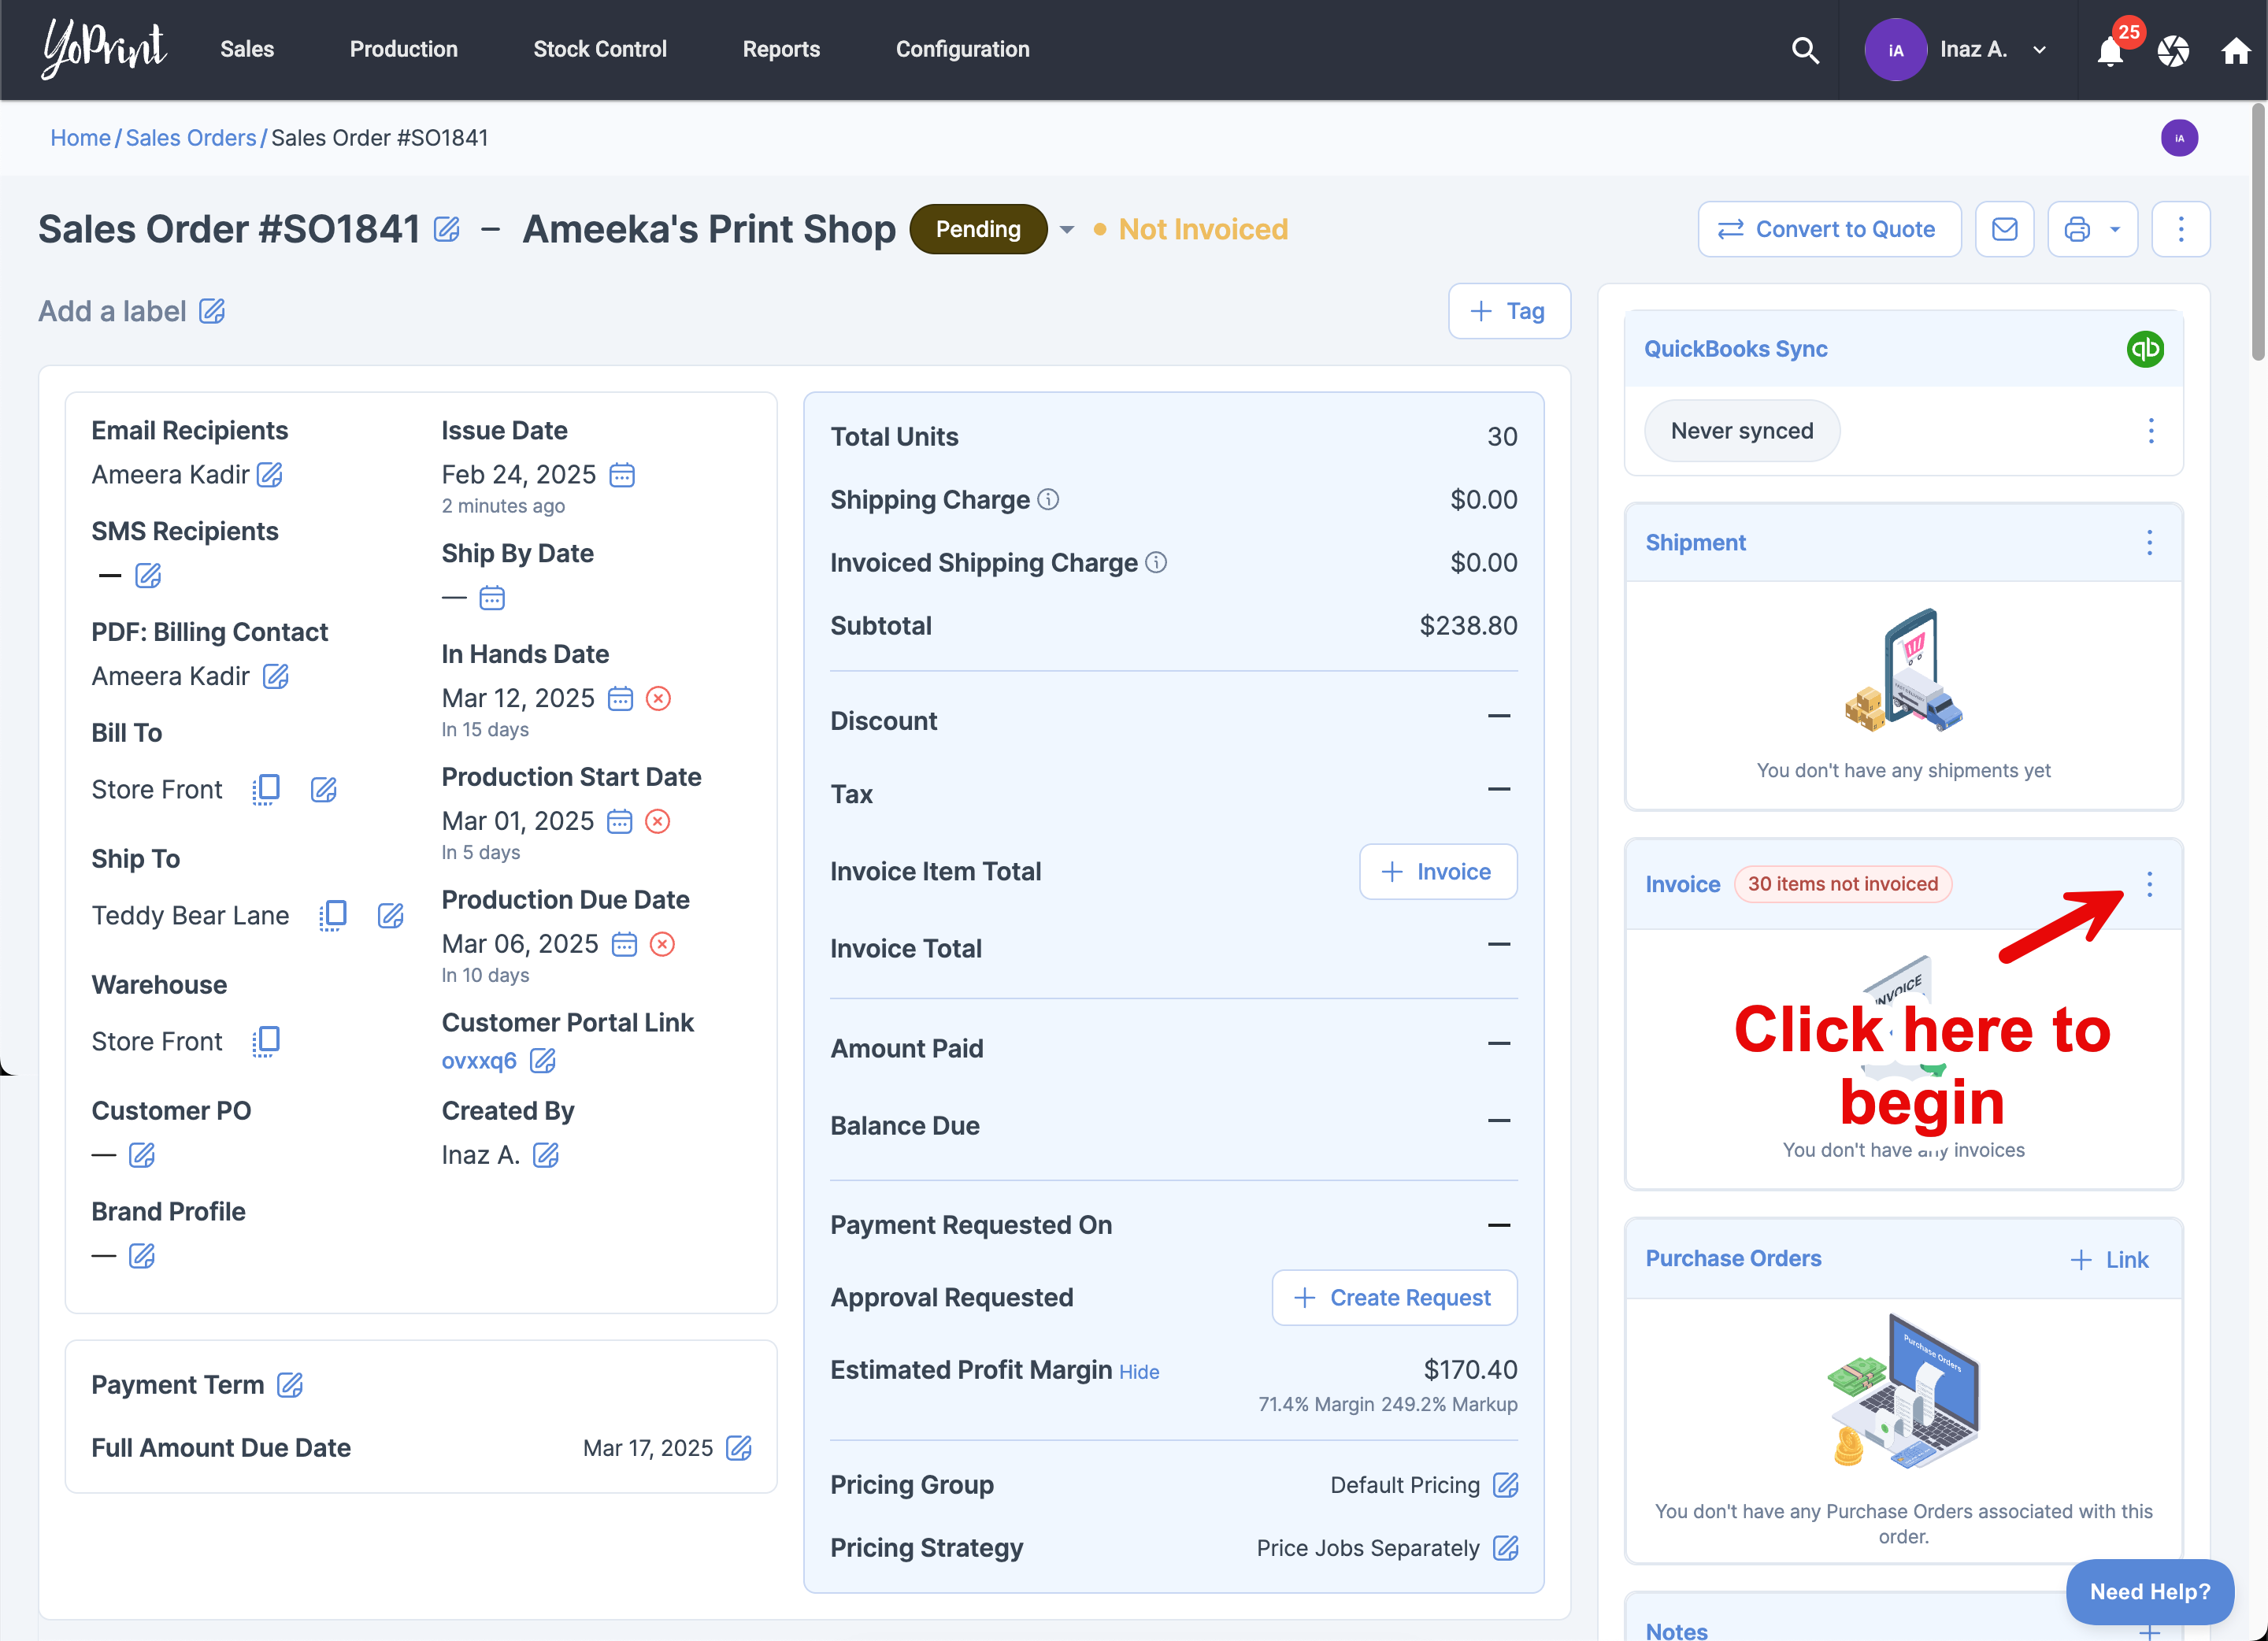
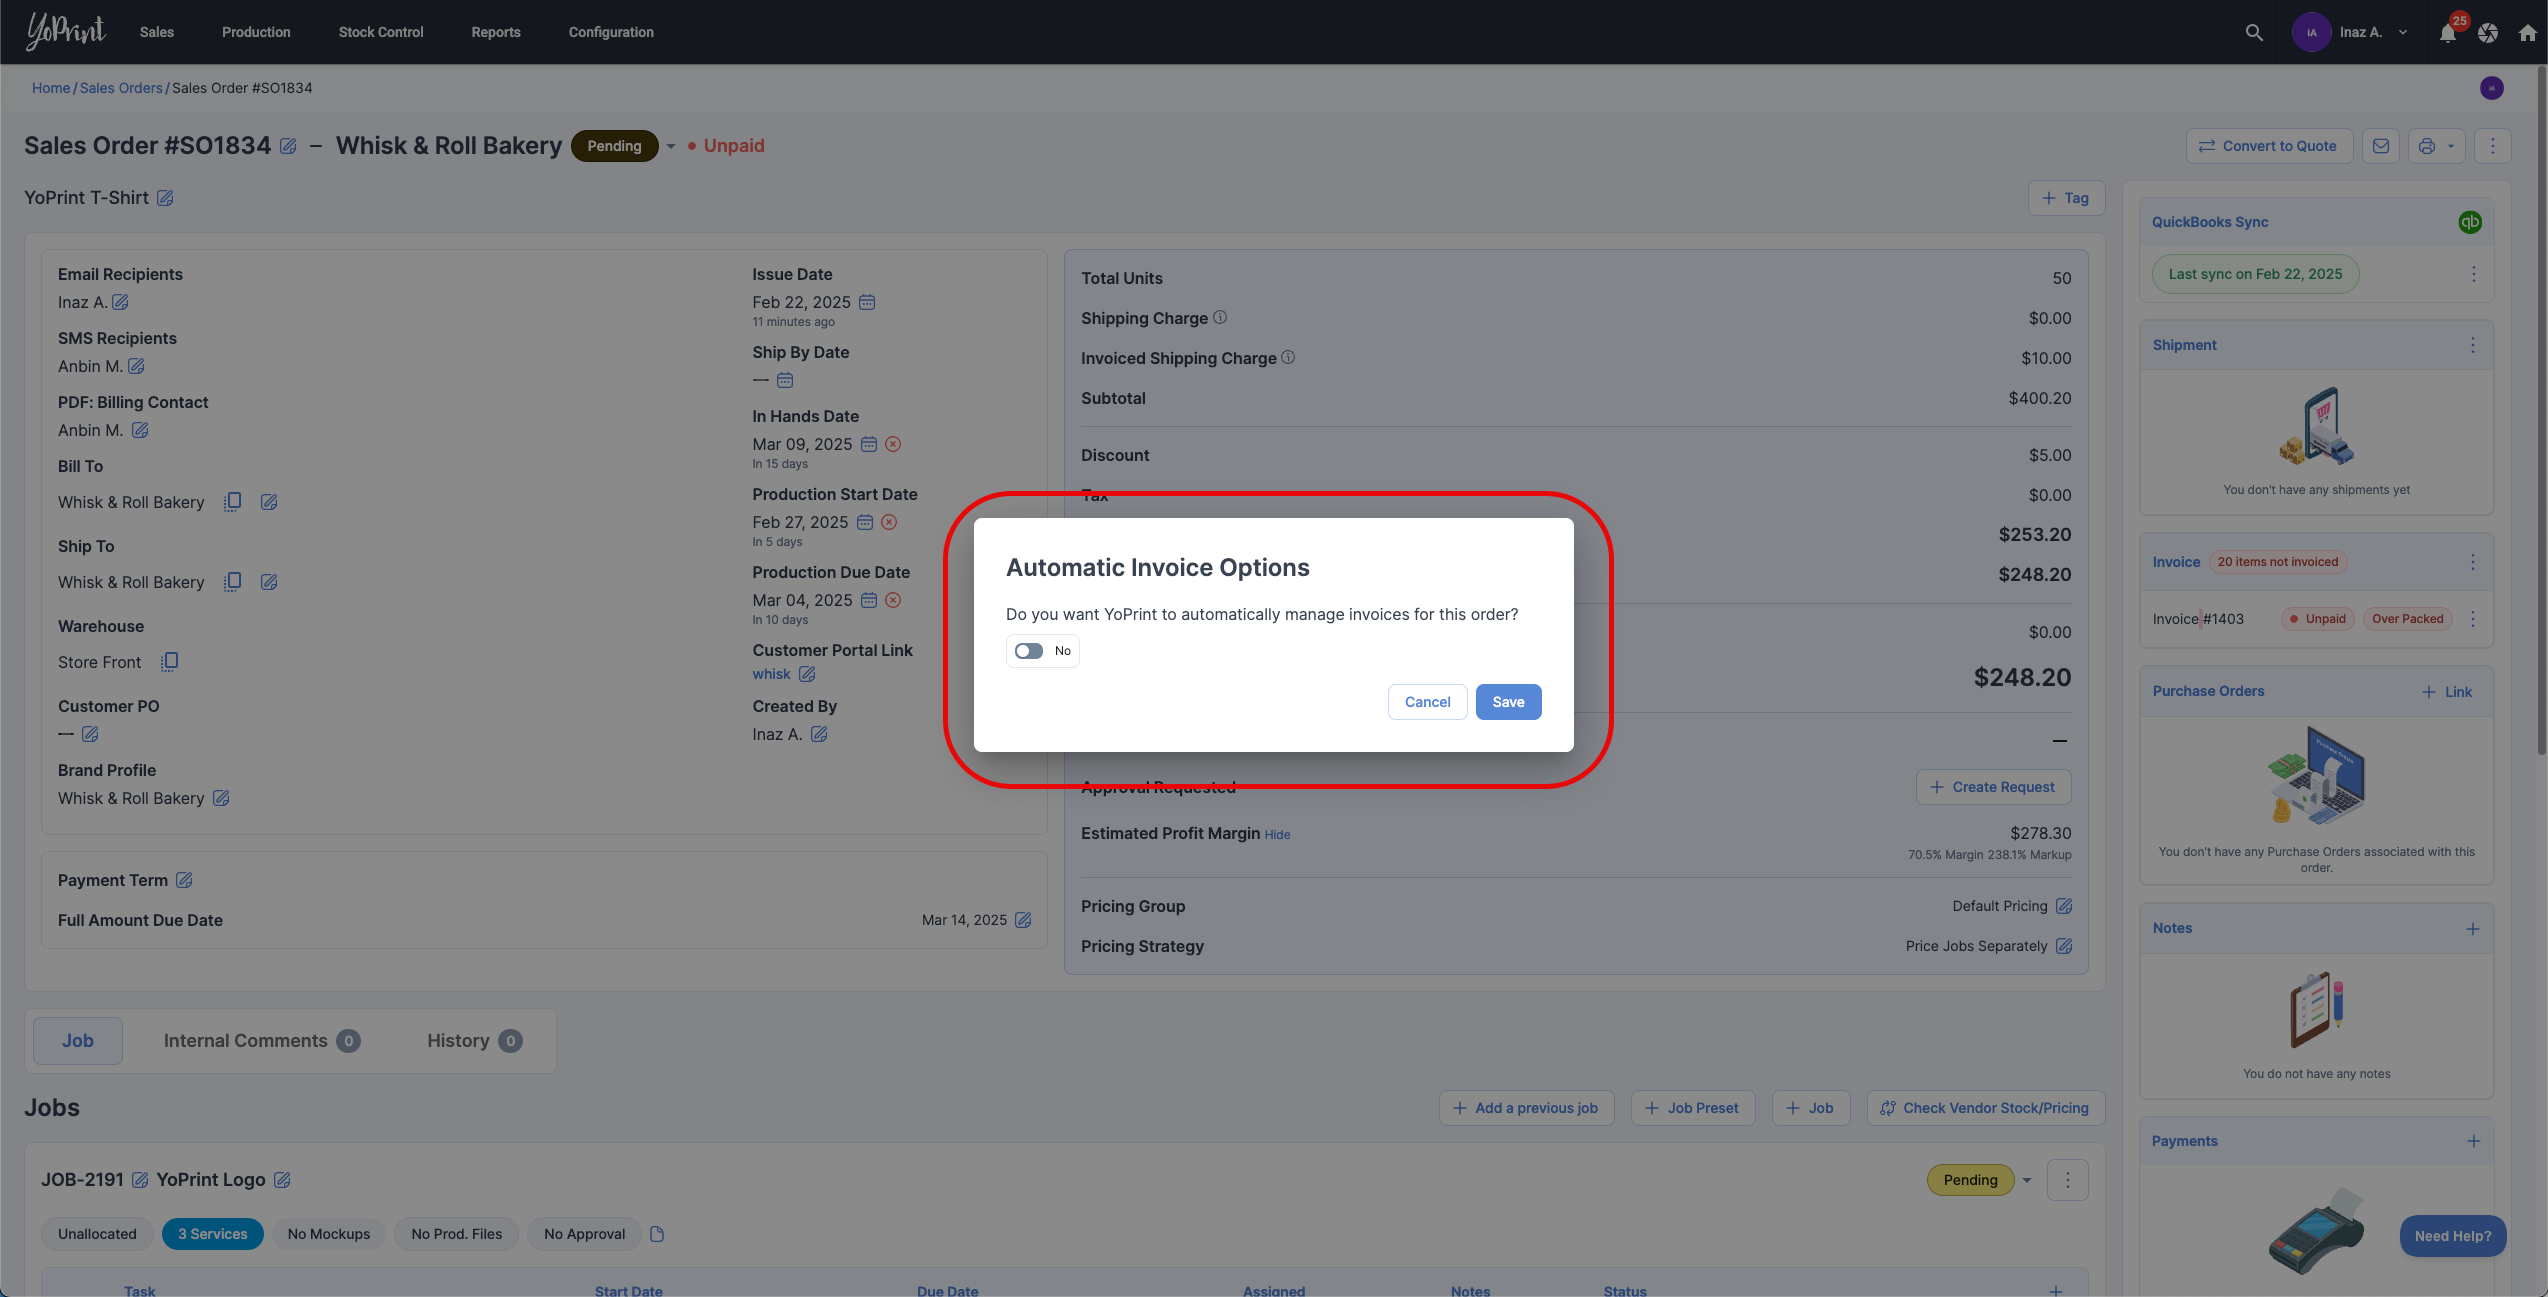
- Whenever you are ready to collect a payment from your customer, you can go over to the invoice panel, and click on the ⋮ icon.
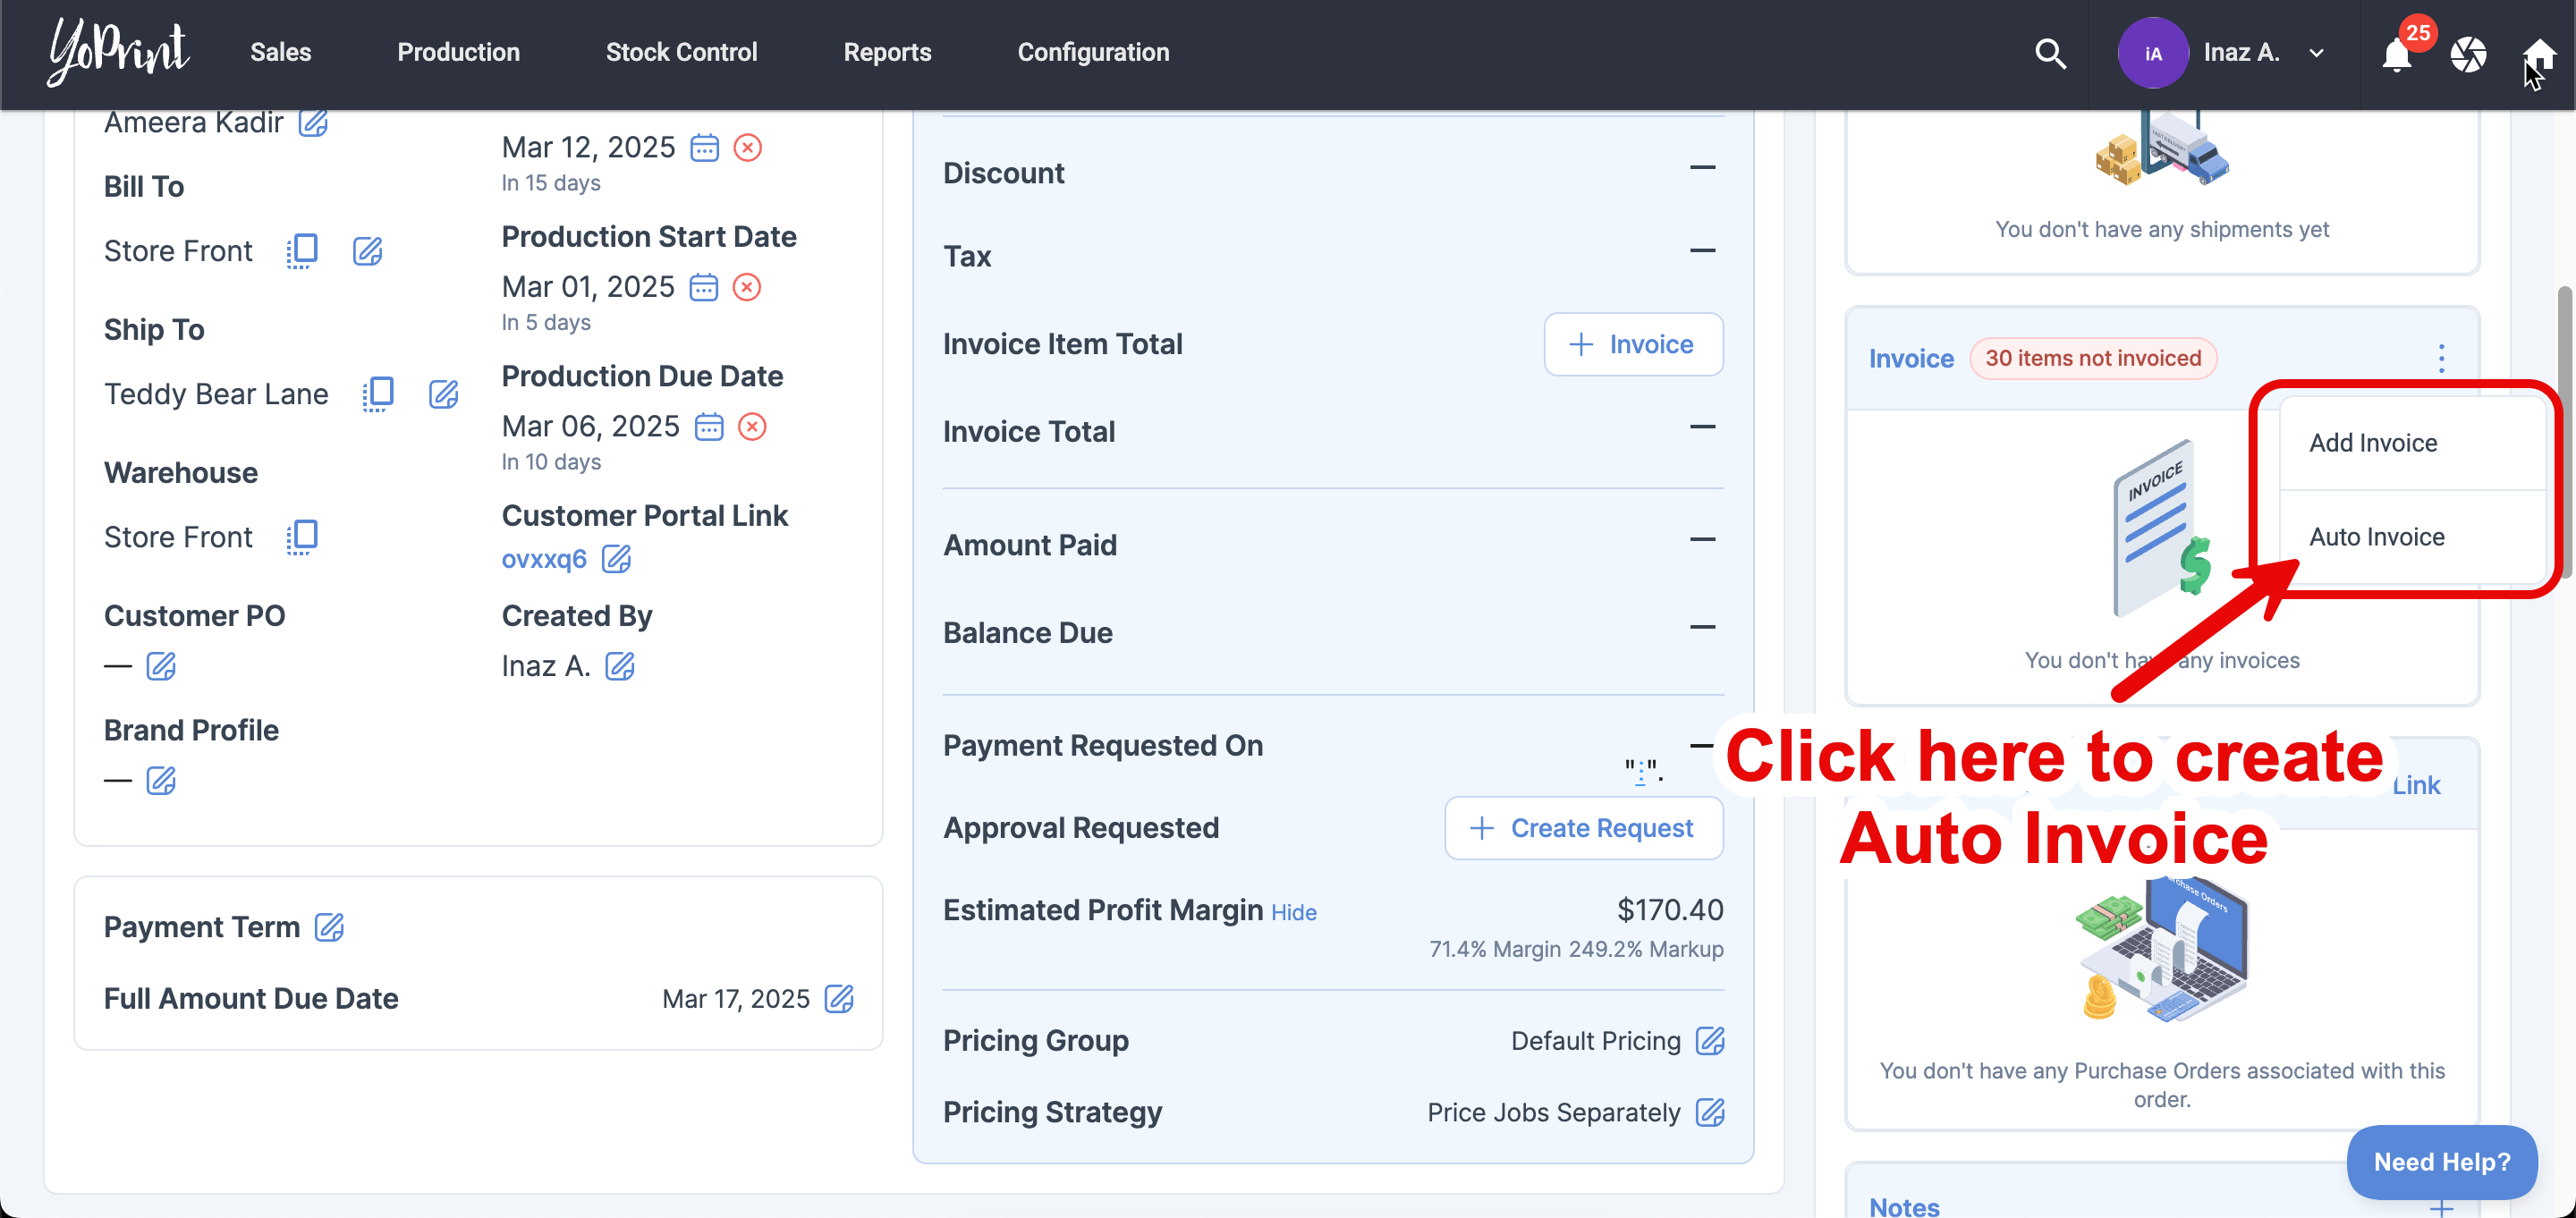
- Select Auto Invoice.
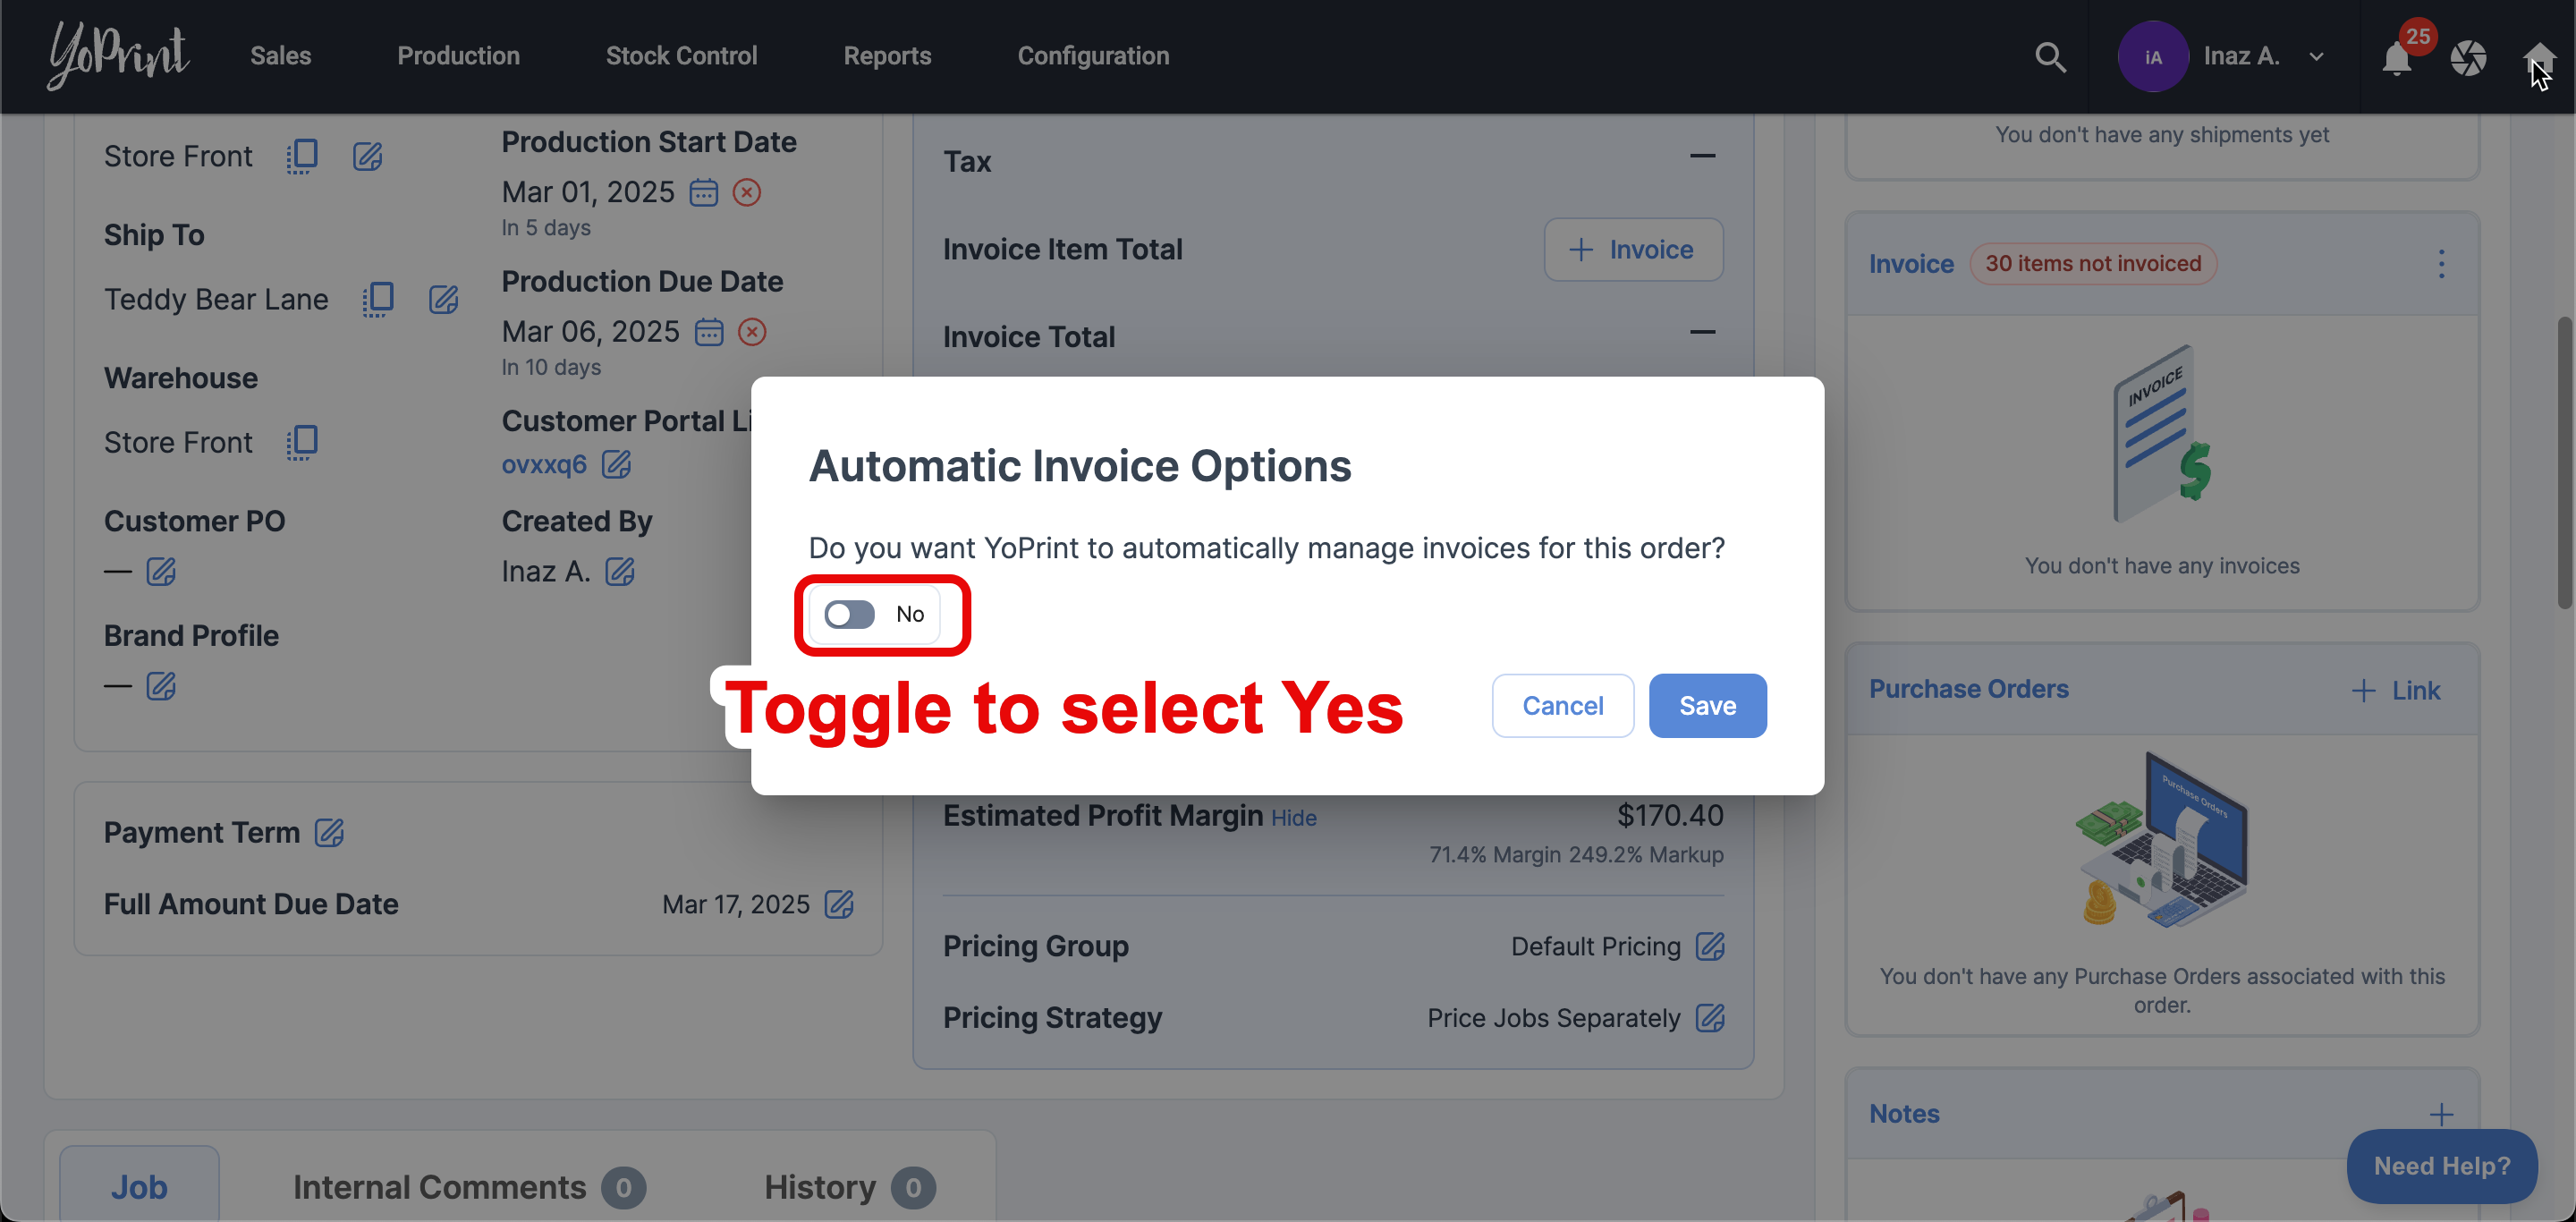
- A dialog box will appear. Toggle to select Yes.
- Once you have enabled Auto Invoice, a dropdown will appear, allowing you to choose how you’d like YoPrint to manage your shipping cost. You can read more about how you can add shipping cost to the invoice, here.

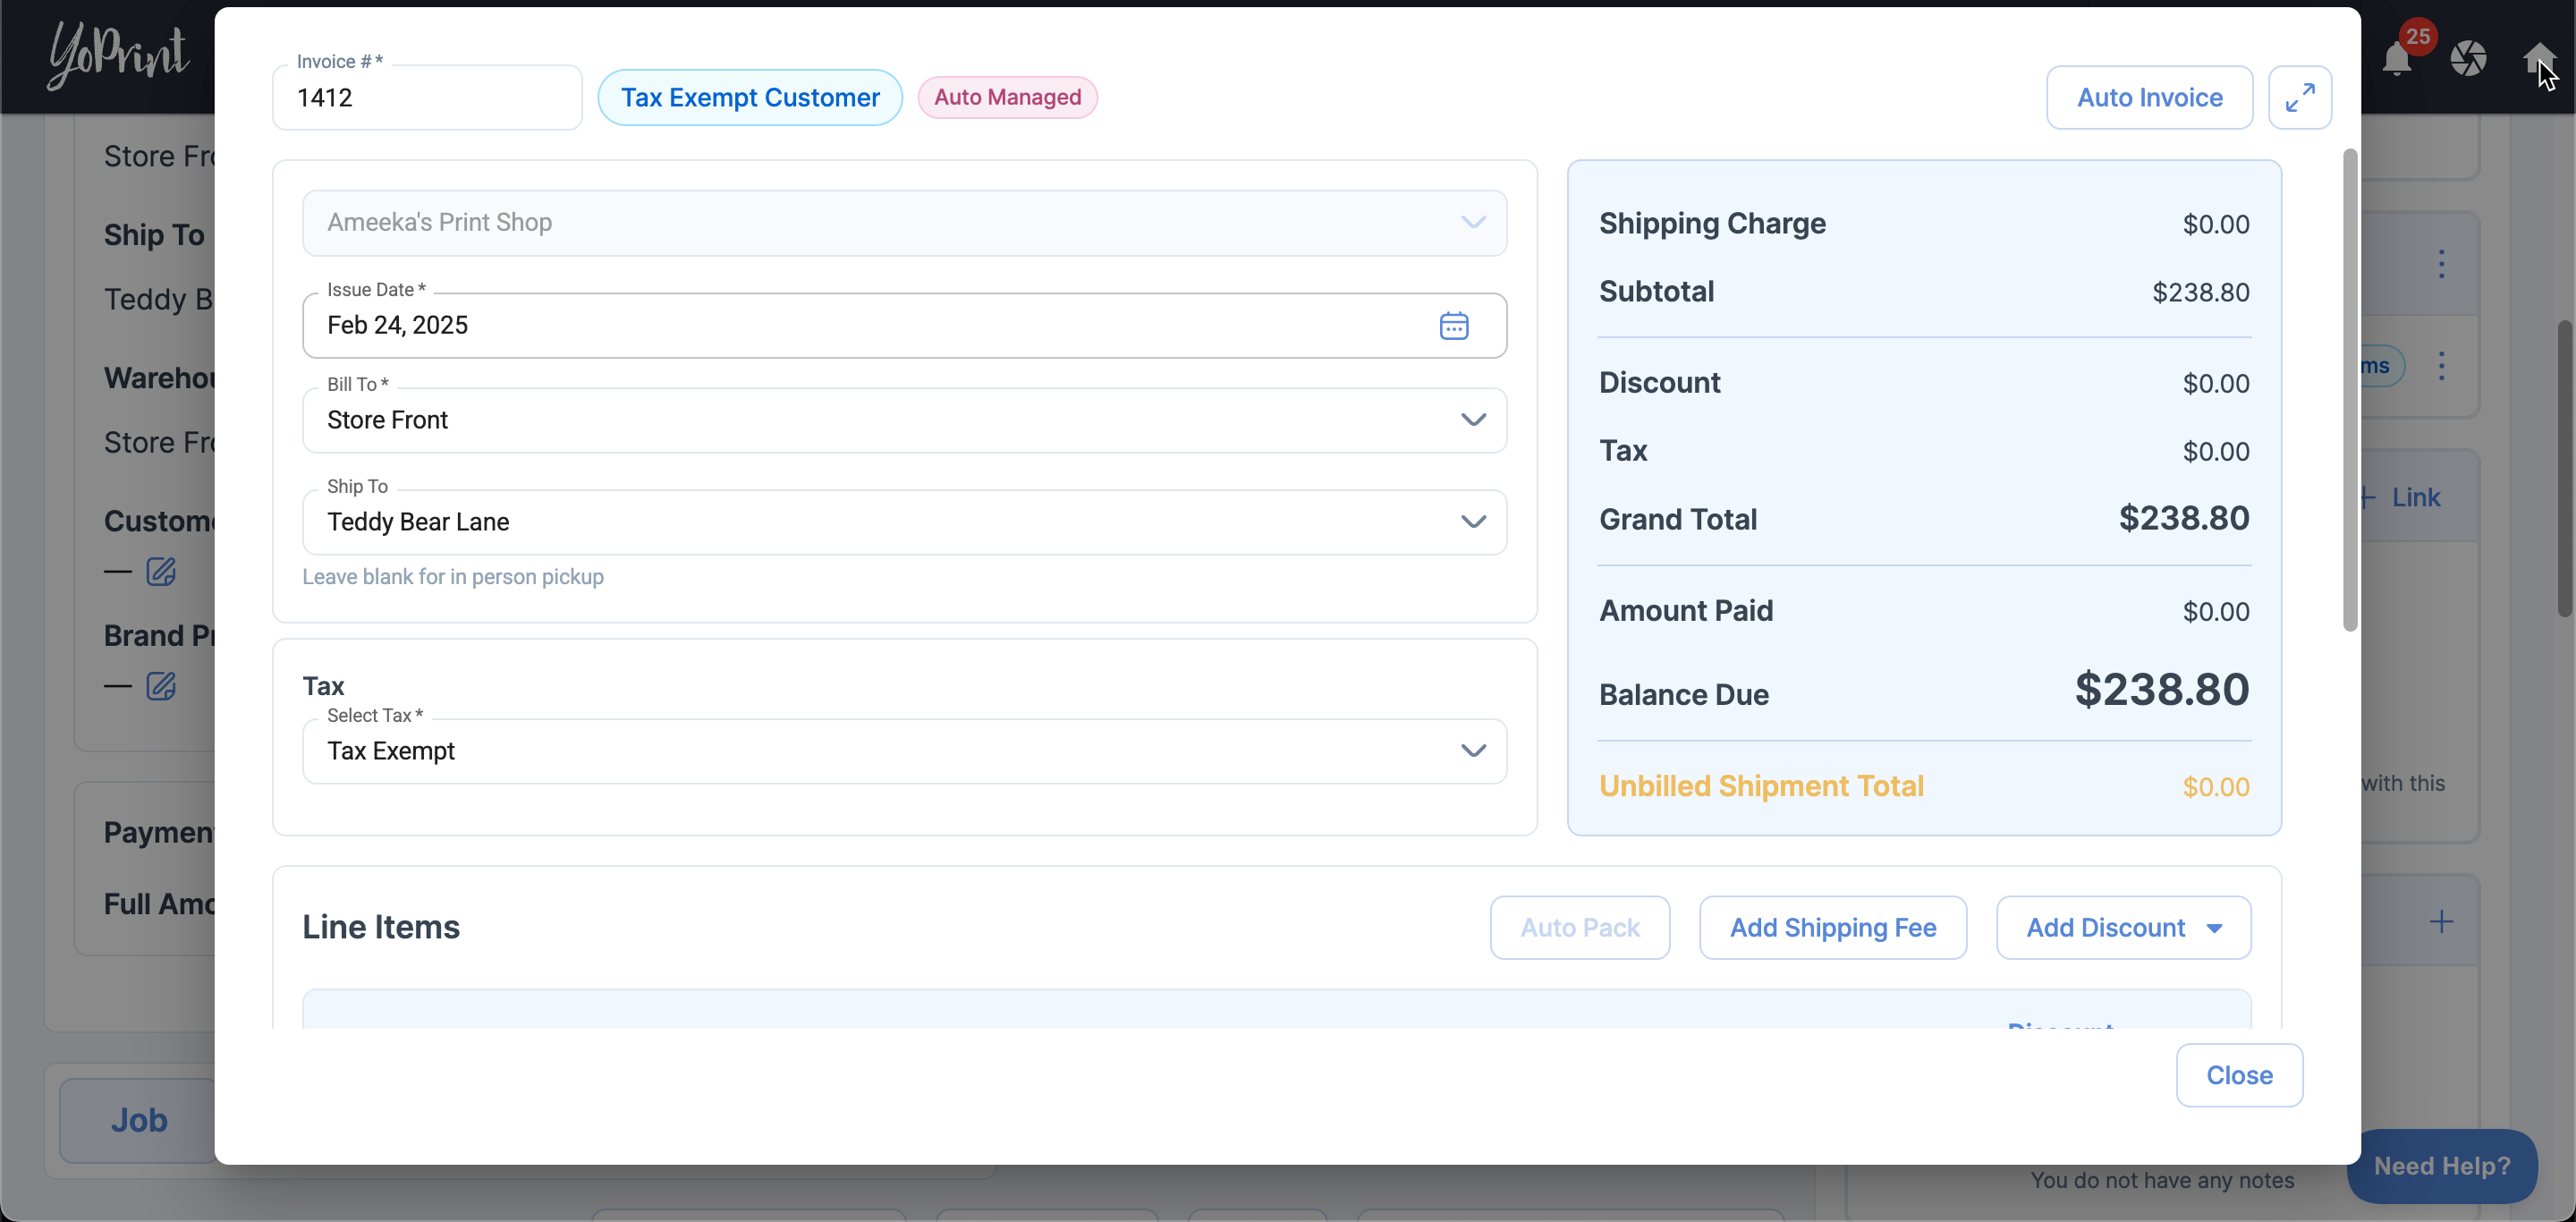
- After choosing how YoPrint should handle the shipping cost for your Auto Invoice, you'll be directed to the generated Invoice Edit Dialog. This is what you will see.
Auto Invoice Edit Dialog
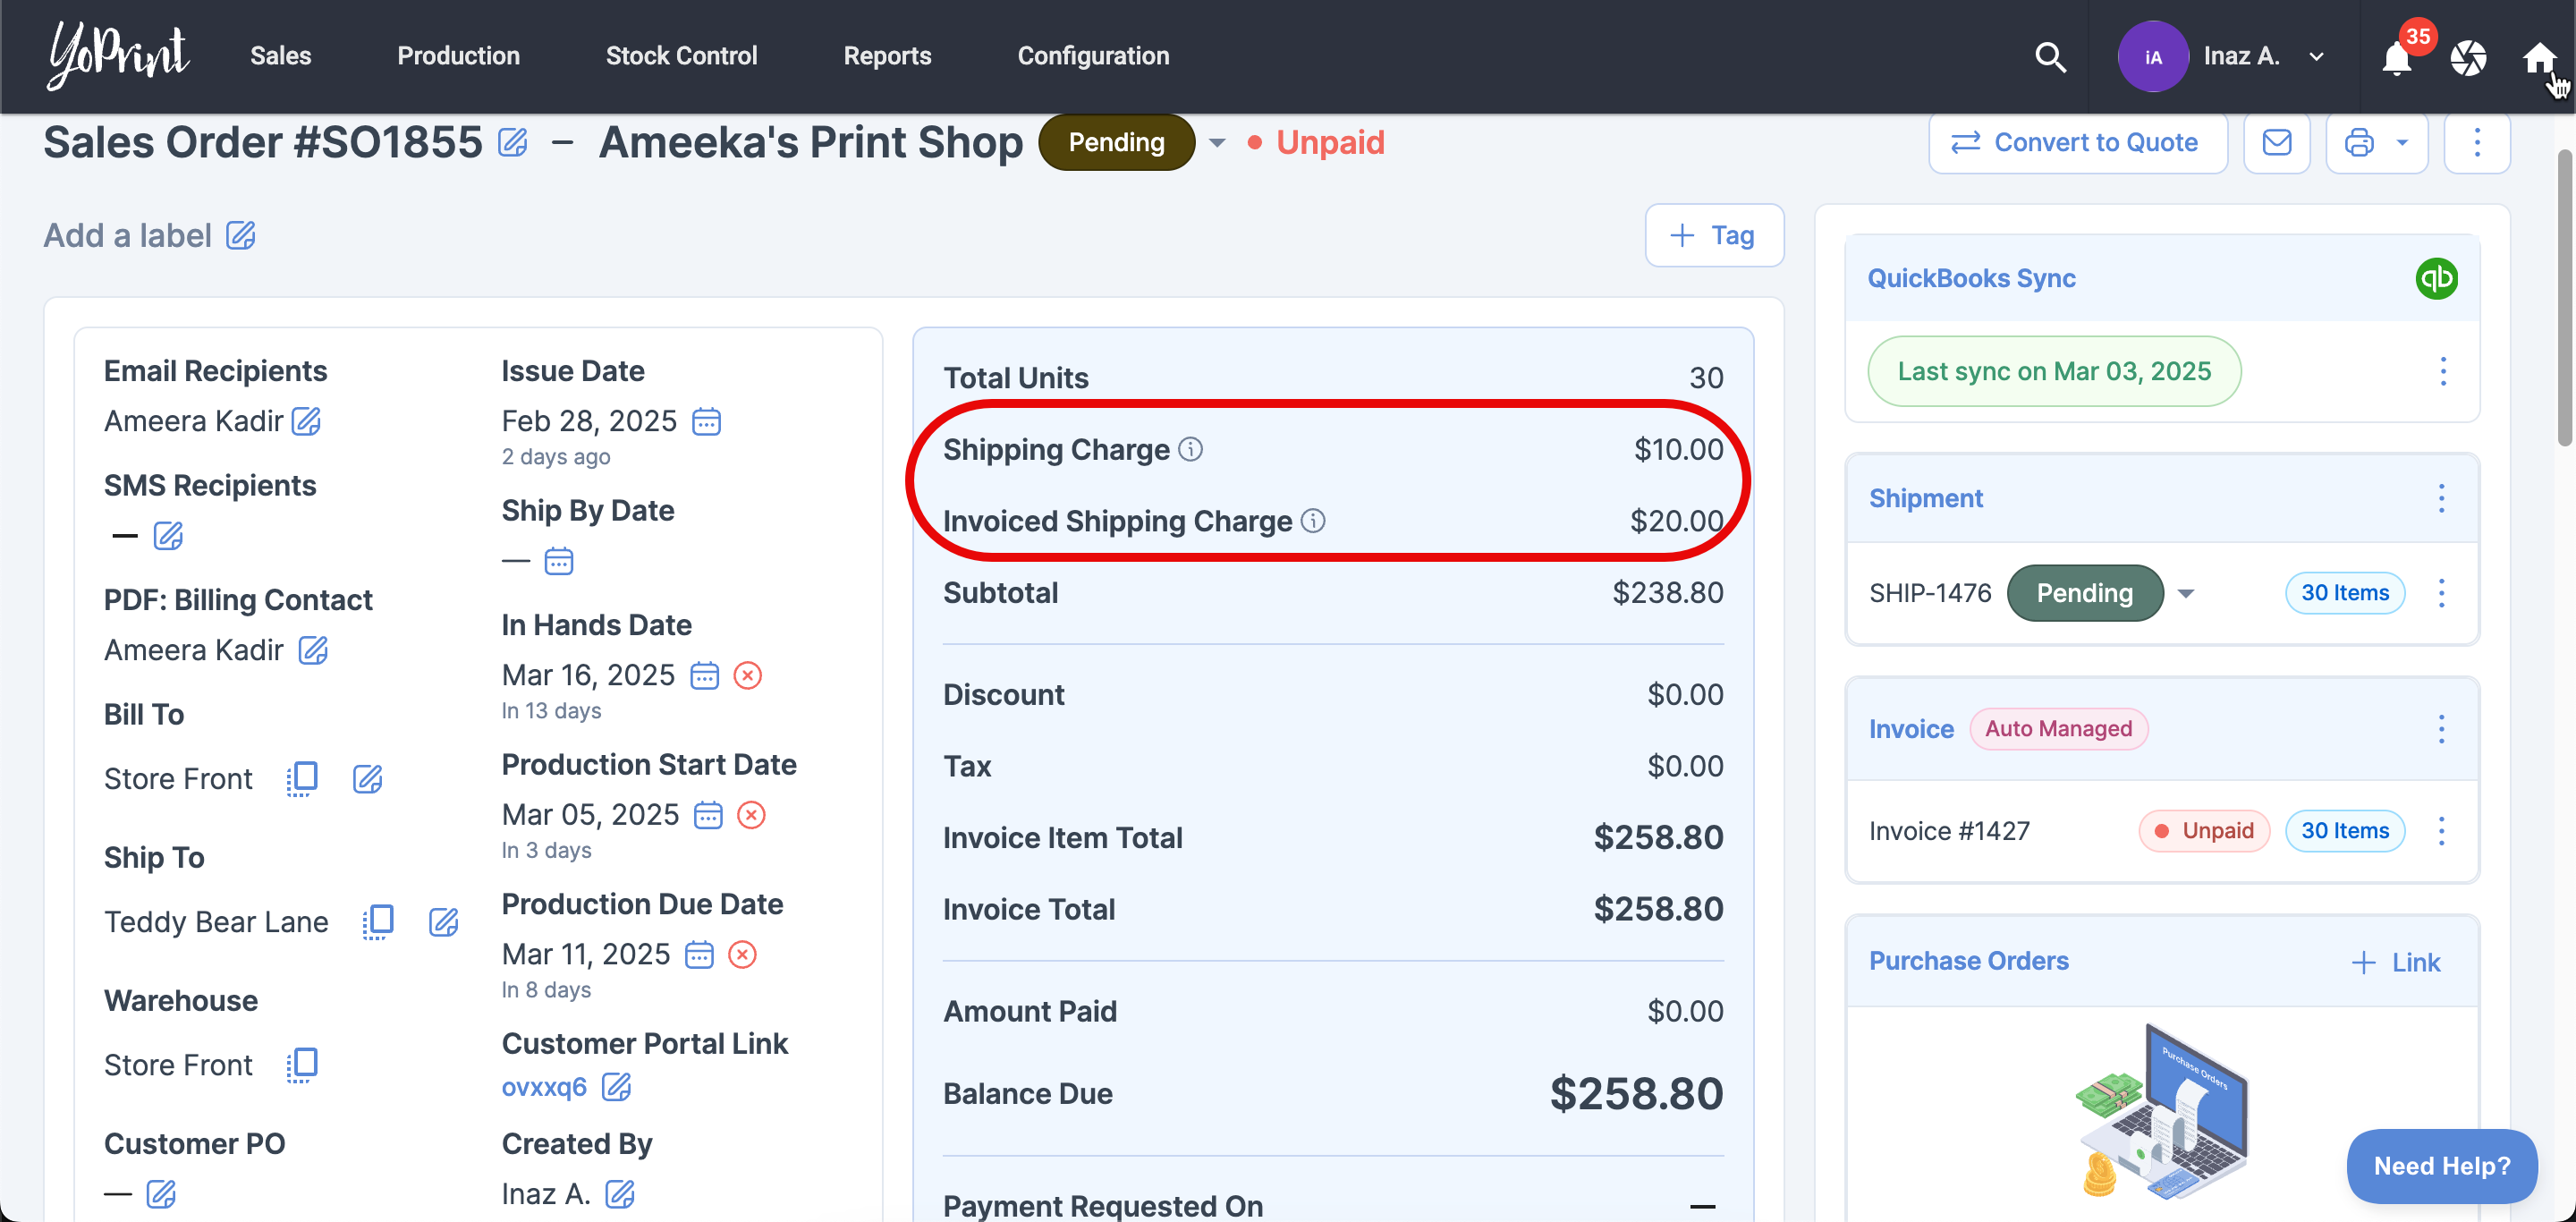
- On the Quote/Sales Order page, you will see that your invoice is Auto Managed in the Invoice panel.
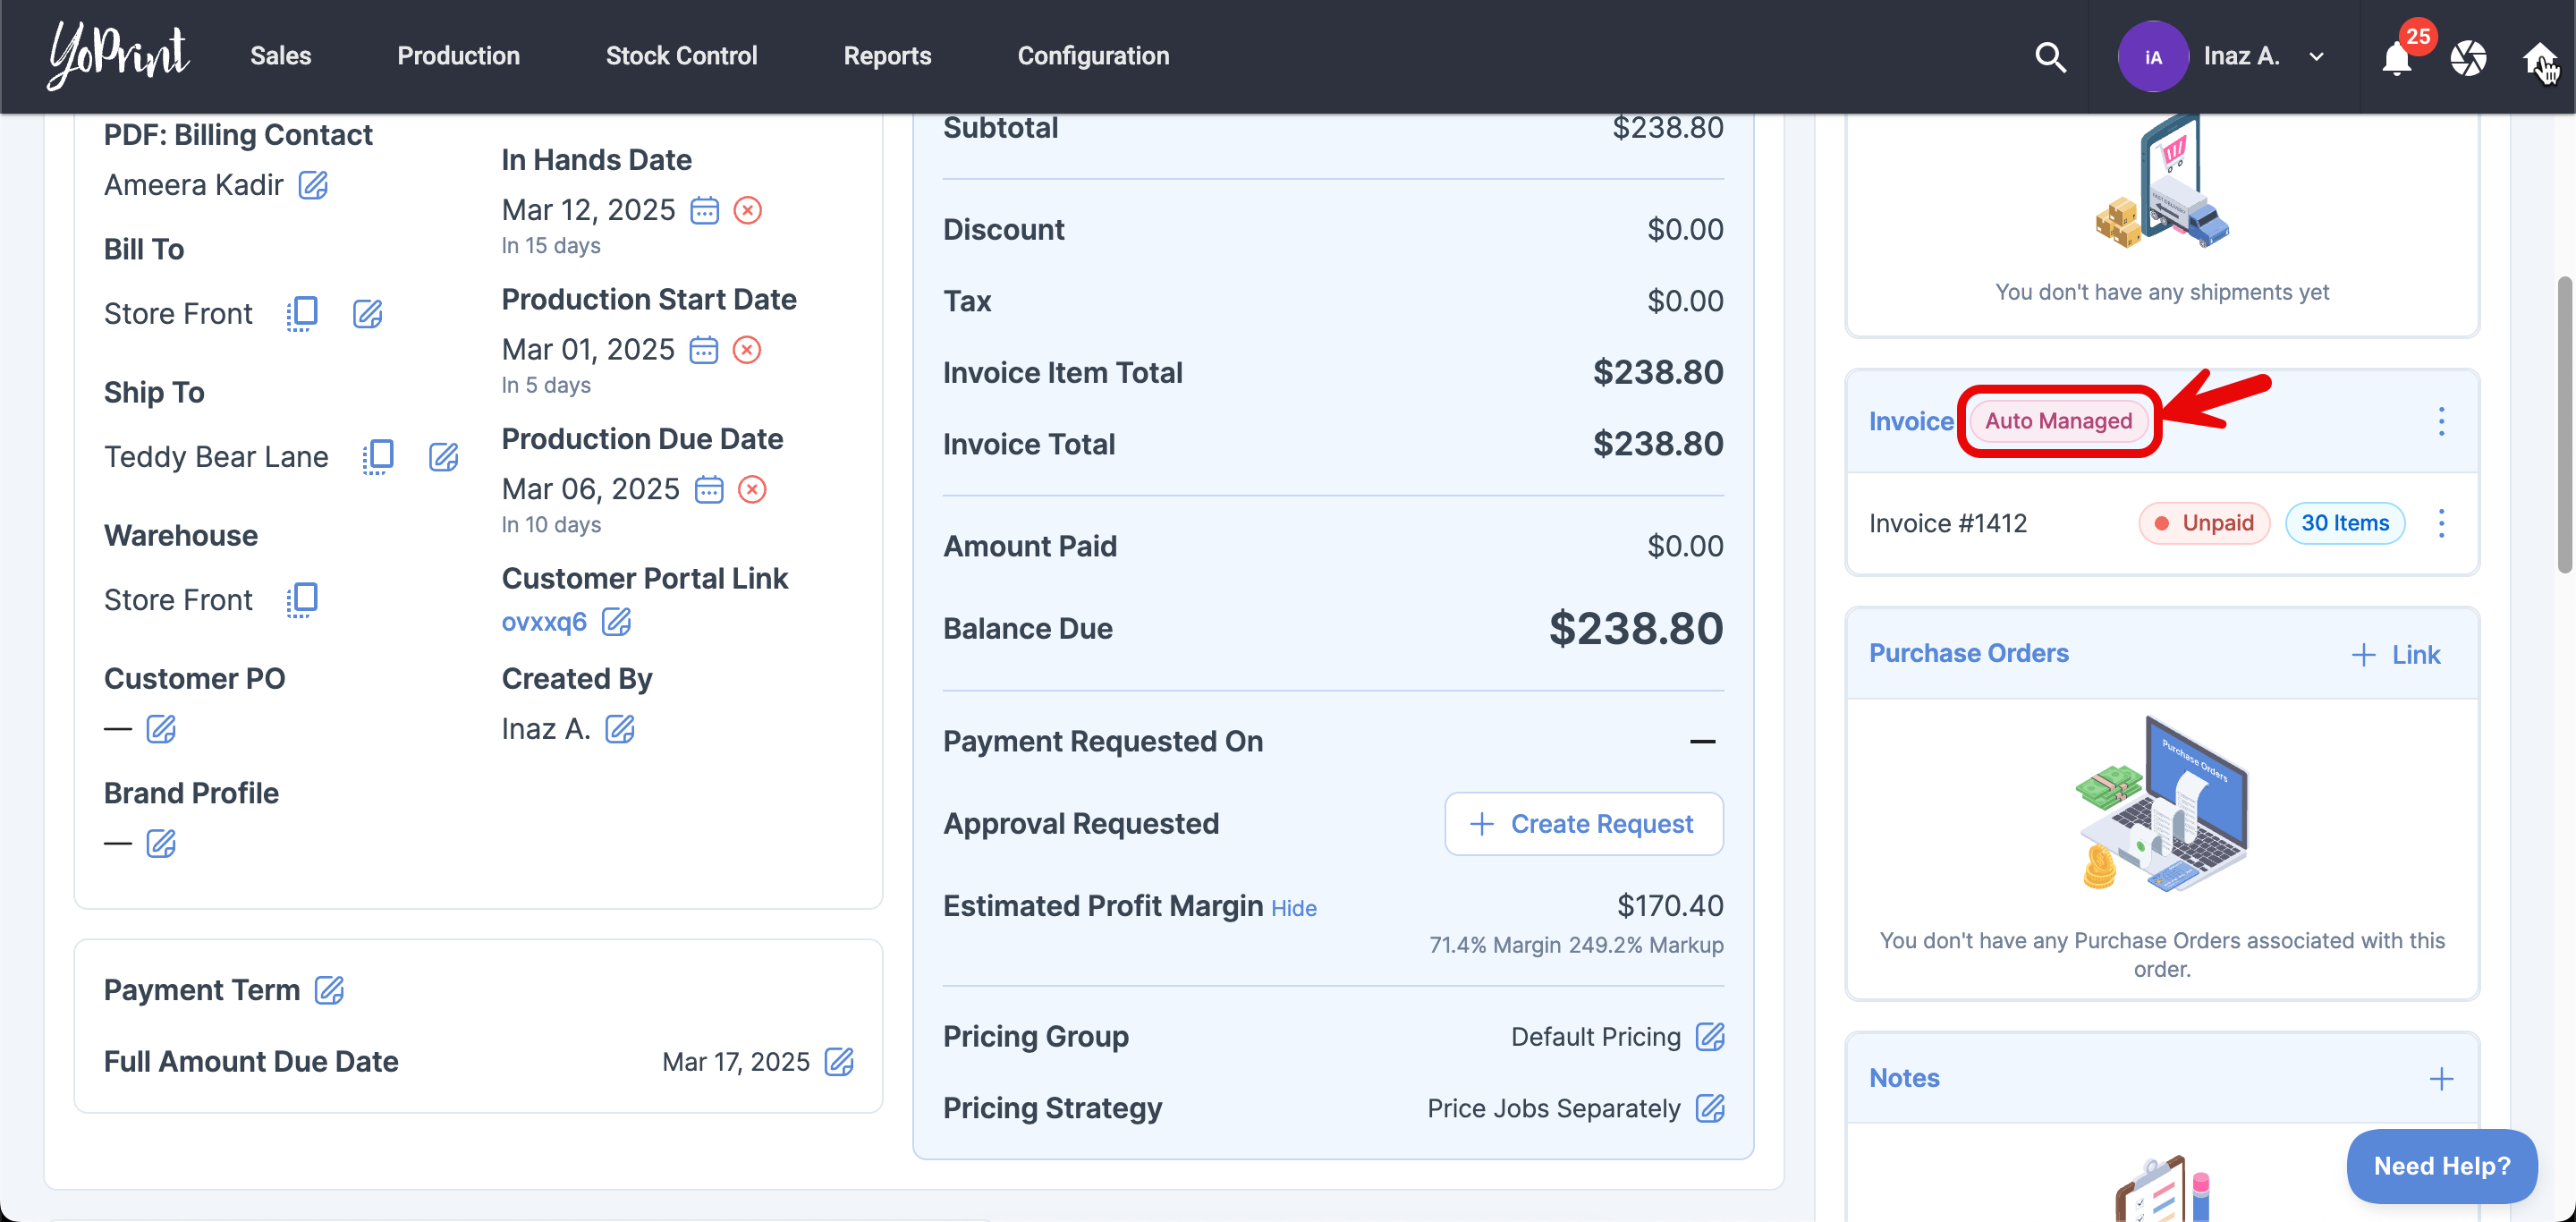
- To open the Auto Invoice edit dialog, click on the ⋮ icon, and Edit.

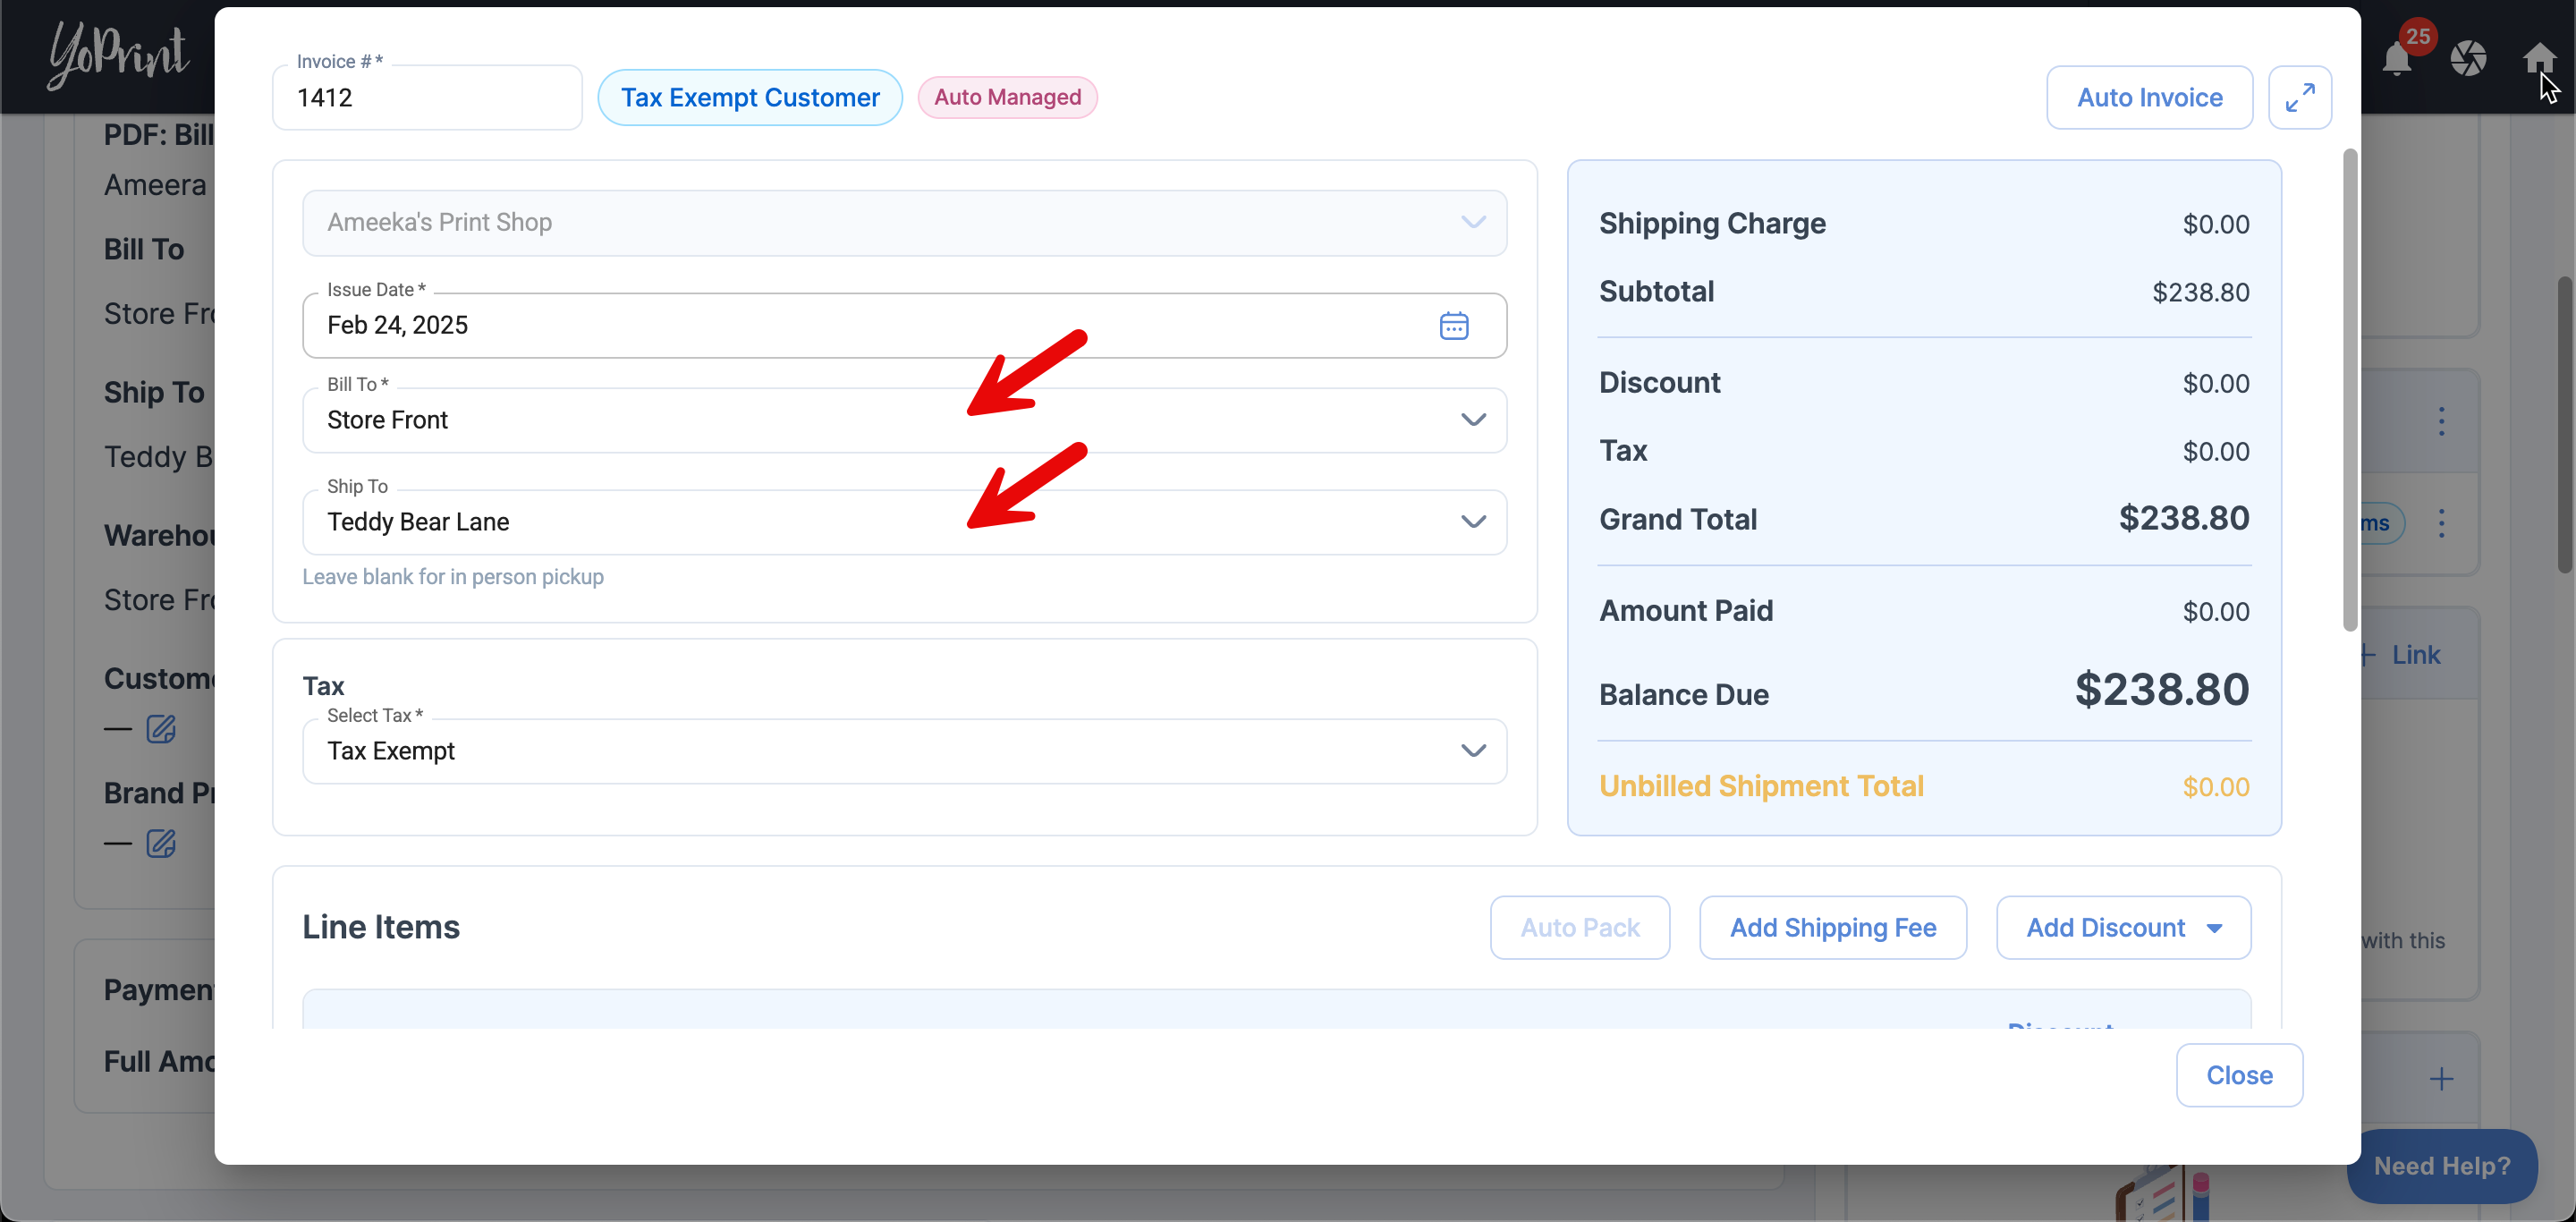
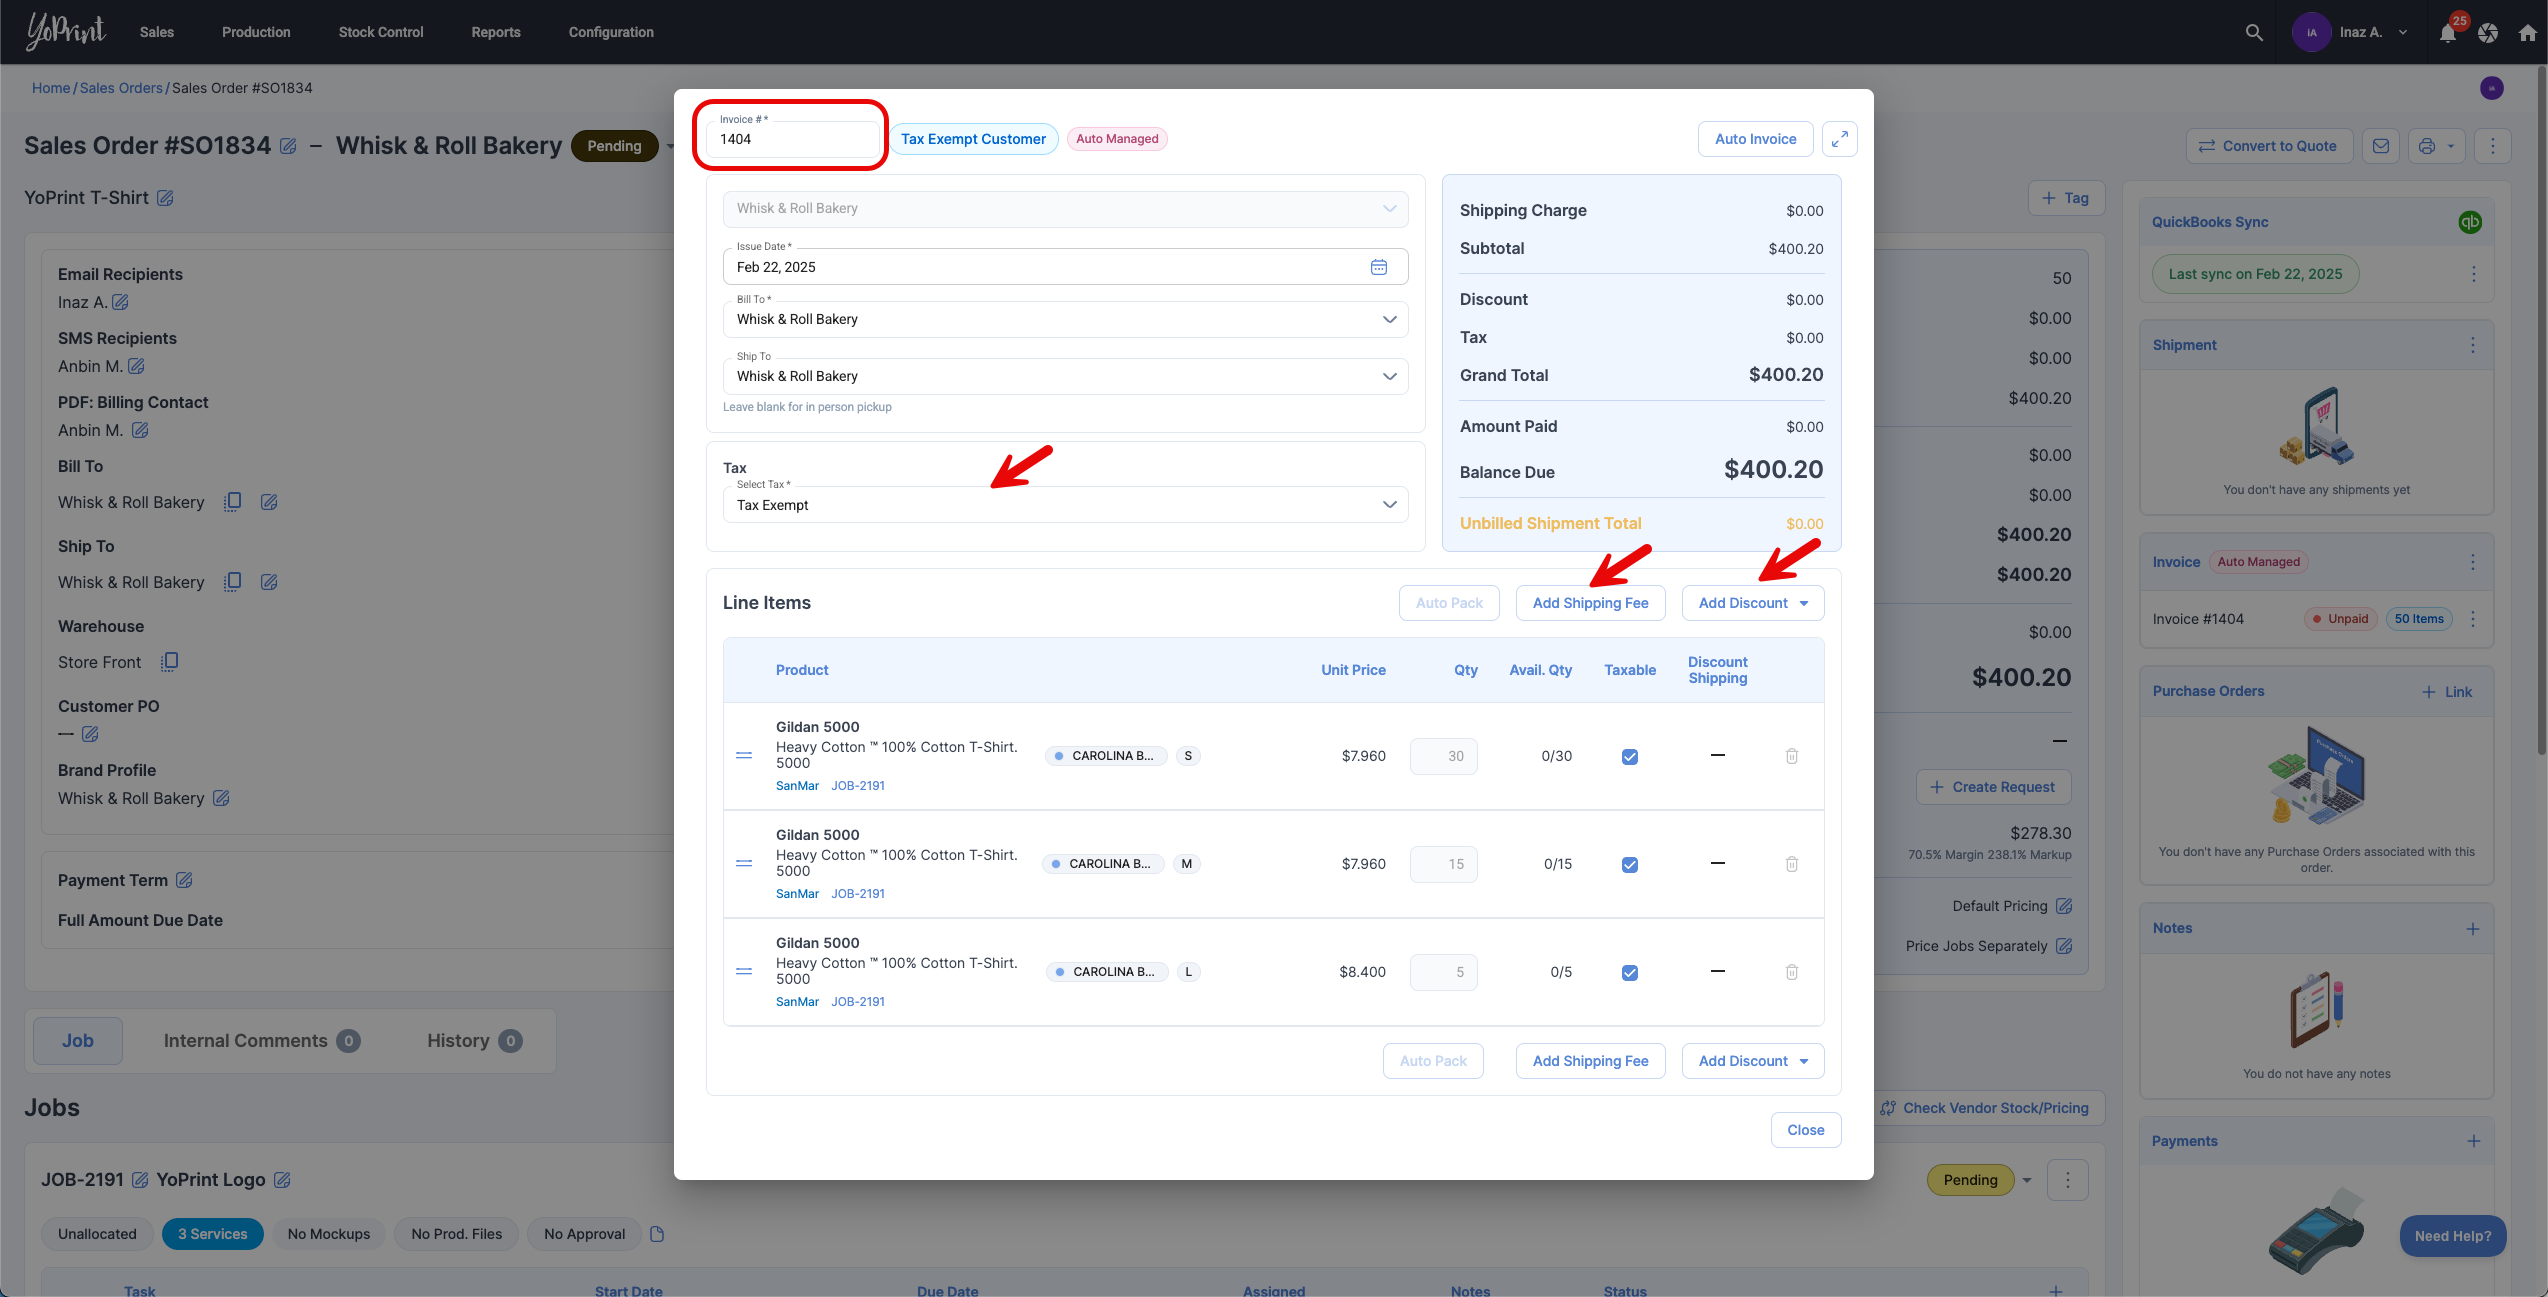
- When managing your invoices, YoPrint will automatically select the billing and shipping details based on the order selection or the customer's default settings.
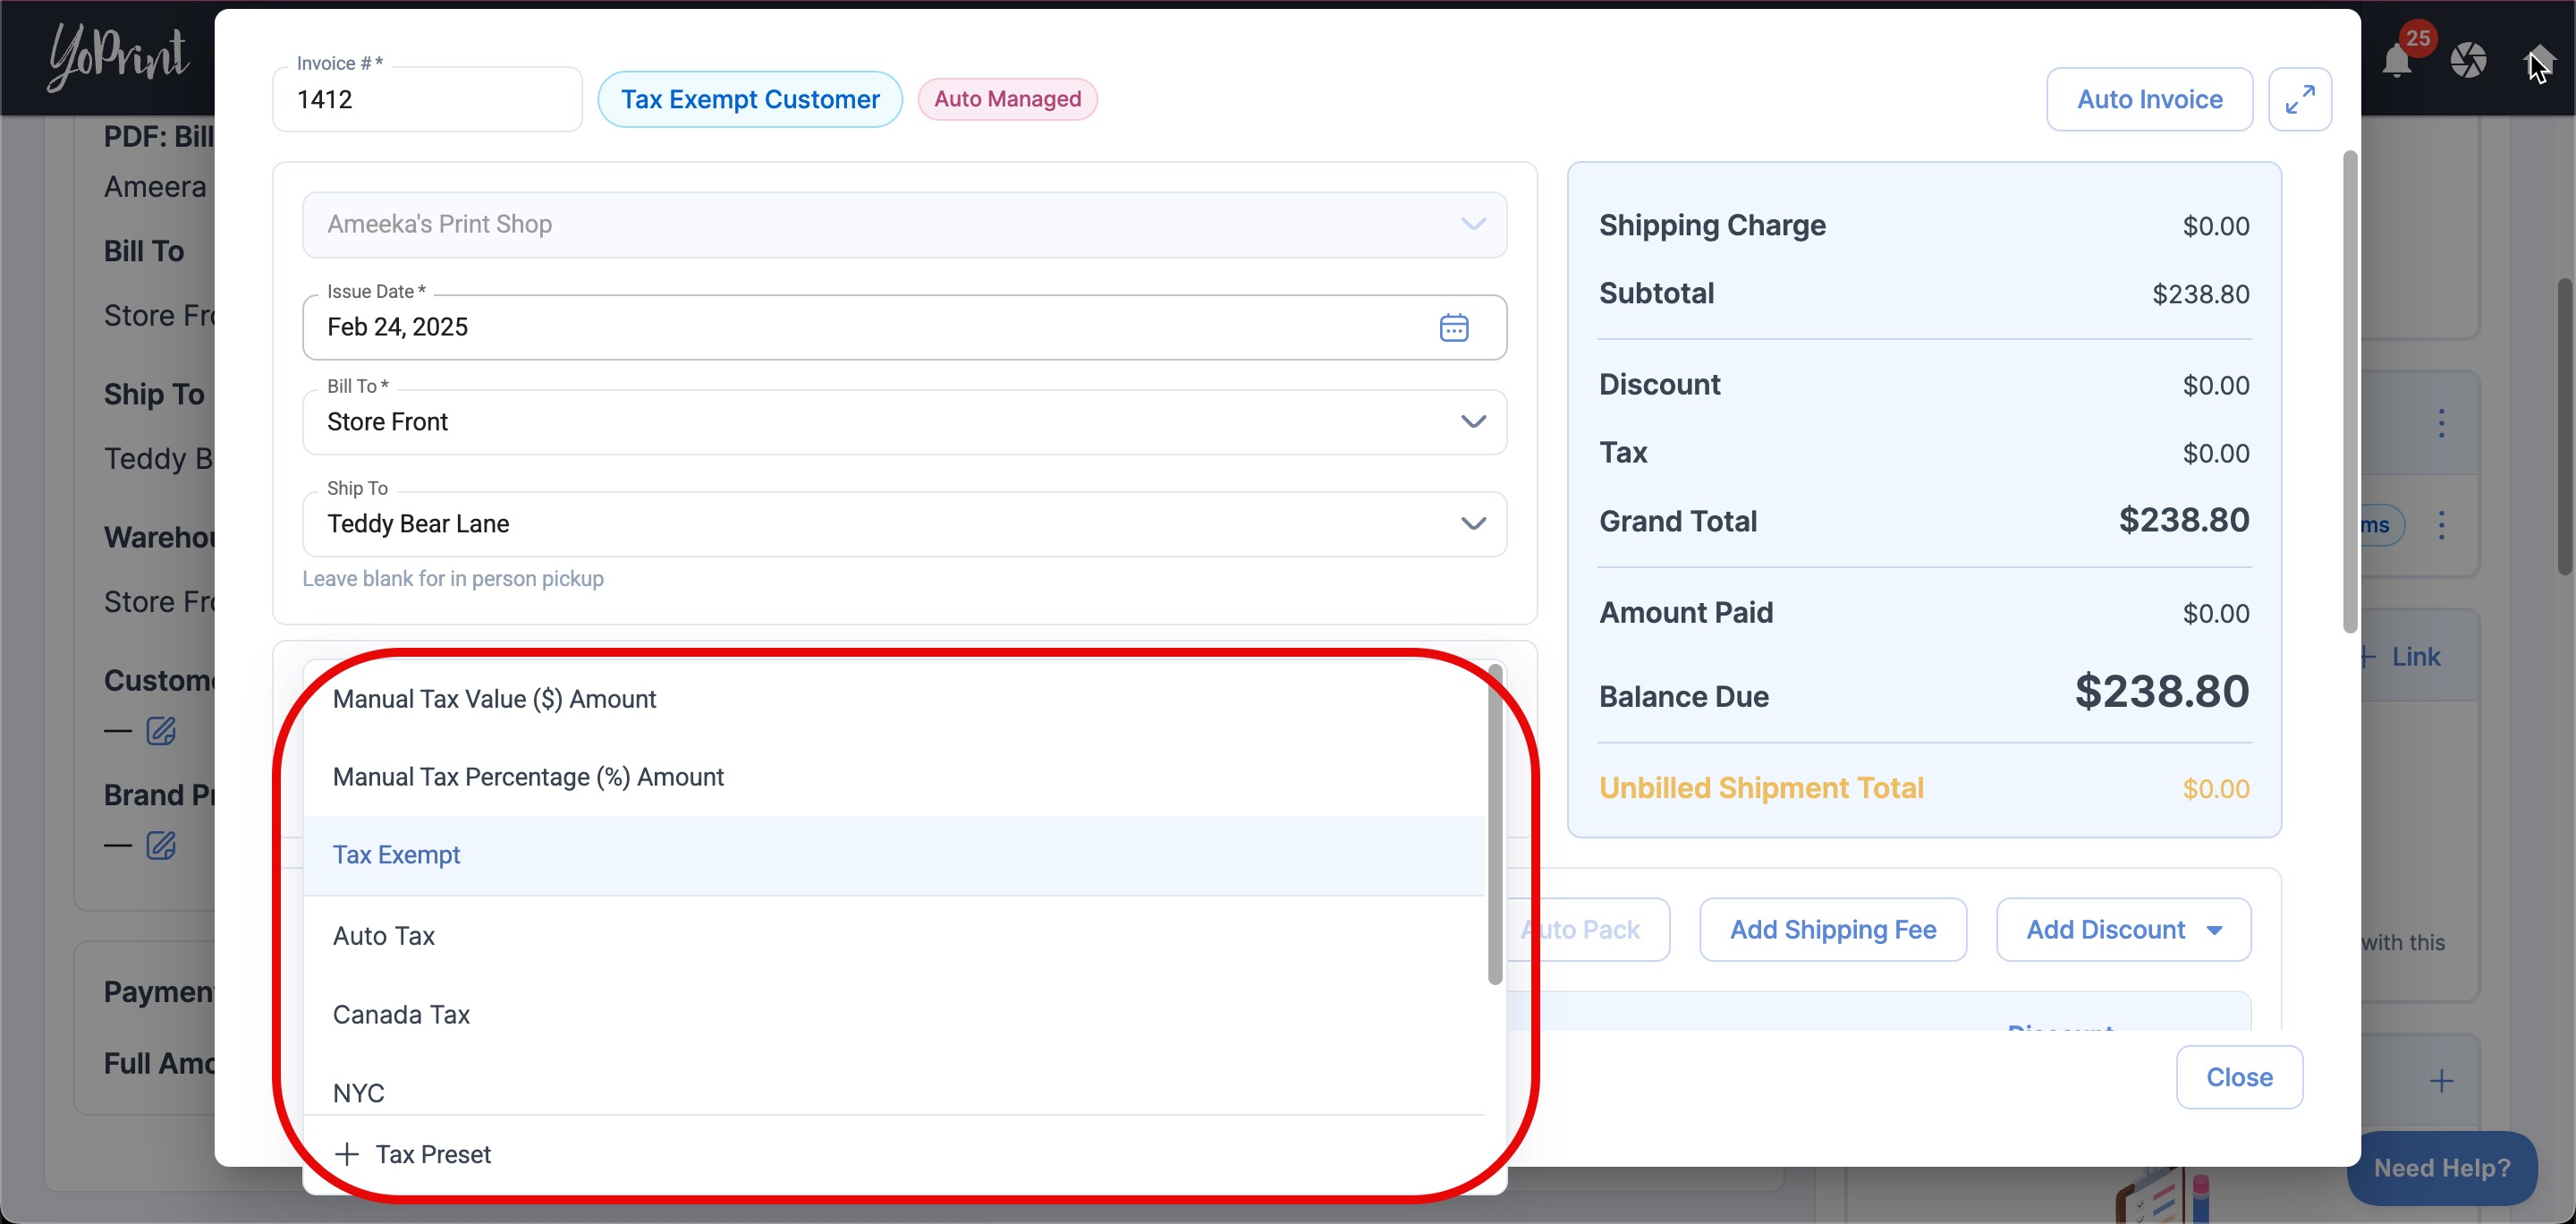
- We’ll apply the default tax set at the account level. You can update this anytime in your Tax Presets. You can also select a different tax or adjust it as needed.
- Once you have selected how the order will be taxed, you can add shipping fees if you prefer to manage the shipping fees yourself.
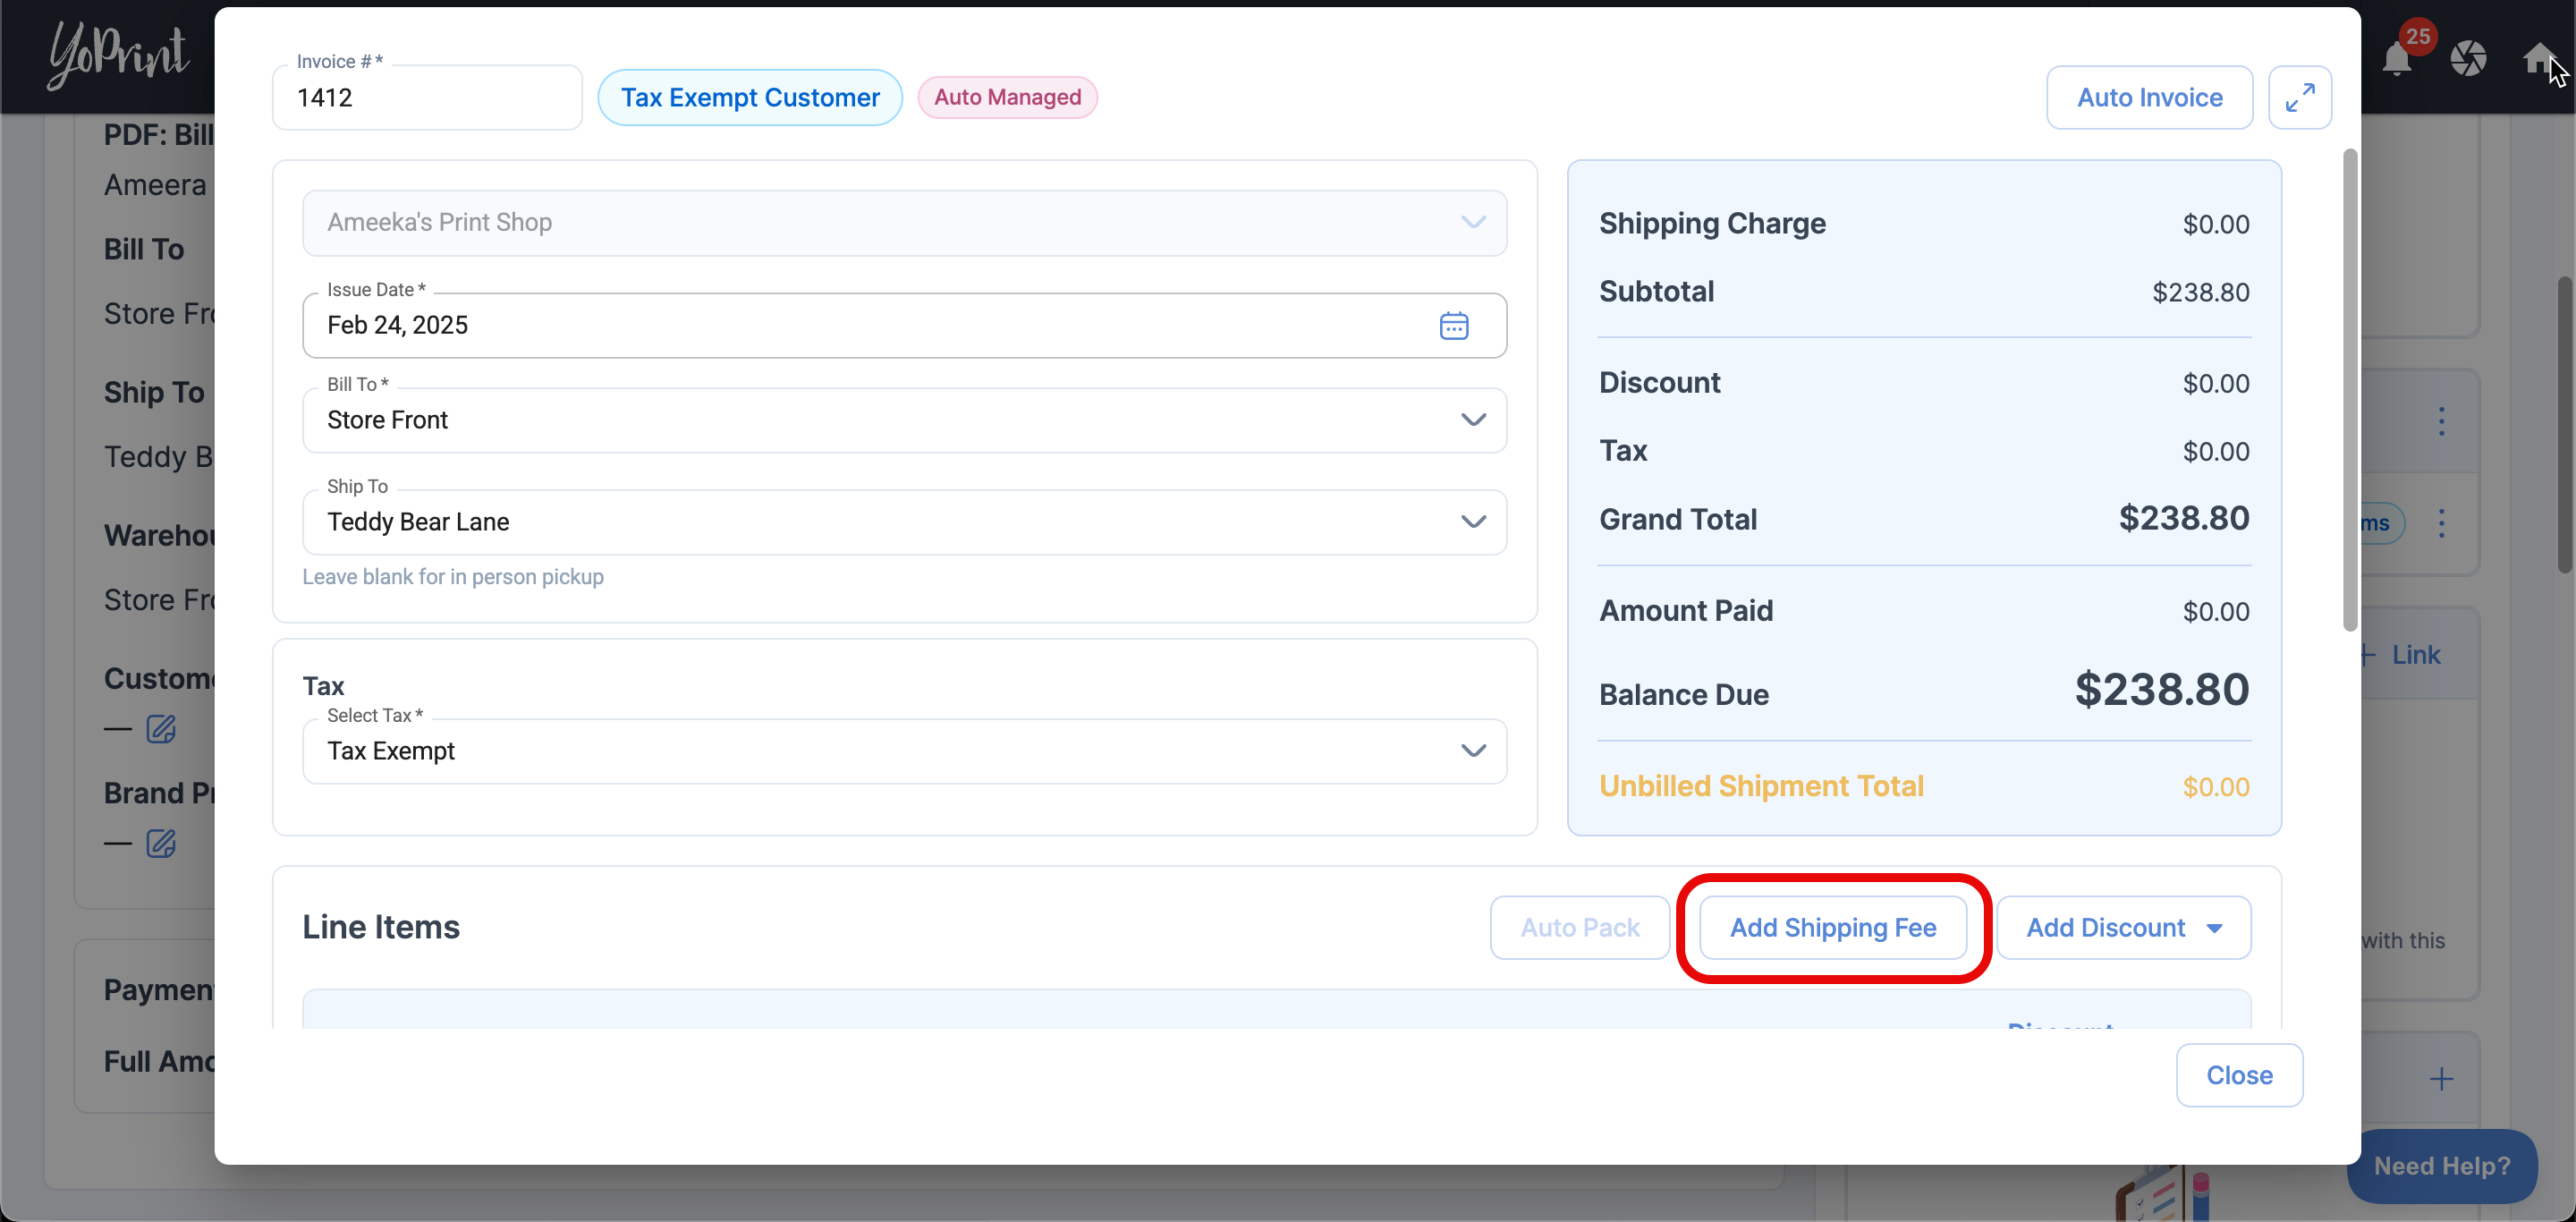
- You can also apply a value or percentage discount to the invoice.
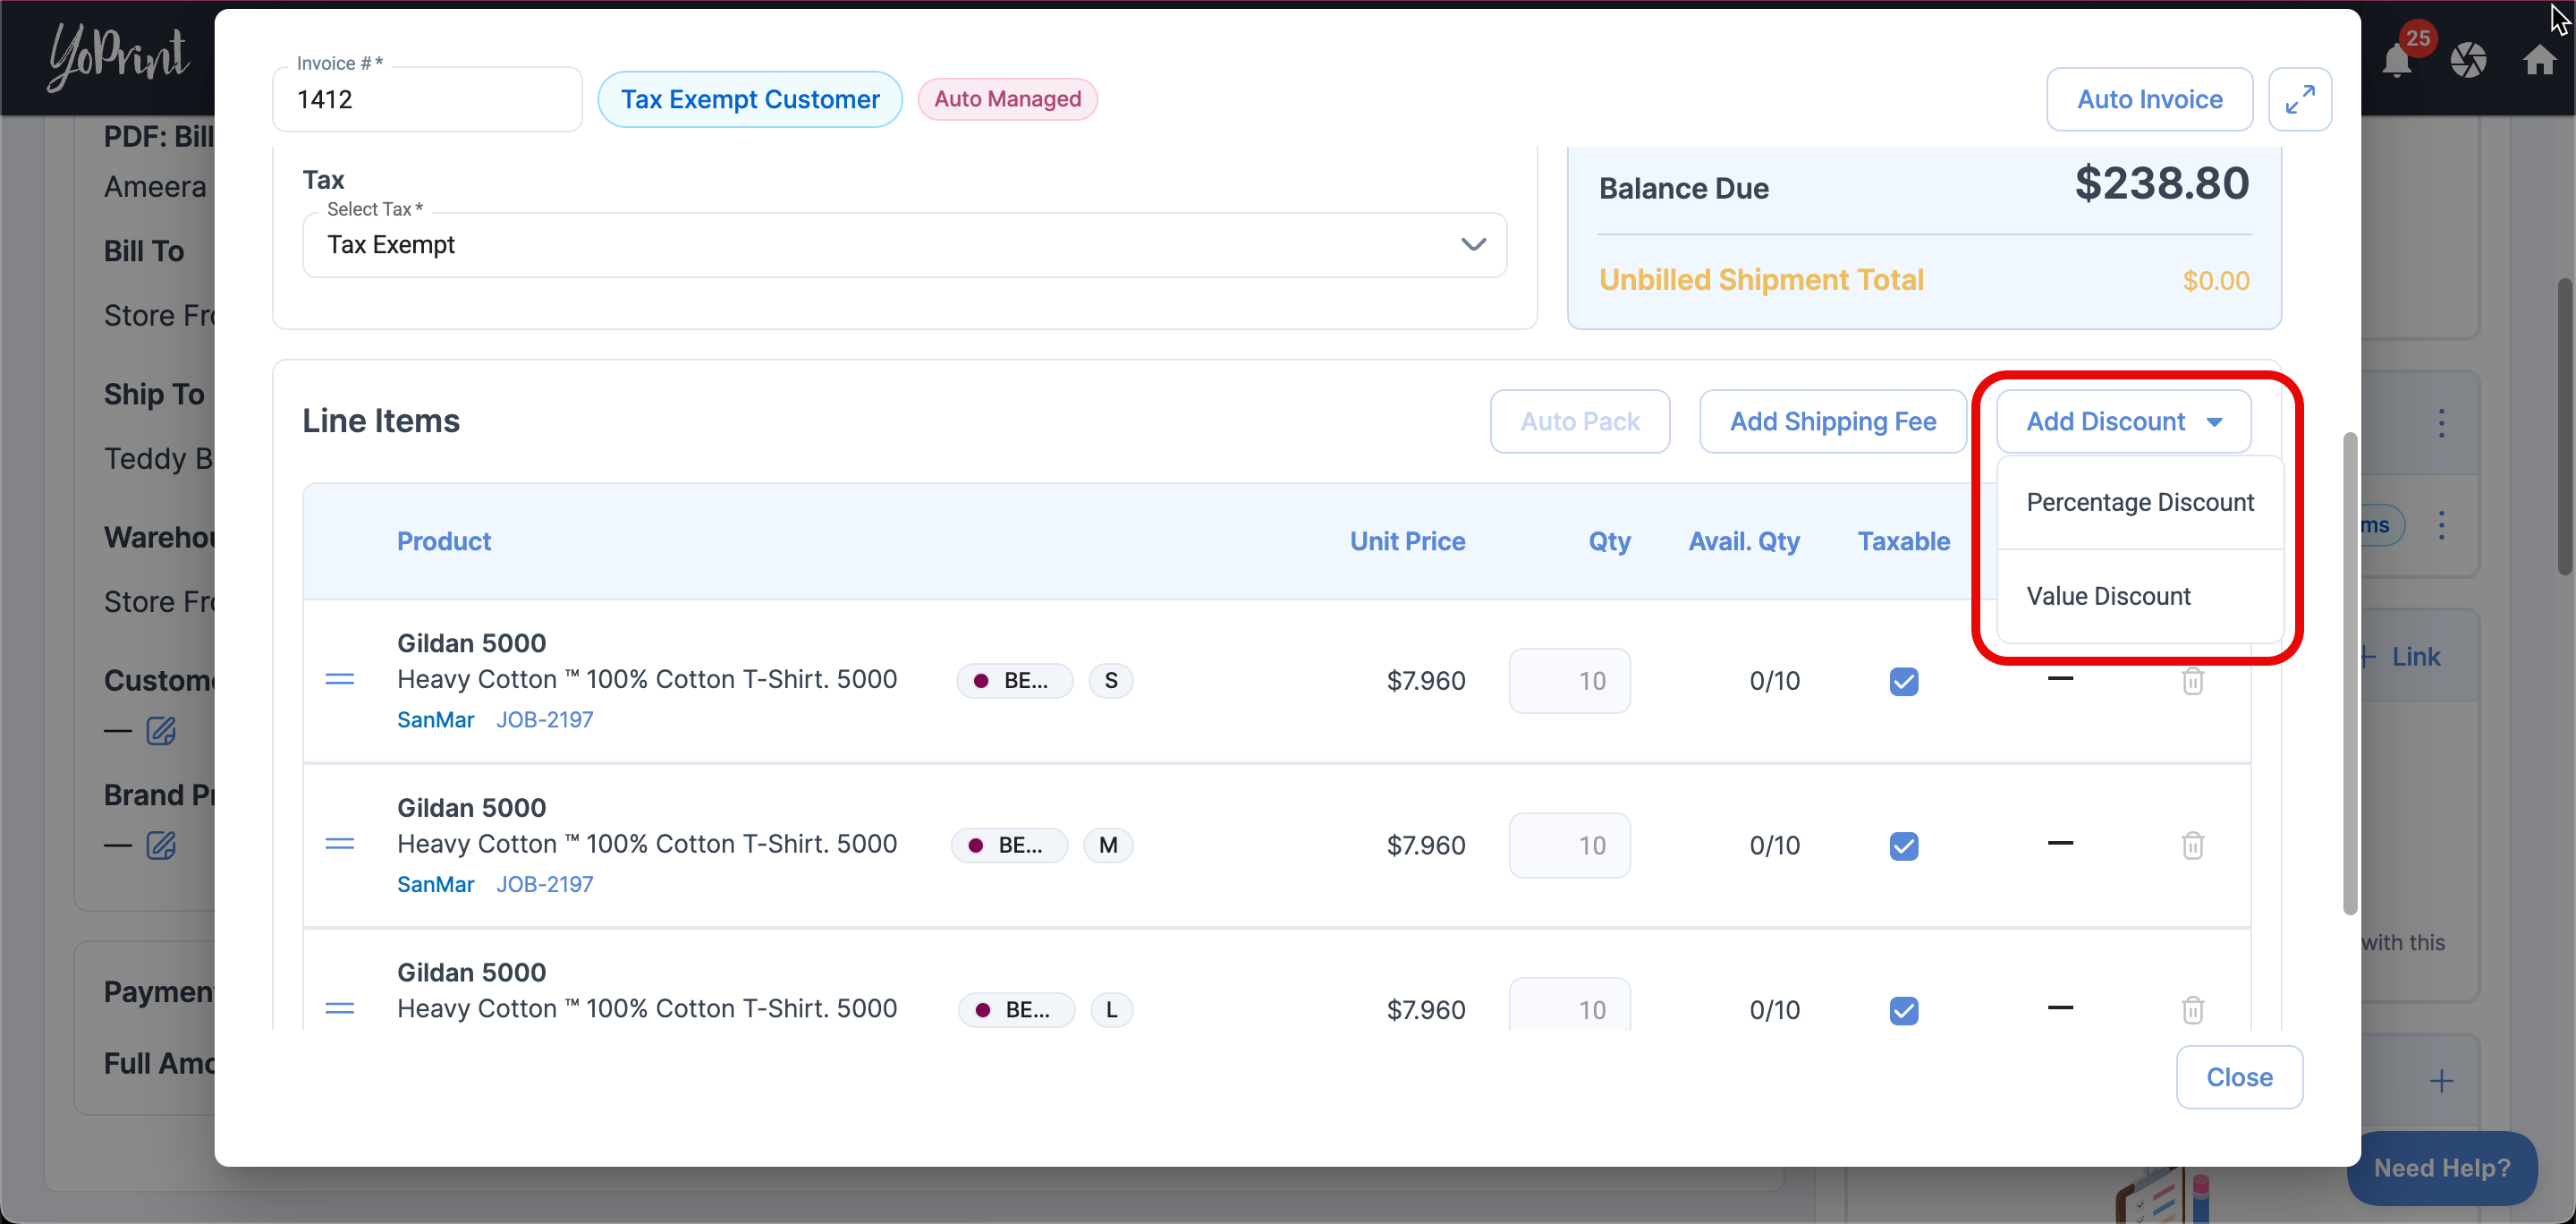
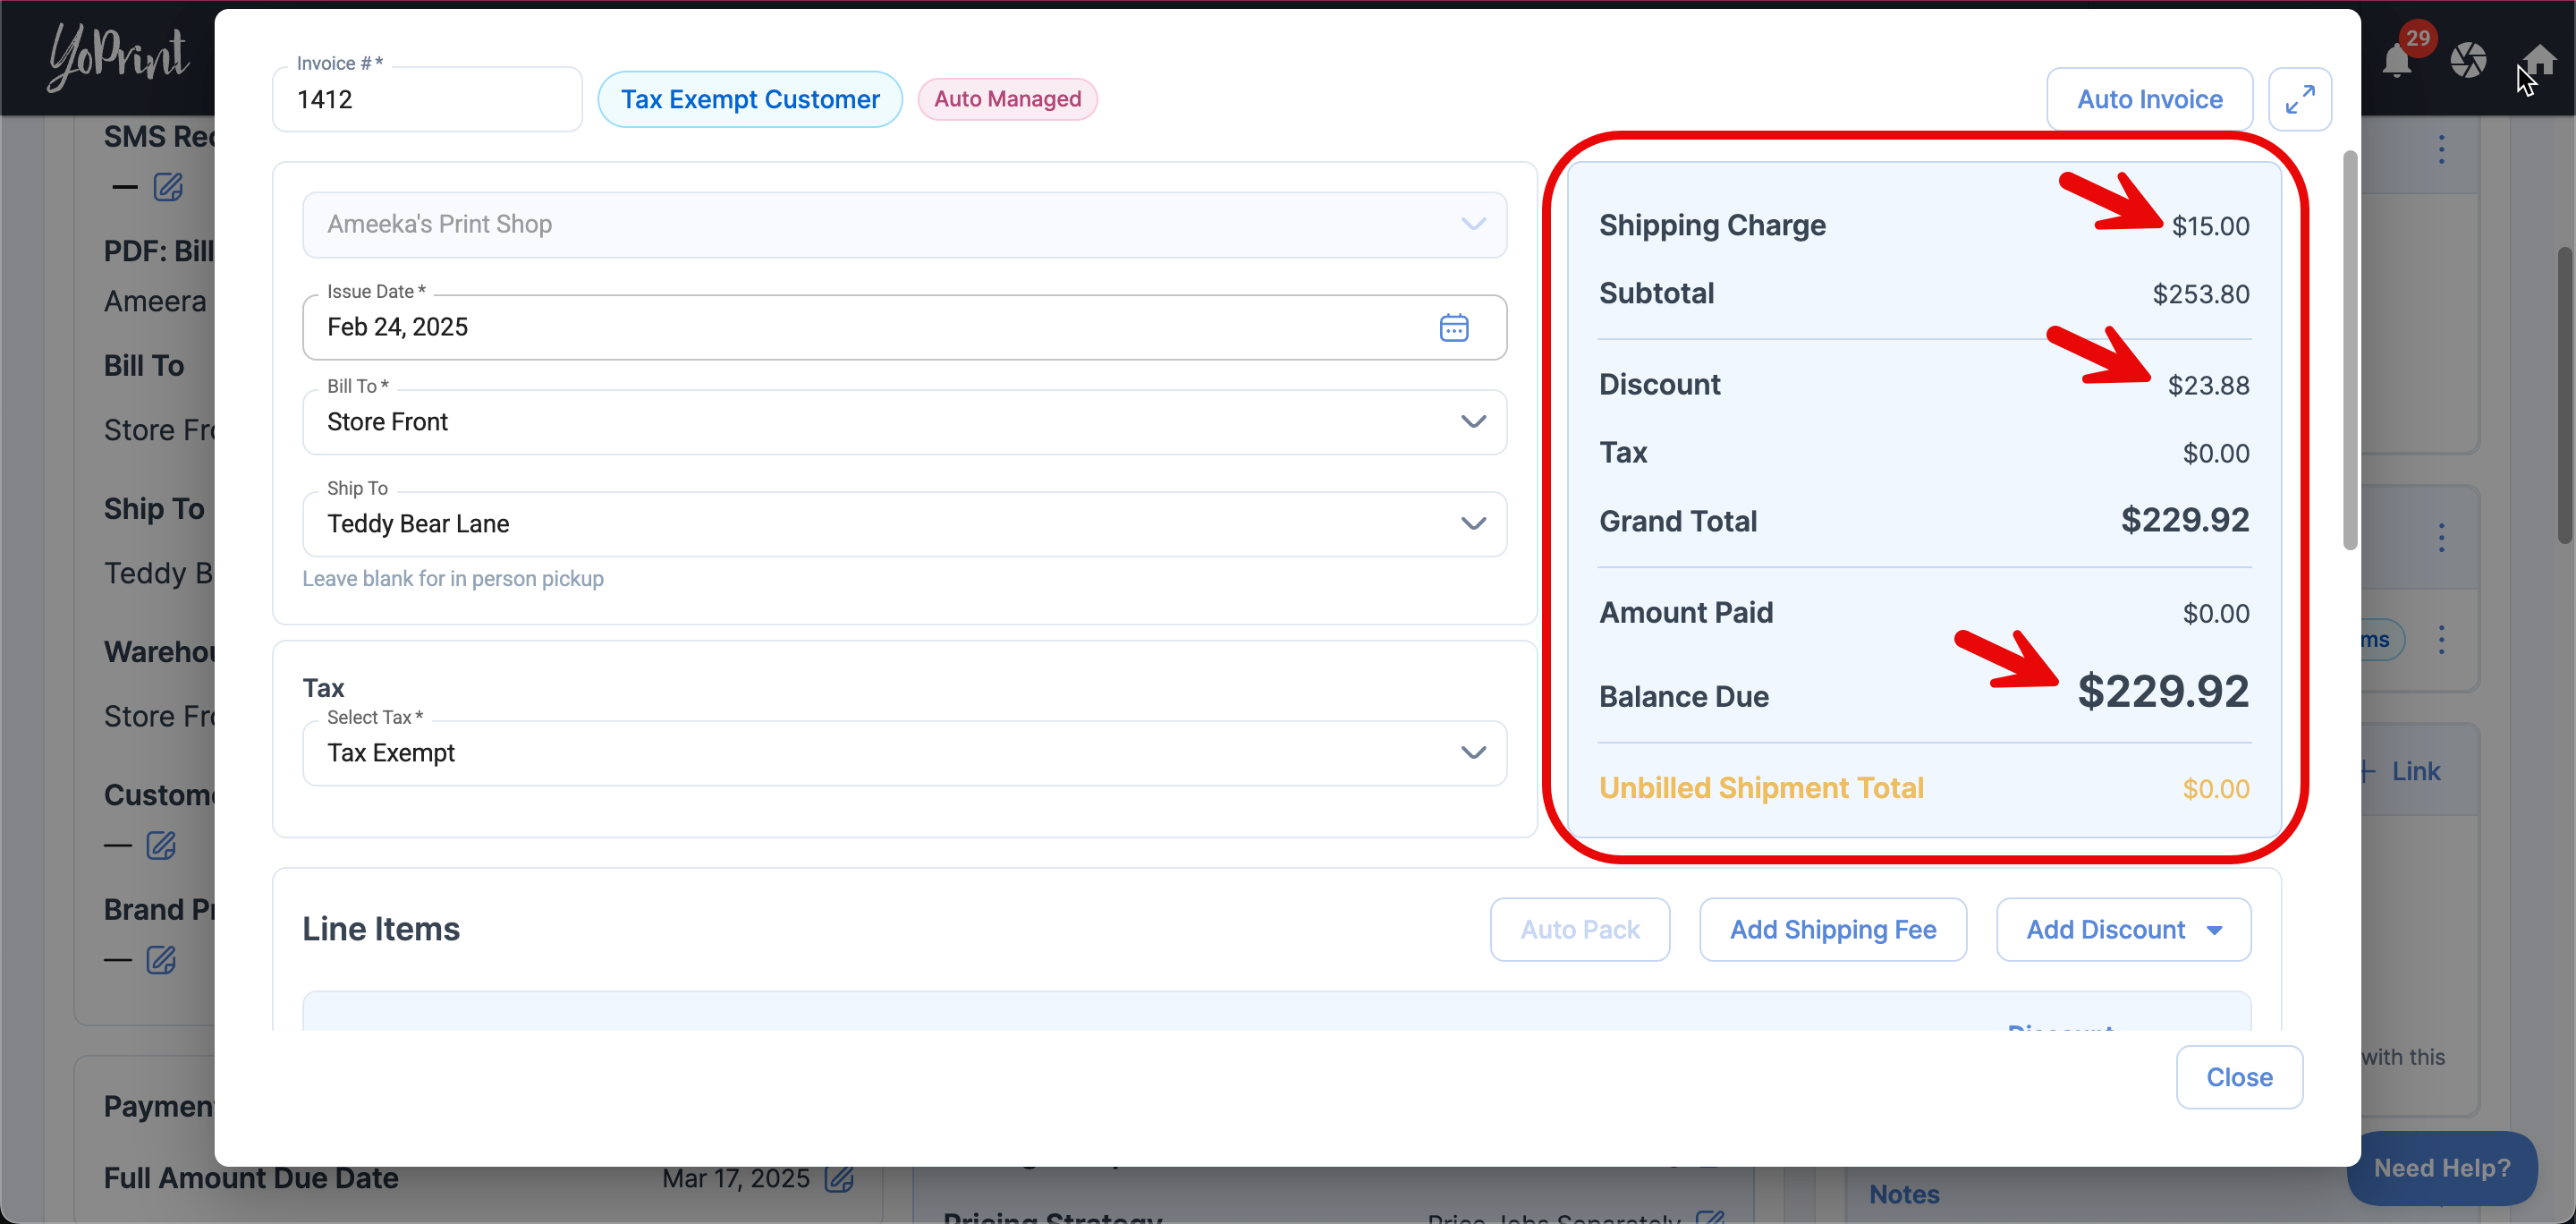
- Let’s add a $15 shipping fee, and a 10% discount for this order as an example.
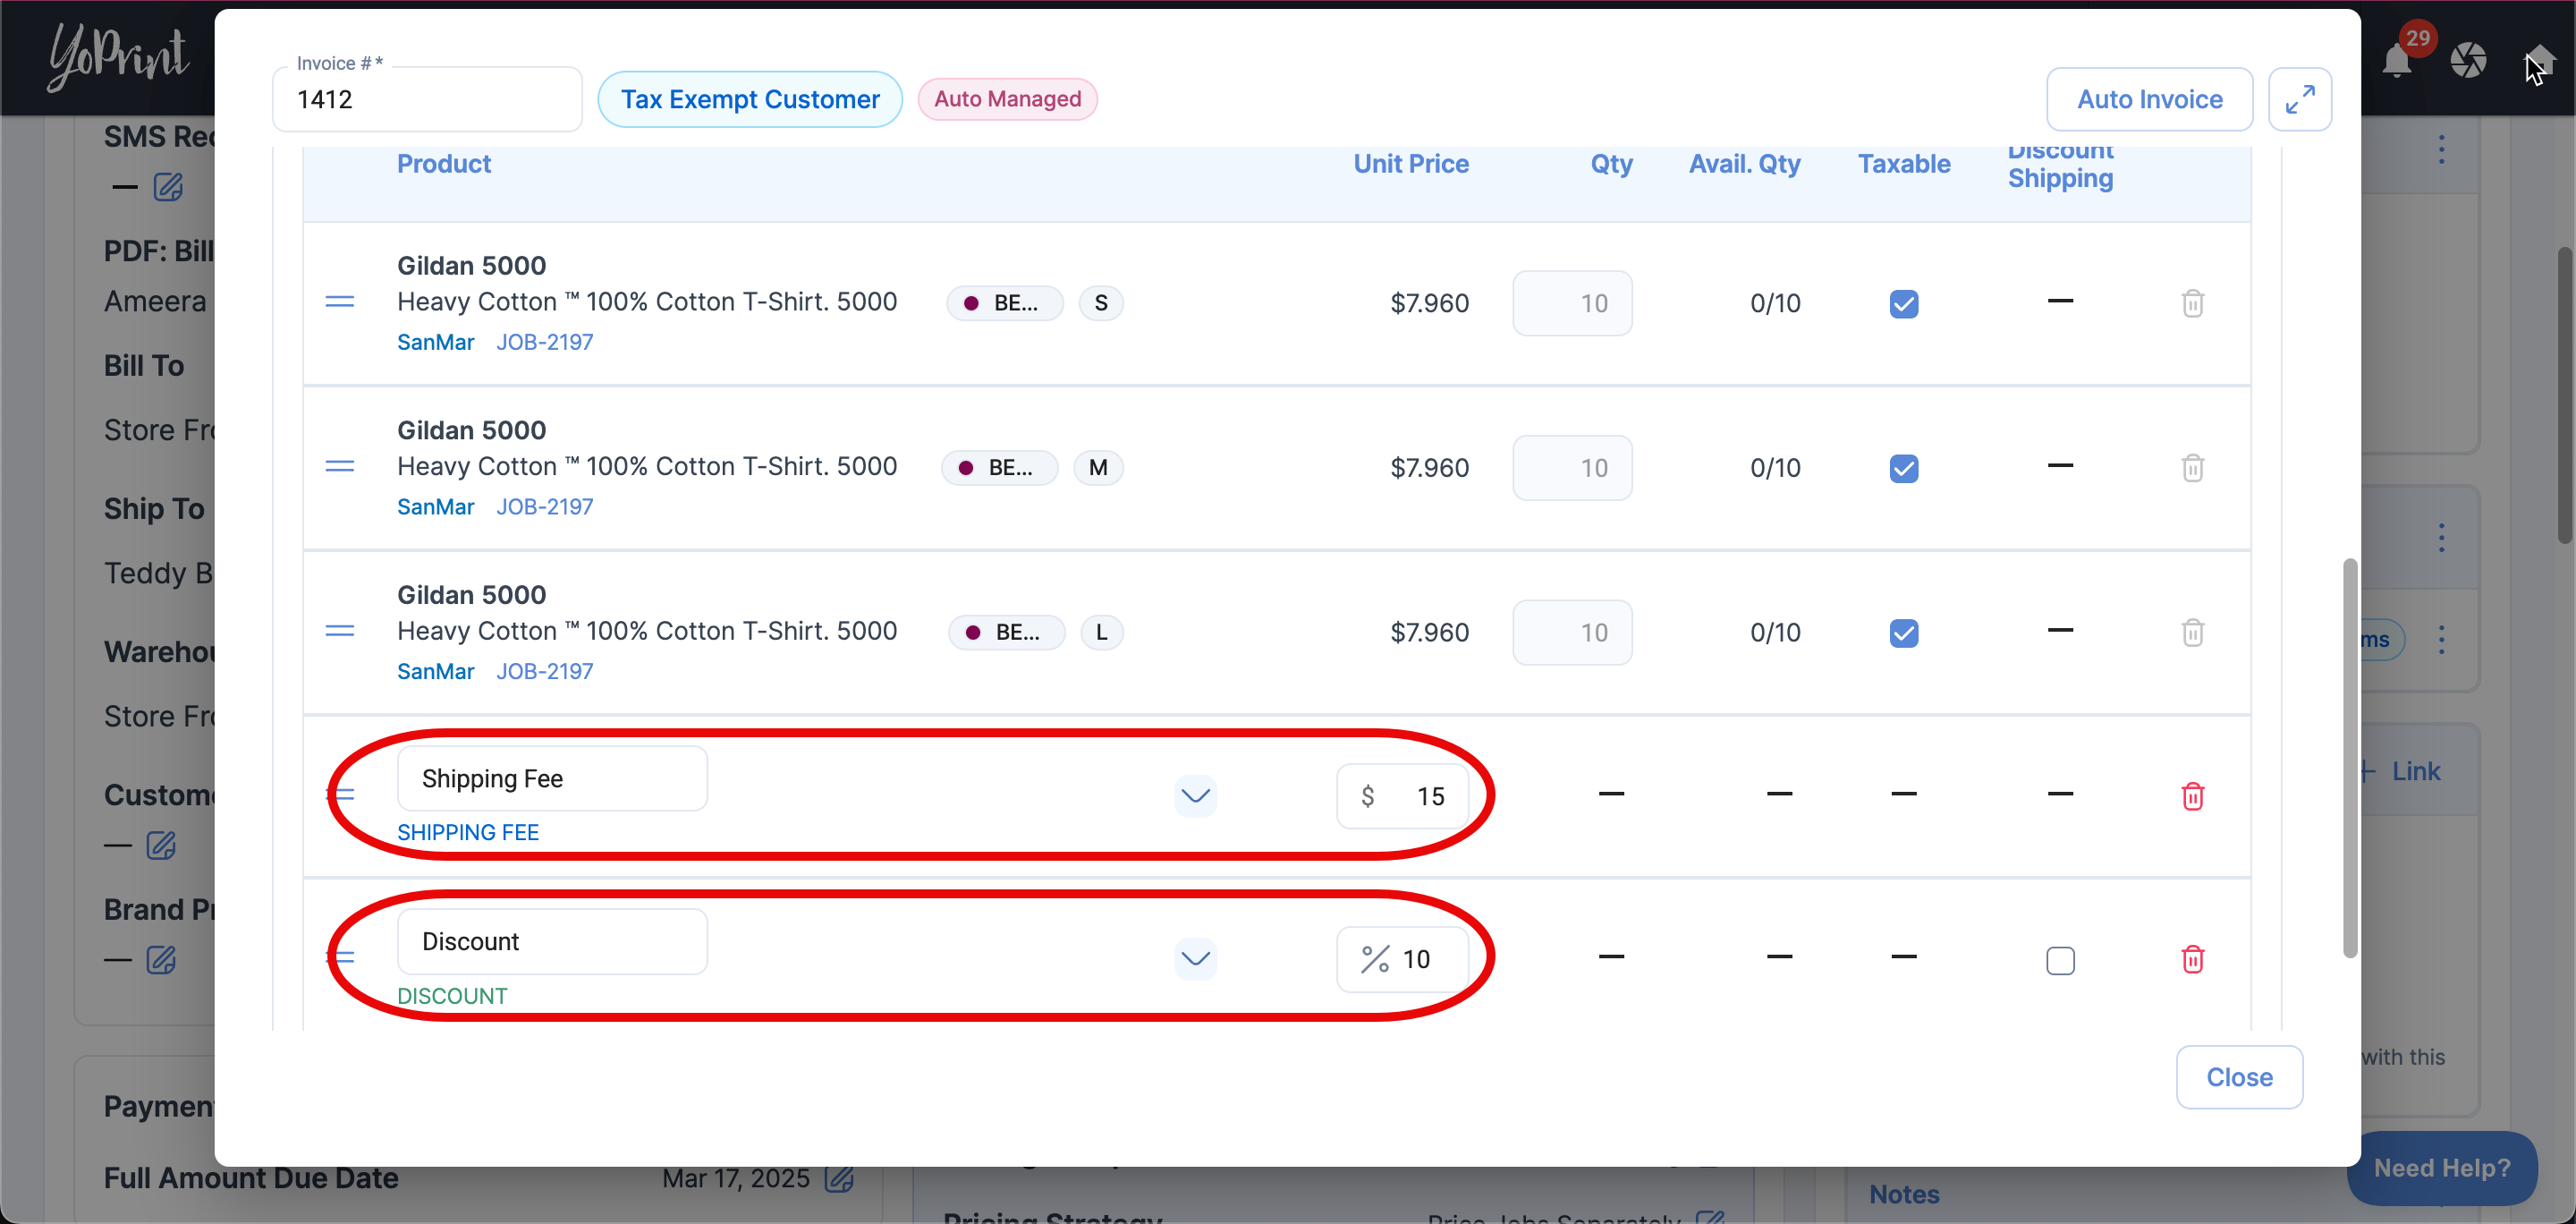
- You will see that the balance due will be updated in real time.
What Changes Can I Make to the Line Items?
In the Auto Invoice edit dialog, you will not be able to update the quantity or remove any line items. However, you will be able to rearrange the line items as needed. You can also choose to make the line items taxable or non-taxable.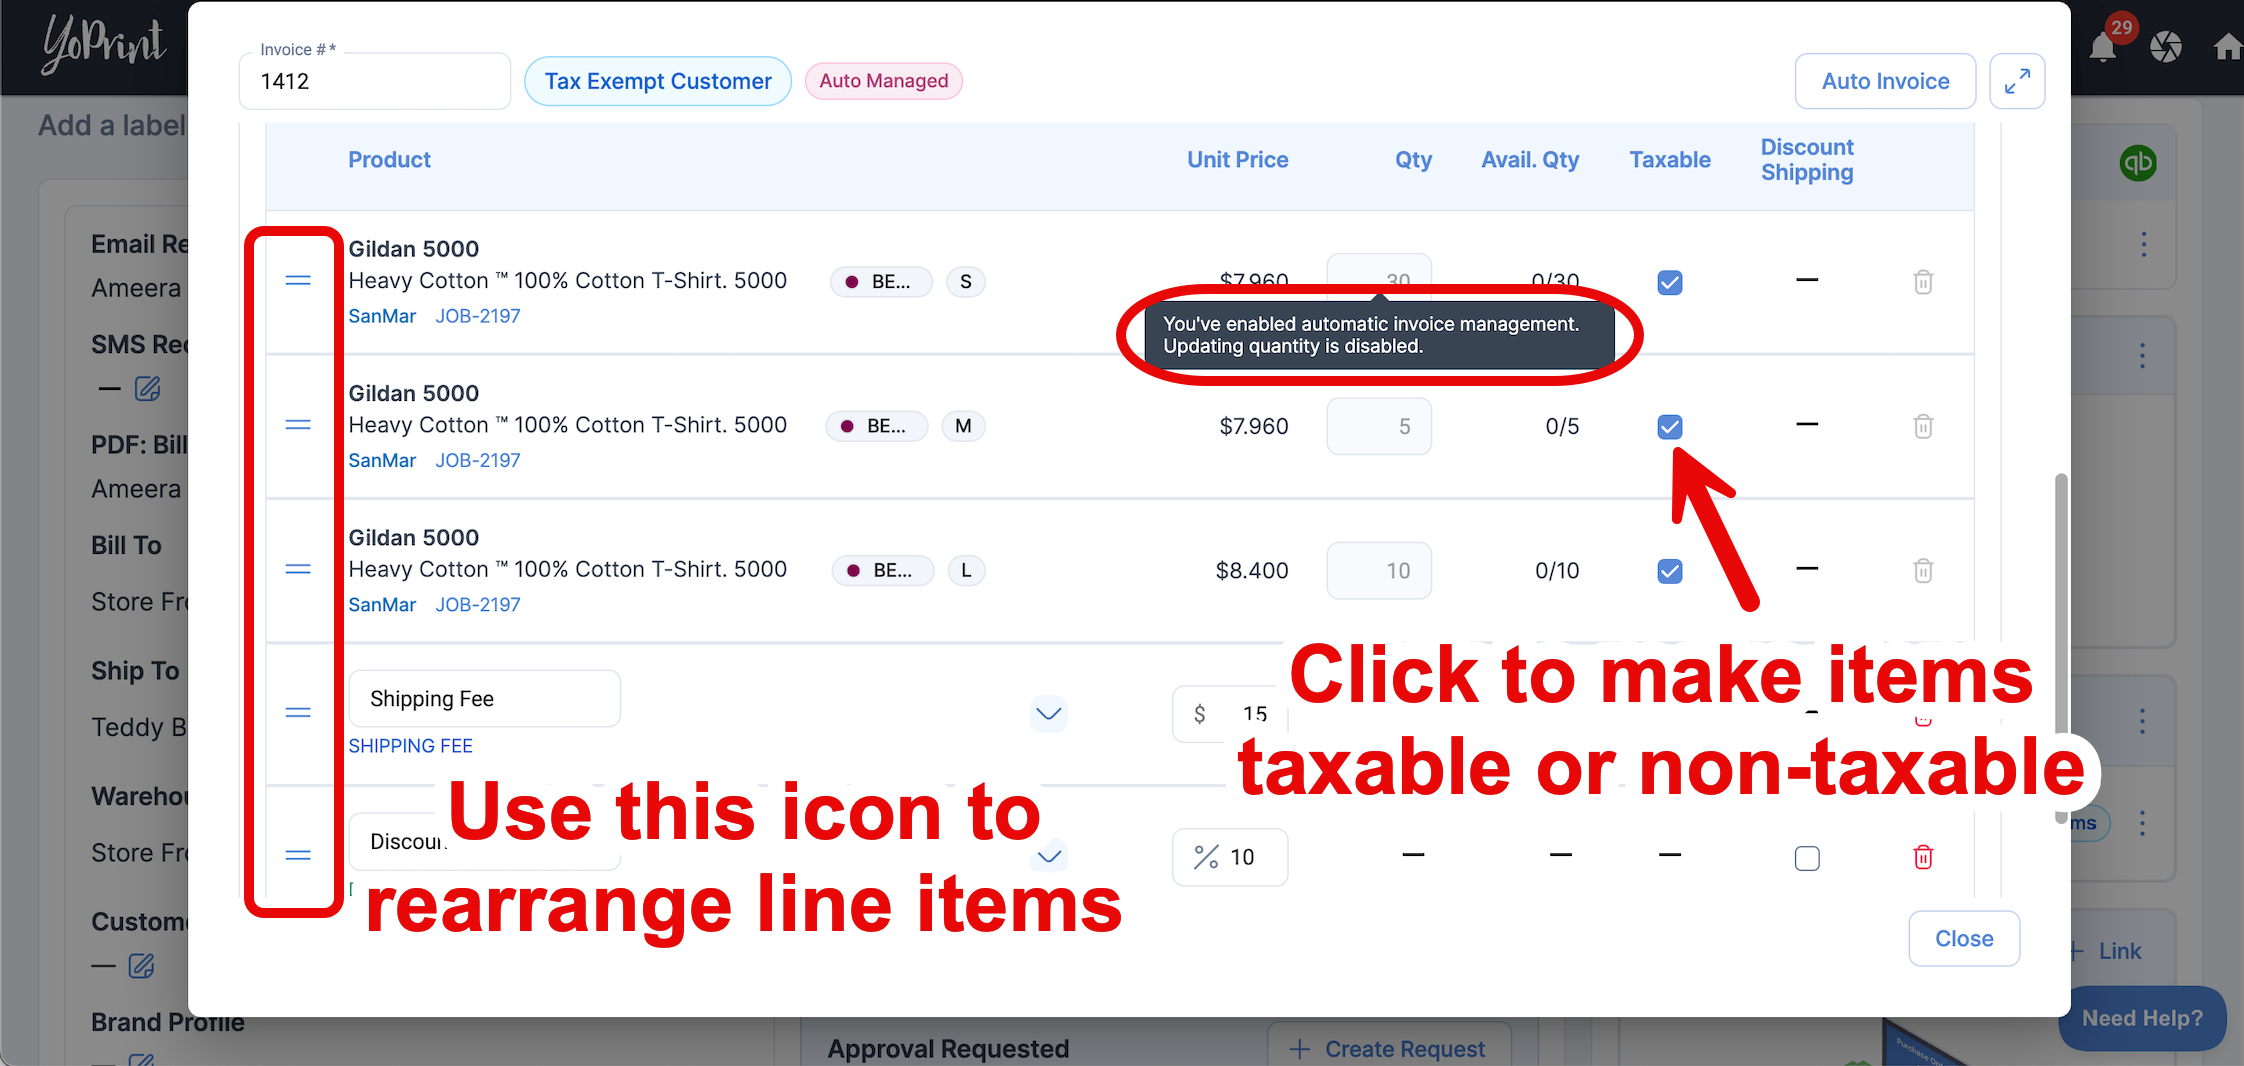
Shipping Fee Vs Shipping Cost
Shipping fees are not shipping costs.
- Shipping Fee – This is the amount charged to your customer for shipping.
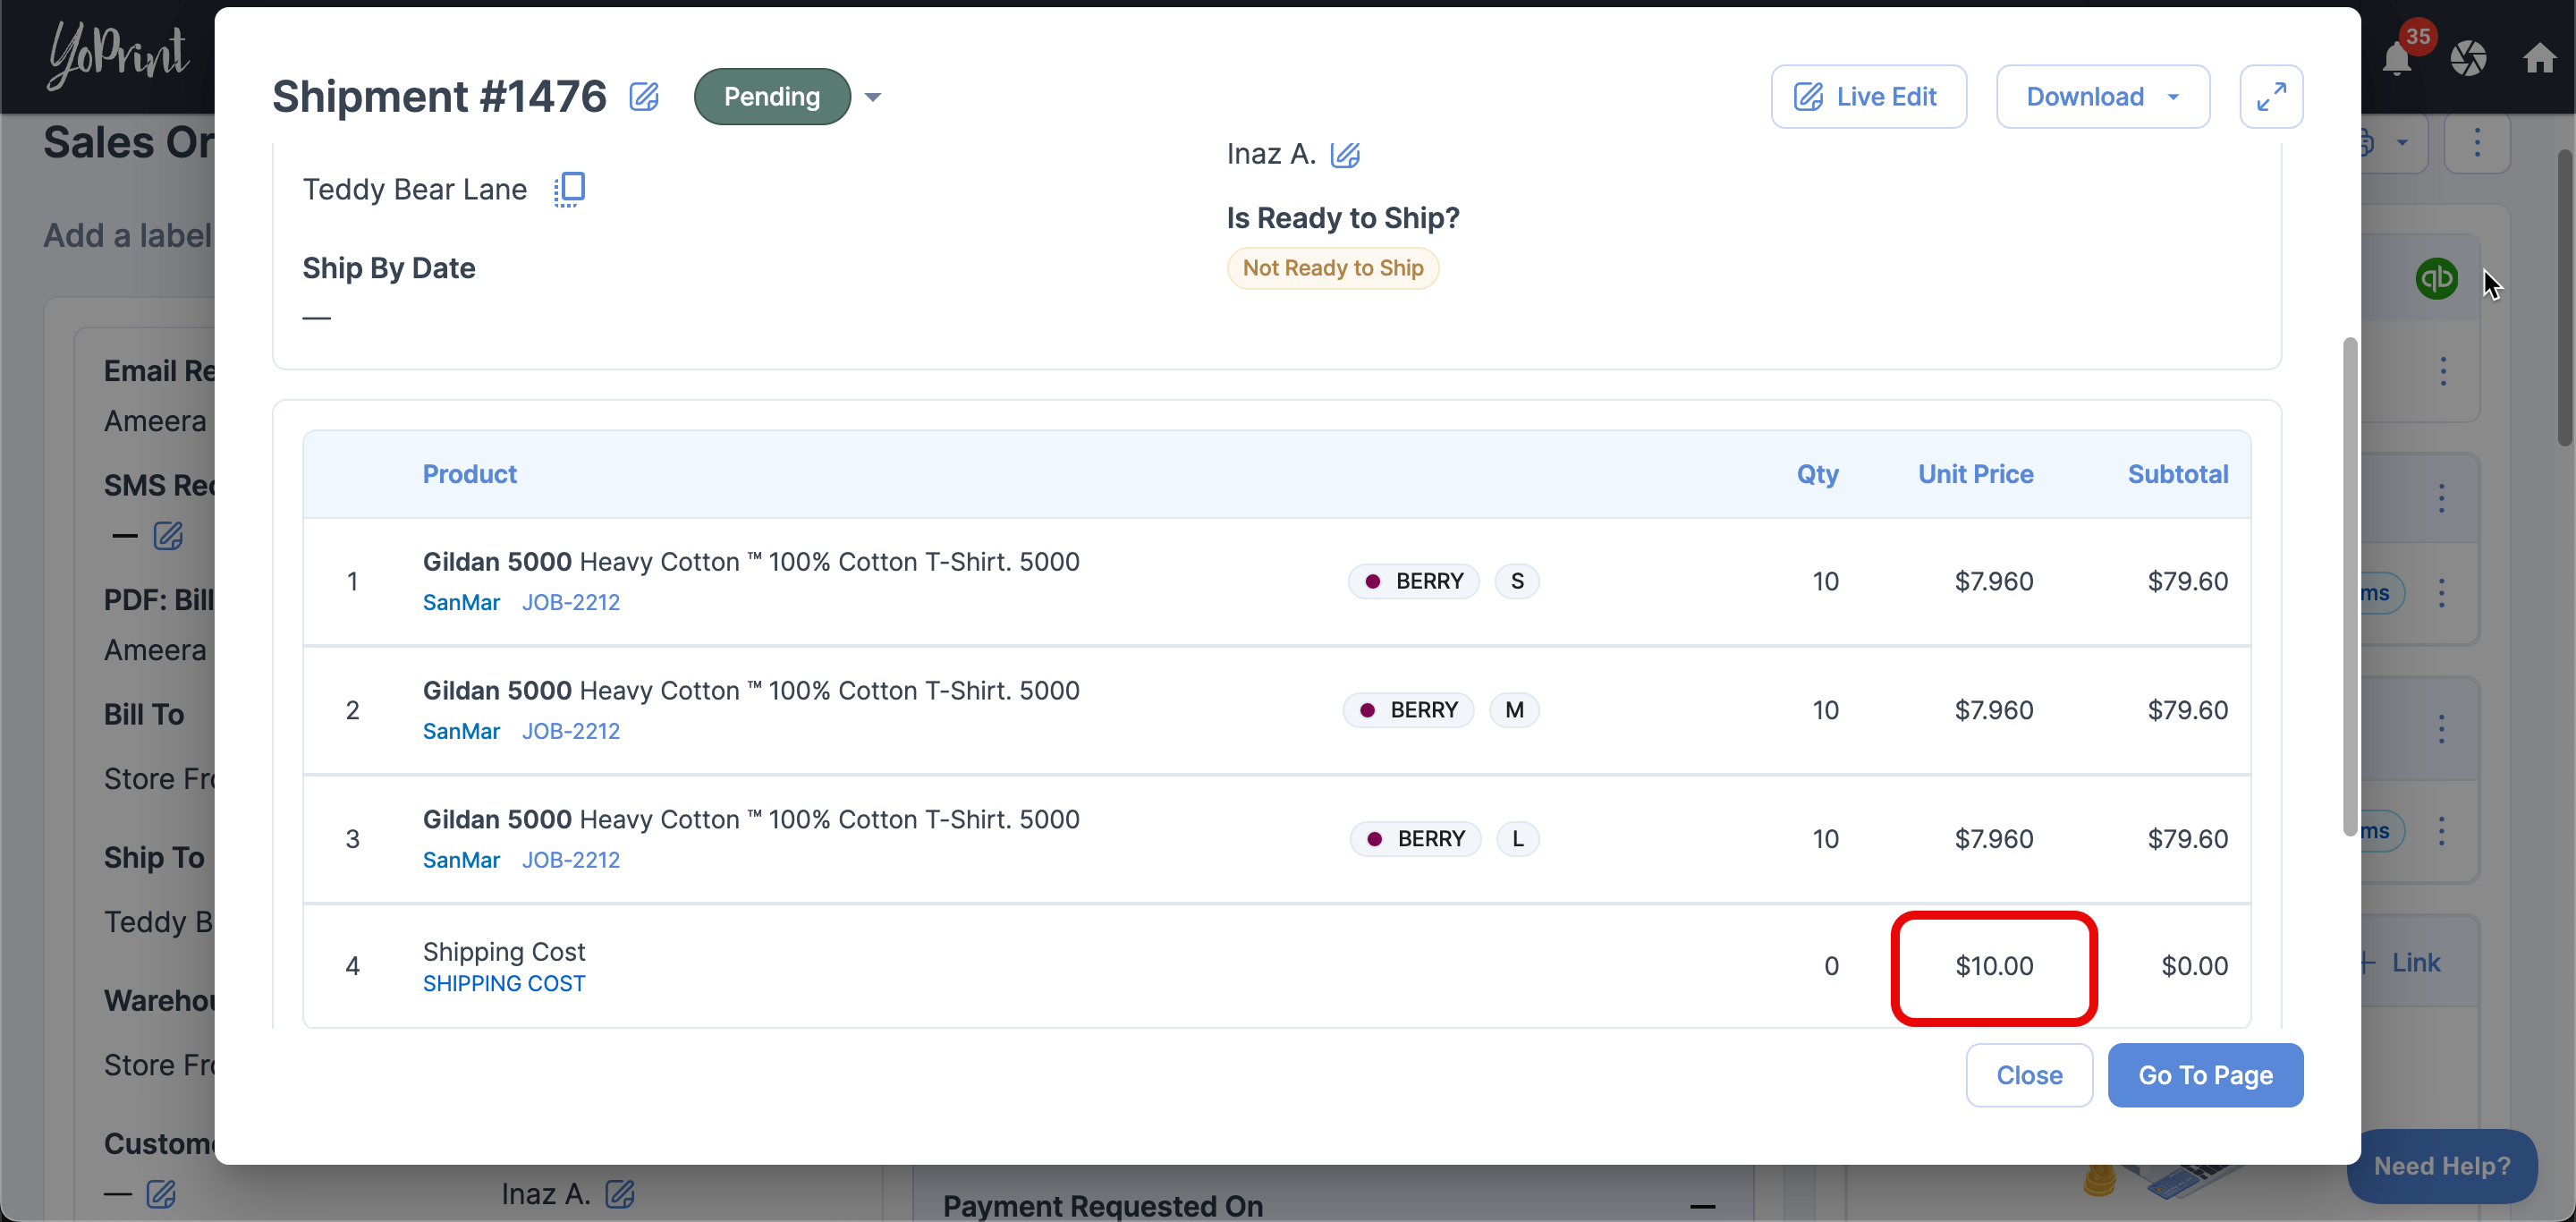
- Shipping Cost – This refers to the actual expense incurred by your business for shipping the order. This is recorded on the shipment level manually or will be added automatically if you use Shippo. You may later invoice this to your customer as "Shipping Fee".
For example:
- Your shop pays $10 to Shippo to ship an order. This is the shipping cost.
- You charge your customer $15 for shipping, this is the shipping fee.
Enabling Auto Invoice will let you choose from the following. Let’s breakdown how they are different.
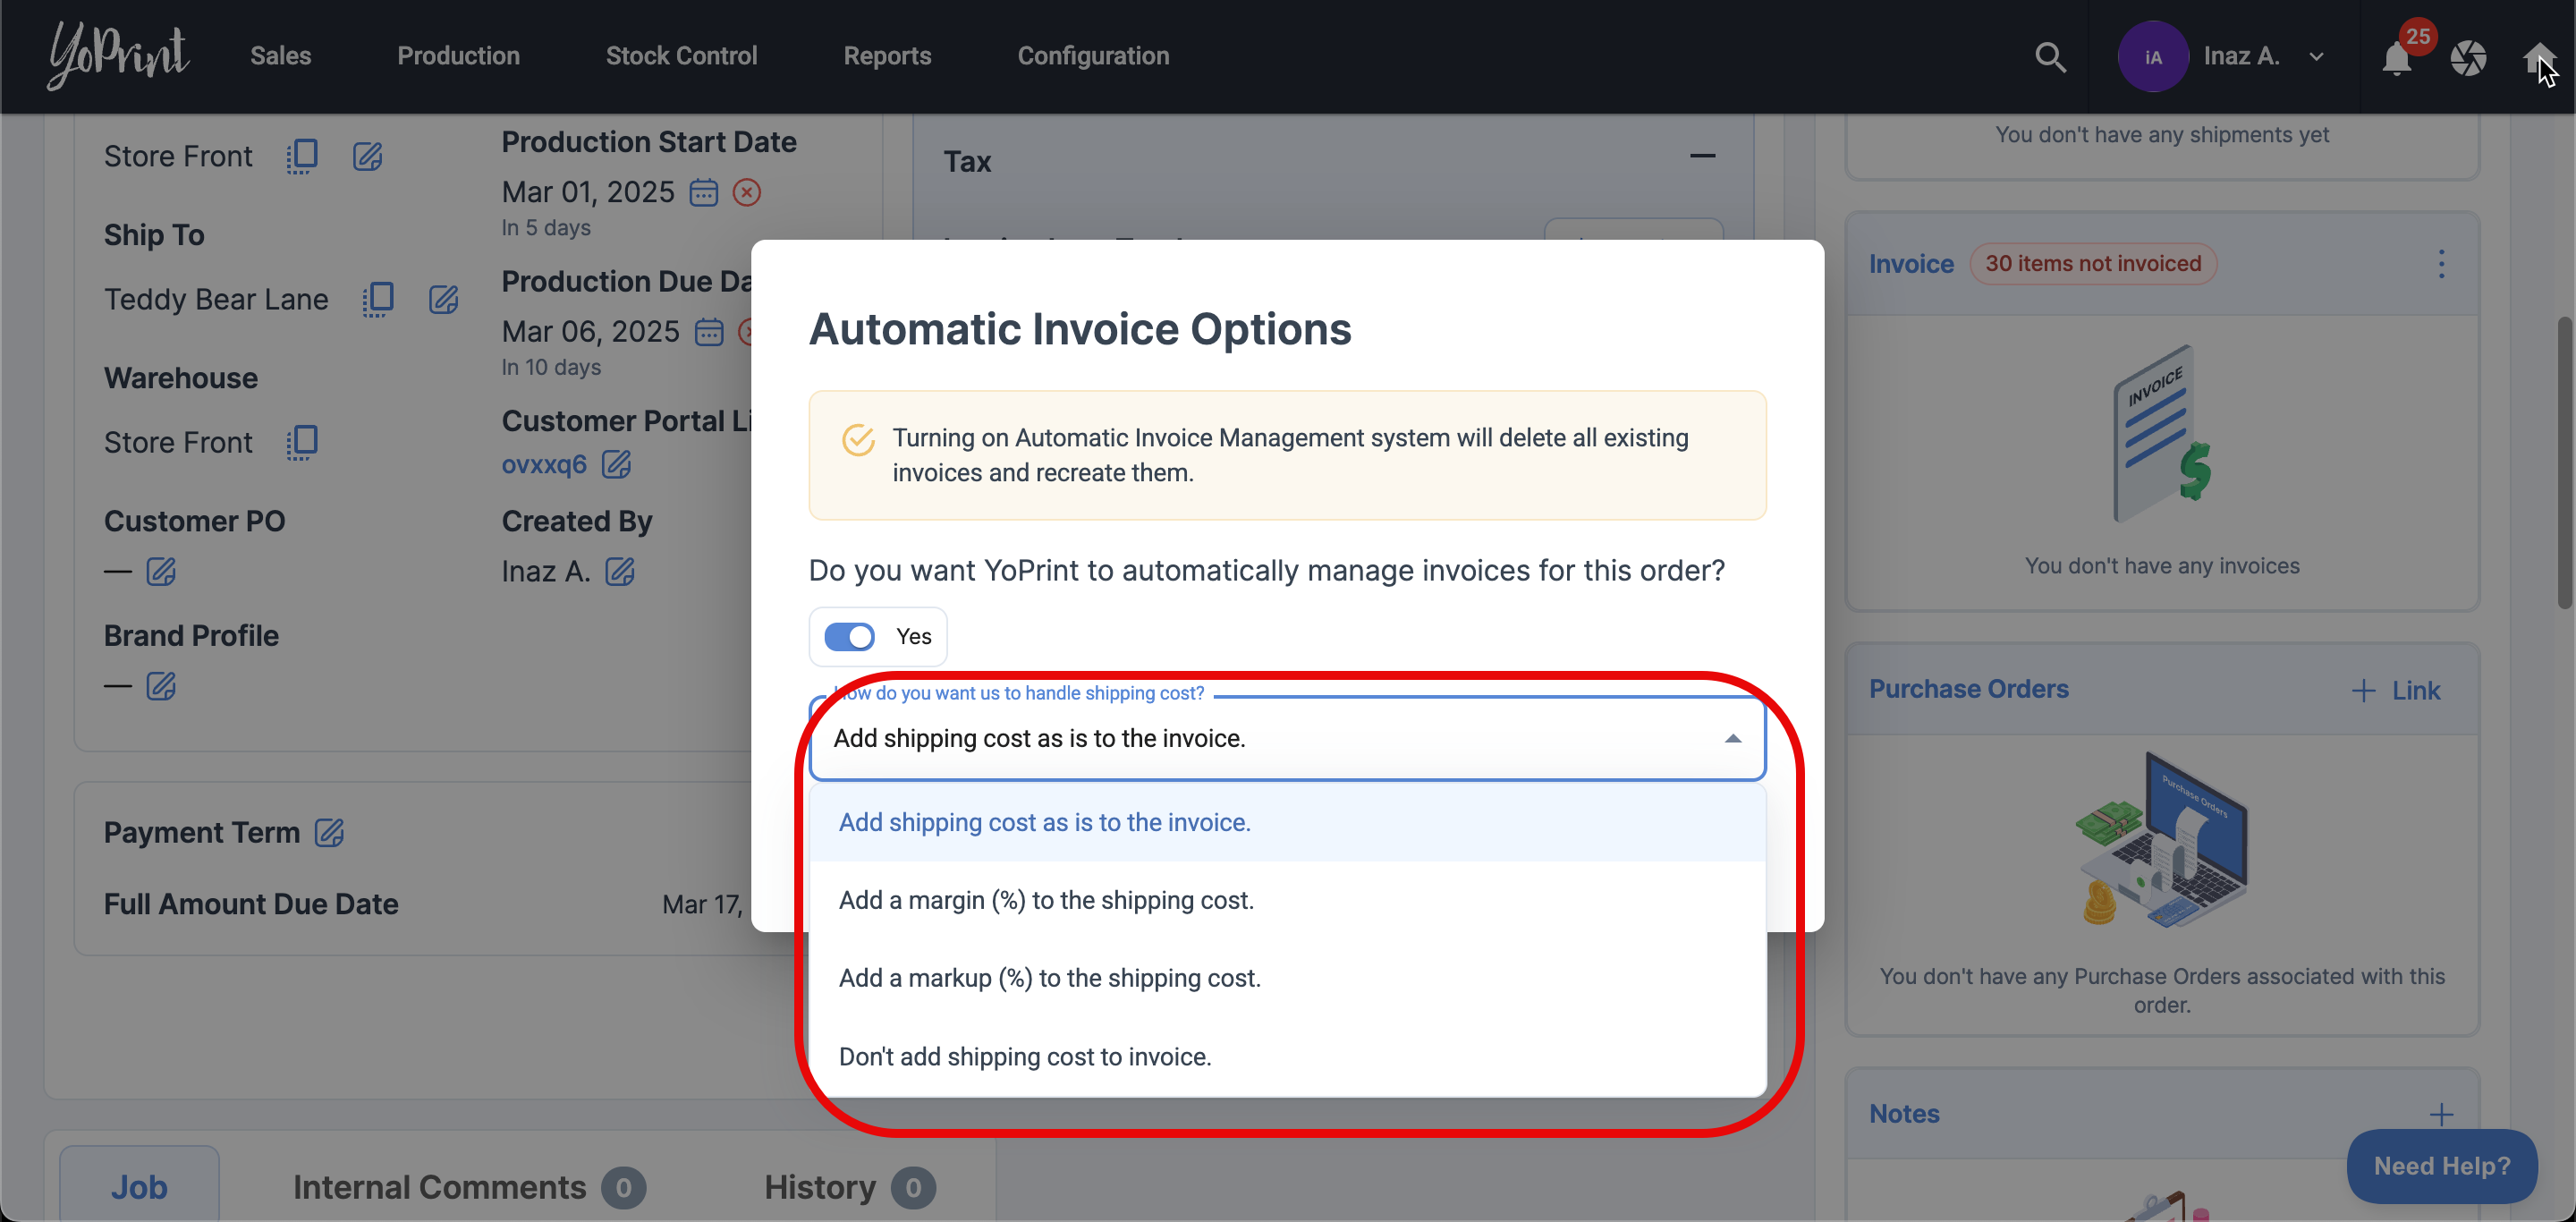
- You can add the shipping cost to the invoice as is. This means that the shipping cost will be added to the invoice without any modifications, such as markups or adjustments.
In other words, whatever amount is set as the shipping cost will appear on the invoice exactly the same, without increasing, decreasing, or applying any margins or fees. - You can apply a margin (%) to the shipping cost, allowing you to adjust the final shipping fee. For example, if you set a 50% margin, the shipping fee will be $20 if the original shipping cost was $10.
- You can add a markup (%) to the shipping cost. This means that you can increase the shipping cost by a certain percentage before adding it to the invoice. For example, if you apply a 100% markup to a $10 shipping cost, the final shipping fee charged to the customer will be $20.
- You can also choose to not add any shipping cost to the invoice. This means that you have the option to exclude shipping costs from the invoice entirely.
This could be useful if you're offering free shipping, covering the shipping cost yourself, or including it in the product price instead.
PRO TIP
Applying a margin or a markup will allow your business to cover additional expenses like handling fees, packaging, or administrative costs while ensuring they don’t lose money on shipping.
How Auto Invoice Updates When Line Items Change
Now, to see how the Auto Invoice works with line items, let’s play around with some of the numbers.
For example, let’s add and reduce the quantity of the line items. We will also change the product cost to see how it will immediately update the invoice.
- To edit anything from your order, you will need to go to the Jobs list, and Live Edit the line items from there.
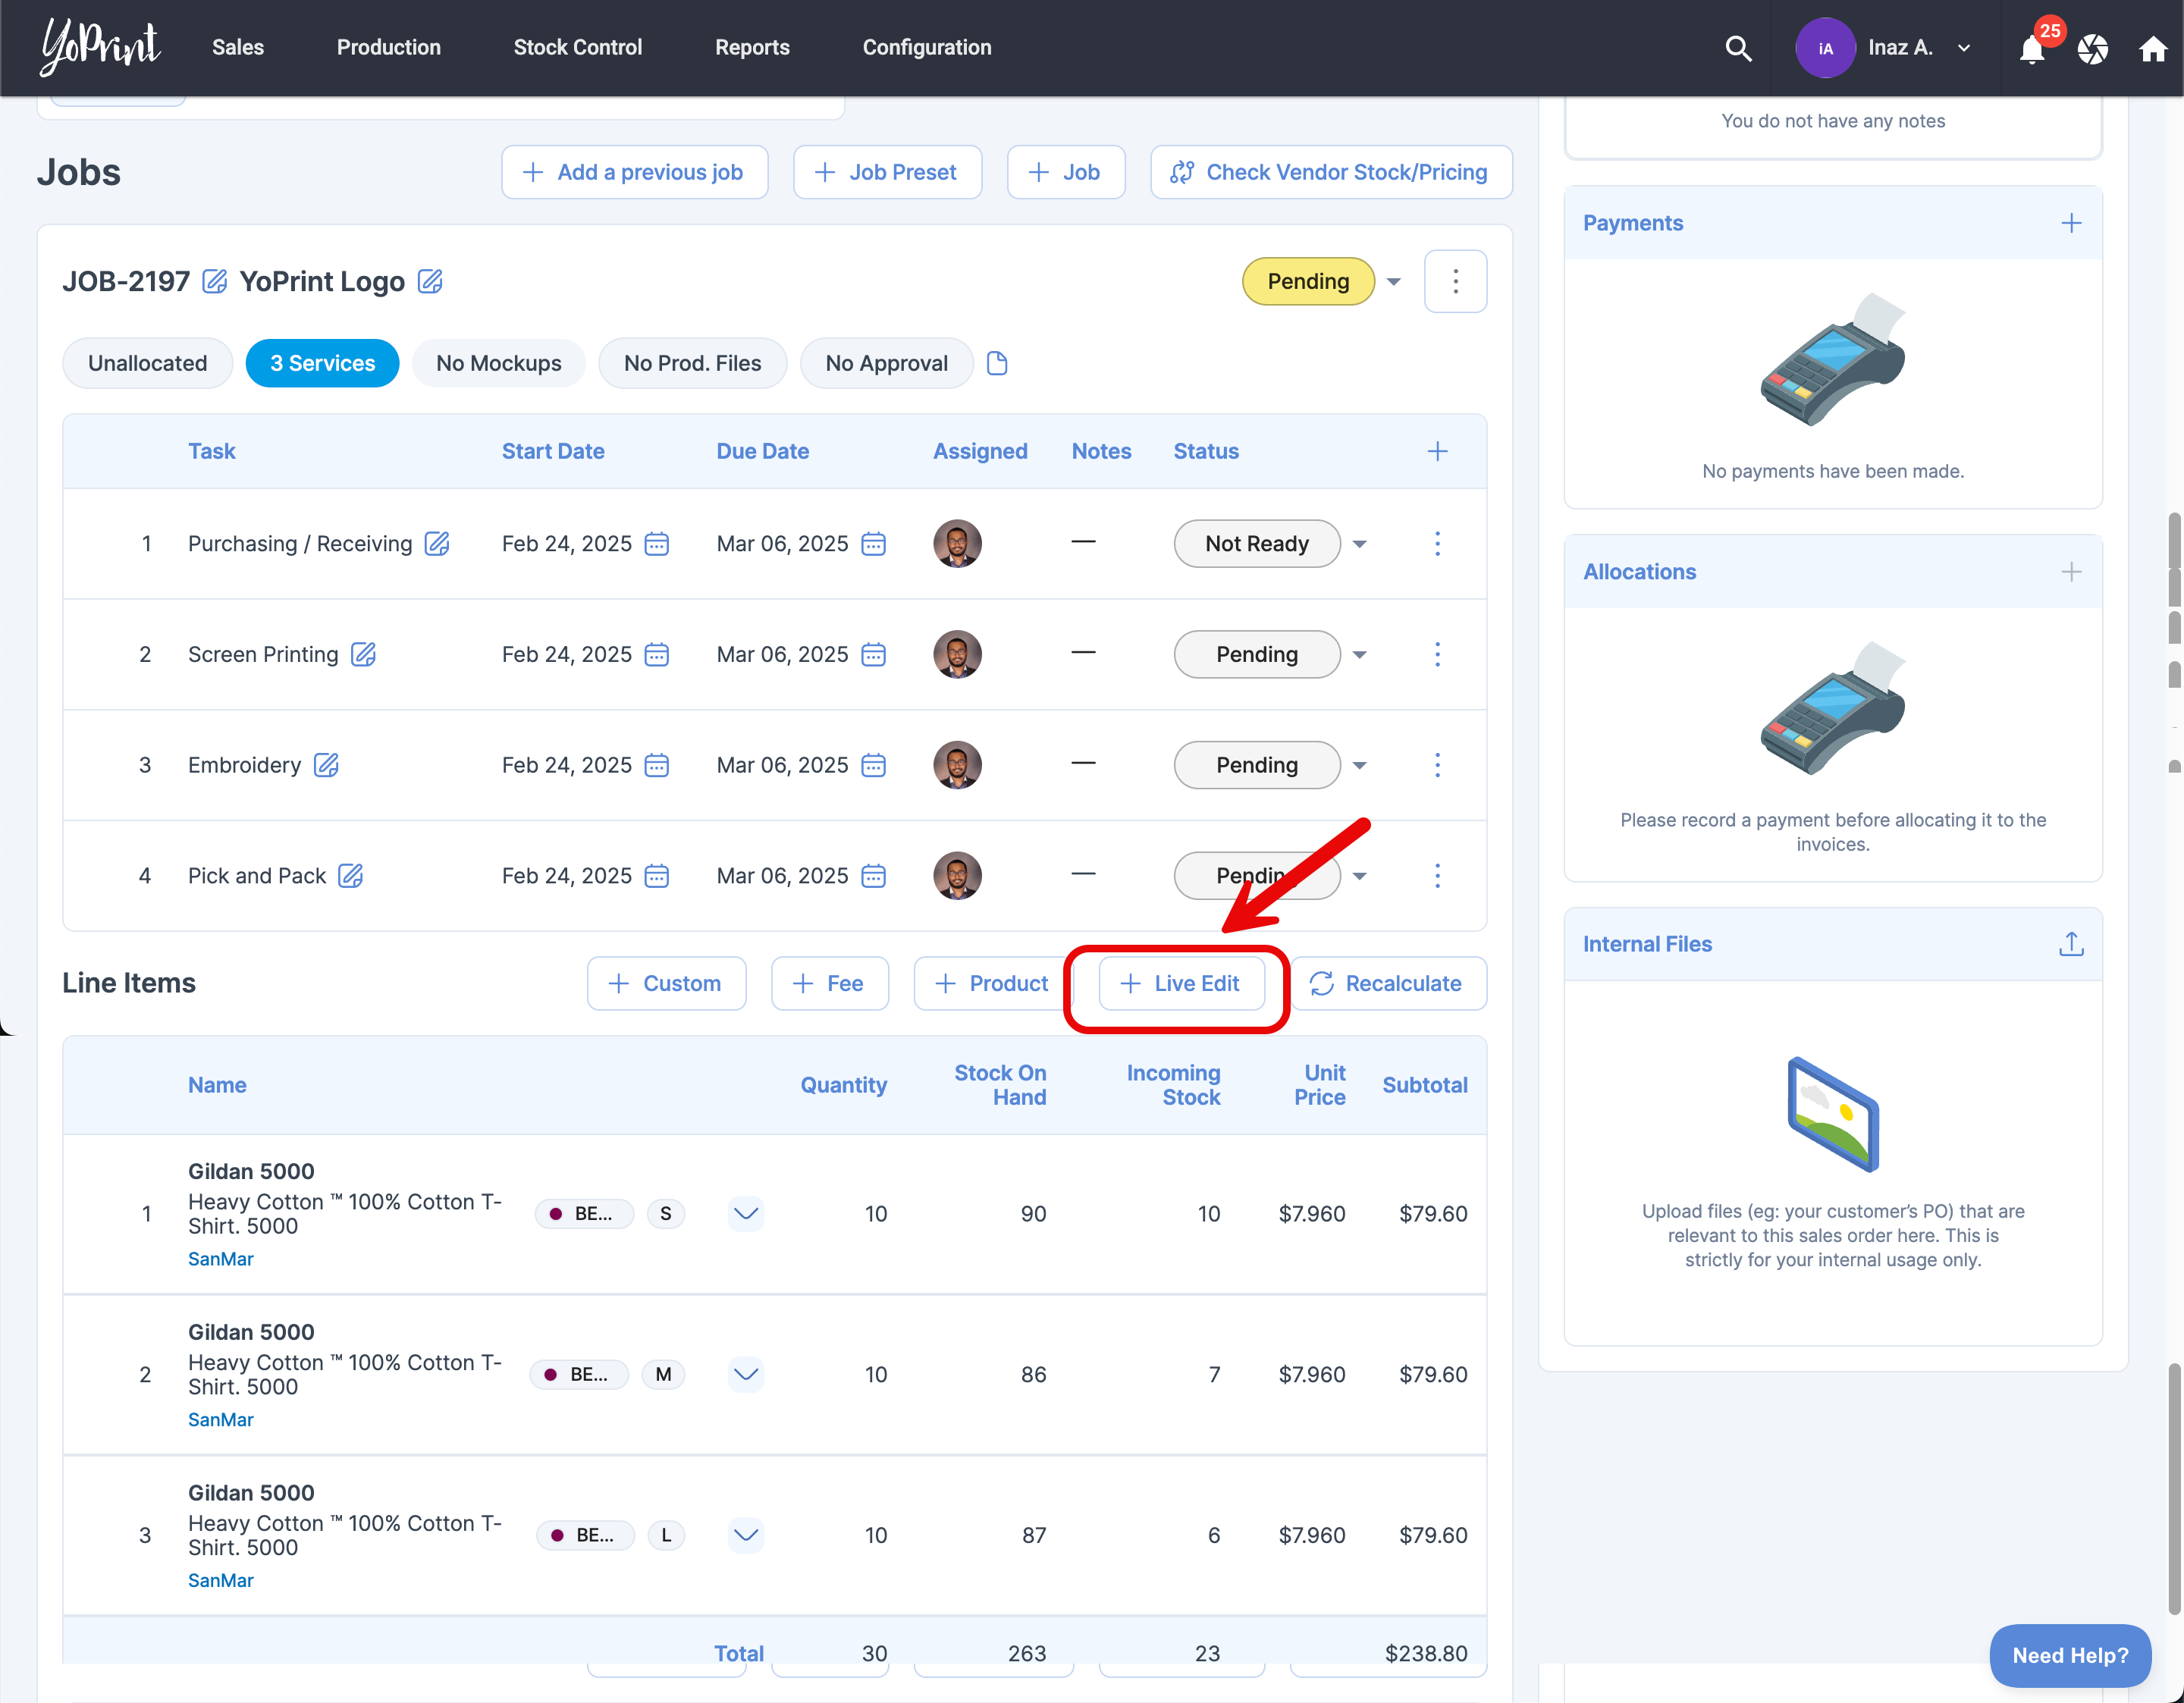
- Now, let's update the quantity for some items and adjust the Product Total for one of them. This is just a hypothetical example for demonstration purposes.
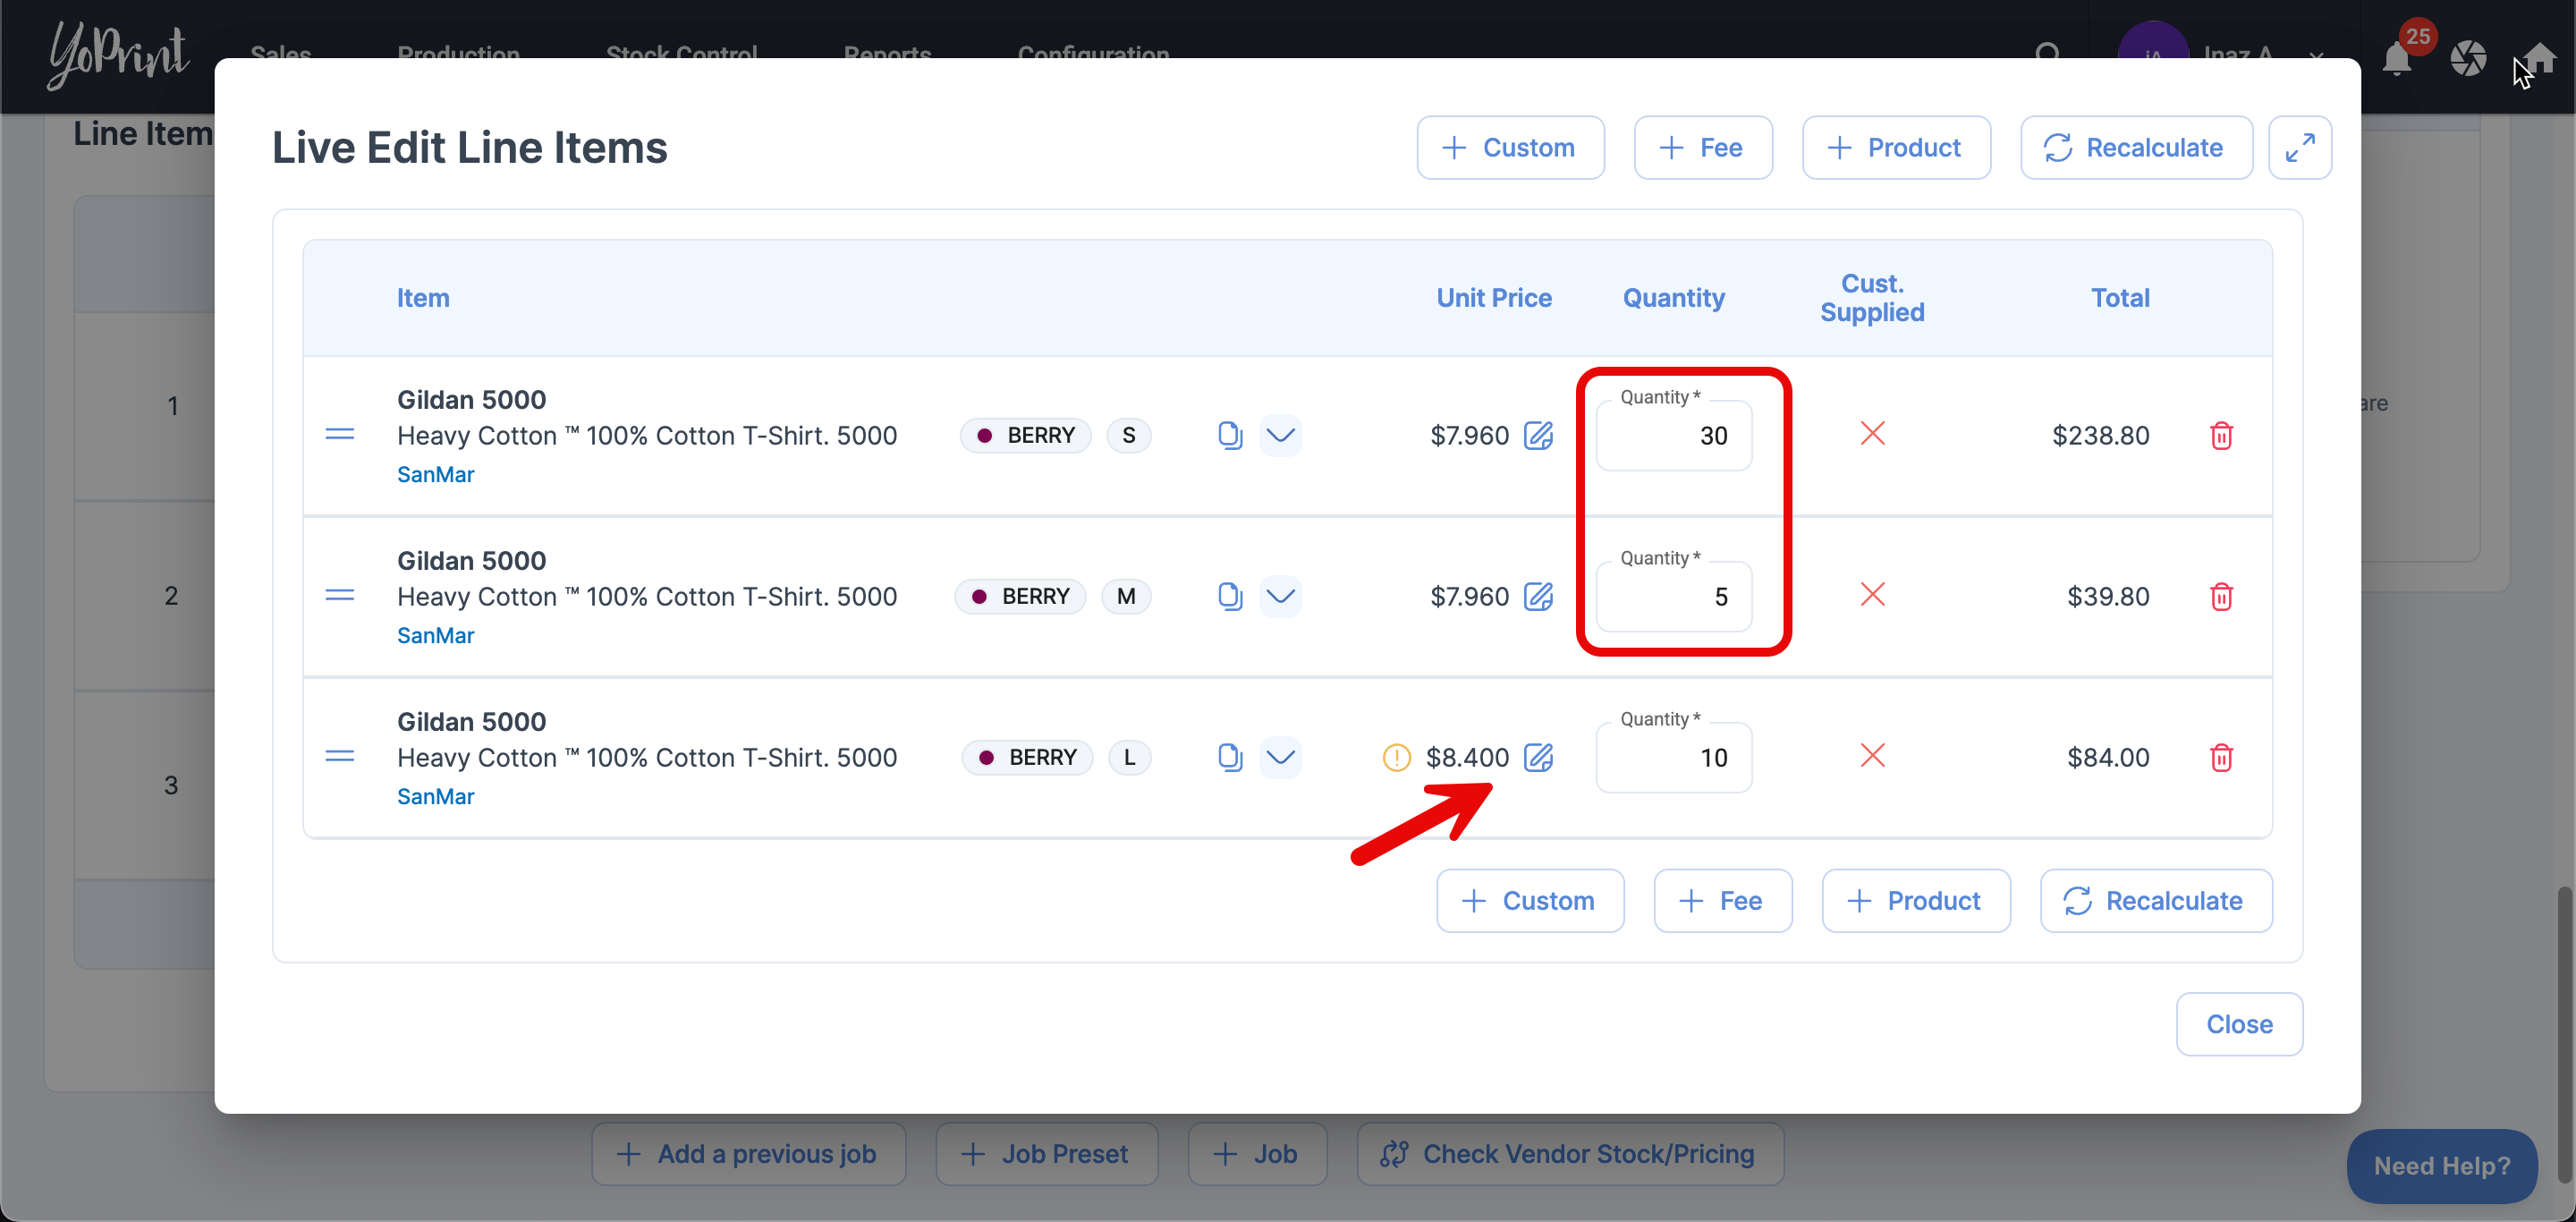
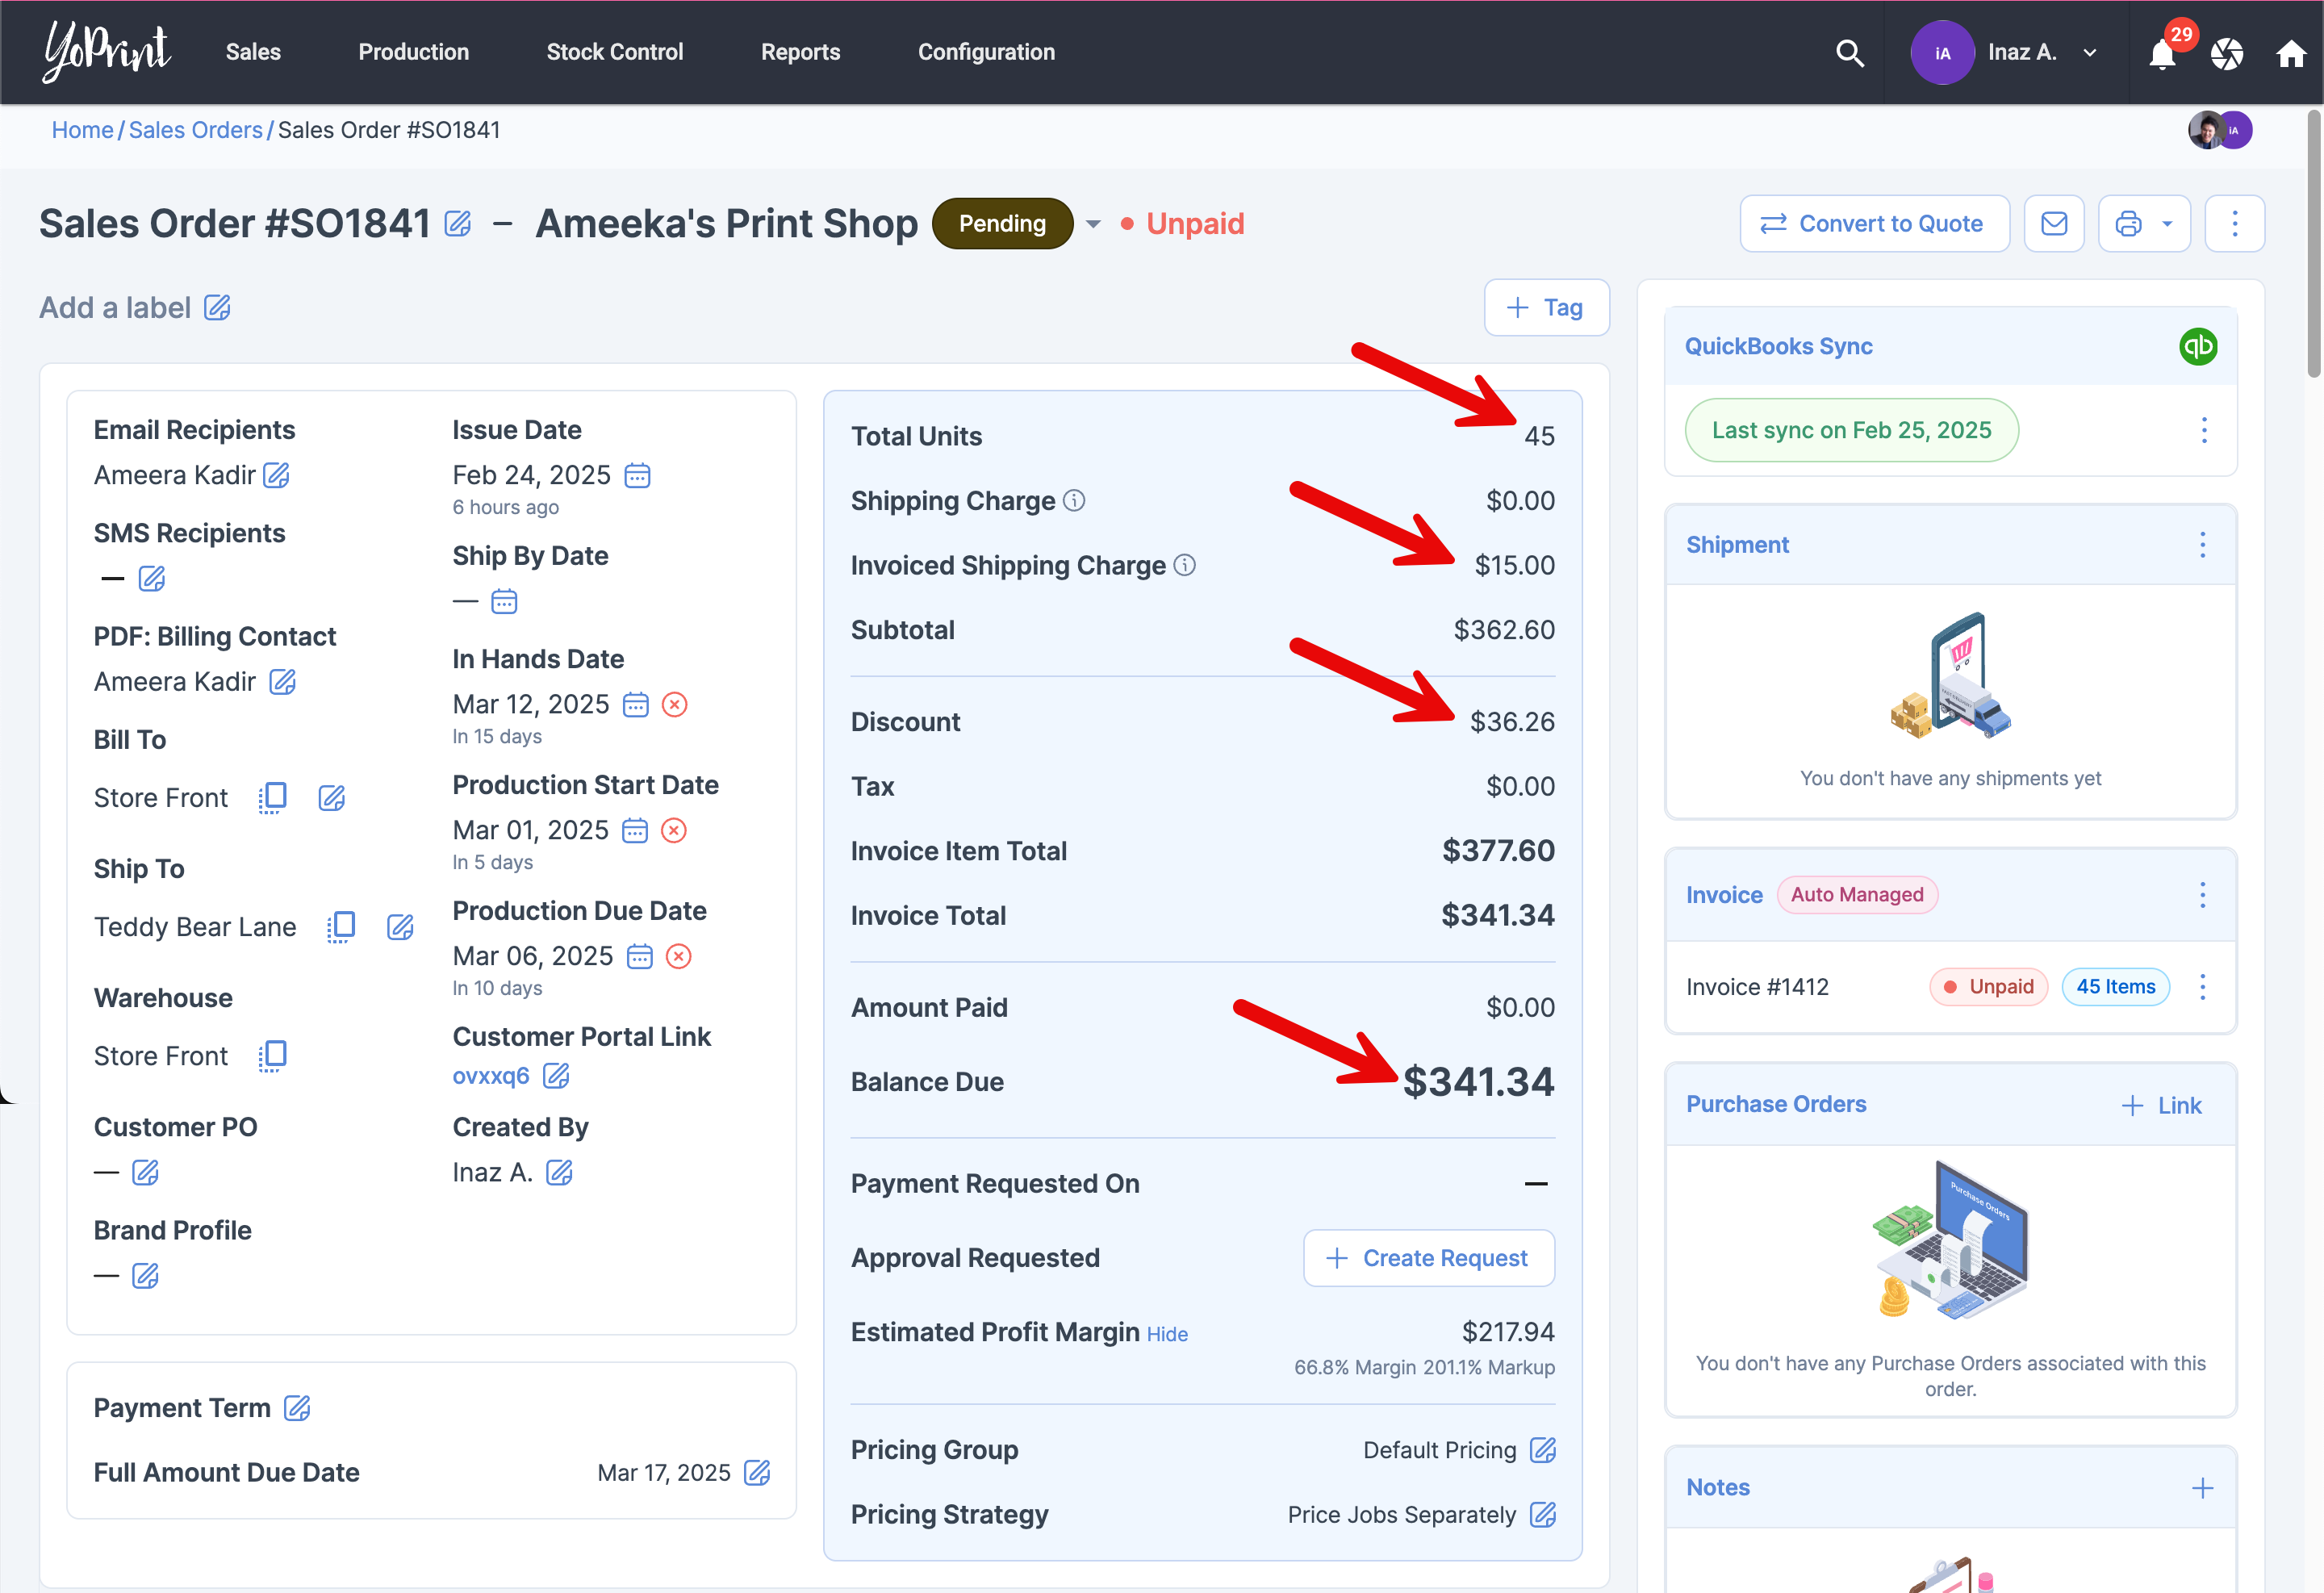
- Once you have applied the changes and go back to the Sales Order page, you will see that the invoice will be updated automatically, reflecting the new quantities and total in real time.
- Shipping fees and discounts will also adjust automatically based on your prior settings.
What Happens If You Turn Off Auto Invoice?
Turning off Auto Invoice will leave the generated invoice AS-IS and will no longer automatically update. However, you can now manually make any changes you desire.
What Happens If You Turn It Back On?
When you turn Auto Invoice back on, ALL EXISTING INVOICES WILL BE DELETED, and a new one will be generated based on the latest order details. Since Auto Invoice allows only one invoice per order, additional invoices cannot be created manually.
The Invoice Number will be regenerated, and shipping fees (if not auto managed) and discounts will need to be re-added, as they won’t carry over automatically.
In short, you’ll be starting fresh with a new invoice.