Create a Quote
In this article
Create a New Quote
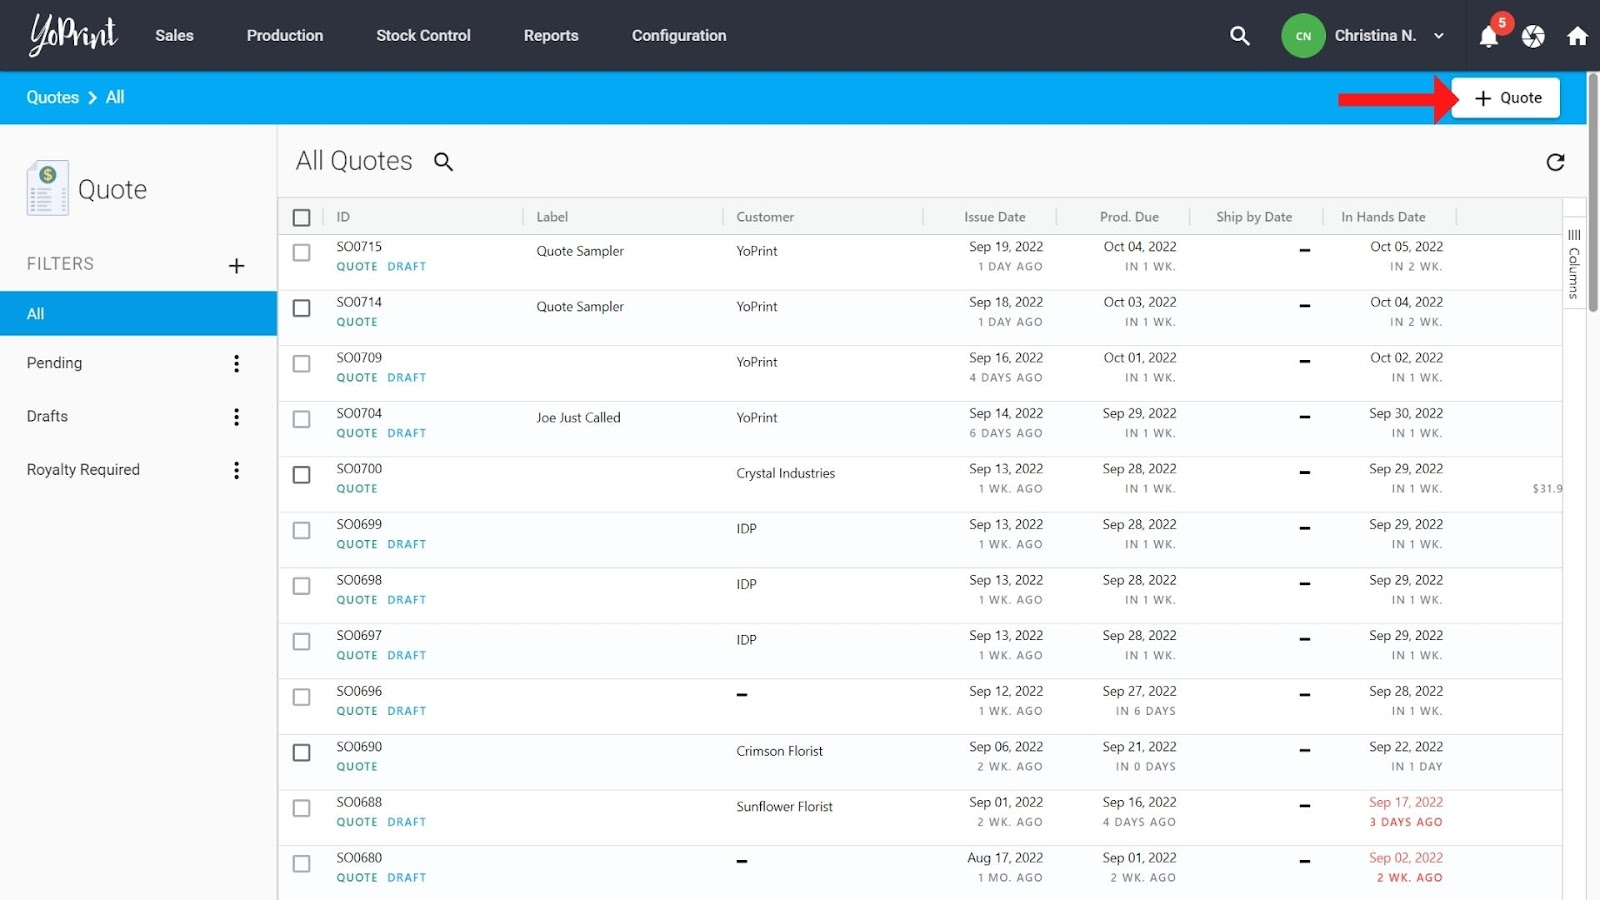
To create a quote, head to the Quote page, and click on the + Quote button.
Add a Customer
You can either add a new customer, or choose an existing customer.
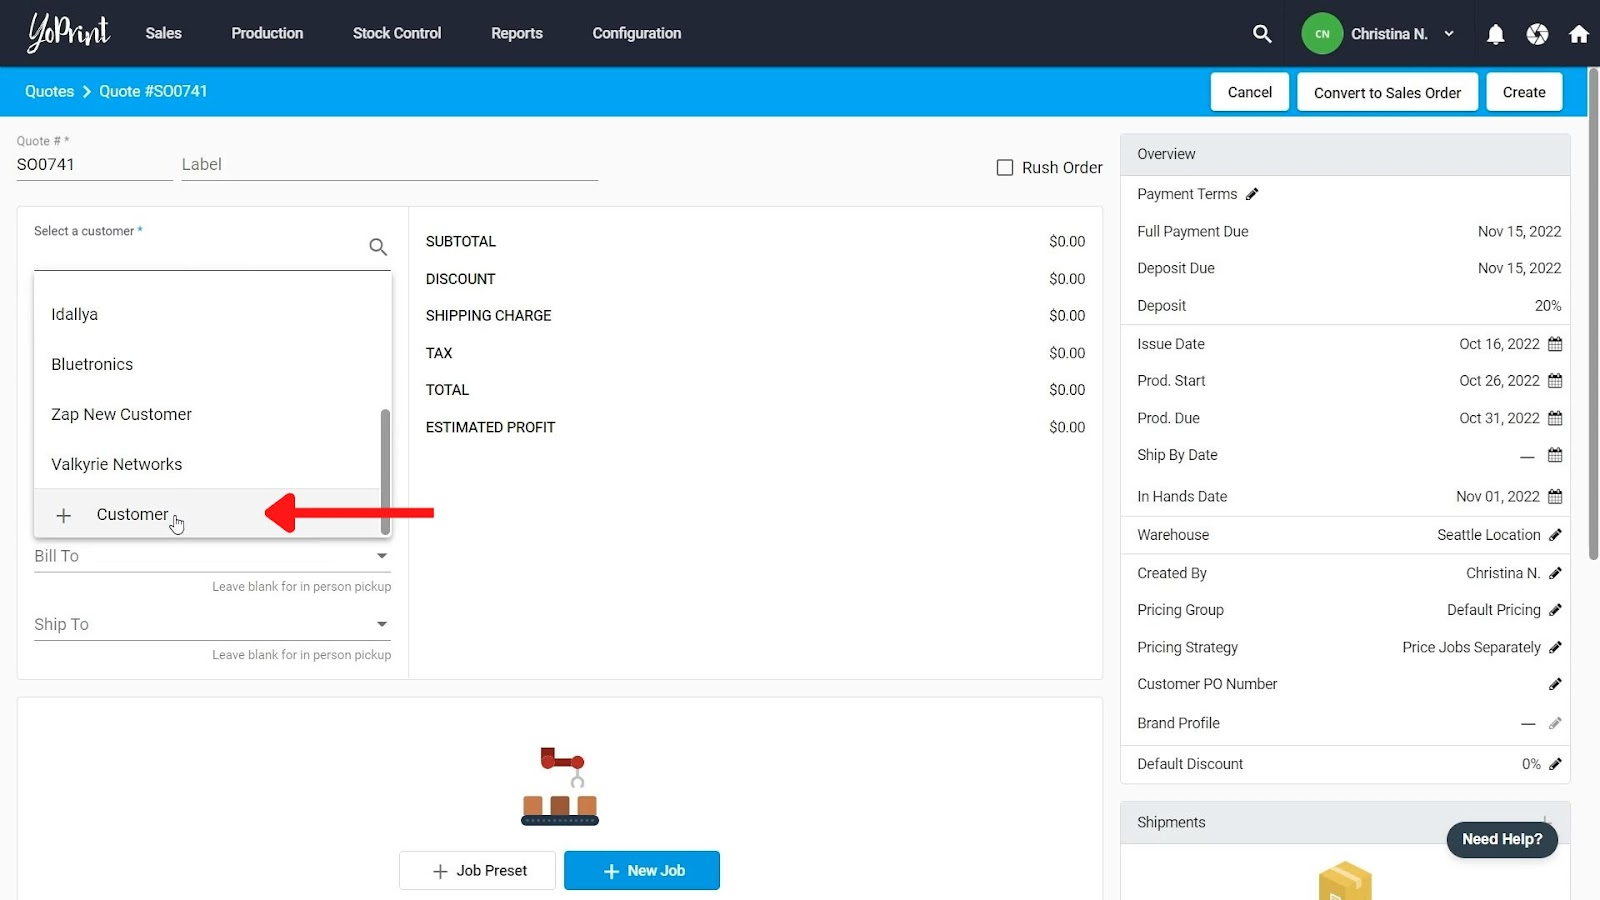
To add a new customer, click on the Select a Customer field, scroll to the bottom, and click on + Customer.
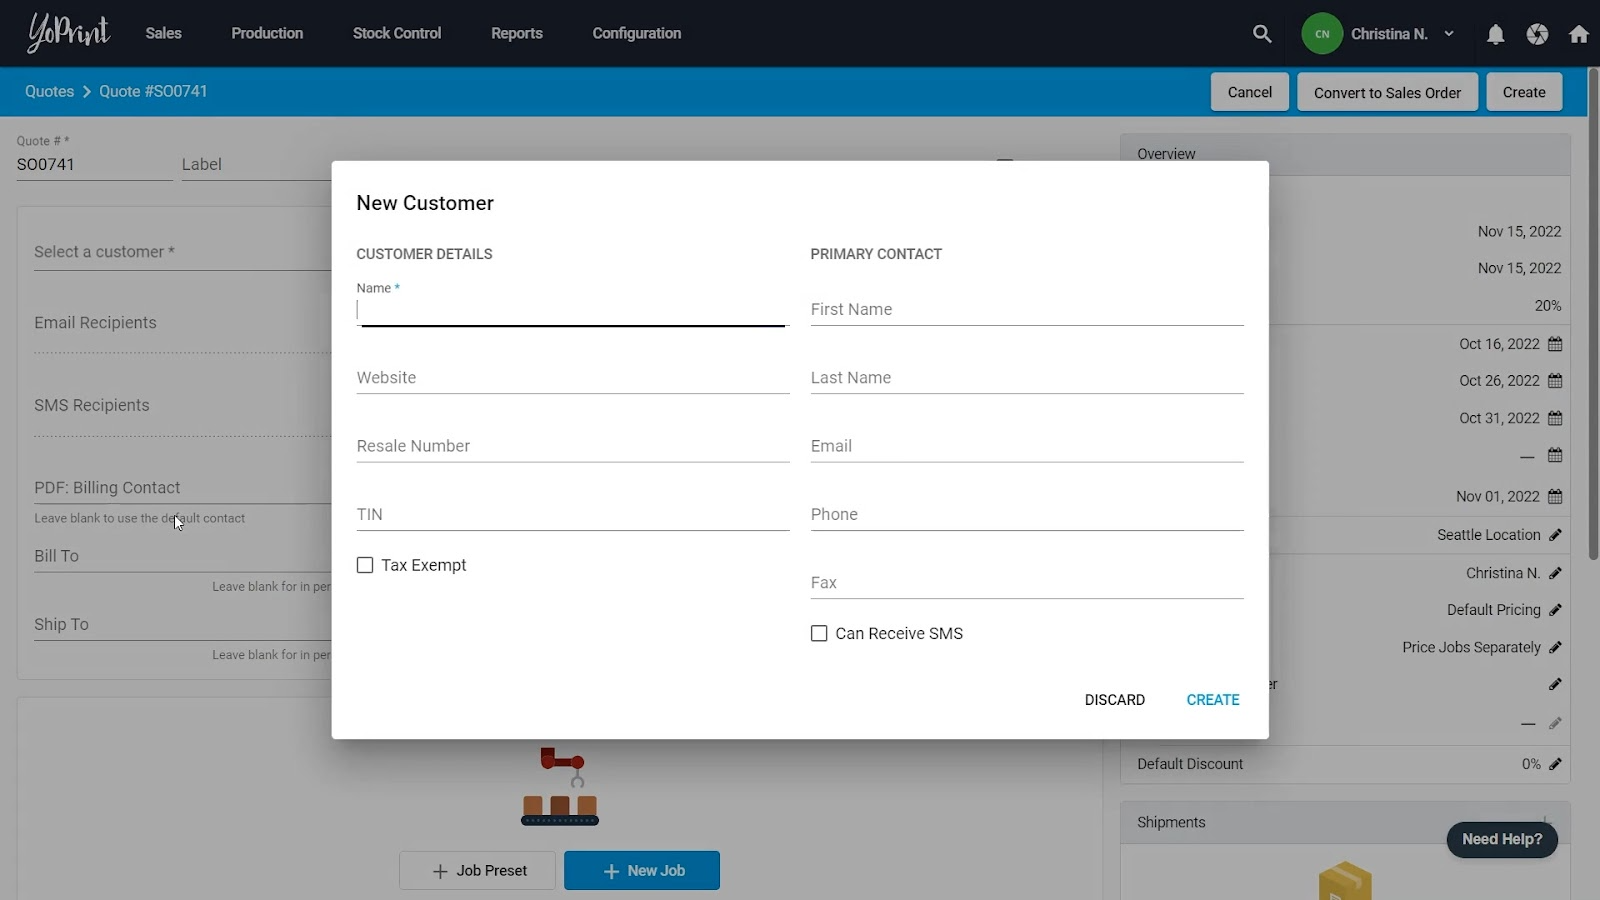
Add in their details and click on Create.
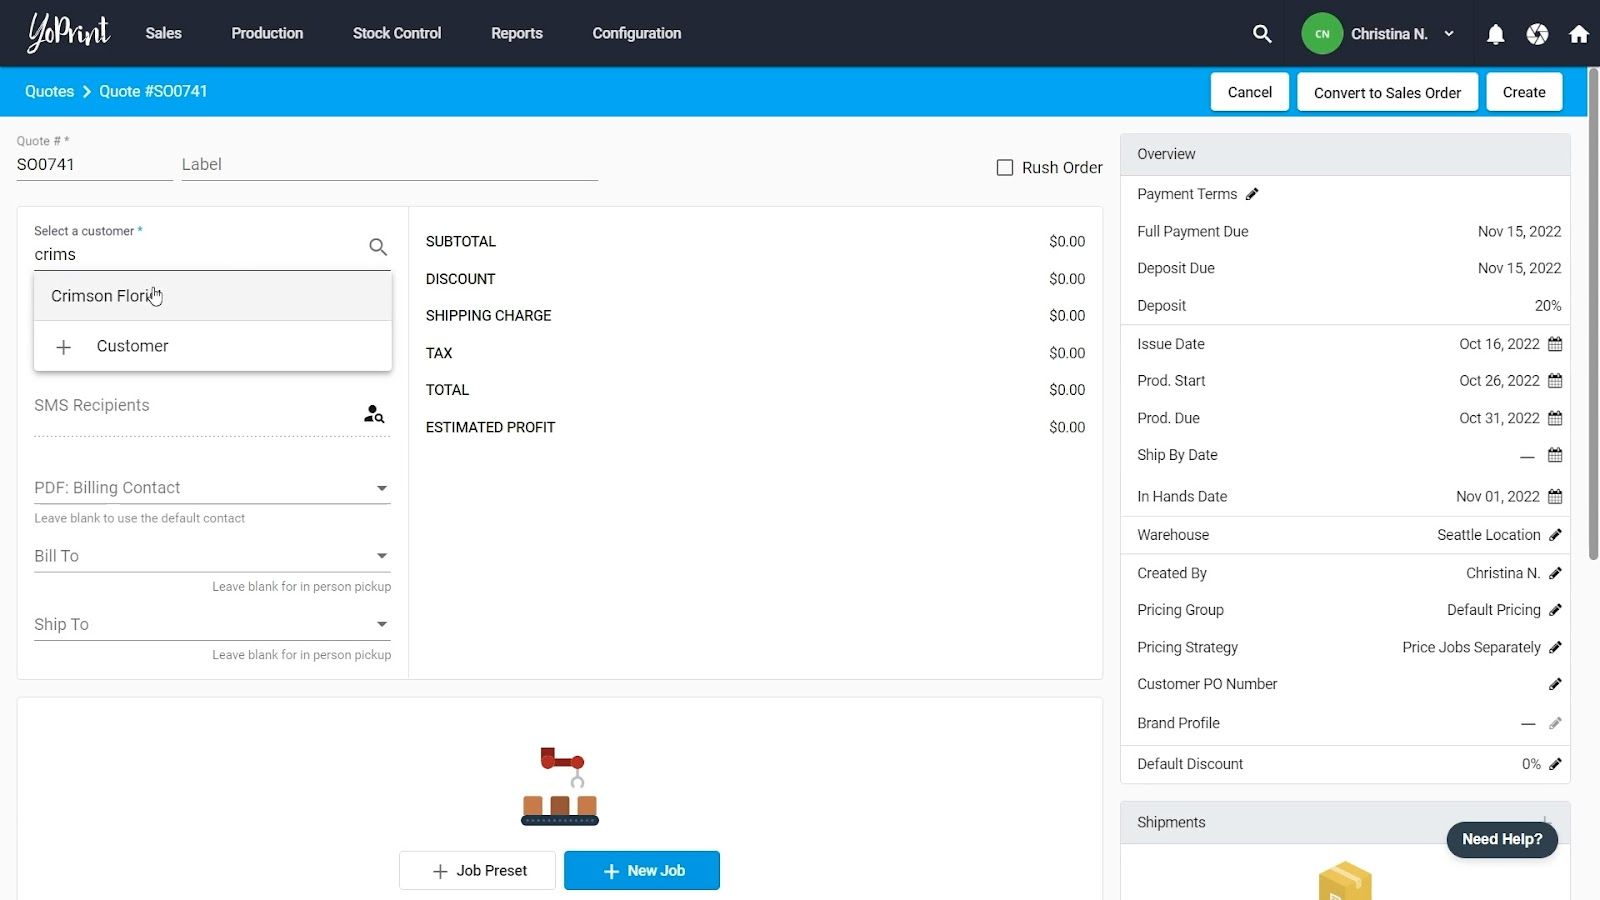
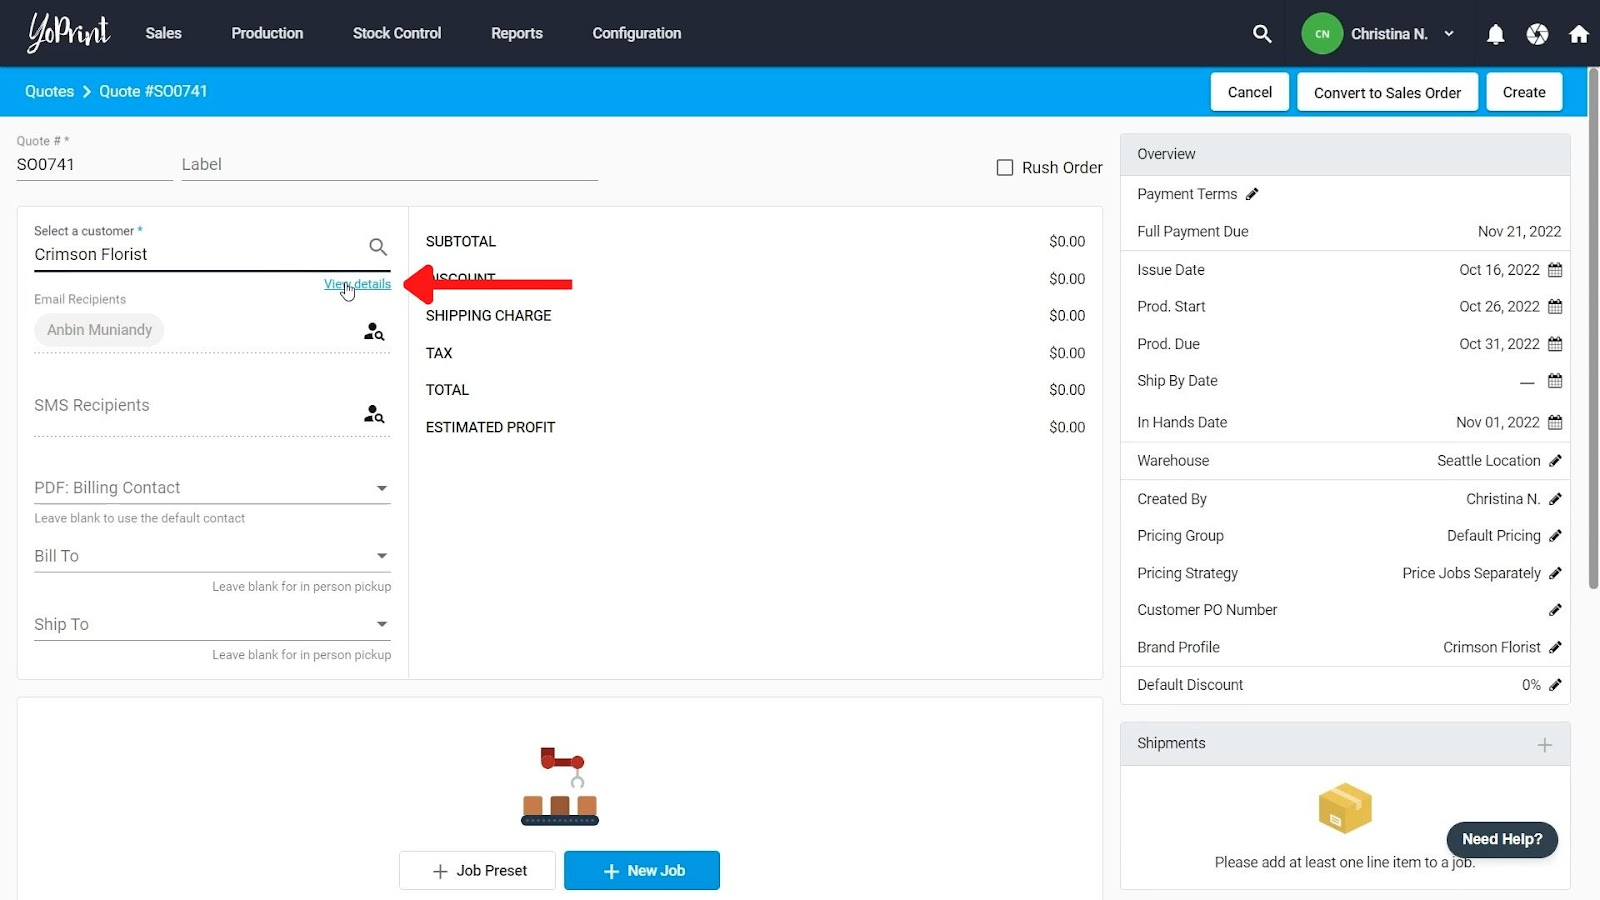
To choose an existing customer, simply search for the customer name and select.
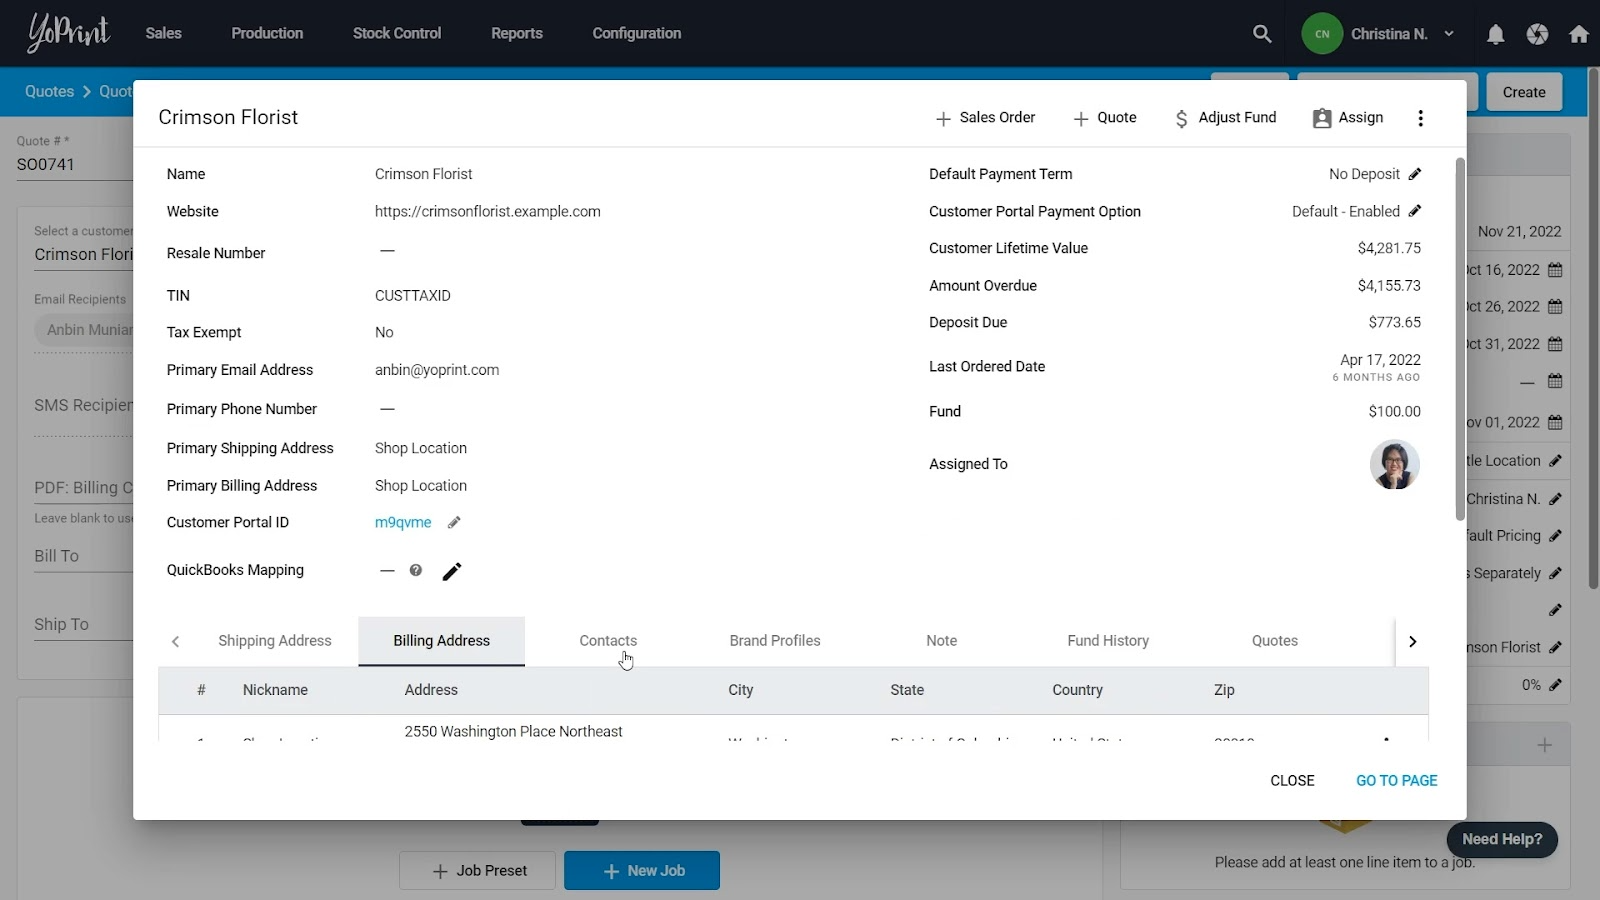
You can click on View Details to check out the customer’s details as well as make edits.
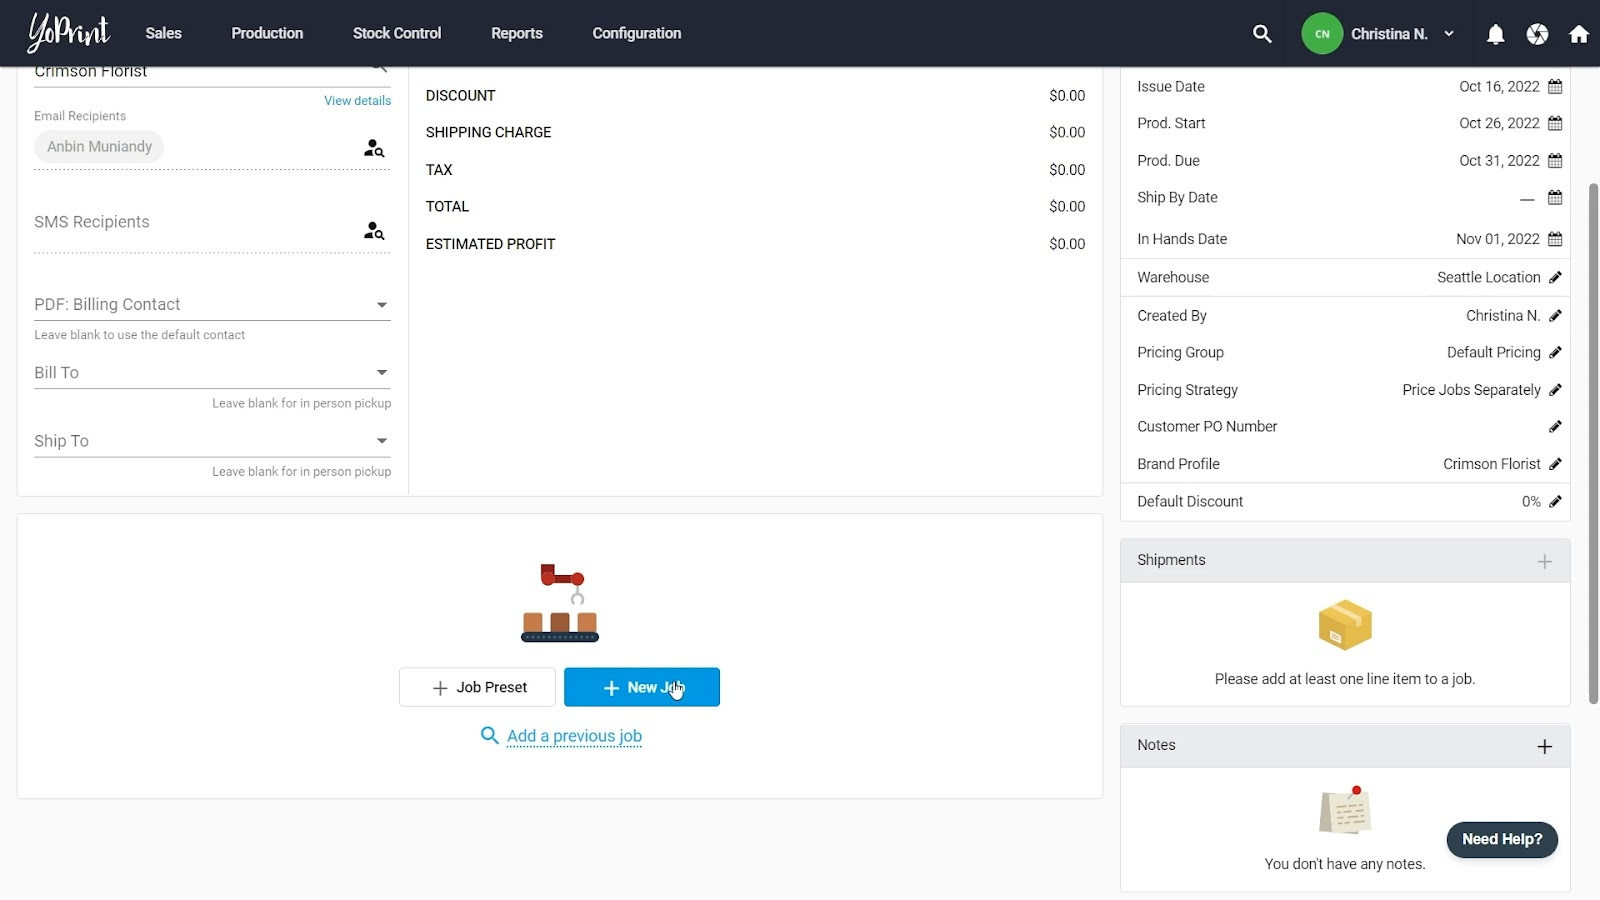
Add Jobs from Scratch
One job should contain any number of decorations for a single product. For example, if you’re printing the back of a shirt and embroidering the front, that counts as one job. And if your customer also wants some hats embroidered, that’s a different job.
There are a few methods for adding jobs, one of them is by creating new jobs from scratch. You can do so by clicking on + New Job.
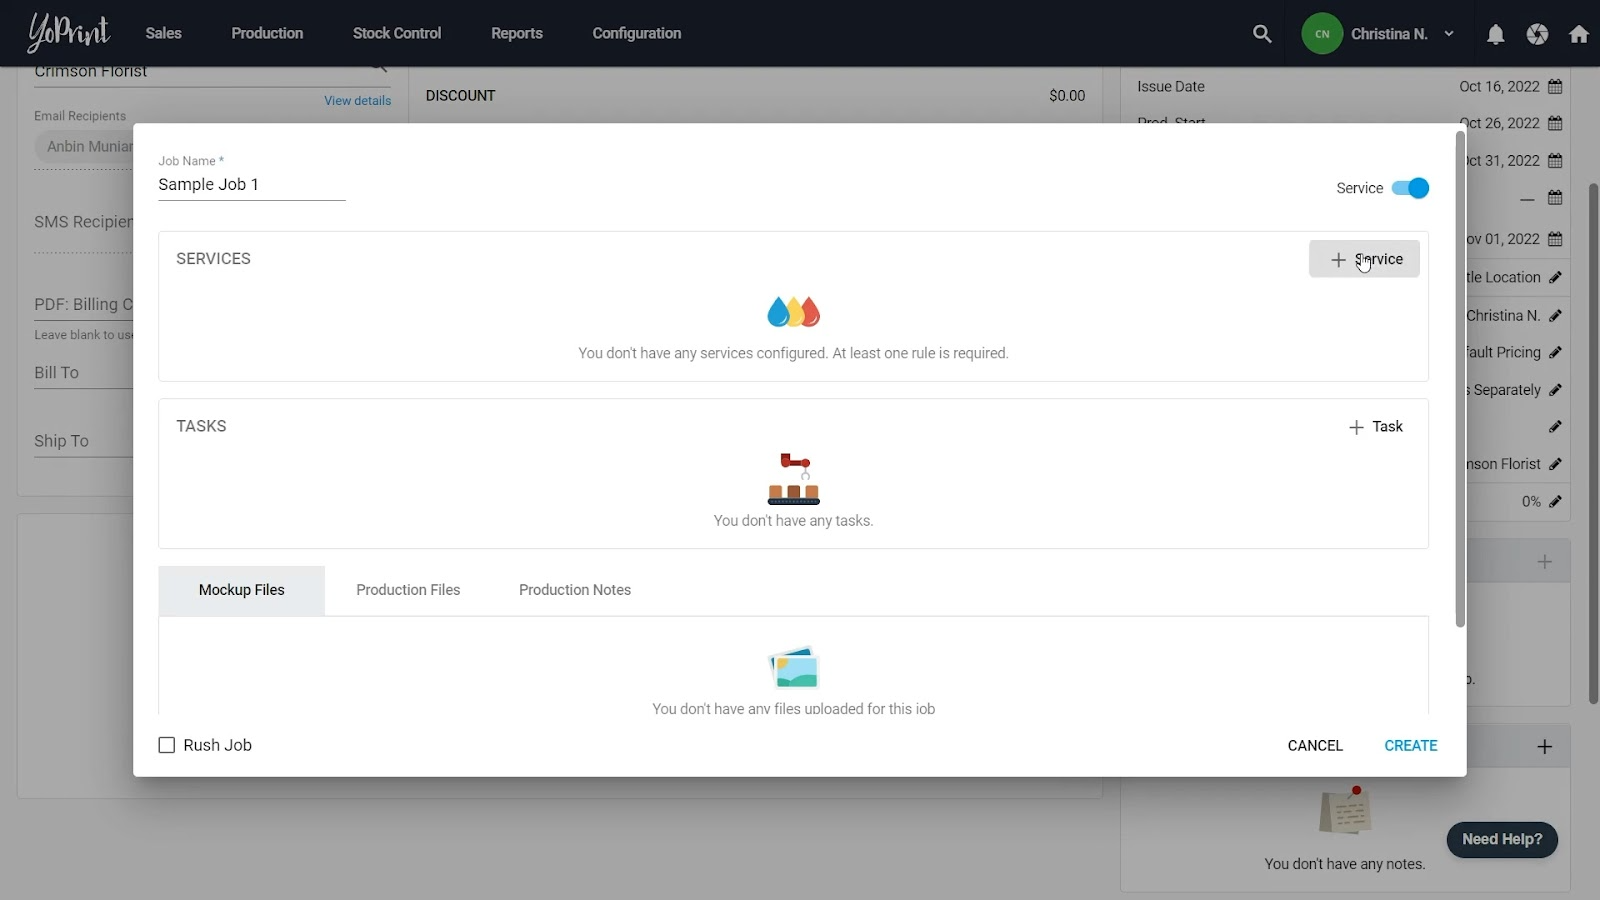
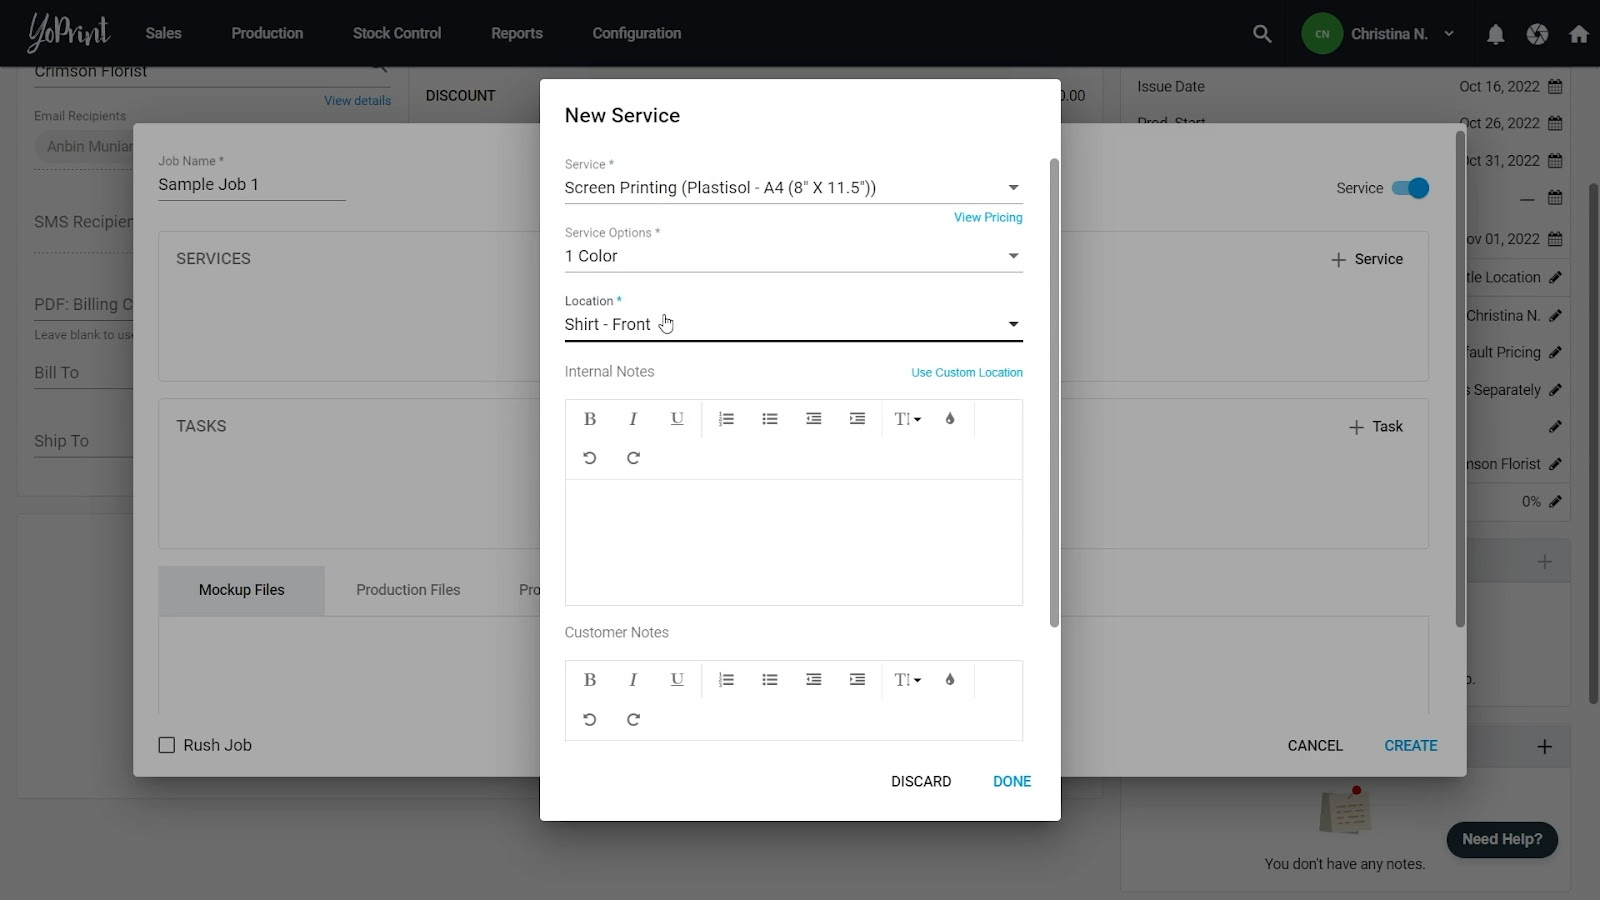
You’ll need to add services, which are the pricing matrices you've set up.
For example, let’s add a screen printing service, its service option, and print location.
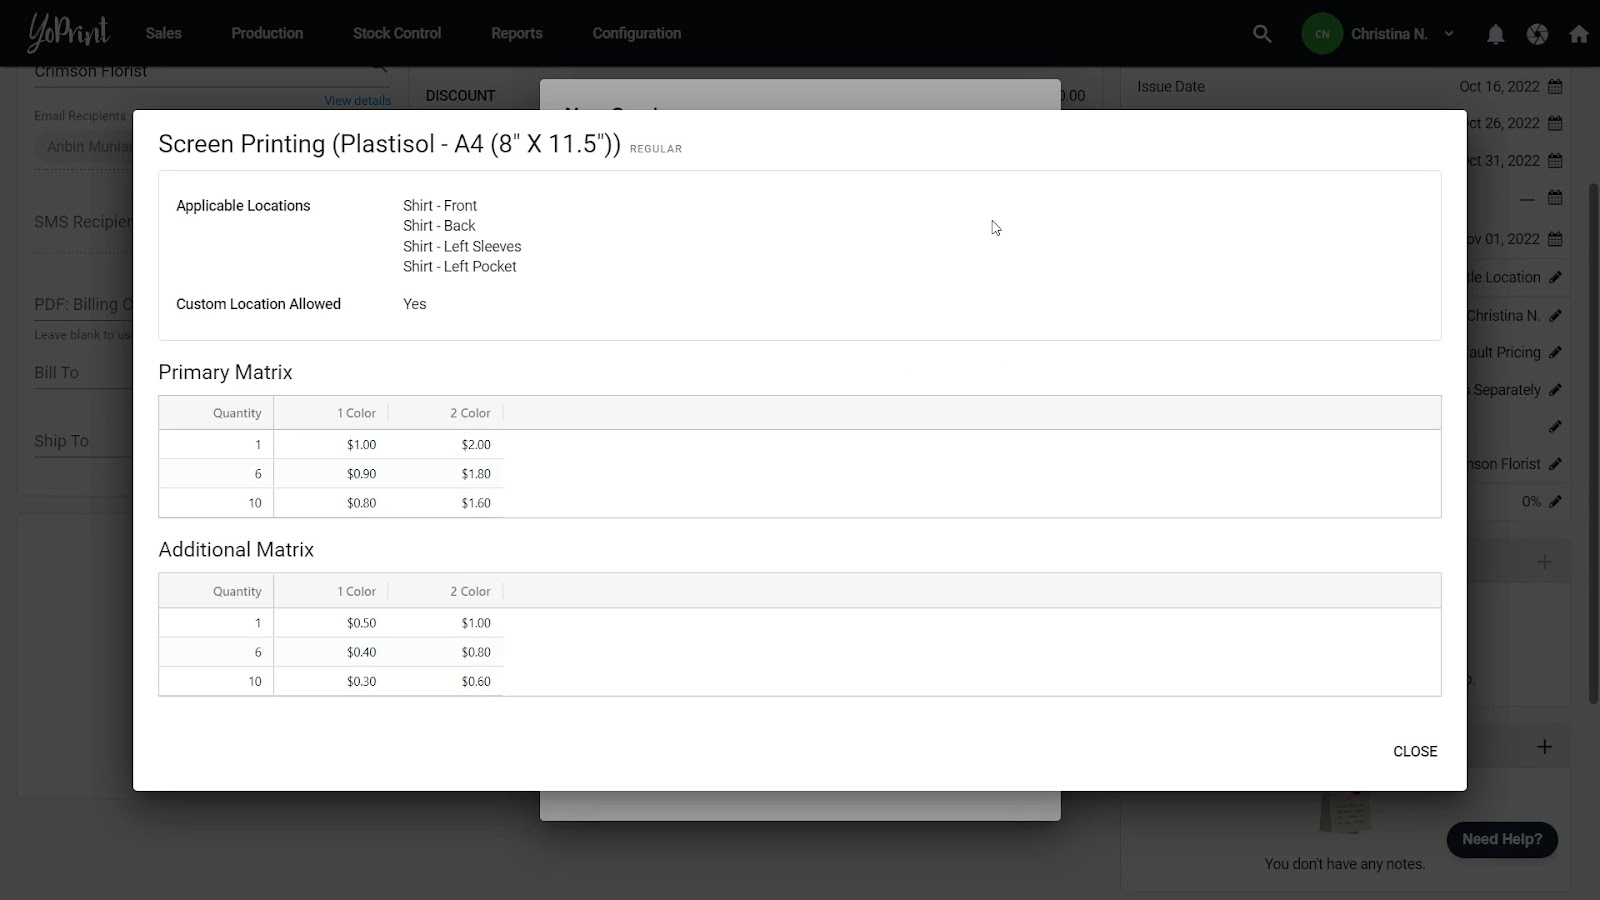
You can click on View Pricing to make sure you’re choosing the right matrix
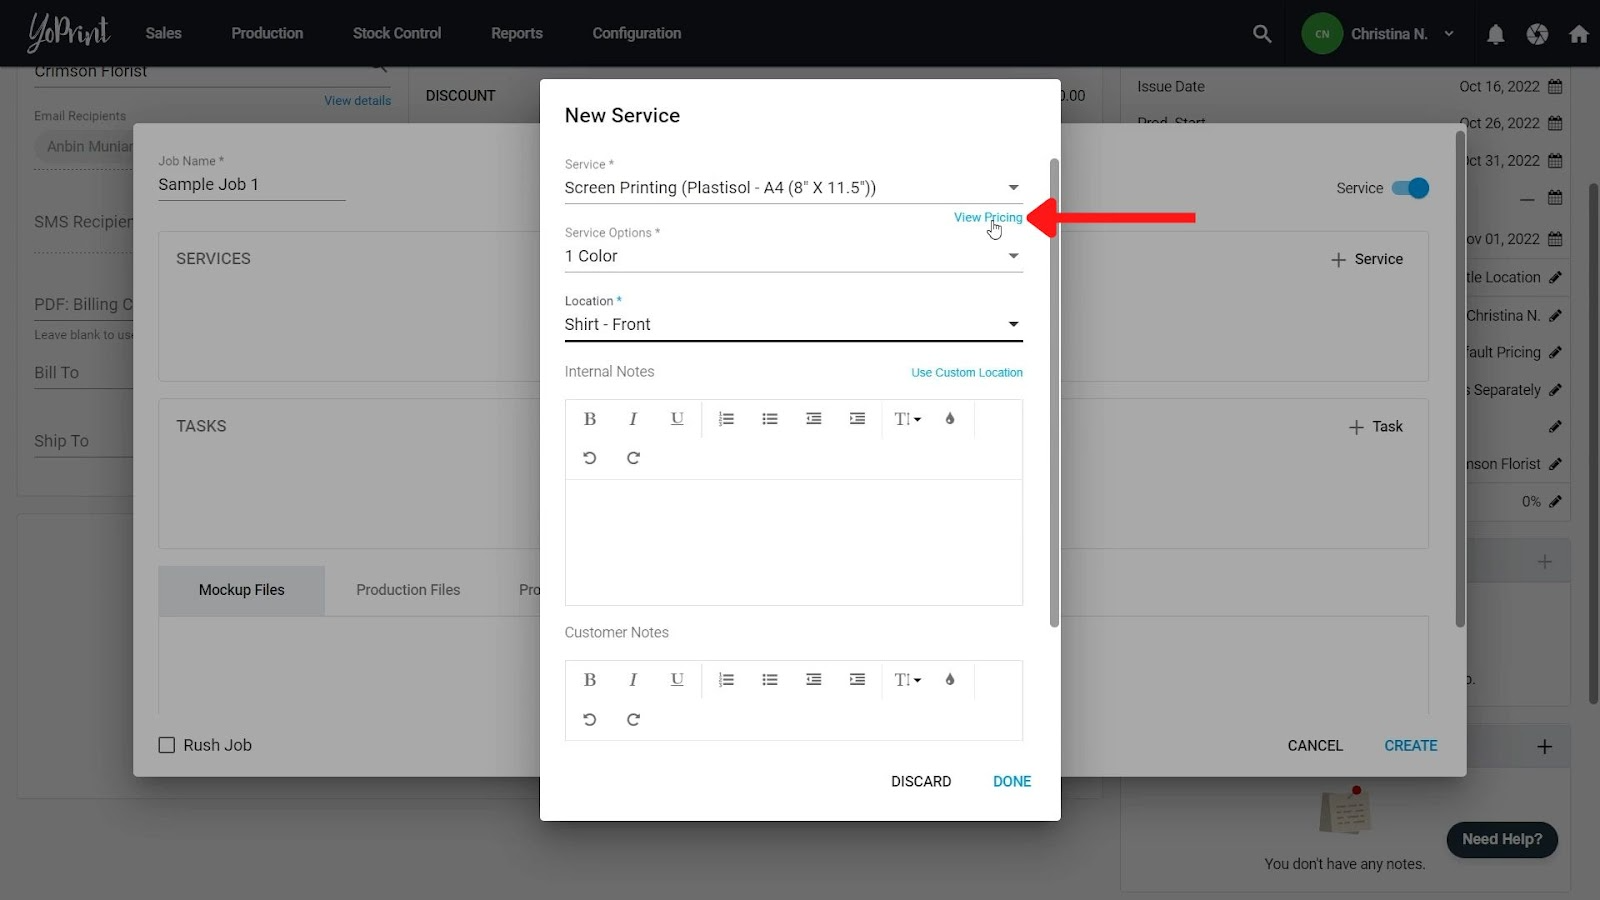
Click on done to add the service to the job.
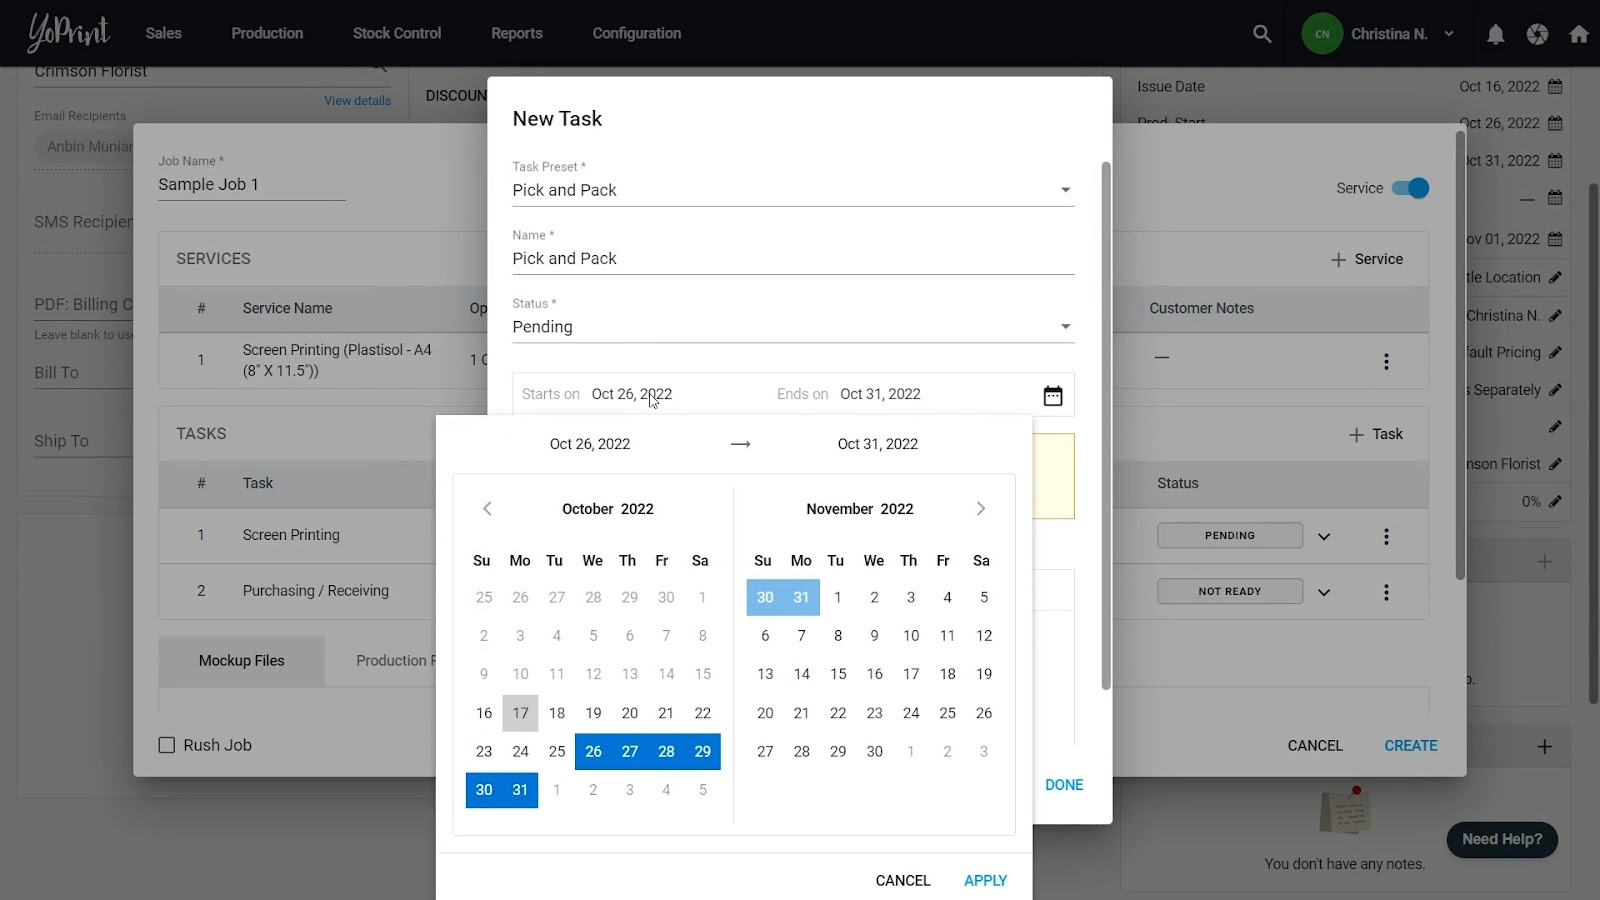
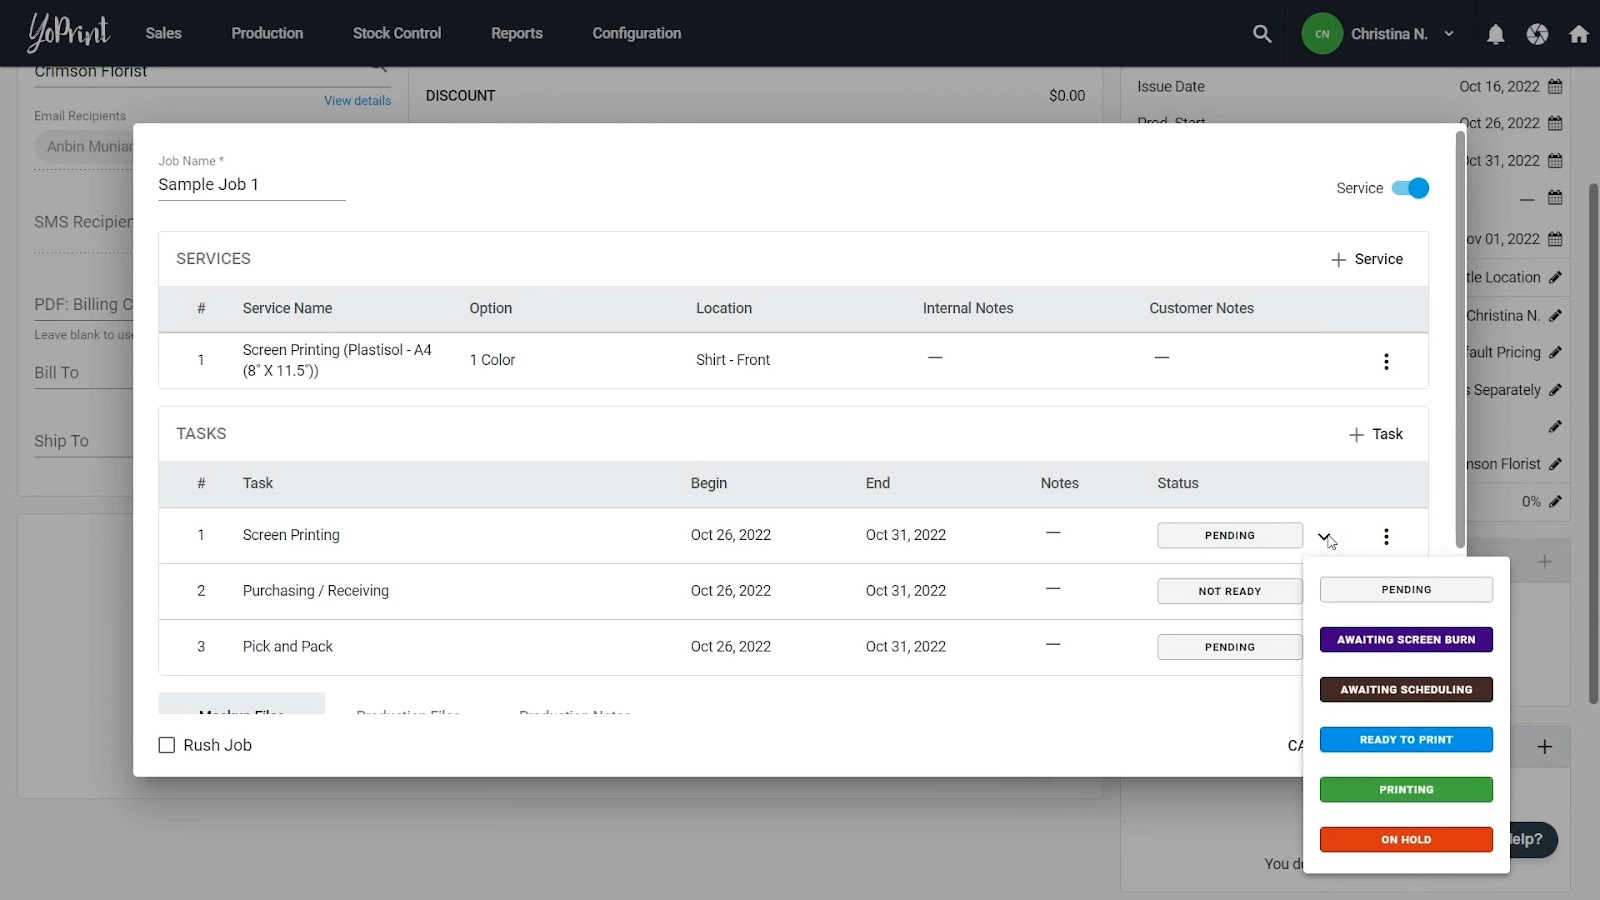
As for tasks, this is optional at this stage. You can create them now, or create them once you’re about to head into production. Tasks are meant for you to assign - you guessed it - tasks to your team and track your team’s progress. For demonstration purposes, let’s add a screen printing task, a purchasing task, and a pick and pack task.

You can change the Start and End dates, as well as change the status of each task.
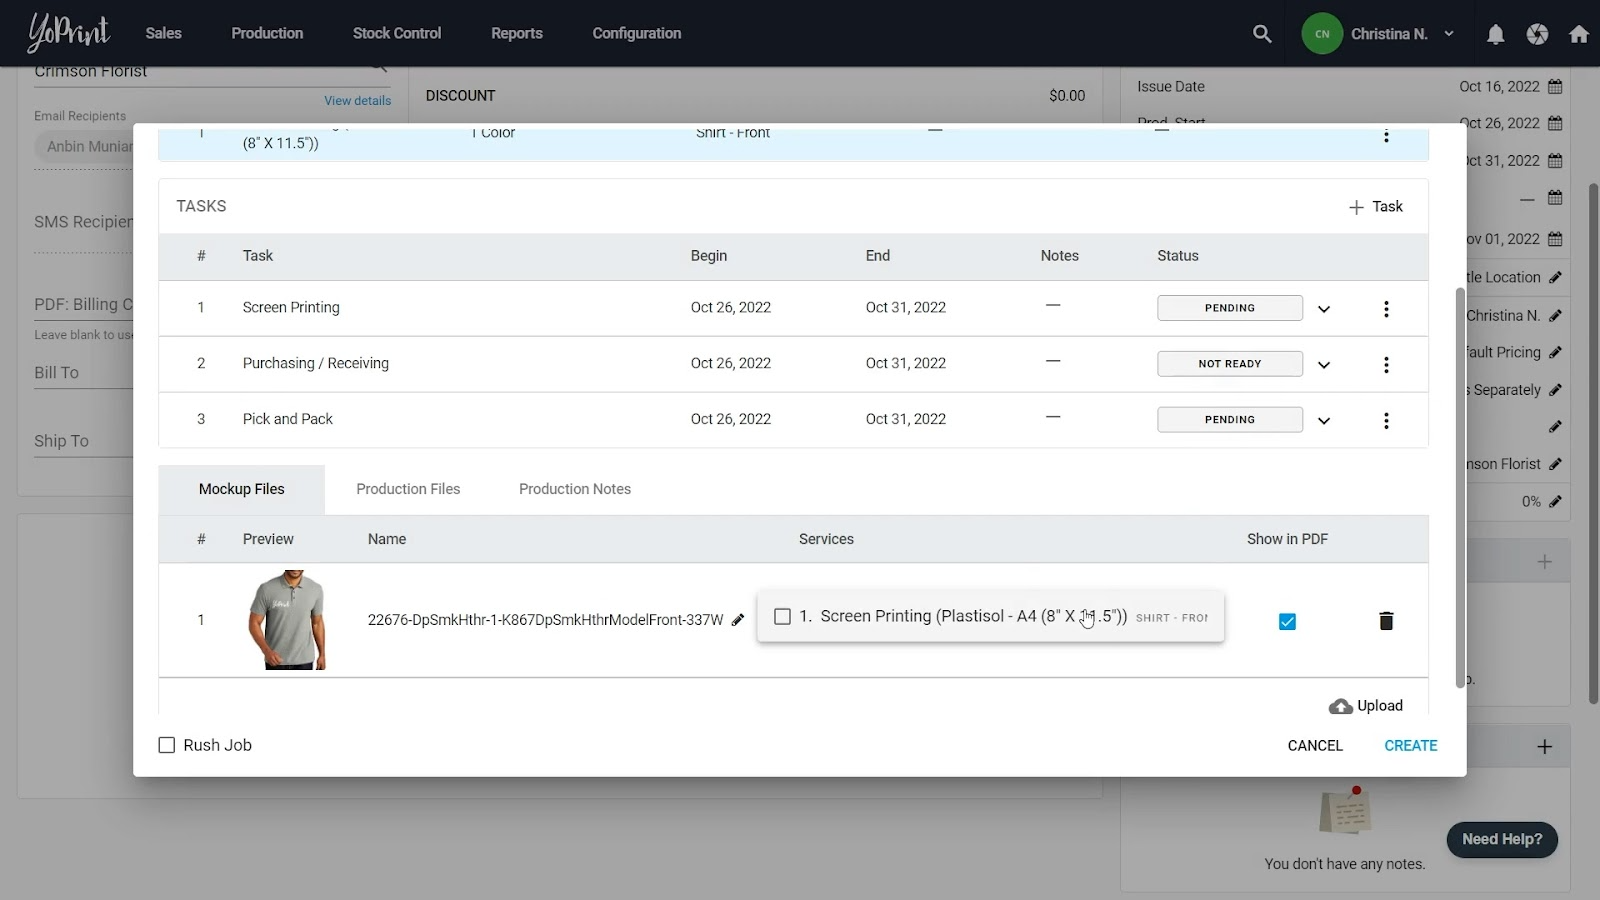
At the bottom, you can upload mockups, production files, and create internal notes for your team.
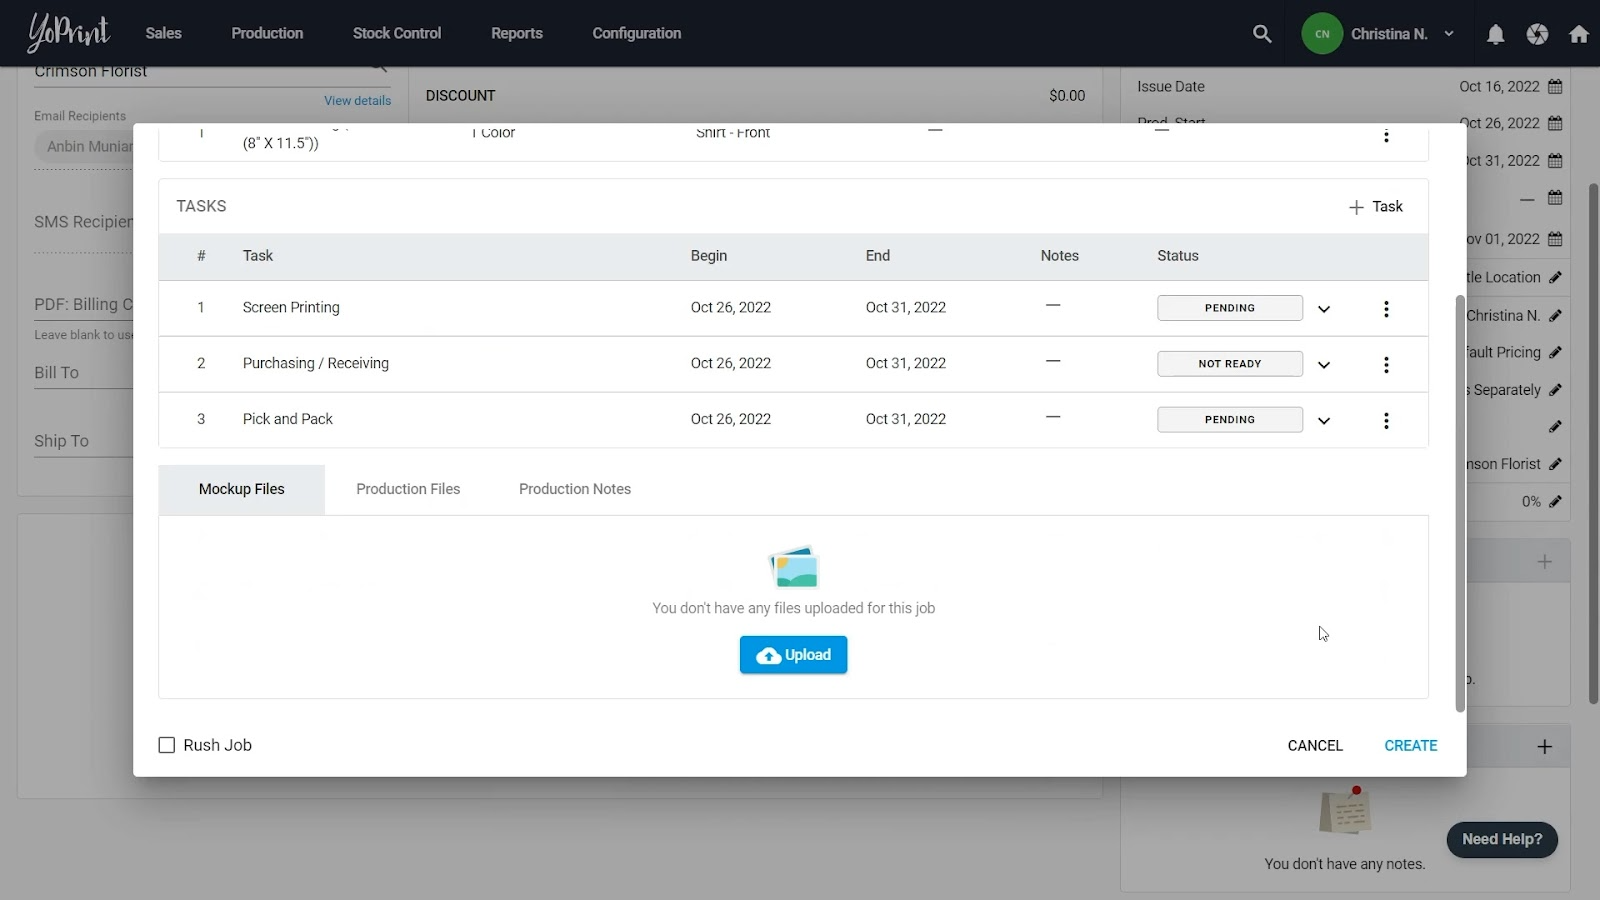
Once you’ve uploaded your mockup, you can specify its print location. We recommend uploading JPEG or PNG, but you can also upload Bitmap, TIFF, and GIF.
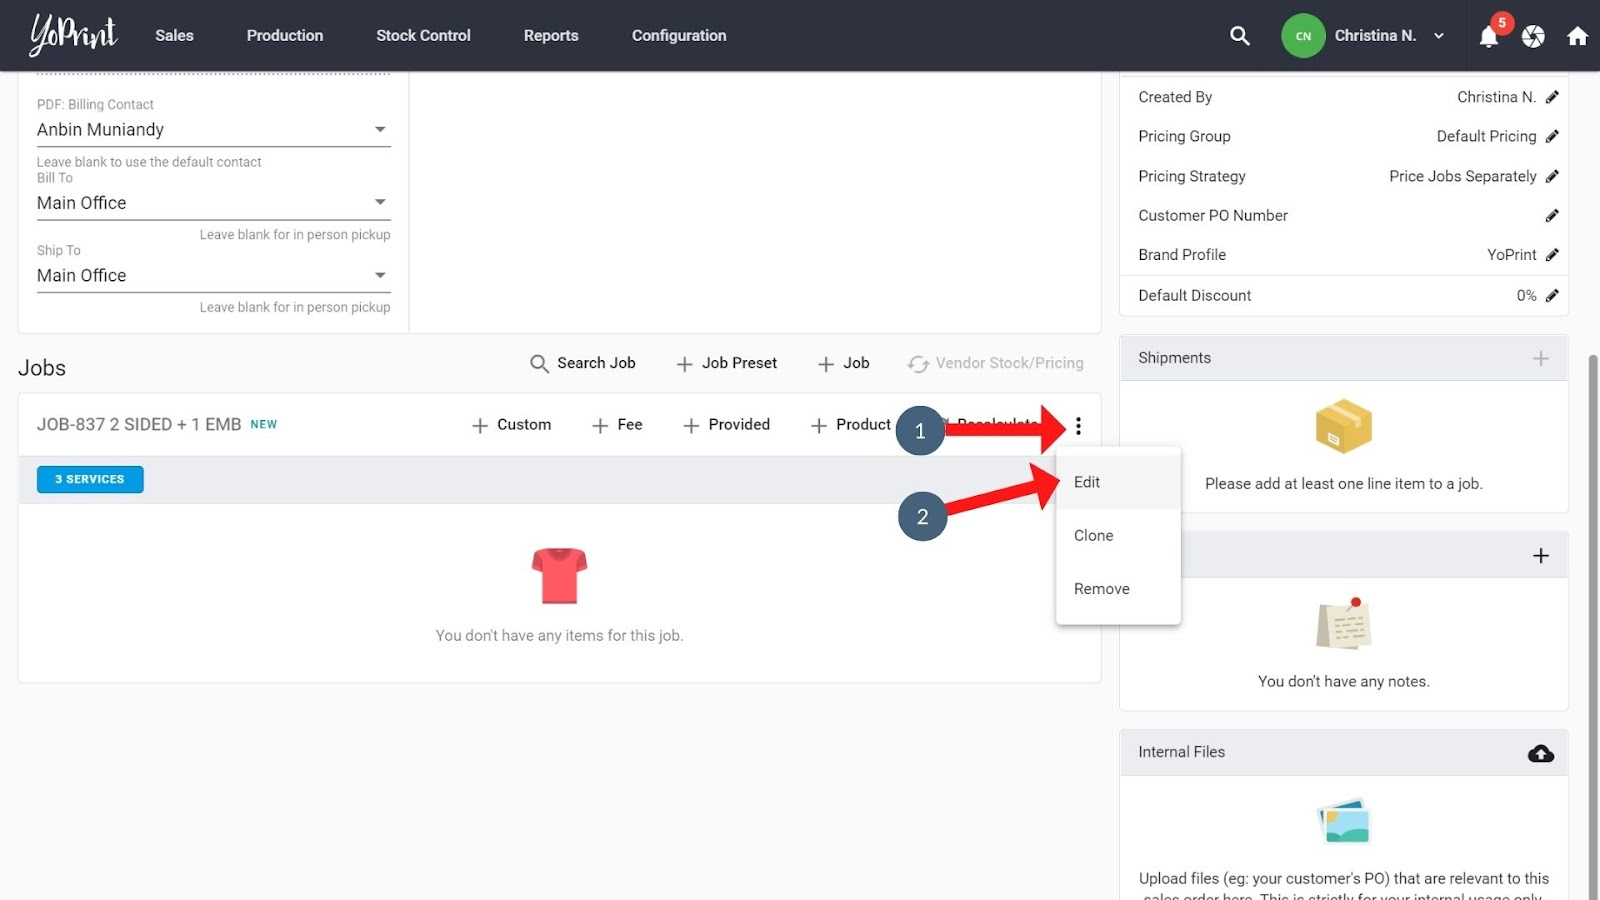
Now you’re done creating a job. Click on Create to add it to the quote. You can always go back and edit jobs at any time.
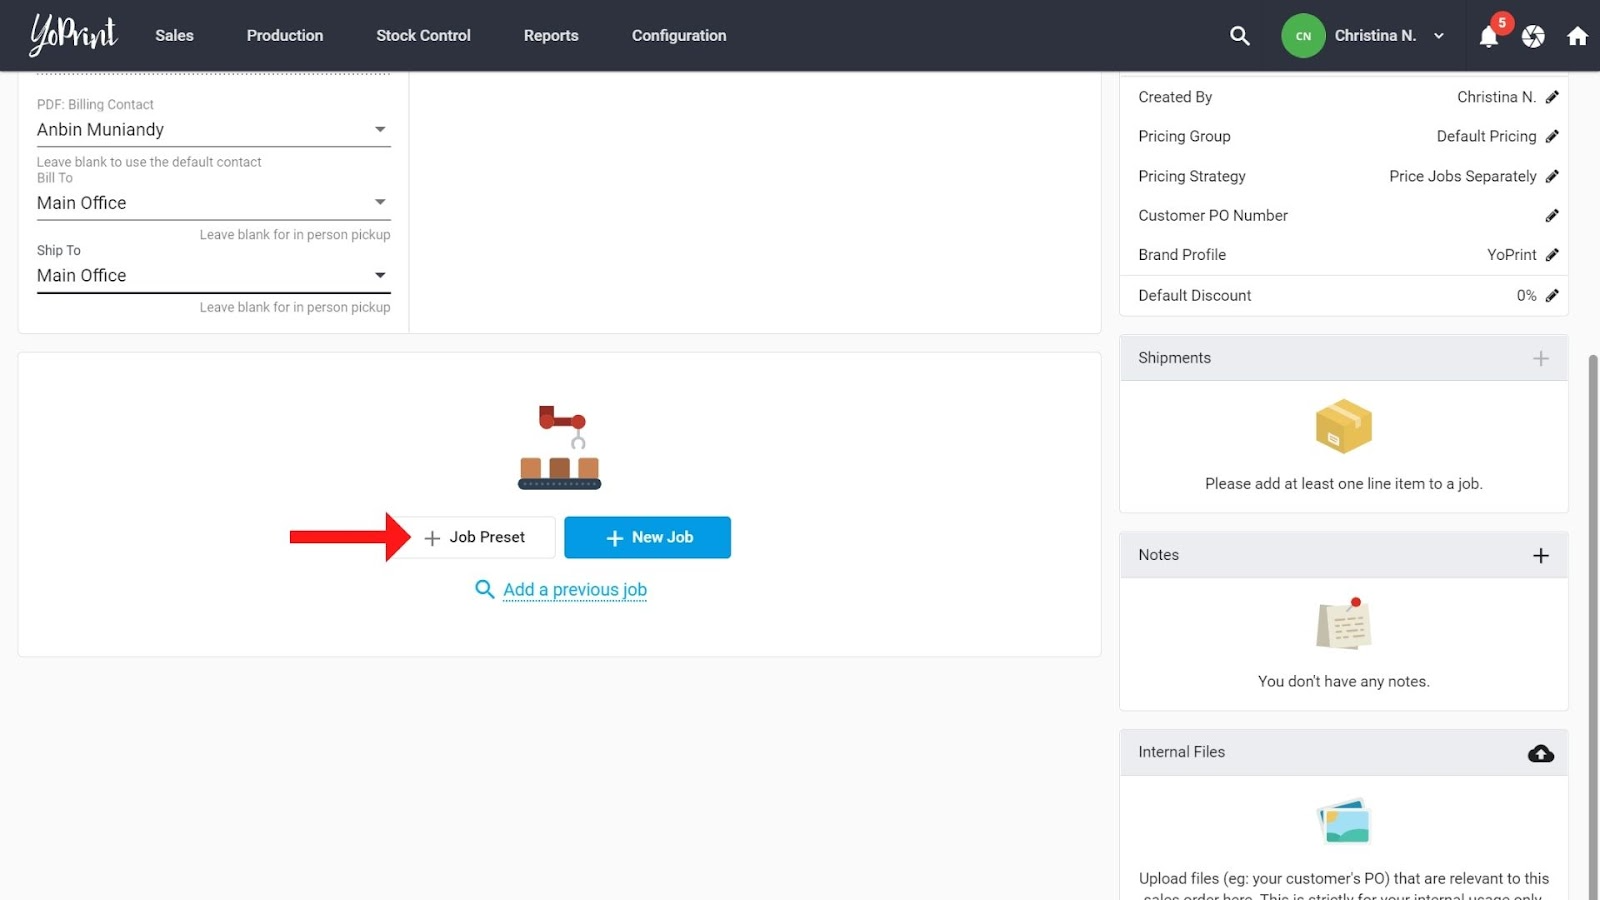
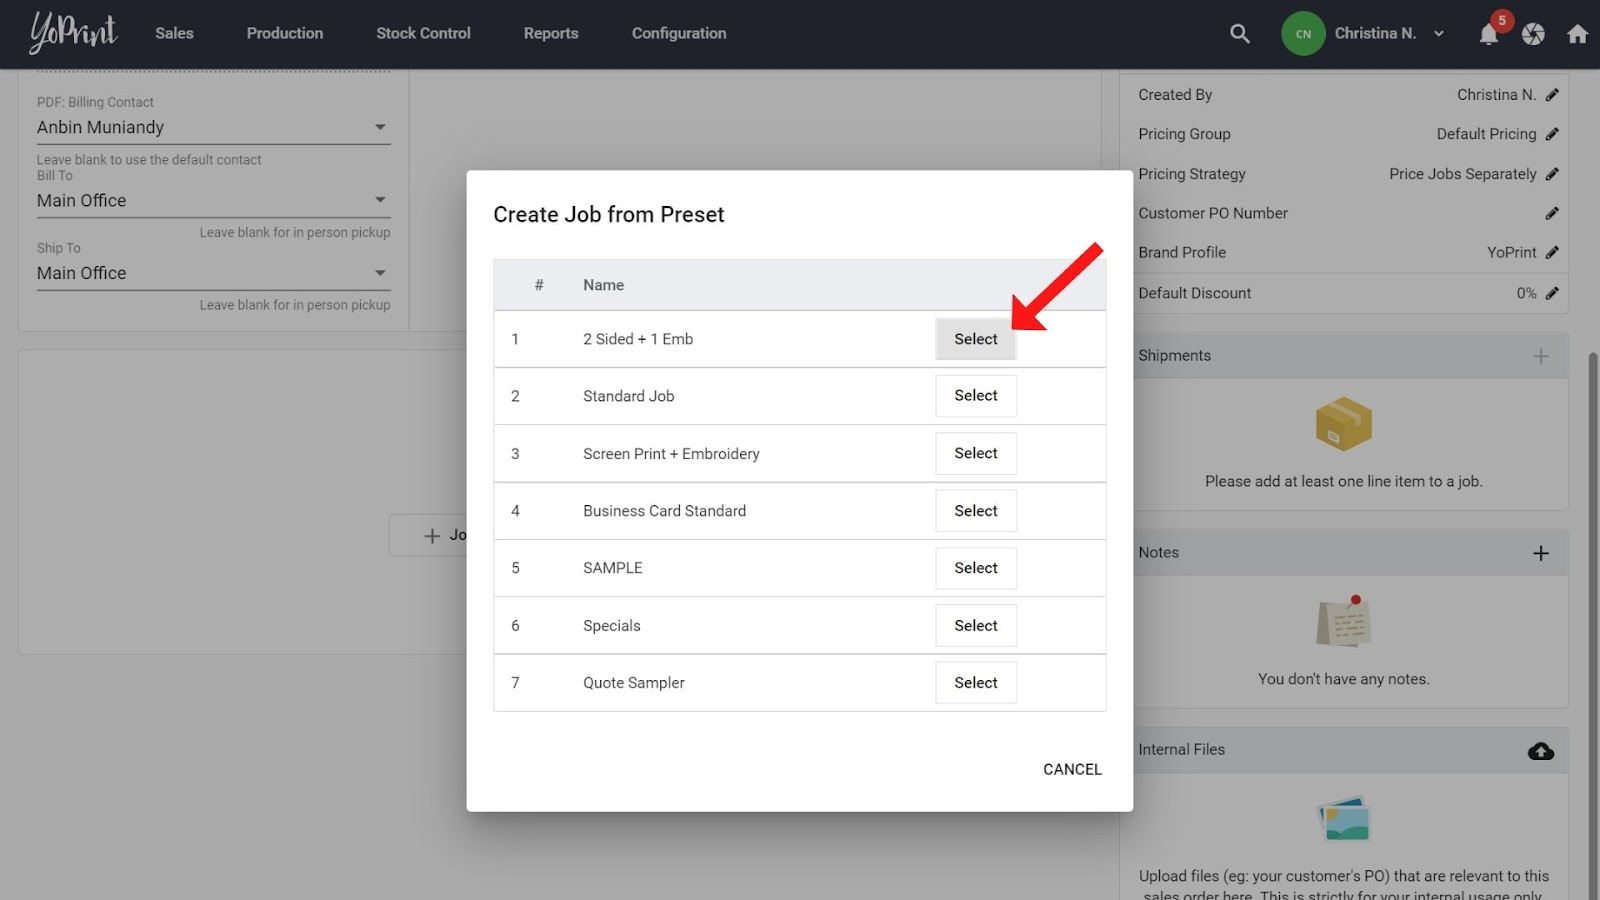
Add Jobs using Presets
To use Job Presets, click on + Job Preset, then select the Preset you’d like to use, and voila, the job is loaded in just one click. Job presets need to be pre-configured in the Settings.
You can always make changes to the preset you chose without affecting the preset if it’s used in another order. You can change the services and tasks, and upload your mockups, production files, and notes.
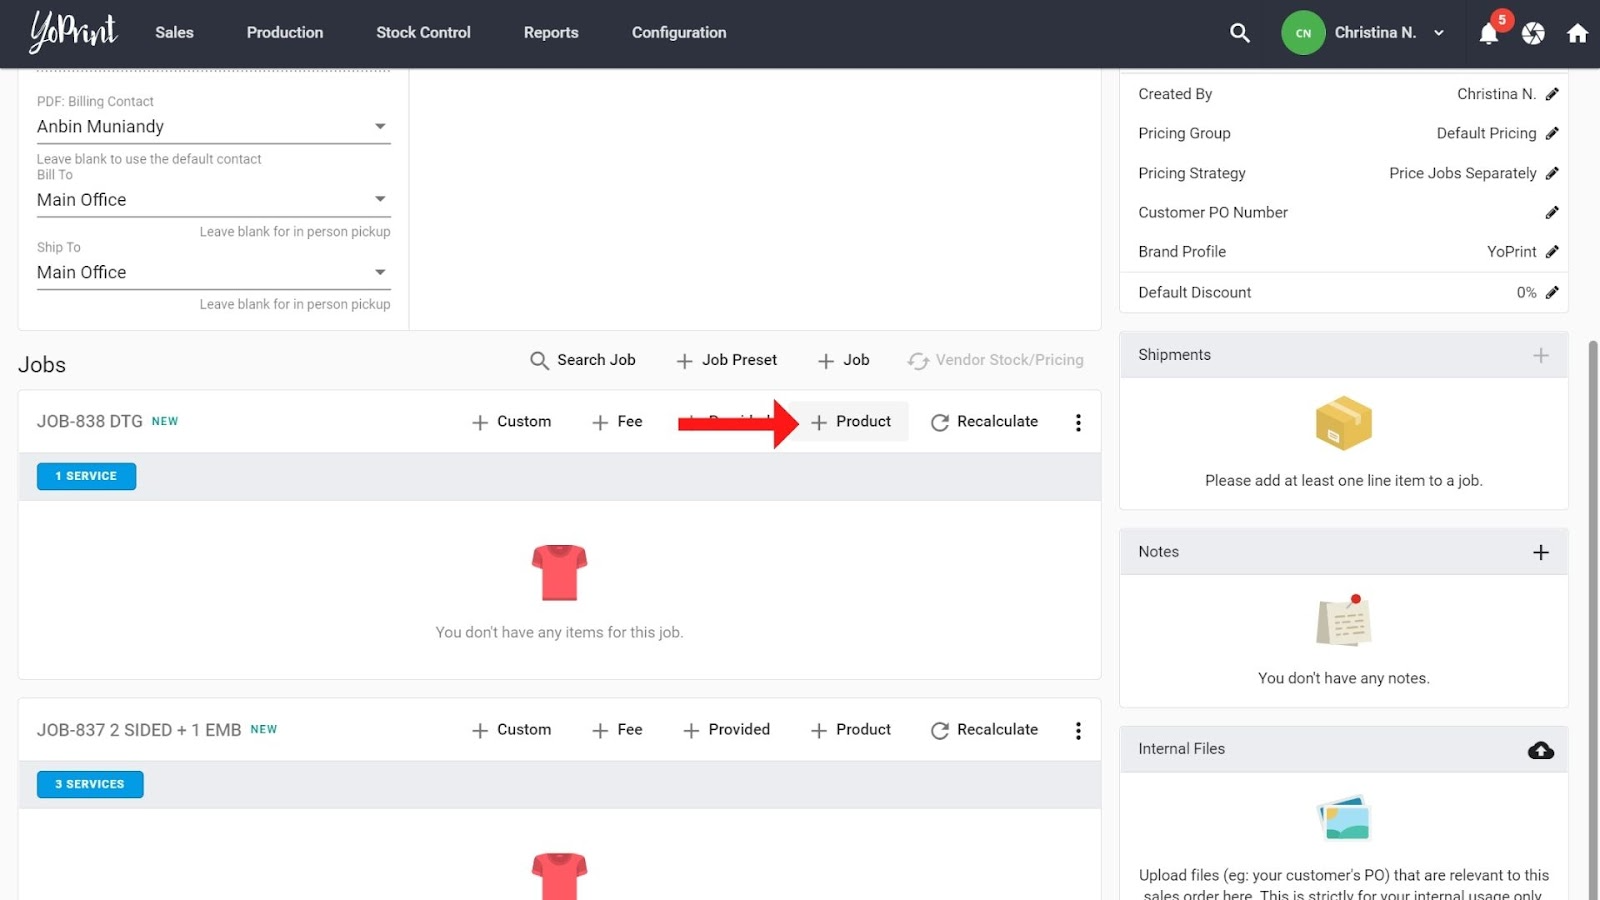
Add Products and Edit Pricing
Now it’s time to add products to your jobs. Click on + Product, and search for the product you want. We pull from a few different catalogs that are updated daily or in real-time, so you’re getting the most recent stock and price information.
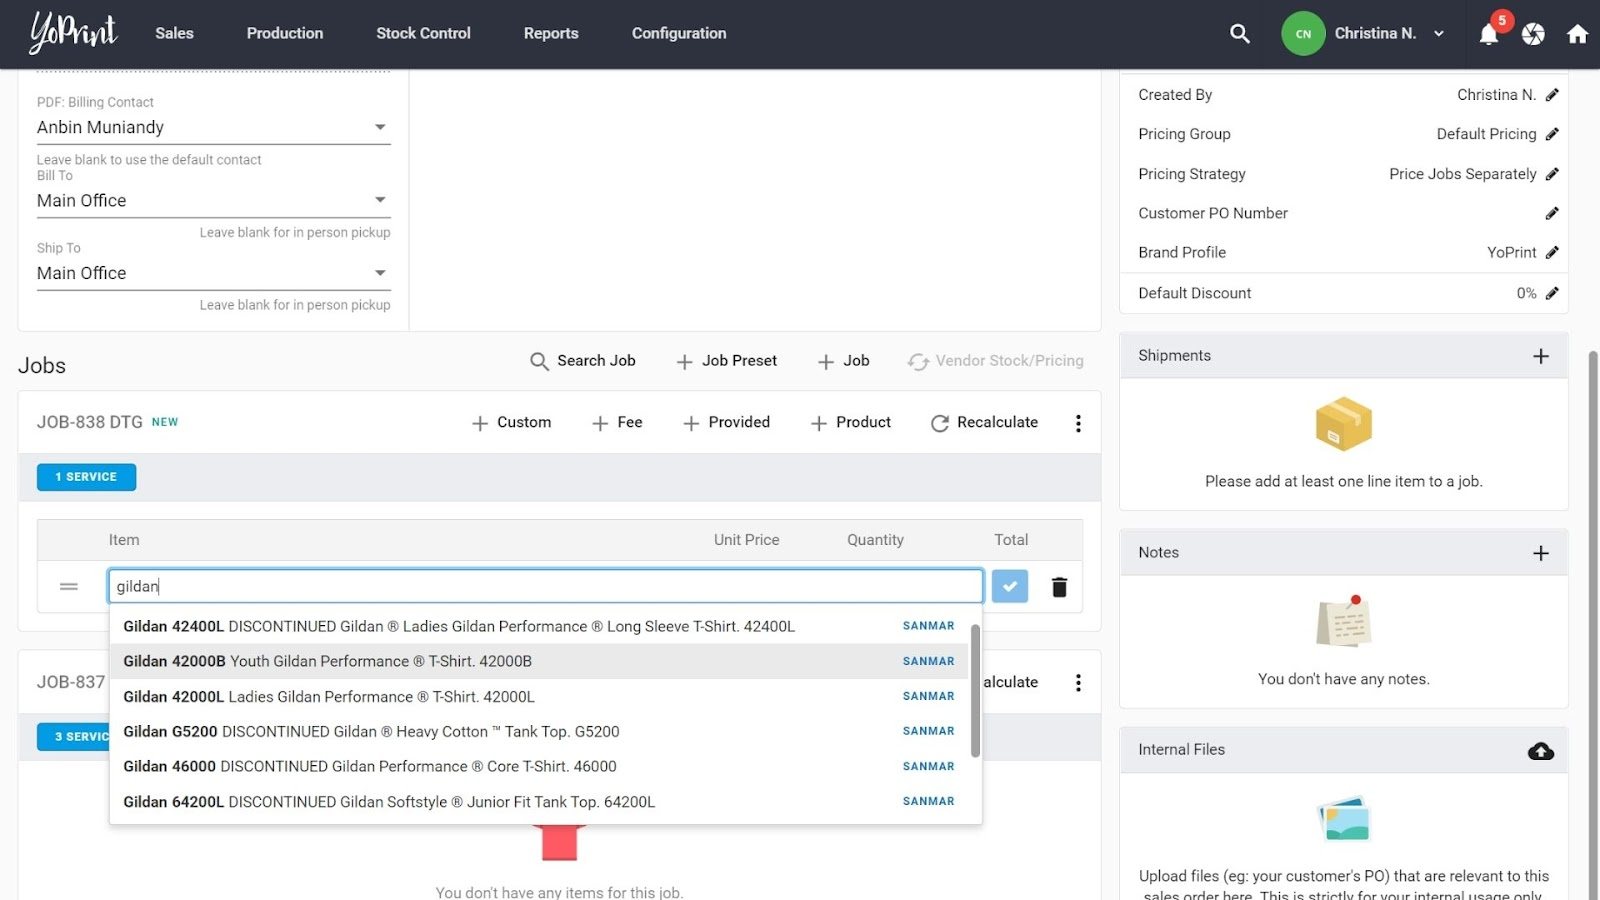
Now, choose the size and color. We only display the colors and sizes available specifically for the product you’ve chosen. So if Gildan 42000B, for example, doesn’t come in size 2XL, you won’t see a 2XL option in the dropdown.
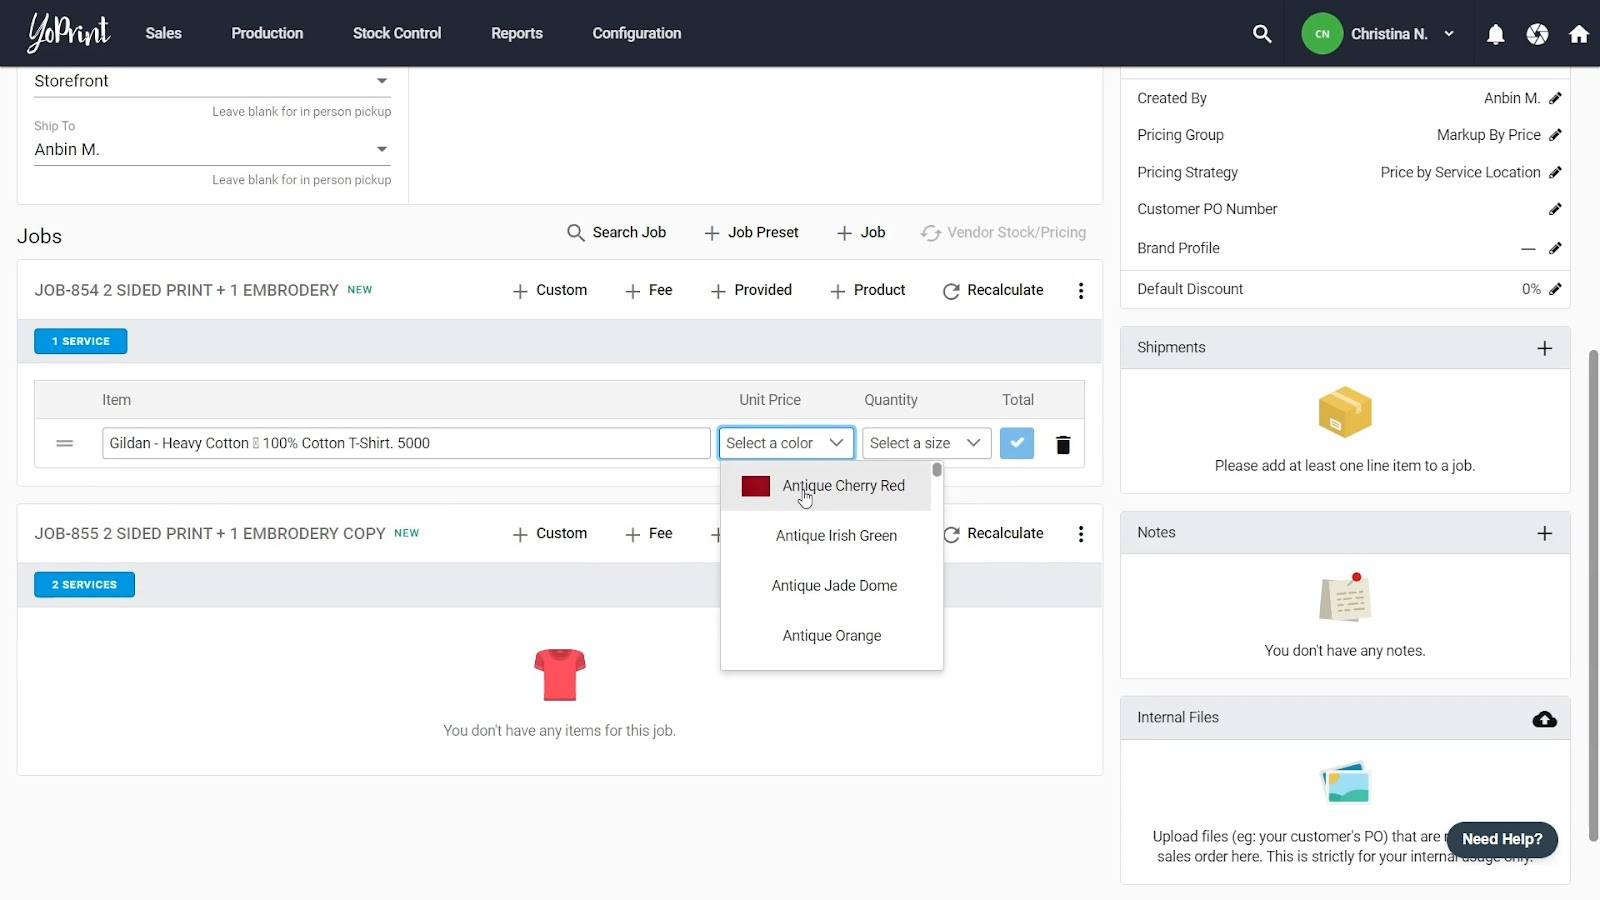
Click on the tick button to add the product to your order, and specify the quantity.
If you want to quickly add more of the same product in different sizes, click on the clone button, and YoPrint adds the next size up.
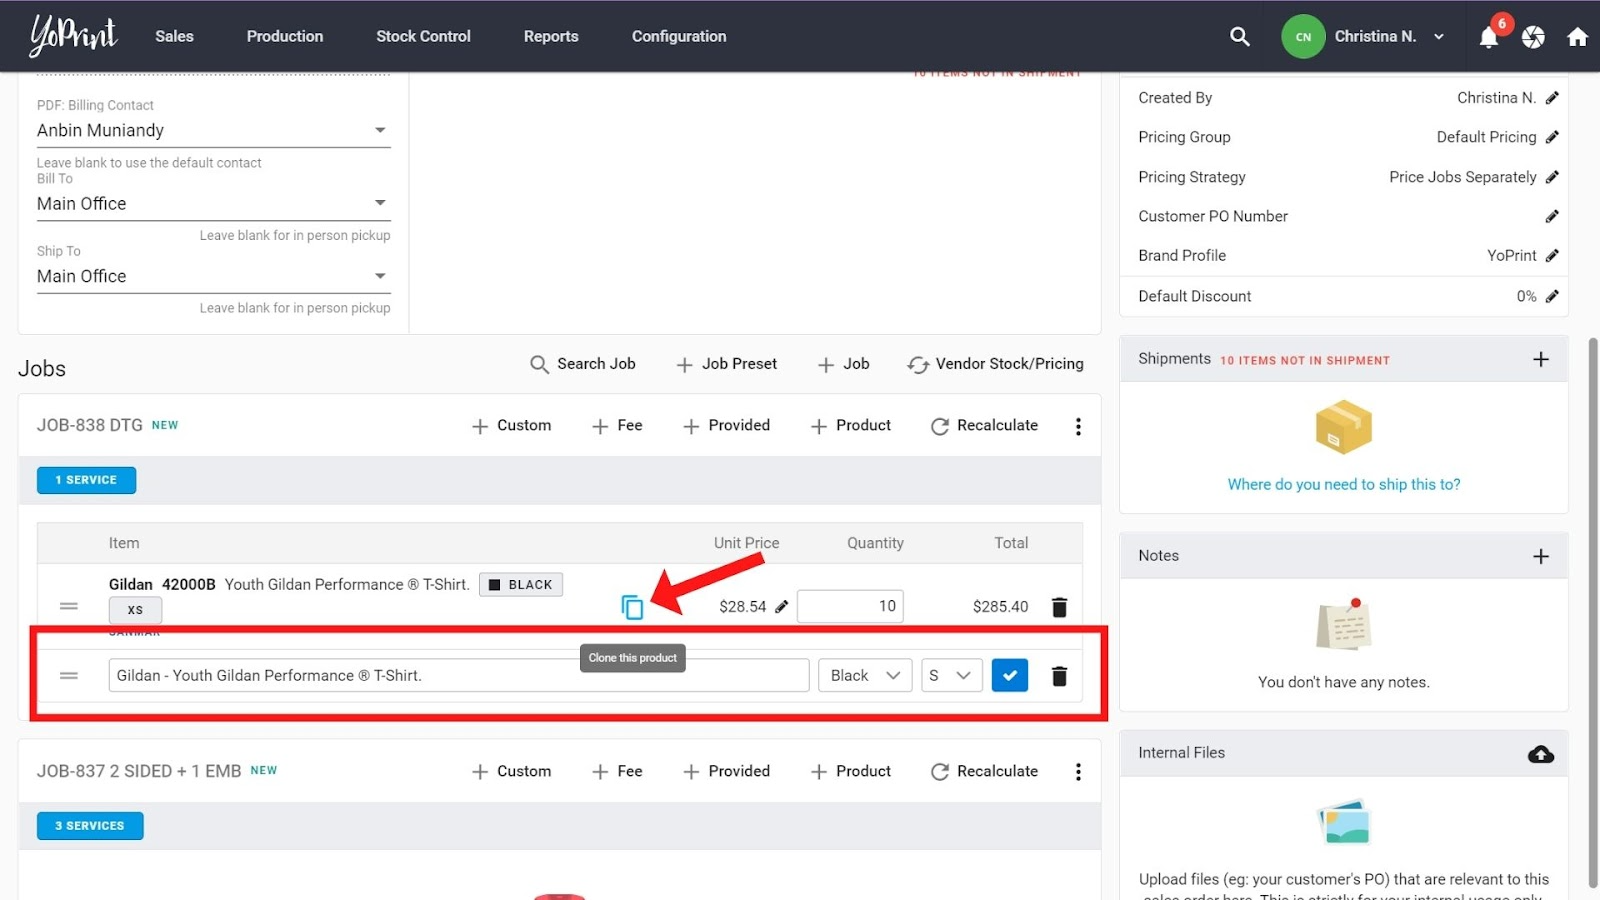
YoPrint automatically calculates product cost and pricing for your. In this example below, since 2XL costs more, YoPrint automatically adjusts the price.

You can hover over the price to see the breakdown, including the cost to buy the product from the vendor, the markup percentage, the resulting price of the product, the service price, and margin.
You can also manually override the price by clicking on it. You can select a different pricing group, or input a different number.
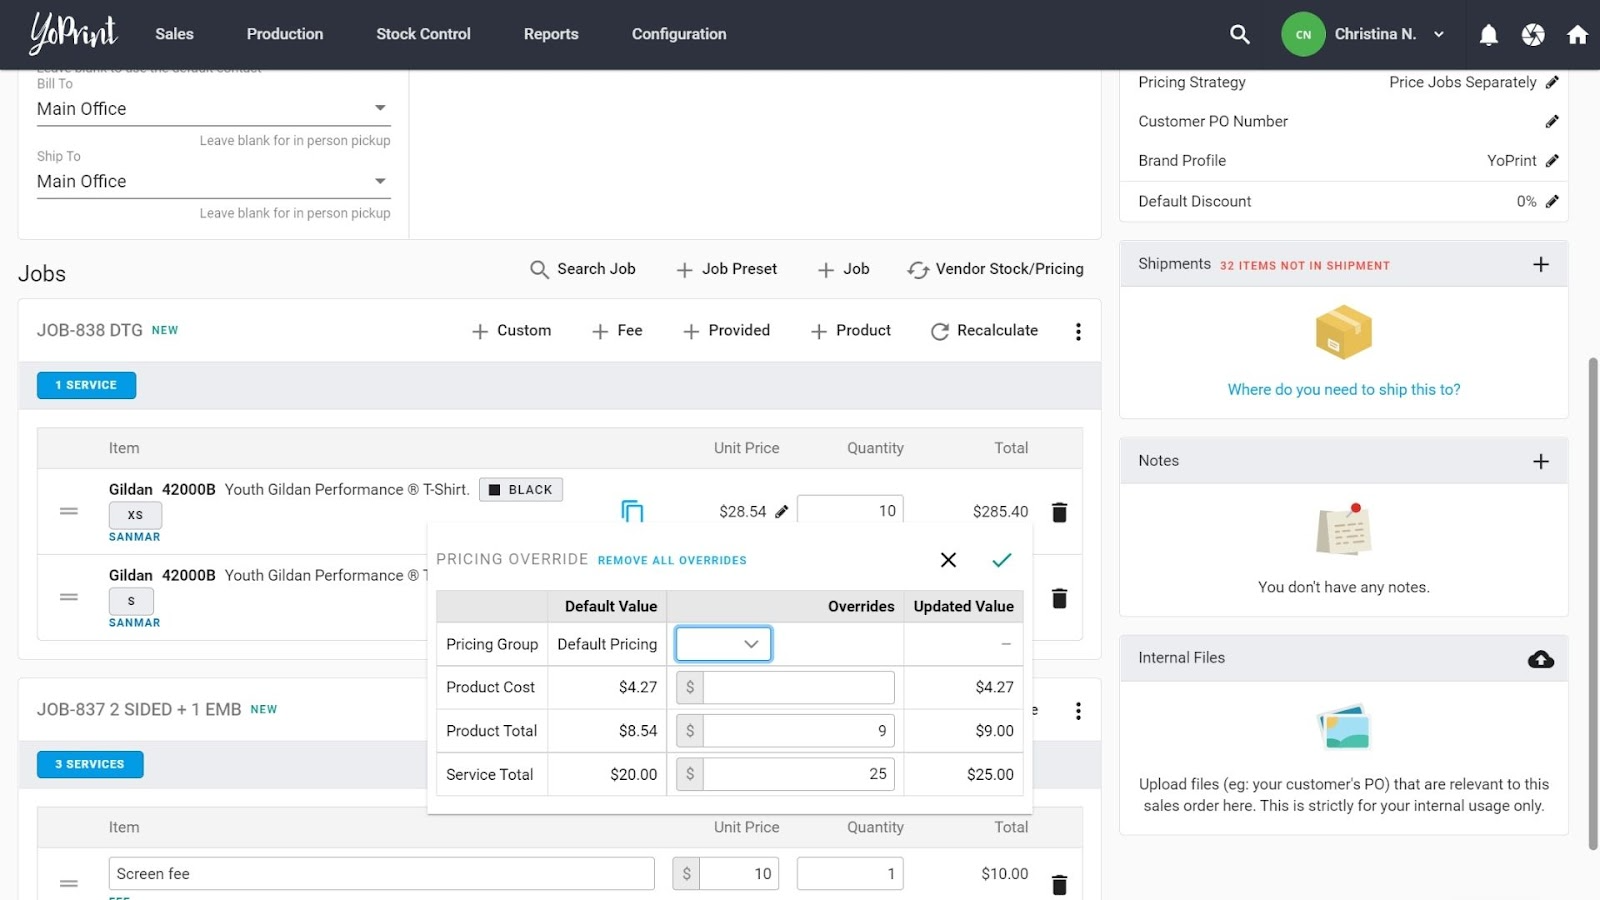
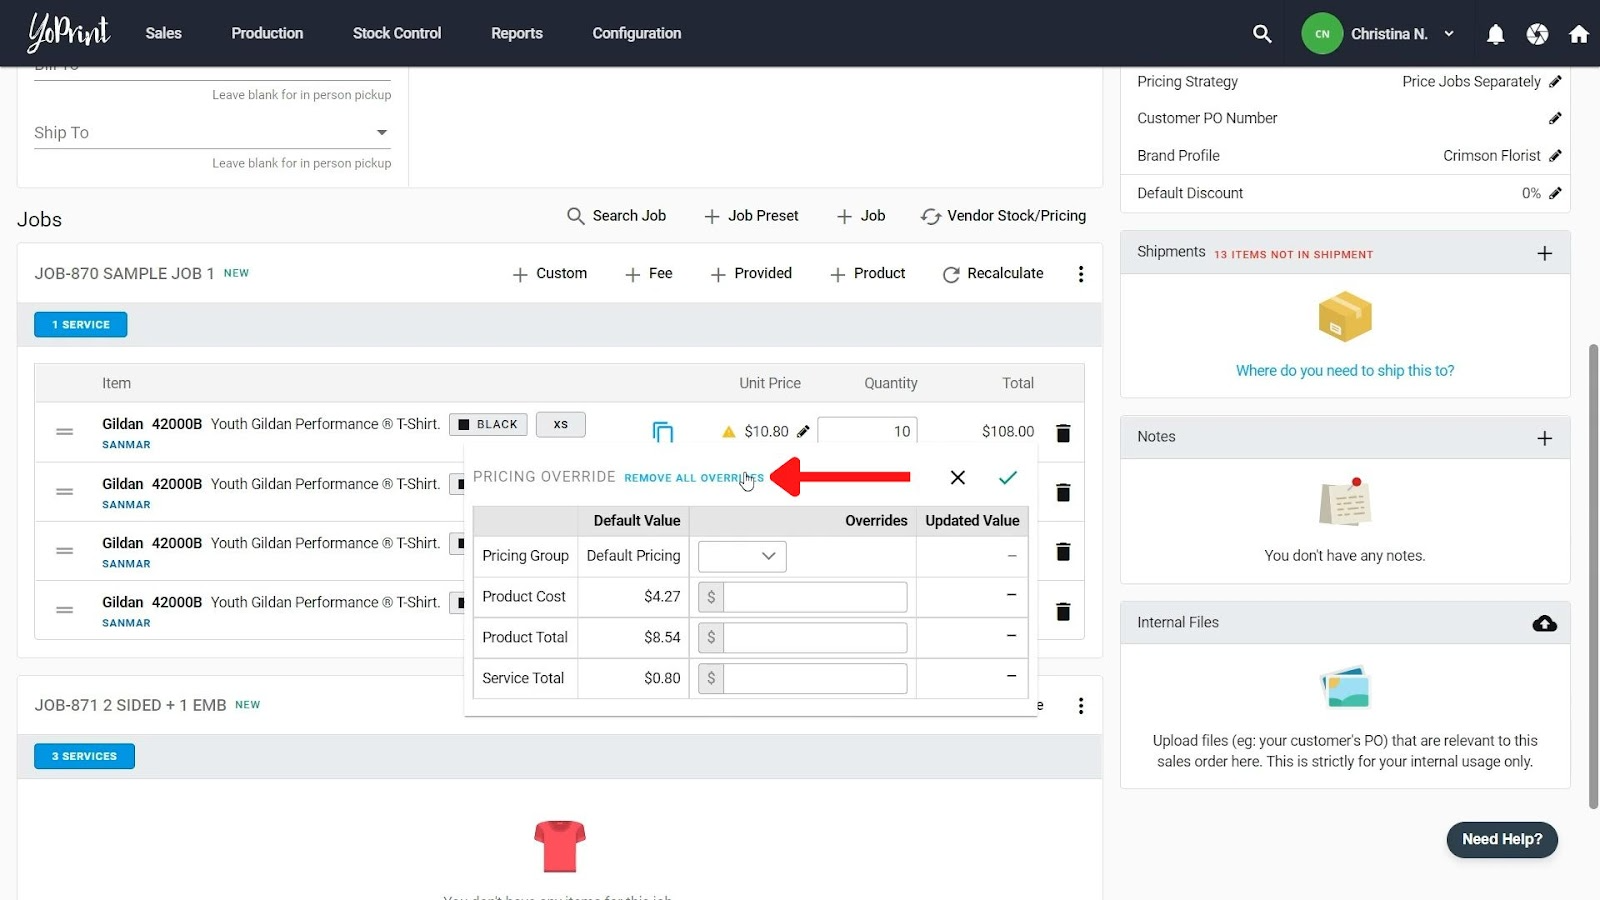
If you manually override it, we display a yellow sign here that indicates an override.

If you change your mind, you can remove overrides by clicking on Remove All Overrides.
Check Vendor Stock
Now you want to check that the vendor has the products you’re ordering in stock. Click on Vendor Stock/Pricing.
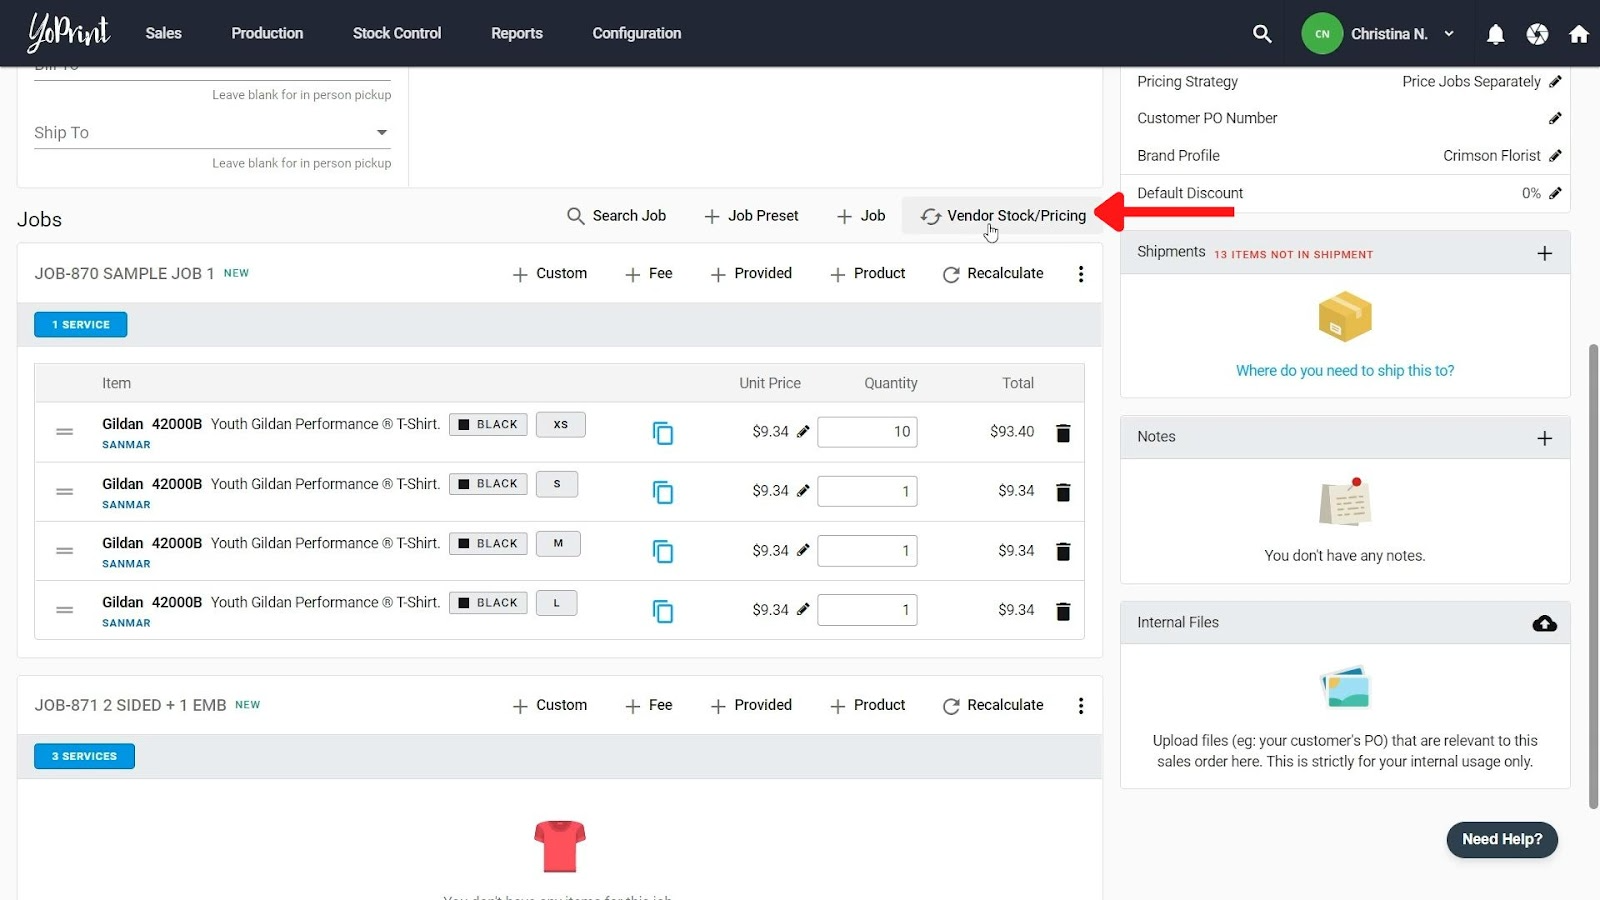
If you hover over the products, you can see their availability at different warehouses. You can make sure they’re in stock before finalizing your customer’s order.

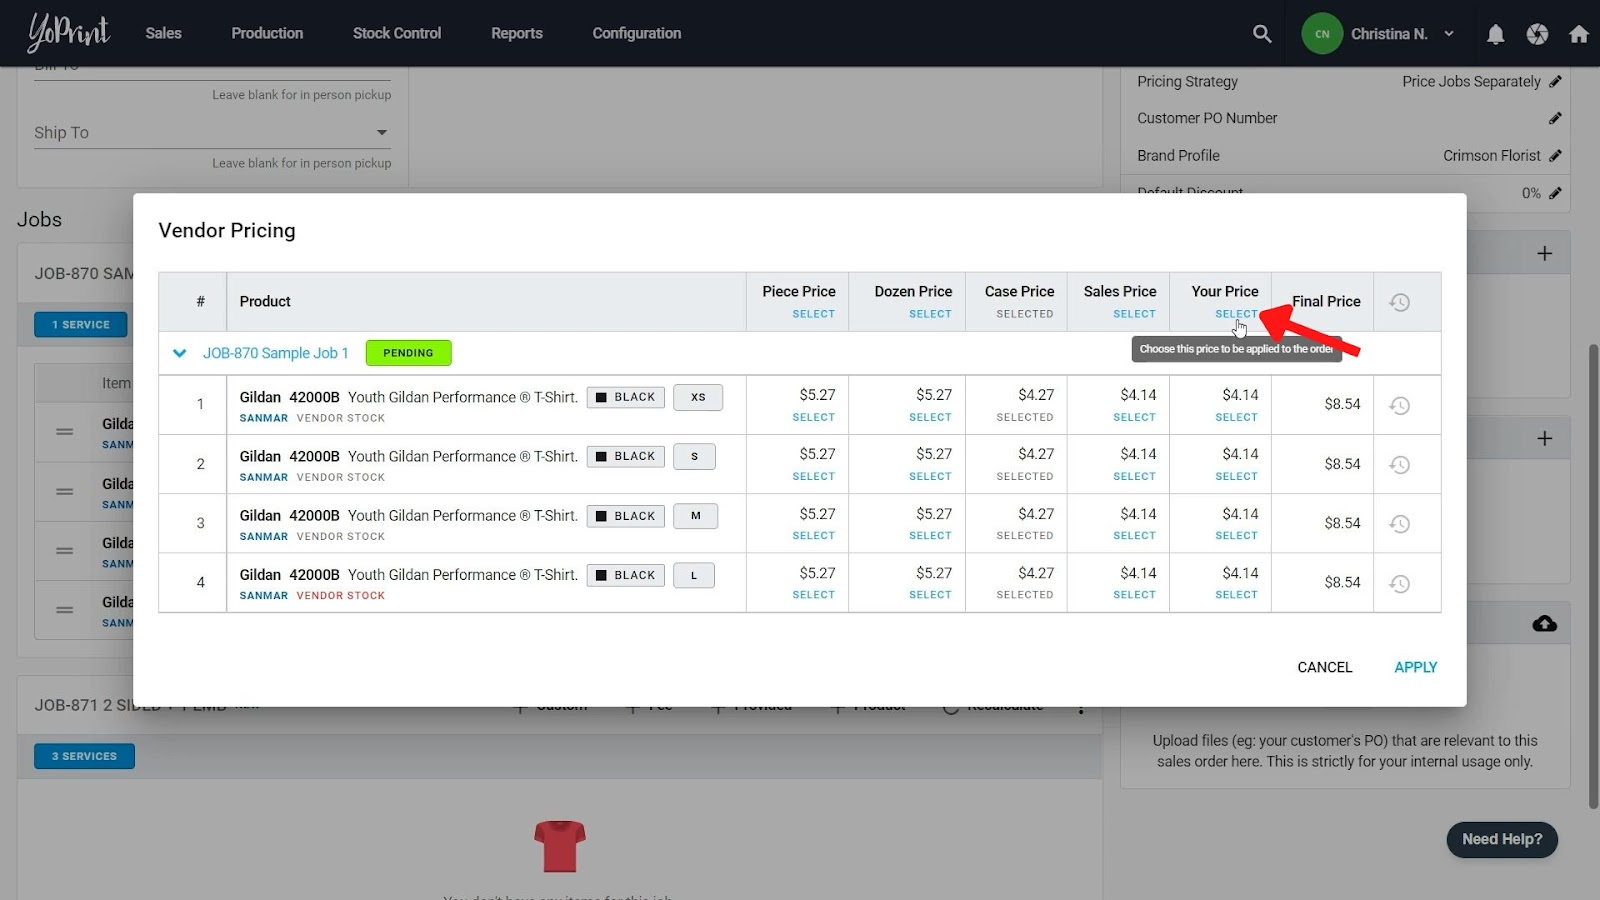
Piece, Dozen, and Case Price is the default price from the Vendor. If there’s a sale going on, you’ll see a Sales price column. And if you added your account to our system, you can see your own pricing under the column ‘Your Price’.
You can click on Select to choose which pricing you want to offer to your customers, and it will override the product cost.
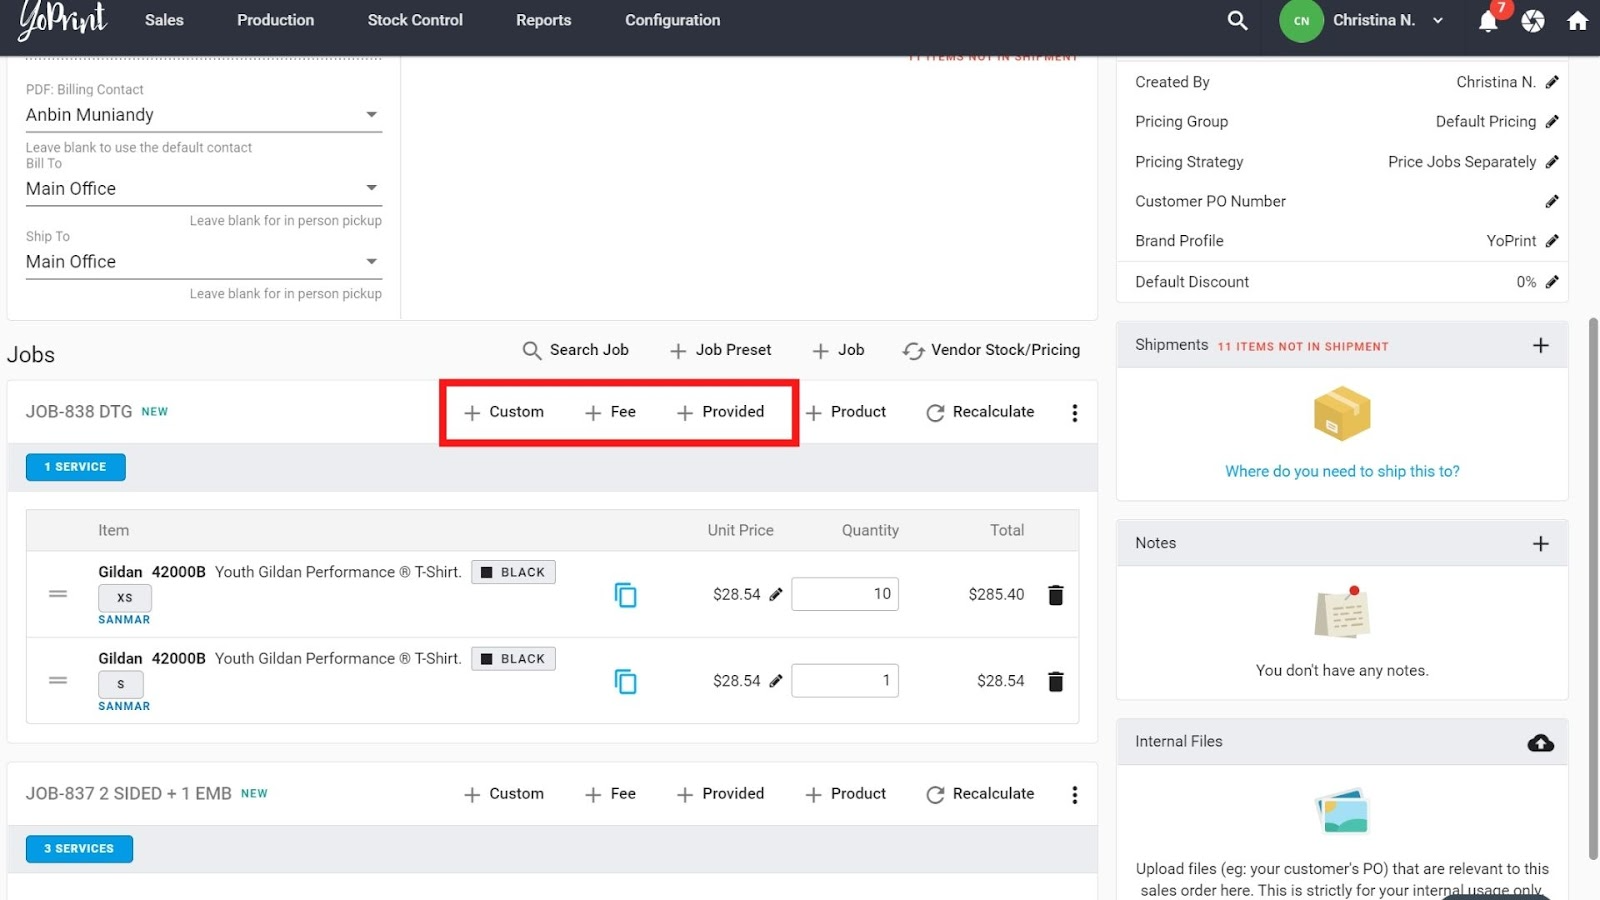
You can also add custom products, customer-provided products, and fees.
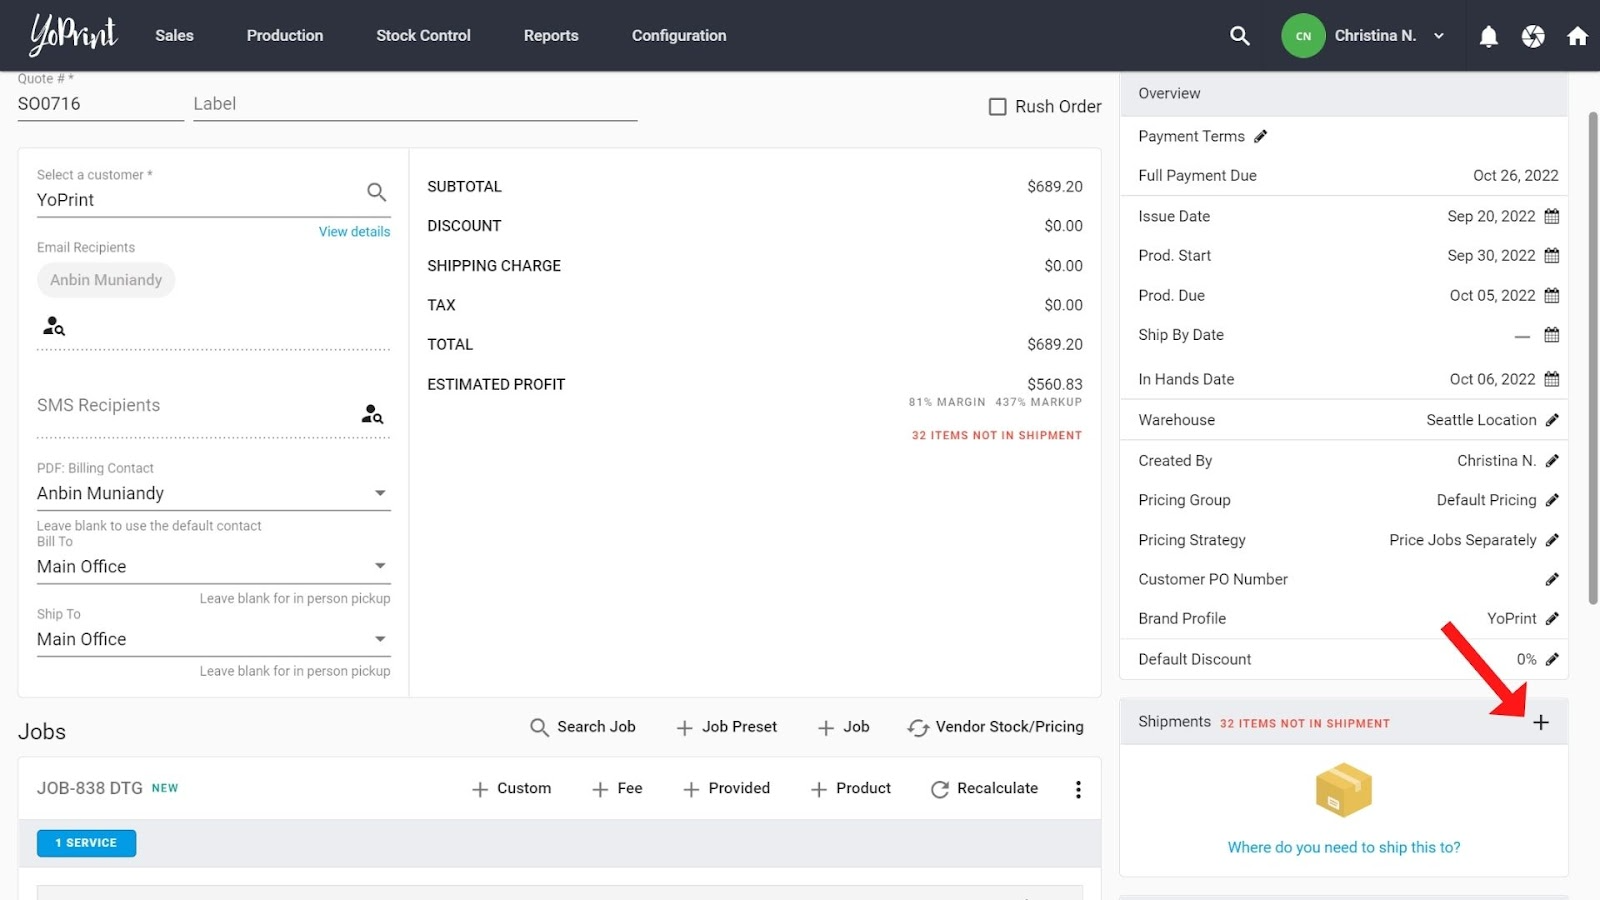
Add Shipments and Tax
Now it’s time to create shipments. You can create multiple shipments that ship to multiple destinations in one quote. Click on the + button in the Shipments dialog.
When you pick your shipping method, the tax amount is automatically calculated based on your locations and tax nexus. Let’s select UPS ground as our shipment method.
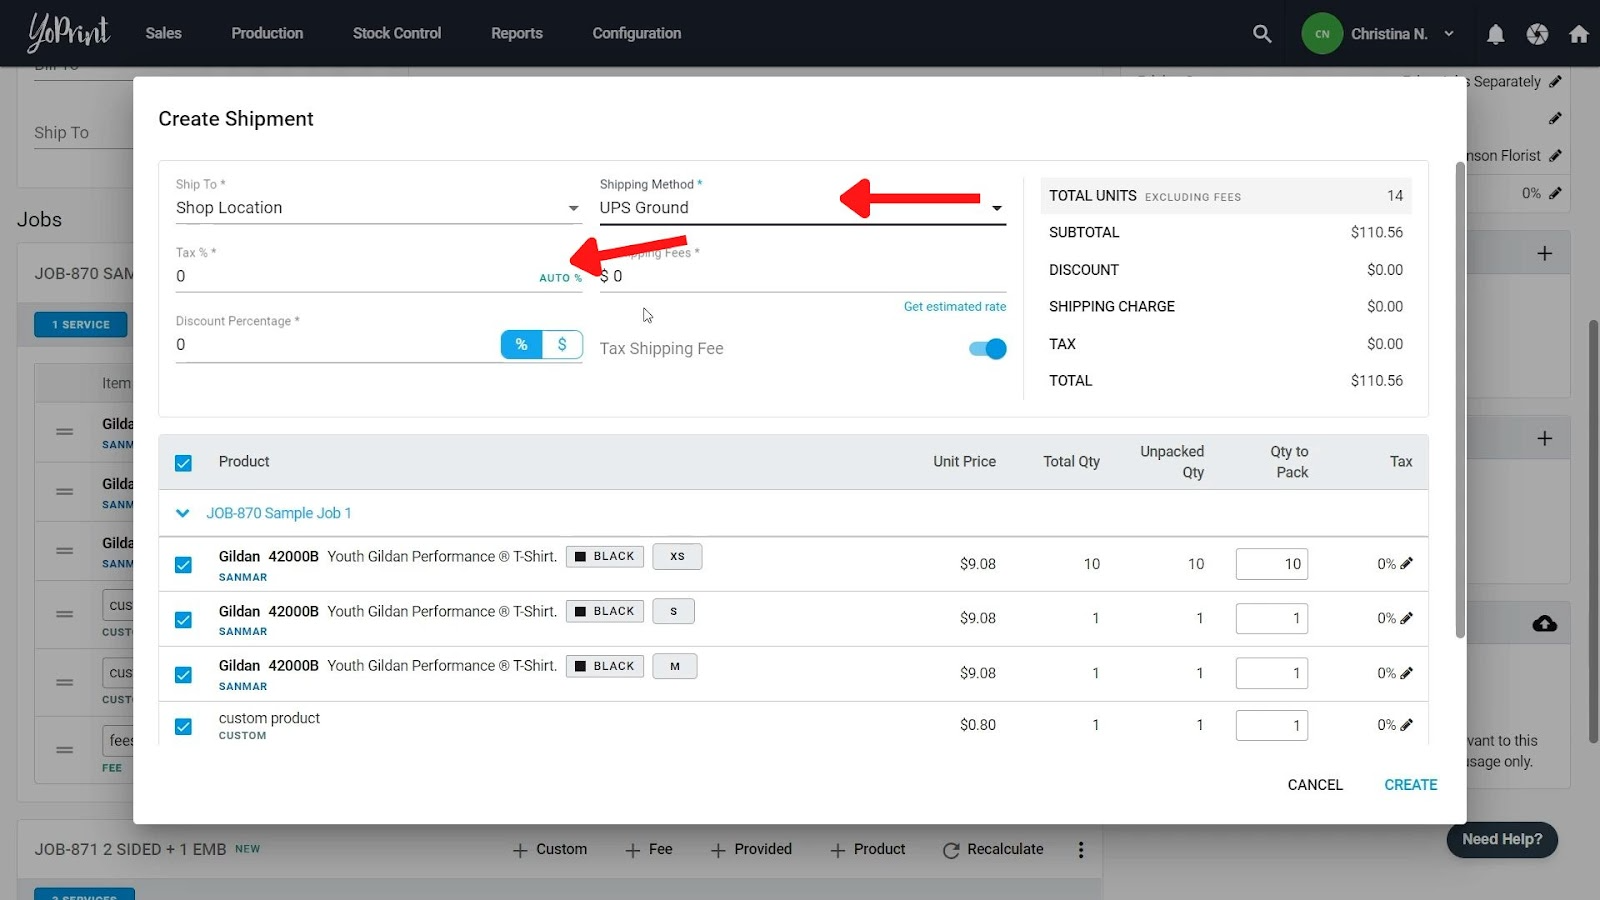
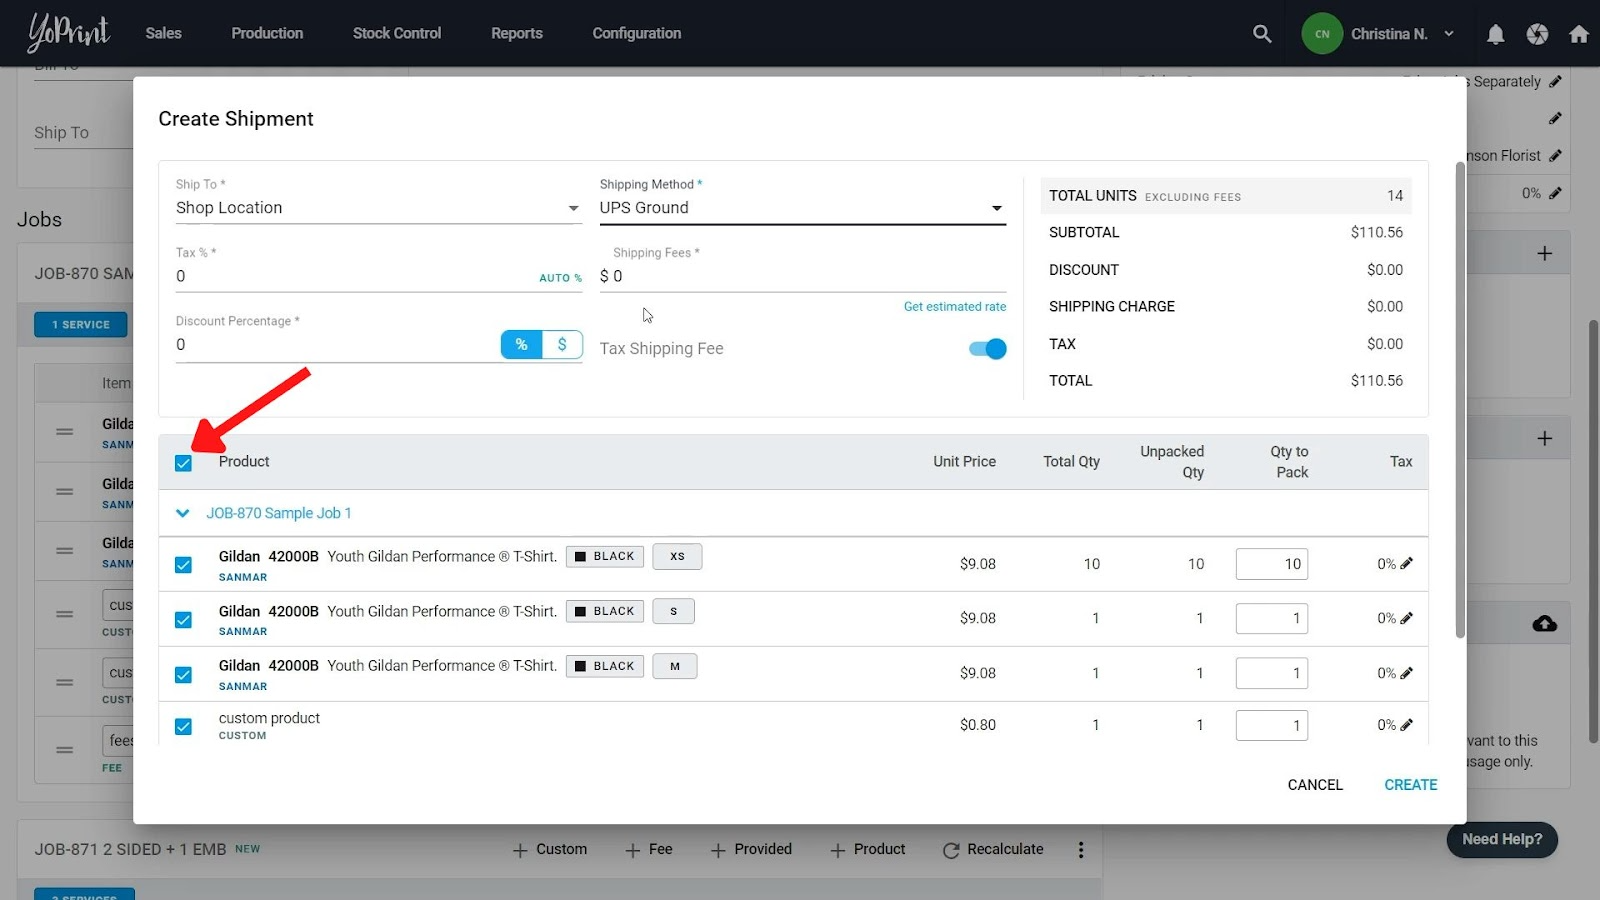
Select the products that need to go into the shipment.
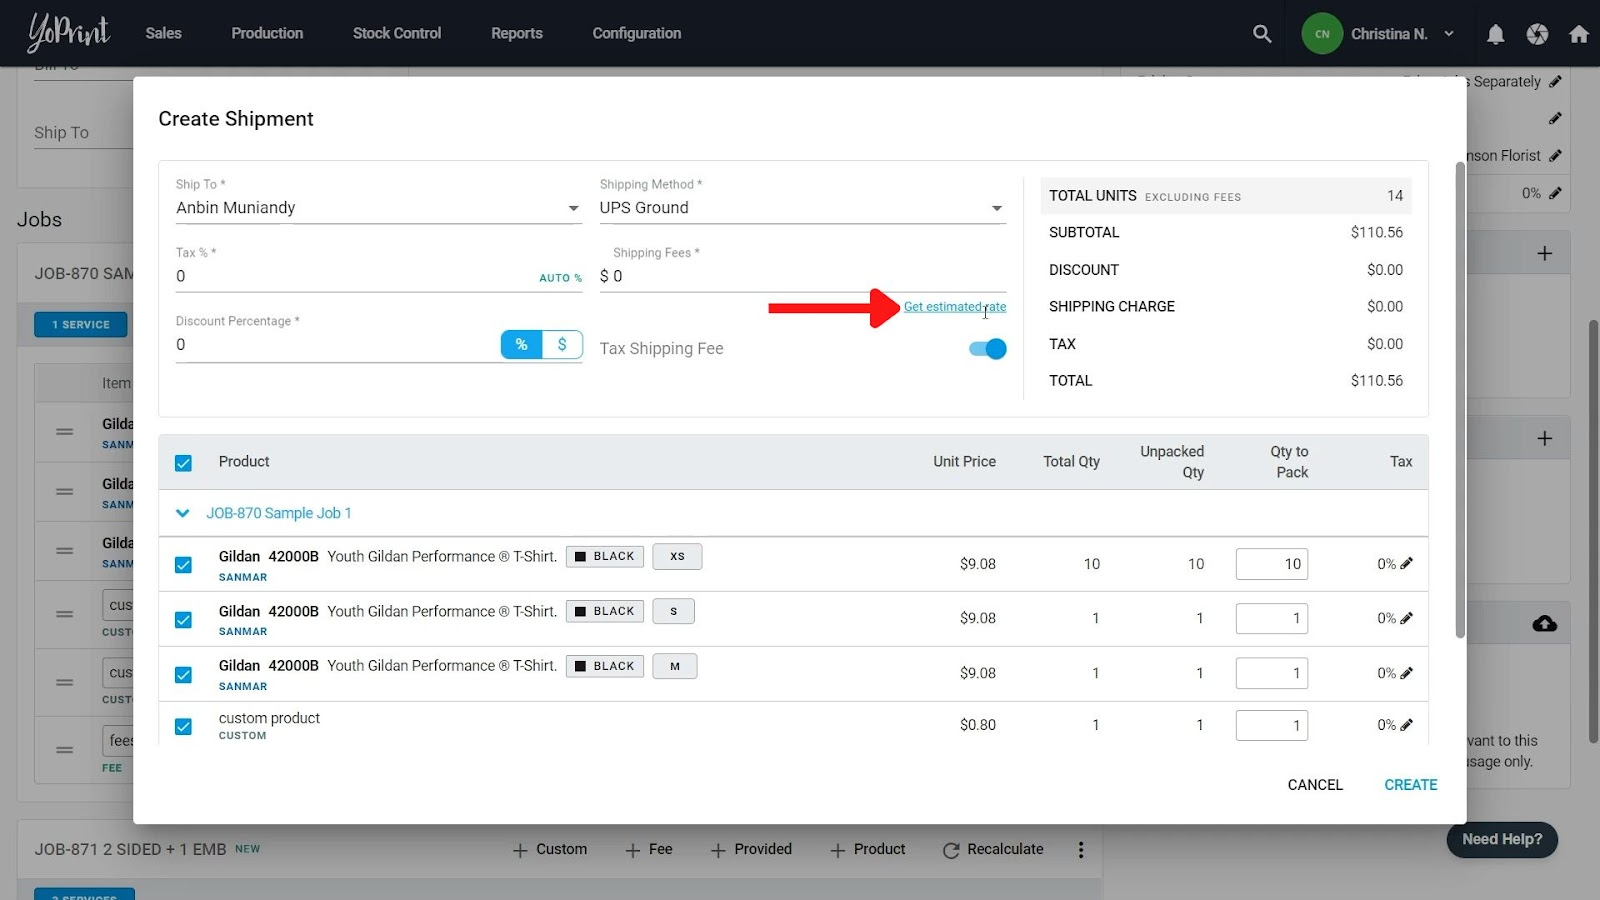
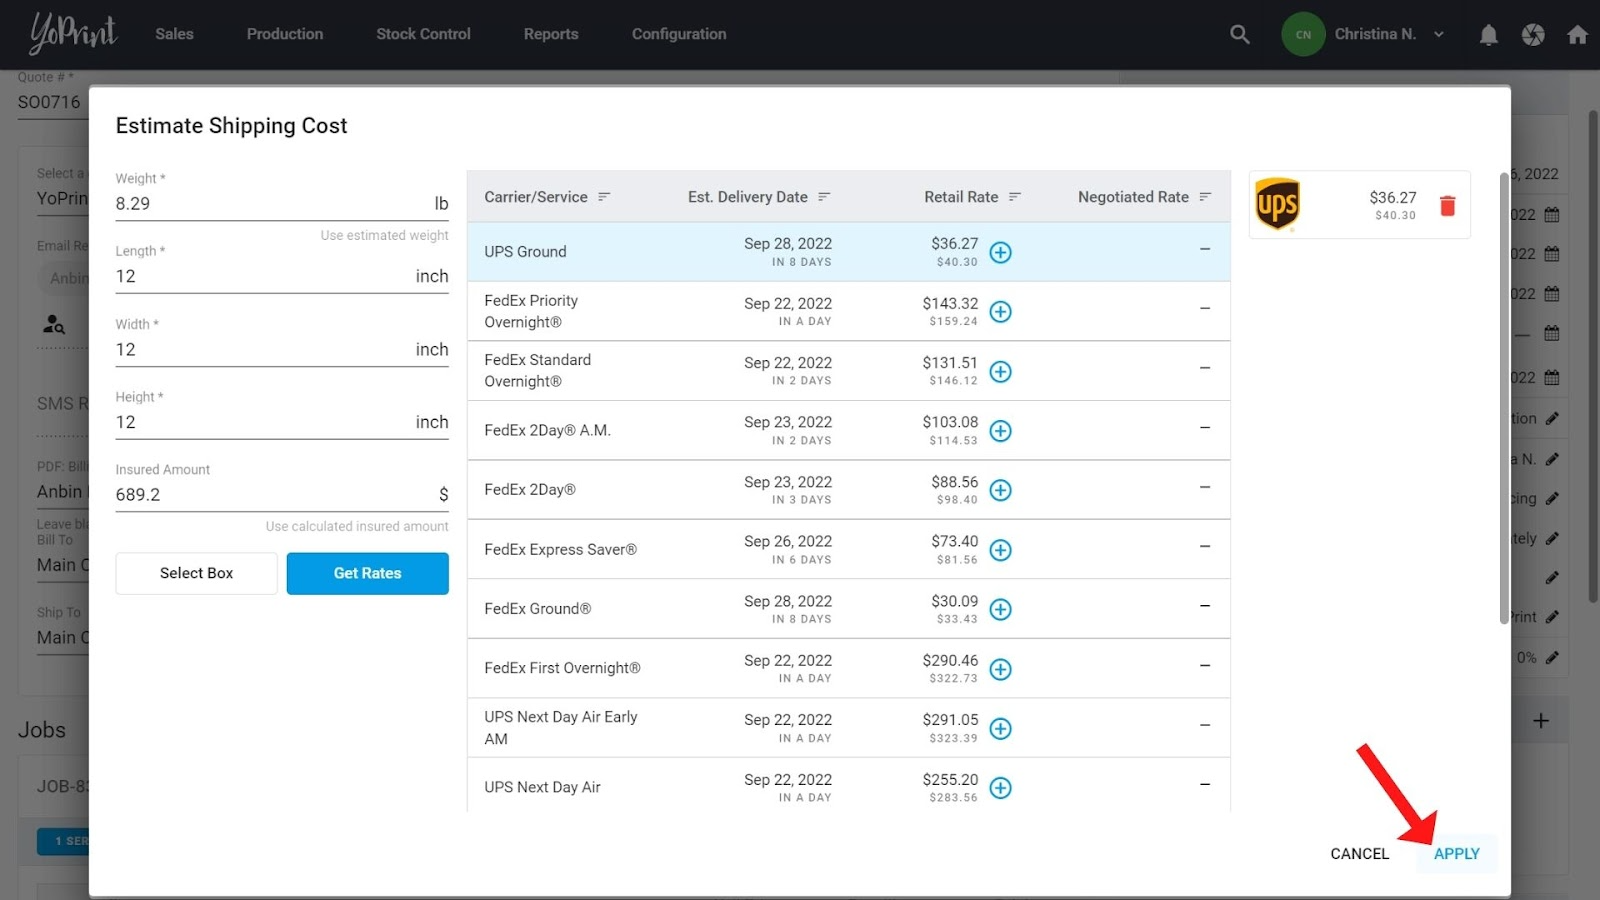
If you’ve added your UPS or FedEx account into our system, you can get estimated shipping rates by clicking on Get Estimated Rates. Rates are based on product size and weight, and is taken from the catalog.
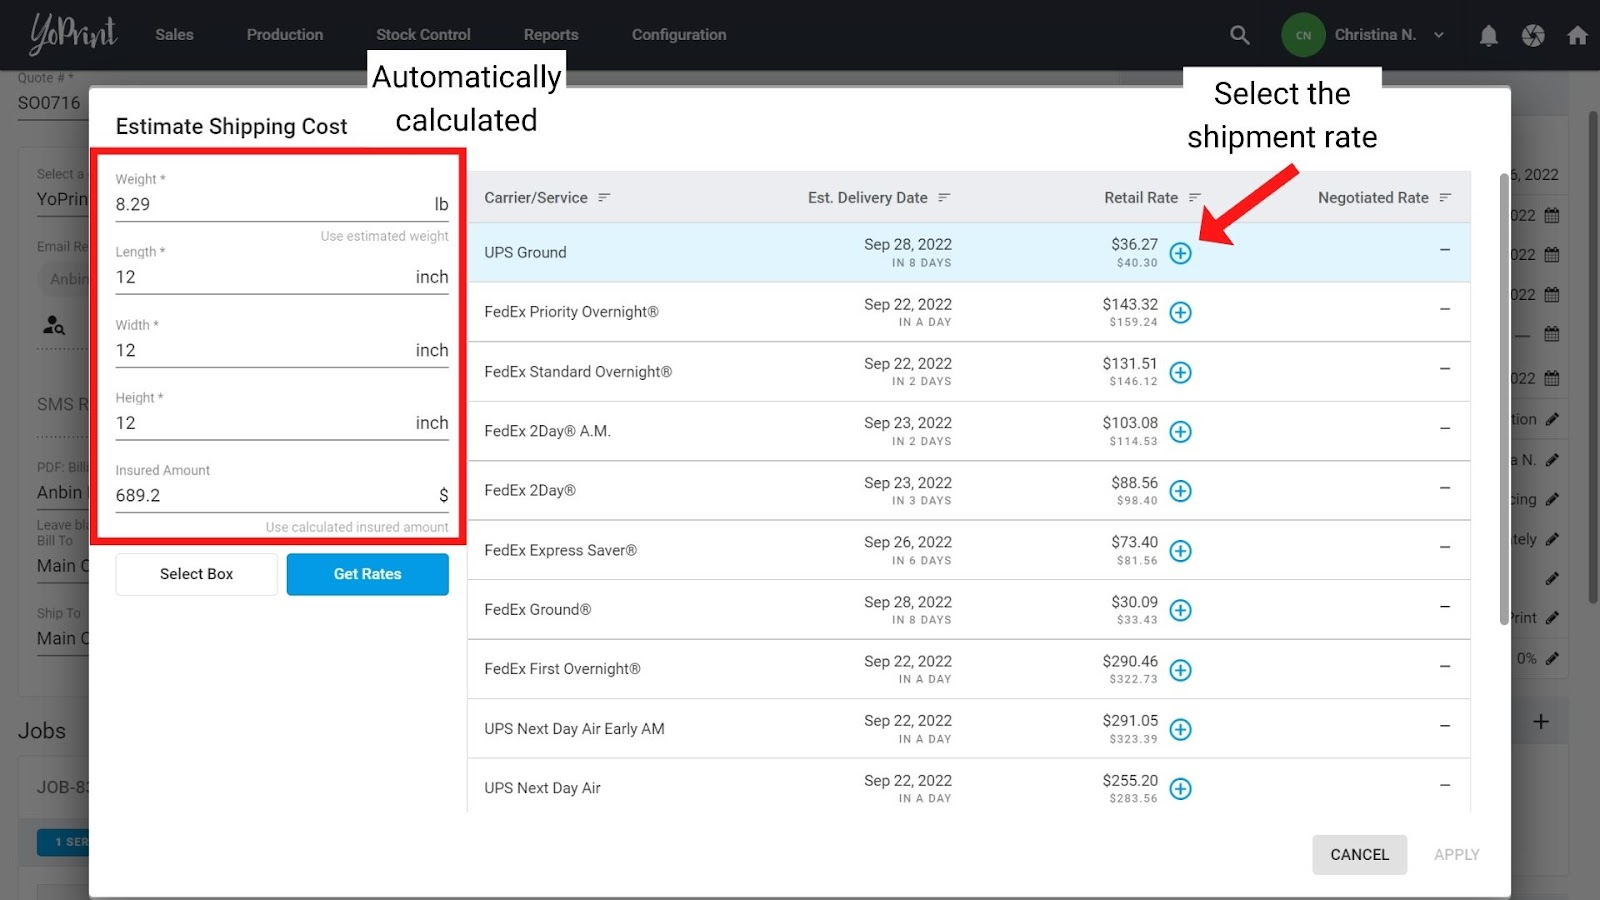
When looking at the pricing, the larger number on top is what the courier company charges, and the smaller number at the bottom is what you want to charge your customer, based on markups you’ve previously set up. Select the rate you want to use, and apply it to the shipment.
You can still edit the Shipping Fee to your liking.
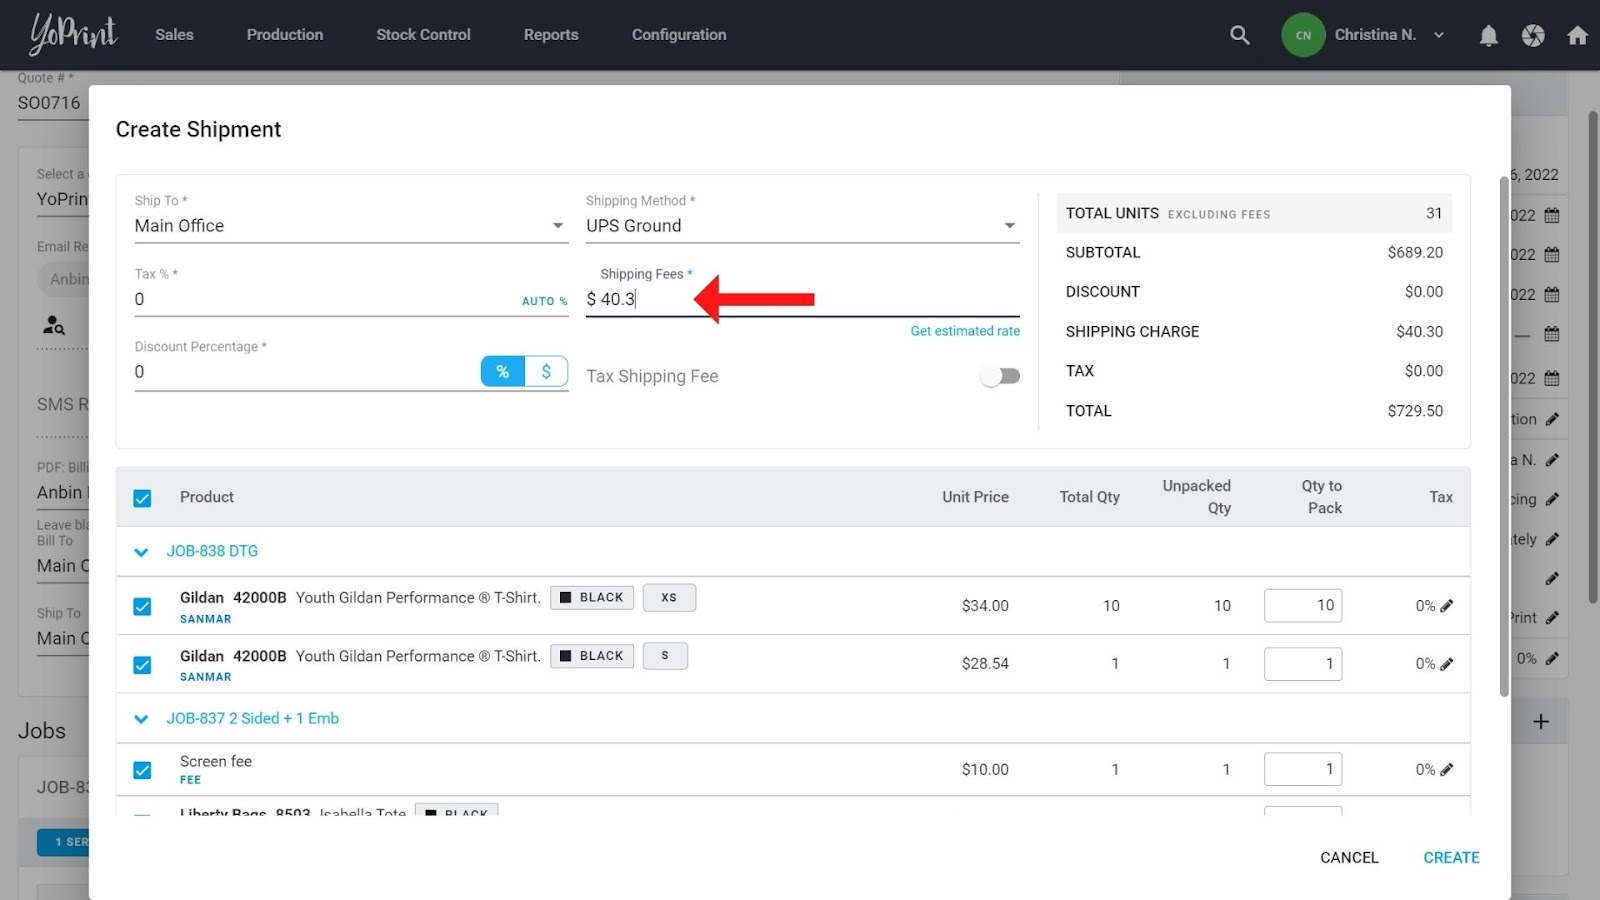
Once the Shipment looks good, click create.
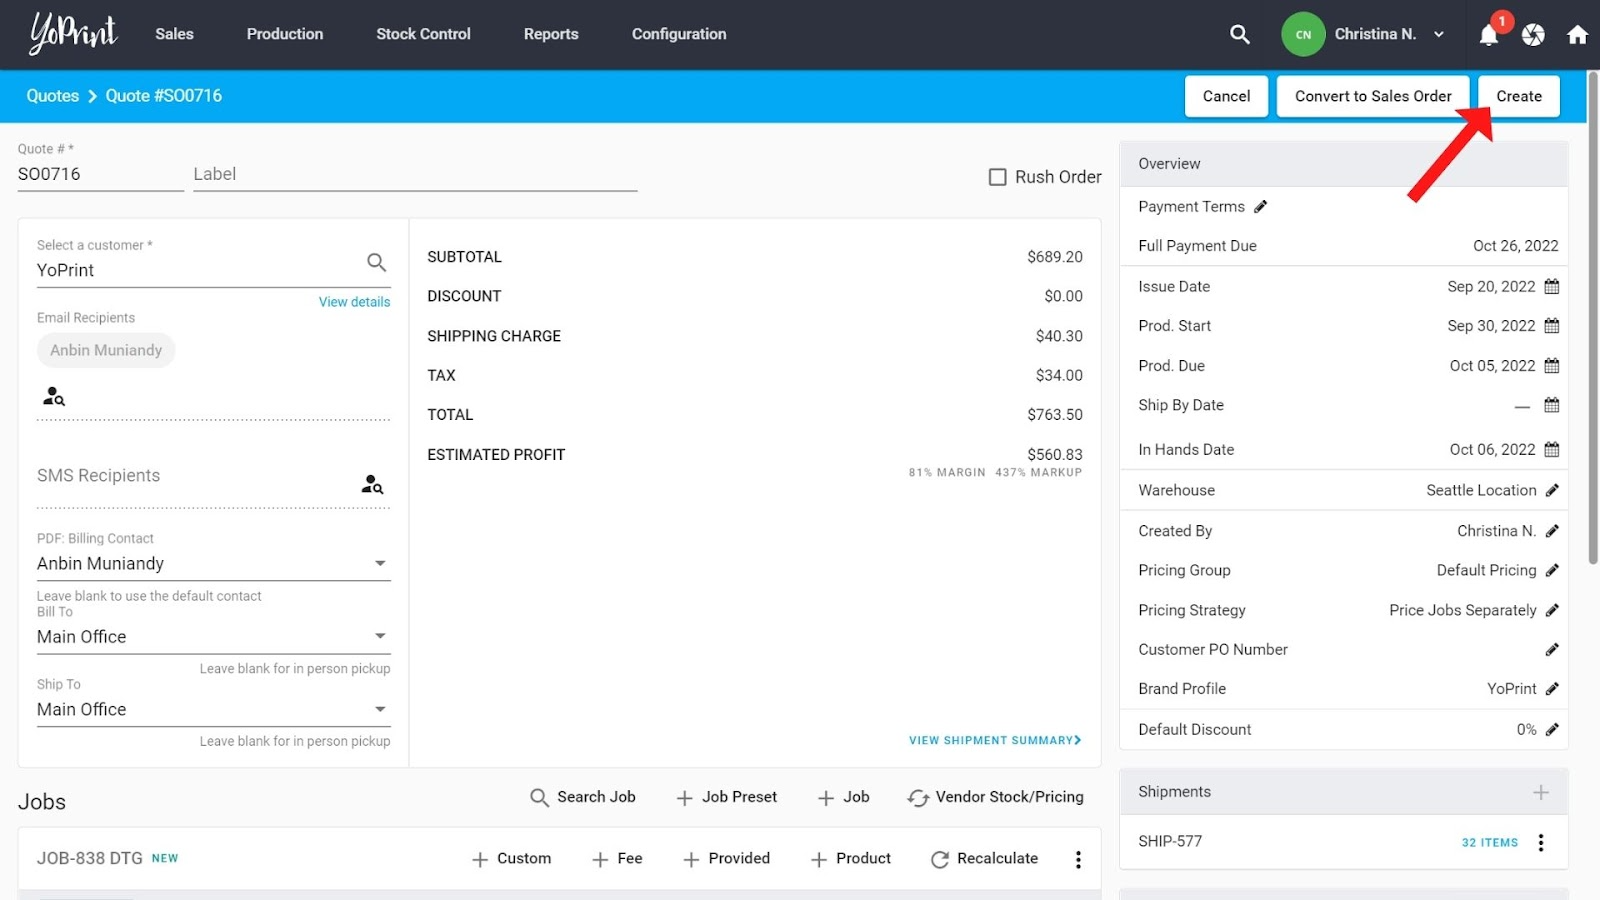
Your quote’s pretty much done now! All you have left to do is to click on Create, and the quote’s published.
More Useful Resources
How to Request a Quote Approval