Edit a Job After Creating a Quote or Sales Order
In this article
Every order contains at least one job. A job groups the garments, fees, and decoration services for one part of a quote or sales order. Keep related products and services together in a job. For example, if a customer orders printed T-shirts and embroidered caps, you can put the T-shirts in one job and the caps in another. Both jobs stay on the same order, but each job tracks its own garments, decoration services, and production status.
To open an order from the dashboard, click Sales > Sales Orders and select your order. To open a quote, click Sales > Quotes and select your quote. Once you open the detail page, you can update line item quantities, rename jobs, and add or adjust decoration services directly from the order page.
Change product lines on a published job
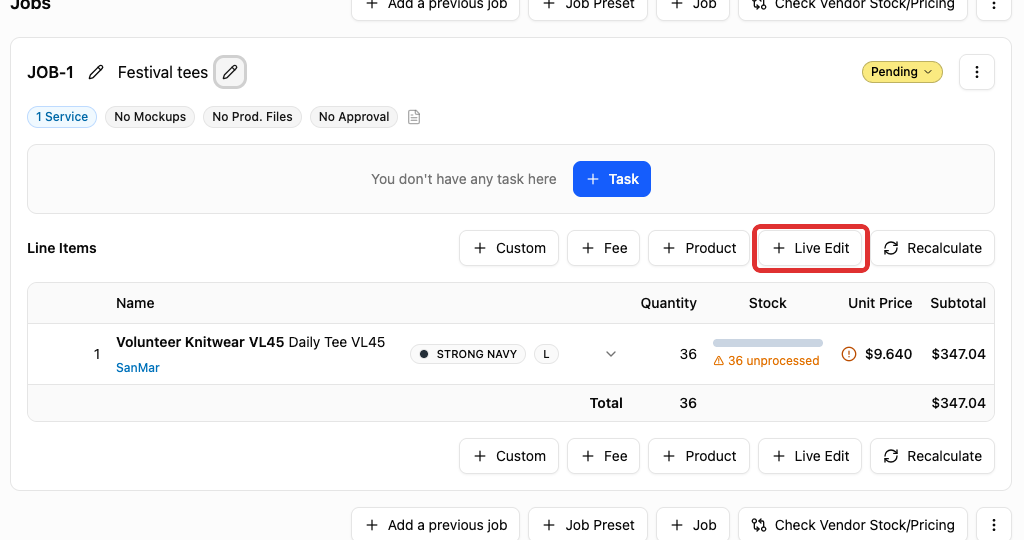
On a published job card, Live Edit lets you update existing line item quantities and pricing. The + Product, + Custom, and + Fee buttons on the job card let you add new lines directly to the job.
-
On the job card, click Live Edit.
-
In the Quantity field, enter the updated number of pieces.
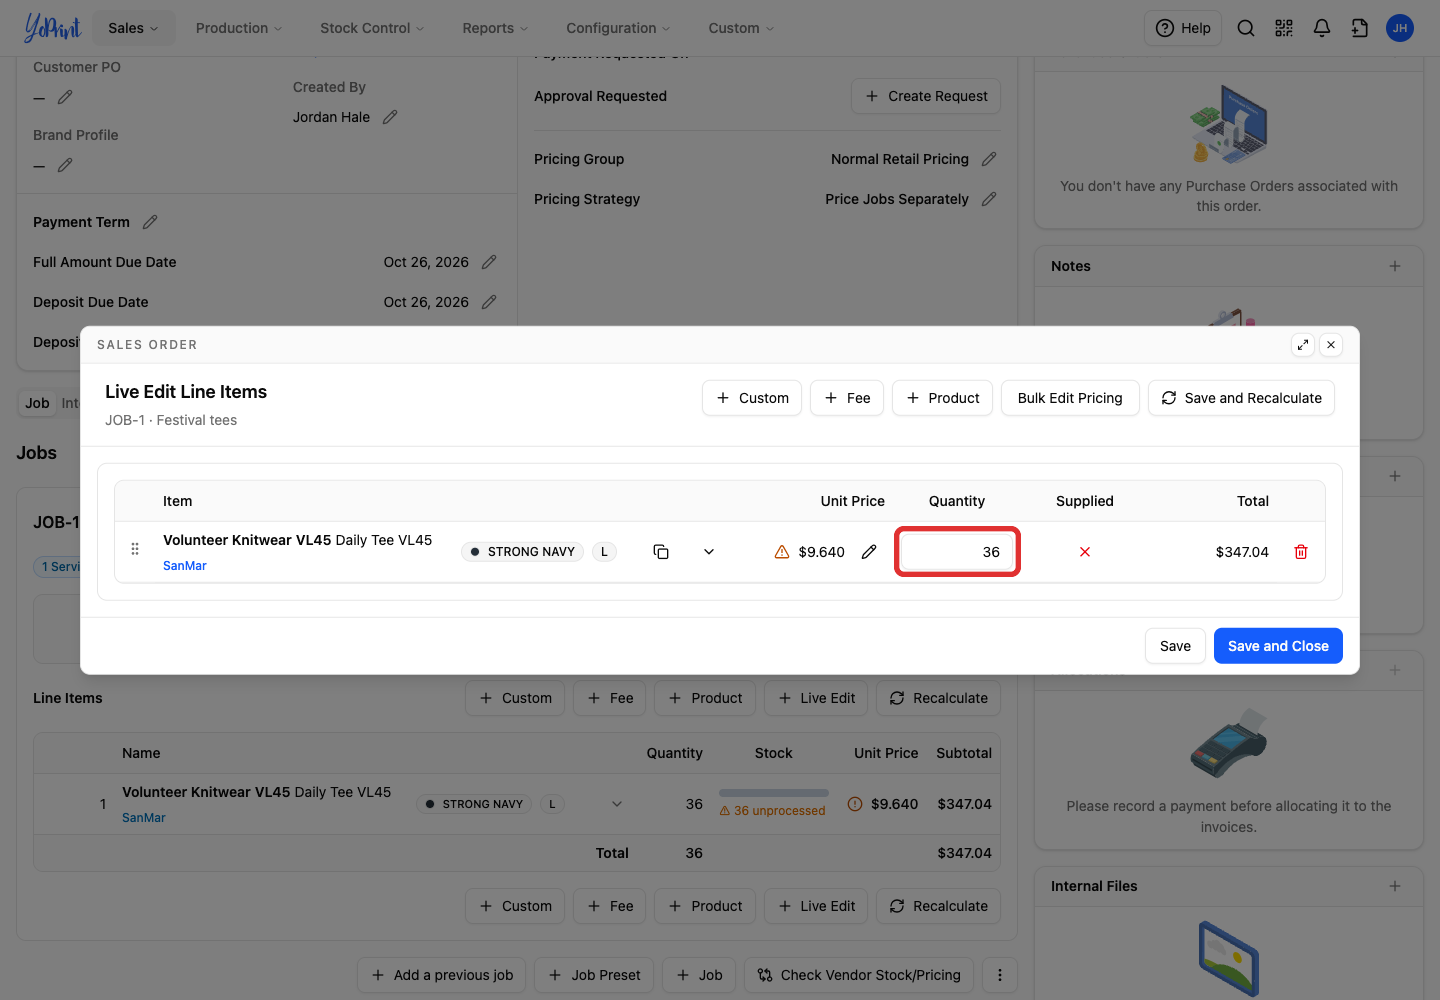
While you type a new quantity, the Unit Price and Total columns temporarily display No value. Clicking Save and Close recalculates the pricing automatically and saves the line items. You can also add items with + Product, + Custom, or + Fee, duplicate lines with Copy, or delete lines with Remove.
-
Click Save and Close.
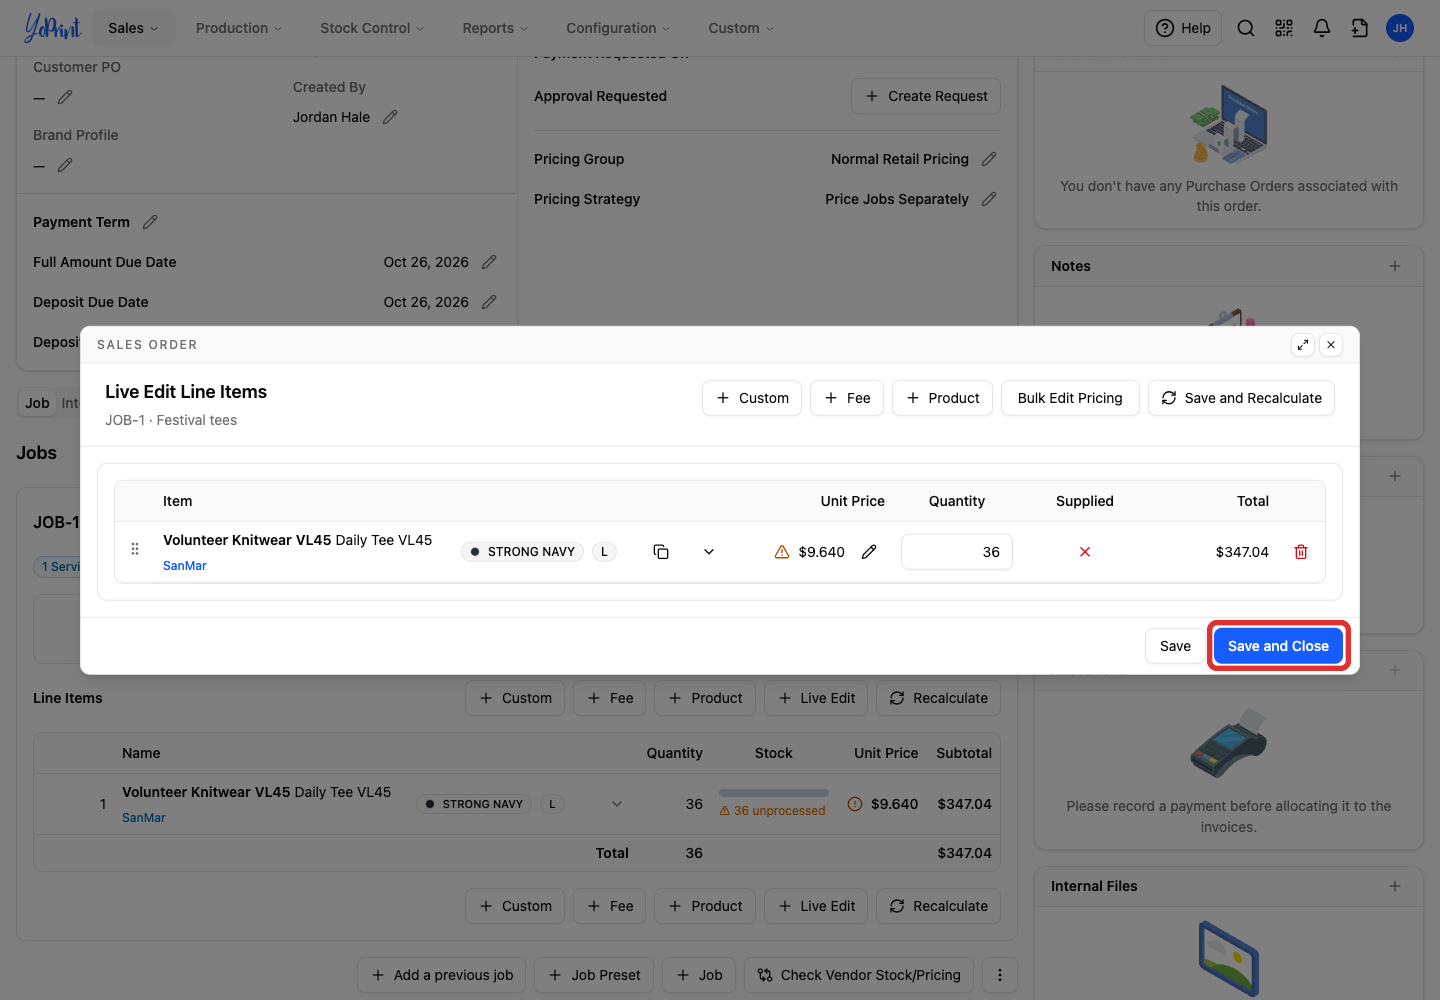
The order subtotal updates immediately. If the sales order already has a saved invoice, the invoice keeps its previous quantities until you edit it. When order quantities exceed what was previously invoiced, YoPrint flags the difference with a badge (such as 4 items not invoiced). This badge alerts you to update the existing invoice or issue an additional invoice so customer billing matches the updated order; it does not block production or change what the customer was already billed. To update invoice amounts, see How to Edit Sales Orders.
Rename the job
-
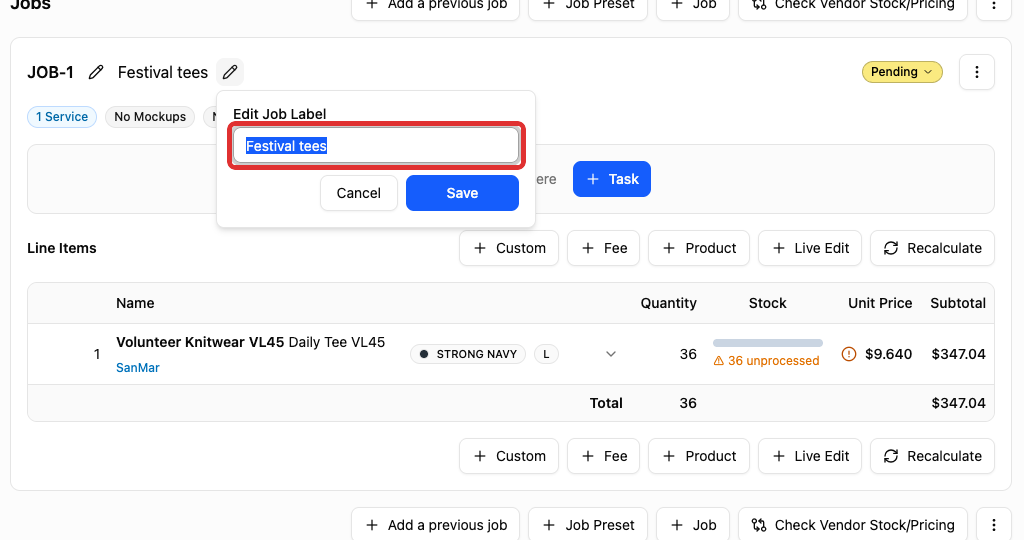
Beside the job name, click the edit pencil icon.
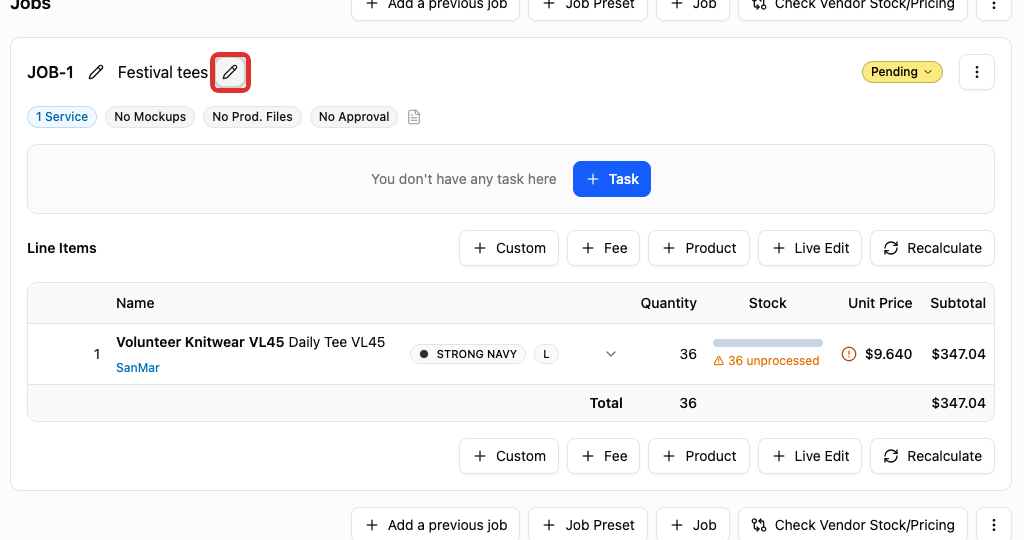
The pencil icon beside the job identifier (such as JOB-1) edits the job ID number. To change the name shown to customers and staff, click the pencil next to the job name. YoPrint calls this the Job Label. It identifies the job for your staff and appears alongside the job ID on customer-facing quotes, invoices, and production job sheets.
-
In the Edit Job Label popover, type the new name.
-
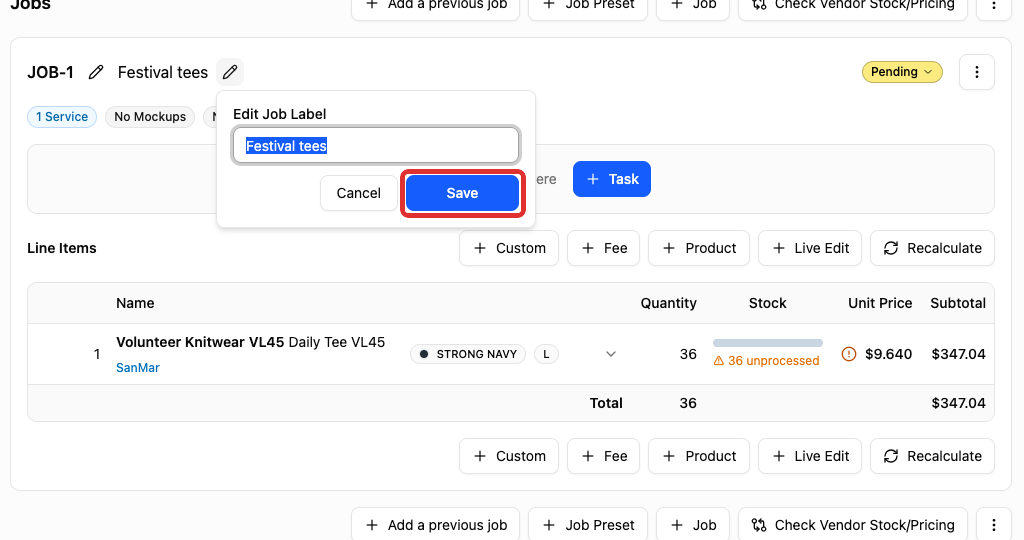
Click Save.
Add and edit services in a job
-
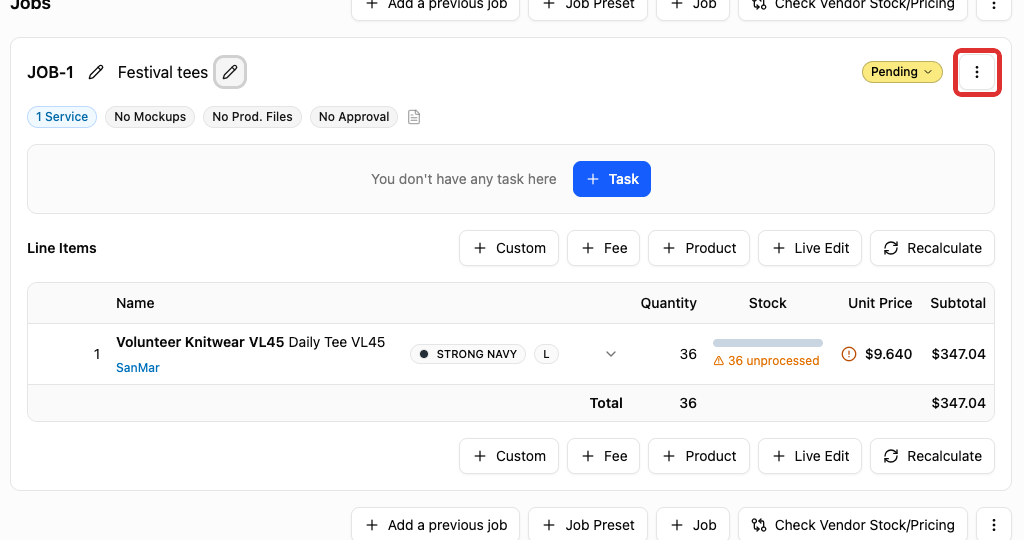
On the job header row (beside the status badge, such as Pending), click the actions menu (⋮).
-
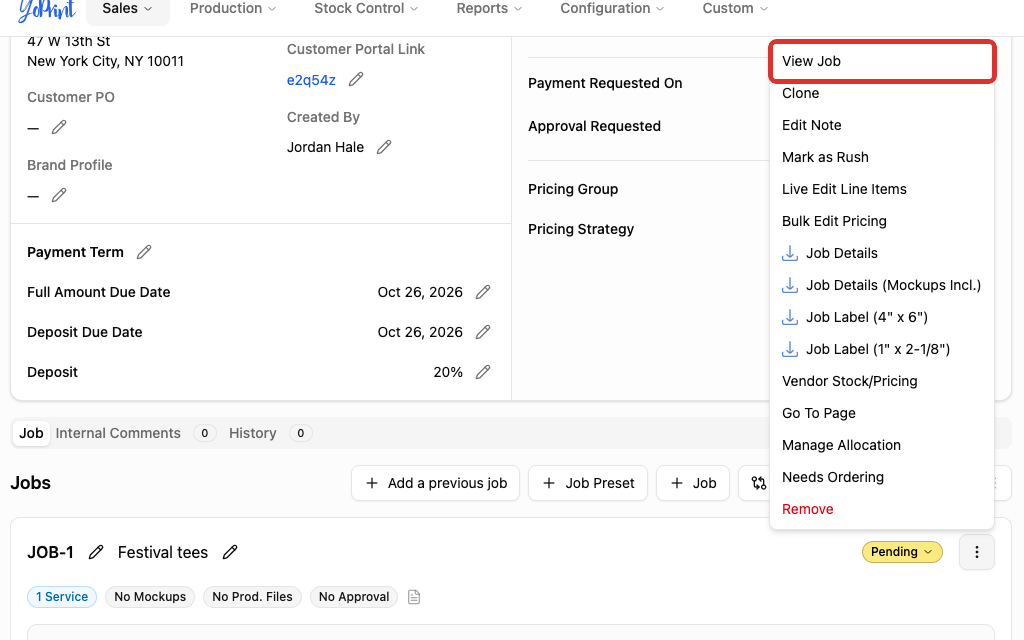
Click View Job.
-
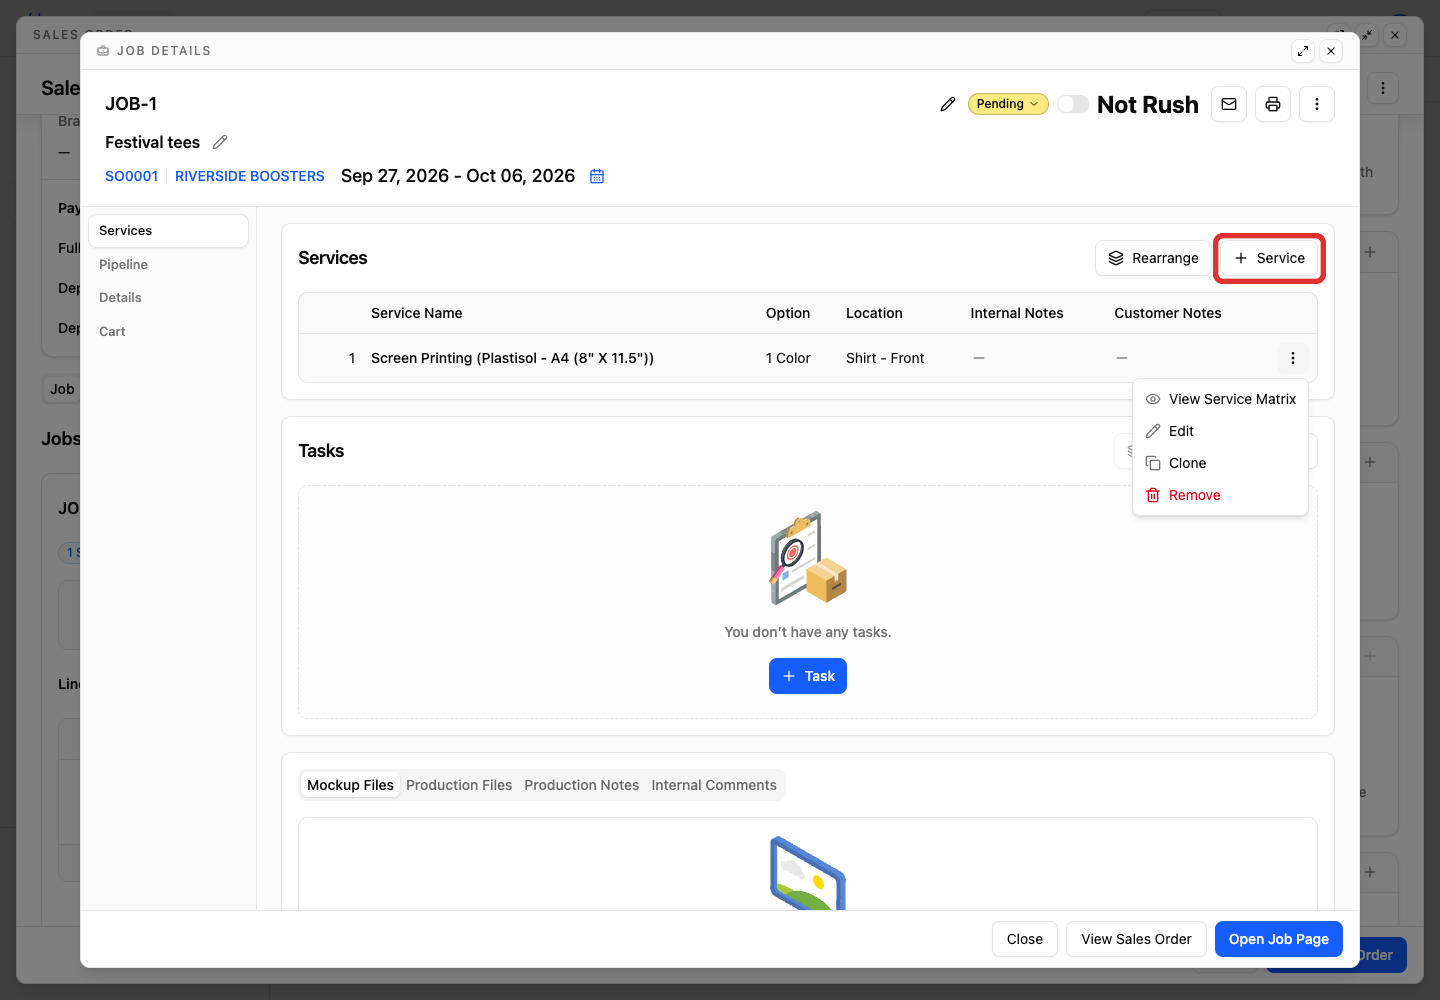
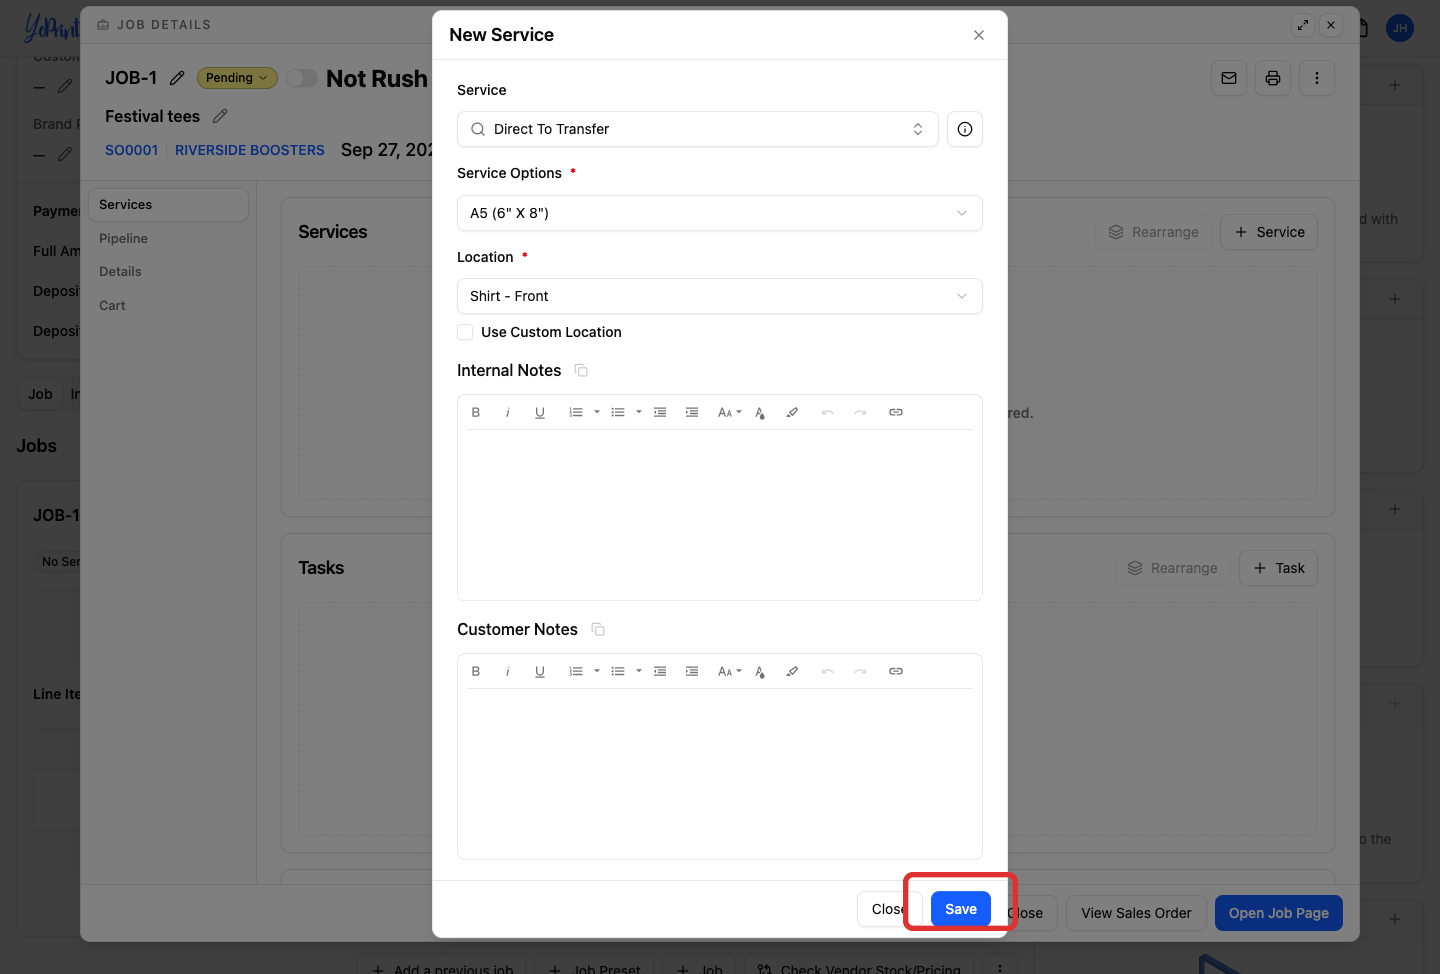
In the job dialog (titled with the job identifier, such as JOB-1), under Services, click + Service.
-
Choose the decoration Service.
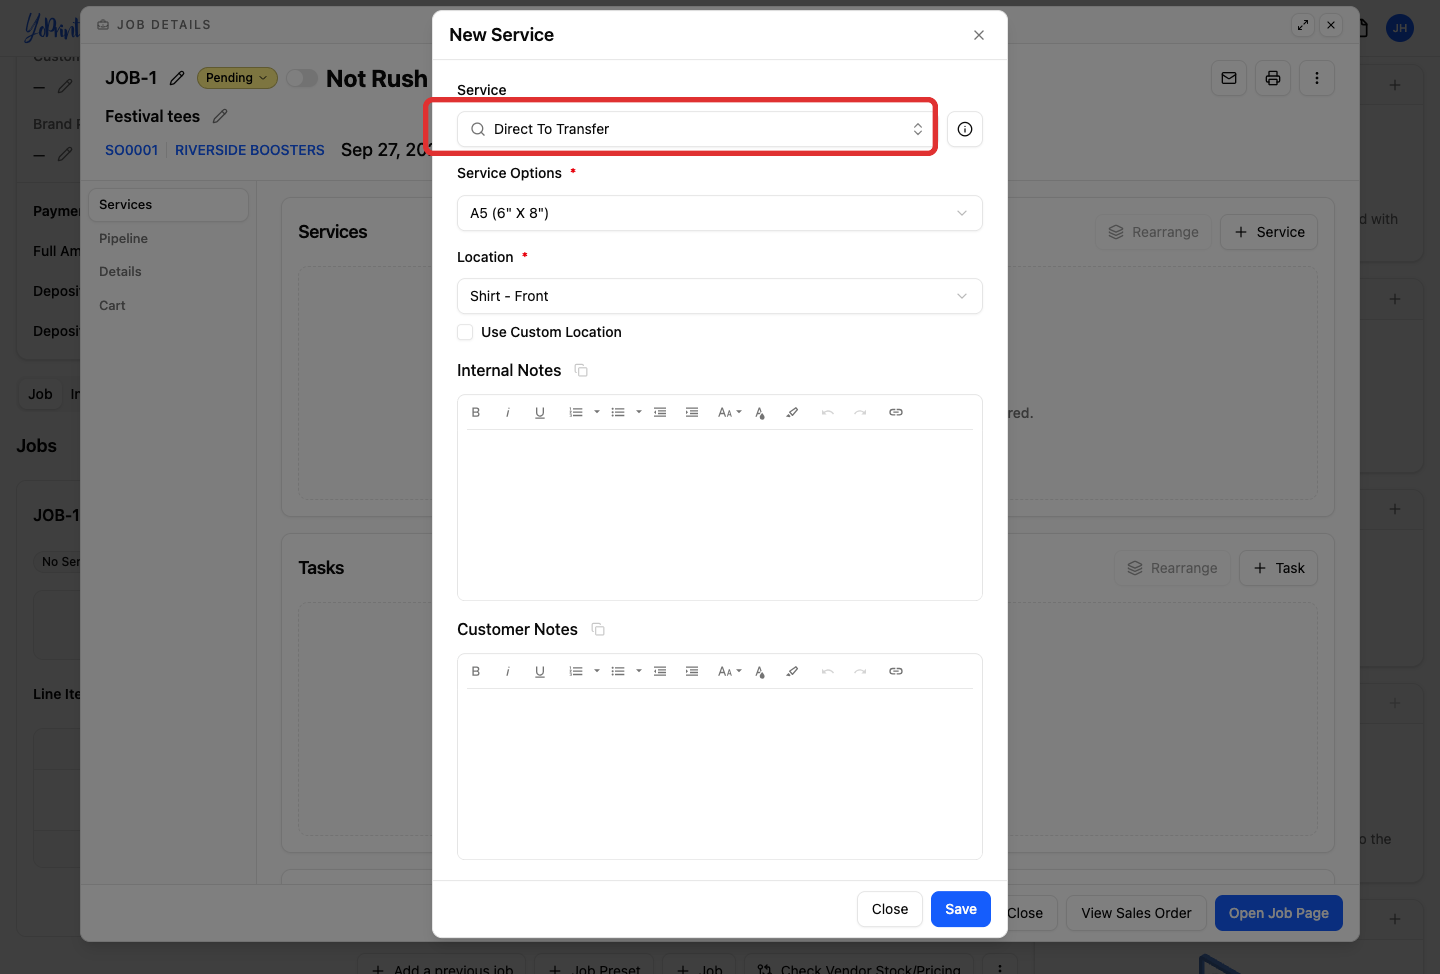
The Service Options and Location dropdowns remain disabled until you select a decoration service.
-
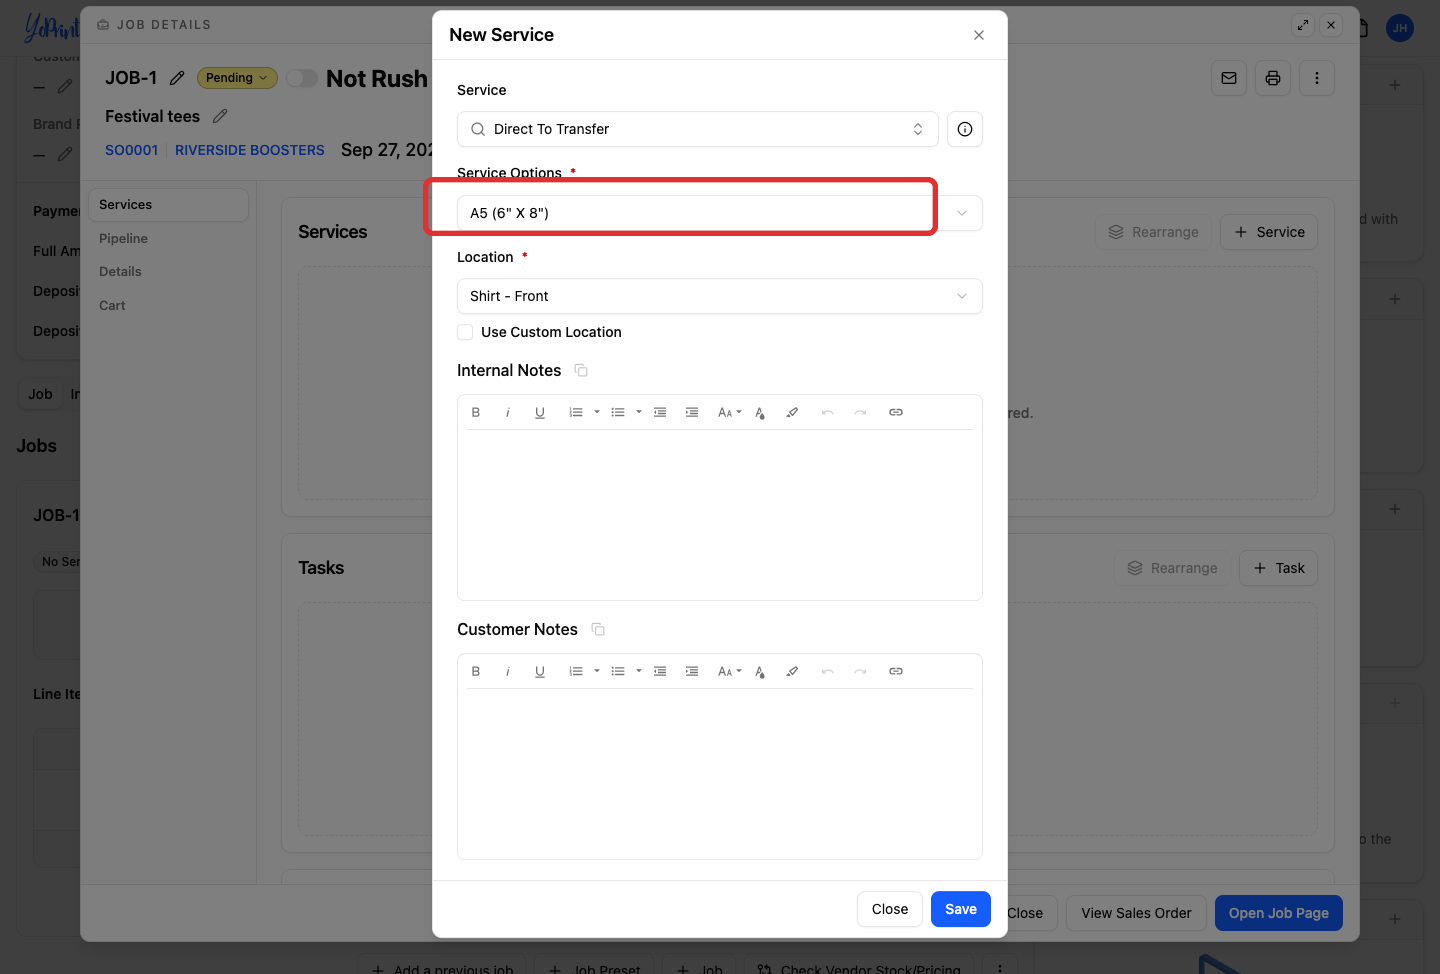
Choose the Service Options.
-
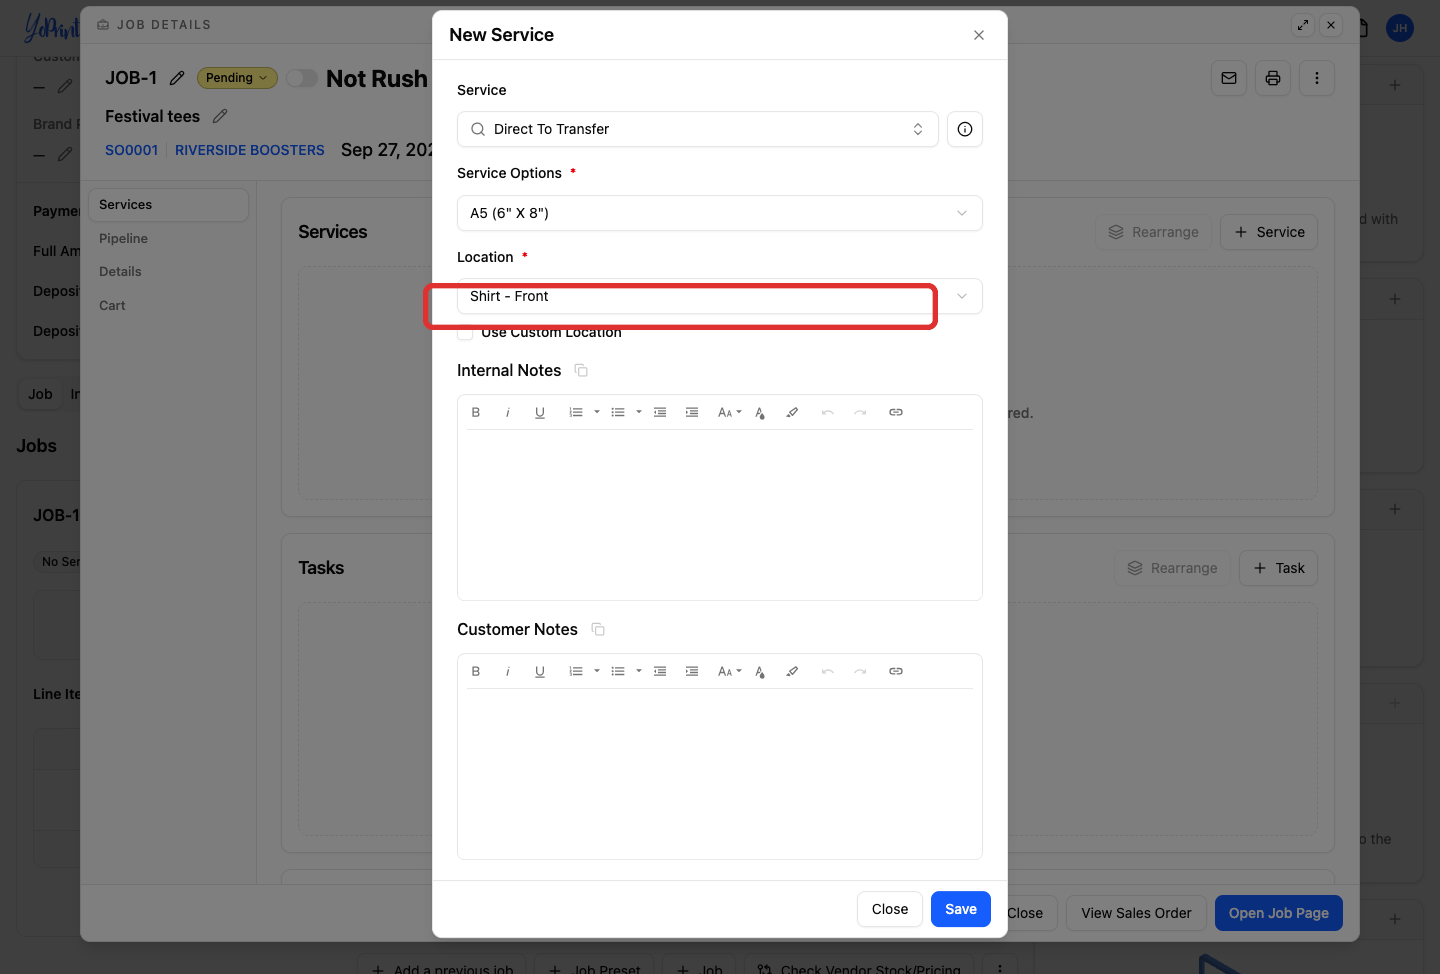
Choose the print or decoration Location.
-
Click Save.
-
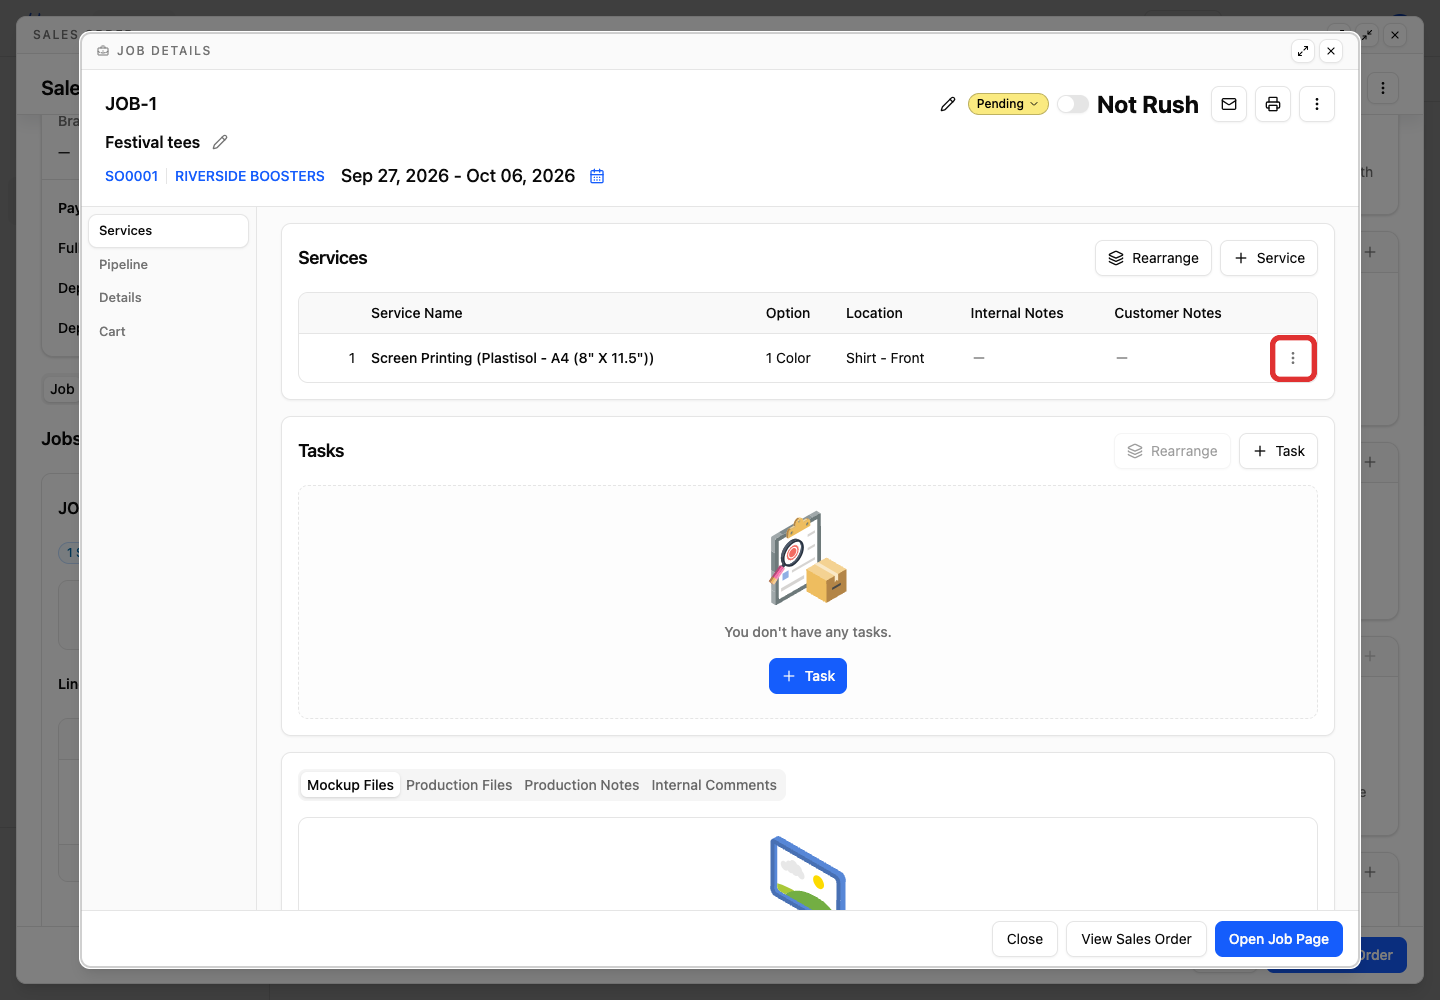
On the service row, click the actions menu (⋮).
-
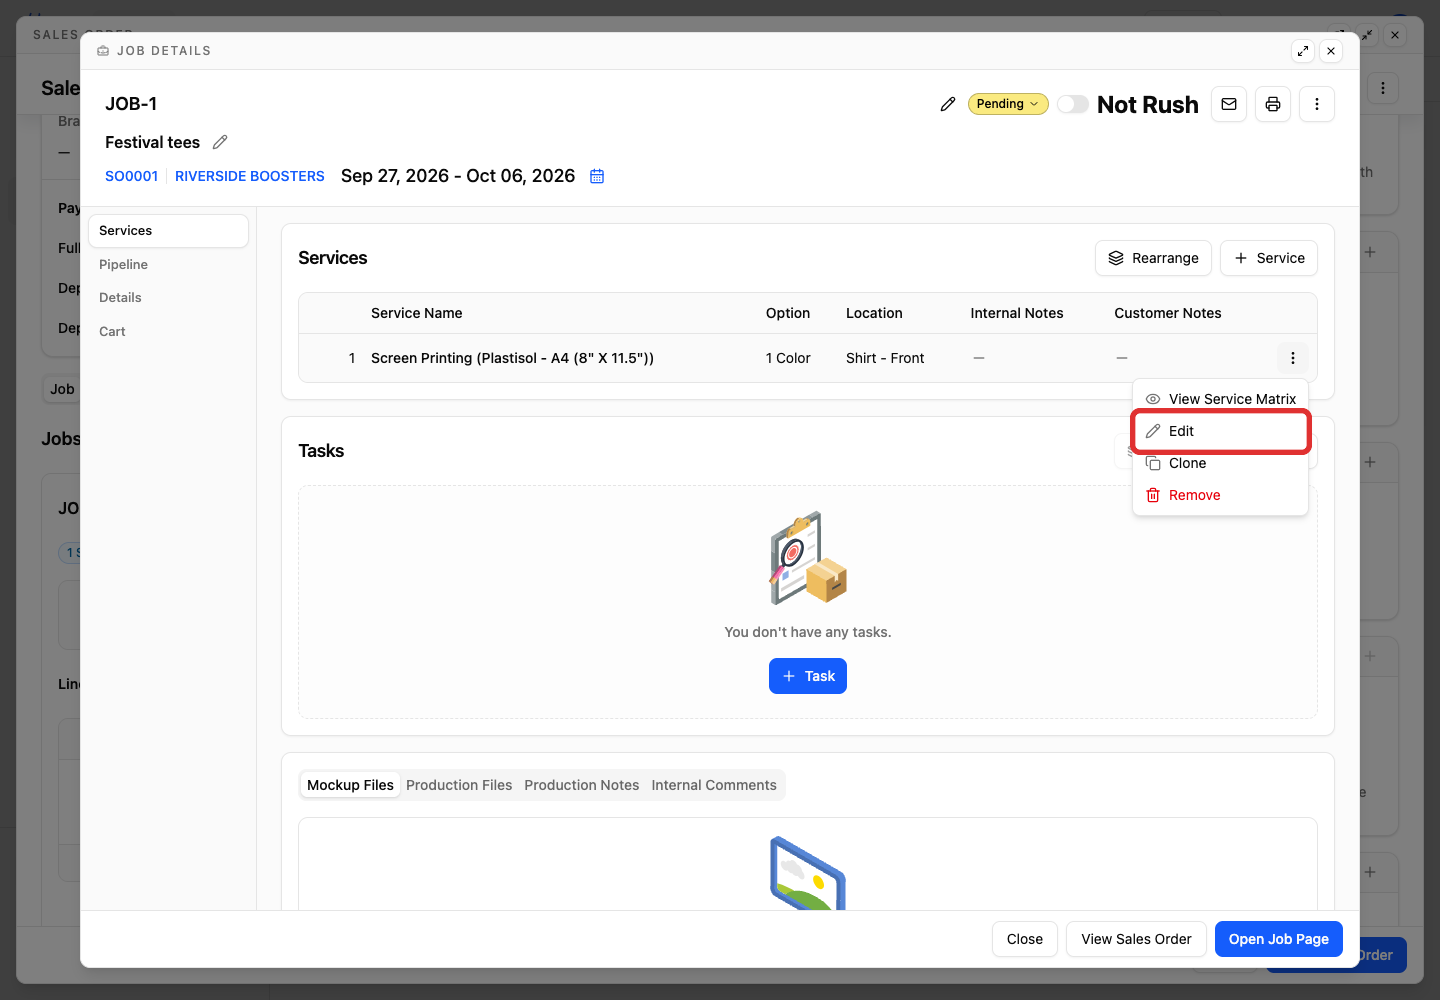
Click Edit.
-
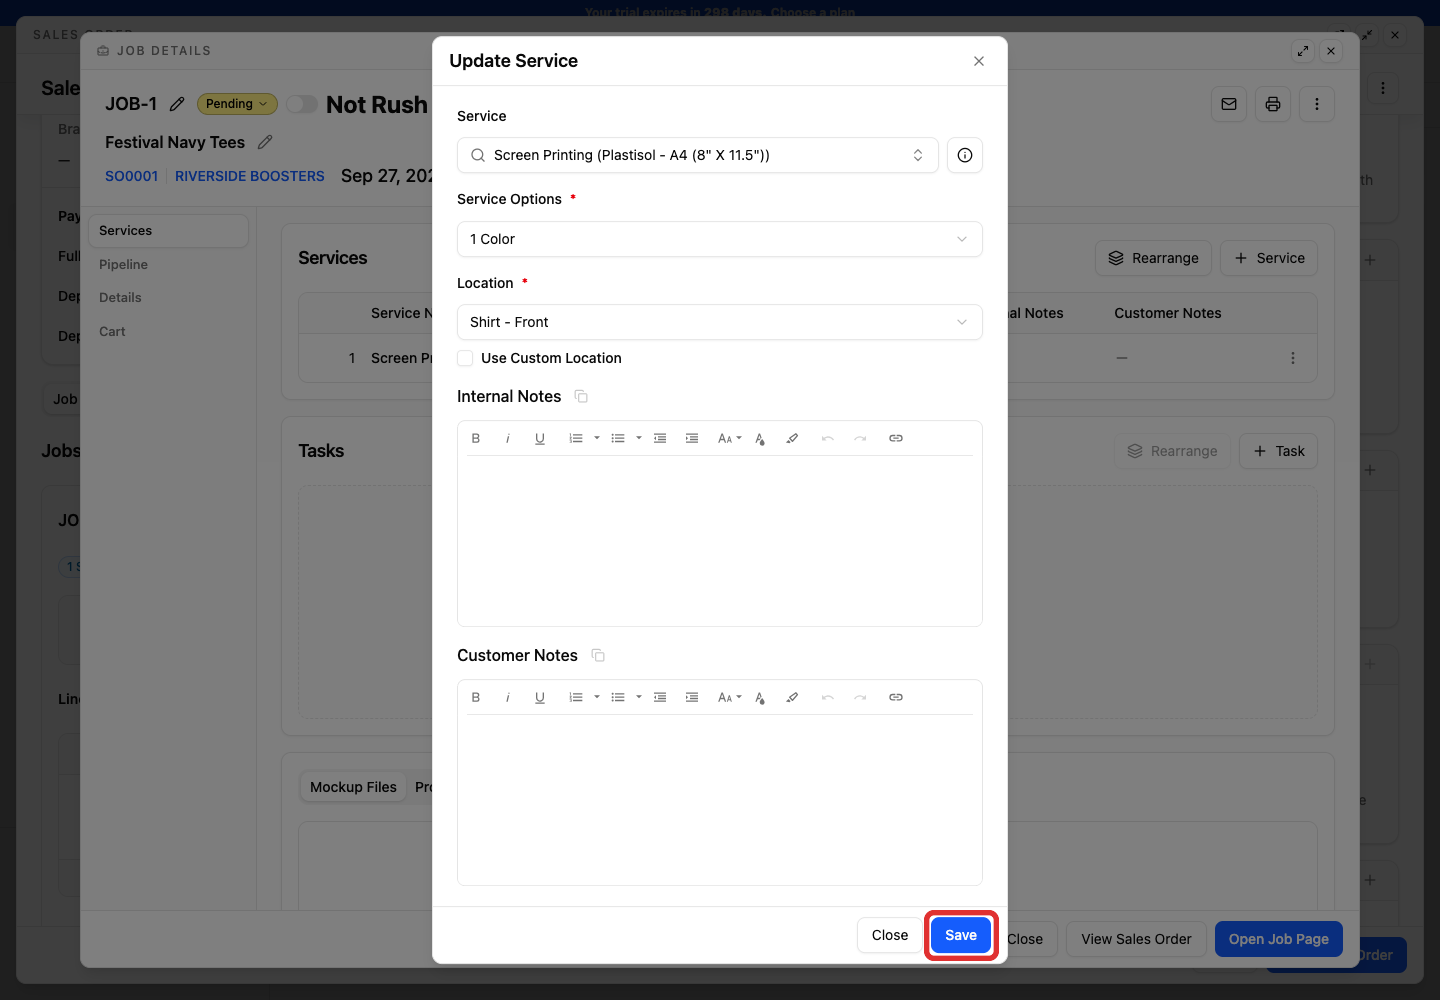
In the Update Service dialog, make your changes and click Save.
-
In the job dialog, click Close to return to the order page.
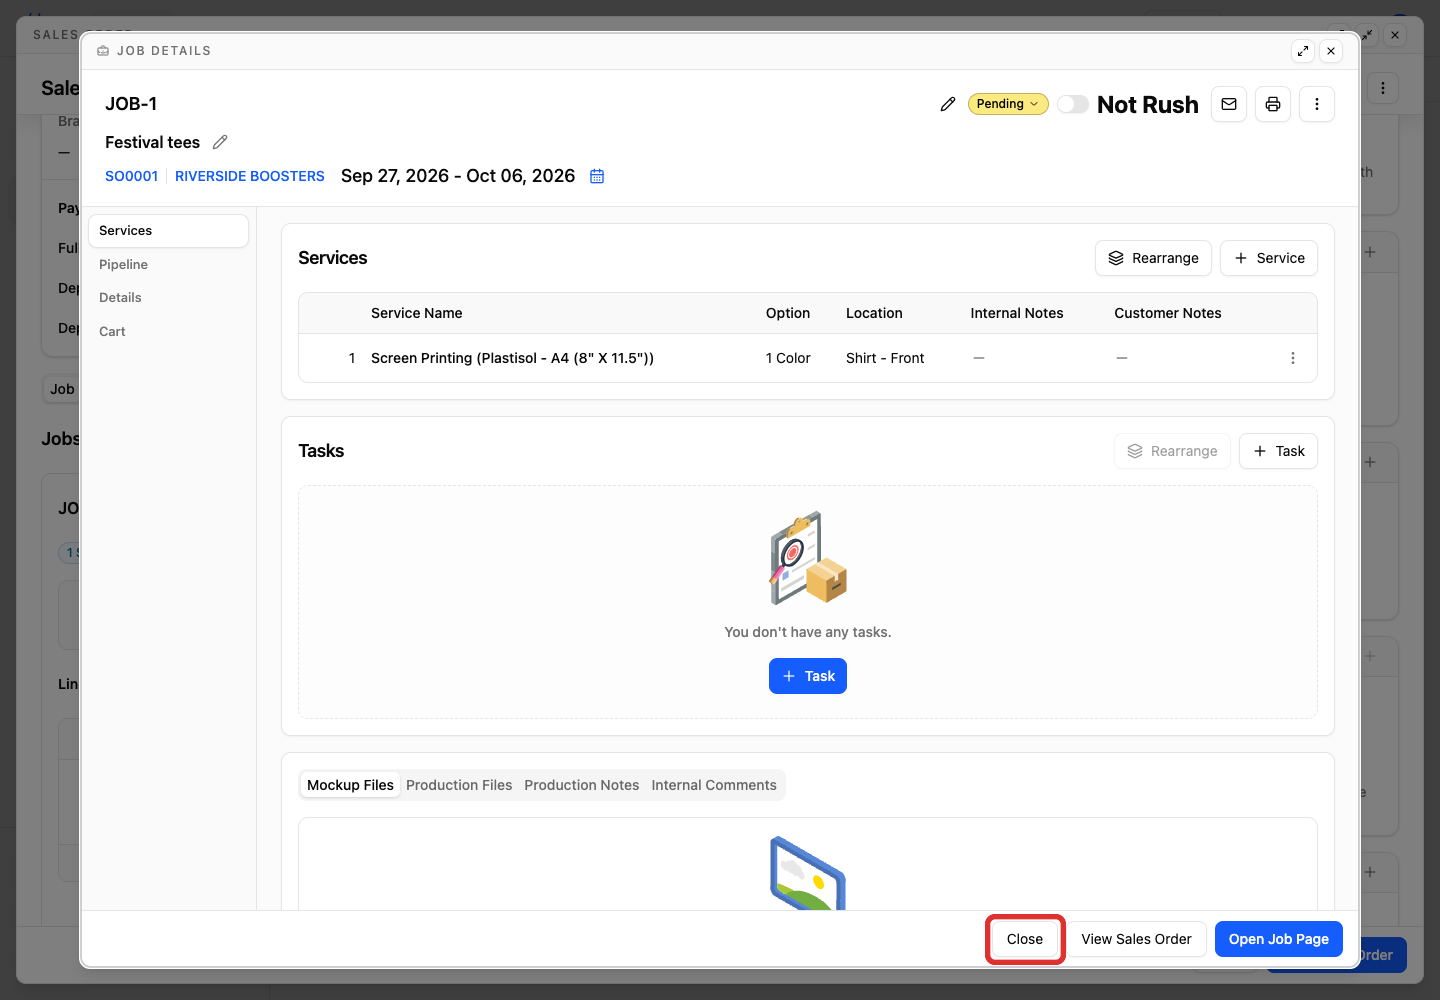
Remove a service
To delete a service from the job, click the actions menu (⋮) on that service row and click Remove. YoPrint deletes the service immediately without a confirmation prompt.
Remove or clone a job
Clone a job
-
On the job header row (beside the status badge, such as Pending), click the actions menu (⋮).
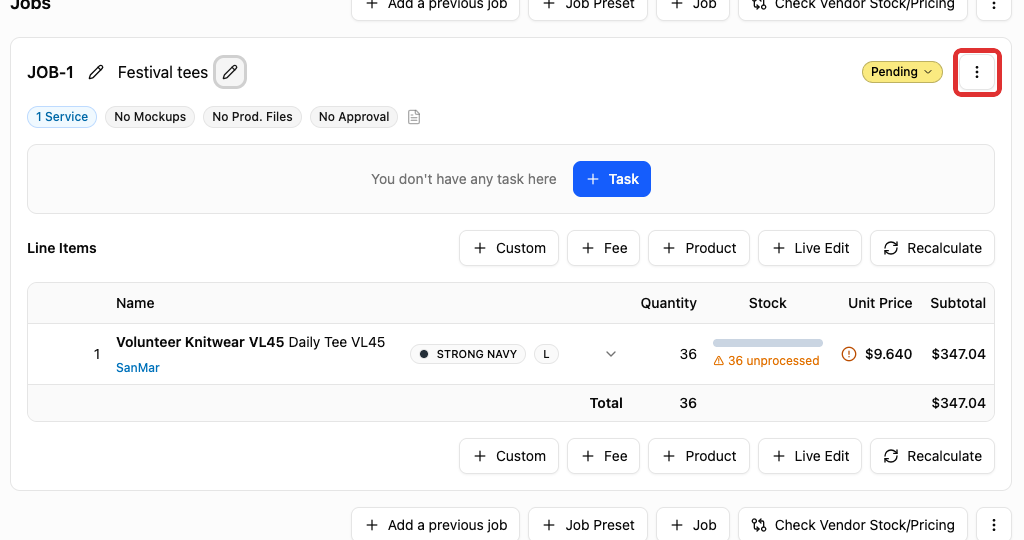
-
Click Clone.
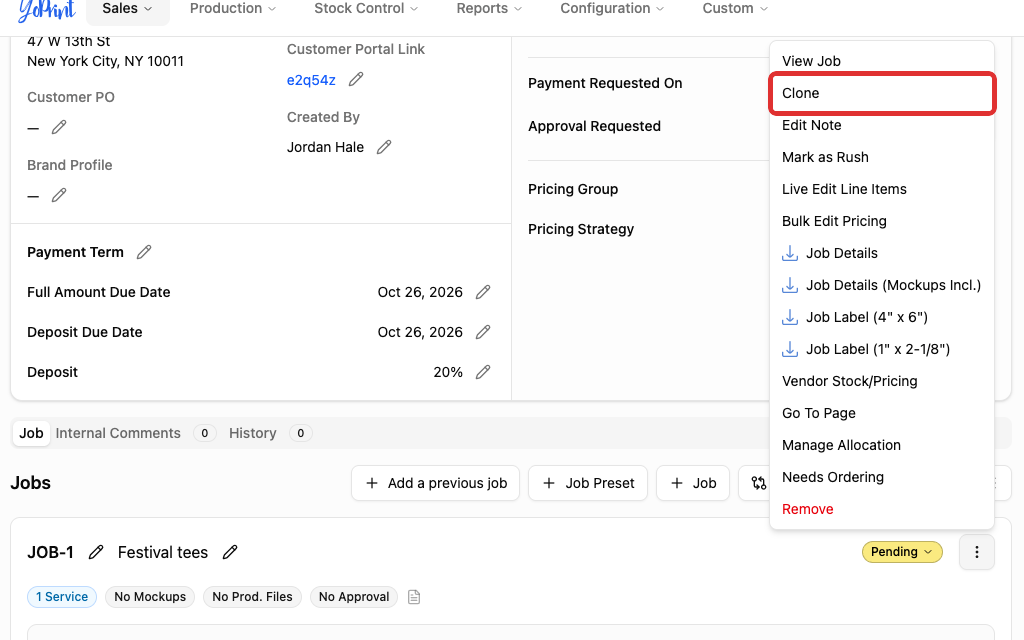
YoPrint duplicates the job, including all line items and service configurations, and assigns a new job number. Cloning a job updates the order subtotal to include the new items. It does not send an automatic notification or email to the customer, and does not alter existing saved invoices.
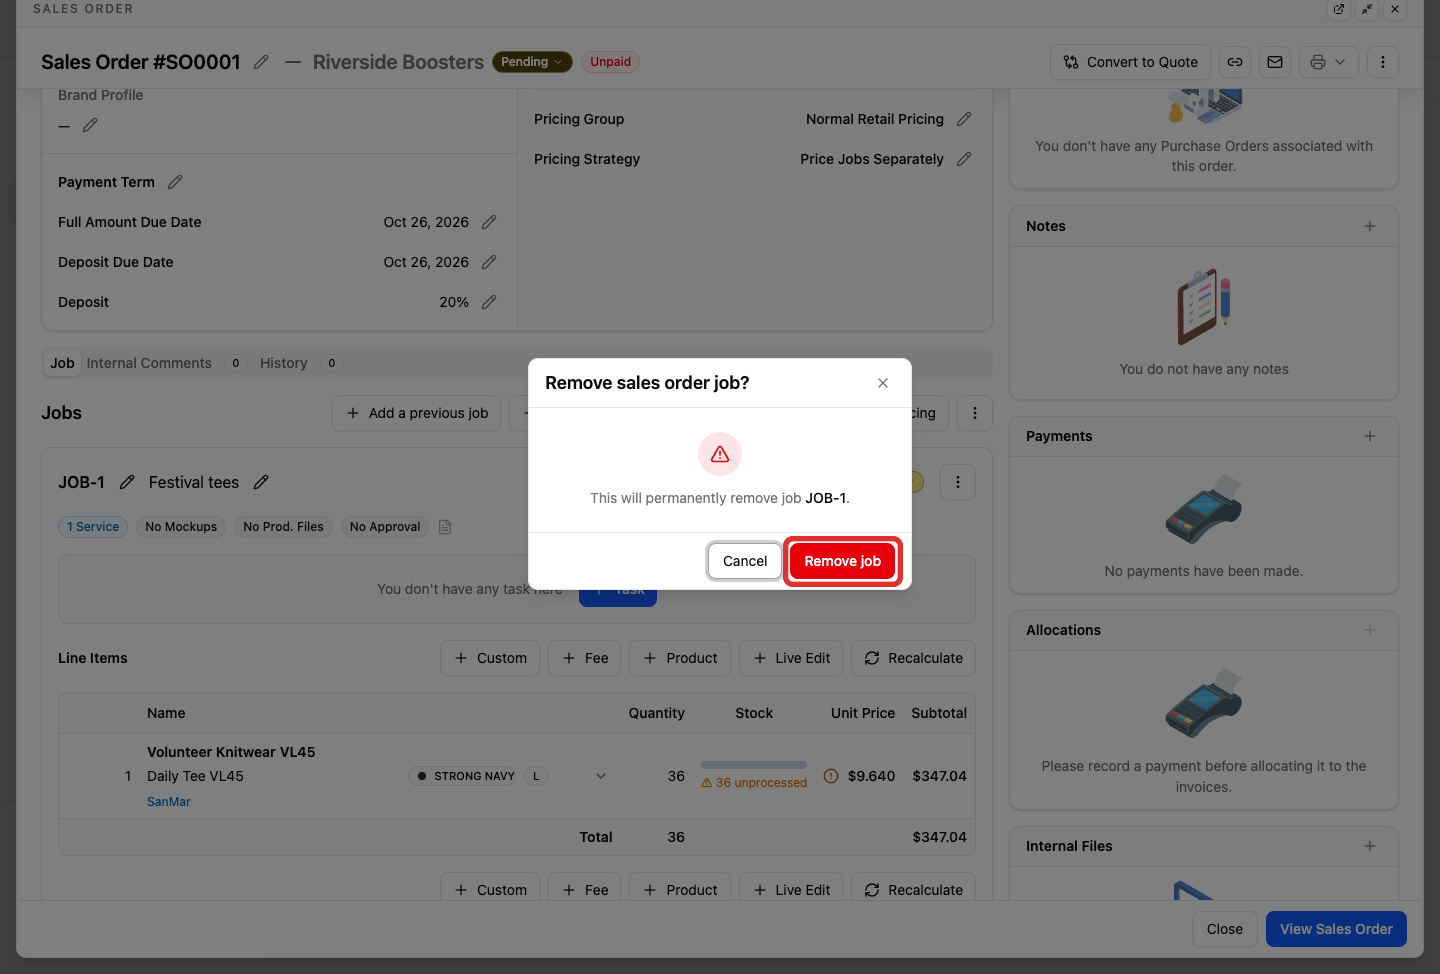
Remove a job
-
On the job header row (beside the status badge, such as Pending), click the actions menu (⋮).
-
Click Remove.
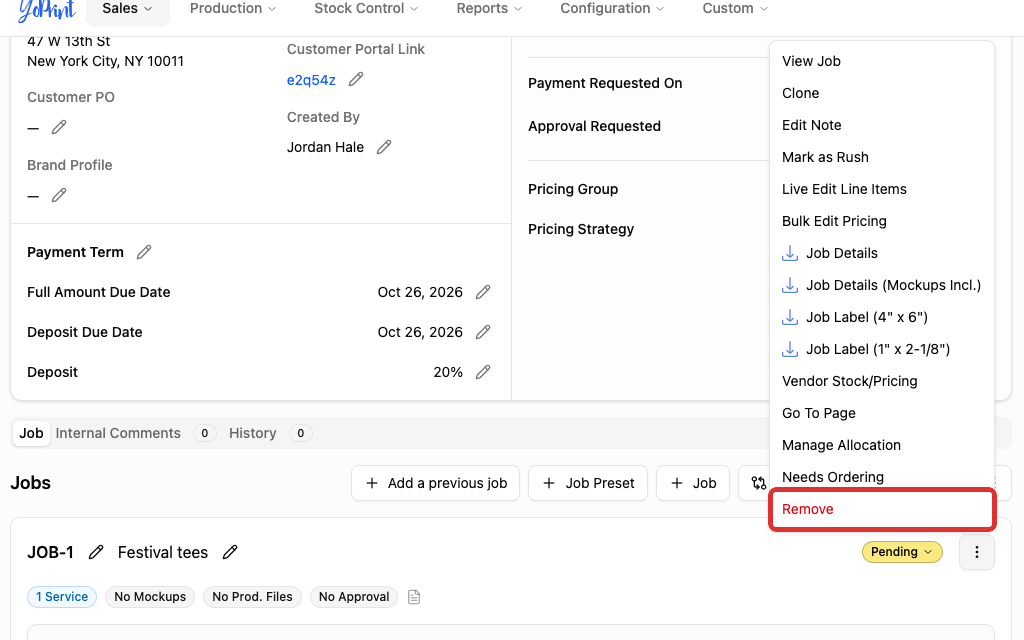
-
When prompted to confirm, click Remove job.
Edit a job on a quote
To edit a quote, navigate to Sales > Quotes and open your quote. Quotes use the same job card and editing controls as sales orders.

-
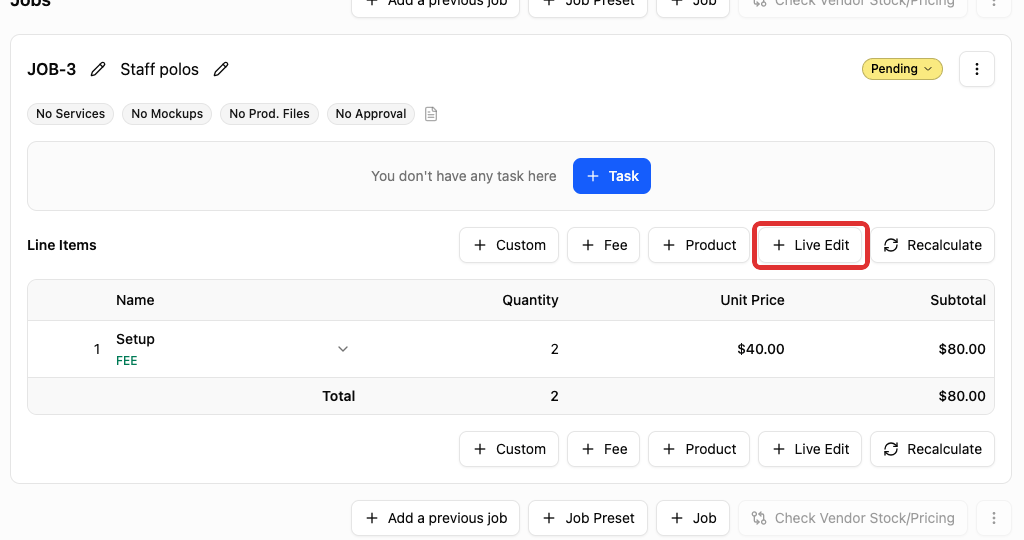
On the quote's job card, click Live Edit.
-
In the Quantity field, enter the updated number of pieces.
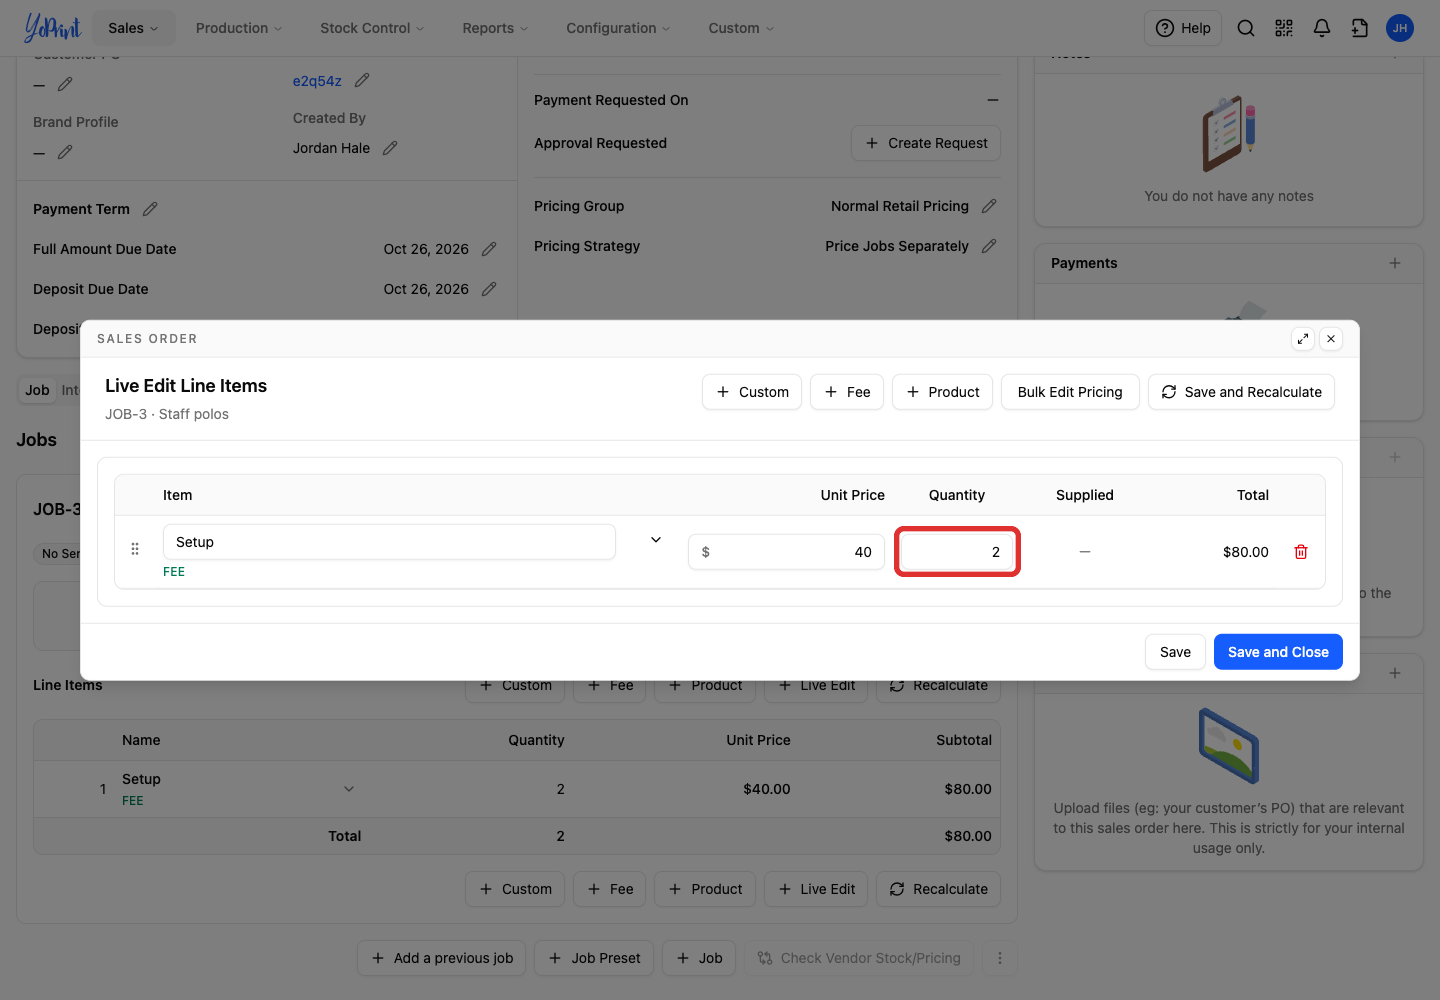
As on sales orders, editing fee or product quantities temporarily displays No value in the total column until you click Save and Close, which calculates the new total and saves the change.
-
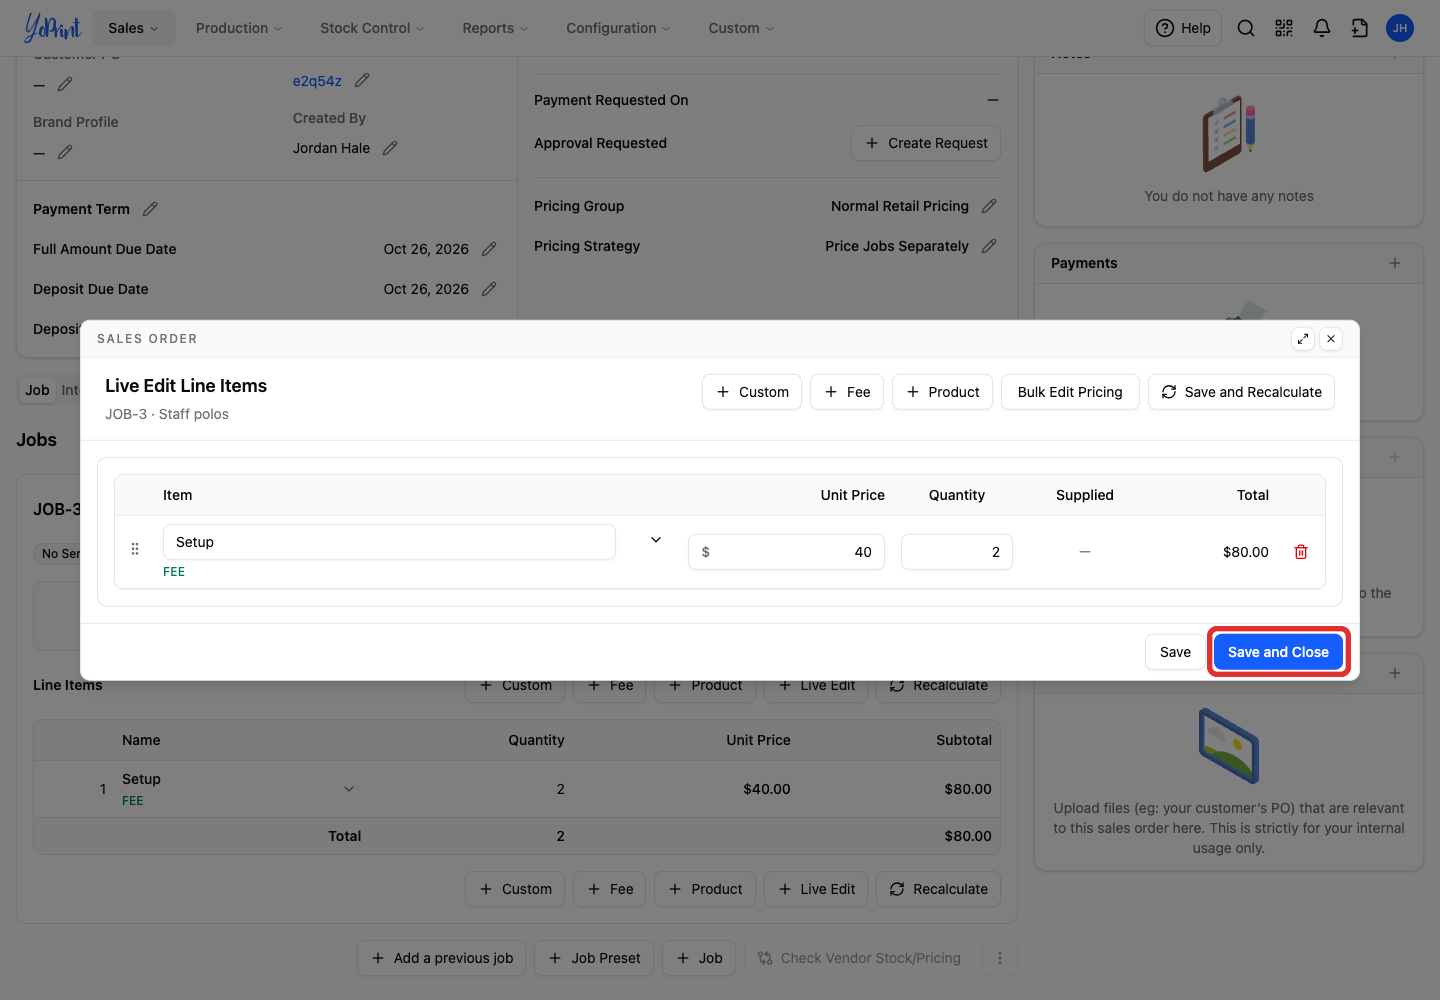
Click Save and Close.
Edit a job on a draft
While an order or quote is still a draft, you do not need Live Edit. You add and change line items directly in the draft editor. You can edit existing line item quantities and pricing directly in the table, or click a line item's actions menu to edit or delete it.
-
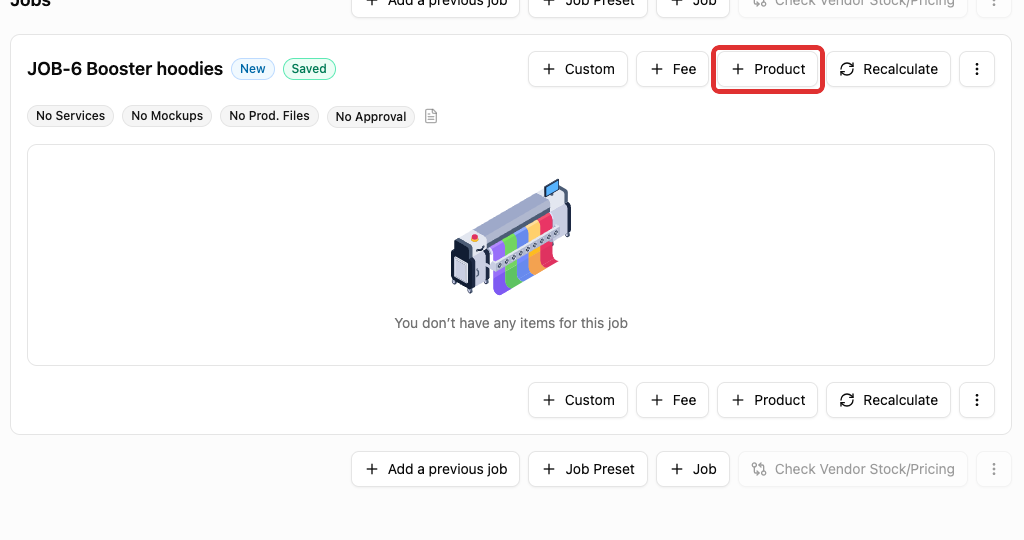
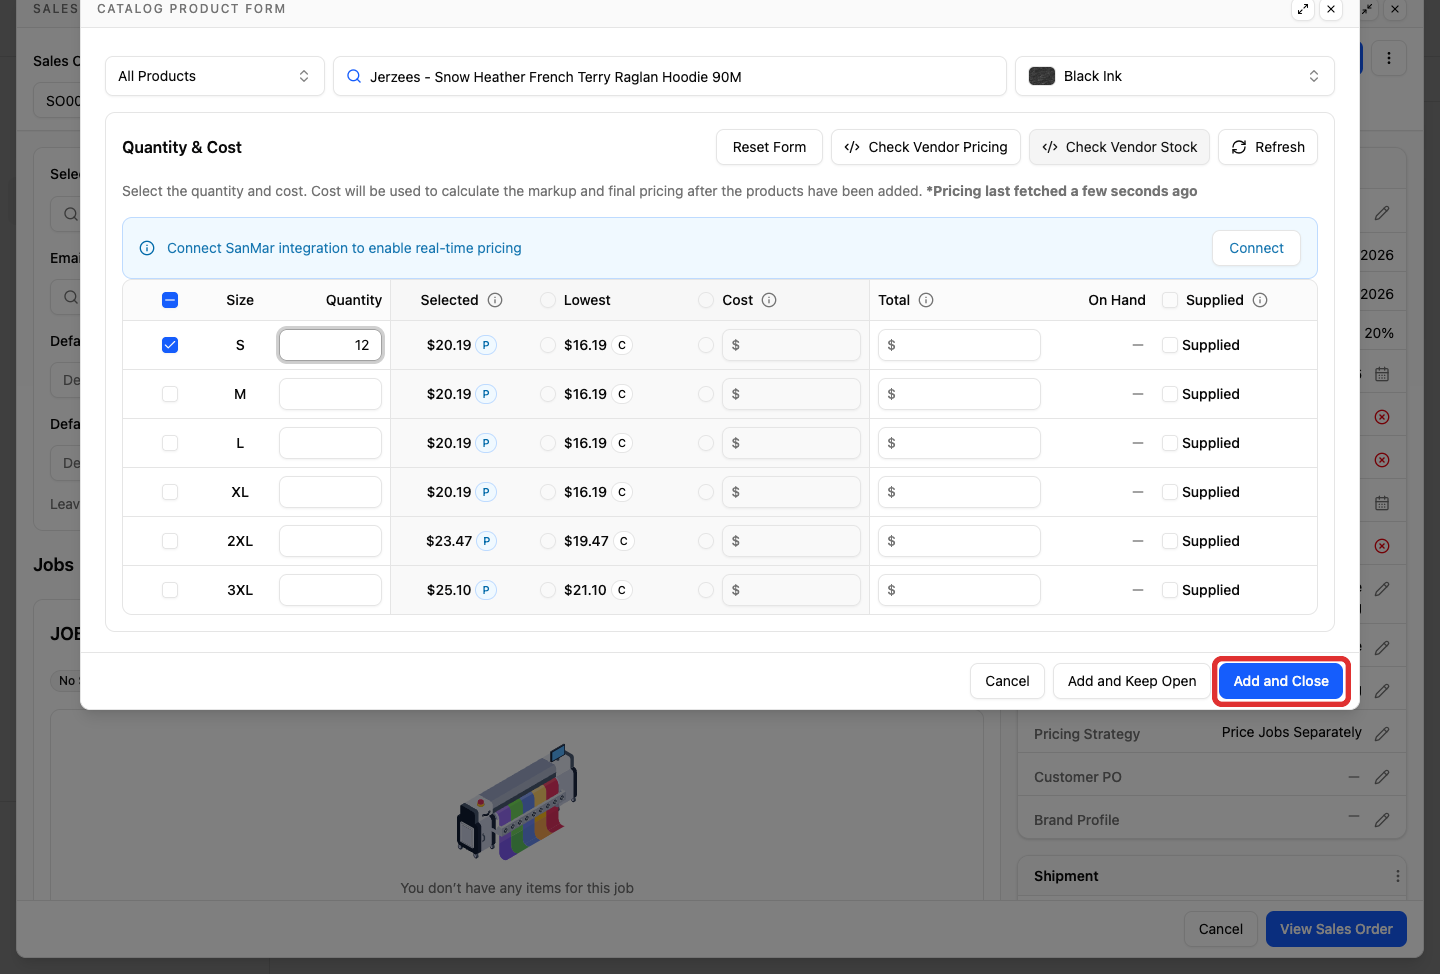
On the draft job card, click + Product.
Custom items and fees
To add custom non-catalog products or extra charges, click + Custom or + Fee on the job card instead.
-
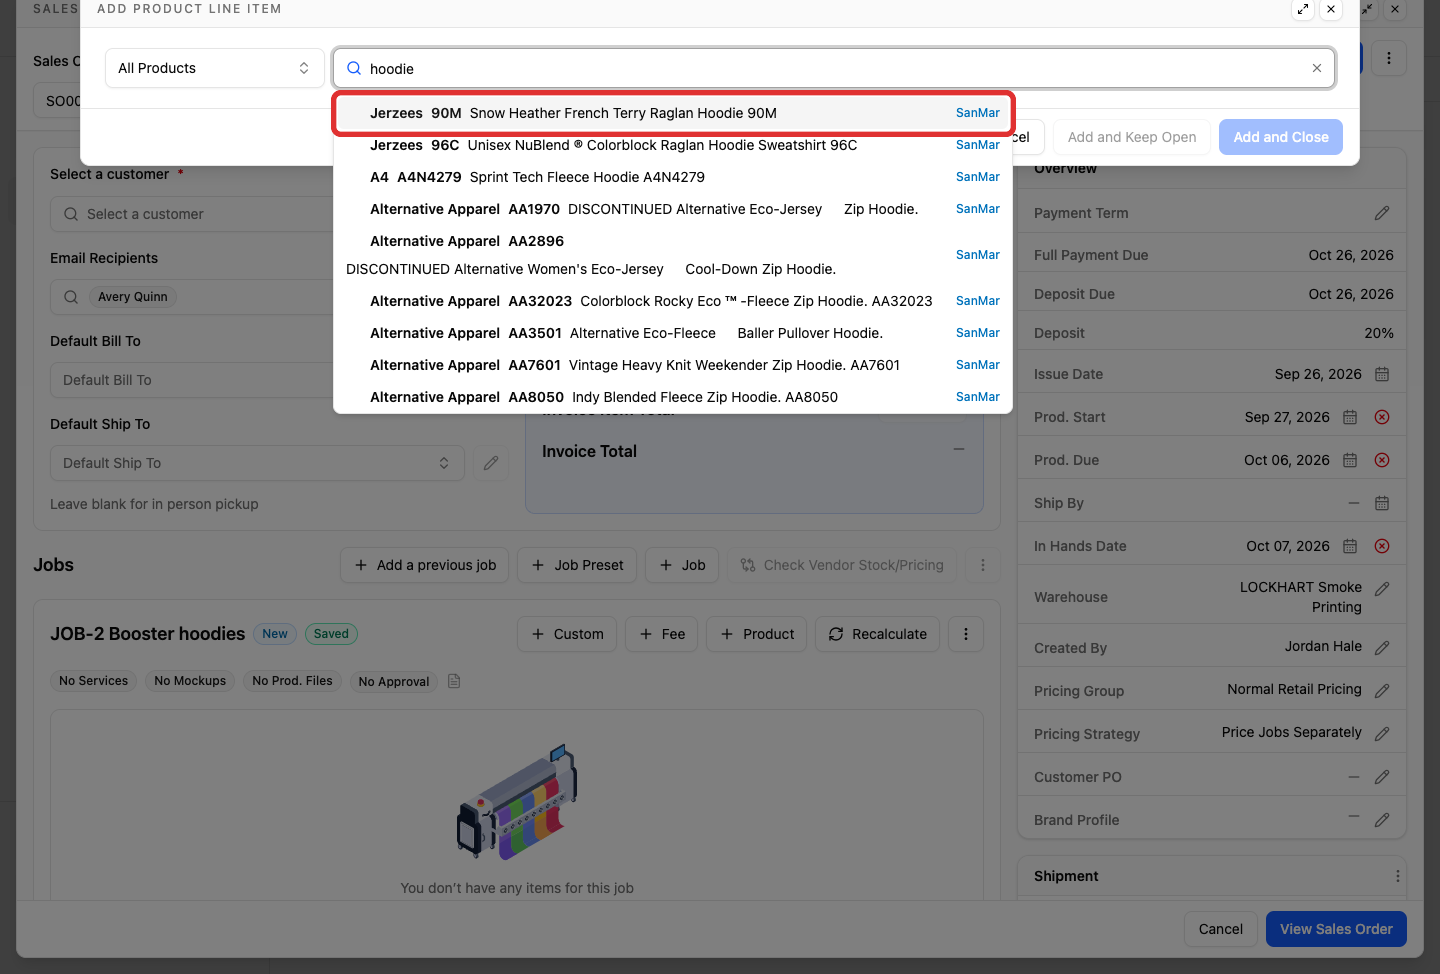
In the catalog search, select the product you want to add.
-
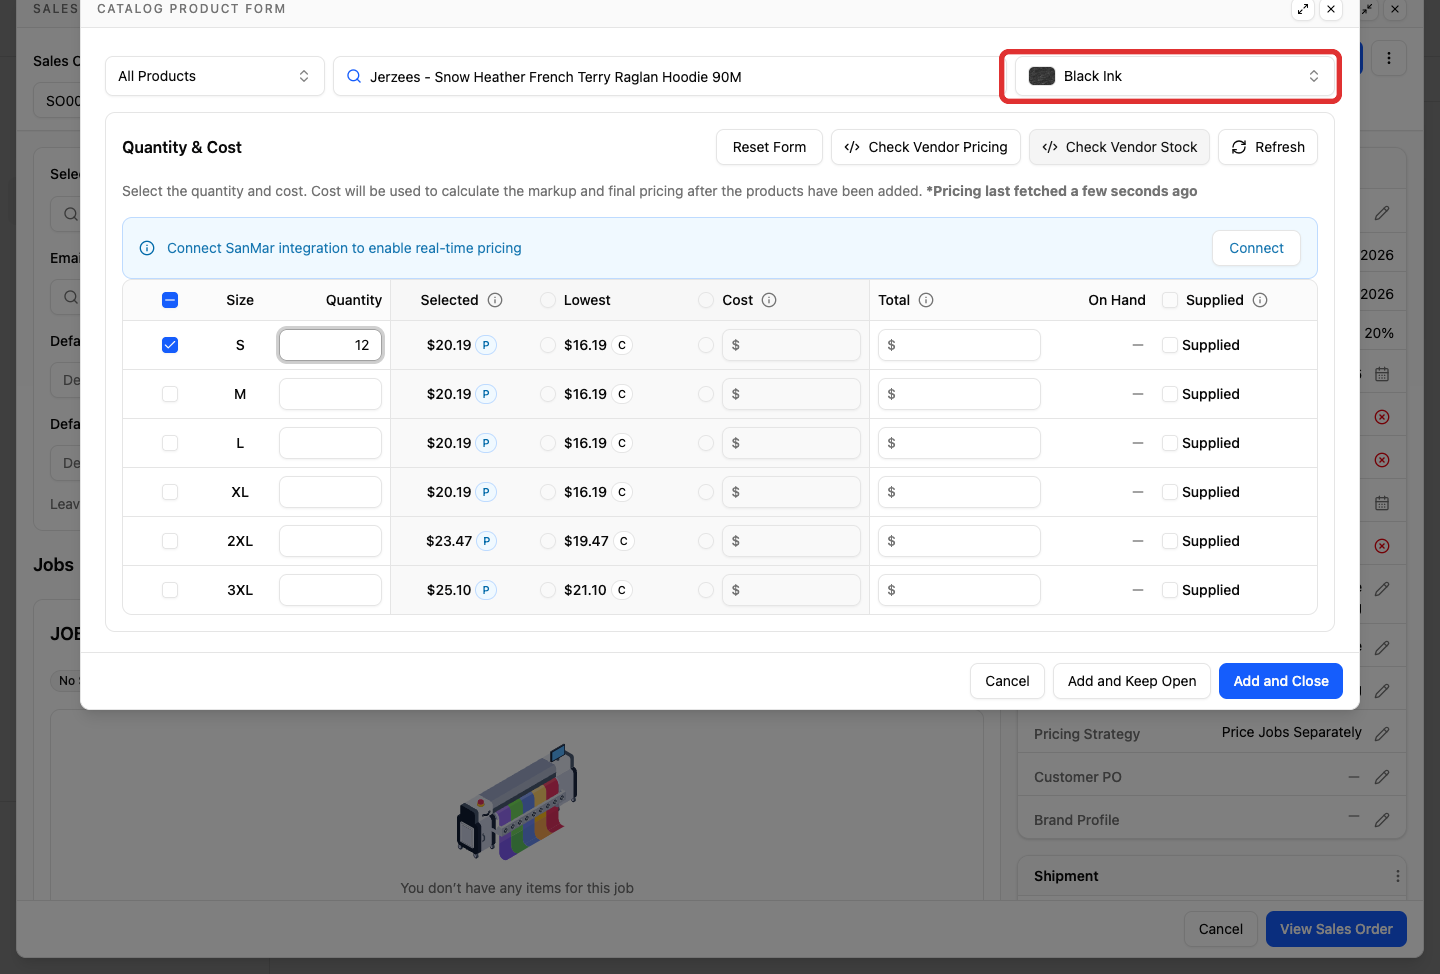
Choose a Color from the dropdown menu to display the size and quantity table.
-
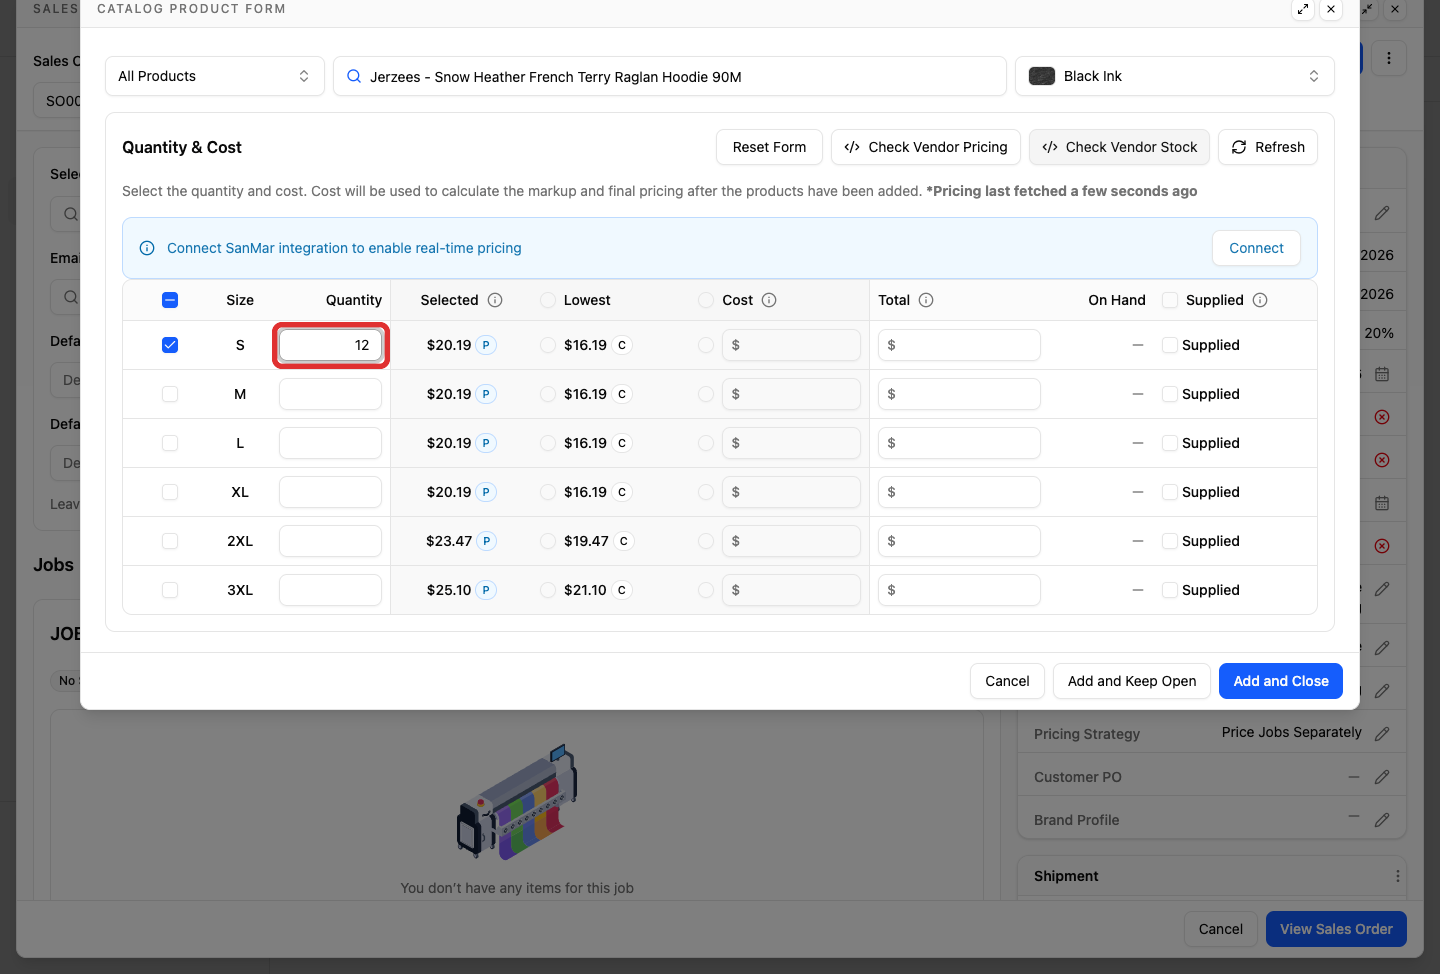
In the product form, enter the quantities for each size.
-
Click Add and Close.
Draft changes save automatically as you work. To learn how to manage drafts and publish them when ready, see YoPrint's Draft System Explained. To learn how to create new sales orders from scratch, see Creating a Sales Order.