How to access the Mockup Creator
In this article
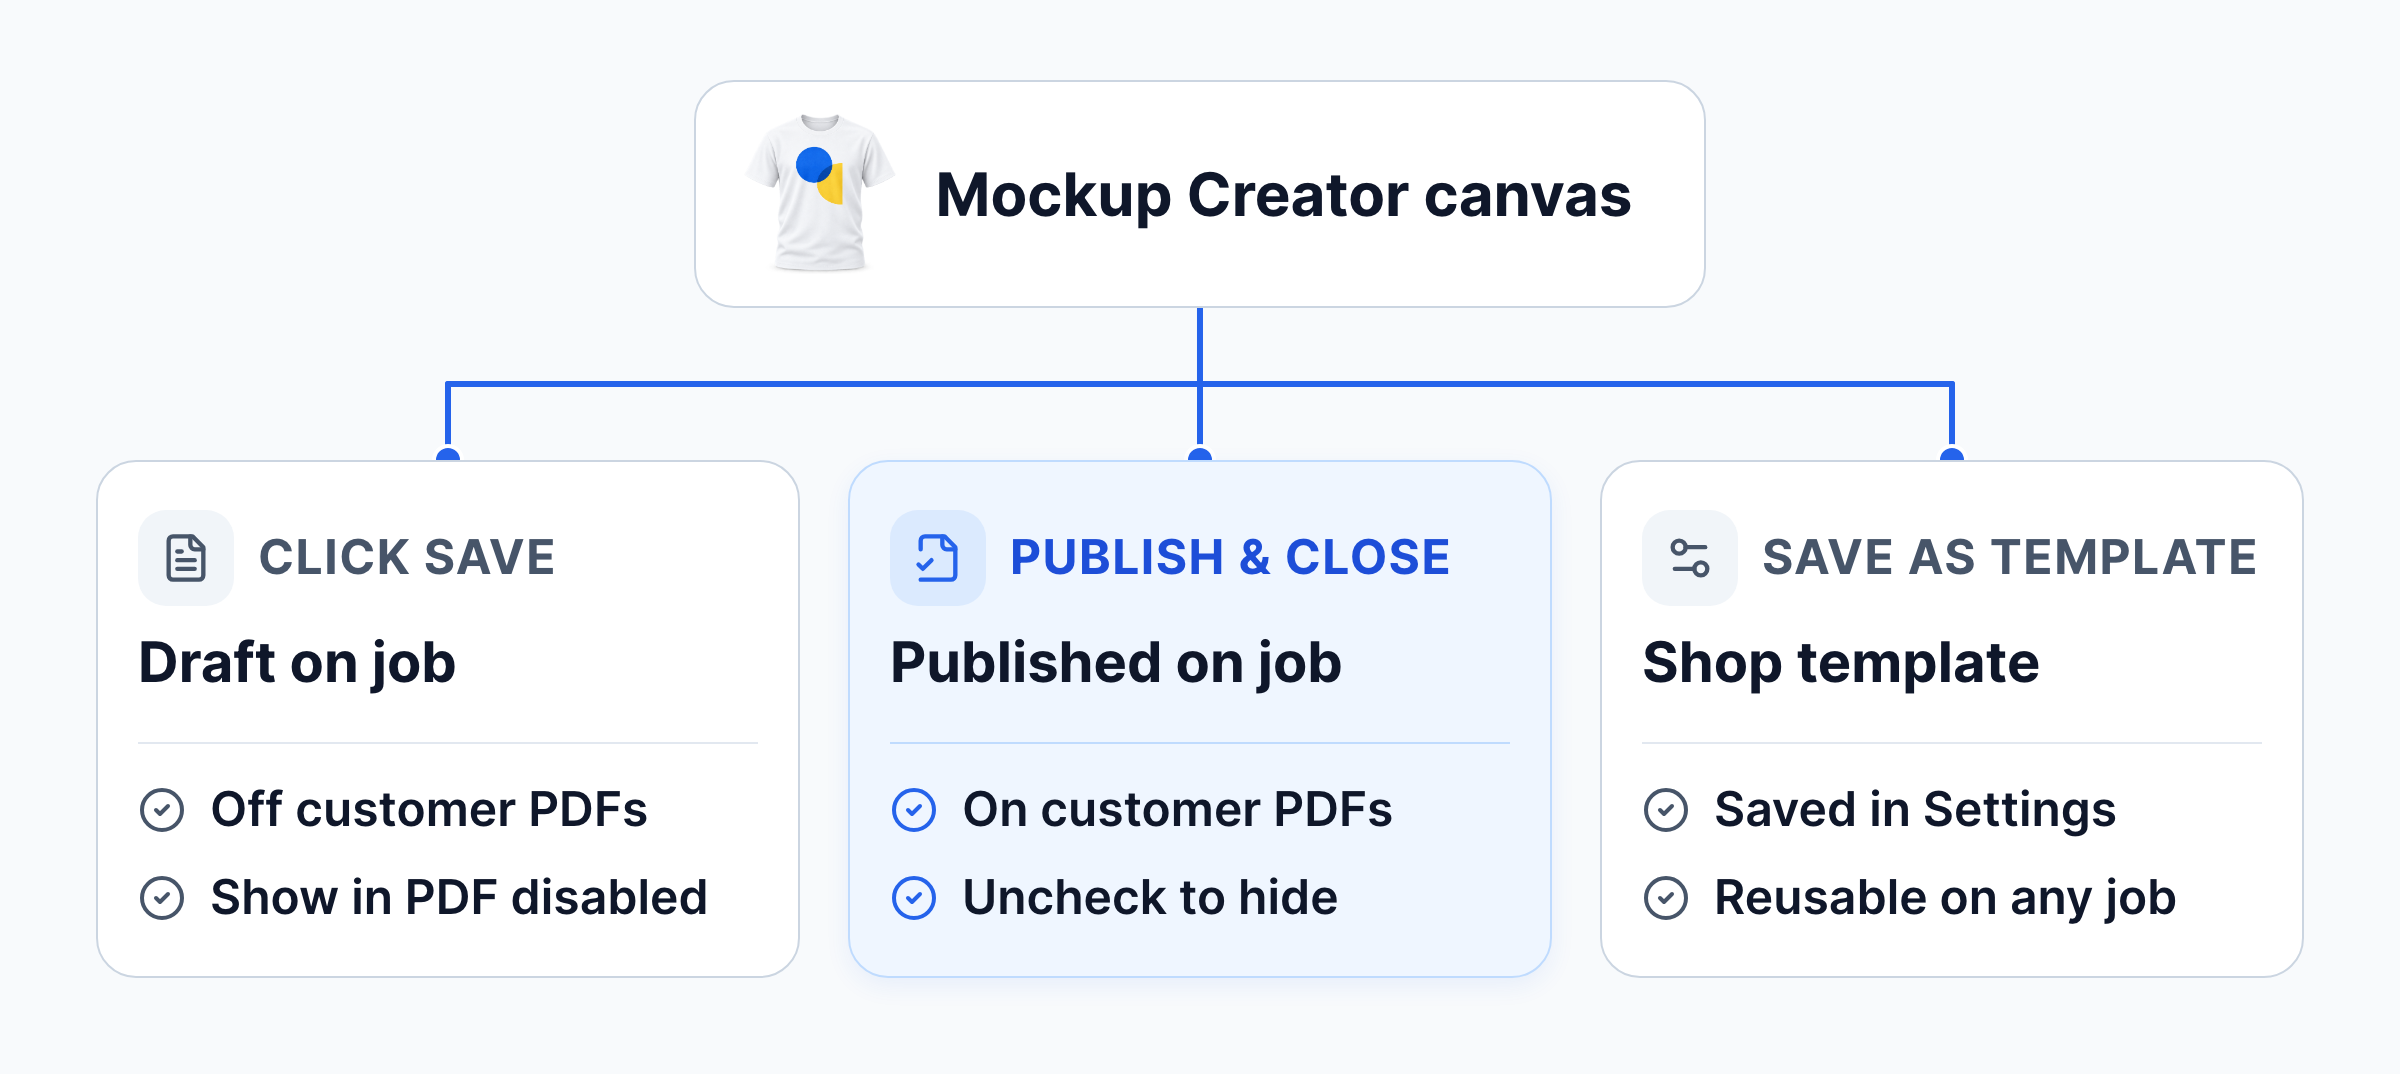
Create mockup artwork directly on a job with Mockup Creator. A mockup file is the visual proof your customer reviews and approves, while a production file is the print file your shop uses to produce the order. Save drafts while you work, publish the design when you are ready to include it on customer PDFs or make it available for approval in the customer portal, and save reusable templates for future jobs.
Open the creator
-
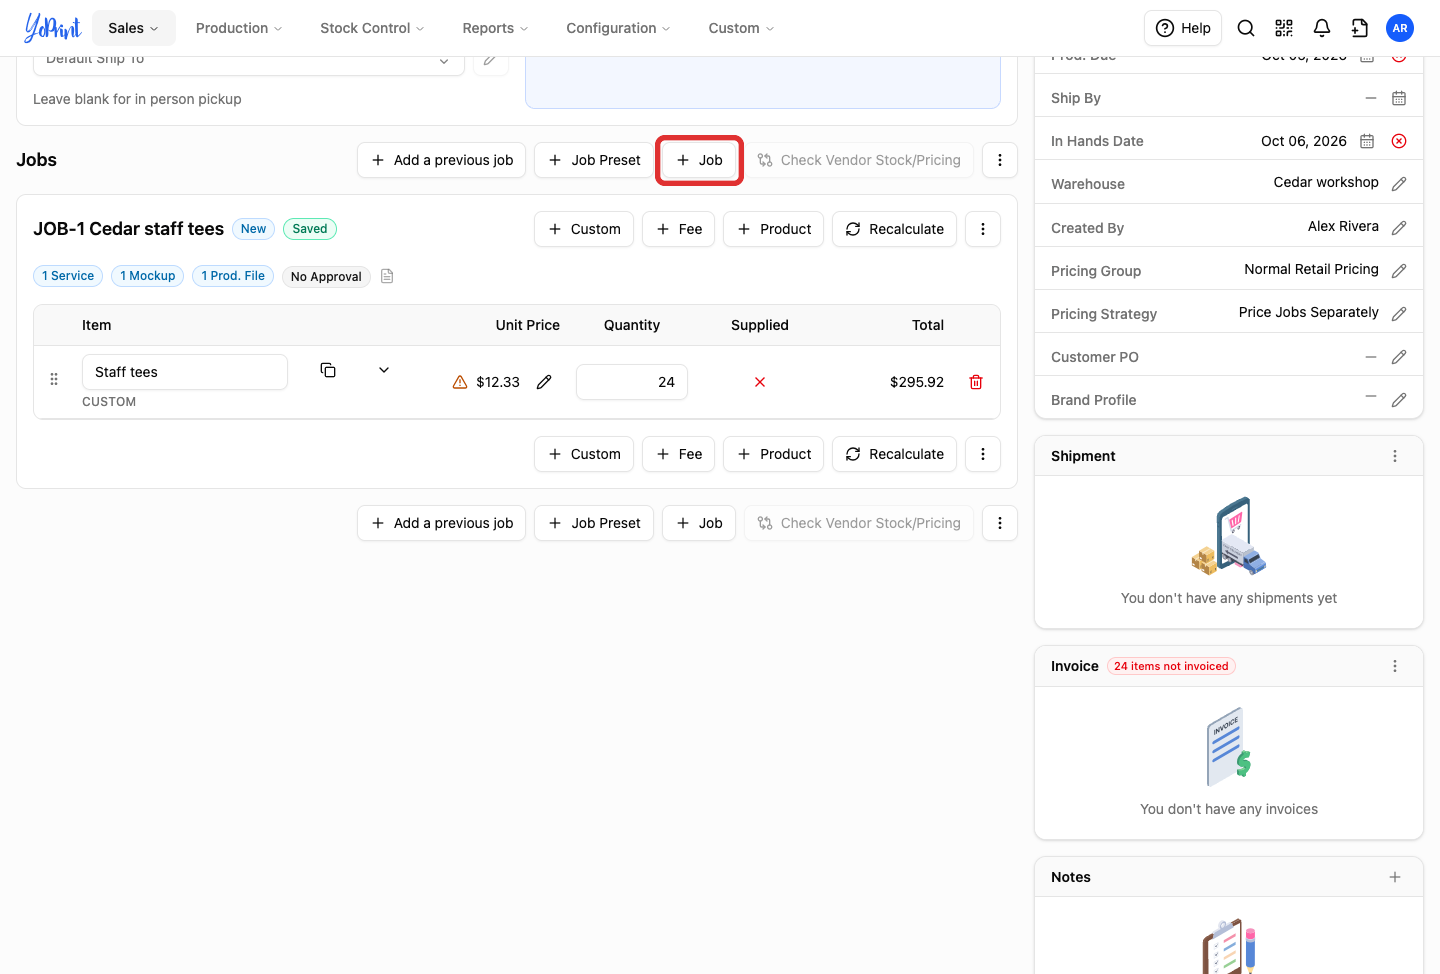
On the quote or sales order, under Jobs, click Job (with the plus icon).
-
In the Create Job drawer, on the Mockup Files tab (selected by default), click Create Mockup.
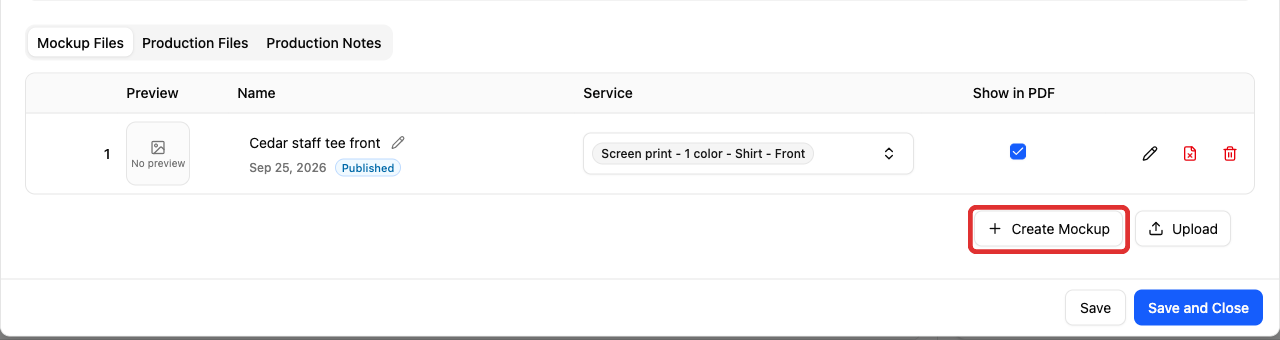
You can create a mockup before saving the job. The design stays attached to that job on your order. Remember to save the job drawer when you finish.
If the job is already on the order
To open Mockup Creator for a job already on your quote or sales order, choose either method:
-
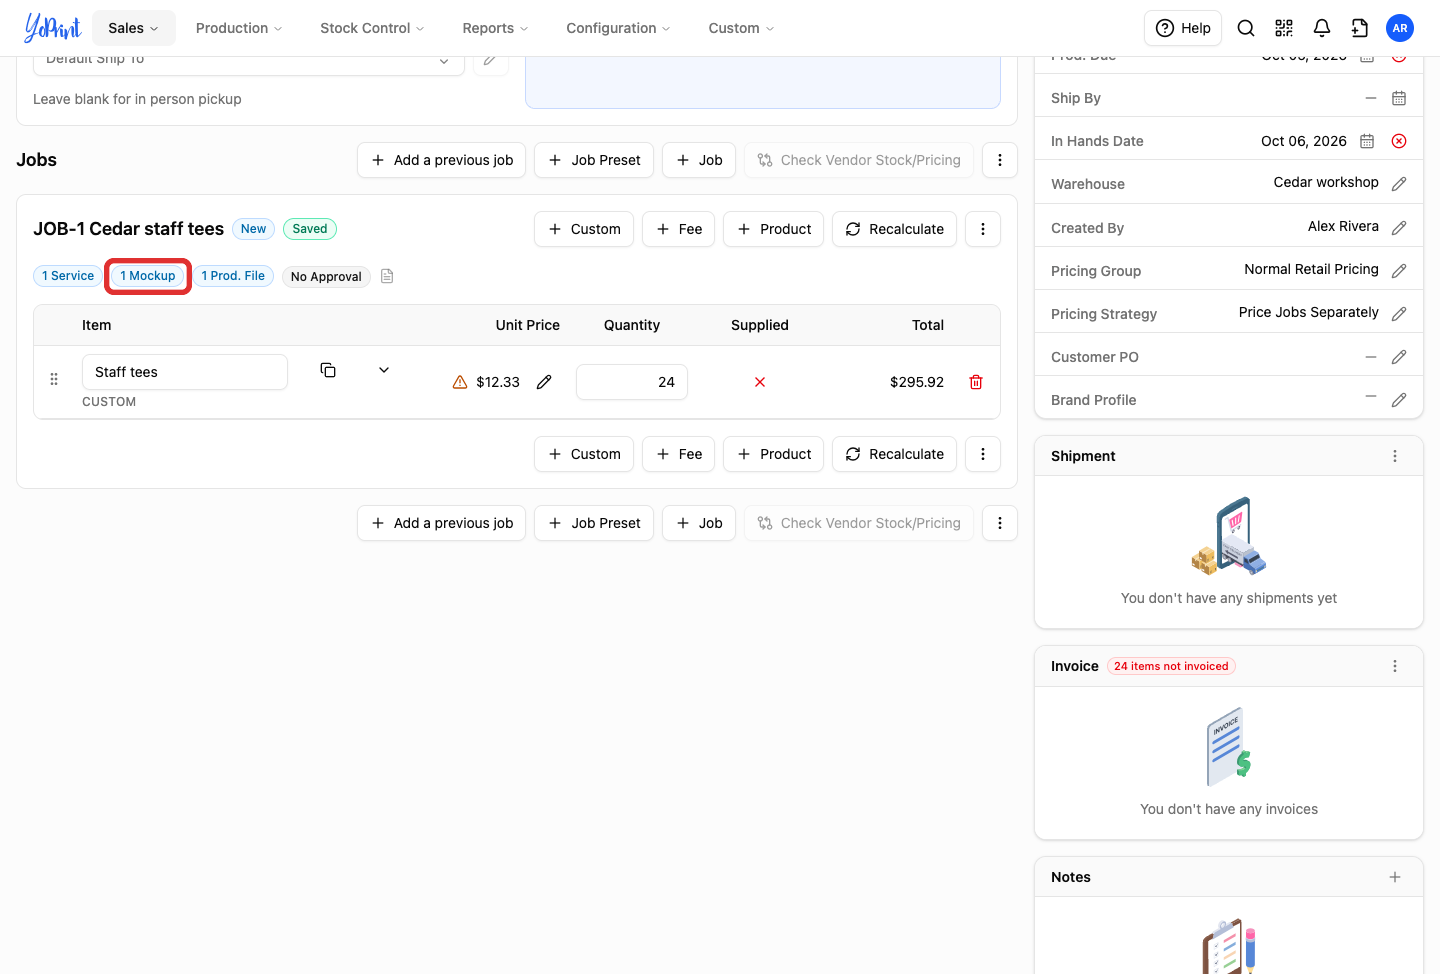
Click the mockup count badge on the job card (such as 1 Mockup or No Mockups).
-
Open the job menu (the three dots) and click Edit.
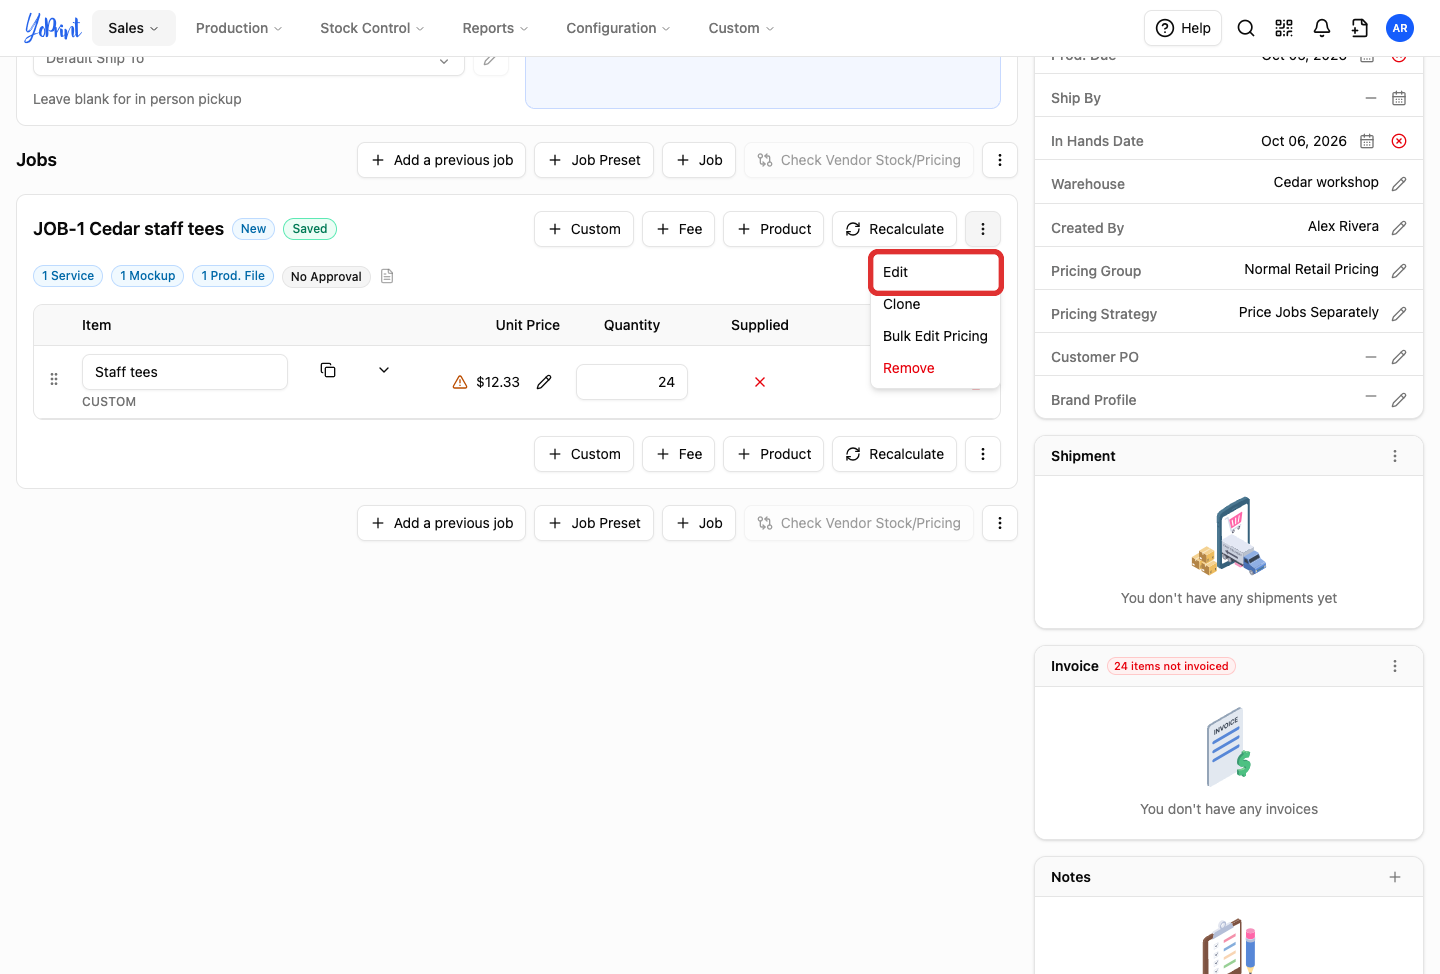
Both methods open the job drawer to the Mockup Files tab. Under Mockup Files, click Create Mockup (or click the edit pencil icon on an existing mockup row to reopen it).
Start from a template
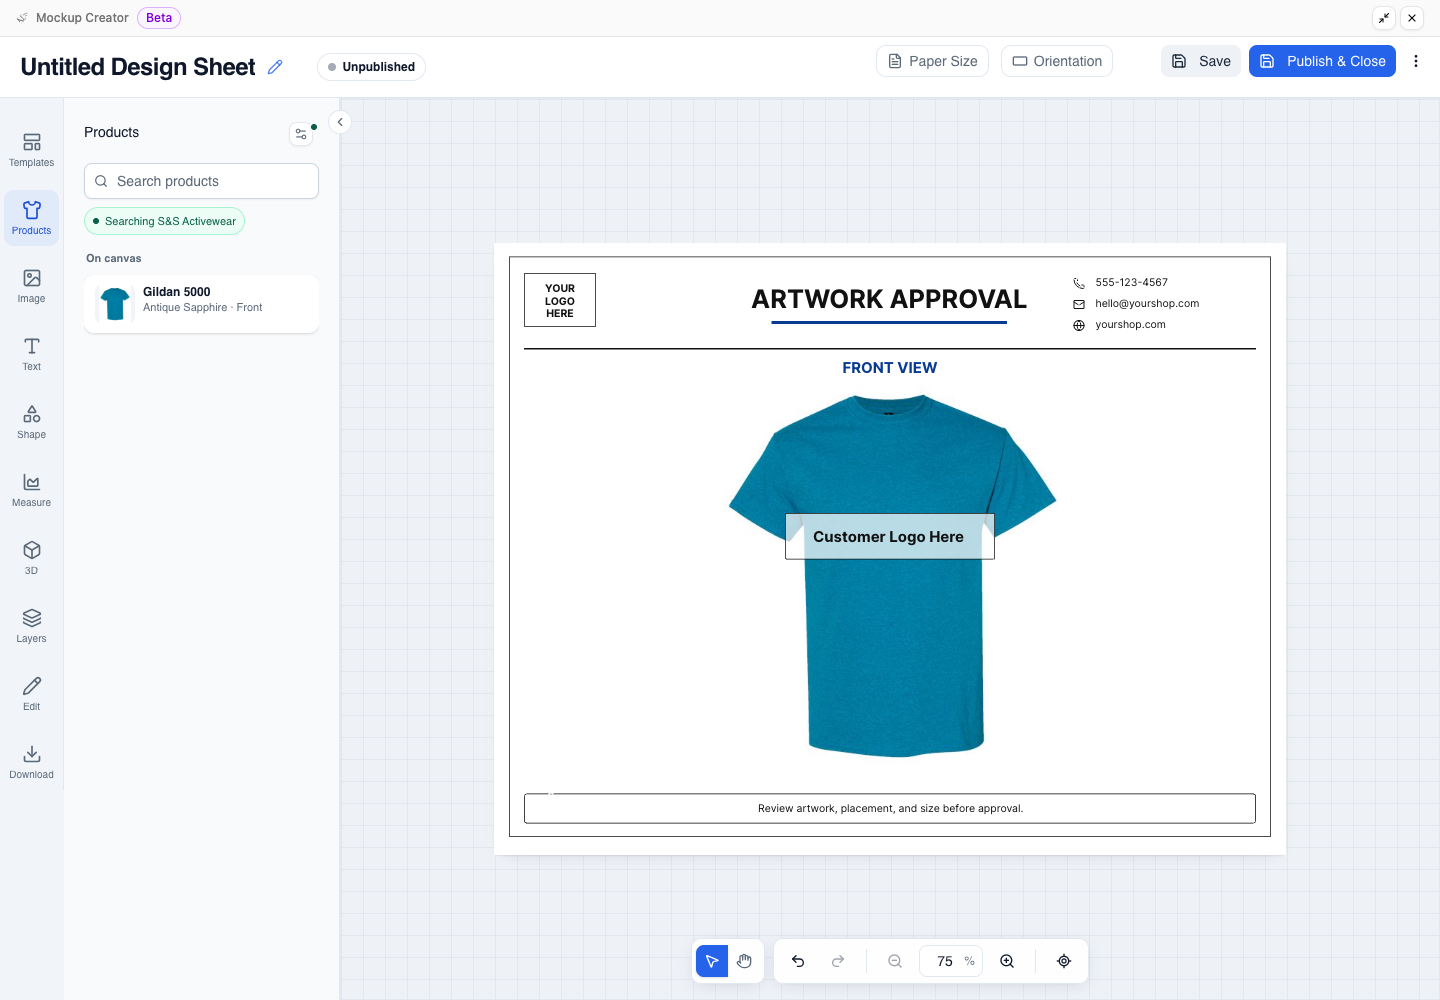
Mockup Creator opens with the Products panel expanded by default to search connected supplier catalogs for blank garments. To use a pre-made garment template instead, switch to templates in the toolbar.
-
In the left toolbar, click Templates.
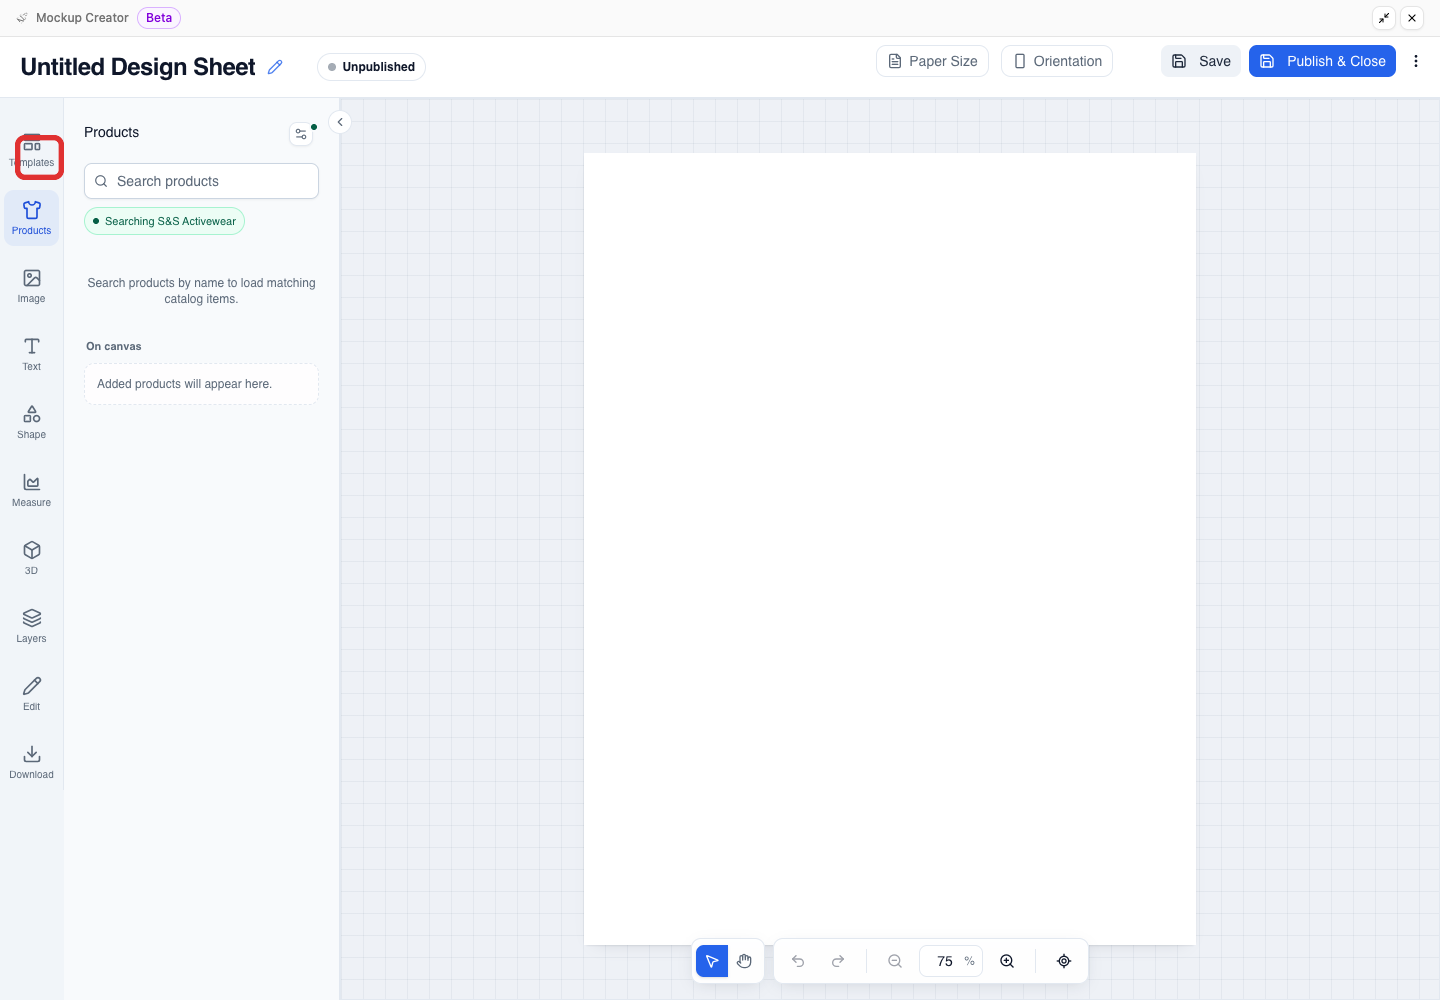
-
In the Templates panel, click YoPrint Gallery.
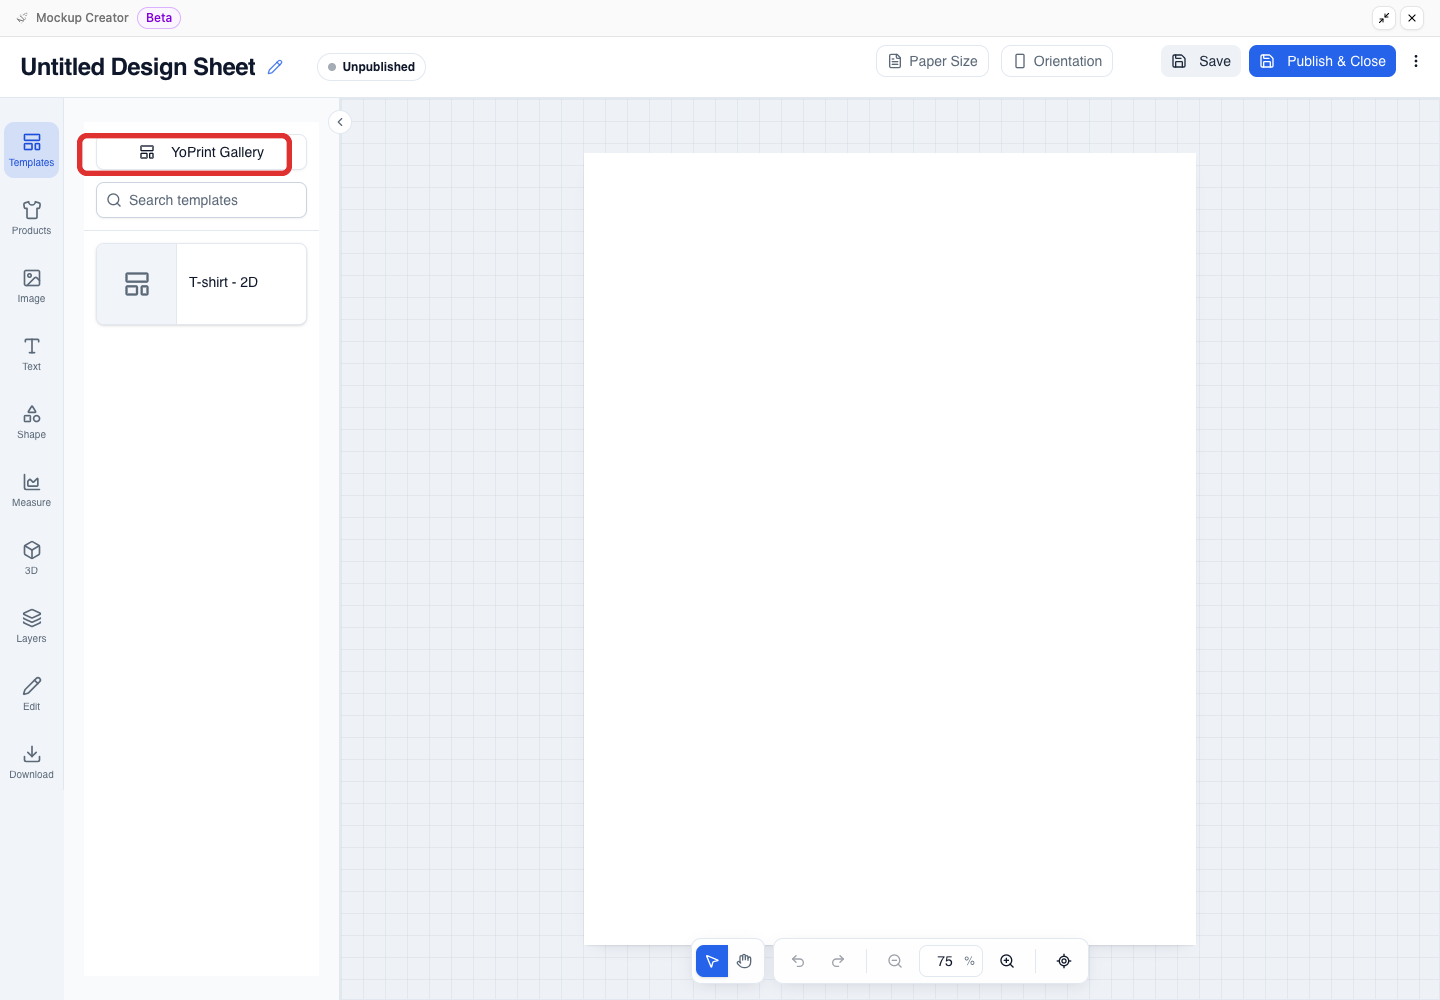
-
Find the layout you want and click Use this template.
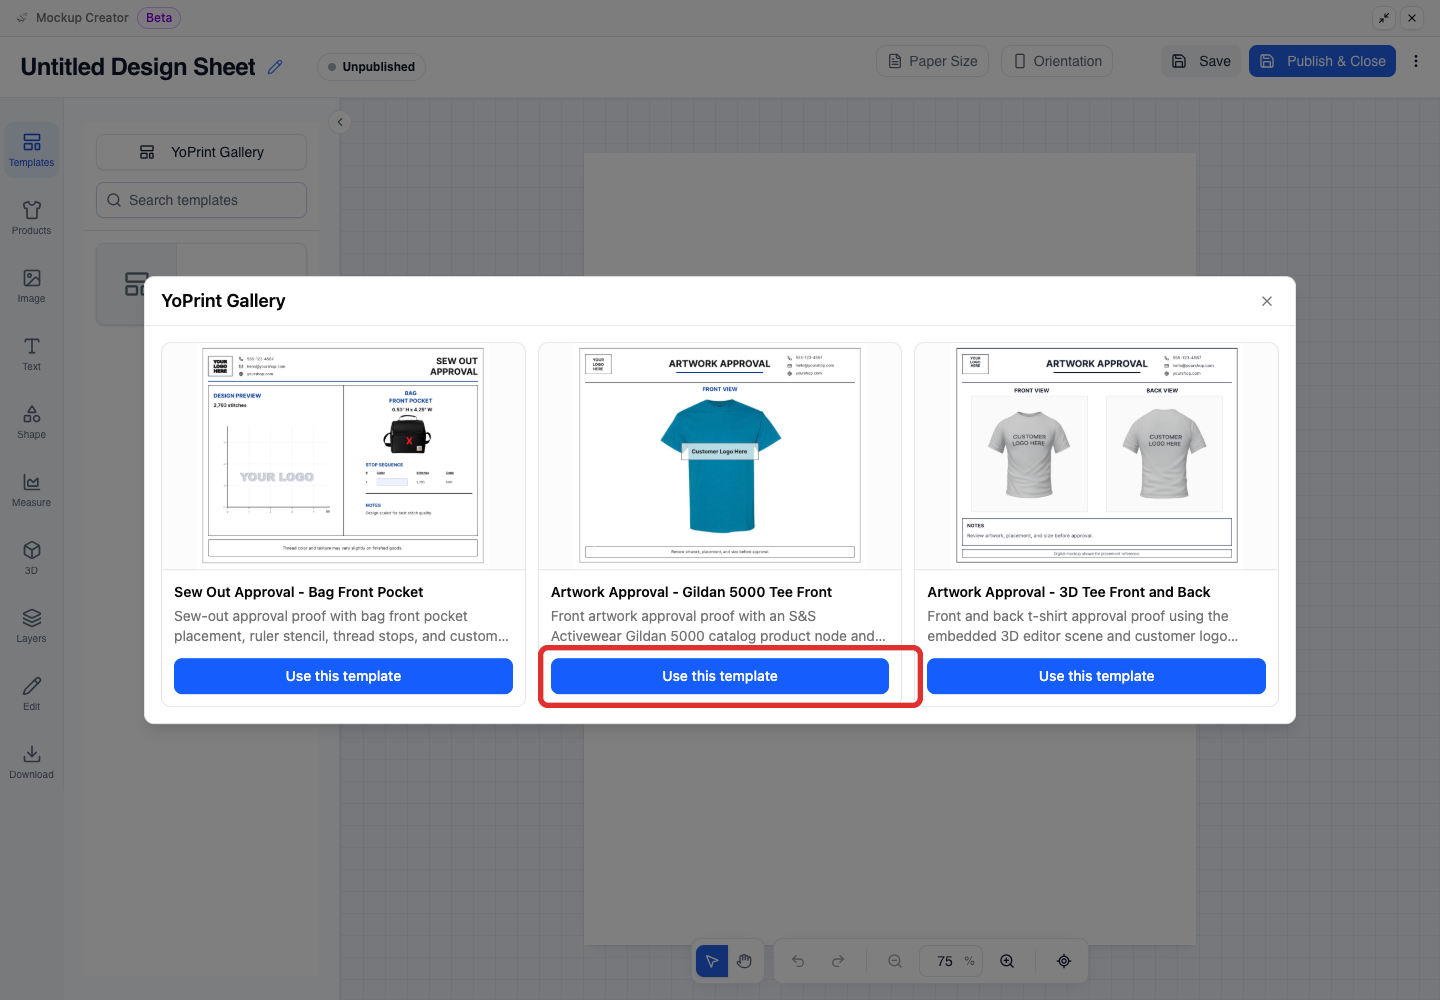
YoPrint copies the layout onto your canvas without altering other jobs. Edits apply only to this specific job.
Use a saved shop template
Templates previously saved by your shop appear in the Templates panel below the YoPrint Gallery button. Click any saved template to load it onto the canvas. If your canvas already contains artwork, YoPrint asks you to confirm before replacing it.
Supplier catalog products
The Products button in the left toolbar searches your connected supplier catalogs for blank garments. Supplier catalogs are optional; you can also use custom garments or pre-made gallery templates. To connect a vendor catalog, see Using Catalog Integrations and Getting Real-Time Stock and Pricing from Vendor Catalog.
Save the design on the job
The design uses the sheet title as its name on the job. To rename the design before saving, click the pencil icon next to the title and type a new name.
-
Click Save.
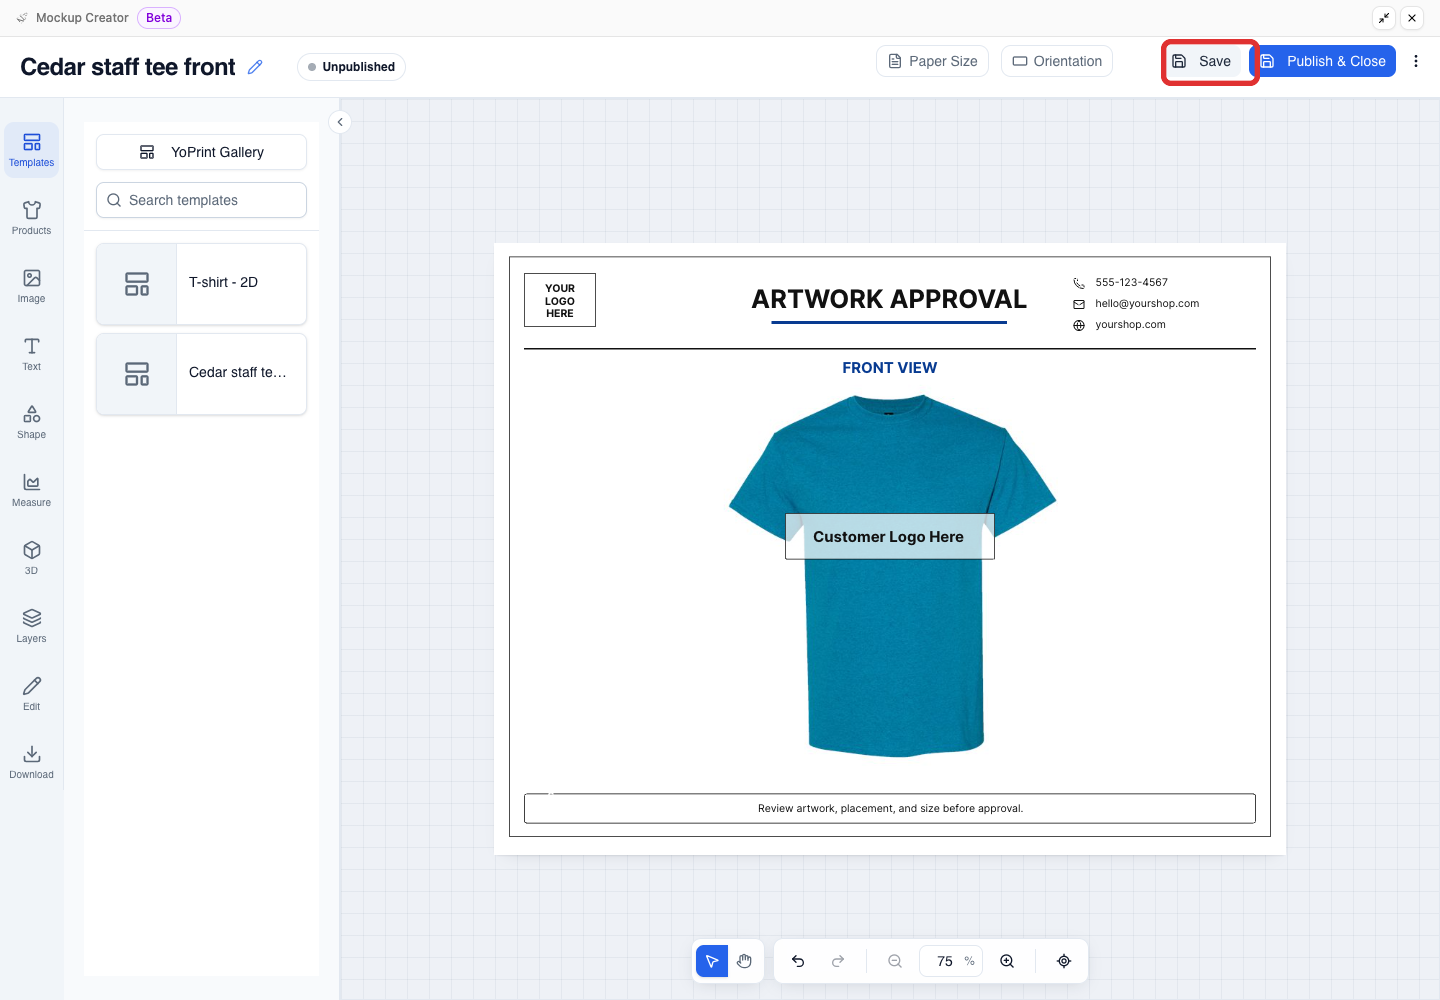
The creator header displays Unpublished beside the sheet title. Mockup Creator remains open so you can continue editing. On the job drawer behind the creator, the design appears under Mockup Files with Draft status.
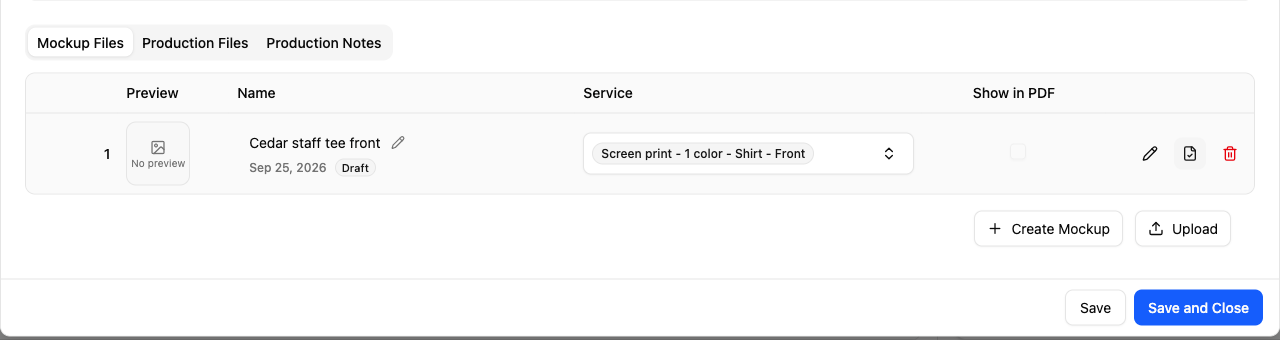
Draft designs do not appear on quote or sales order PDFs. The Show in PDF checkbox remains unchecked and disabled until you publish the design. Use drafts for internal work in progress to keep unfinished artwork off customer documents.
Publish the design
Publishing makes the mockup available for customer viewing and artwork approval. It does not automatically notify the customer; approval is requested when you send the quote or sales order.
-
In Mockup Creator, click Publish & Close.
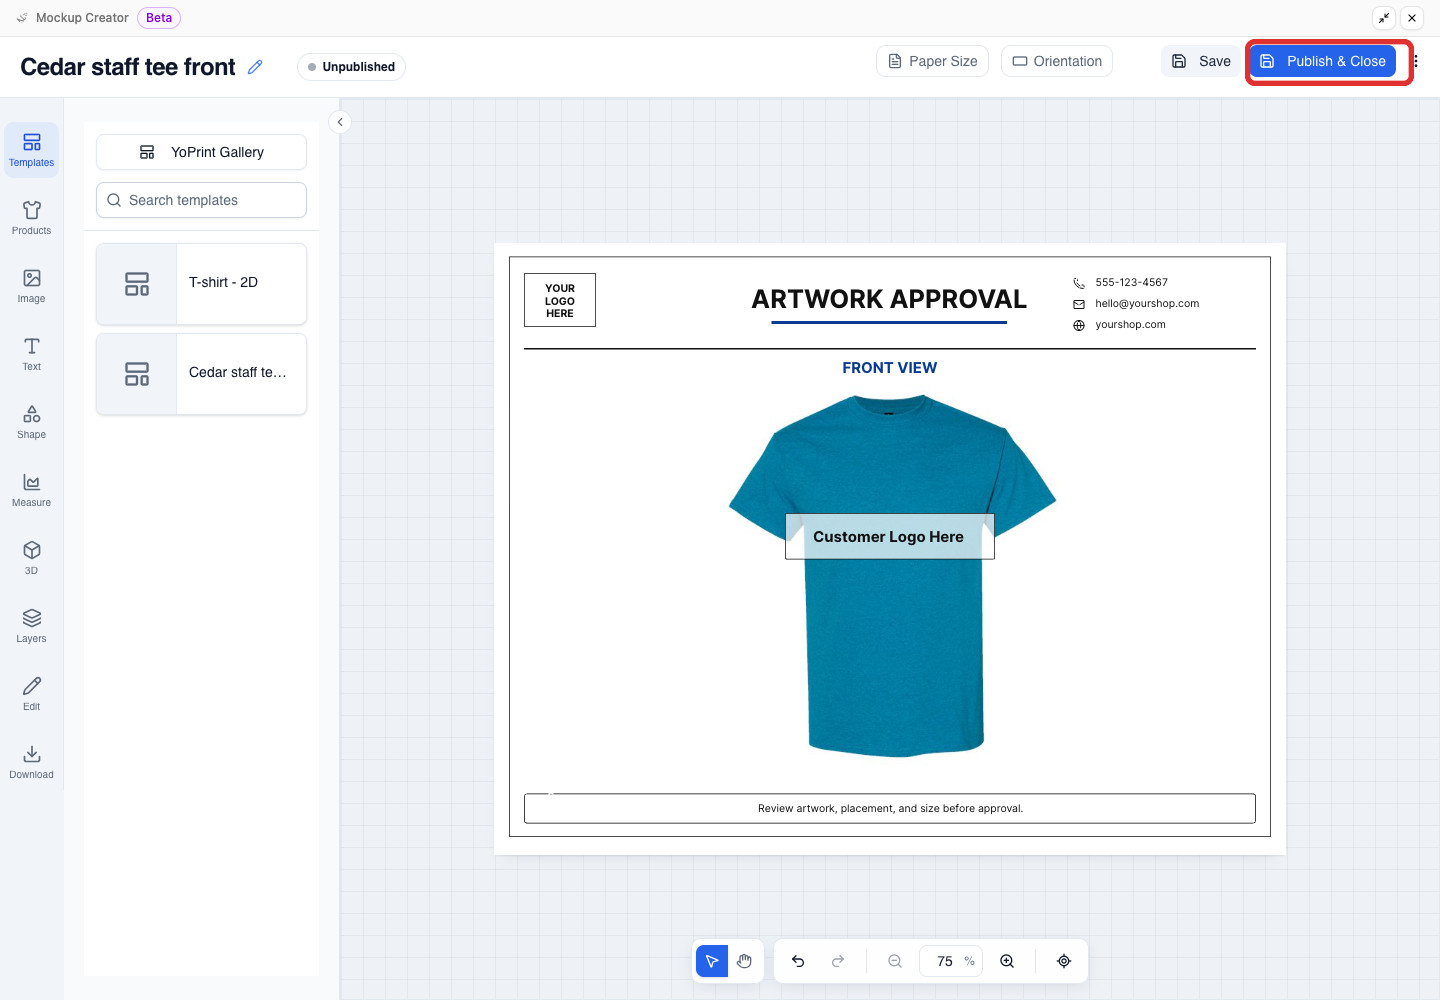
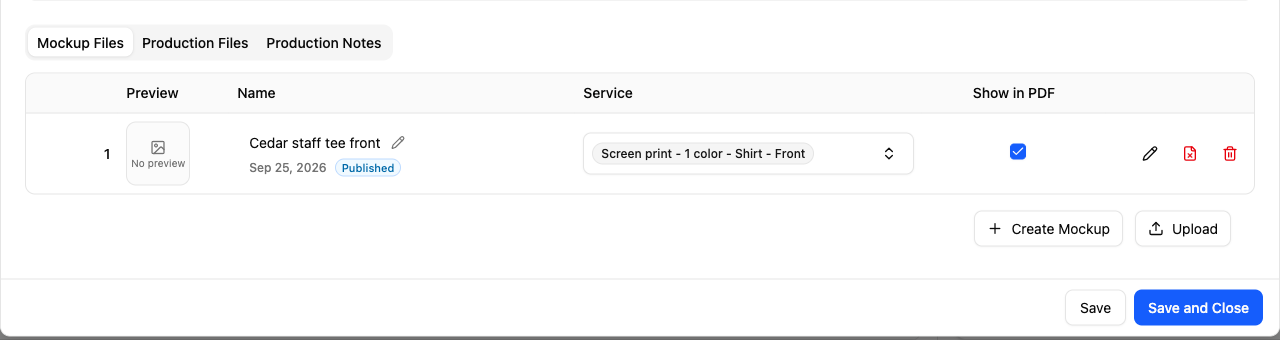
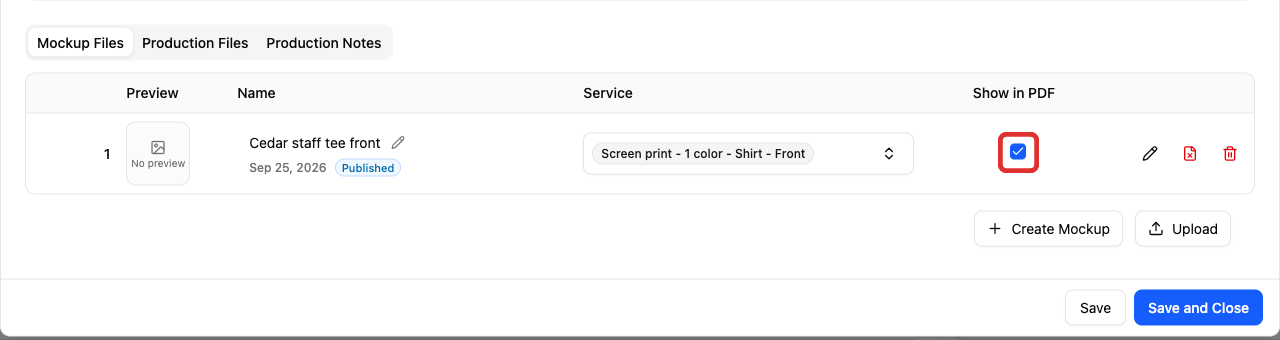
Publishing marks the design ready for customer viewing and closes Mockup Creator, returning you to the job drawer. Under Mockup Files, the design status changes to Published, and Show in PDF is checked automatically.
Keep the mockup off customer PDFs
To keep the mockup on the job and available in the customer portal without displaying it on printed or downloaded quote or sales order PDFs, uncheck Show in PDF.
You can also manage publication directly from the row under Mockup Files. Click the publish icon on a draft row to publish it. On a published row, click Unpublish to revert the design to Draft status and clear Show in PDF.
Customer artwork approval
To send the mockup to your customer for approval or manage price visibility, see Customer Portal Overview and How to Request Artwork Approval from Your Customer.
Save a template for the next job
To save a template from an existing mockup:
-
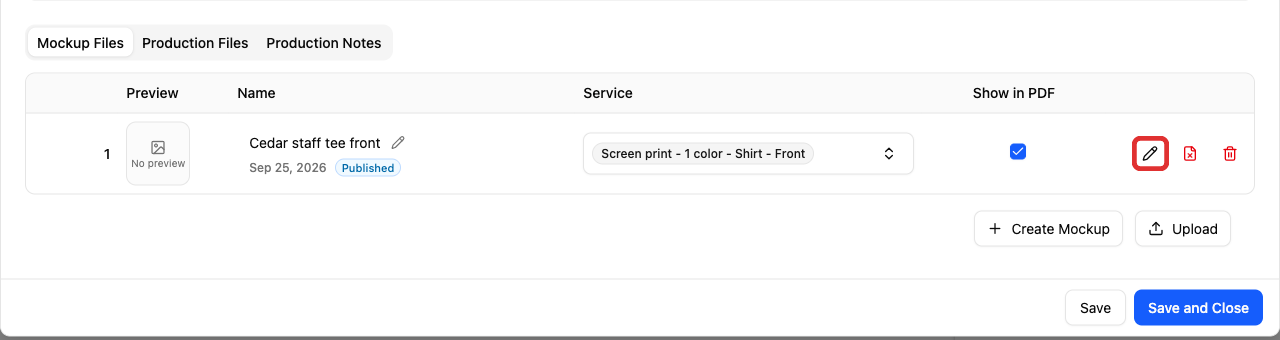
Under Mockup Files, click the edit icon (the pencil) on the mockup row to open Mockup Creator.
-
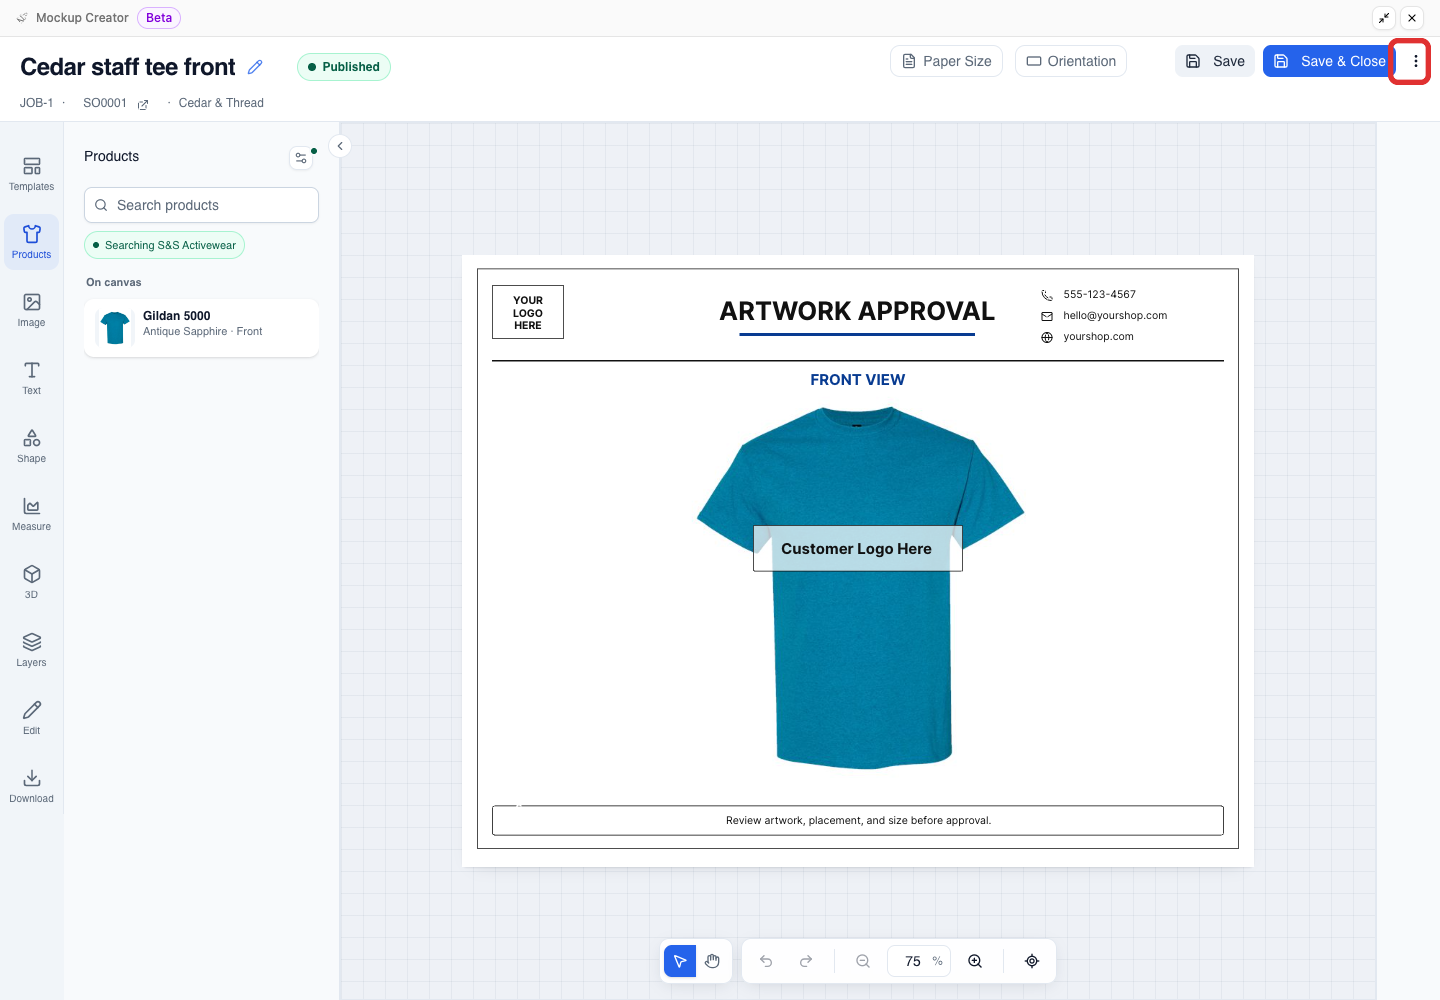
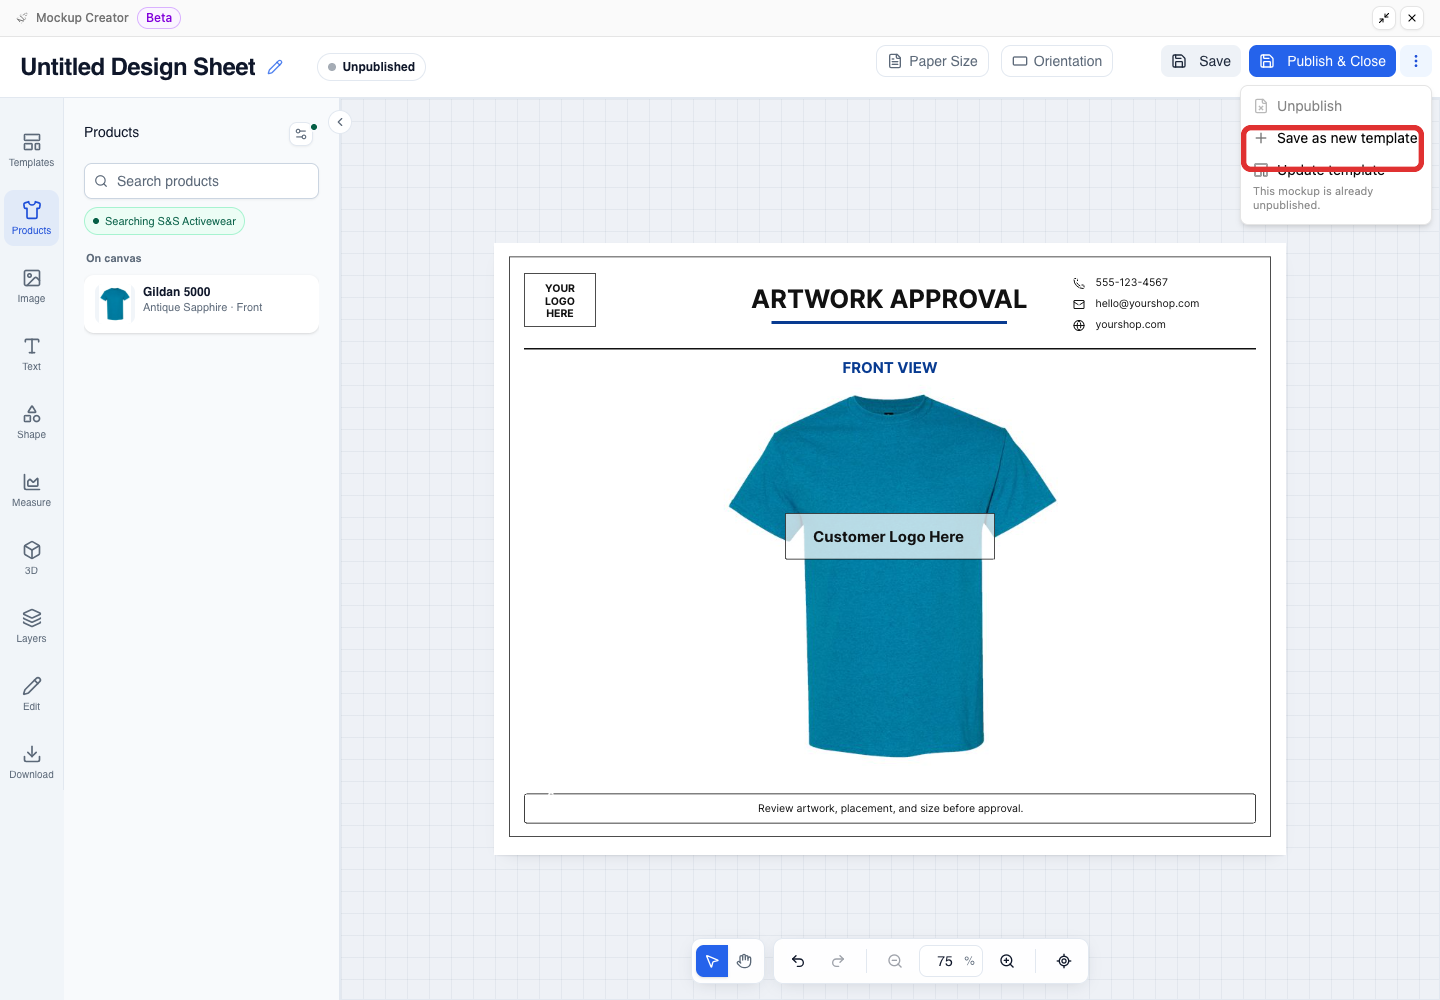
Beside Save & Close (or Publish & Close if unpublished), click the three-dots menu icon.
-
Click Save as new template.
-
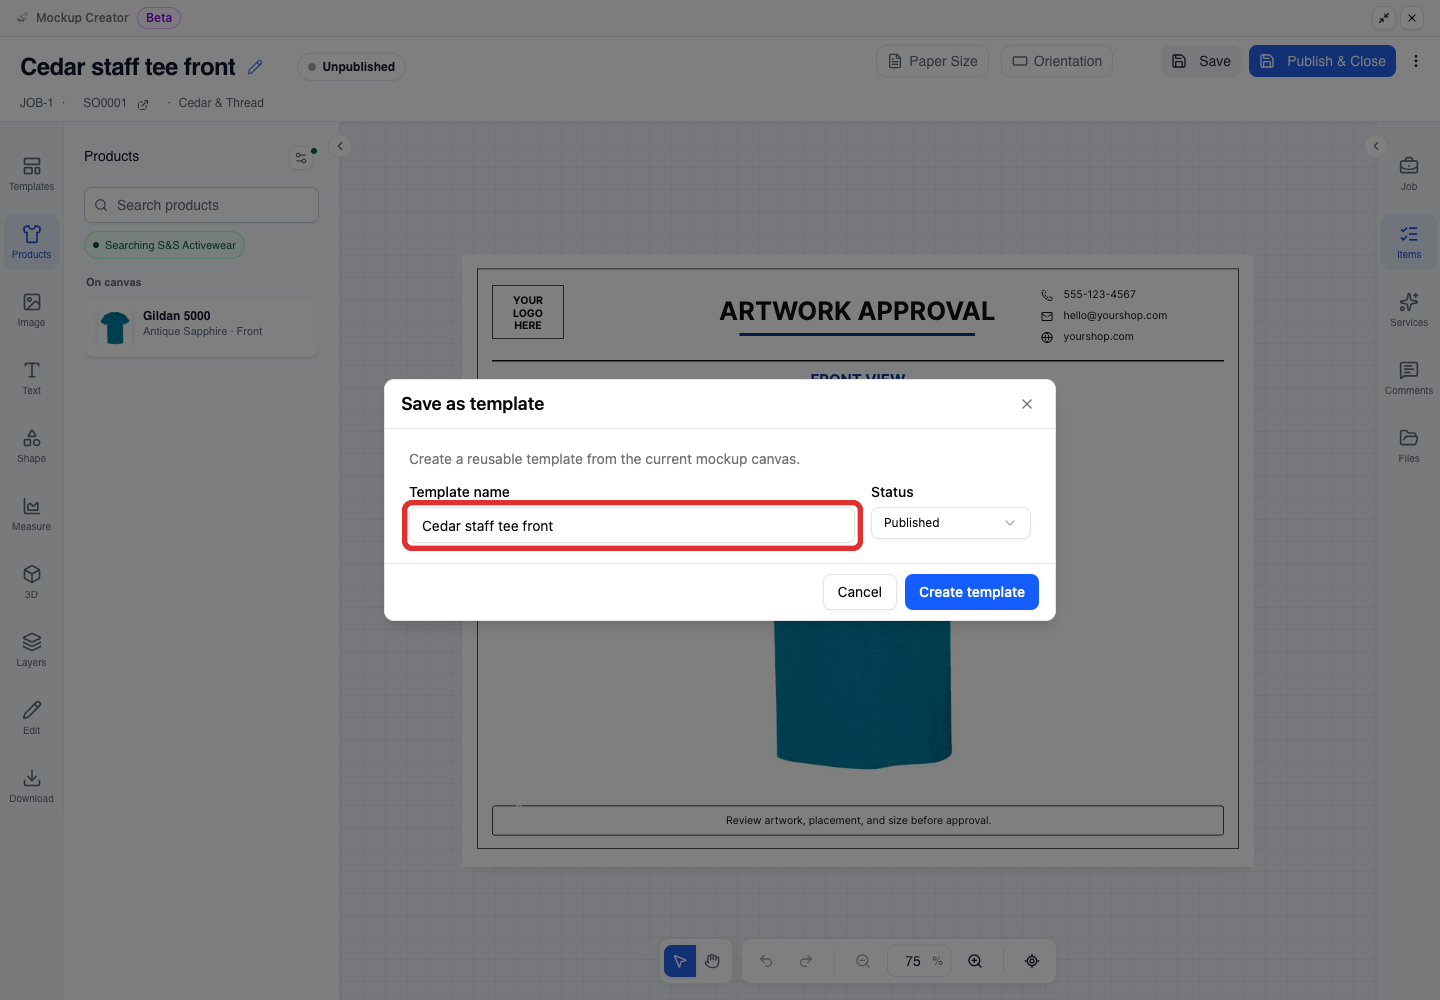
In the Template name field, type a name for the template. Keep Status set to Published.
-
Click Create template.
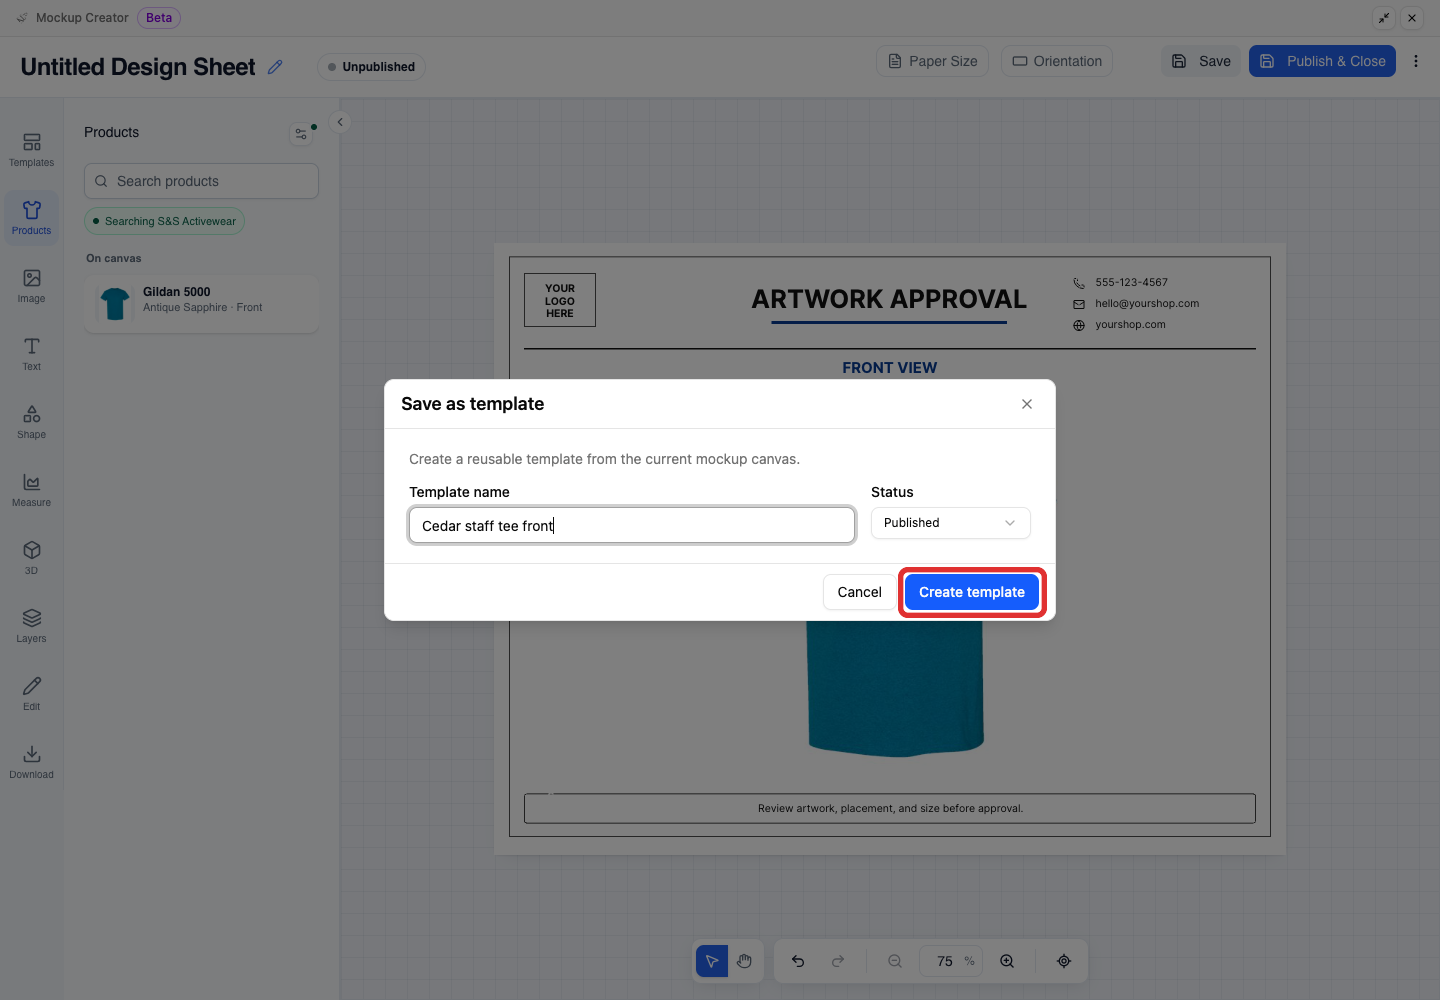
The design on the job keeps its original name. The template is saved as a separate copy.
-
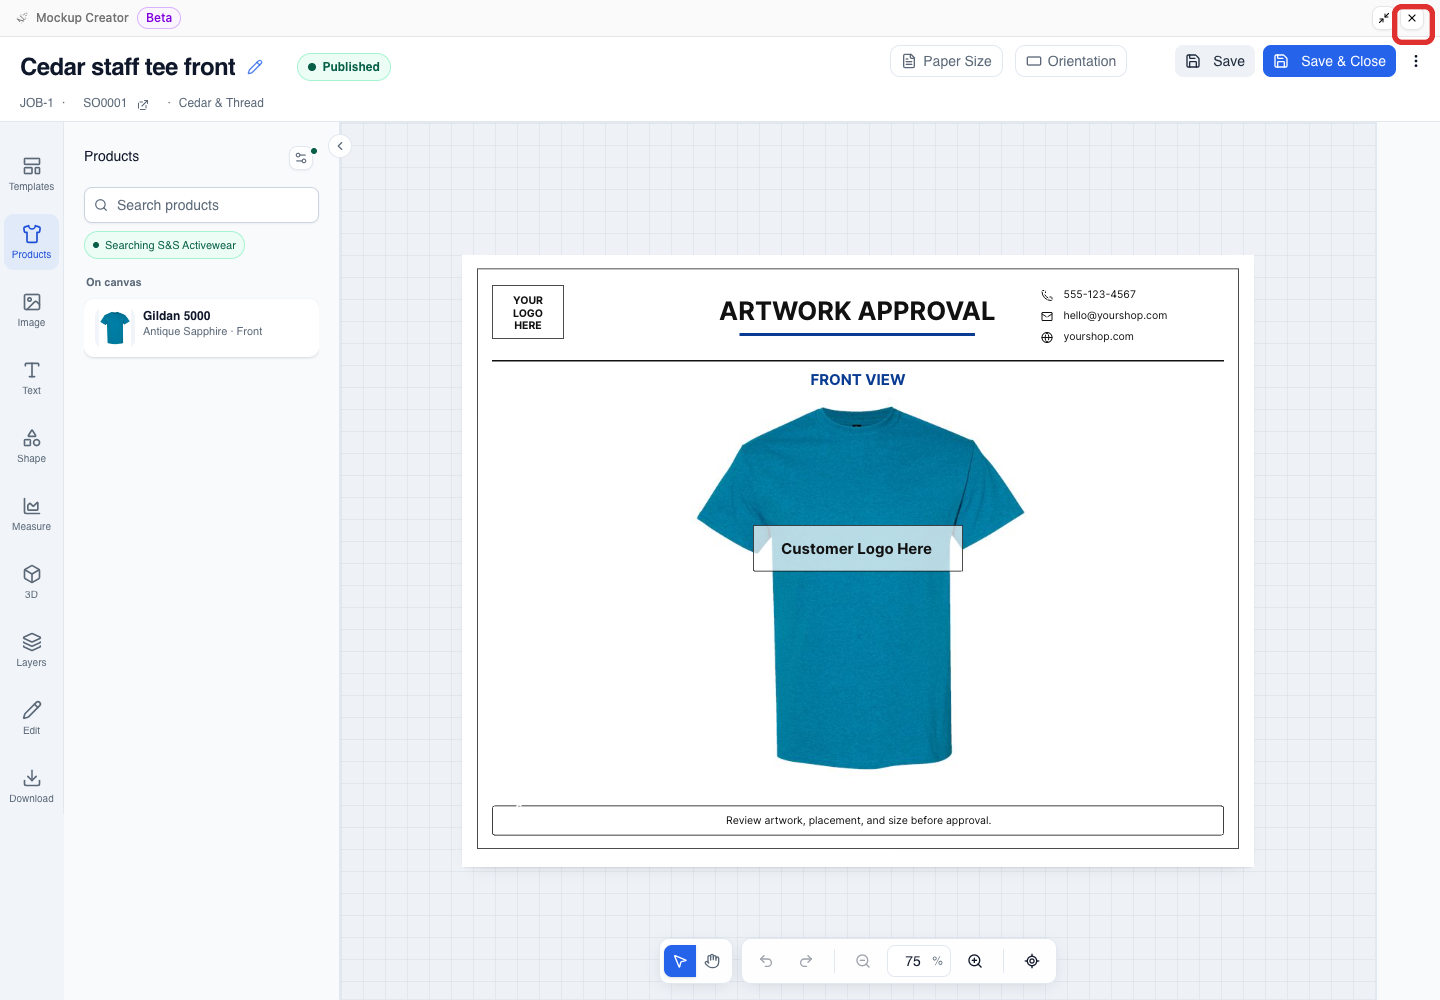
Click Close (the × icon) to exit Mockup Creator, then save and close the job drawer.
-
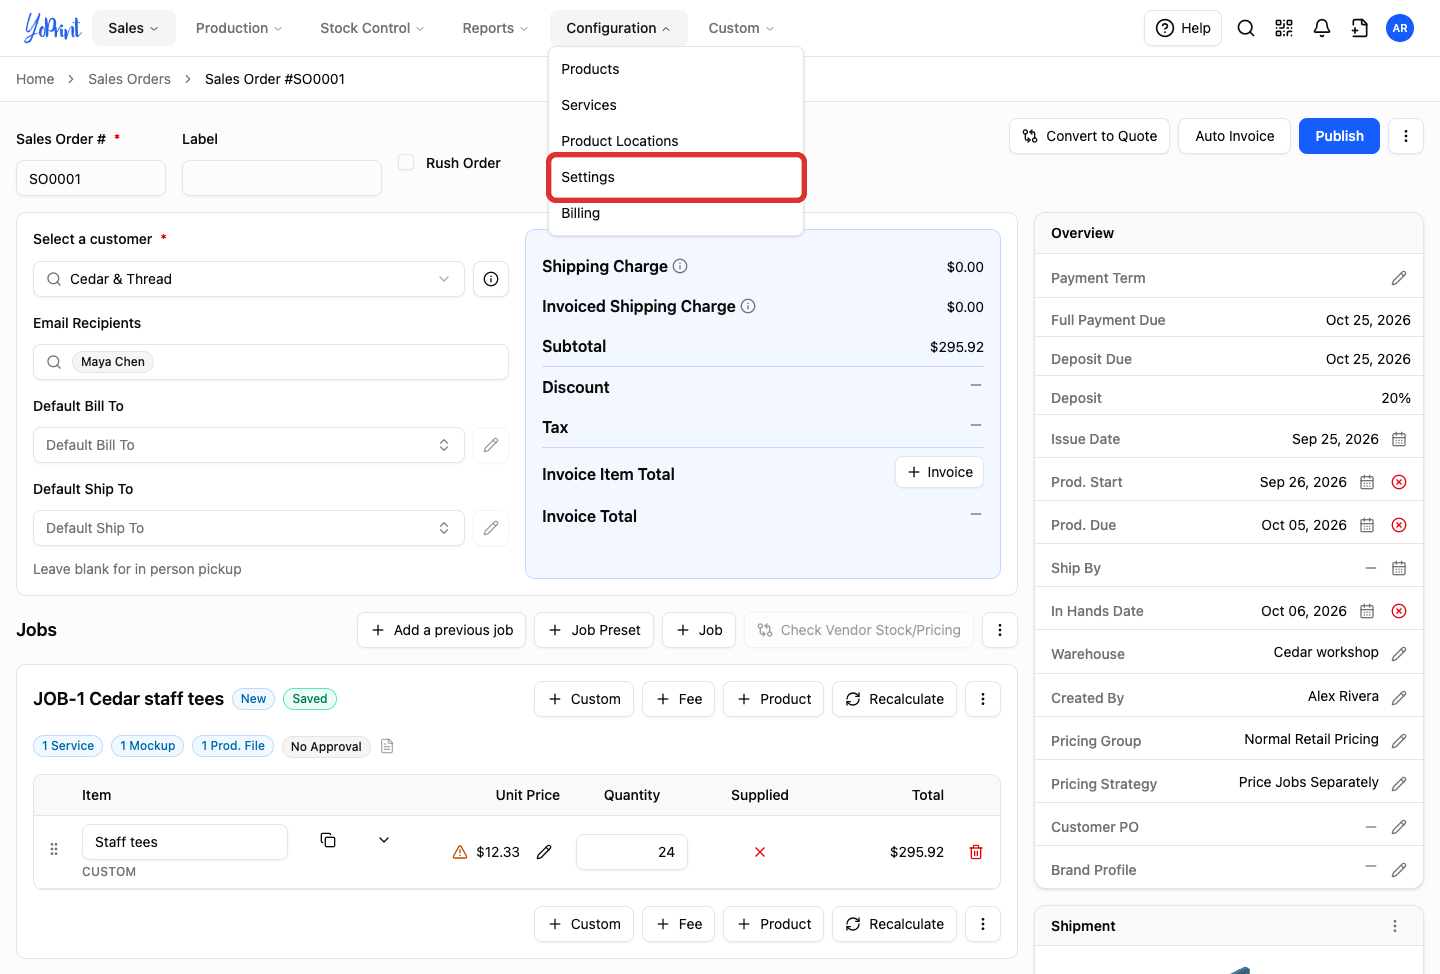
Go to Settings.
-
In the left sidebar, click Mockup Templates.
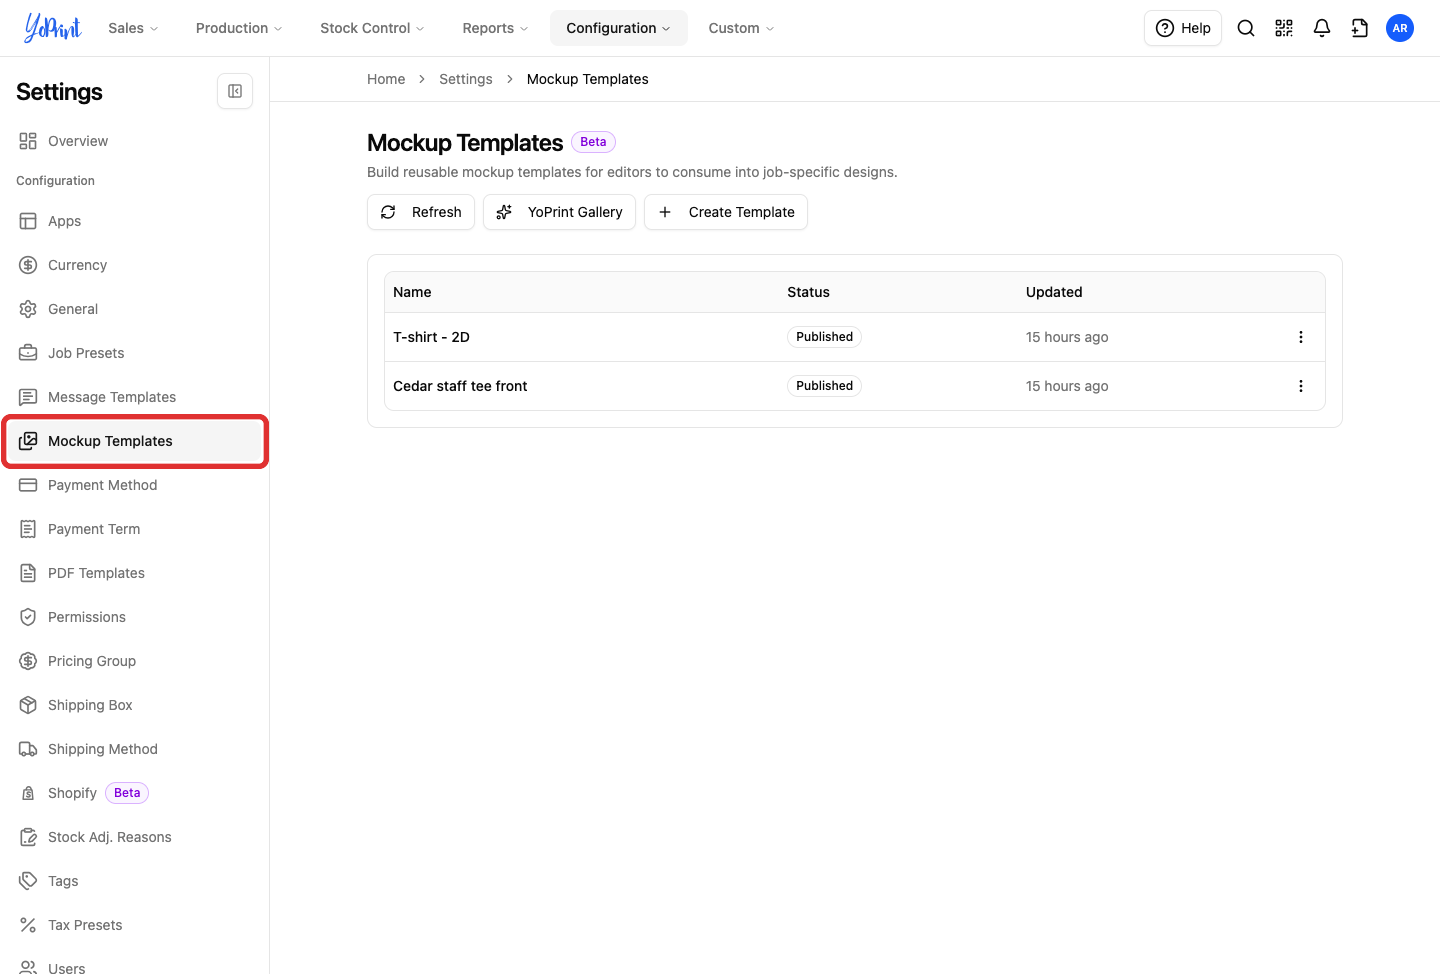
Your template is listed in the library. The next time you click Templates in Mockup Creator, this template is available to load onto any canvas.
For the difference between customer mockups and internal shop print files, see Mockup vs Production Files.