Create and Edit a Variant Product
In this article
A variant product is a product in YoPrint that comes in sizes, colors, or both. Each size and color combination is a variant with its own price, weight, vendor, and supplier code. For example, a hoodie in four sizes and two colors has eight variants.
You create and edit the entire product on one page: its details, its sizes and colors, and every variant. YoPrint does not save your changes until you click Save.
For a product with no sizes or colors, see Add Non-Garment Products and Set Up Pricing. To add many products at once, see Import and Update Products Using a CSV Template. For products from a supplier catalog, see Different Ways to Add Your Products.
Start a new product
Open the product editor from your product list.
-
Open Configuration, choose Products, and click Add Product.
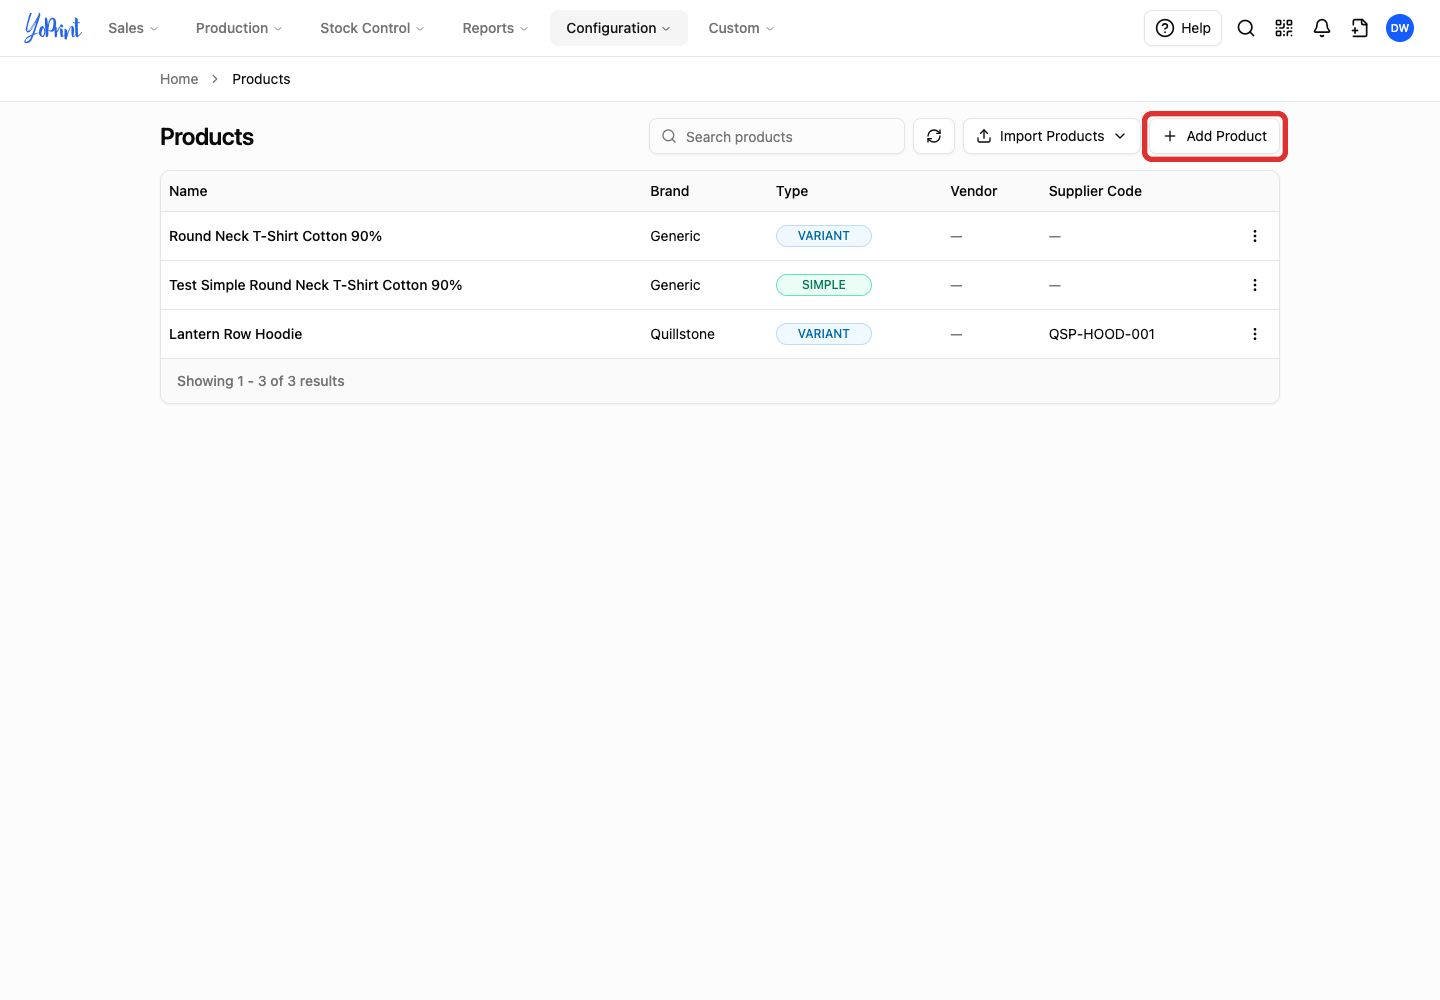
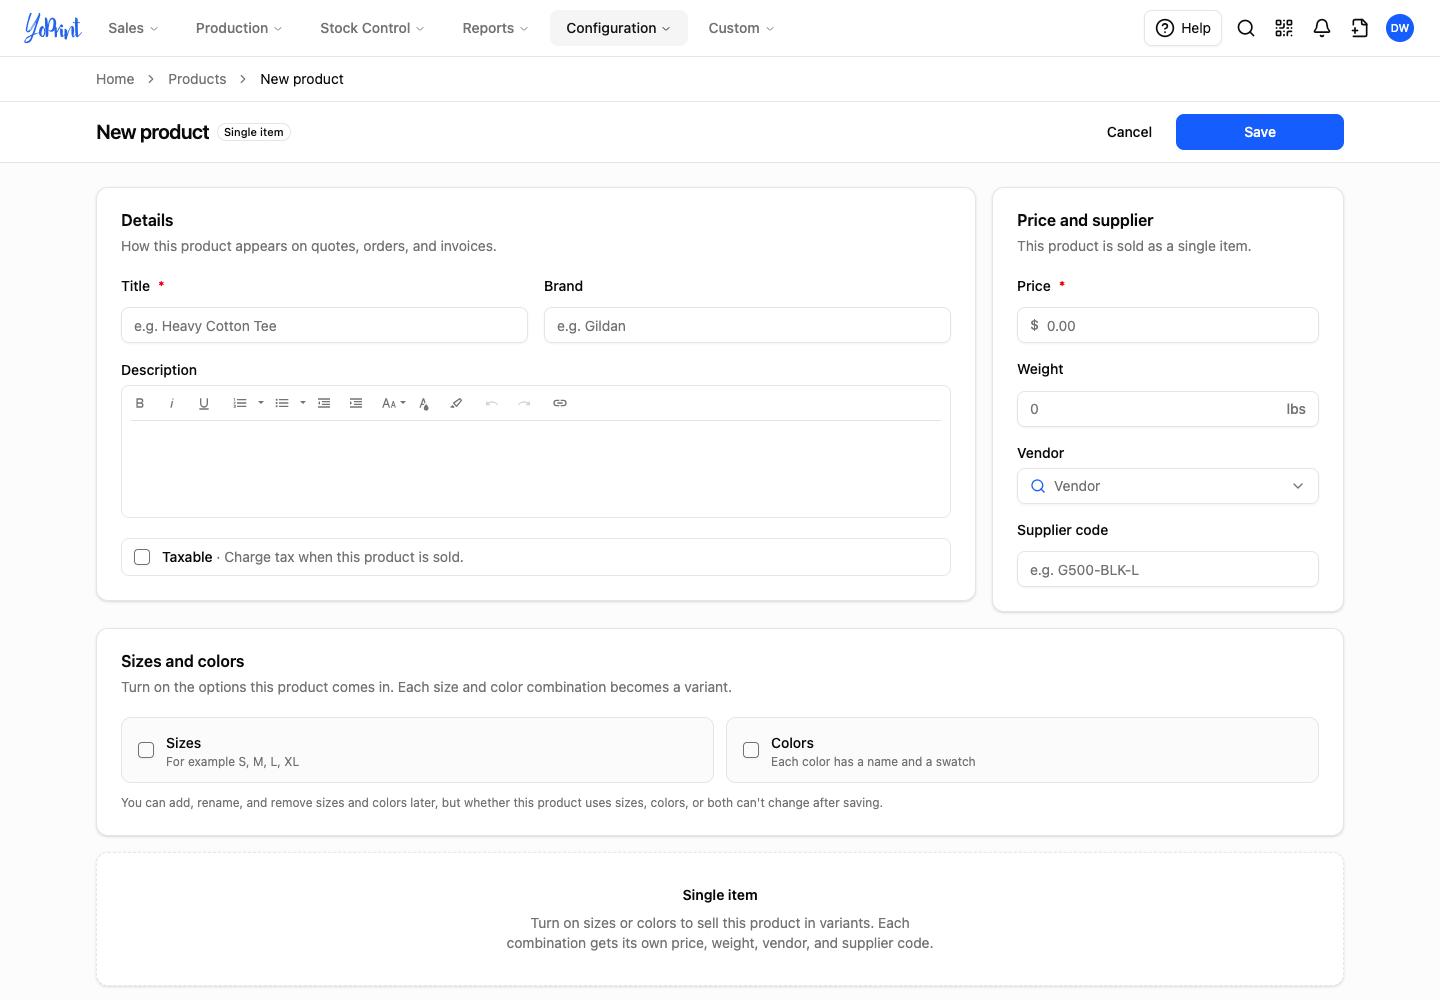
The editor opens with three cards: Details, Price and supplier, and Sizes and colors. Below them is a Single item panel. The product stays a single item until you turn on sizes or colors.
Enter the product details
-
In Details, enter the Title.
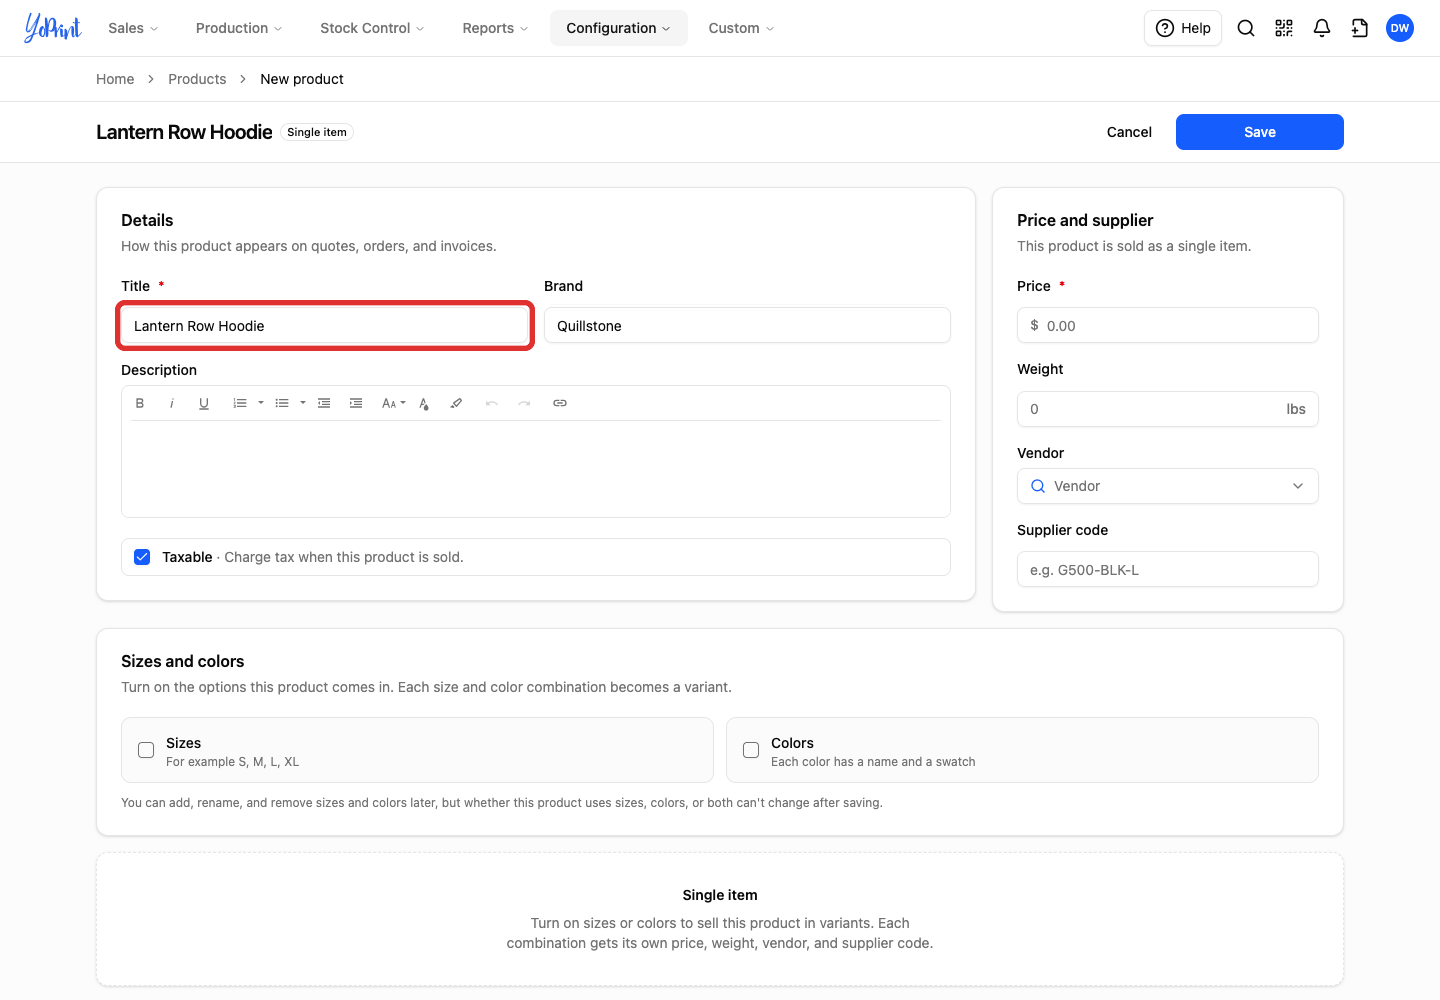
Add the Brand and a Description if you use them.
-
Tick Taxable if you charge tax when the product is sold.
Turn on sizes and colors
Choose the options this product comes in to switch it from a single item to a variant product.
-
In Sizes and colors, tick Sizes, Colors, or both.
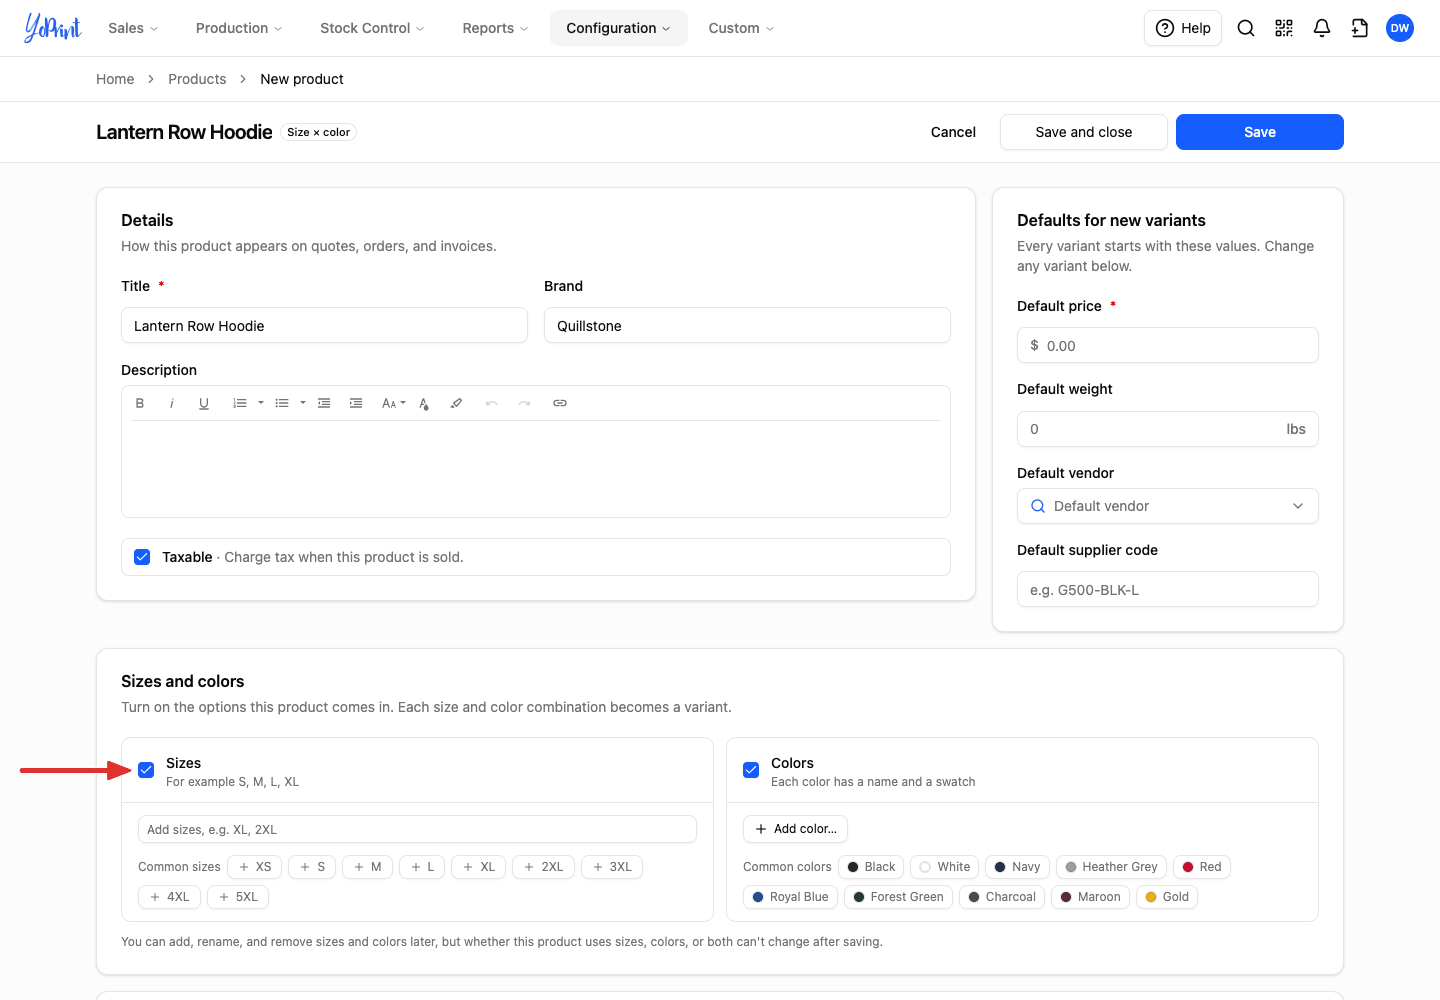
You can add, rename, and remove sizes and colors later. However, you cannot change whether the product uses sizes, colors, or both after you save. A product that you save as a single item stays a single item, and its edit form has no sizes or colors.
Turning on an option updates the editor:
- Size × color: The badge beside the product title updates to show which options the product uses.
- Defaults for new variants: This card replaces Price and supplier.
- Variants: This card replaces the Single item panel and fills in as you add sizes and colors.
Set the defaults for new variants
Every variant you create now starts with these values. You can change any variant afterwards.
-
In Defaults for new variants, enter the Default price.
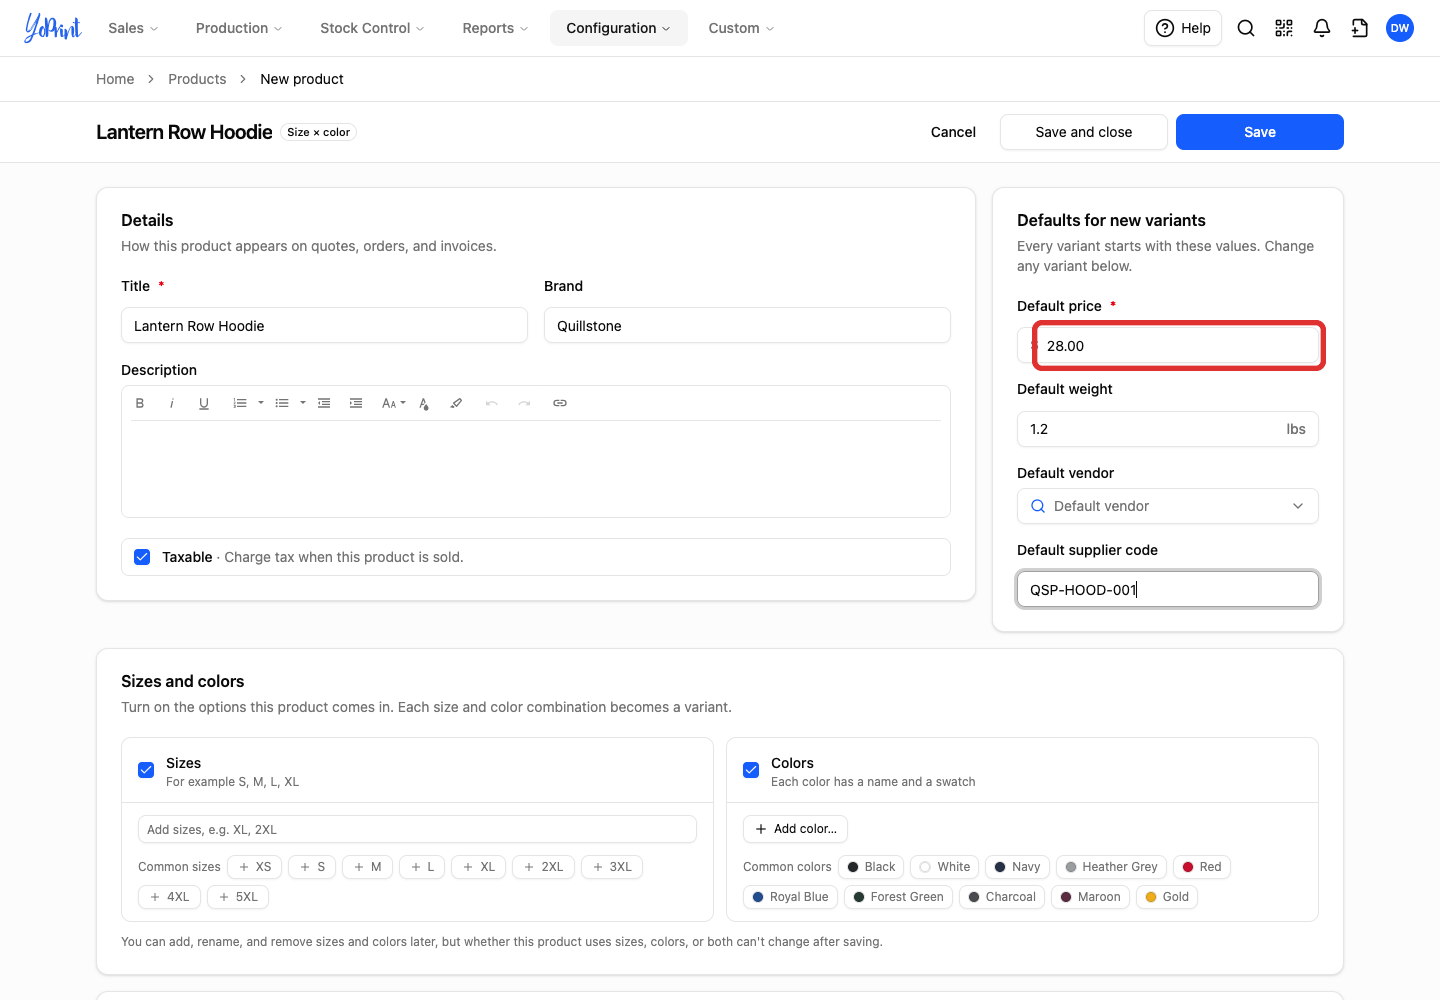
The price is the product's base price, and your pricing group adds its product markup when the product goes on a quote: see Set up Pricing Groups: Configure Product and Service Markups.
If the same details apply to the whole product, enter a Default weight, select a Default vendor, and enter a Default supplier code. Vendors come from Vendor Management.
Add sizes and colors
Each size and color you add creates every combination with the others in Variants.
-
Under Sizes, click the common sizes you sell, or type a size in Add sizes and press Enter.
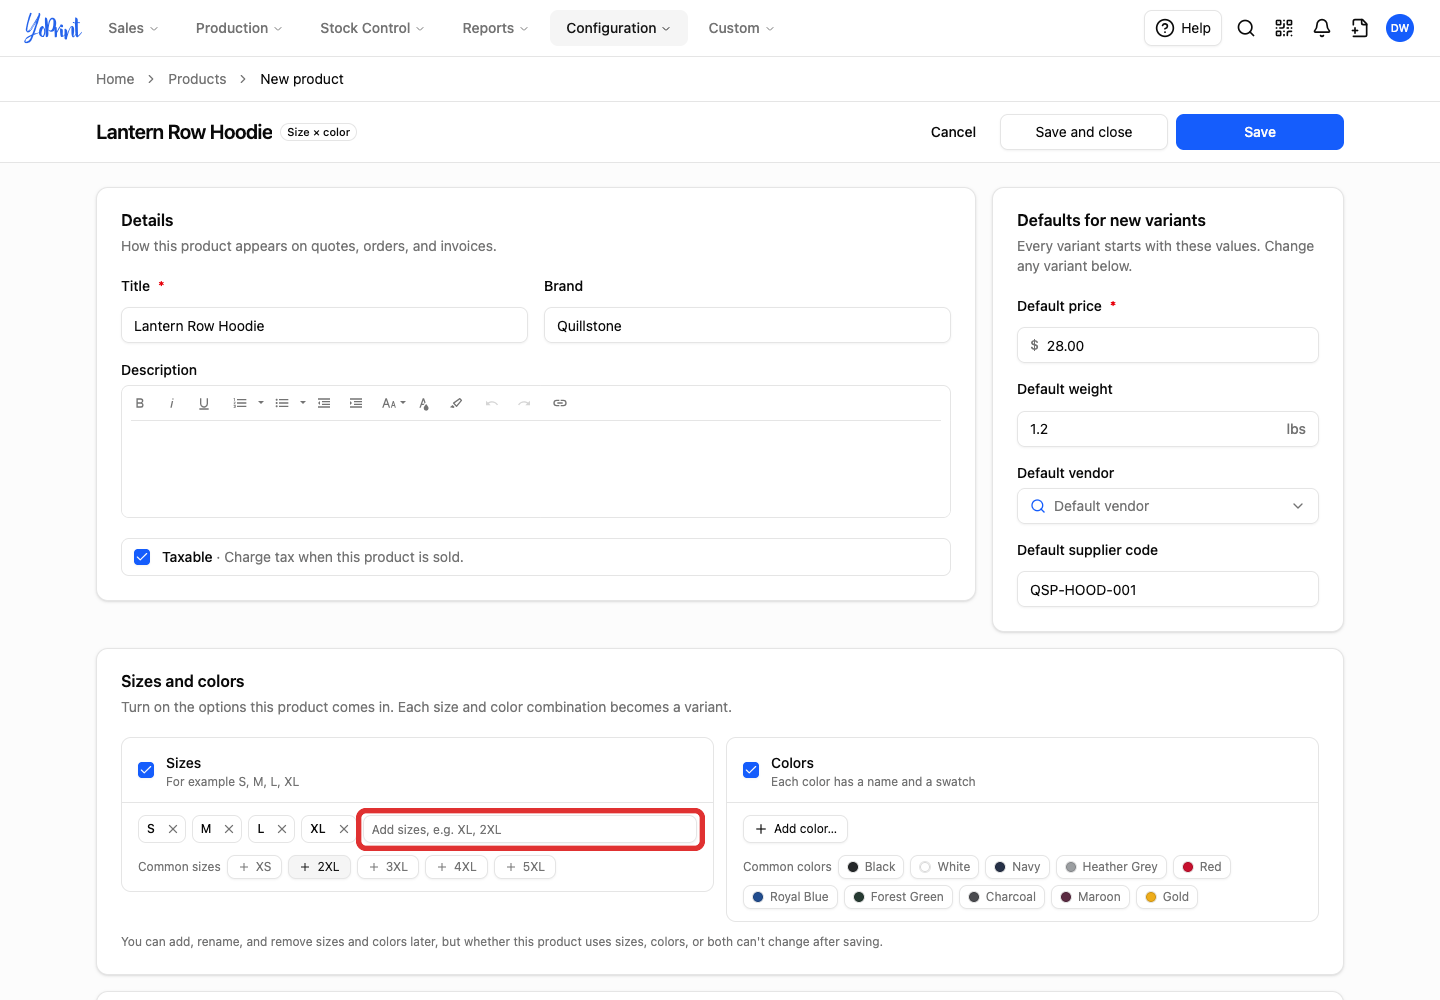
You can paste several sizes at once into Add sizes, separated by commas.
-
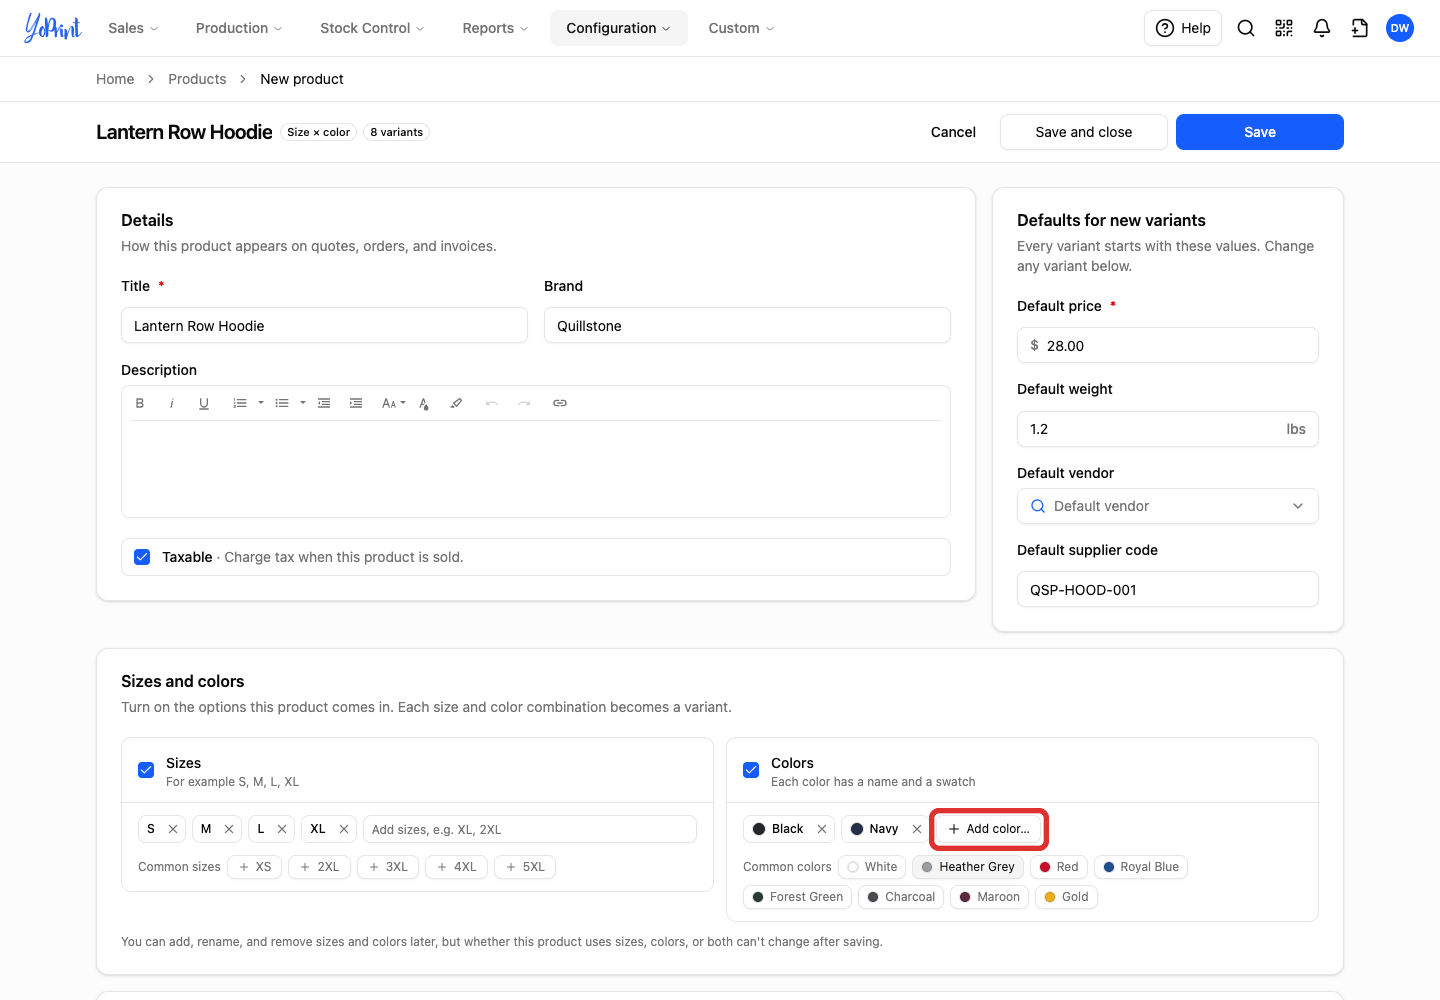
Under Colors, click the common colors you sell, or click Add color… to add your own.
-
If you clicked Add color…, enter a Name in the dialog. Type a hex code in the Color field or click the swatch beside it to pick a color, then click Save.
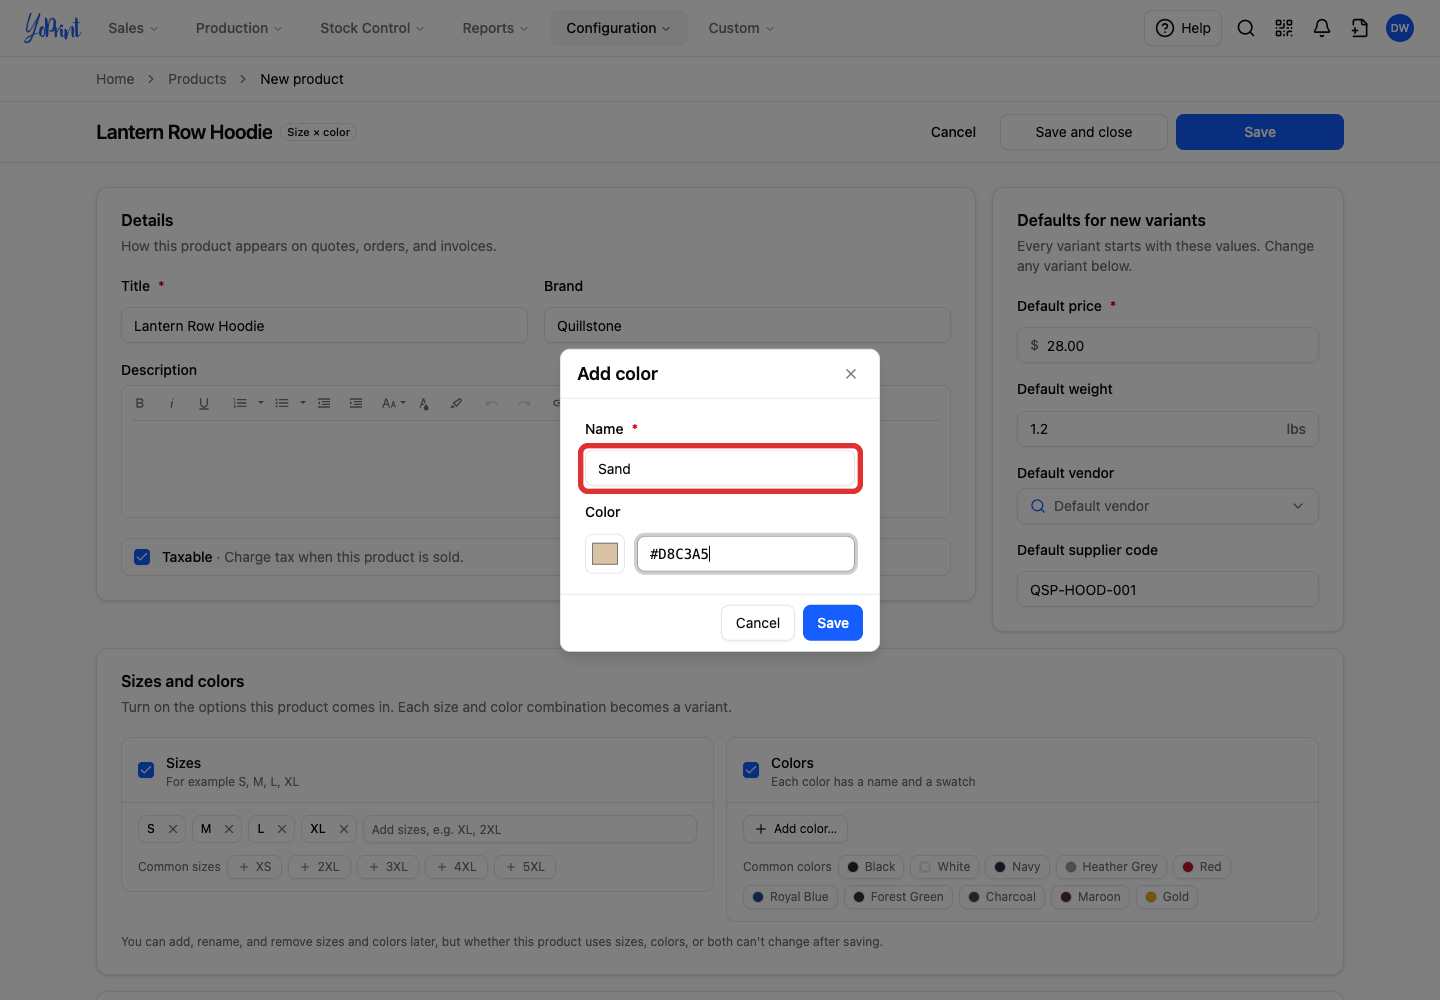
To remove a size or color before you save, click the × on its chip.
Check and price the variants
Variants lists every combination with its Price, Weight, Vendor, and Supplier code. To edit a single cell, click it, type a value, and press Enter to move down the column.
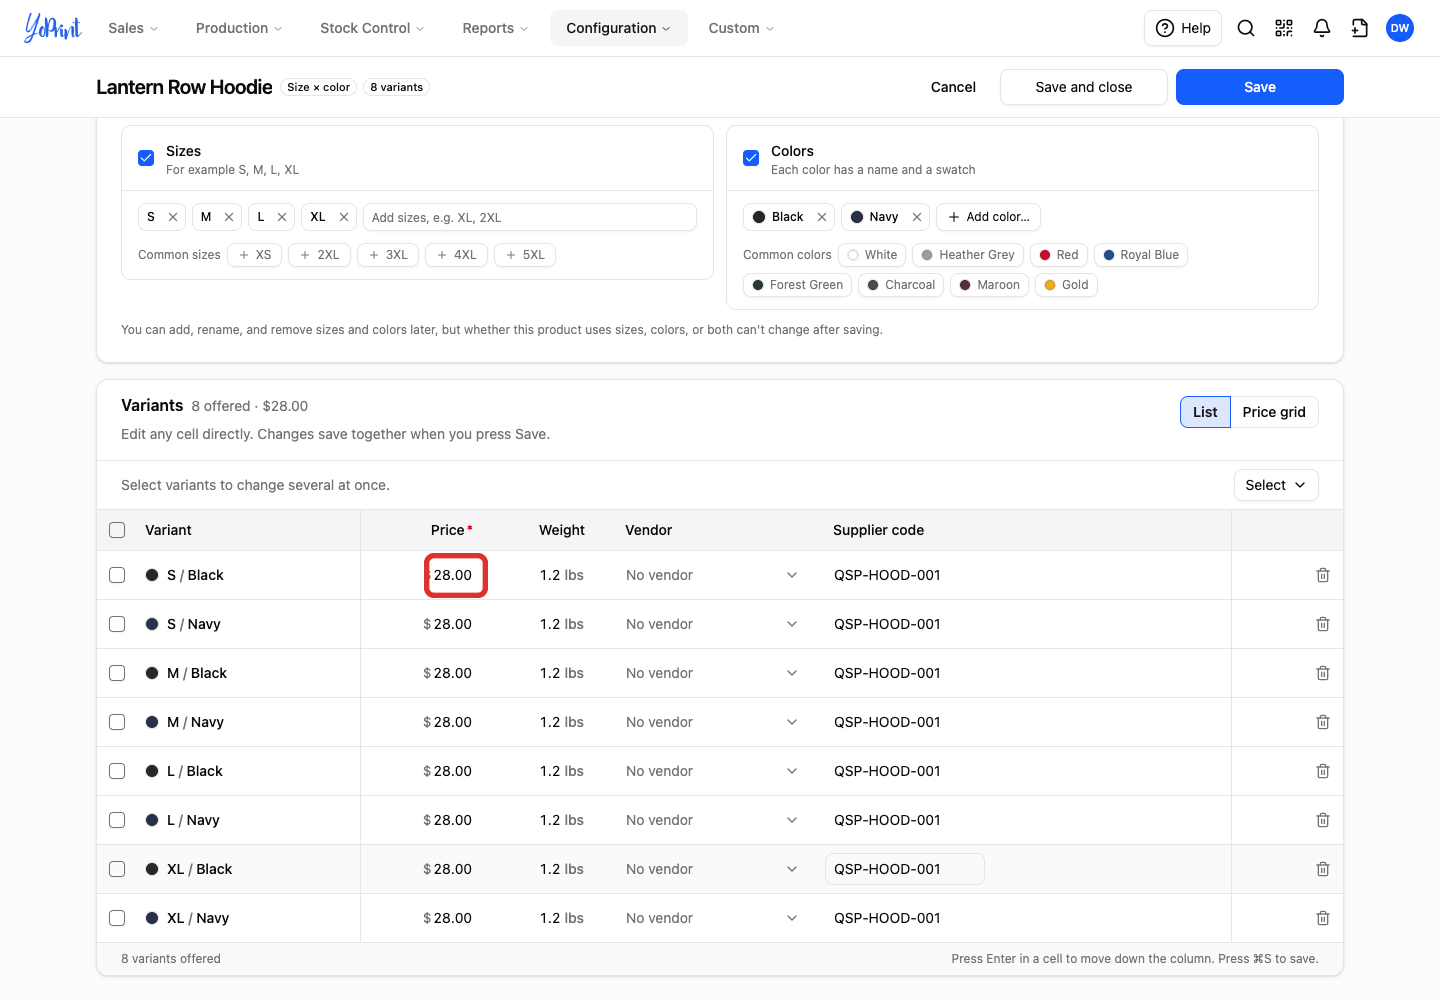
You can also price variants by size or color, or update several variants at once:
-
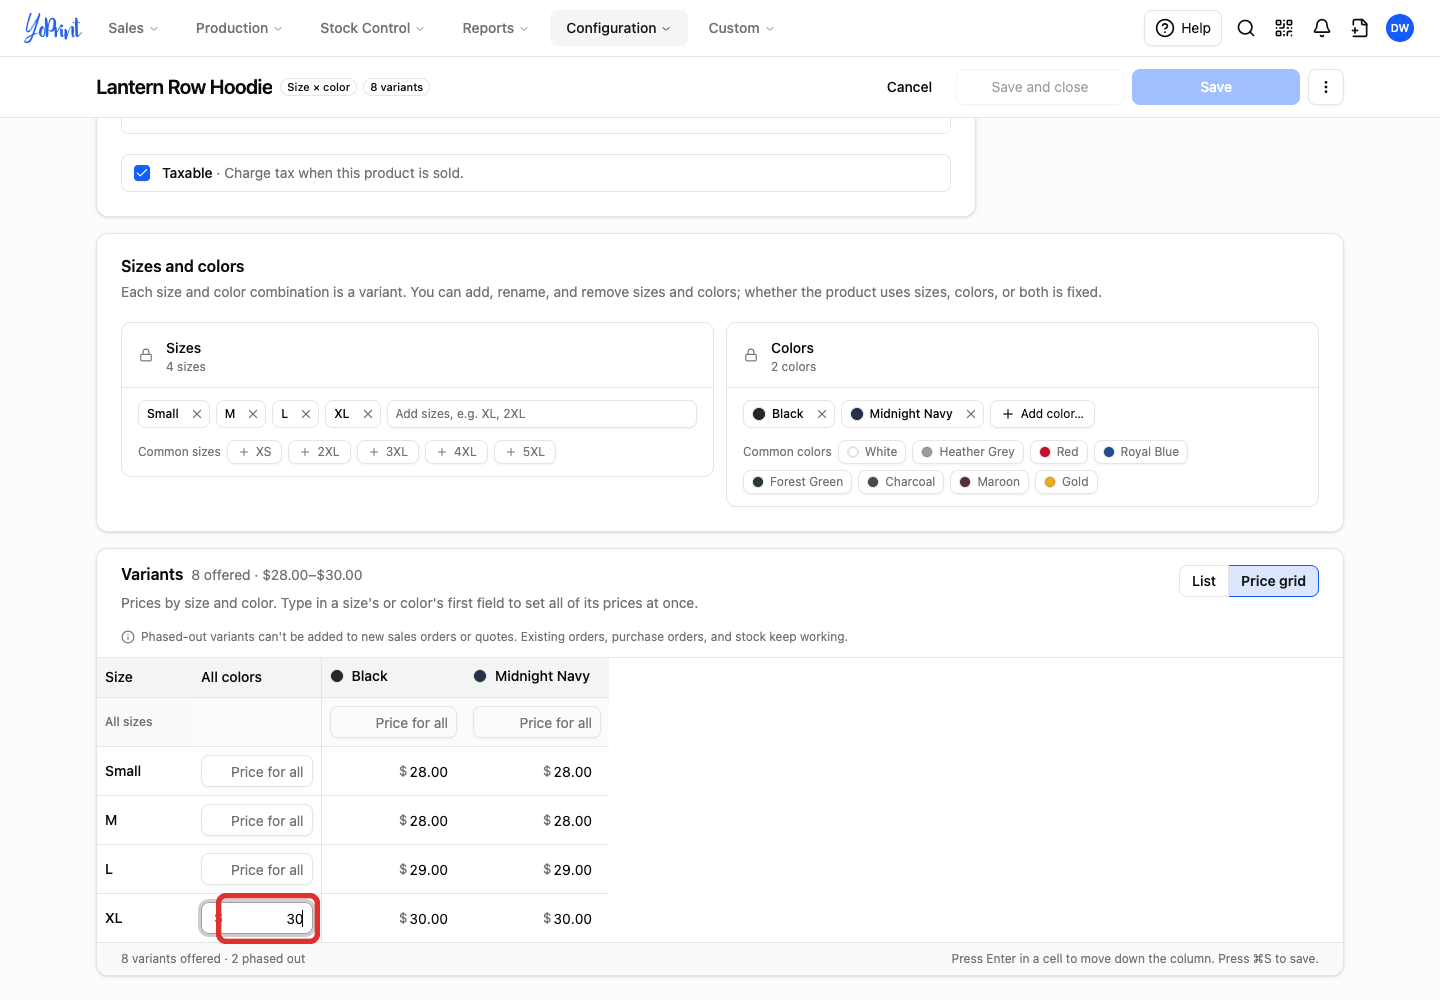
To price by size or by color, switch Show variants as from List to Price grid. Click the Price for all field at the start of a size row or color column and type a price to set every variant of that size or color at once.
-
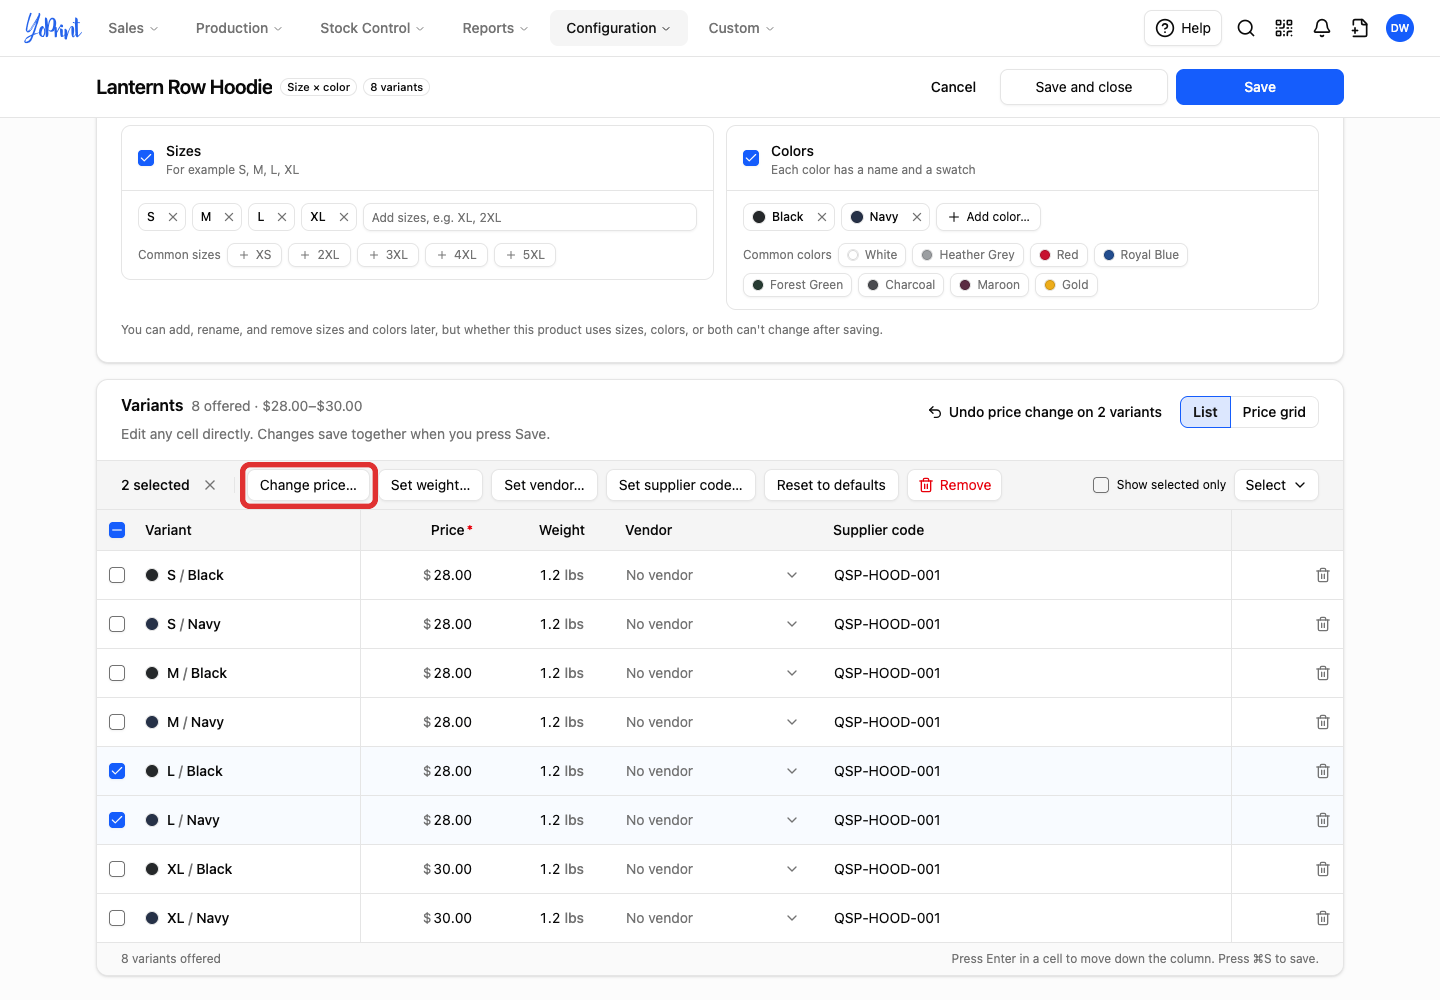
To change several variants at once, tick their rows, or open Select and tick a size or a color. Click Change price… in the bar above the table.
-
Choose Set to, enter the new price, and click Apply.
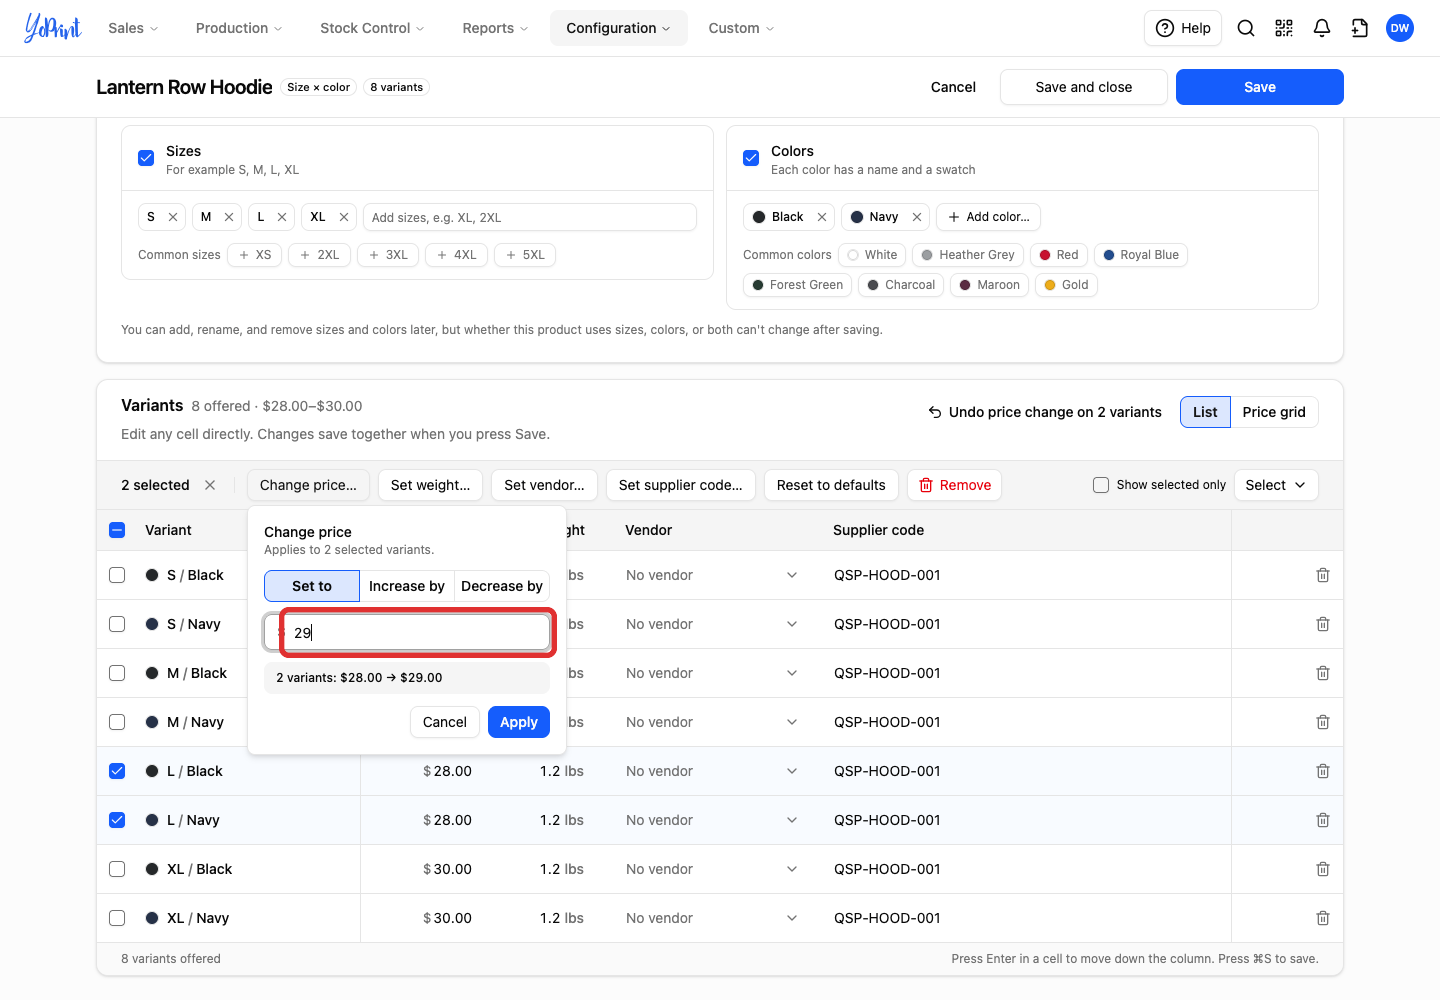
Choose Increase by or Decrease by to adjust the selected prices by a fixed amount or a percent. The dialog shows the new prices before you apply them. Click Undo above the table to reverse the change you just applied.
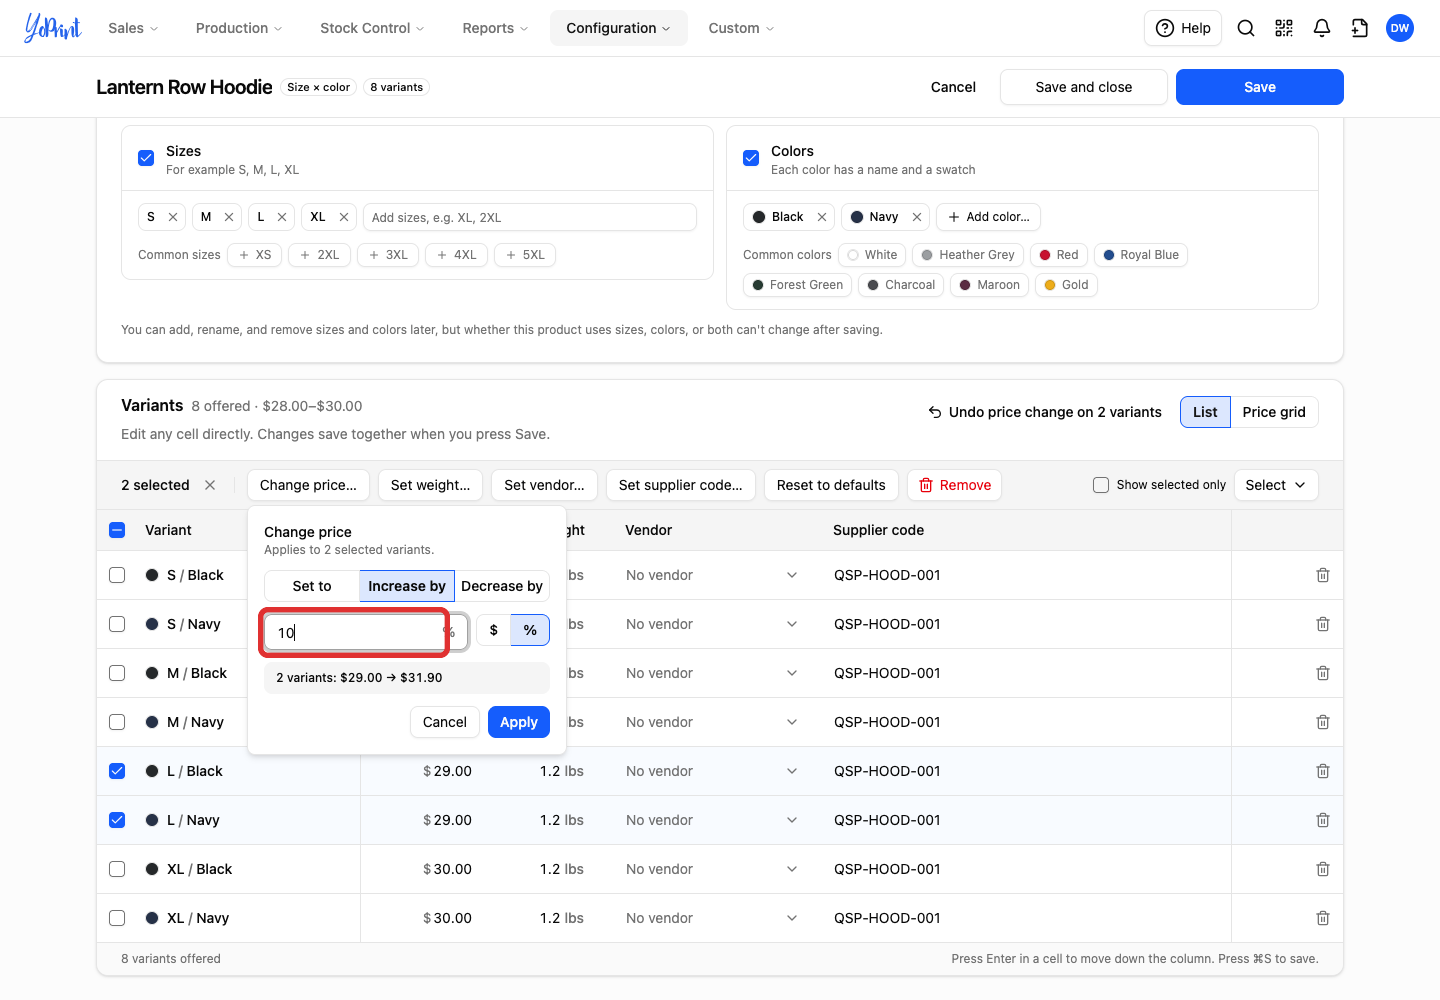
Use the other buttons in the bar above the table to update more details for the selected variants:
- Set weight…: Enter a weight for all selected variants.
- Set vendor…: Choose a vendor for all selected variants.
- Set supplier code…: Enter a supplier code for all selected variants.
- Reset to defaults: Return the selected variants to the default price, weight, vendor, and supplier code.
- Remove: Take the selected variants out of the product.
Save the product
Save the product and all of its variants together.
-
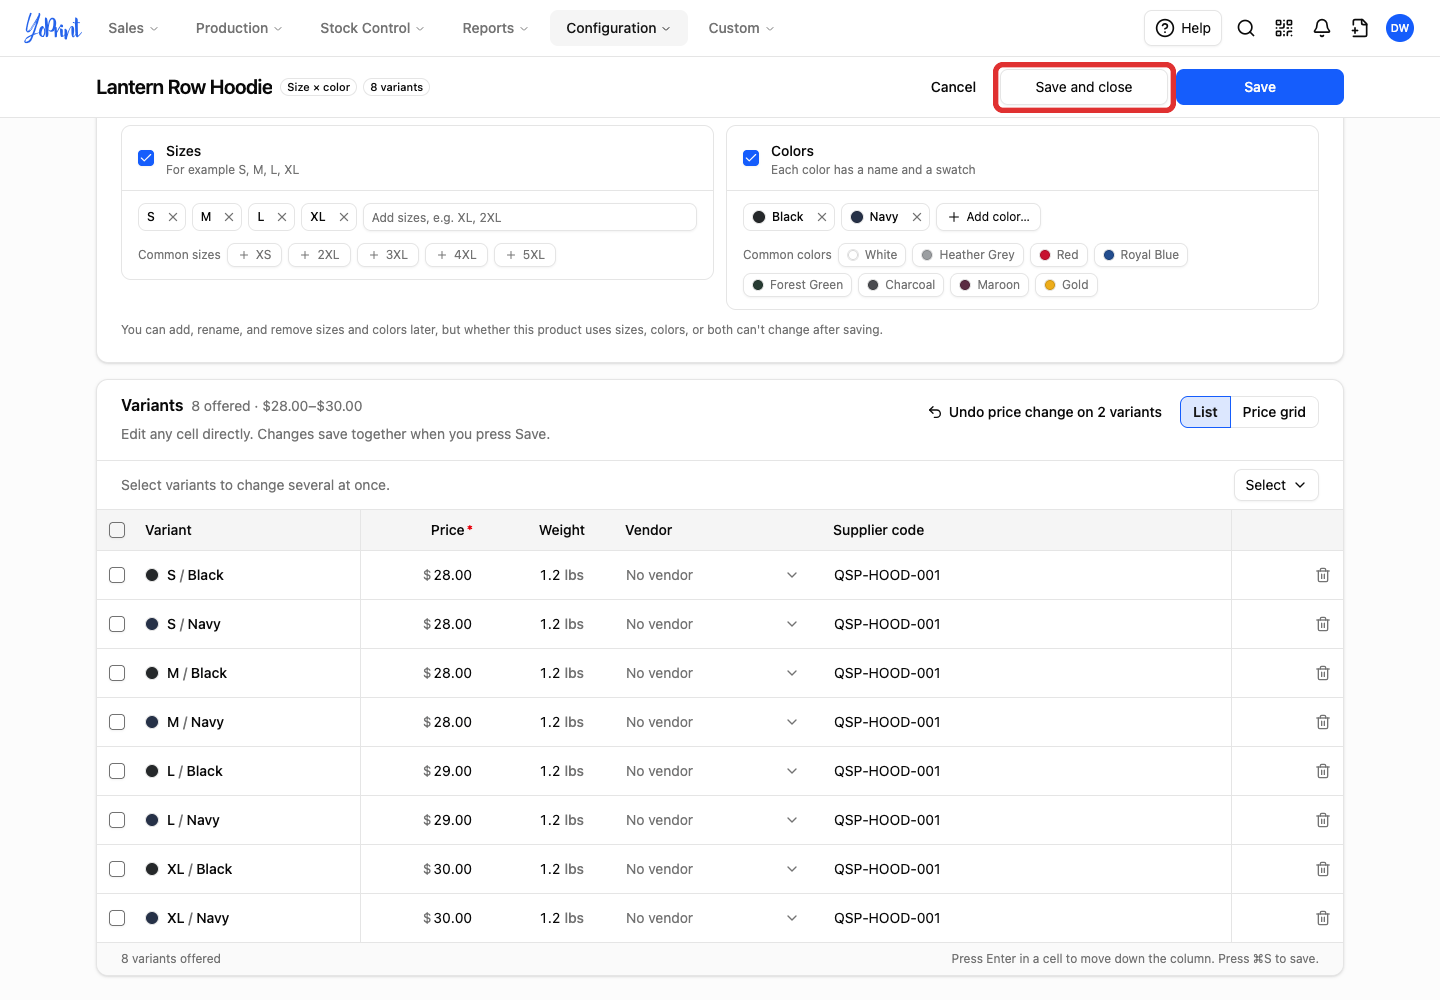
Click Save and close to save and return to Products, or click Save to save and keep editing.
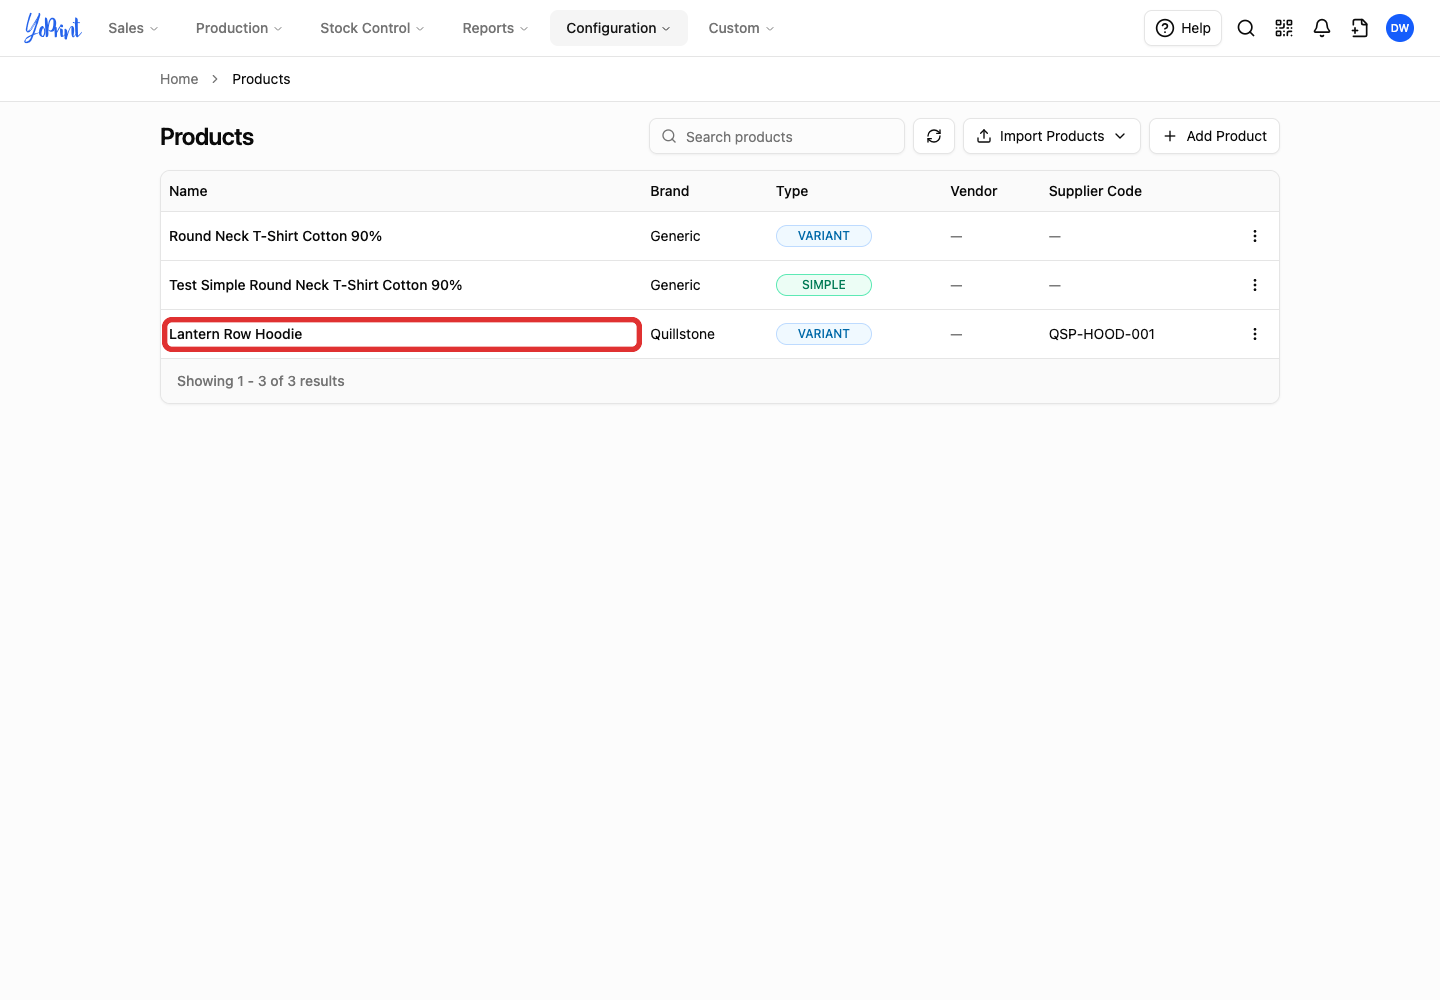
The product appears in Products with the type Variant.
To add the product to a quote or sales order, see Creating a Sales Order and How to quickly add other colors/sizes for a product in Sales Order/Quote. To track stock on hand for its variants, see Inventory Overview.
If you leave the page with unsaved changes, YoPrint asks whether to discard them.
Change a product later
Reopen a saved product to edit its details, add new sizes or colors, or offer combinations that were previously left out.
-
Open Products and click the product's title.
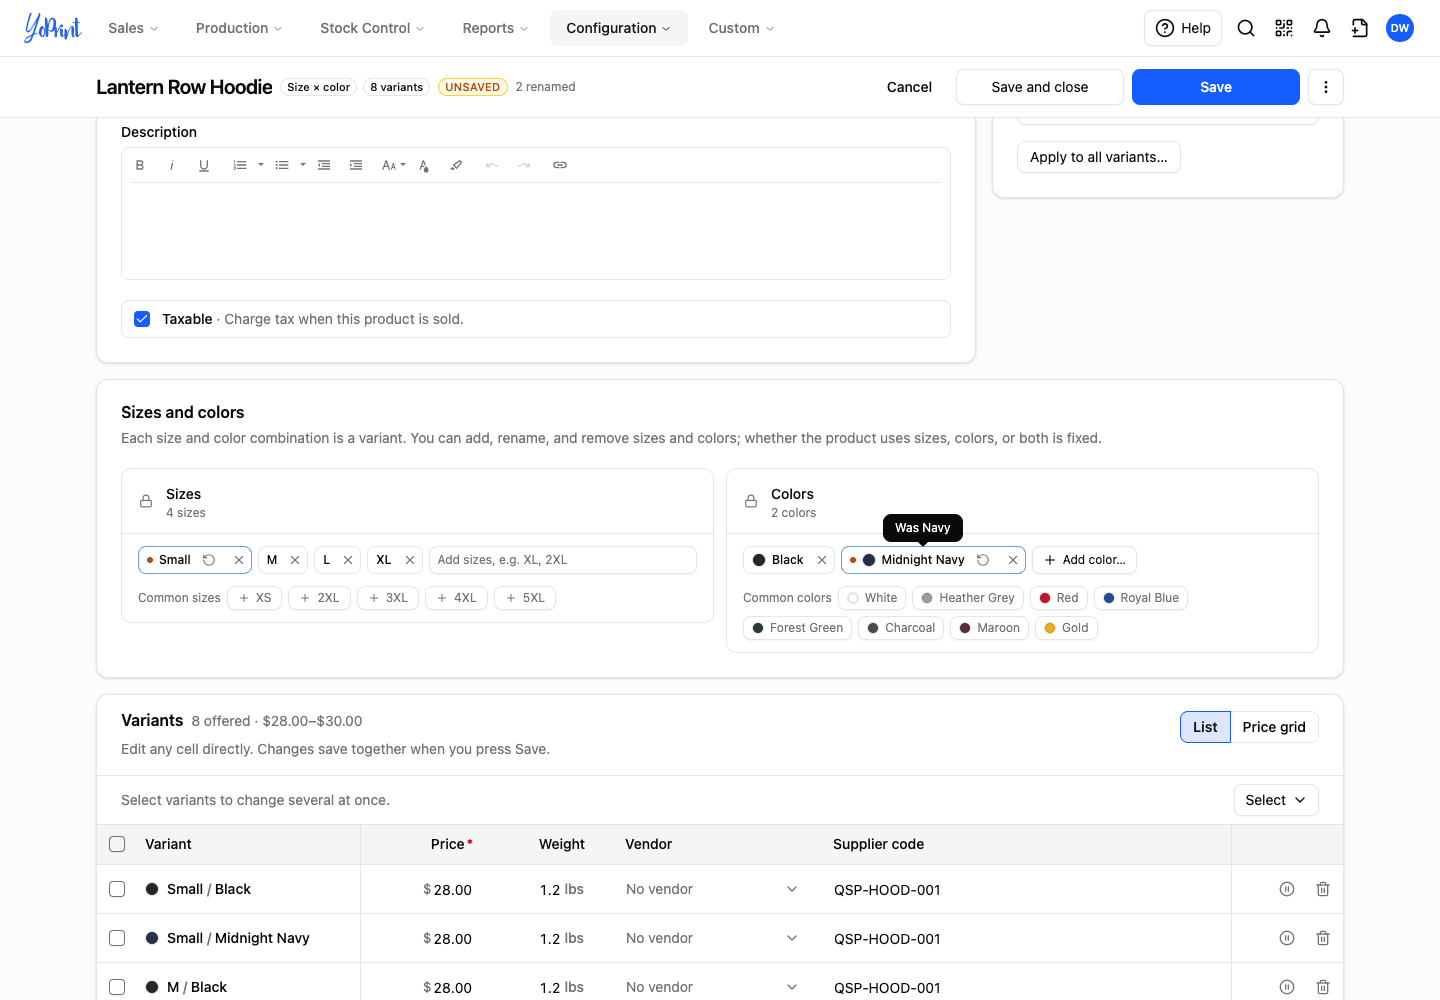
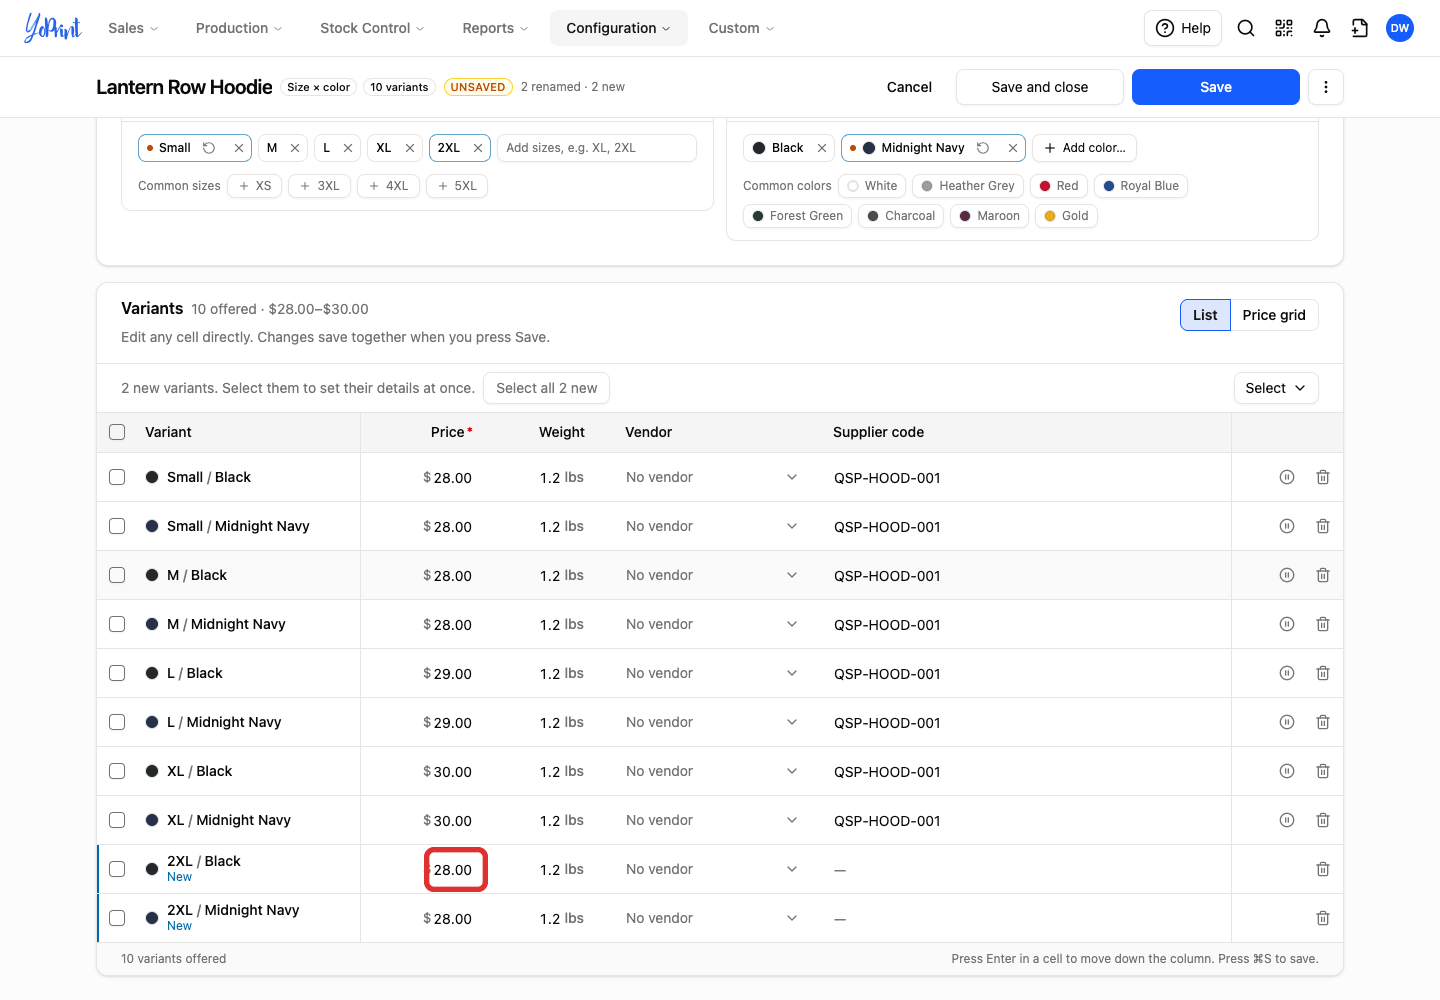
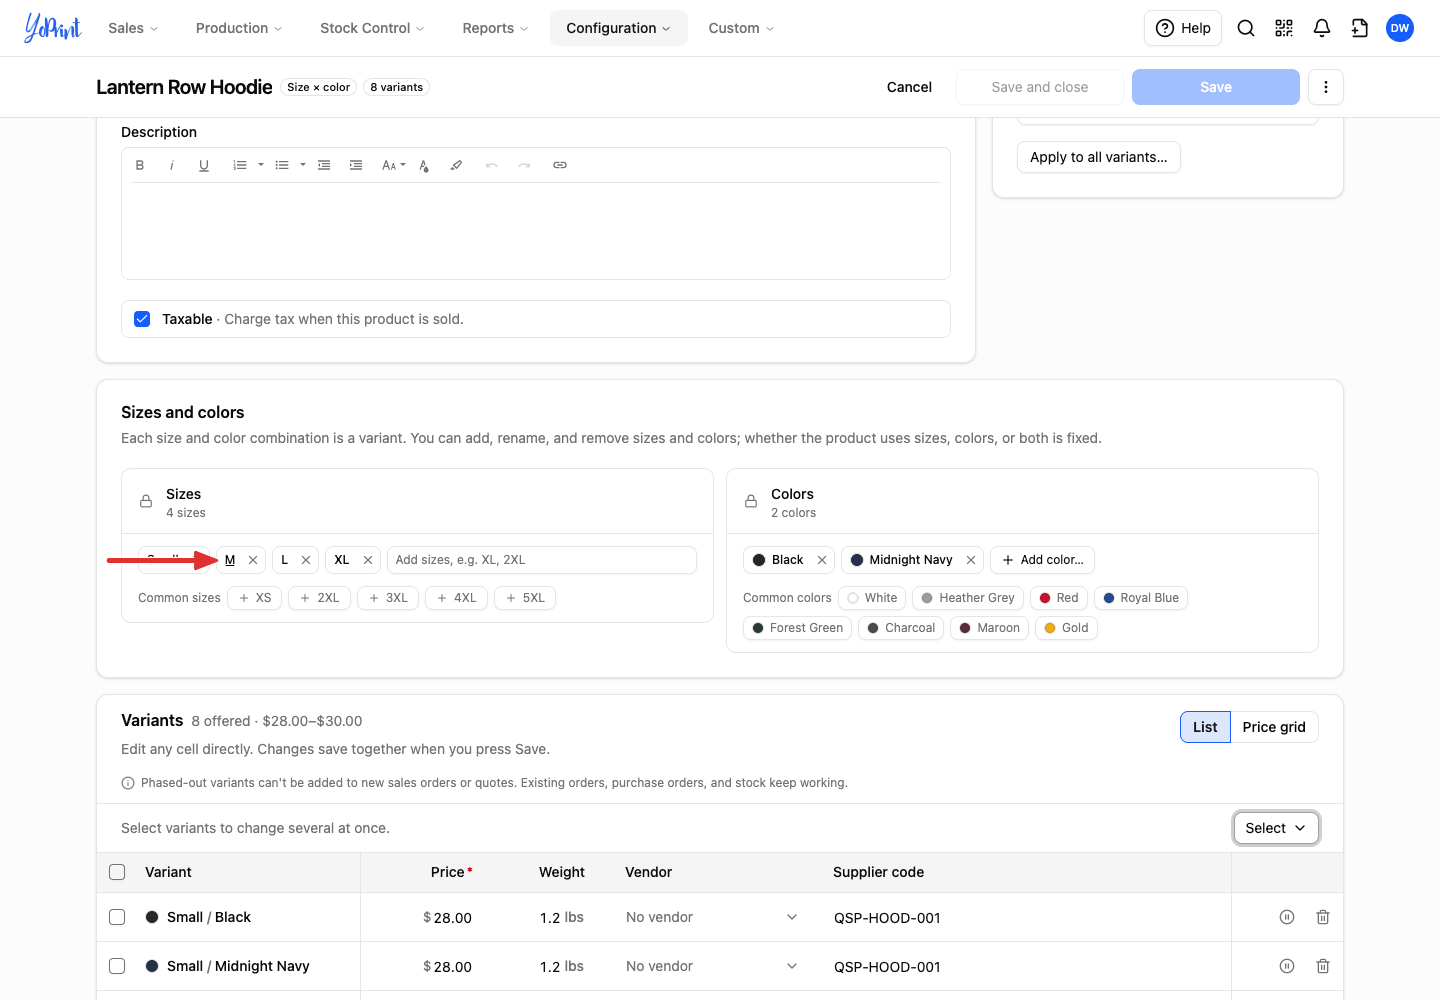
While you edit, the title row shows Unsaved and a summary of pending changes, such as "2 renamed · 1 new". Lock icons on the Sizes and Colors cards indicate that the choice of sizes, colors, or both is fixed.
-
Add a size or color in Sizes and colors. Its new combinations appear in Variants marked New, with an empty Supplier code. A new size starts at the Default price. It takes the weight and vendor only when every saved variant shares one value, and is blank otherwise. A new color copies the price, weight, and vendor from the same size in another color.
Sizes and colors stay in the order you added them in the editor and the price grid: when your team adds a product line, standard sizes XXS to 6XL appear in size order with other sizes after them.
-
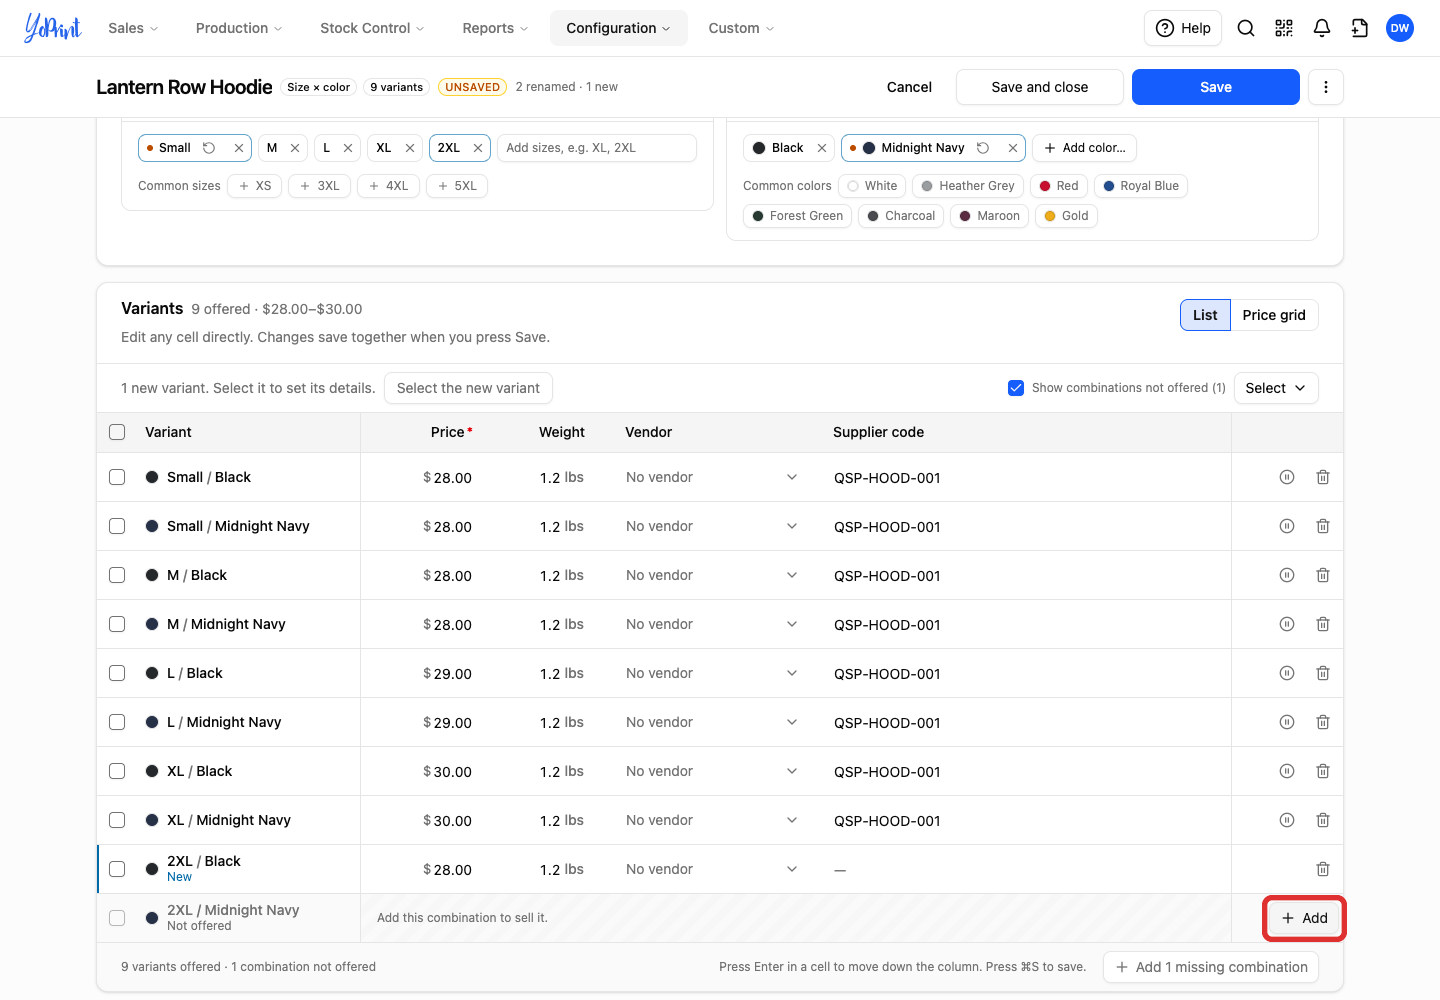
To sell a combination that you removed or never added, tick Show combinations not offered above the table to list those rows as Not offered. Click Add on a row to sell that combination, or click Add missing combinations to add all of them.
-
Click Save.
Reset all variants to the default price
To put every variant back on the default price, change the Default price and click Apply to all variants…. This changes prices only, and shows how many manually entered prices it will replace before you confirm.
A price change applies to lines added after you save, and lines already on quotes and sales orders keep their price.
Rename a size or color
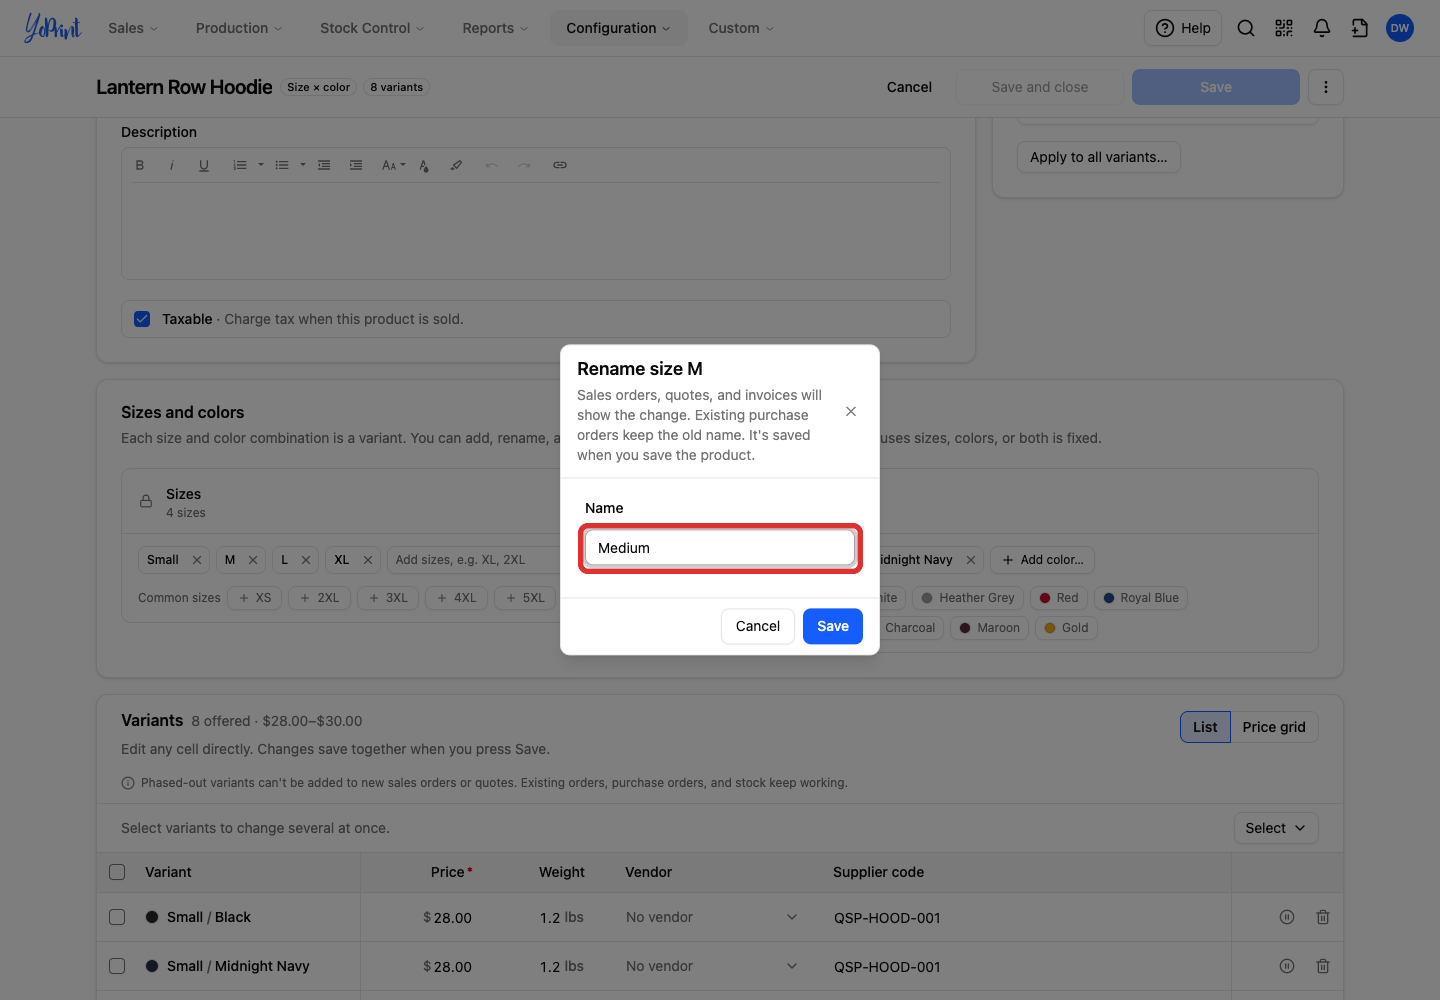
A renamed size or color keeps its variants, so orders, quotes, invoices, and stock stay linked to it. Sales orders, quotes, and invoices show the new name. Purchase orders that you have already sent keep the name they were sent with.
-
In Sizes and colors, click the size's name on its chip.
-
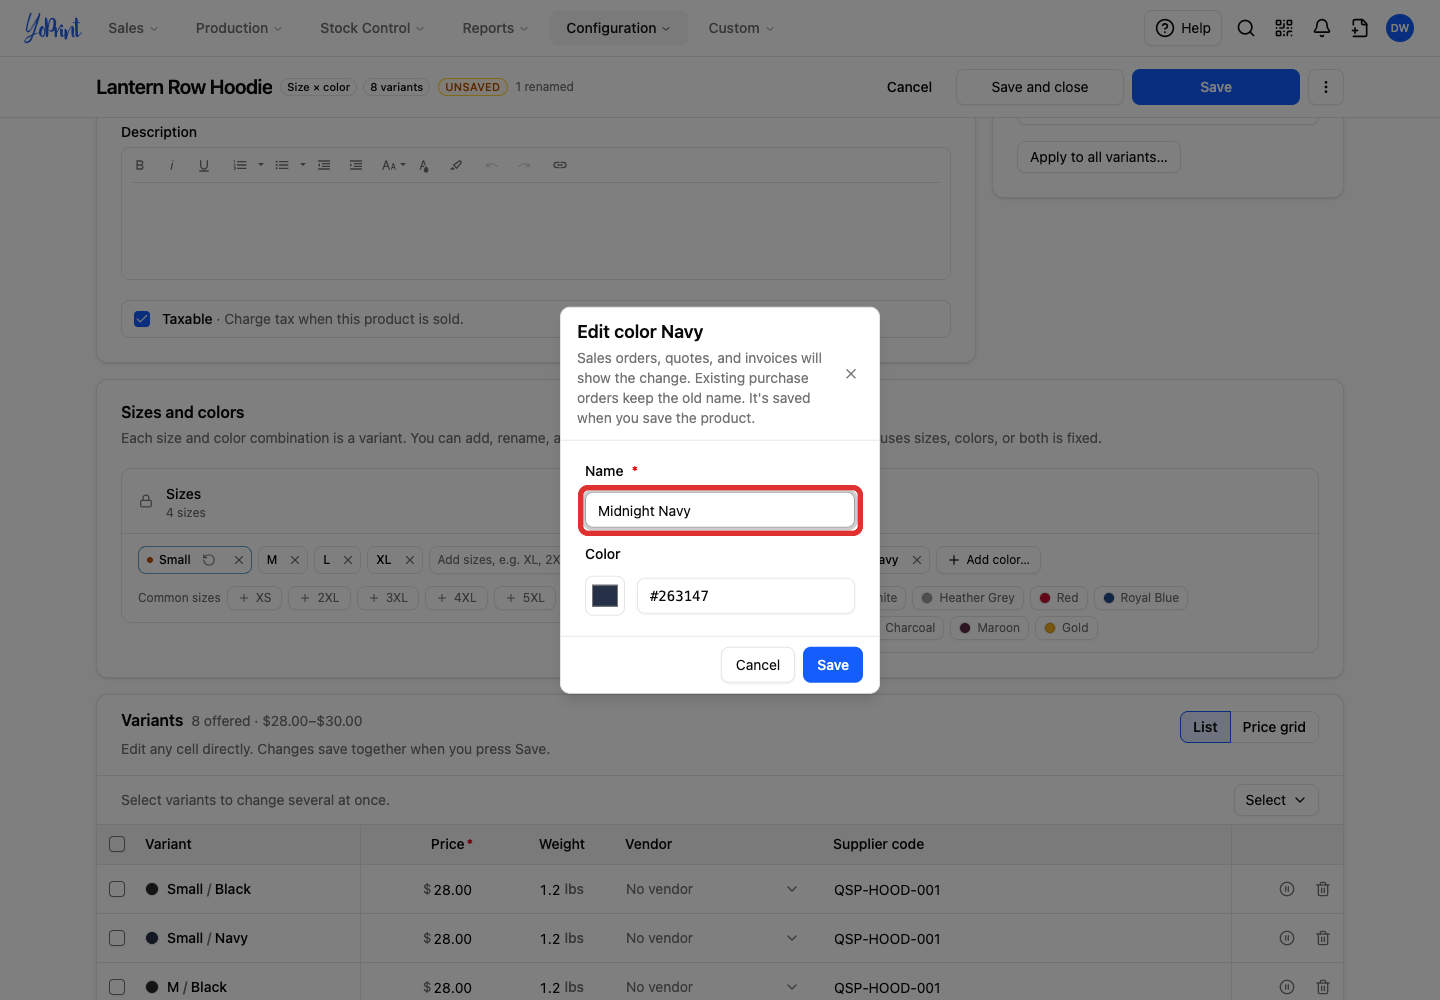
Enter the new Name and click Save.
Pricing rules that match this size
Pricing rules match a size by its name. If any of your rules name this size, the dialog lists them in three groups:
- Rules that will stop applying to new order lines of this size.
- Rules that will start applying to new order lines of this size.
- Rules that may apply differently depending on their other conditions.
Lines already on your orders keep the rules they have. To keep a rule applying, update its sizes after you save.
Until you save the product, the chip shows the new name and an undo arrow that restores the old name.
-
To rename a color or change its swatch, click the color's chip, edit its Name or Color, and click Save.
-
Click Save at the top of the page.
After you save, the old name still belongs to the renamed size or color, so a new size or color on this product cannot use it. To free the old name, rename the option back to that name, or choose a different name for the new option. Each size and color on a product must have a unique name.
Remove a size, color or variant
Remove a single variant combination, or remove an entire size or color.
-
In Variants, click the bin icon at the end of the row.
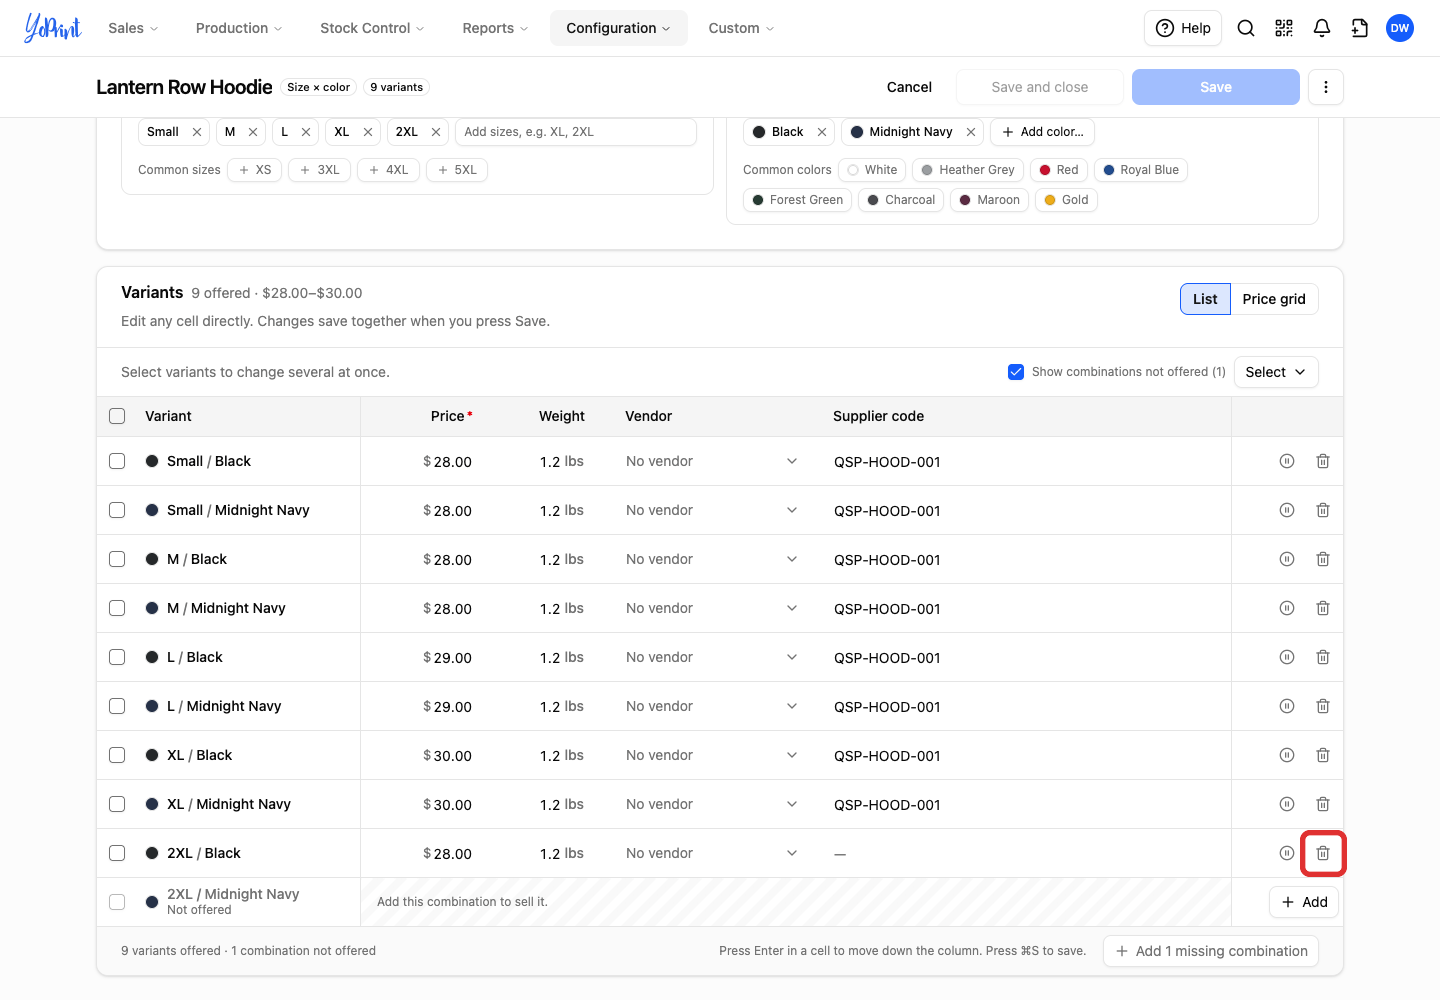
To remove every combination of a size or color at once, click the × on its chip in Sizes and colors. To phase out a variant instead of deleting it, click the pause icon beside the bin icon. Phasing out a variant keeps the variant and its history so you can resume it later, while removing a variant deletes it.
The row is struck through and marked Will be removed, with an Undo button available until you save.
-
Click Save, then click Delete and save in the confirmation dialog. The dialog lists every variant that will be deleted.
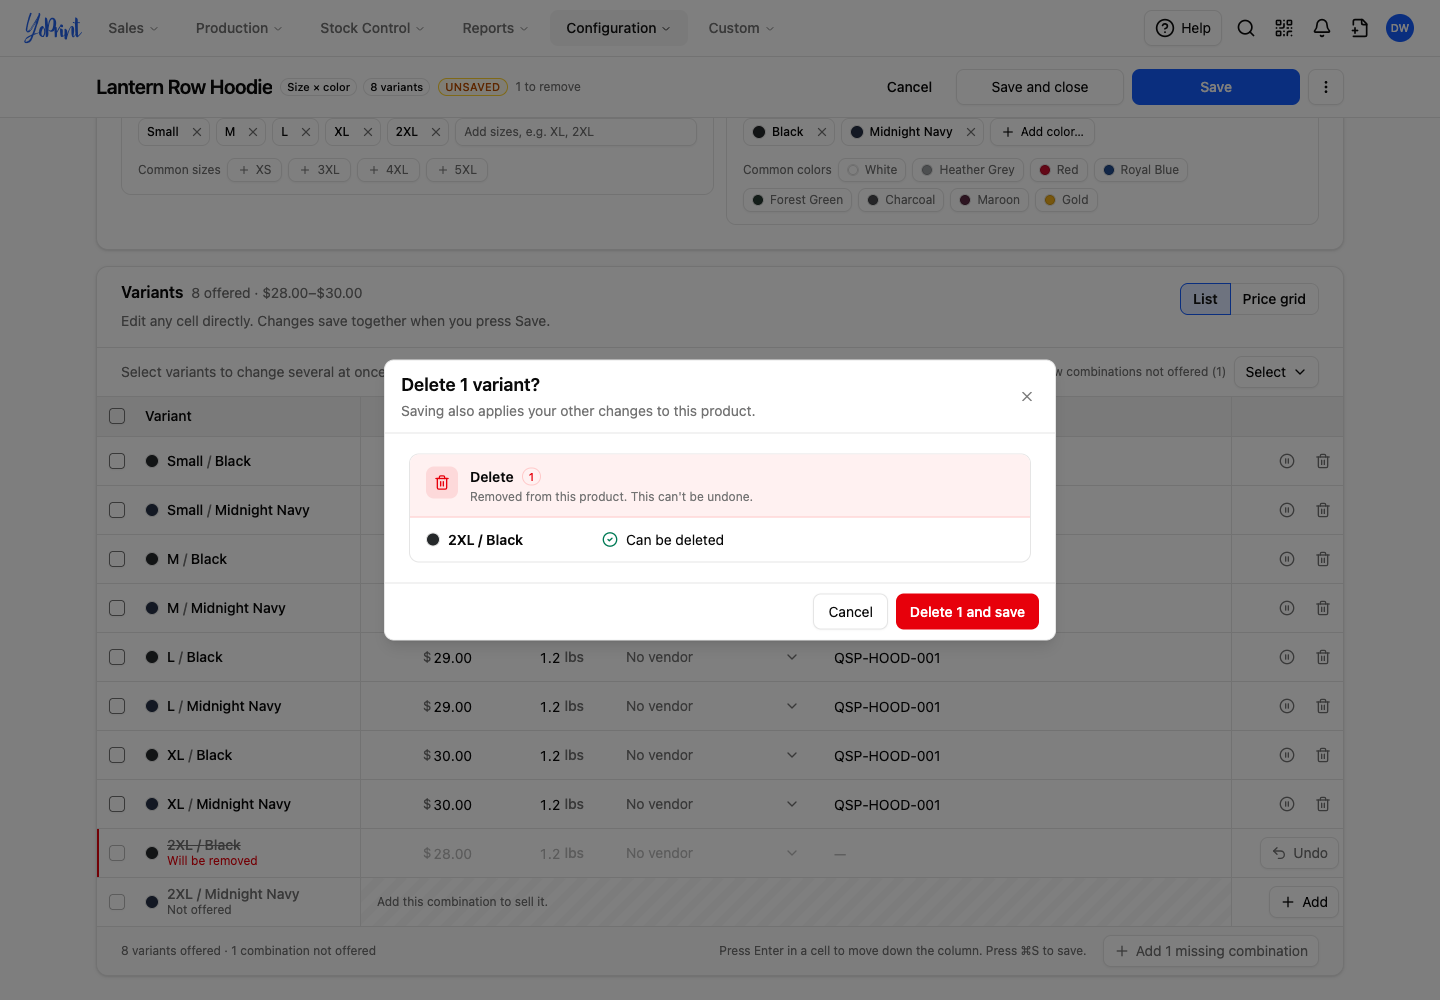
A variant that is already in use, such as on a published order, cannot be deleted. The confirmation dialog lists it under Phase out instead with the reason, and saving phases it out.
To stop selling a size or color without deleting it, or to bring it back later, see Phase Out or Delete a Product, Size or Color.